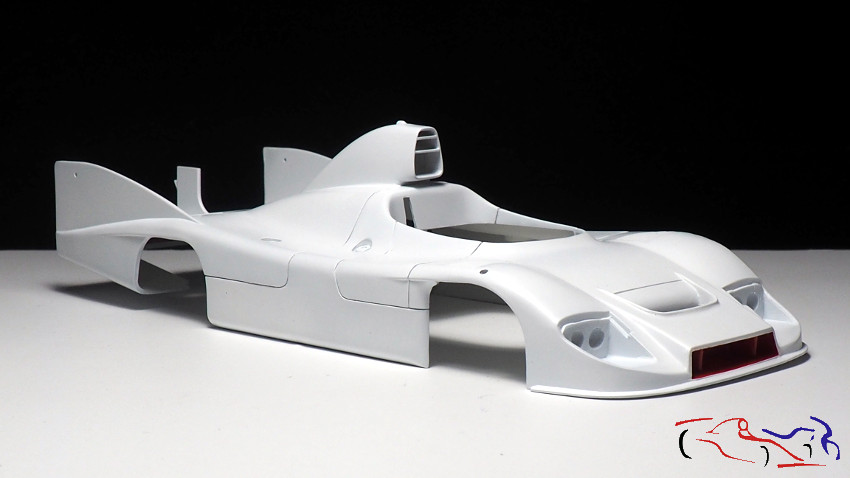
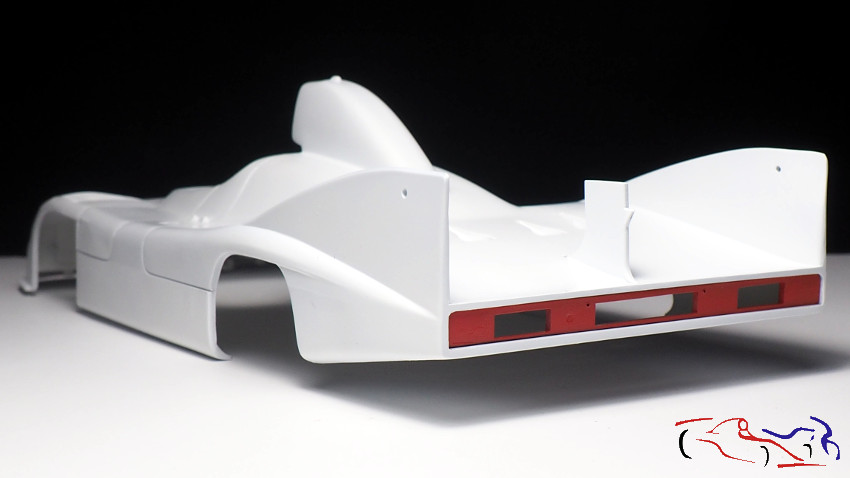
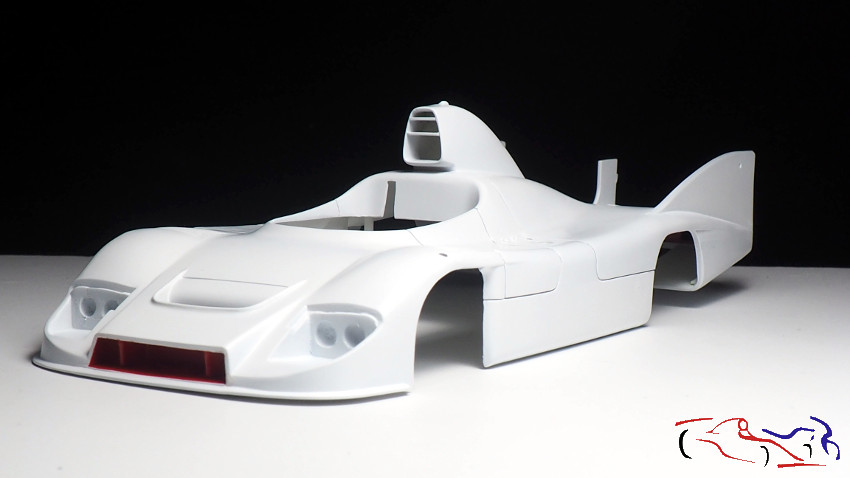
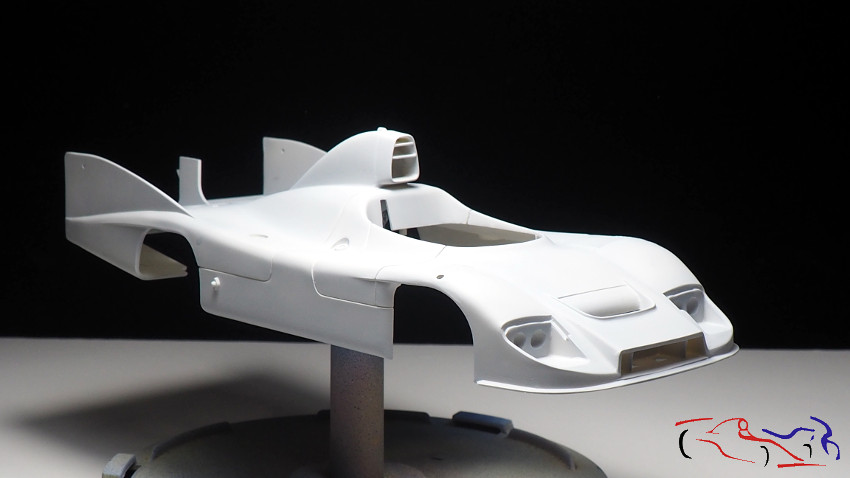
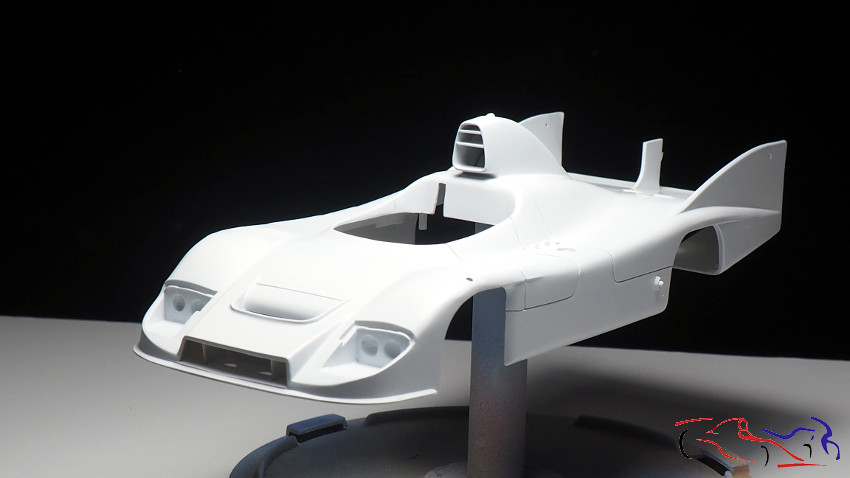
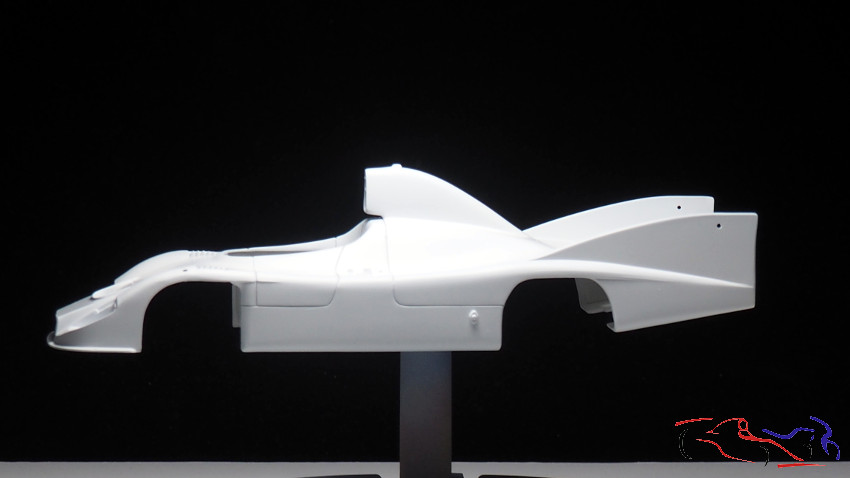
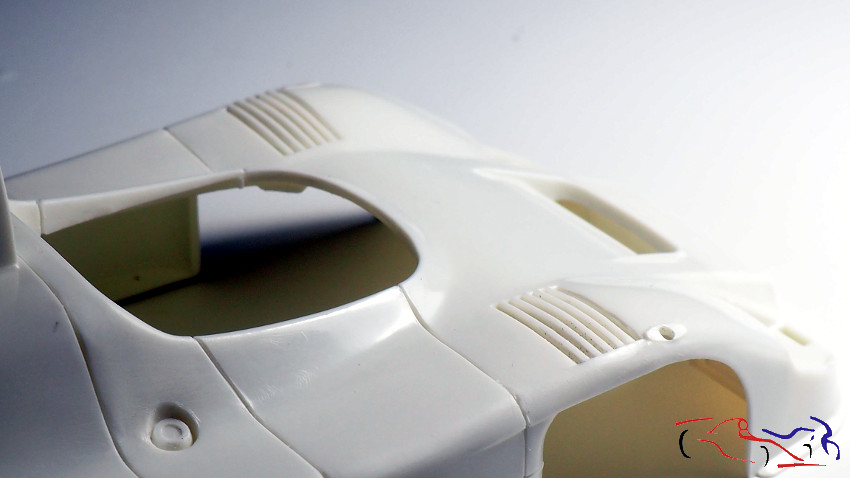
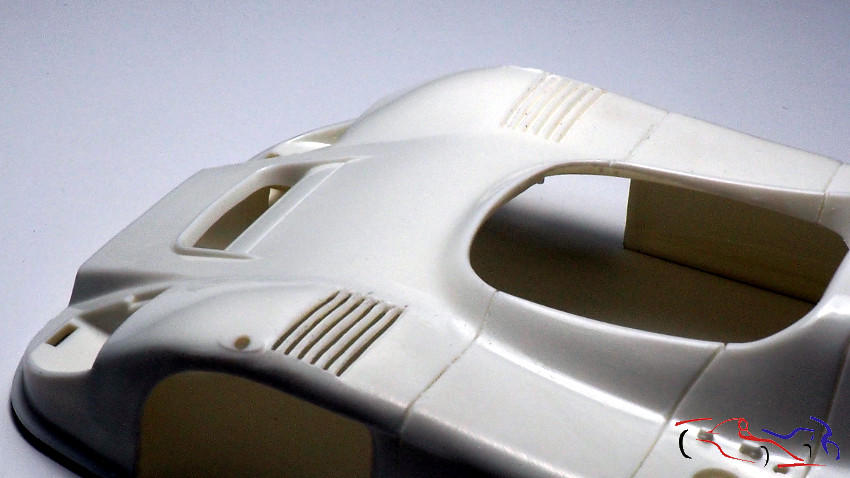
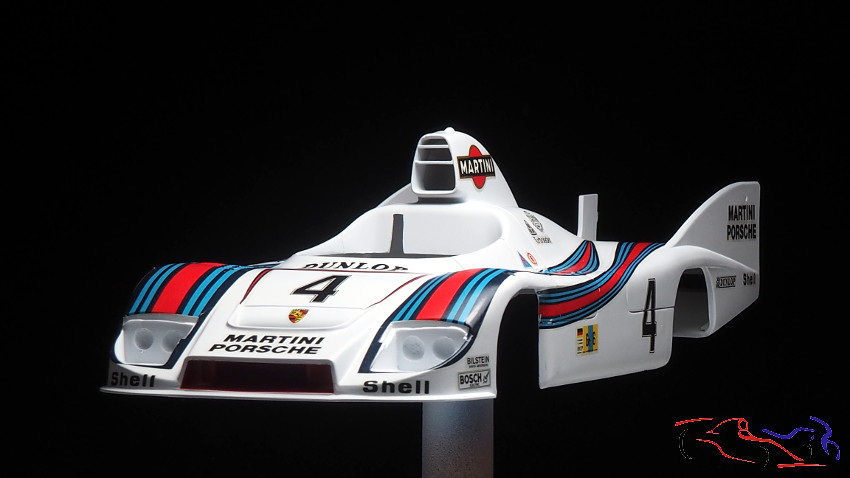
Hola a todos. En este post del Porsche 936, os voy a enseñar las diversas modificaciones que le hago al kit, ya que comparándolo con fotos originales, tiene muchas carencias, y que harán que la maqueta, parezca más un coche real reducido, y no un coche de juguete. Lo que siento de esta actualización es que hay poco color en las fotos, ya que es un trabajo de base, para que próximas etapas, resulten favorables.
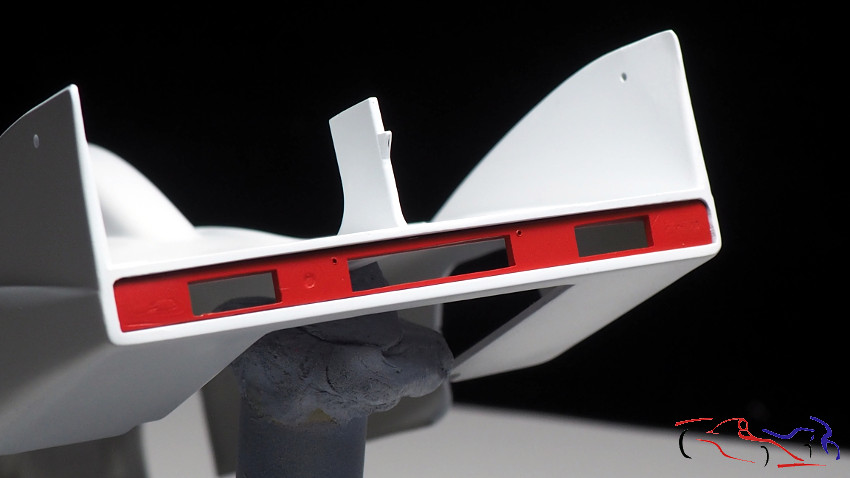
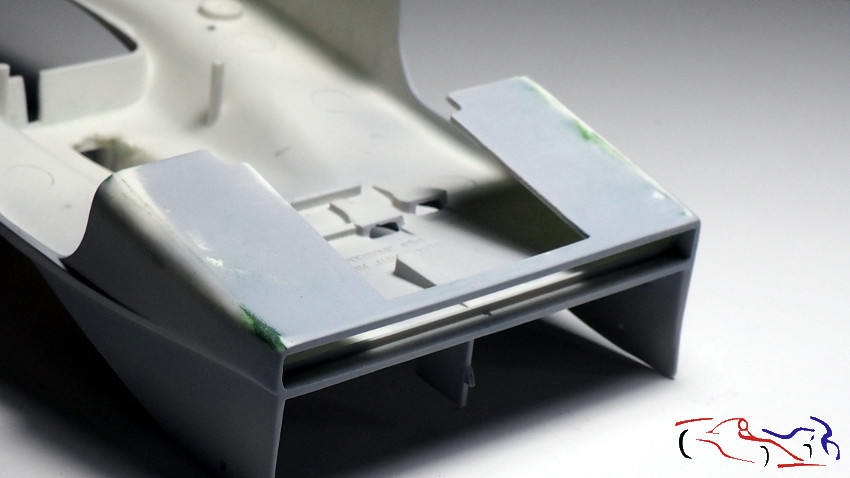
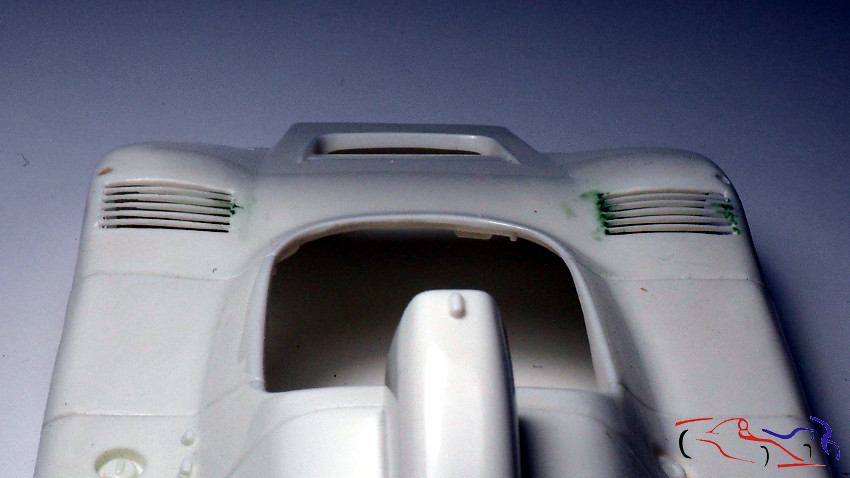
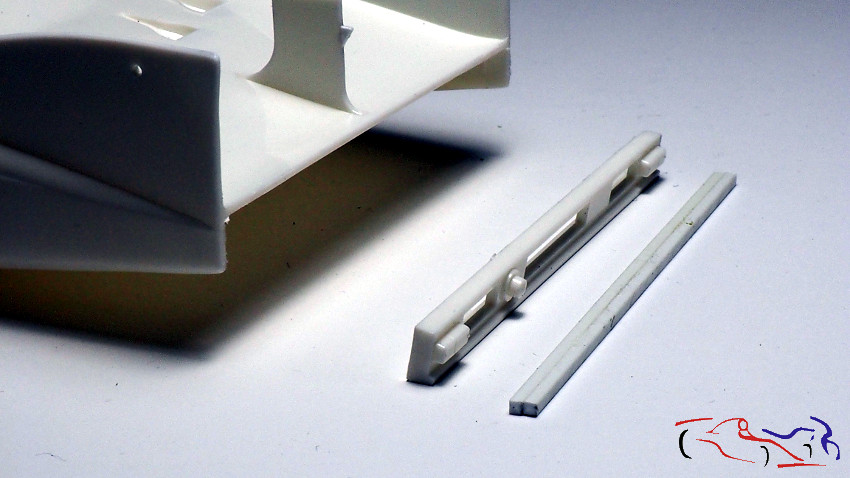
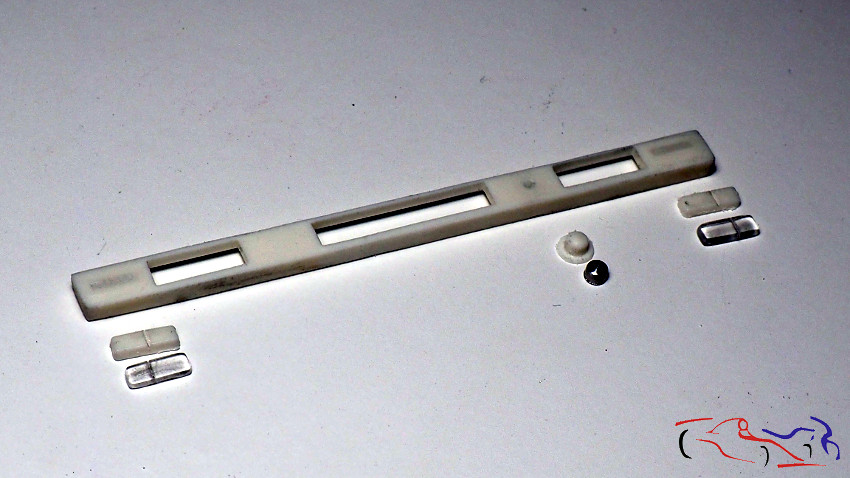
Empezamos con la pieza que lleva los faros traseros. Además de que las luces son simples trozos de plástico blanco, esa pieza contiene en la parte inferior, una tira que en realidad, forma parte de la carrocería y que va unida a los laterales de la misma, formando una sola pieza. Si pegamos la pieza original en su sitio, habrá unas separaciones en la unión de sus extremos, no dando continuidad a la carrocería. Por lo tanto, hacemos otra pieza con dos tiras de plastico, que uiniremos a la carrocería:
Hello everyone. In this post of the Porsche 936, I am going to show you the various modifications that I make to the kit. Comparing it with original photos, it has many deficiencies, that they will make the model look more like a real reduced car, and not a toy car . What I feel about this update is that there is little color in the photos, since it is a basic work, so that next stages are favorable.
We start with the part that has the taillights. In addition to the lights being simple pieces of white plastic, this piece contains a strip at the bottom, which is actually part of the bodywork and is attached to the sides of the body in the real car, forming a single piece. If we glue the original part in place, there will be some gaps in the union of its ends, not giving continuity to the body. Therefore, we make another piece with two plastic strips, which we will attach to the body:
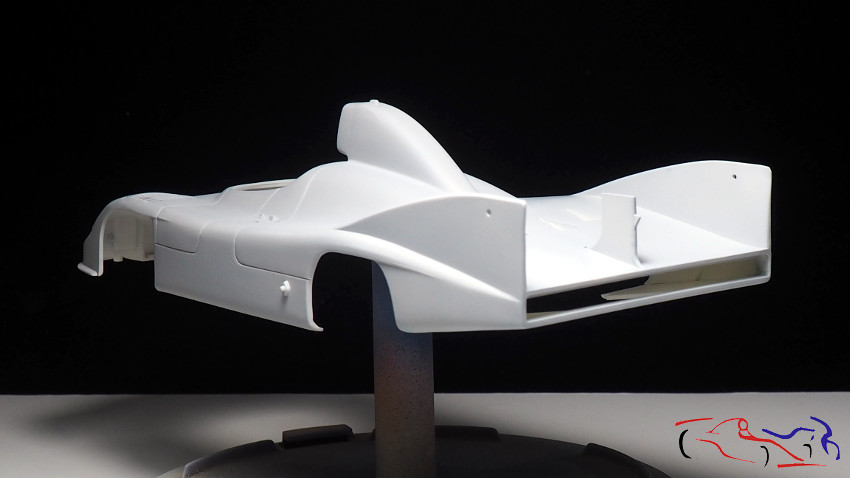
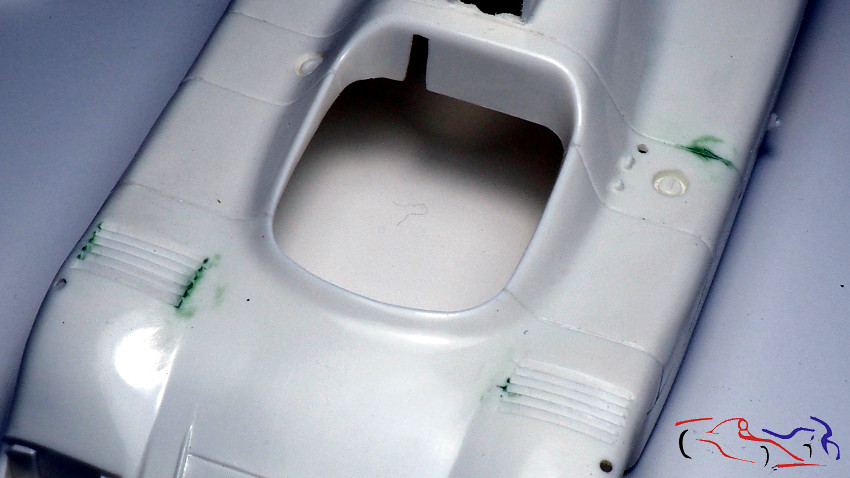
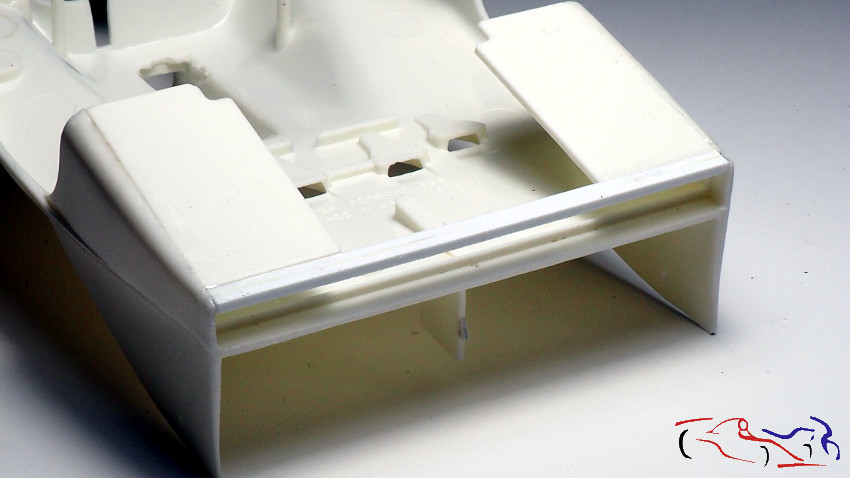
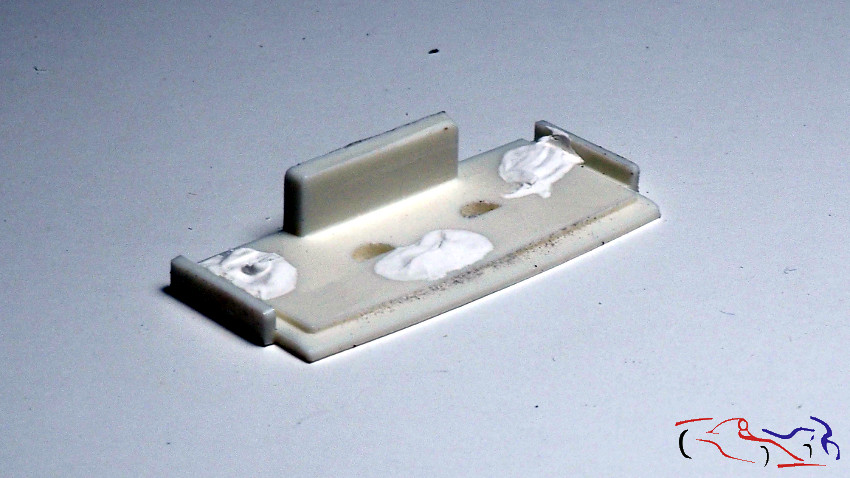
 Si le damos la vuelta a la carrocería, vemos esa nueva pieza pegada por sus extremos. Hemos aprovechado para pegar las dos piezas laterales de la carrocería en su parte inferior. Más adelante veremos este mismo ángulo de la carrocería en procesos posteriores.
If we turn the body around, we see the new piece stuck to its ends. We have taken the opportunity to glue the two side parts of the body on the bottom. Later we will see this same angle of the body in subsequent processes.
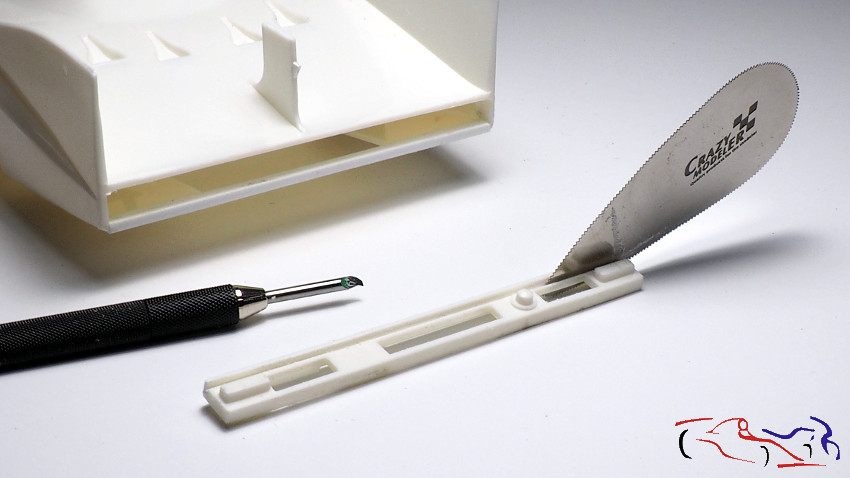
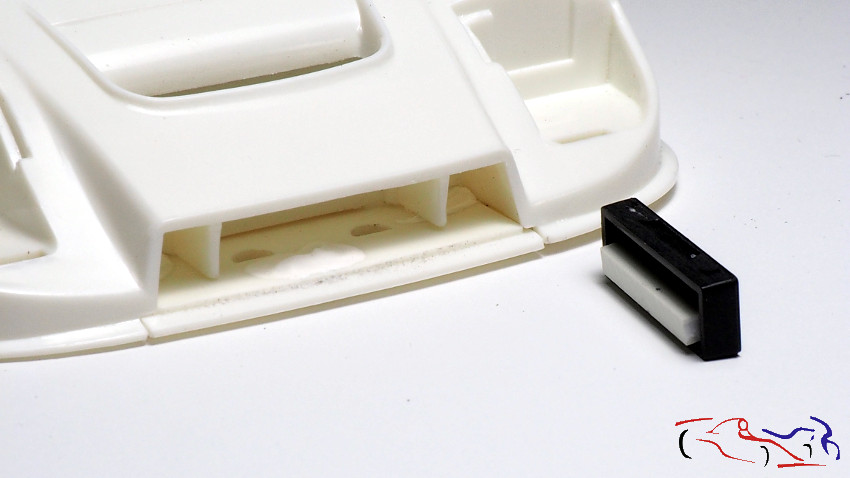
 Y por supuesto, eliminamos esta tira de la pieza original, cortándola después de haber marcado la linea de corte con el scriber de Tamiya, de 0,2 mm. Otra ventaja de separar las dos piezas es que lo que he cortado, es de color blanco de la carrocería, y la base de las luces, es de color rojo Martini, con lo que es mucho más fácil a la hora de pintarlo:
And of course, we remove this strip from the original part, cutting it after marking the cut line with the Tamiya 0.2mm scriber. Another advantage of separating the two pieces is that what I have cut, it has to be painted in white color like the body, and the base of the lights will be Martini red, making it much easier to paint:
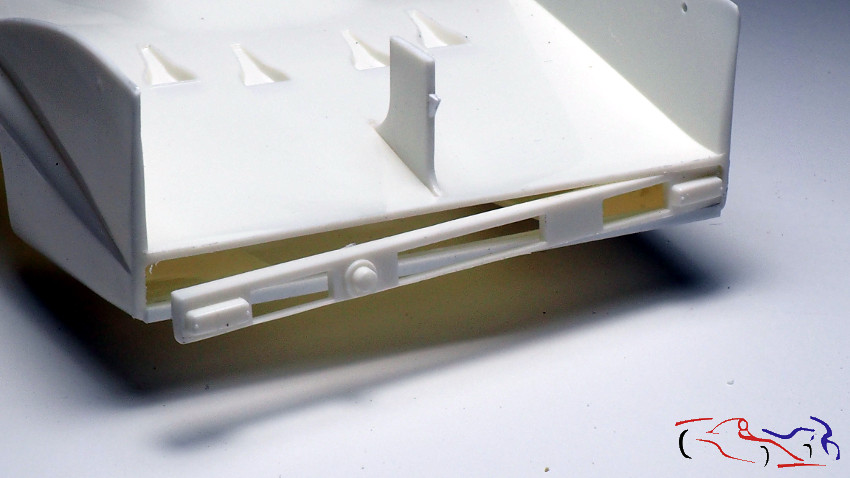
 Una vez cortado, vemos como se pondrá la pieza de las luces en su hueco:
Once cut, we see how the piece of lights will be put in its hole:
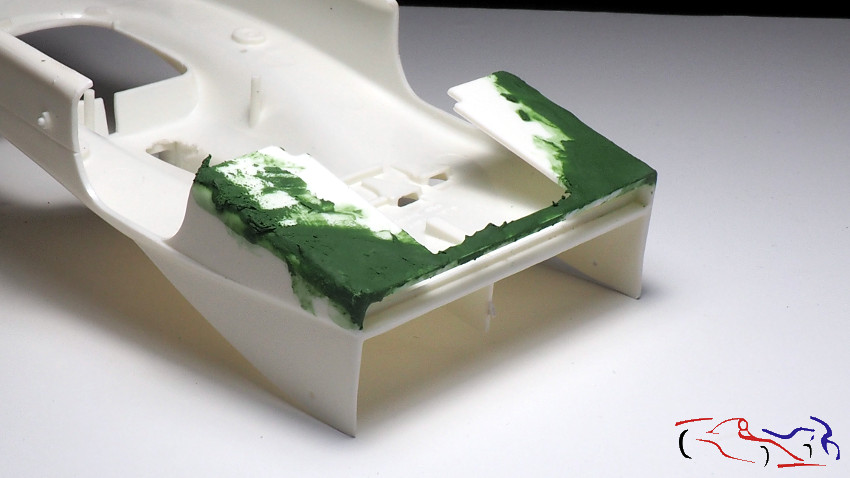
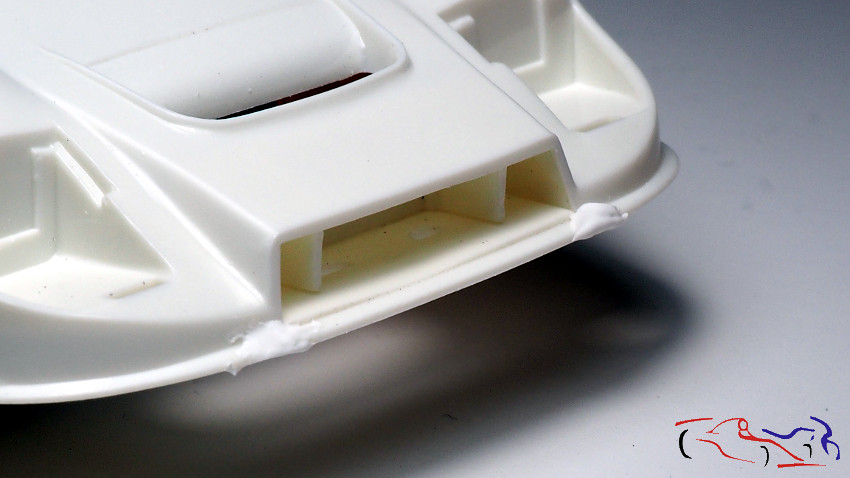
 Ahora, para igualar todo el conjunto, aplico masilla Squadron, y la estiendo con un poco de acetona y un pincel:
Now, to equalize the whole set, I apply Squadron putty, and spread it with a bit of acetone and a brush:
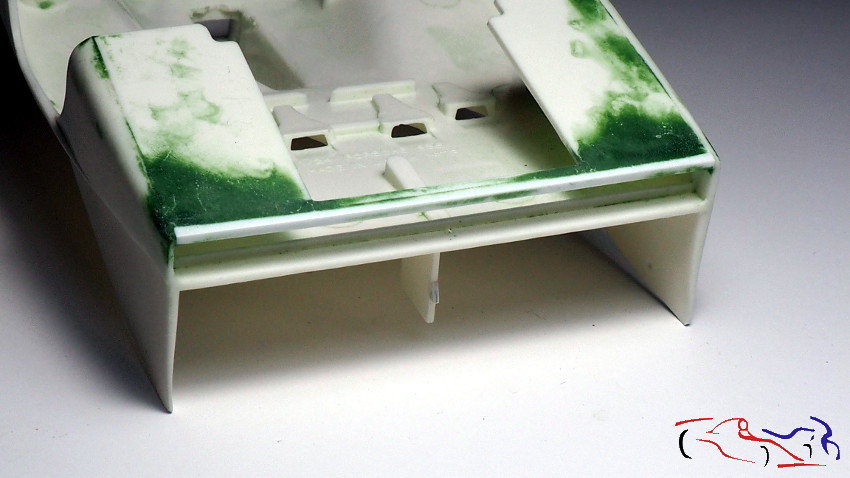
 Ya está lijada!. Lo comprobaremos con la imprimación:
It’s already sanded! We will check it with the primer:
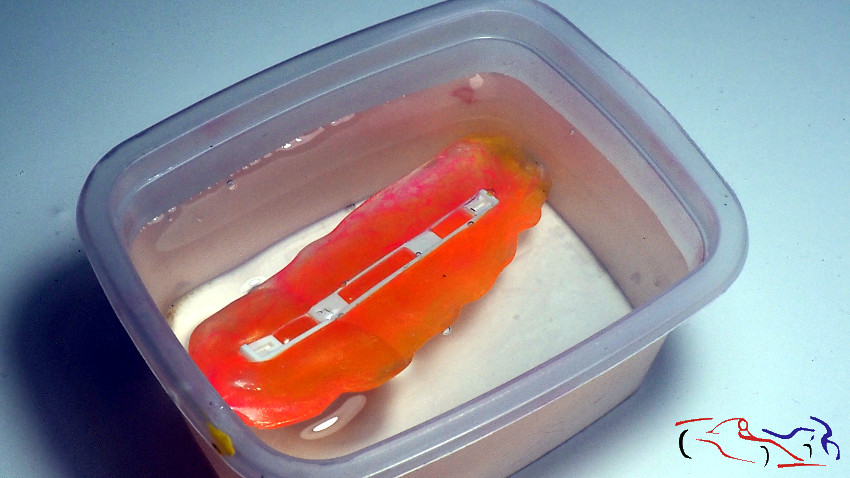
 Pasamos al proceso de sustituir la luces de plástico blanco. Lo primero es crear un molde con Oyumaru, que una vez calentado en agua hirviendo, y puesto sobre la pieza, lo introduzco en agua fira para que se vuelva a endurecer:
We go to the process of replacing the white plastic lights. The first thing is to create a mold with Oyumaru, that once heated in boiling water, and put around the piece, I introduce it in fresh water so that it hardens again:
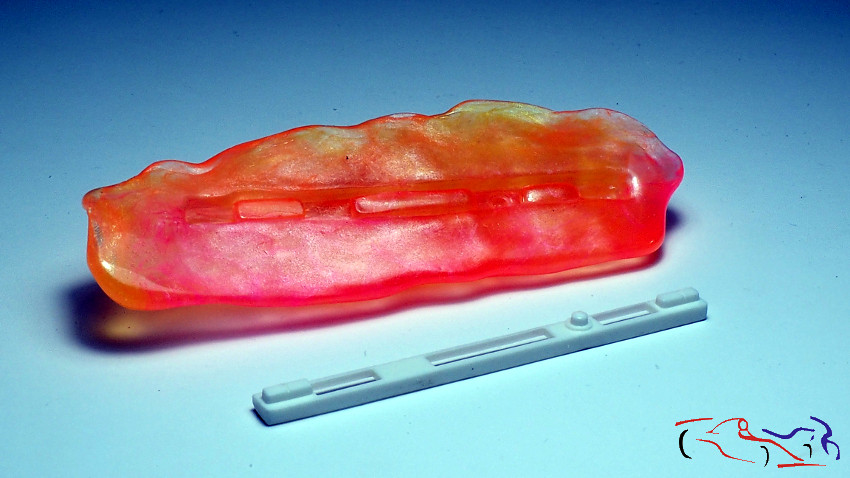
 …y sacamos la pieza:
… and we take out the piece:
 Sobre ese molde, pongo Acrifix, pegamento para metacrilato que solidifica con los rayos del sol en pocos minutos, que una vez seco, recorto, y pulo, tal y como se ve en la foto.
A su vez, rehago el piloto redondo con aluminio tallado en el minitaladro, y por supuesto, recorto todos los componentes que voy a sustituir de la pieza:
Over that mold, I put Acrifix, glue for methacrylate that solidifies with the rays of the sun in a few minutes, which once dry, I cut, and polish, as seen in the photo.
In turn, I remake the round pilot with carved aluminum in the mini drill, and of course, cut out all the components that I am going to replace in the part:
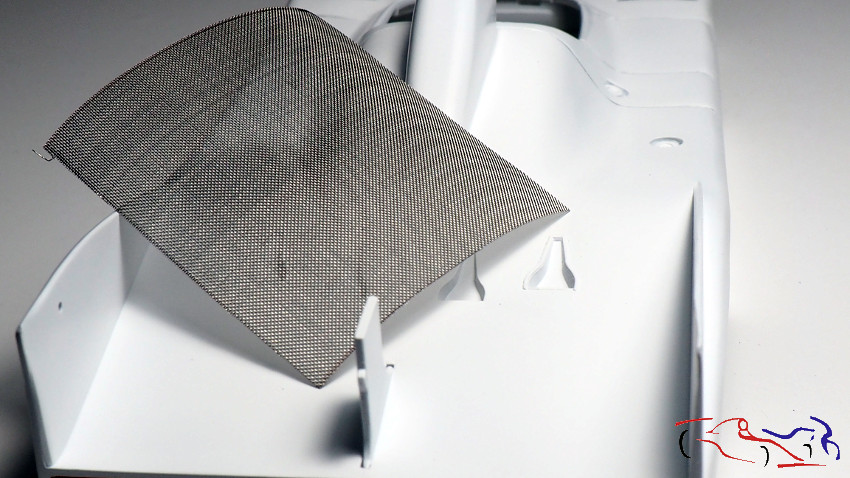
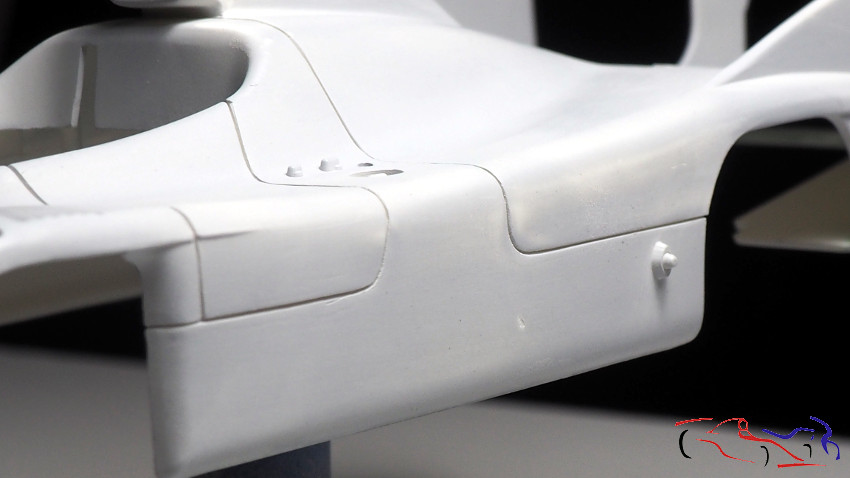
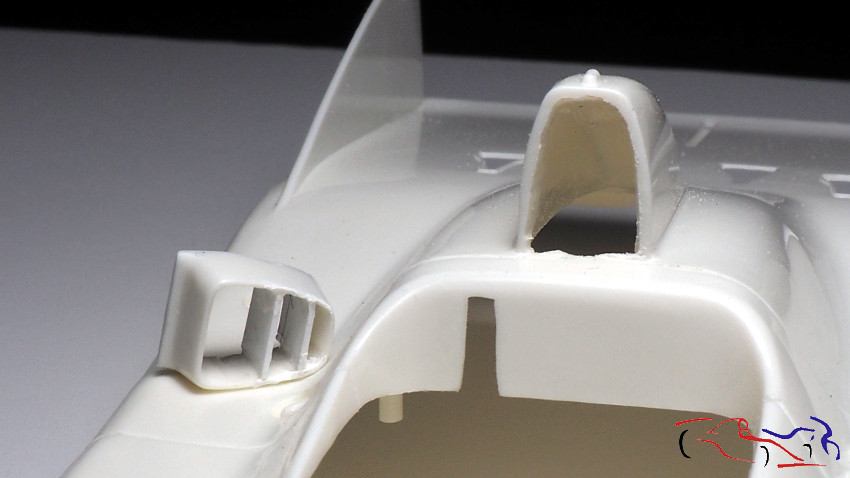
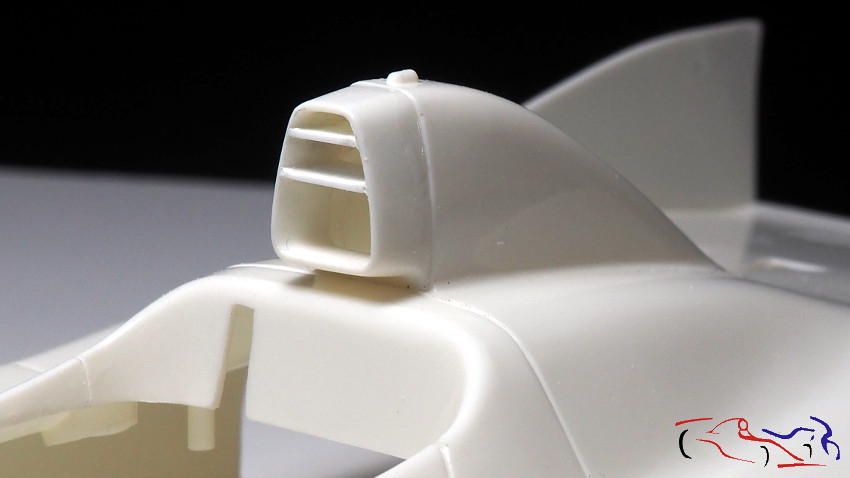
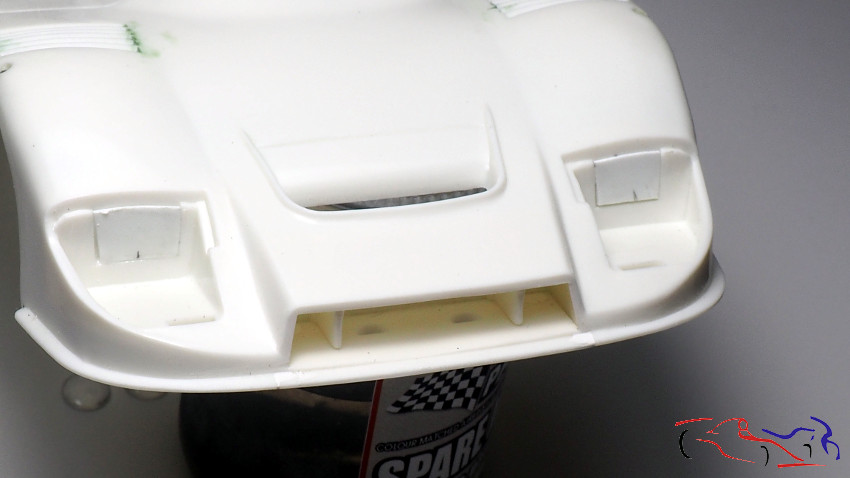
 Pasamos a la parte delantera, al hueco donde va el radiador. Si lo hago como dicen las instrucciones, se verán las uniones de la pieza inferior, que es donde va pegado el radiador. Decido pegar la pieza inferior antes de pintar la carrocería paar eliminar las lineas de unión de la pieza, por lo que el radiador deberá pegarse después. Para ello, le quito las dos palos que se introducirían en la pieza inferior, y le añado un listón al radiador por detrás, para darle una profundidad correcta.
Let’s move to the front, to the hole where the radiator goes. If I do it as the instructions say, you will see the joints of the lower part, which is where the radiator is attached. I decide to glue the lower part before painting the body, to eliminate the lines of union of the part, so the radiator must be glued afterwards. To do this, I remove the two sticks that would fit into the bottom piece, and add a ribbon to the radiator from behind, to give it a correct depth.
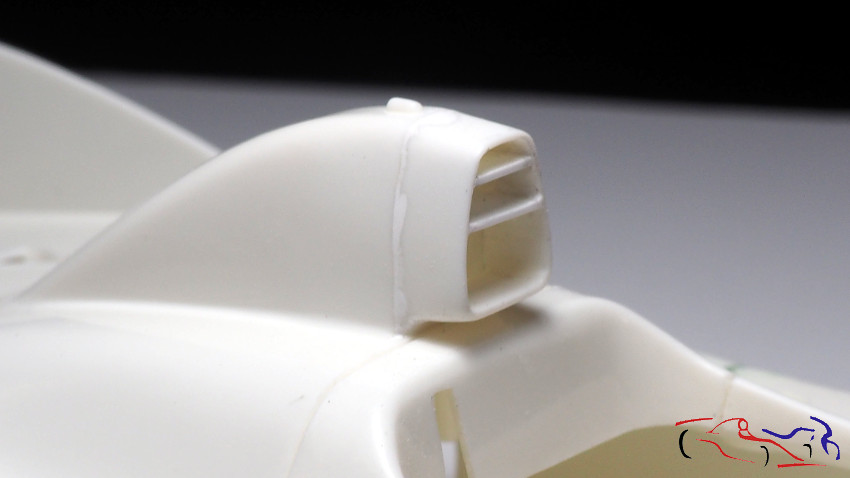
 Tapamos las marcas de inyección de la pieza inferior…
We cover the injection marks on the bottom part …
 ….la pegamos y ponemos masilla en las uniones:
…. we glue it and put putty in the joints:
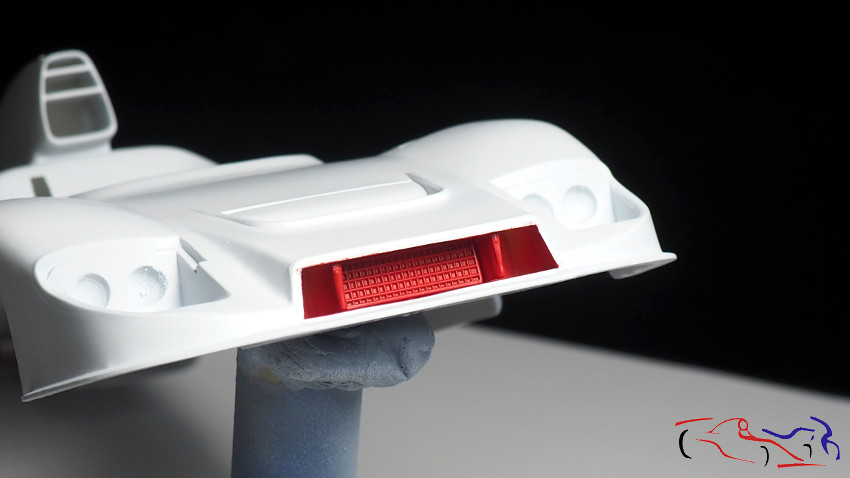
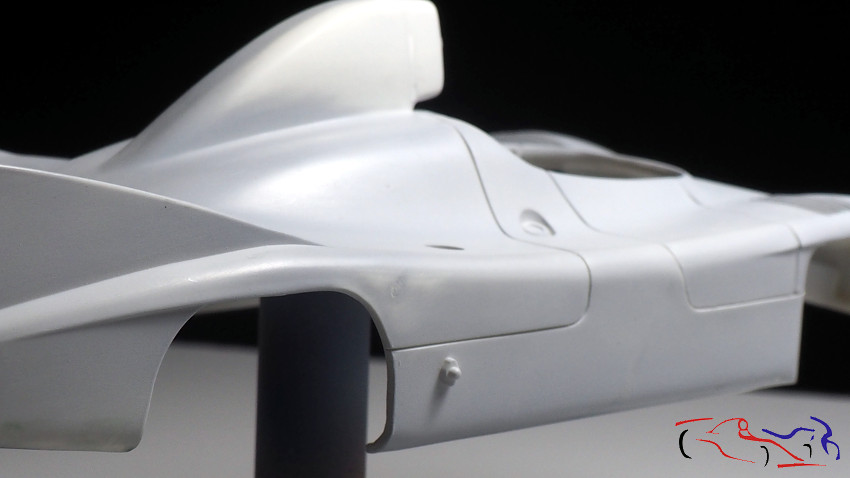
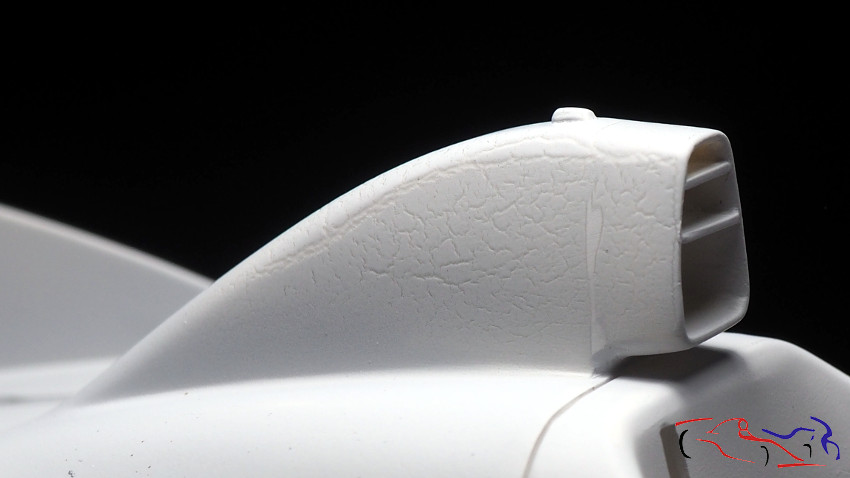
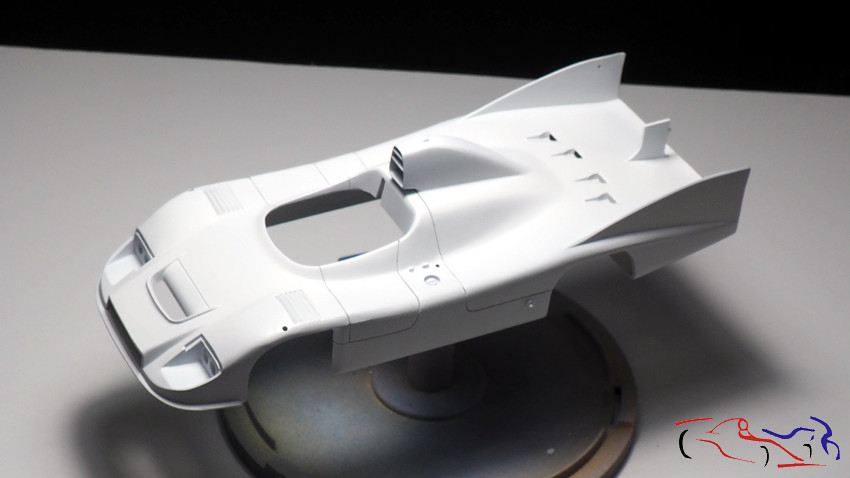
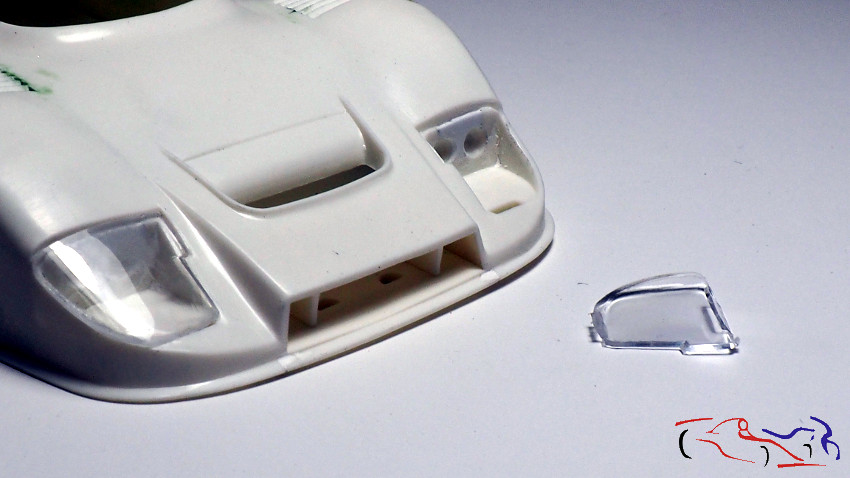
 Aquí tenemos el resultado, uan vez lijadas las uniones de la pieza con la carrocería. Aprovecho esta foto para mostraros,el proceso con las luces delanteras. Gracias a unos colegas, he decidido elimianr los faros que había previsto, por unos más reales. Como primer paso, relleno con un trozo de plástico, y con masilla después, el hueco del fondo de los faros, que es para colocar el cristal, y los propios faros de la maqueta:
Here we have the result, once the joints of the part with the body have been sanded. I take this photo to show you, the process with the headlights. Thanks to some colleagues, I have decided to eliminate the headlights that I had planned, for more real ones. As a first step, I fill the hole in the bottom of the headlights with a piece of plastic, and with putty later, which is to place the glass, and the headlights of the model:
 Como no voy a utilizar la pieza de los faros ni los fotograbados que mostré en el anterior post, hago unos conos donde irán los faros, para darle la profundidad y forma real. A su vez, elimino las partes de los cristales, que van metidos en la carrocería, tanto en la parte trasera como la delantera, y que servñian para fijar el cristal. Vemos el hueco rectangular en el faro izquierdo, que debemos rellenar, y como quedaría el cristal en el faro derecho,
Since I am not going to use the headlight piece or the photoetched parts that I showed in the previous post, I make some cones where the headlights will go, to give it the depth and a real shape. In turn, I remove the parts of the glass, which are embedded in the body, both in the rear and the front, and which served to fix the glass. We see the rectangular hole in the left headlight, which we must fill, and how the glass would look in the right headlight,
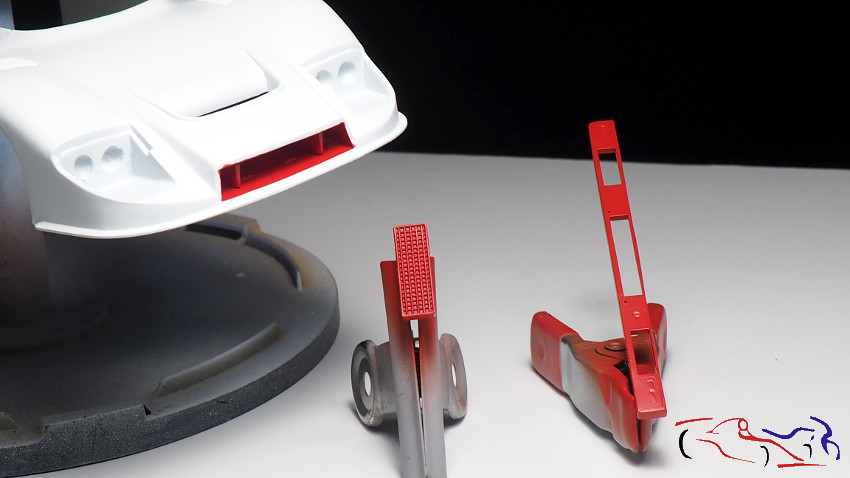
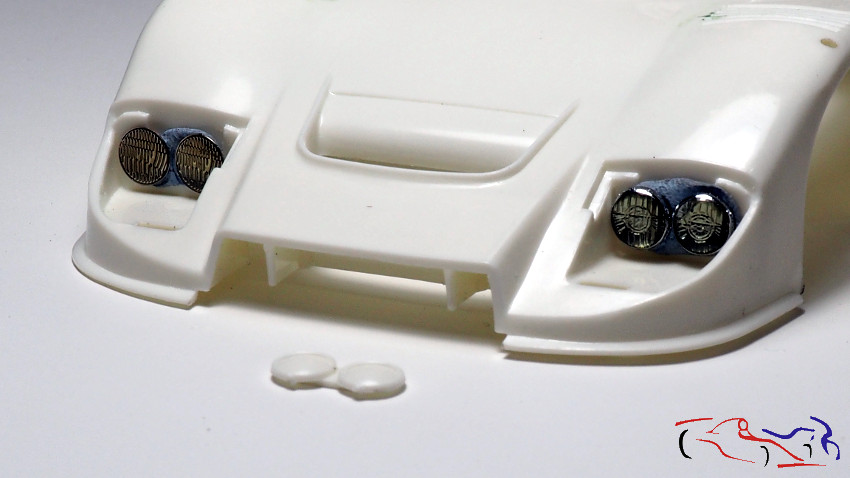
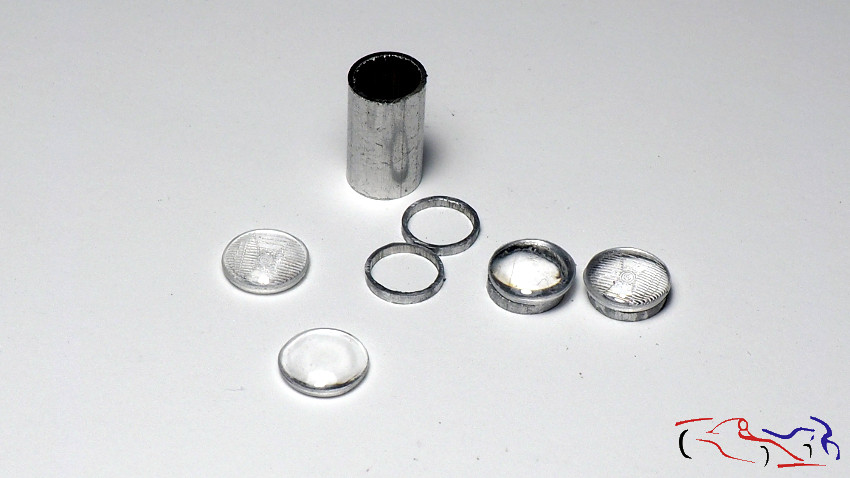
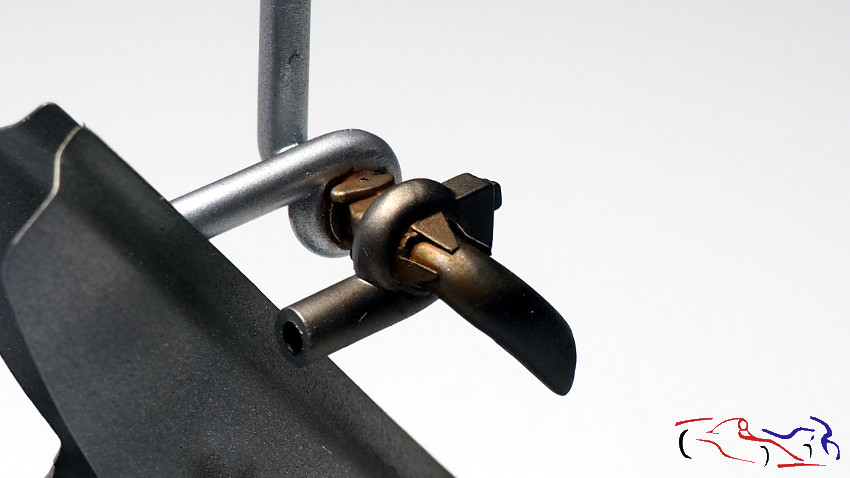
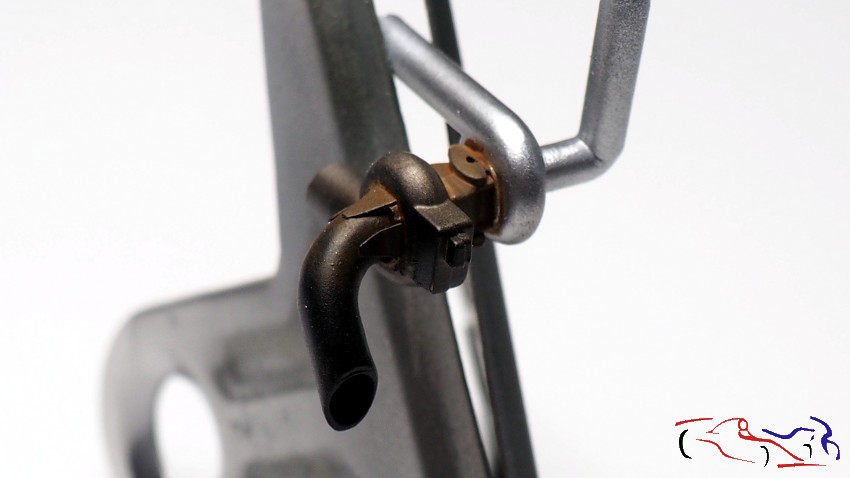
 Y como hacemos los faros? Primero cogemos los cristales que me sobraron de los faros auxiliares del Opel Manta, y un tubo de aluminio. Pongo el tubo en la mesa de coordenadas para poder medir bien, y corto con el minitaladro aros de 1 mm. Aquí vemos el resto de tubo, dos aros, dos cristales y dos faros montados:
And how do we make the headlights? First we take the glasses that were left over from the auxiliary headlights of the Opel Manta kit, and an aluminum tube. I put the tube on the coordinate table to be able to measure well, and I cut 1 mm rings with the mini drill . Here we see the rest of the tube, two rings, two glasses and two mounted headlights:
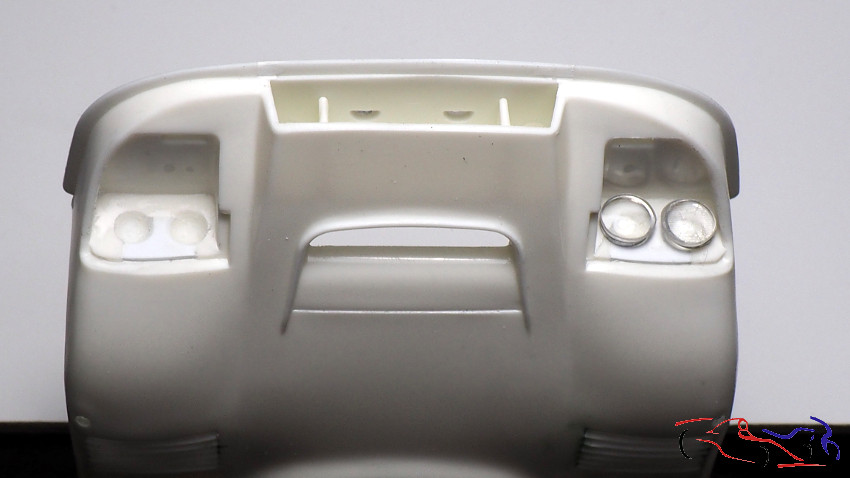
 Y aquí los vemos colocados. Deberé agrandar más las cuencas de los faros porque aun parecen pequeñas. Este trabajo lo hago con el minitaladro y una fresa especial:
And here we see them placed. I’ll have to enlarge the headlight sockets more because they still look small. I do this work with the mini drill and a special milling cutter:
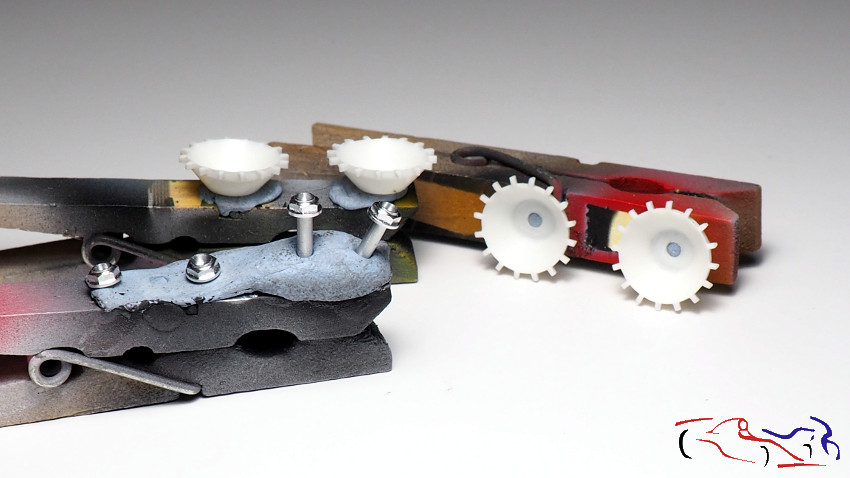
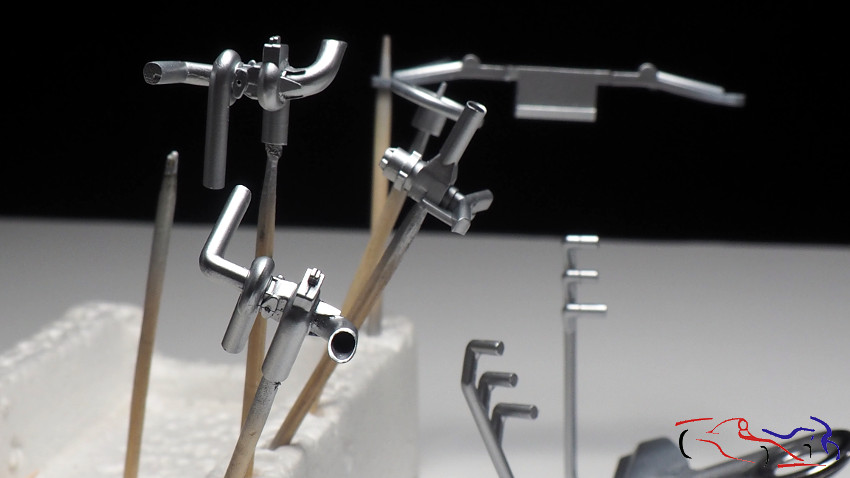
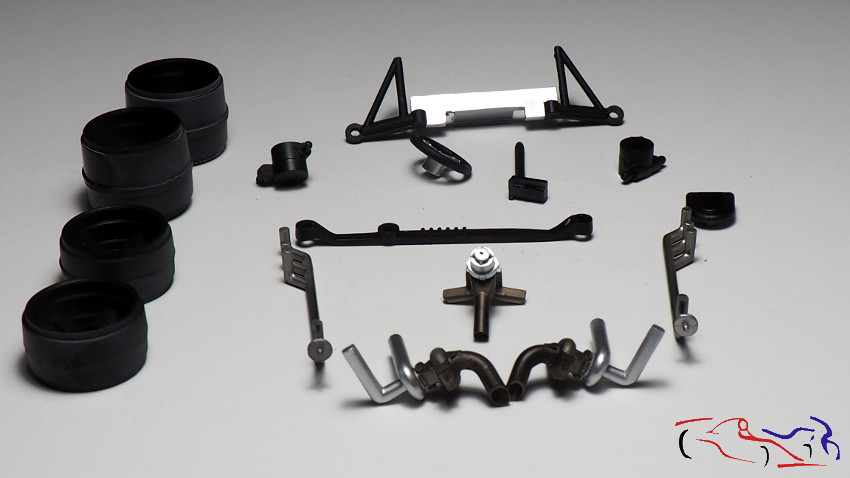
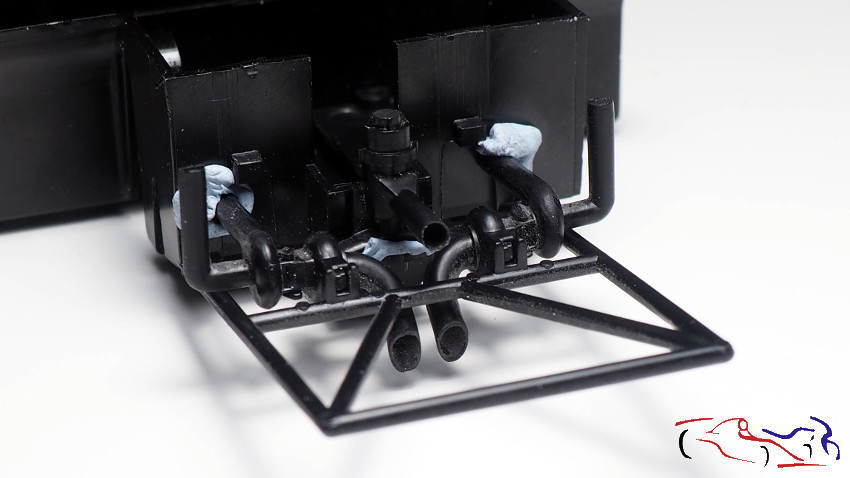
 Y para terminar, pasamos a las pocas piezas del motor, que las uno con BlueTack para ver como queda:
And to finish the post, we turn to the few parts of the engine, which I join with BlueTack to see how it looks:
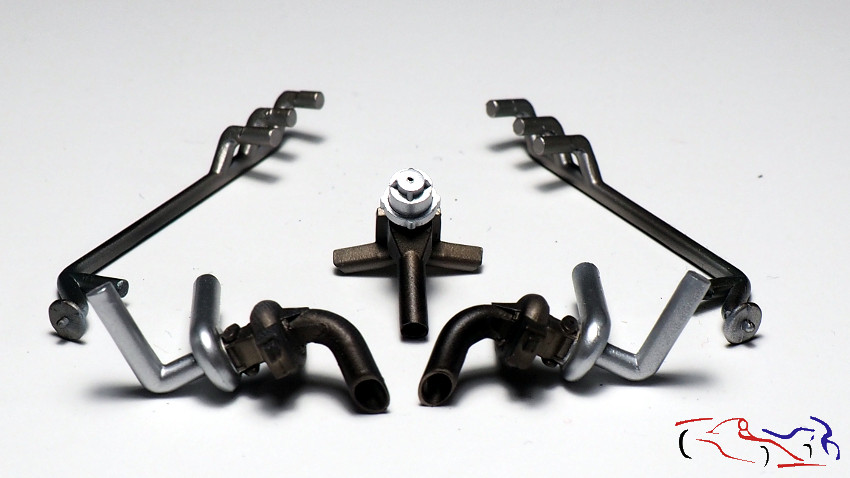
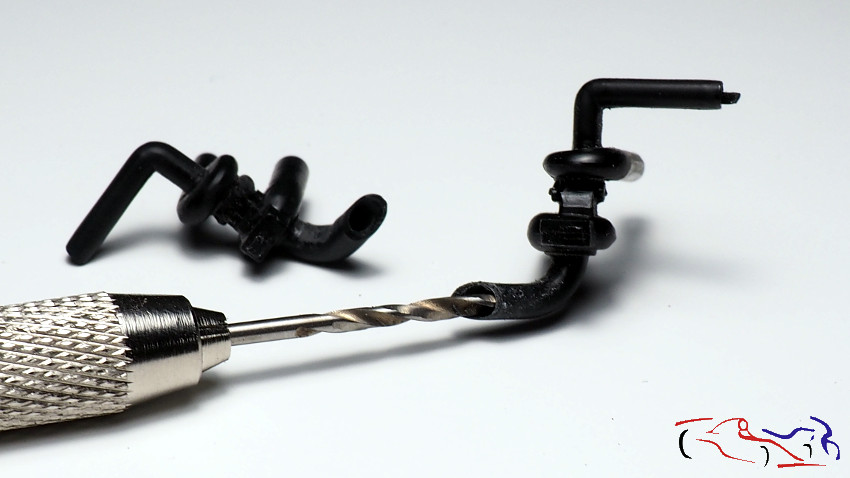
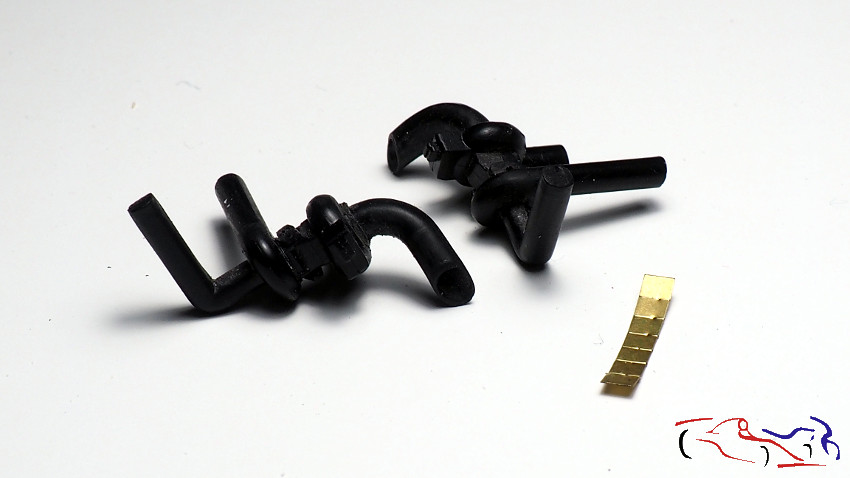
 Y añadimos un poco de detalle. Viendo fotos reales, veo que en la unión del tubo de escape y el turbo, hay uan pequeñas láminas, cuatro, alrededor del tubo con forma trapezoidal. Cojo el latón, y lo marco para cortarlo y limando unas esquinas, hacer los trapezoides, aun no hechos en la foto:
And we add a little detail. Looking at real photos, I see that there are four small sheets around the trapezoidal tube. So I take the brass, and mark it to cut it and file some corners, make the trapezoids, not yet made in the photo:
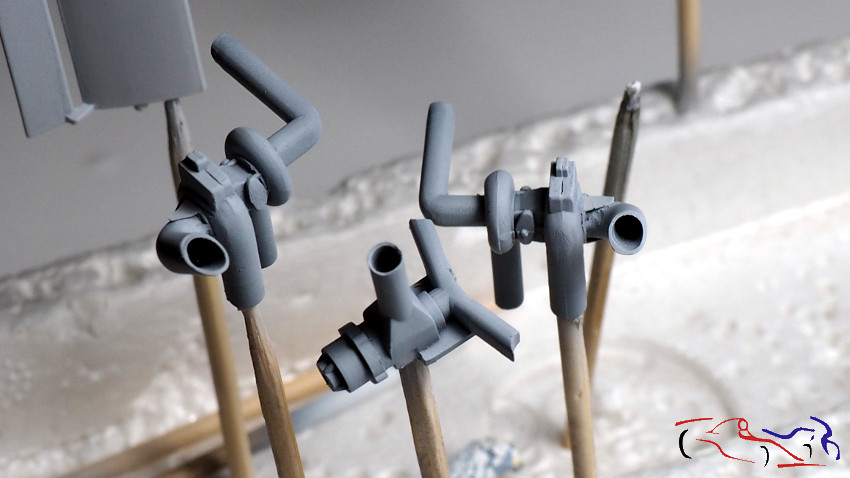
 Una vez pegados y con la imprimación dada, este es el resultado. Tengo qye ref¡visar alguna linea de molde, y pasar a la pintura:
Once glued and primer, this is the result. I have to check some mold line, and go to the painting:
 Lo próximo que tengo que hacer es terminar de lijar la masilla de la carrocería, y pasar a pintar.
Gracias por ver y comentar.
The next thing I have to do is finish sanding the body filler, and go to paint.
Thanks for viewing and commenting.
 Pero antes de todas la fotos, os muestro otros avances que he hecho. Primero con las piezas de los escapes con los turbos. Al chequear fotos originales, me doy cuenta que toda la parte del turbo tiene un ligero color óxido. Para reproducirlo, utilizo el lavado óxido de MIG, que aplico con un pincel. El acabado que tiene lo podéis ver en las siguientes fotos:
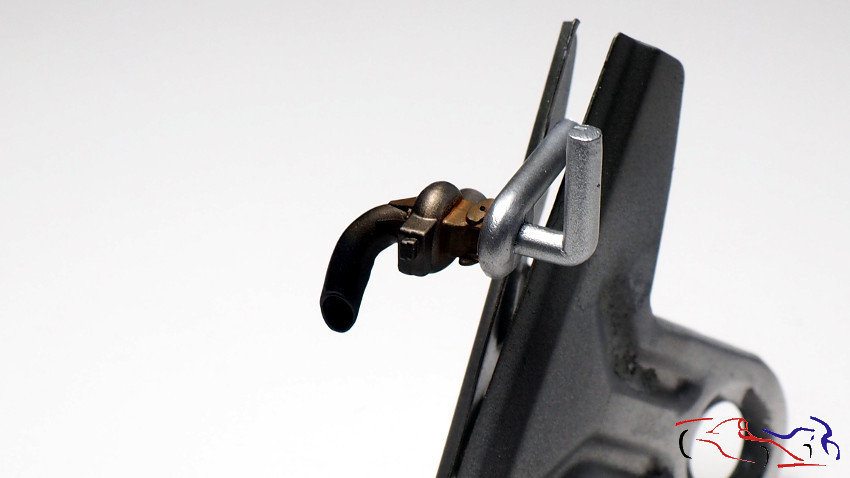
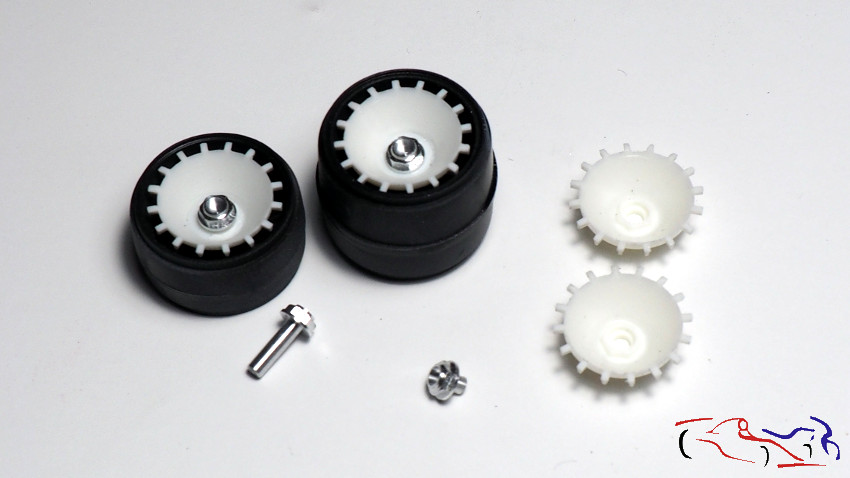
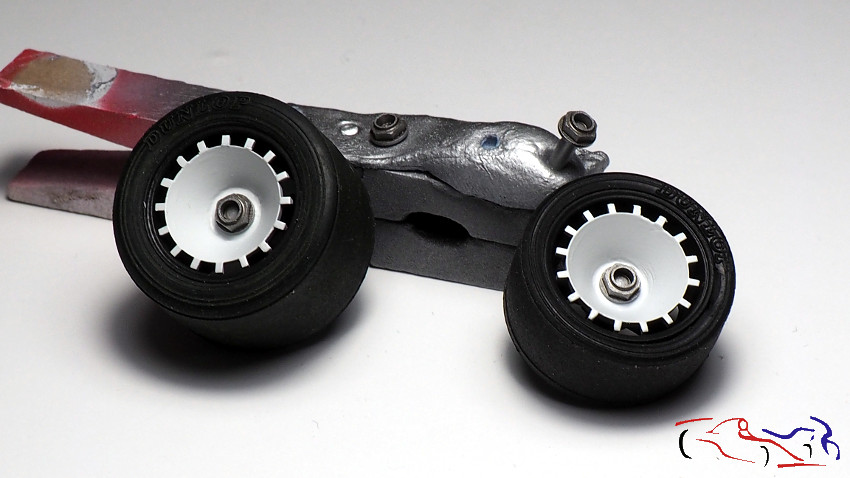
 Otro punto que cambiado son las llantas. Recordad que eliminé la tuerca que venia de origen, y que usaría la de Scale Production. Aquí tenemos un par de fotos donde se ve el conjunto si pegar aun. Las tuercas tienen una capa de Alclad dark Aluminium y un lavado con Smoke:
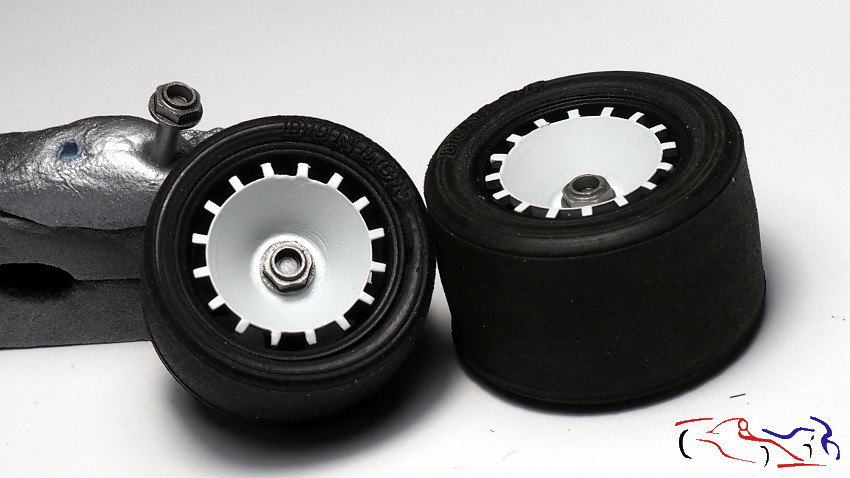
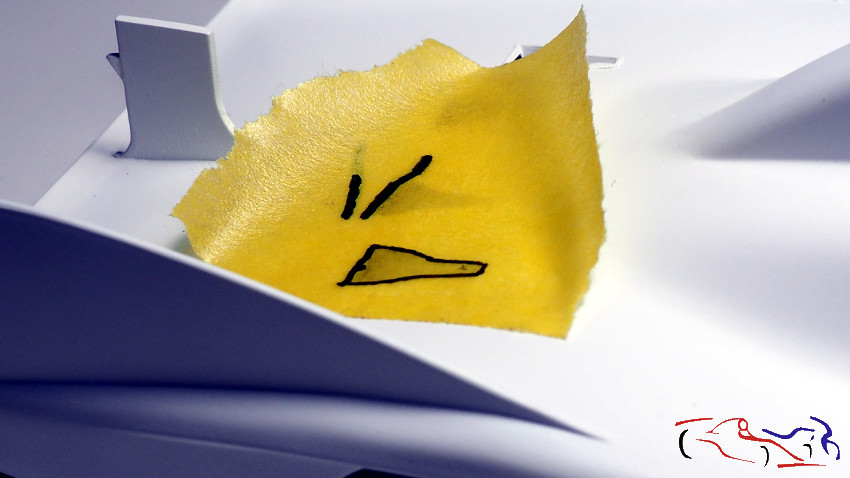
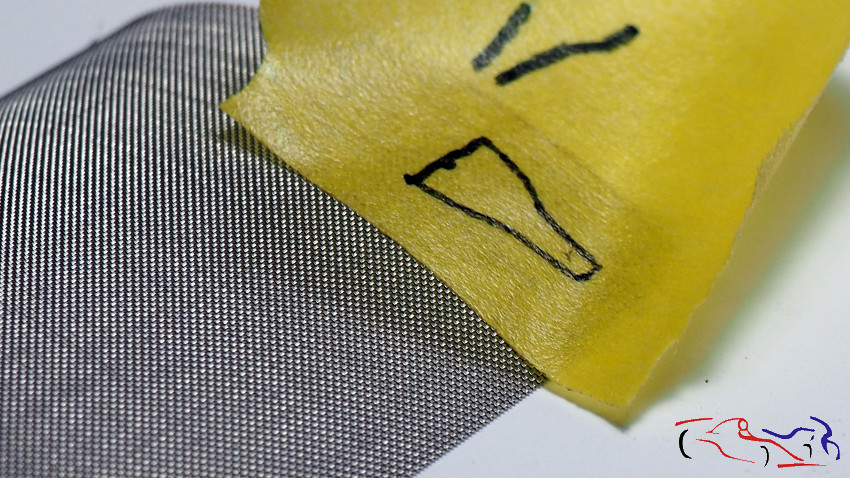
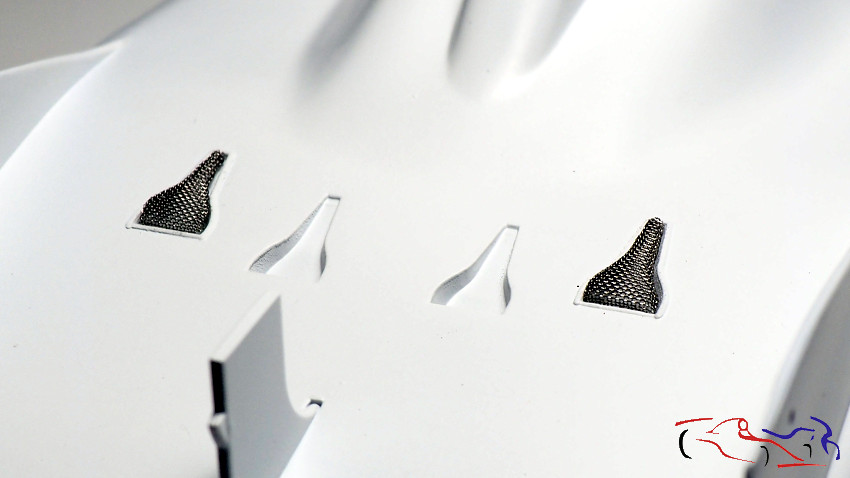
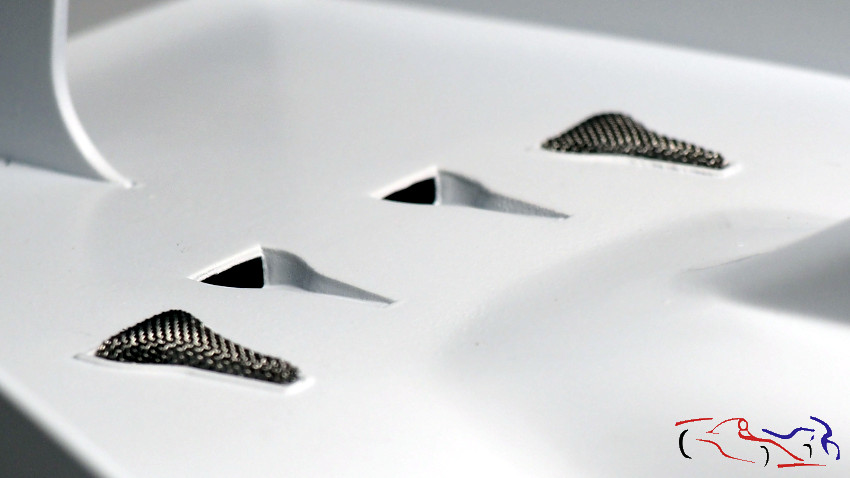
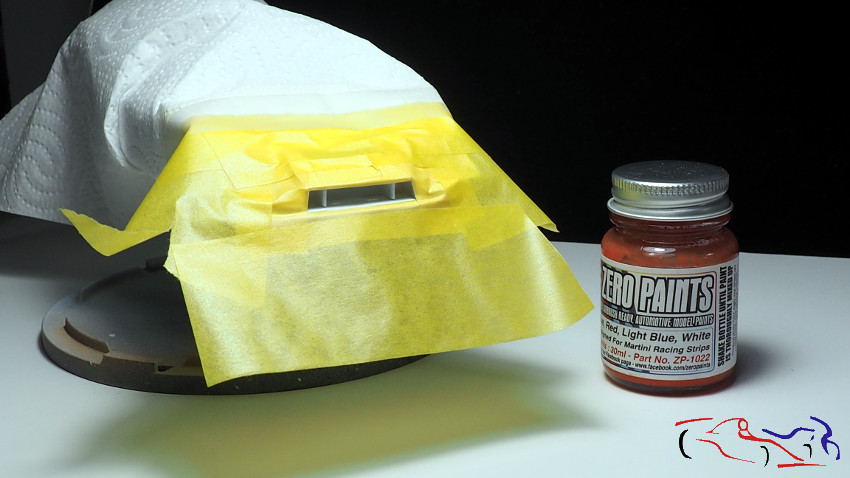
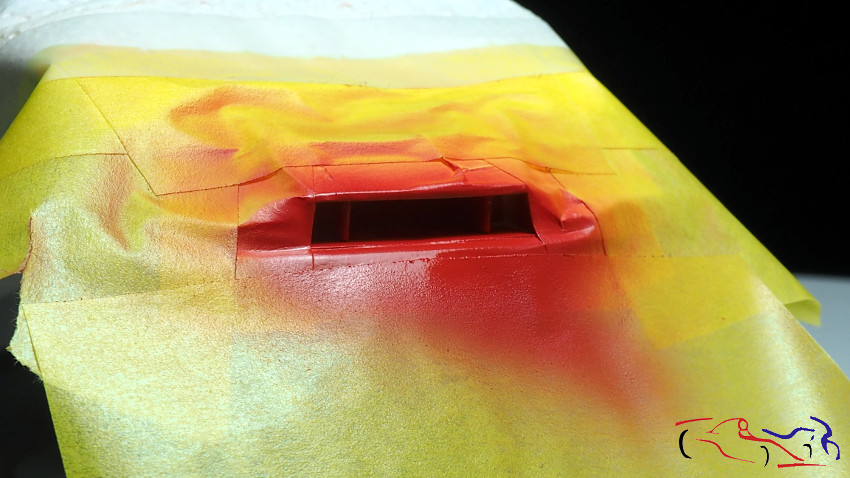
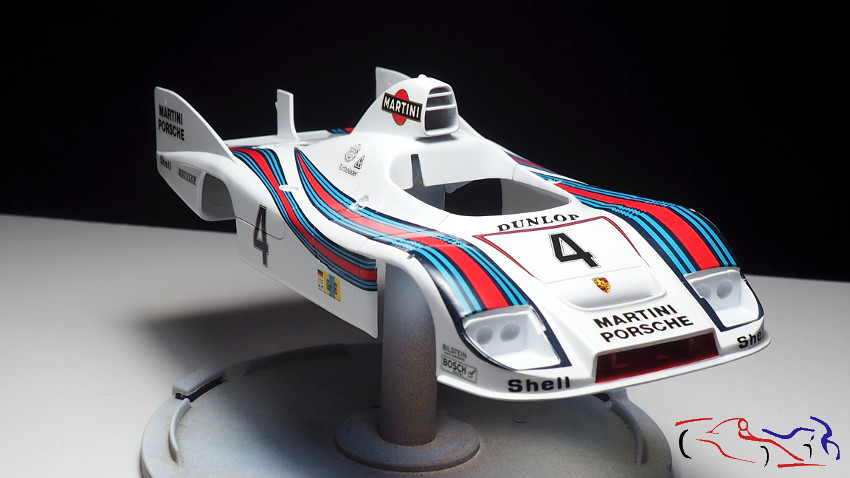
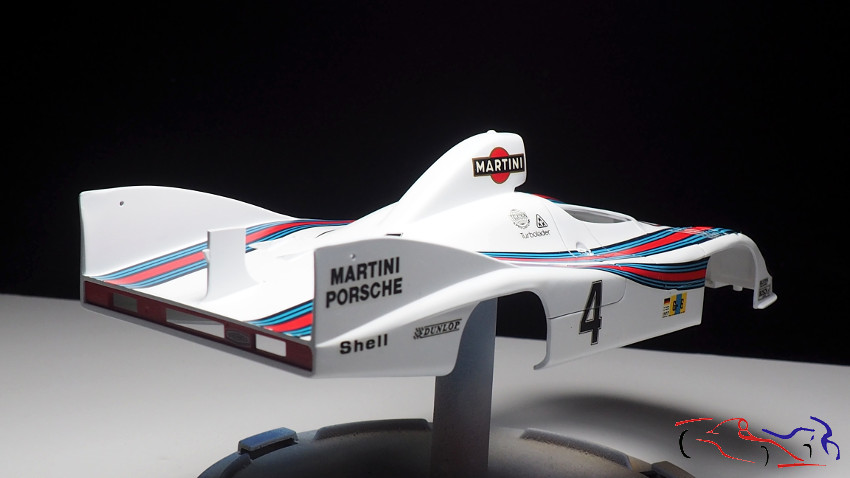
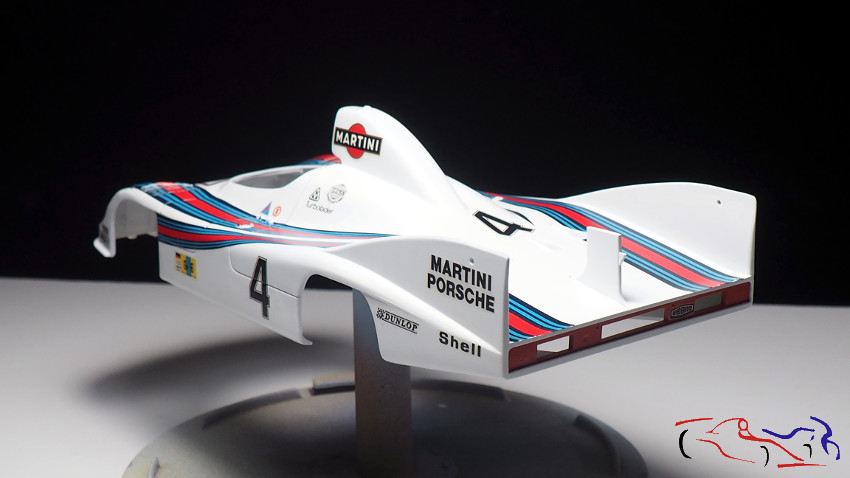
 Y ahora si, las fotos de las calcas. Decir que tuve problemas la principio porque son muy delgadas, y con los líquidos Micro se volvía extremádamente frágiles, por lo que decidí usar agua y secador, y depués el Micro Set. Para las rejillas, puse la calca ayudándome con un bastoncillo de algodón, pero no mucho. Una vez estaban un poco secas, las corté con un cutter nuevo por su parte delantera, para que el resto de la calca, se adheriera a la rejilla, y aplicando Micro Set con un pincel, que metía por cada ranura.
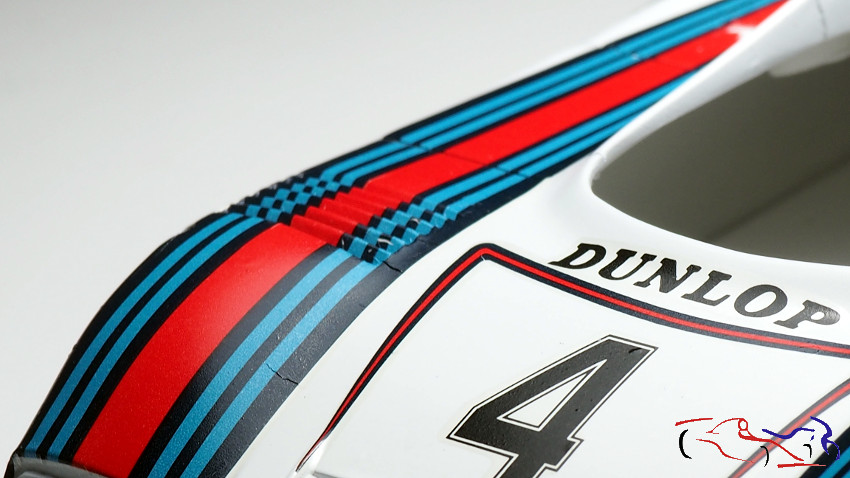
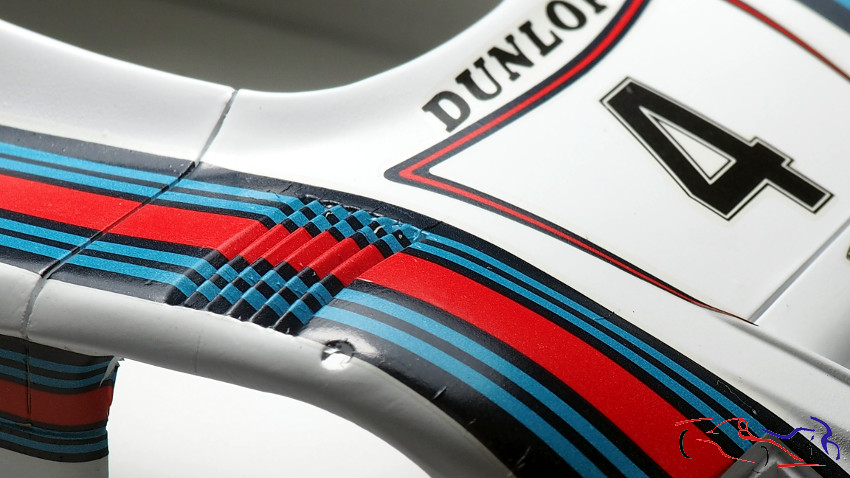 La complicación de las calcas de este coche, aparte de las rejillas, no fueron las bandas de Martini, sino colocar el resto de logos en la misma posición en los dos lados de la carrocería, por lo que ponía la de un lado sin fijar y después ponía la del otro lado. Una vez comprobadas las posiciones de ambas calcas, incluso con una regla, las fijaba.
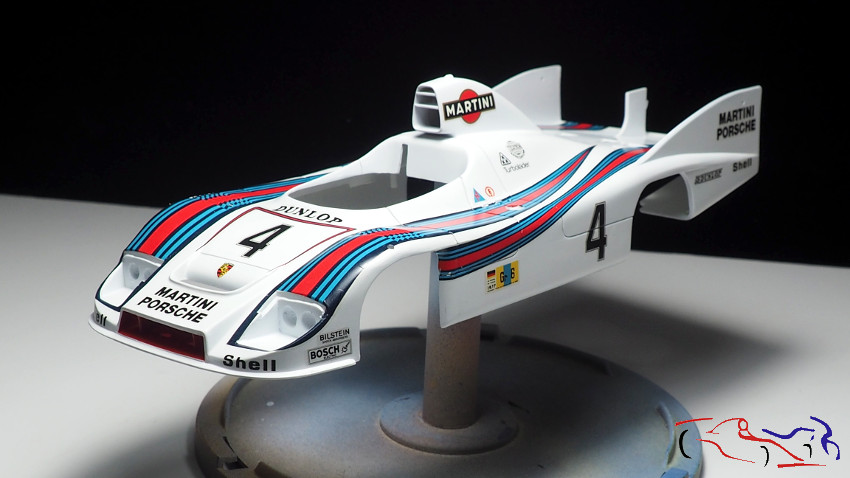
 Ahora, hay que arreglar algunos pequeños fallos de las calcas con pintura, y pasaremos a lacarla. También nos pondremos con el chasis y el cockpit.