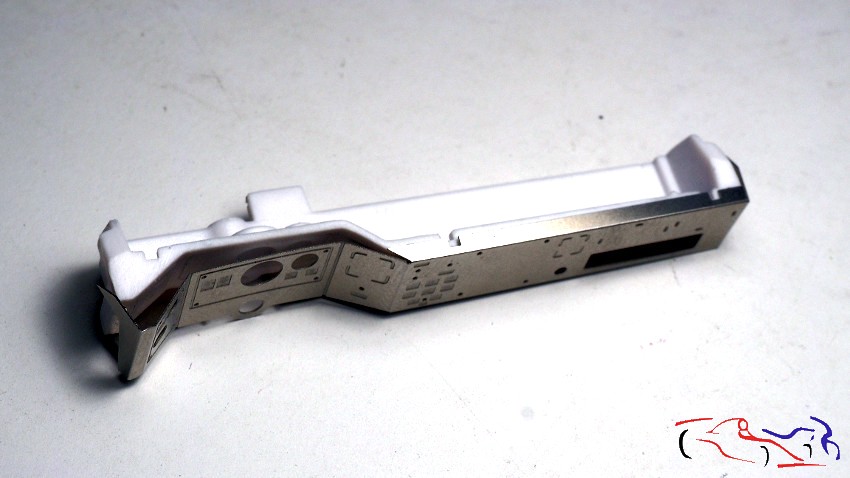
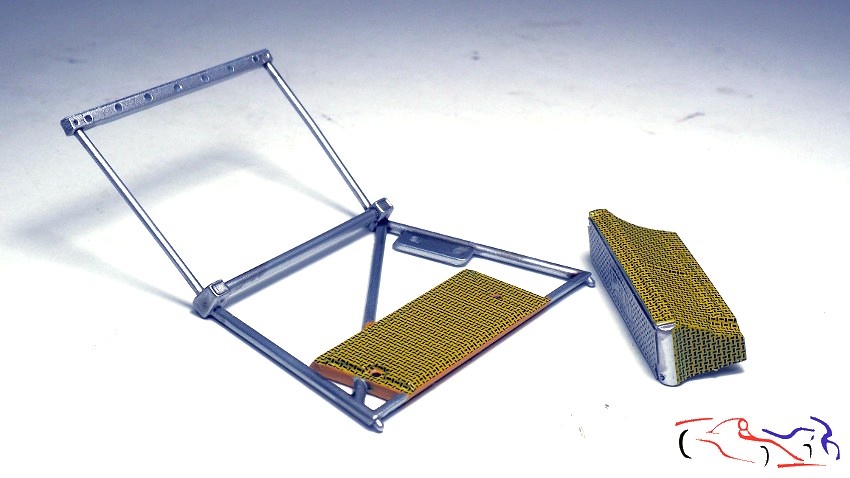
Continuamos modificando piezas del Lancia Delta S4, y lo primero que os muestro es como queda la entrada de aire al turbo con su filtro, así como el radiador de aceite, ambos con la calca de fibra colocada:
We continue modifying pieces of the Lancia Delta S4, and the first thing that I show you is how the air inlet to the turbo with its filter is, as well as the oil radiator, both with the fiber decal placed:
Pero antes de decir como lo hice, vamos paso a paso y empezamos por los botes de liquidos que lleva el coche delante del parabrisas. Recordad que los eliminé para darle profundidad, y después de imprimados, los pinté de blanco. A la izquierda, veis las tapas de dichos botes pintadas de negro satinado.
But before saying how I did it, we go step by step and start with the cans of liquids that the car has in front of the windshield. Remember that I eliminated them to give them depth, and after priming, I painted them in white. On the left, you see the covers of these boats painted in black satin.
 Para dar el tono amarillento tipico de esos botes, les pongo una gota de óleo MIG a cada cara:
To give the yellowish tone typical of those boats, I put a drop of MIG oil on each face:
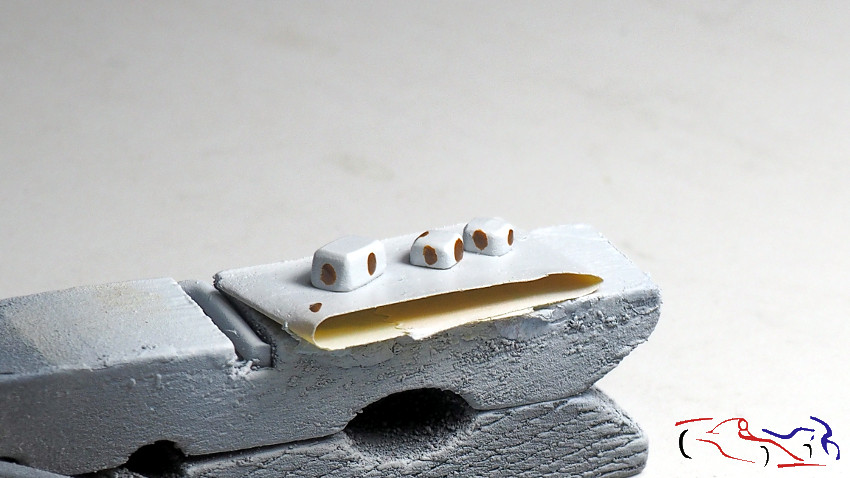 Con un pincel plano y disolvente, los voy difuminado dejando más cantidad de pintura en la base, simulando la linea del líquido. Después les pondré las tapas.
With a flat brush and solvent, I will blur them leaving more paint in the base, simulating the line of the liquid. Then I’ll put the covers.
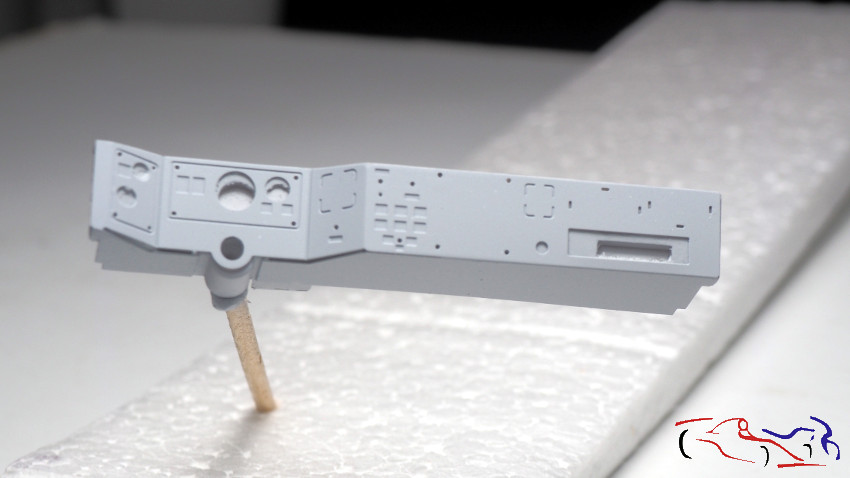
 Pasamos al salpicadero y aquí os muestro el original del kit:
We went to the dashboard and here I show you the original kit:
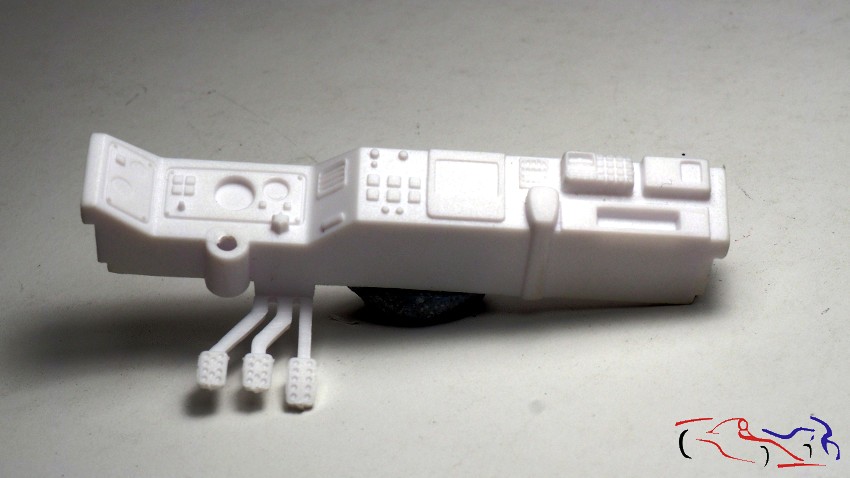
Pero como voy a usar el fotograbado de Hobby Design, elimino todo lo superficial con lima y después lija. También os muestro el fotograbado
But since I’m going to use Hobby Design’s gravure, I eliminate everything superficial with a file and then sandpaper. I also show you the Photoettached
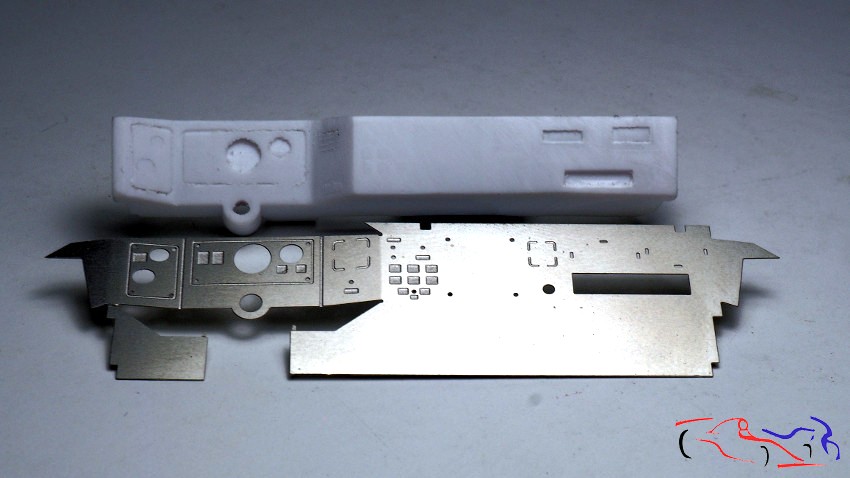
Una vez doblado, miro a ver como emcaja, y veo que es complicado, por lo que elimino del fotograbado las planchas laterales, y la superior que va delante del copiloto:
Once folded, I look to see how it emulates, and I see that it is complicated, so I remove the side plates from the gravure, and the upper one that goes in front of the copilot:
Lo pego con cianocrilato y lo imprimo con Gravity, que también funciona para metales. Siguiente paso es pintar e ir haciendo todas las piezas que lo componen, una a una y pintando antes de pegarlas!
I glue it with cyanoacrylate and primed it with Gravity, which also works for metals. Next step is to paint it and make all the pieces that compose it, one by one and painting before gluing them!
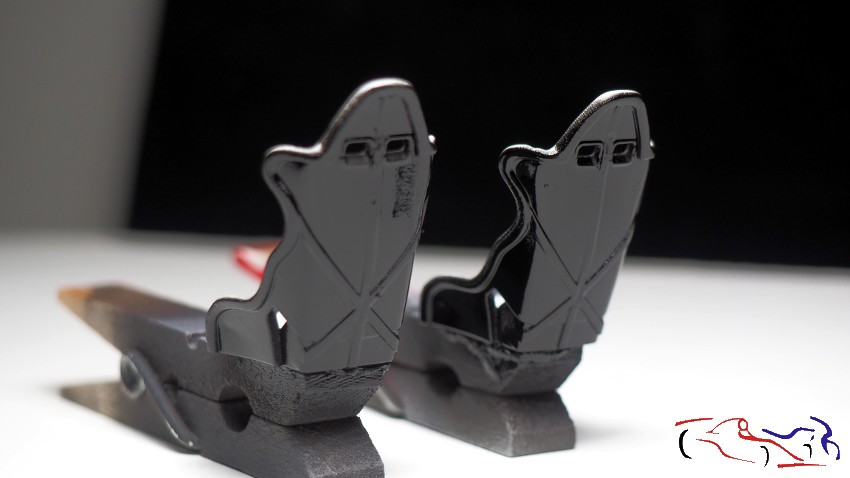
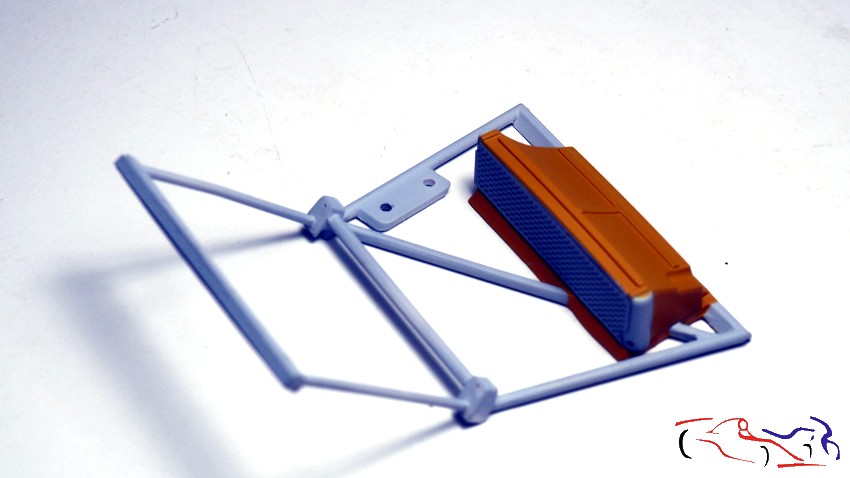
 Pasamos a los backets. Una vez imprimados, le doy una capa de negro brillante de Zero, que es la primera vez que uso y me ha resultado muy agradable de usar, con un brillo bastante bueno para aplicar despues la calca de la fibra:
We go to the backets. Once primed, I give a layer of bright black Zero, which is the first time I use and it has been very pleasant to use, with a pretty good shine to apply after the decal of the fiber:
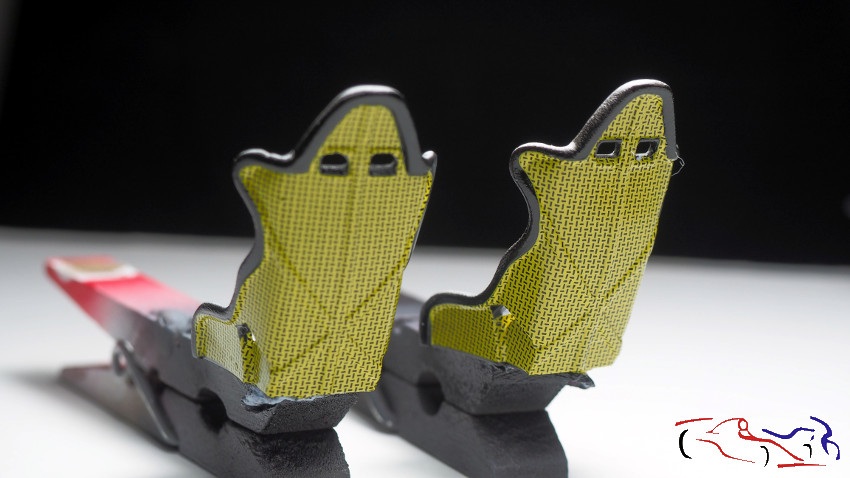
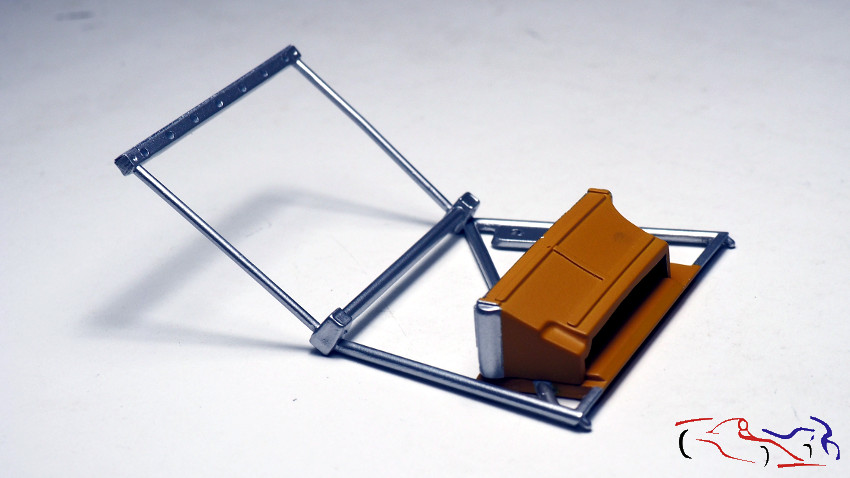
Ya tenemso la calca aplicada, con los líquidos Micro y el secador. Lo siguiente será barnizar para enmascarar, y aplicar el color azul al asiento.
We already have the decals applied, with the Micro liquids and the dryer. The following will be varnish to mask, and apply the blue color to the seat.
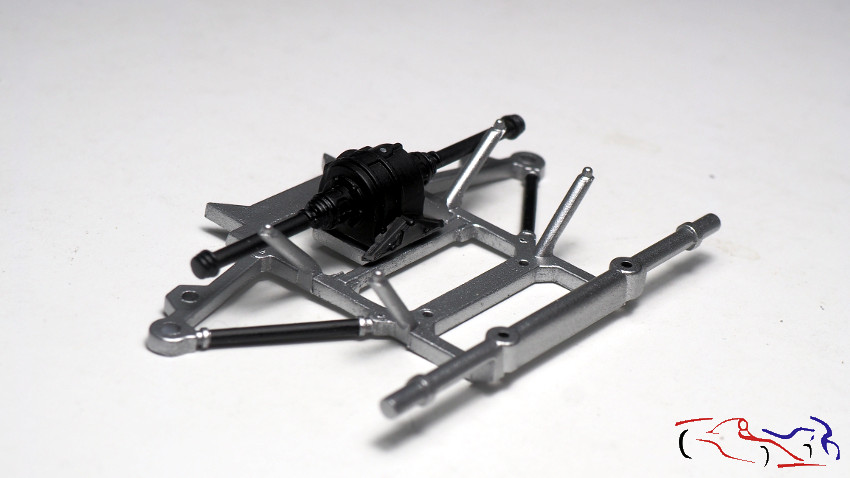
 Pasamos a piezas del chasis delantero. Estas dos piezas fueron pintadas en negro satinado, y enmasacardas para aluminio una, y negro plastico la otra, todos los colores de Zero. Aquí ya están las pinturas aplicadas:
We move to front chassis parts. These two pieces were painted in satin black, and one masked for aluminum, and black plastic for the other, all the colors of Zero. Here are already the paintings applied:
 Si quitamos las máscaras y las ponemos en su lugar, queda así:
If we remove the masks and put them in their place, it looks like this:
 Ahora vamos a modificar las entradas de aire del motor, al Intercooler y al filtro que después va conectado al turbo. Enmascaramos para pintar la parte que va de Kevlar, con la pintura que tiene Zero:
Now we are going to modify the air inlets of the engine, the Intercooler and the filter that is connected to the turbo. We masked to paint the part that goes to Kevlar, with the paint that Zero has:
 Una vez la pintura está seca, quitamos las máscaras…
Once the paint is dry, we remove the masks …
….para ponerlas de nuevo y pintar las barras de aluminio de zero. Quitamos las máscaras y presentamos el conjunto:
…. to put them back and paint the zero aluminum bars. We remove the masks and present the set:
 Y aplicamos las calcas del TK extra de Beemax, que se aplican muy bien. Decir que el intercooler tiene la rejilla de fotograbado pegada, a la que hemos recoratdo unas esquinas para poner las entradas de las mangueras de aceite.
And we apply the decals of the extra TK of Beemax, which apply very well. To say that the intercooler has the photogravure grid attached, to which we have picked some corners to put the entries of the oil hoses.
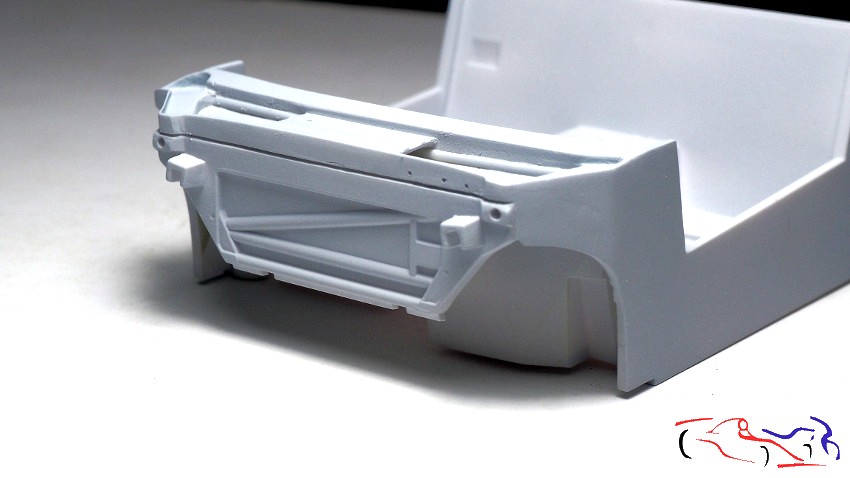
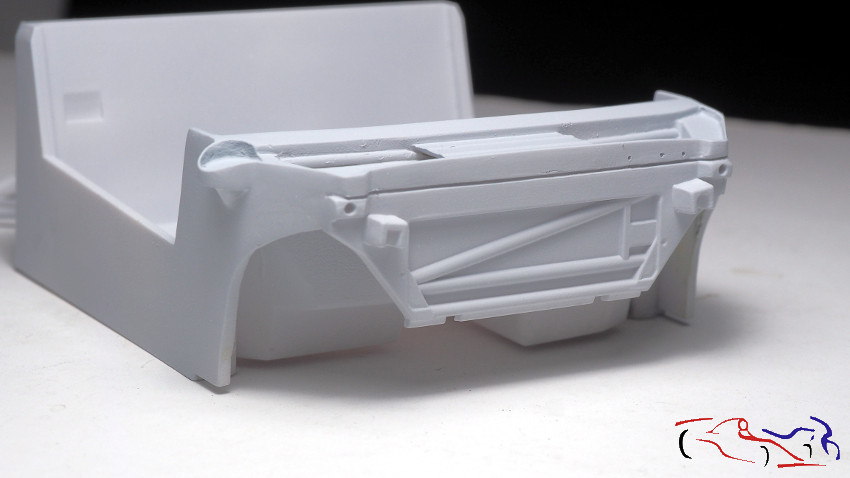
Pasamos al chasis, el cual lo dejamos listo para imprimar, y eso es lo que he hecho: imprimar para ver imprefecciones.
We went to the chassis, which we left ready to print, and that’s what I did: print to see imprefections.
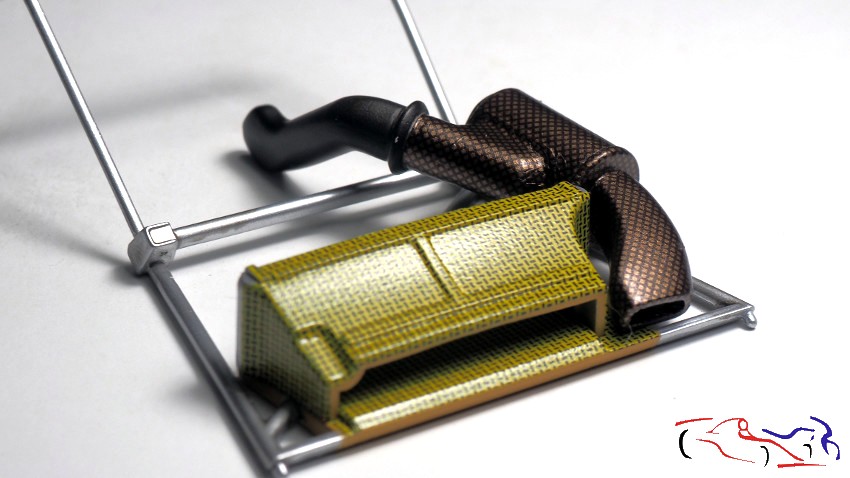
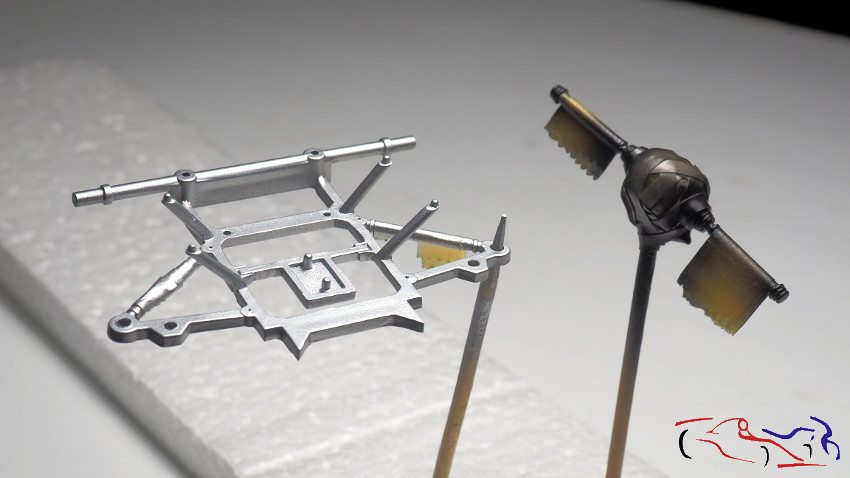
 Y volvemos a la pieza de inicio, la del filto de entrada de aire al turbo, que estaba pintada con negro satinado, y en la que tenemos que cubrir con fibra. Lo primero es hacer plantillas con cinta de enmascarar. Ponemos la cinta y marcamos con un lápiz los bordes:
And we go back to the starting piece, which is the turbo air intake filter, which was painted in satin black, and we have to cover it with fiber. The first thing is to make templates with masking tape. We put the tape and mark the edges with a pencil:
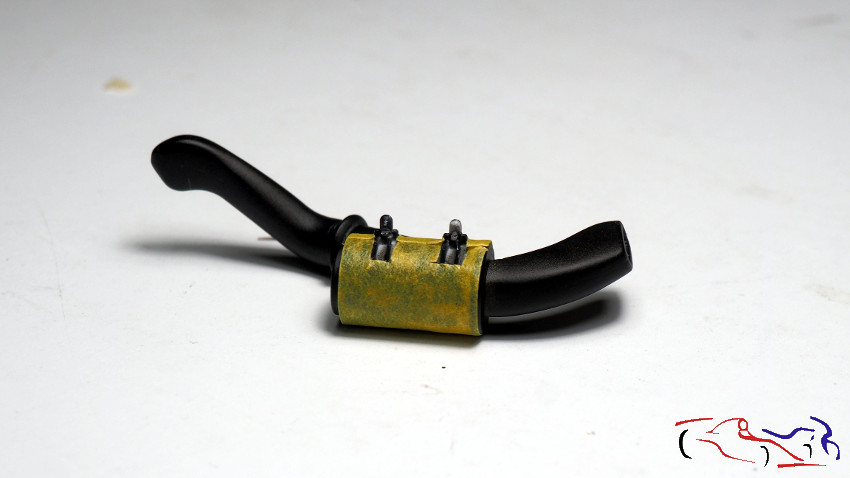 Una vez hechas las plantillas y recortadas con un cutter, las ponemos sobre la plancha de la calca elegida. En este caso, se ven dos tramas y colores diferentes, una para la entrada de aire y el filtro, más dorada, y la del final, más gris. Decir que esas hojas que cogí estaban en mal estado, deshaciendose al salir del agua, con lo que tuve que user otras más nuevas.
Once the templates were made and cut with a cutter, we put them on the plate of the chosen decal. In this case, two different patterns and colors are seen, one for the air intake and the filter, more golden, and the one for the end, more gray. To say that those leaves I took were in bad condition, falling apart when leaving the water, so I had to use other new ones.
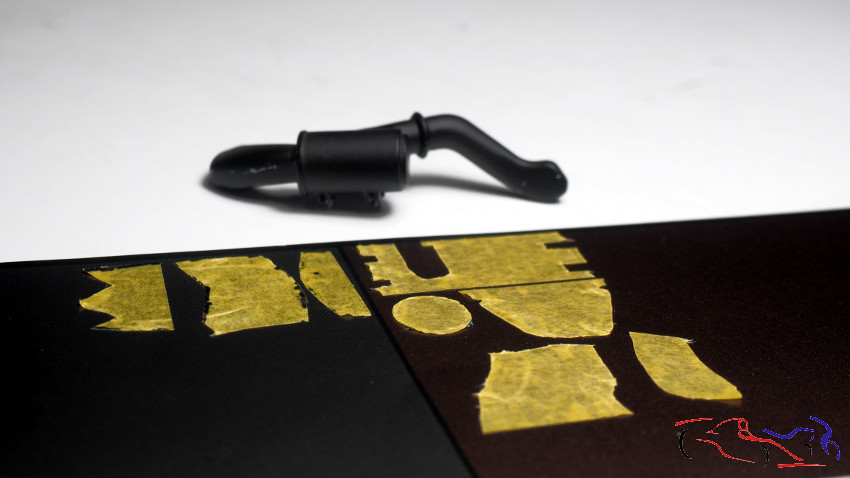 Una vez cortadas, se van poniendo aplicando calor con un secador y los productos micro con una bastoncillo de algodón:
Once cut, they are applied with the help of an airdryer and the micro products applied with a cotton swab:

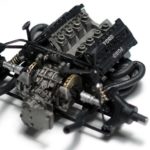
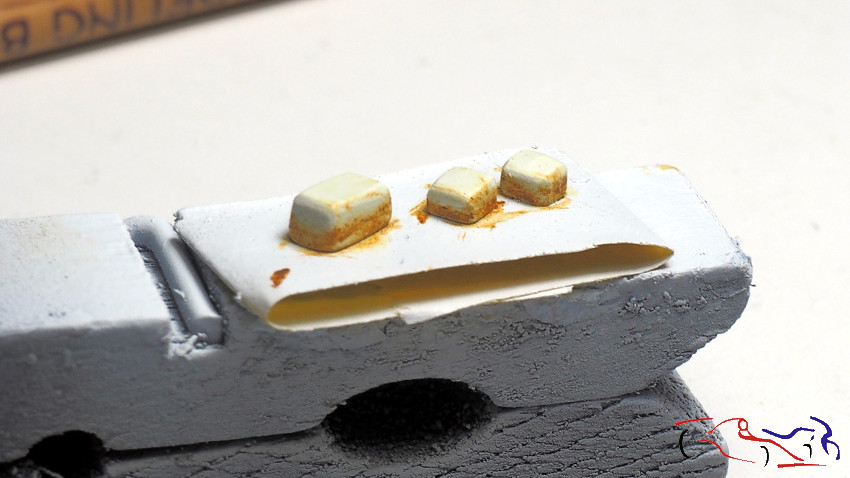
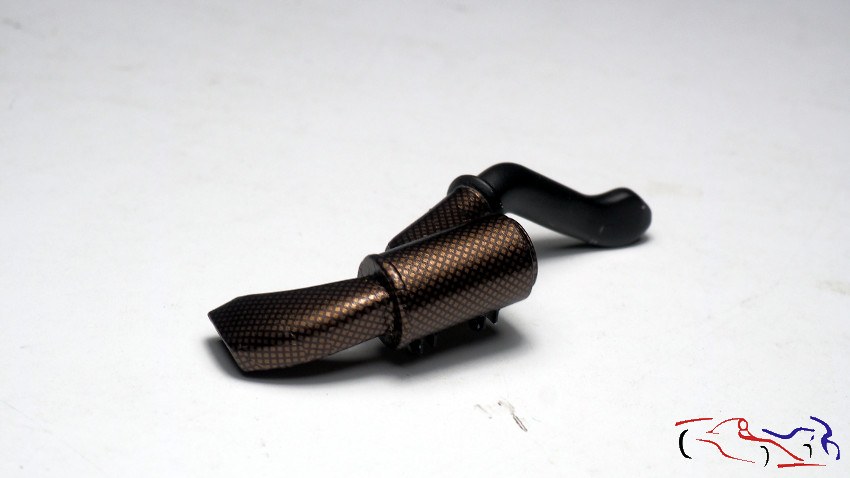 Para terminar, os muestro ahora la primera foto, pero ya sabiendo como se ha realizado:
For finishing today, I show you now the first photo, but you already know how it was done:
Gracias por ver y comentar!
Thanks for viewing and commenting!