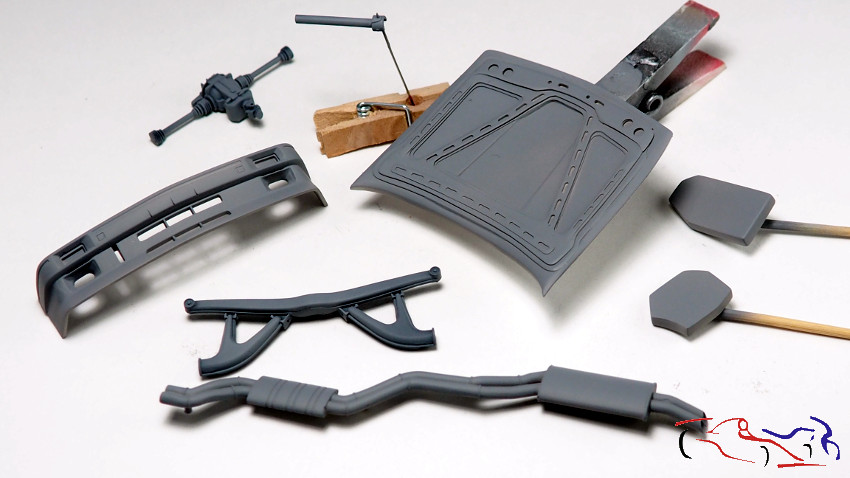
Hola a todos de nuevo. Después de terminar el Mercedes AMG GT3, vuelvo a trabajar sobre este modelo. Comenzamos con varias piezas imprimadas, en las que destaca la parte inferior de capó motor:
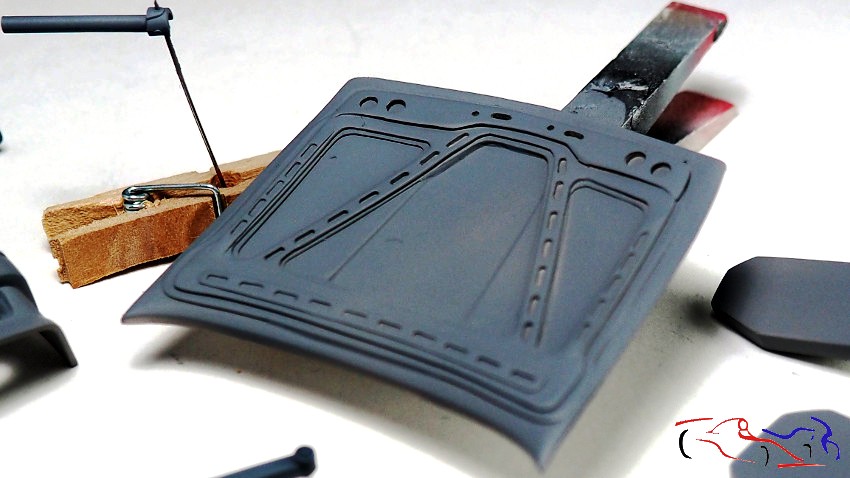
Hello everyone again. After finishing the Mercedes AMG GT3, I’m back to work on this model. We’re starting with several primed parts, most notably the lower part of the engine hood:
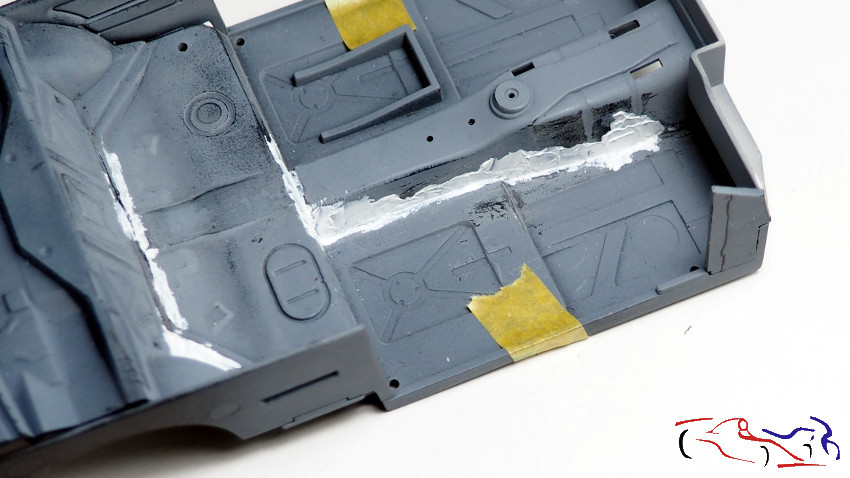
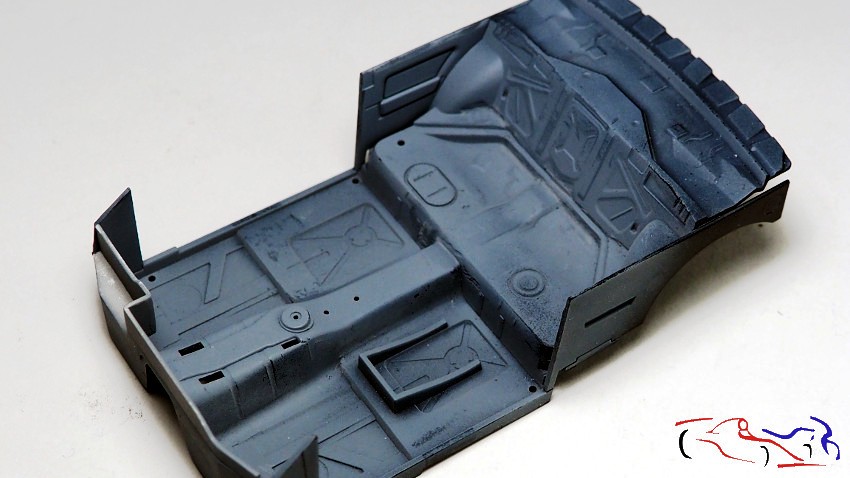
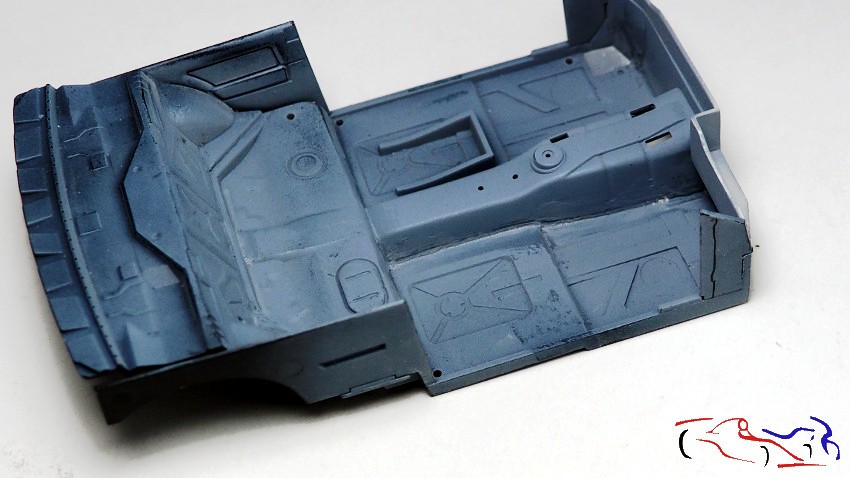
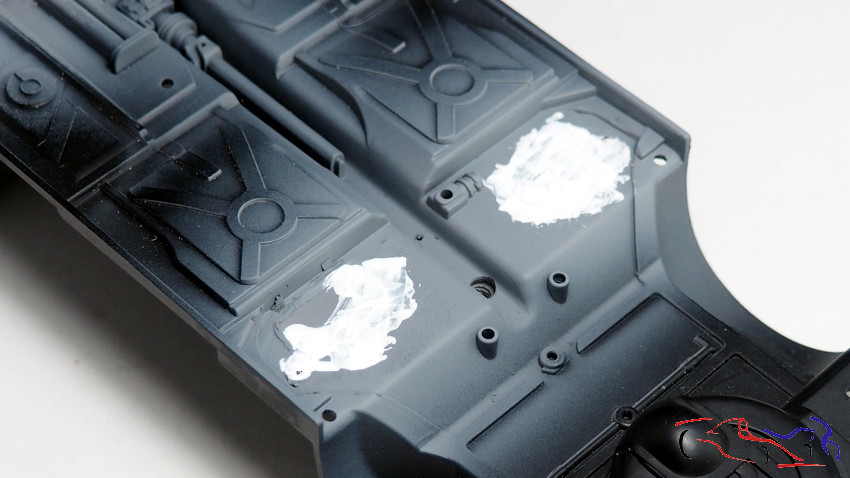
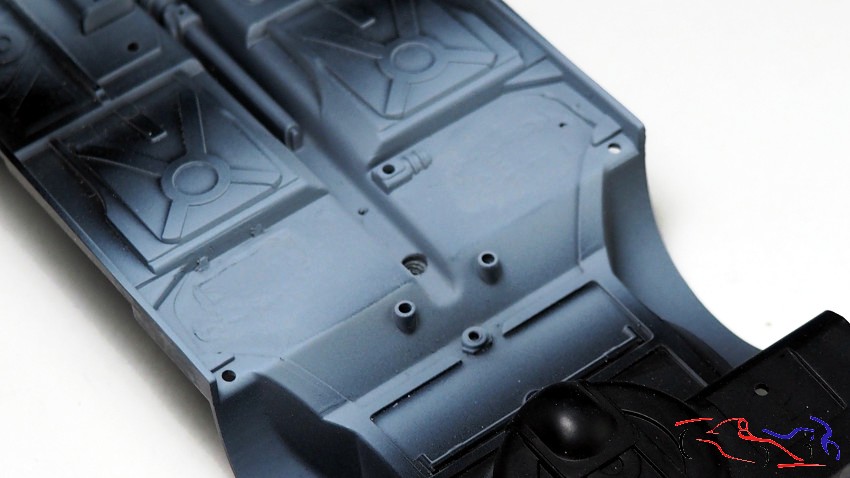
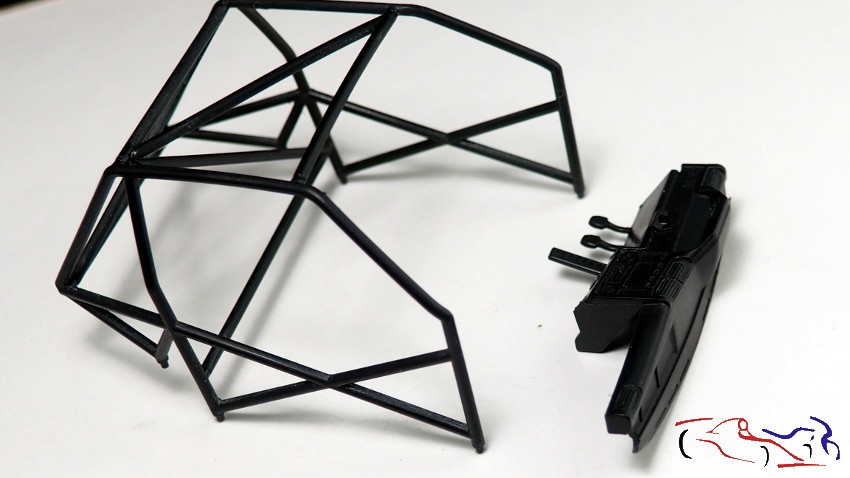
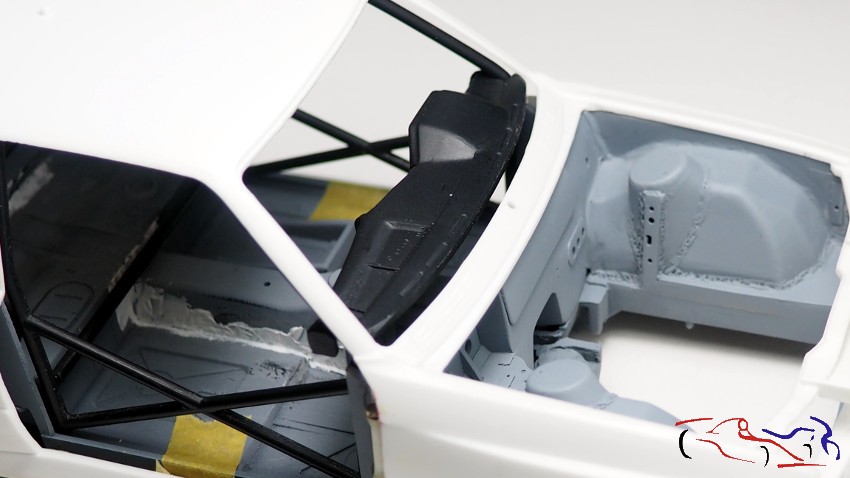
Otras piezas que hemos modificado son el cockpit y los bajos del chasis, que aunque ya se han eliminado los tubos o cables que venían incluidos en él, aun queda alguna labor para afinarlos. En el caso del chasis, se taparon los huecos realizados a ras de suelo, y se pondrán los nuevos depçositos:
Other parts we’ve modified include the cockpit and the underbody. Although the original pipes and cables have been removed, some work still needs to be done to fine-tune them. In the case of the chassis, the holes made at ground level have been covered, and the new tanks will be installed:
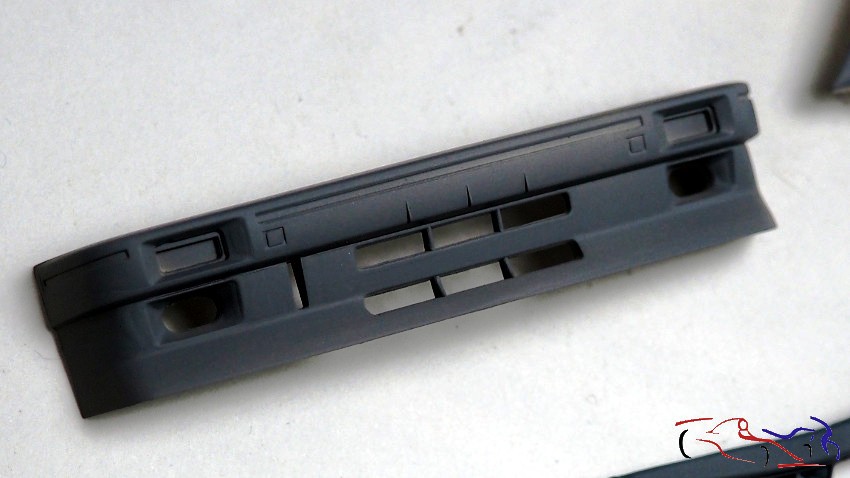
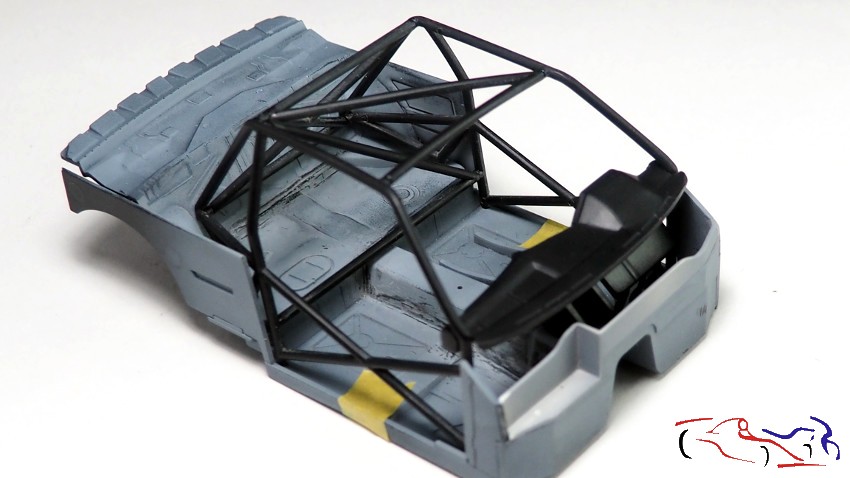
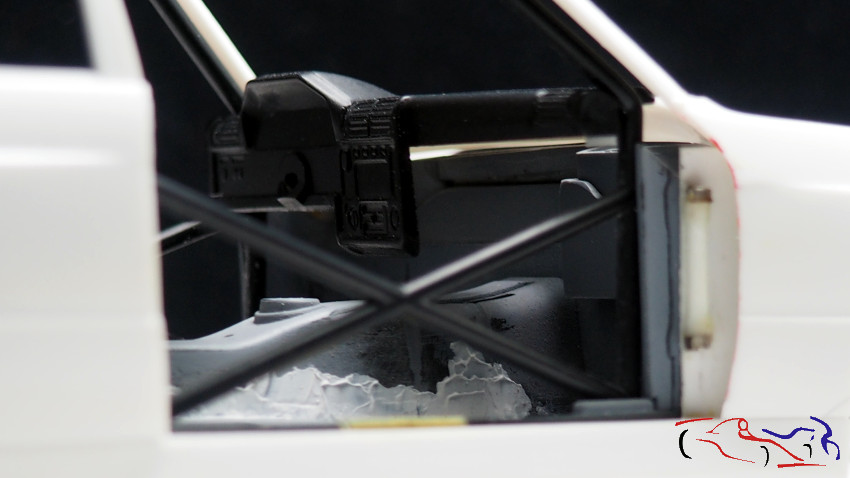
Mas piezas que hemos ido gestionando. El salpicadero, va sujeto por dos extensiones inferiores al chasis. Viendo el proceso que hizo Borja en el suyo, la manera más real de sujetarlo es a las barras antivuelco pediante dos topes de plastico, en donde apoyará dicho salpicadero. De esta manera, podemos eliminar esos dos extensiones inferiores, y asi, tapar un poco los laterales del inferior del salpicadero tal y como aparece en el coche real:
More parts we’ve been working on. The dashboard is held by two lower extensions to the chassis. Looking at the process Borja followed on his, the most realistic way to hold it is to the roll bars using two plastic stops, where the dashboard will rest. This way, we can remove those two lower extensions and thus slightly cover the sides of the lower dashboard, just as they appear on the real car:
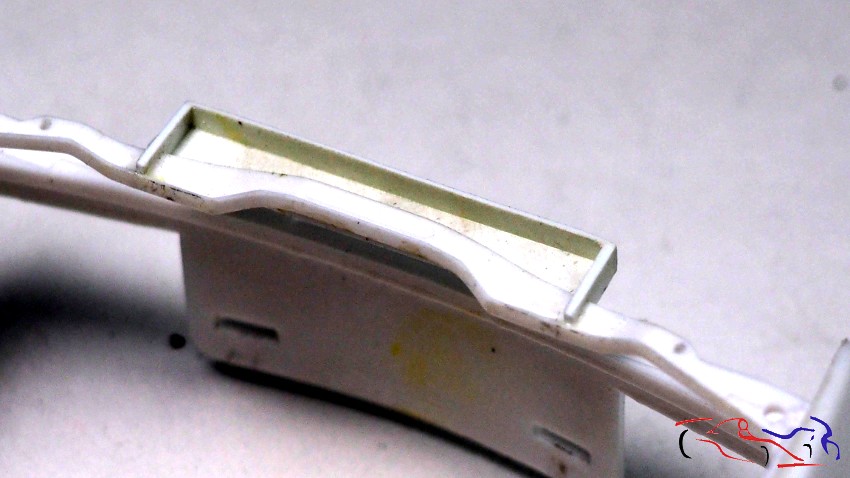
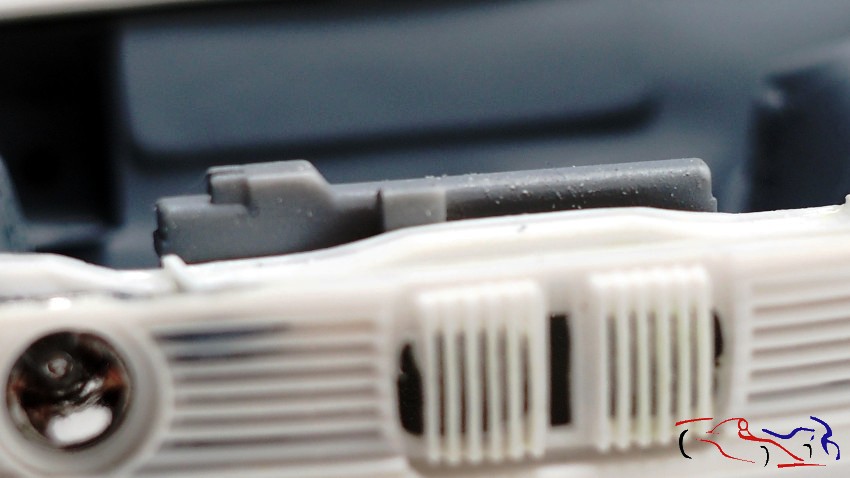
Otra de las piezas que era básica para que el capo se pueda abrir, es la pieza que rehice, y que es la base del giro donde el capo bascula. EL problema es que la hice 1 mm más larga en un lado, con lo que, si bien a la vista no se notaba, a la hora de bascular el capó, se descentraba. Por elló, decidí hacer otra para sustituir a la primera que hice:
Another essential piece for the hood to open is the one I remade, which is the pivot point where the hood swings. The problem is that I made it 1 mm longer on one side, so while it wasn’t noticeable, it became off-center when the hood was tilted. Therefore, I decided to make another one to replace the first one I made:
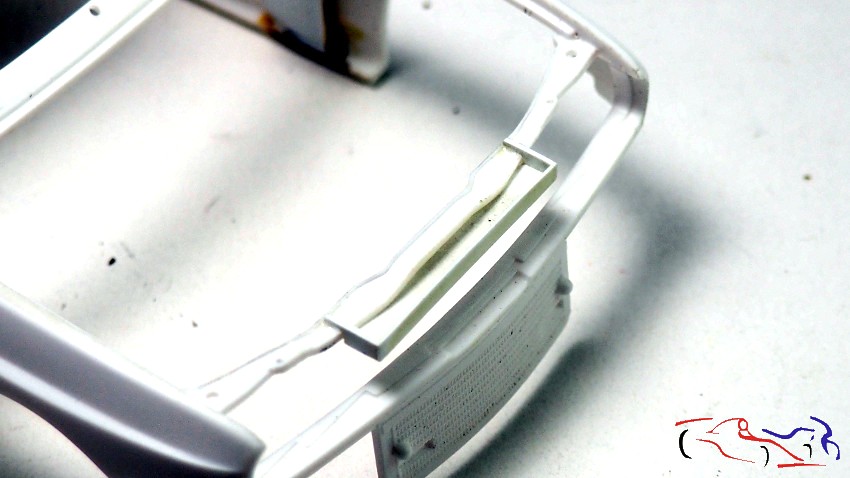
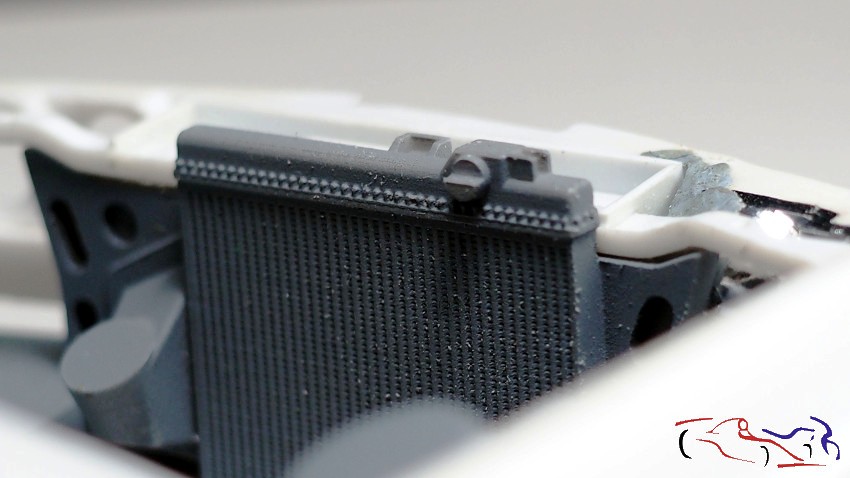
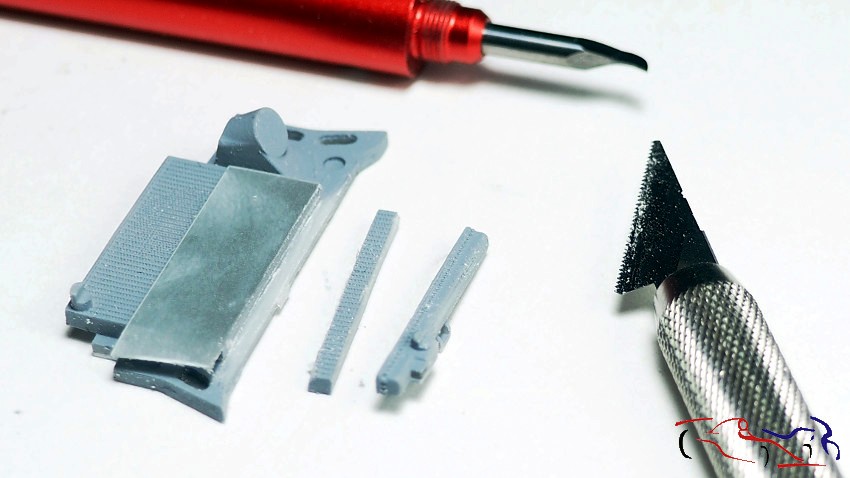
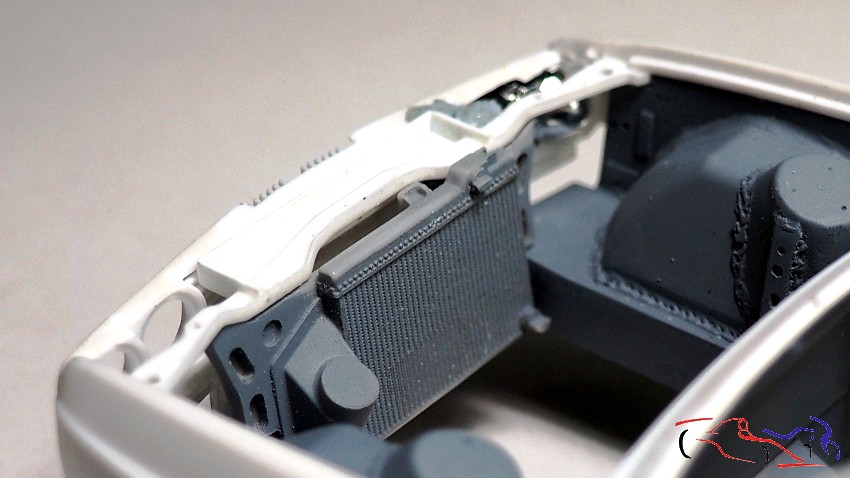
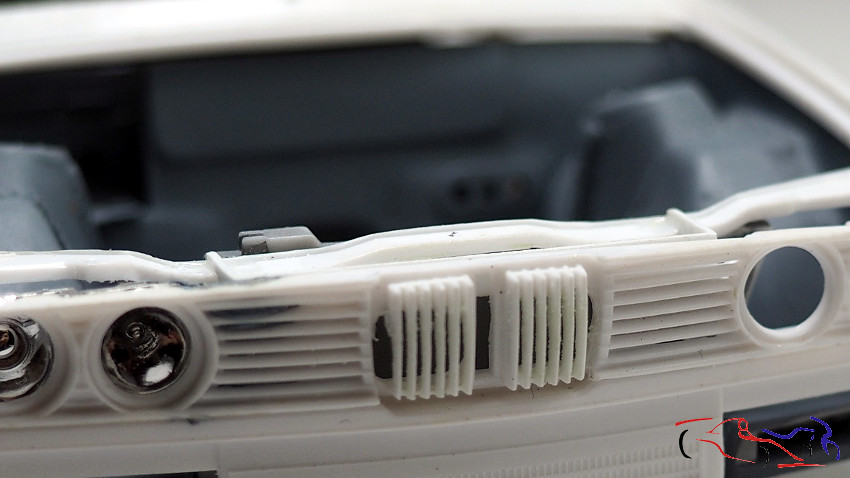
Continuando con esa parte del coche, en una prueba vi que al cerrar el capo con el radiador, no apoyaba completamente en los laterales d ela carrocería porque el radiador sobresalía mucho y hacía de tope. Viendo fotos del coche real, comprobé que el radiador no sobresalia tanto por lo que procedía a eliminar un poco por la parte superior del propio radiador, dejando la parte superior tal cual es. Podemos comprobar en las dos ultimas fotos, como era y como ha quedado después de la operación:
Continuing with that part of the car, during a test, I noticed that when I closed the hood with the radiator, it didn’t fully rest on the sides of the body because the radiator protruded too far and acted as a stop. Looking at photos of the real car, I confirmed that the radiator didn’t protrude that far, so I proceeded to remove a bit from the top of the radiator itself, leaving the upper part as it is. In the last two photos, we can see what it was like and how it looks after the operation:
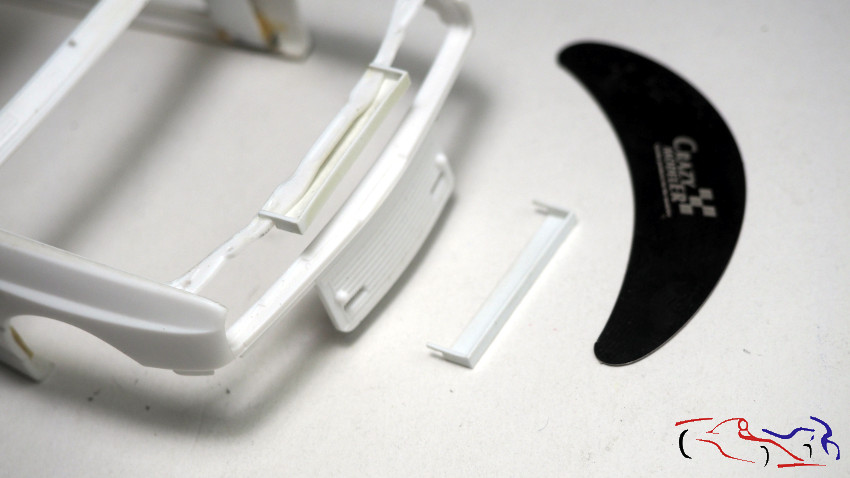
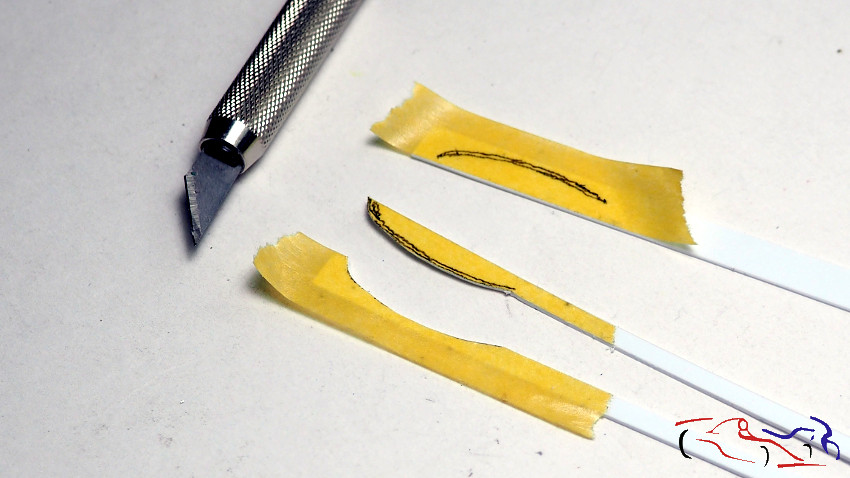
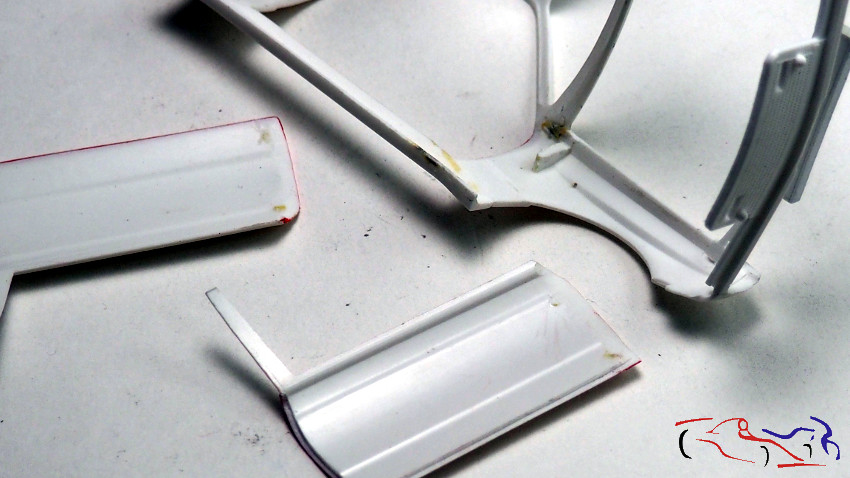
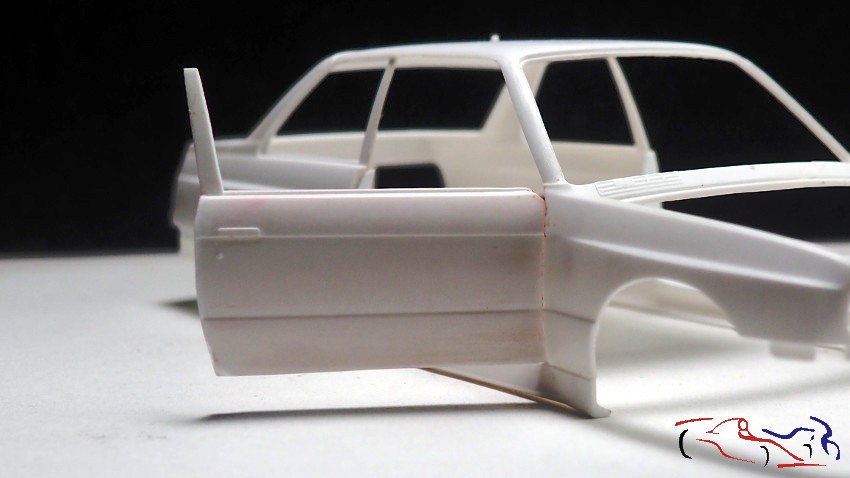
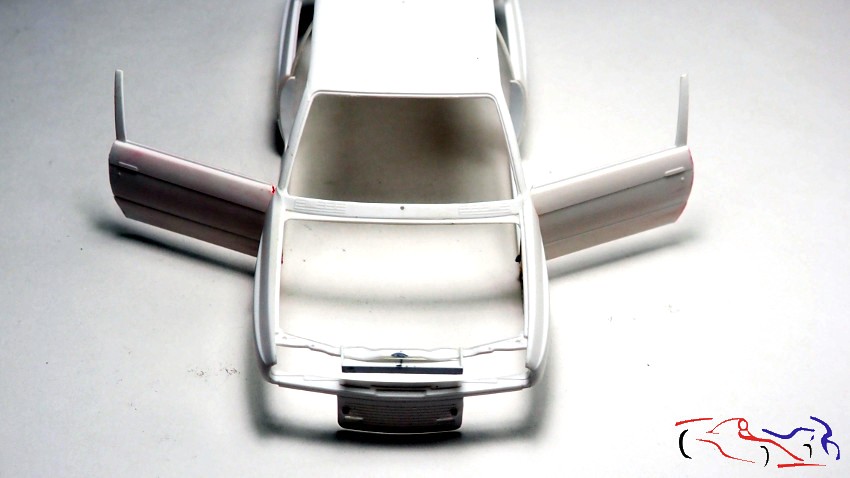
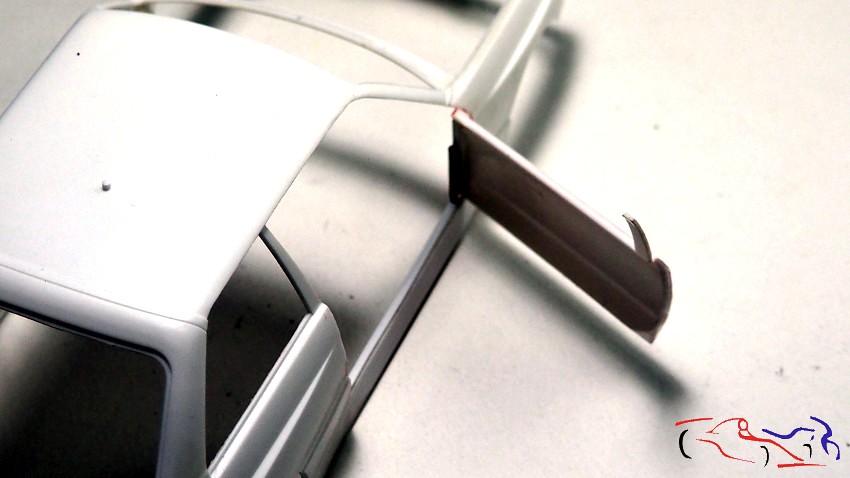
Nos movemos a las puertas. Deciros que el sistema de imanes para hacer las bisagras me estaba dado muchos problemas porque es muy dificil, pagar los imanes en la posición exacta, por lo que decidí eliminarlos de las puertas y de la carrocería, para sustituirlos por este método, que vi hacer a varios modelistas japoneses: una guia vertical desde la carrocería donde se inserta un tubo fijado a la puerta. . Lo primero era pegar un plástico donde la puerta hará de tope al cerrarla y que desde debajo, se pondrá la guia vertical. Depsués de tomar medidas en cinta de enmascarar, la pasamos a plancha de plástico, cortamos y pegamos a la carrocería:
Moving on to the doors. I’d like to tell you that the magnet system for making the hinges was giving me a lot of trouble because it’s very difficult to place the magnets in the exact position. So I decided to remove them from the doors and the body, replacing them with this method, which I’d seen several Japanese modelers use: a vertical guide from the body into which a tube attached to the door is inserted. The first thing I had to do was glue a piece of plastic where the door would stop when closing, and from underneath, the vertical guide would be placed. After taking measurements on masking tape, we transferred it to a sheet of plastic, cut it, and glued it to the body:
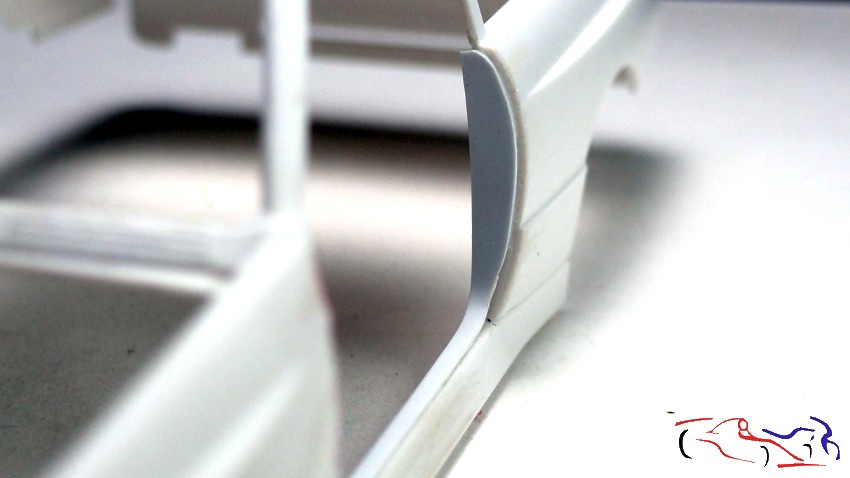
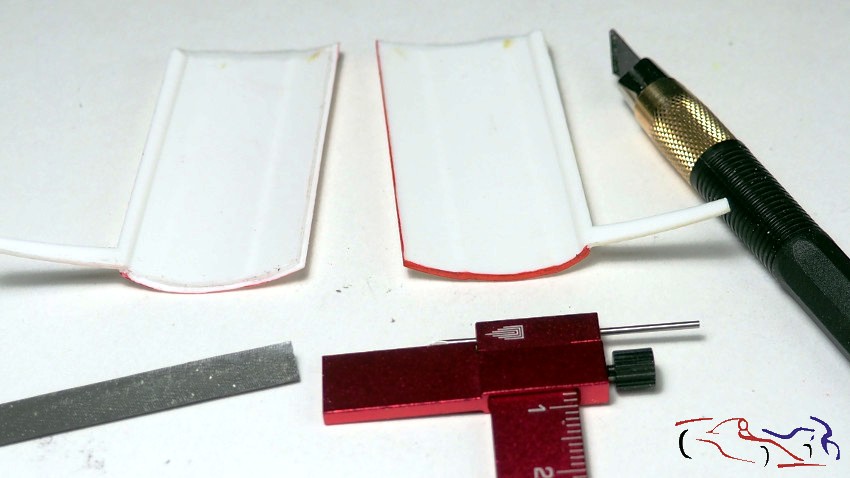
EL siguiente paso es tallar las puertas para que el borde apoye sobre el plástico puesto en la carrocería. Para ello usamos un uitl para marcar una distancia a lo largo del bordetanto por la parte interior d ela puerta, como por el borde de la misma. Para ello, pinto el borde de rojo para saber lo que elimino.
The next step is to carve the doors so that the edge rests on the plastic applied to the body. To do this, we use a tool to mark a distance along the edge, both on the inside of the door and along its edge. To do this, I paint the edge red so I know what I’m removing.
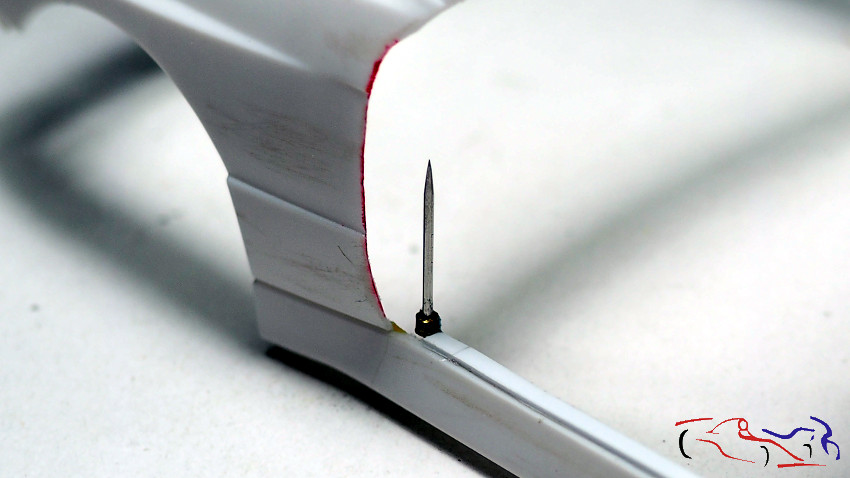
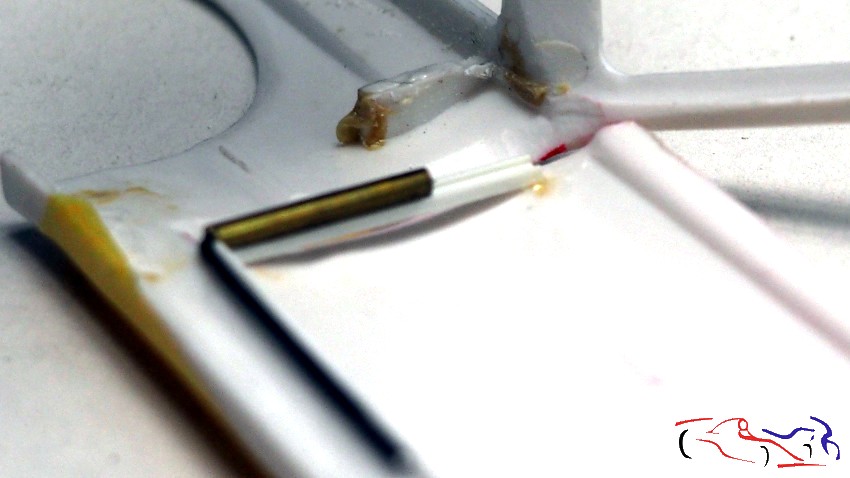
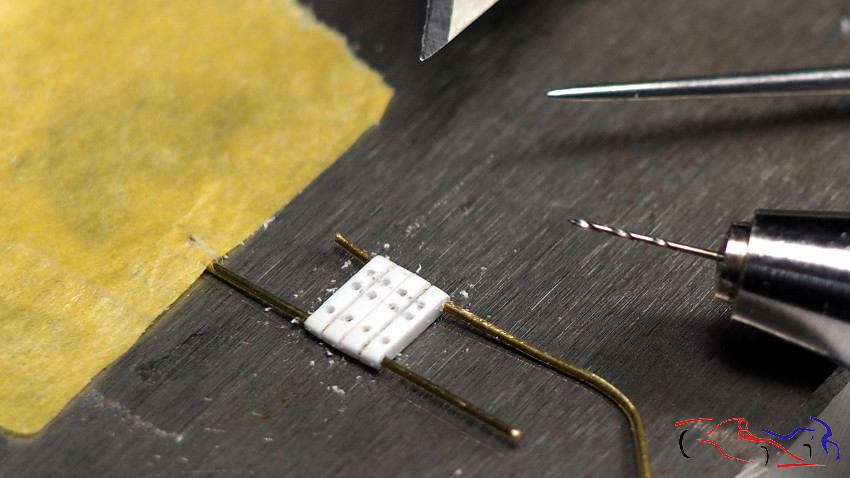
A continuación, cogemos un alfiler de los que se utilizan para fijar los insectos al corcho, lo doblamos a 45 grados y cortamos. Estos alfileres irán colocados y pegados debajo de las piezas de plástico que pusimos en la carrocería como eje de giro de la puerta, con un tope en la parte inferior para que la puerta no se descuelgue. También cortamos el tubo que irá fijado a la puerta:
Next, we take one of the pins used to attach insects to cork, bend it at a 45-degree angle, and cut it. These pins will be placed and glued under the plastic pieces we attached to the body as the door’s pivot axis, with a stop at the bottom to prevent the door from sagging. We also cut the tube that will be attached to the door:

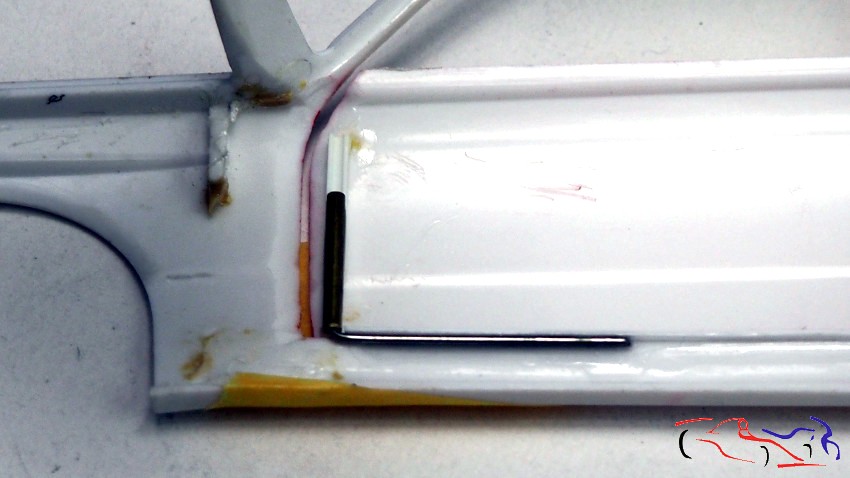
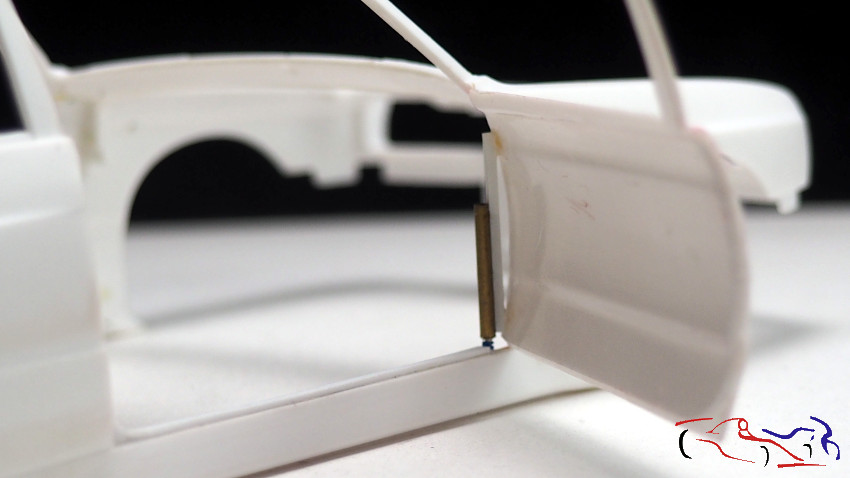
Una vez pegado el eje, fijamos la puerta con cinta de enmascarar en su correcta posición, ponemos el tubo dentro del alfiler, y añadimos entre el tubo y la puerta, una tira con forma de U, larga, para que apoye el tubo y así consigamos una verticalidad correcta respecto a la curvatura de la puerta. Mas adelante, rellenaremos los huecos con masilla epoxi.
Once the axle is glued, we secure the door in its correct position with masking tape, place the tube inside the pin, and add a long U-shaped strip between the tube and the door to support the tube and ensure proper verticality with the door’s curvature. Later, we’ll fill the gaps with epoxy putty.
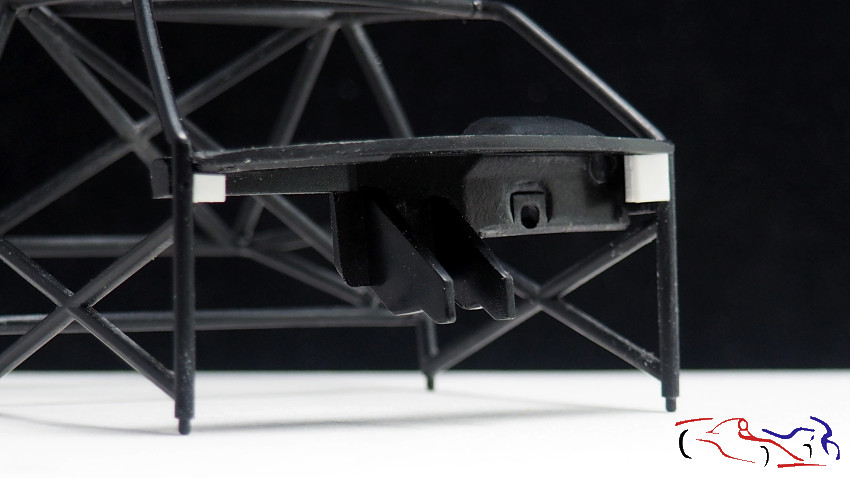
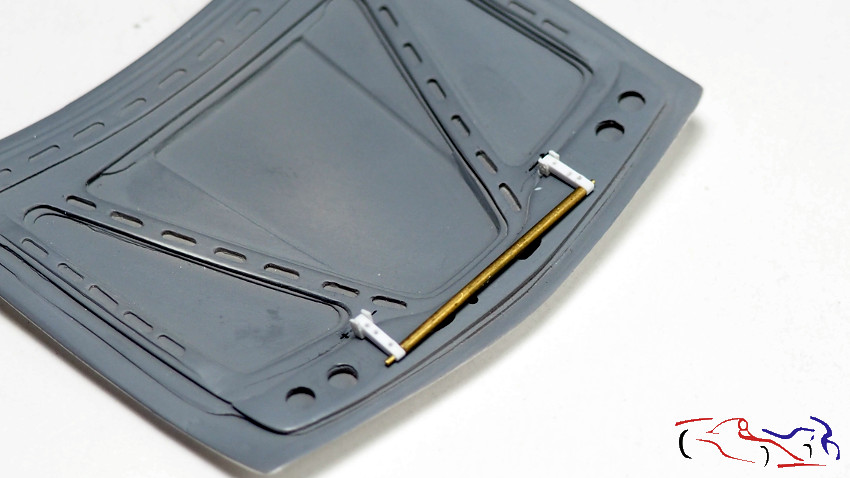
Y para terminar hoy, nos ponemos con las bisagras del capó. Tal y como comenté en el anterior post #5 de este coche, el capó bascula sobre un tubo horizontal, que en los extremos tiene unas piezas que en su parte final, basculas nuevamente sobre otras que van fijadas al capó. Para hacer las piezas intermedas, despues de corta varias, y hacerles los agujeros por donde girarán, las coloo todas juntas para redondear mejor los extermos y para marcar a la misma distancia, unos agujeros que tienen. Una vez realizadas, las coloco sobre el capó y ahgo también, las pequeñas piezas que giran de nuevo y que van pegadas al capó. Más adelante veré como fijo todo y como lo pinto:
And to finish today, we’ll work on the hood hinges. As I mentioned in post #5 for this car, the hood hinges on a horizontal tube. At the ends, the pieces swing back onto other pieces that are attached to the hood. To make the intermediate pieces, after cutting several and making the holes where they’ll pivot, I place them all together to better round the ends and mark the holes at the same distance. Once made, I place them on the hood and also the small pieces that pivot again and are attached to the hood. Later, I’ll see how I fix everything and how I paint it:
Esto es todo por ahora, gracias por ver y comentar!!
That’s all for now, thanks for watching and commenting!!


