Continuamos con el Delta S4 y piezas diversas que voy modificando o rehaciendo para mejorar su detalle.
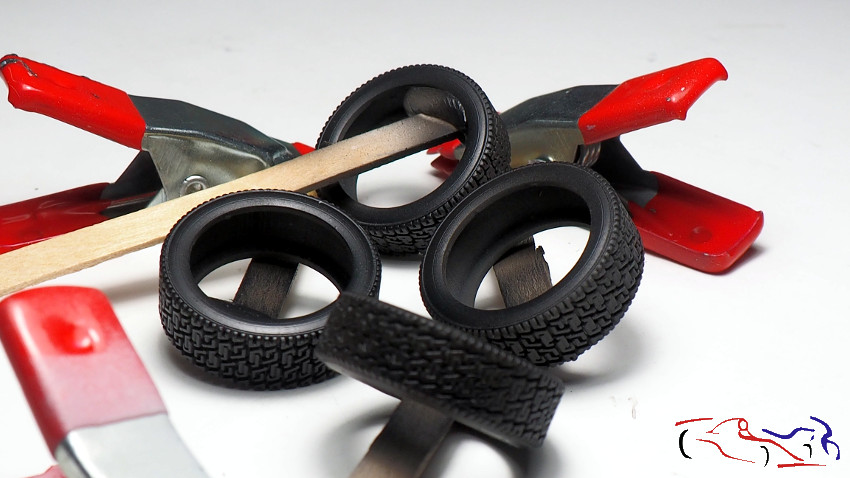
Vamos con los neumáticos. Después de su imprimación, los pinto con el Negro de Zero para las ruedas. Su acabado es muy buneo como podéis comprobar!!
We continue with the Delta S4 and various pieces that I am modifying or redoing to improve its detail.
We go with the tires. After priming, I paint them with Zero Black for the wheels. Its finish is very good as you can see!

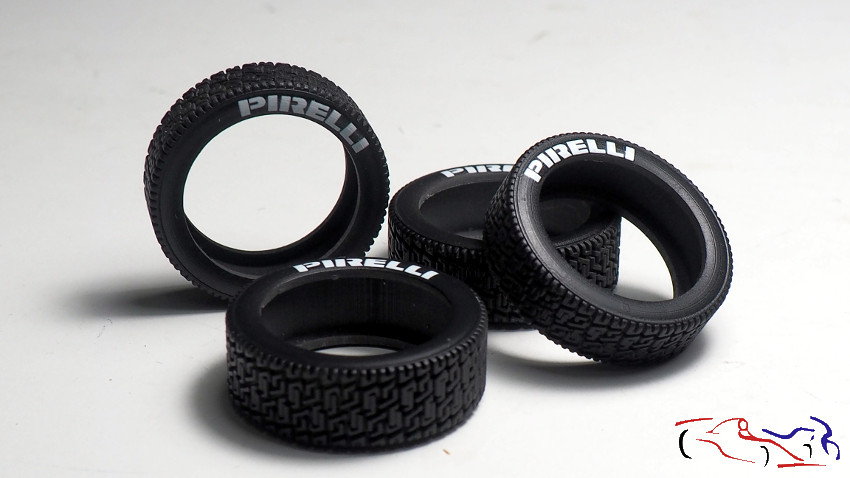
Una vez seco, le ponemos la calca de Pirelli con la ayuda de los productos MIcro y el secador:
Once dry, we put the decal of Pirelli with the help of the MIcro products and the dryer:
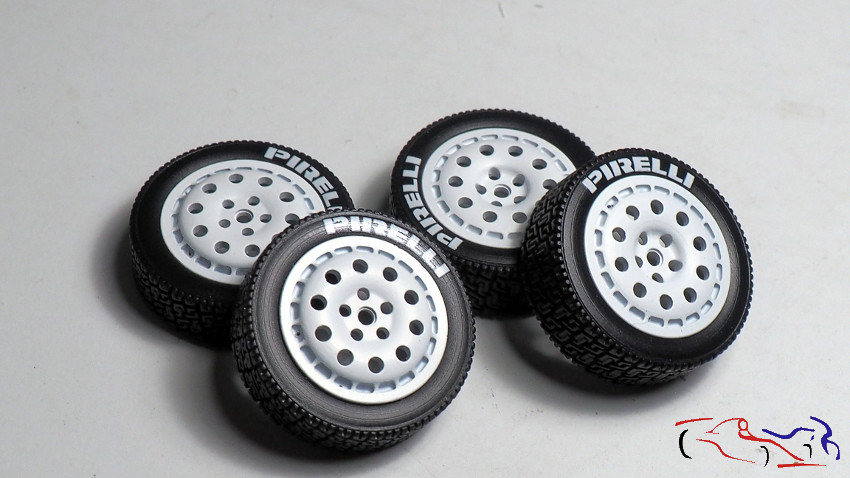
 Y si colocamos las llantas, este es el resultado:
And if we place the tires, this is the result:
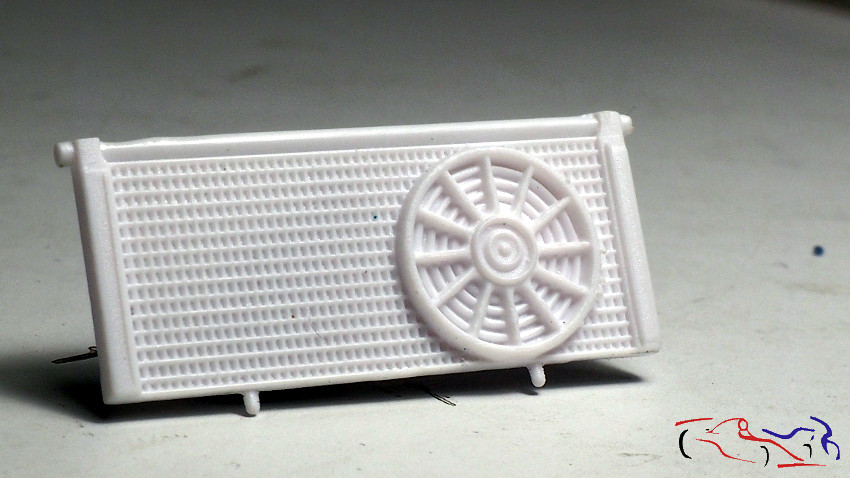
 Pasamos al radiador delantero, al que le vamos a añadir los fotograbados de Beemax y de HD. Pero para ello, debemos primero rebajar el ventilador existente de la pieza…
We go to the front radiator, to which we are going to add the photoetches of Beemax and HD. But for this, we must first lower the existing fan of the piece …
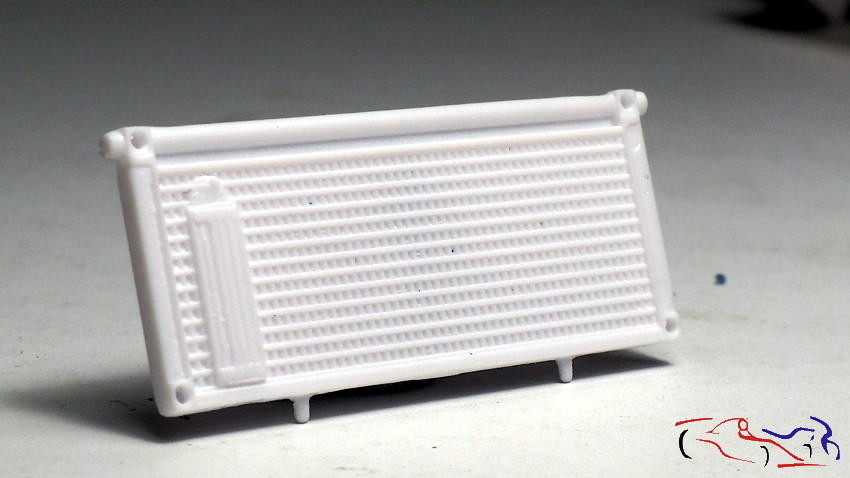
 …. Y ese filtro de la parte trasera. En su lugar irá el filtro de KMP:
…. And that filter from the back. In its place will go the KMP filter:
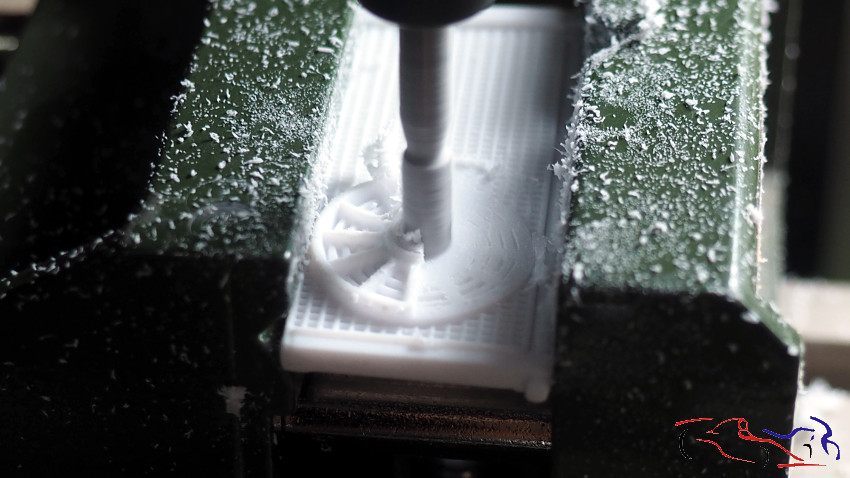
 Para ello, utilizamos la fresadora de Proxxon:
For this, we use the Proxxon milling machine:
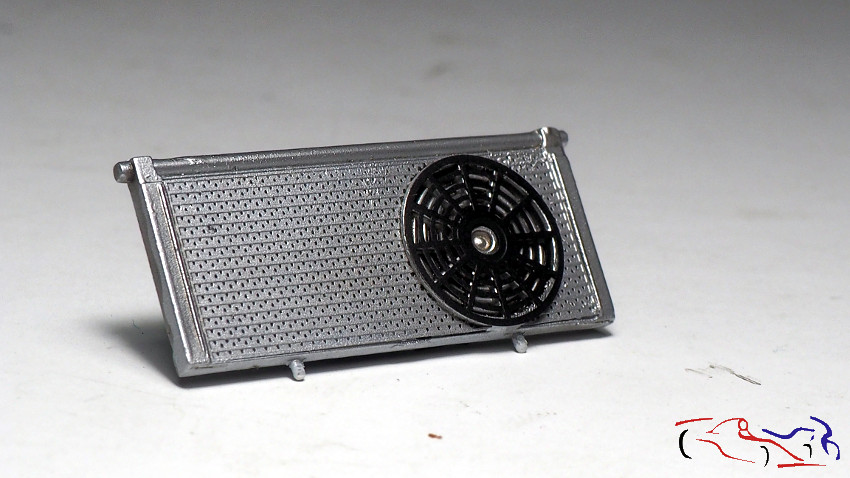
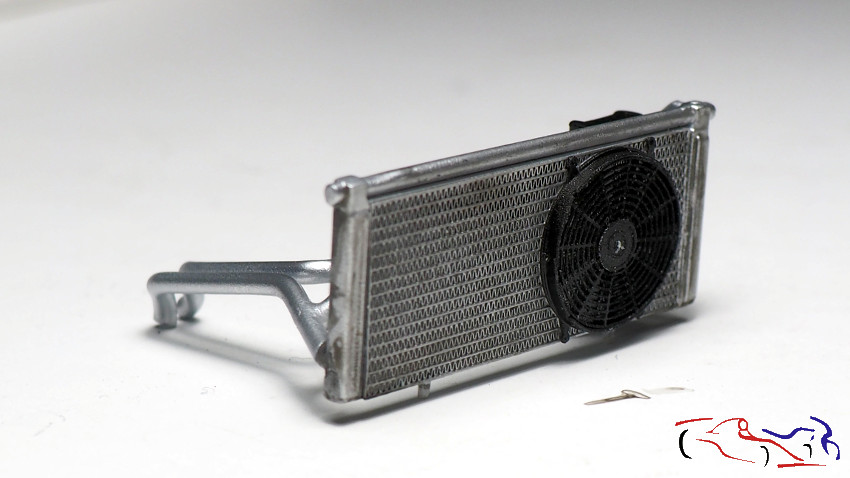
 Y este es el resultado del radiador con la rejilla y ventilador de Beemax, ya pintados:
And this is the result of the radiator with the grid and fan of Beemax, already painted:
 Pero como tengo algunas piezas de recambio, rehago otro radiador con los fotograbados de HD, más completos:
But since I have some spare parts, I redo another radiator with the most complete HD photoetches:
 Y aquí el resultado en su parte delantera, ya ensuciado y sin cablear:
And here the result in its front, already dirty and without wiring:
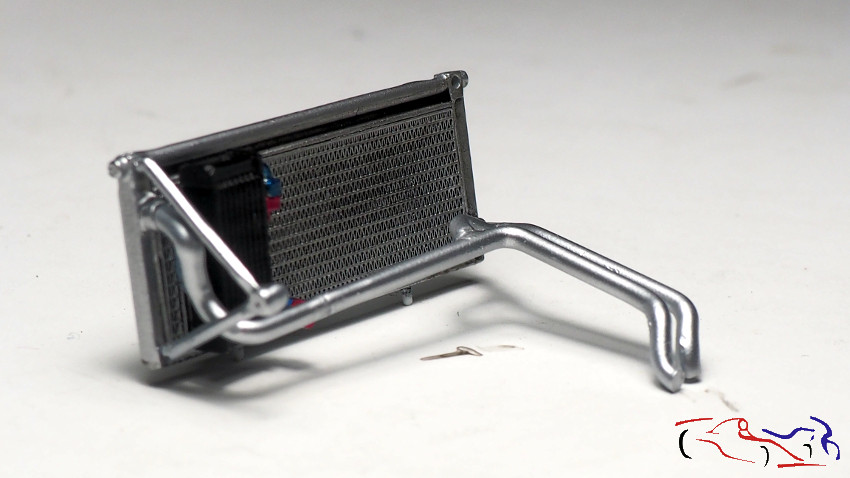
 Mientras tanto, en su parte trasera, vemos colocados sin pegar, los tubos realizados con redondo de evergreen y doblados con el calor de un soldador, y el filtro de KMP, ya pintado. Proximamente pondré más información de esta pieza con más detalles aplicados:
Meanwhile, in its back, we see placed without sticking, the tubes made with evergreen round and folded with the heat of a welder, and the KMP filter, already painted. Soon I will put more information of this piece with more details applied:
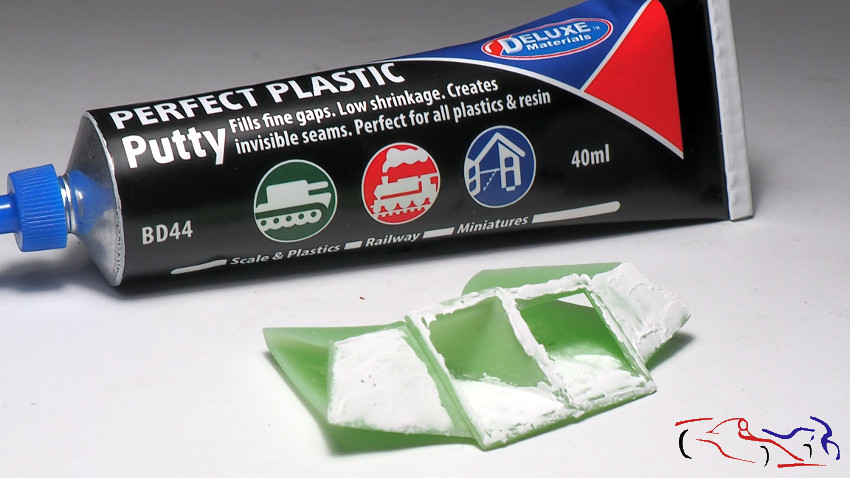
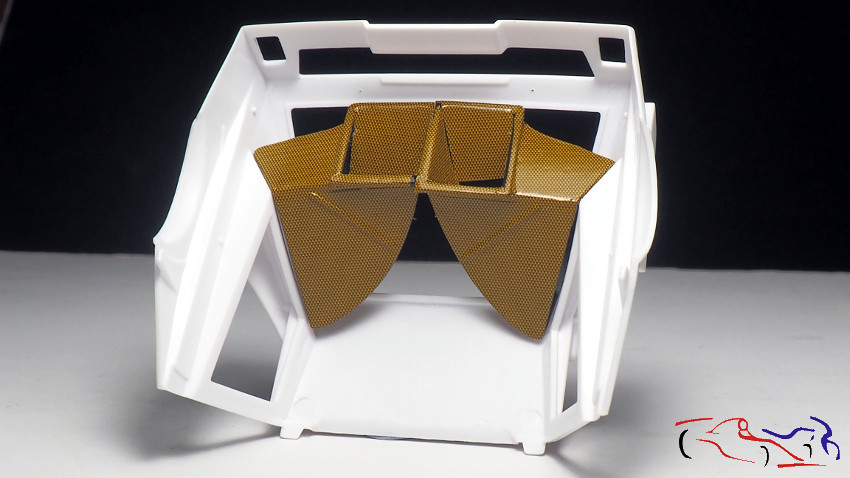
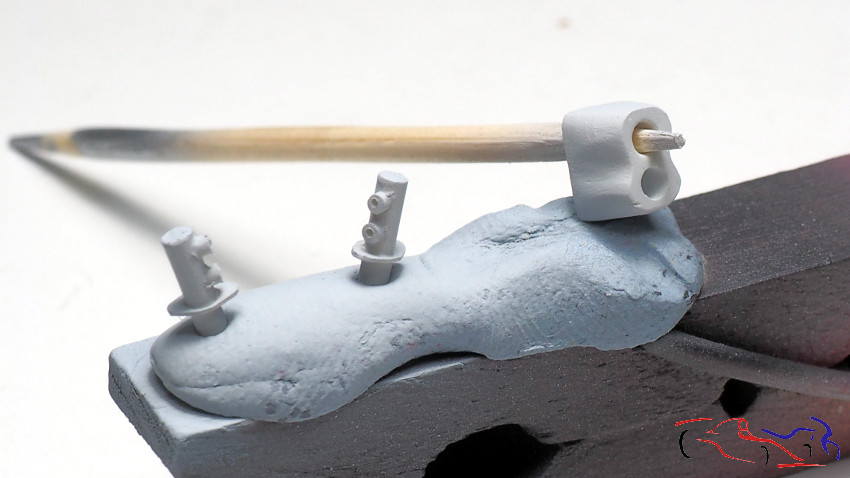
 Pasamos a una pieza de KMP, hecha en 3D que se pondrá dentro del portón trasero y que canaliza el aire de las entradas laterales hacia los dos grandes radiadores del motor. Para afinarla, la lijo y relleno con este putty nuevo que se disuelve con agua y que su acabado es muy similar a la verde de Stuco. La aplicamos por casi todos lados:
We pass a piece of KMP, made in 3D that will be placed inside the tailgate and that channels the air from the side inlets to the two large radiators of the engine. To refine it, sand it and fill it with this new putty that dissolves with water and that its finish is very similar to Stuco’s green. We apply it almost everywhere:
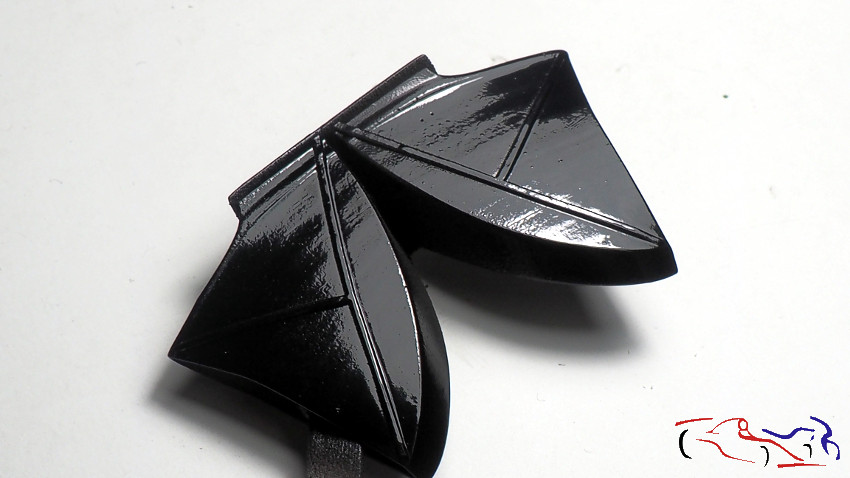
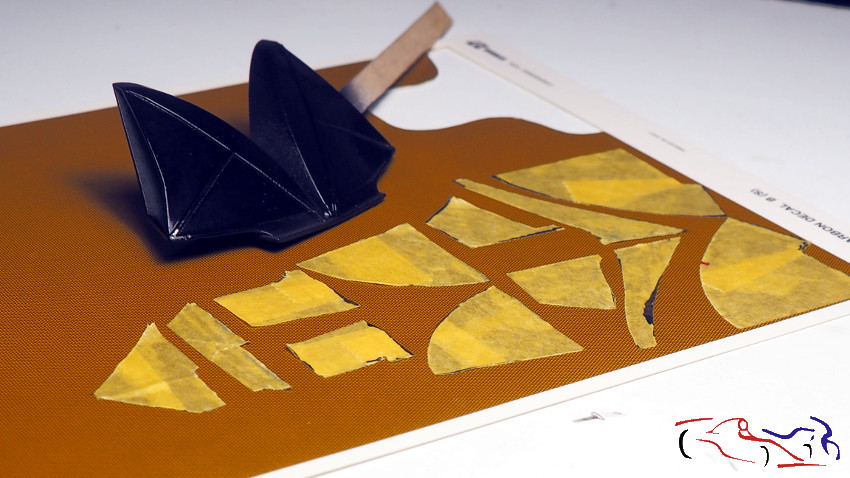
 Después lijamos, imprimamos y pintamos con begro brillante de Zero, para aplicar calcas de Kevlar a todo el conjunto:
Then we sand, print and paint with bright begro de Zero, to apply Kevlar decals to the whole set:
 Para ello, ponemos cinta de enmascarar por partes, la recortamos y ponemos en hoja de calca:
To do this, we put masking tape in parts, cut it and put on a decal sheet:
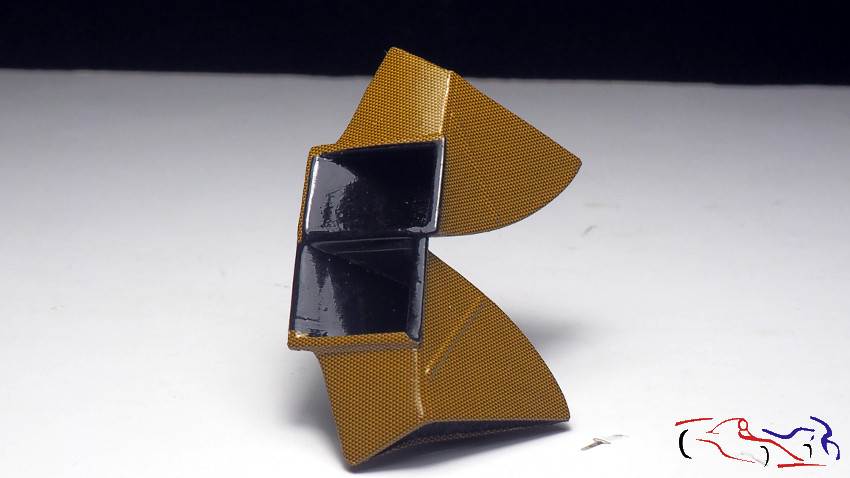
 Las cortaremos y aplicaremos por partes con los productos micro y secador de pelo…poco a poco:
We will cut them and apply parts with micro products and hair dryer … little by little:
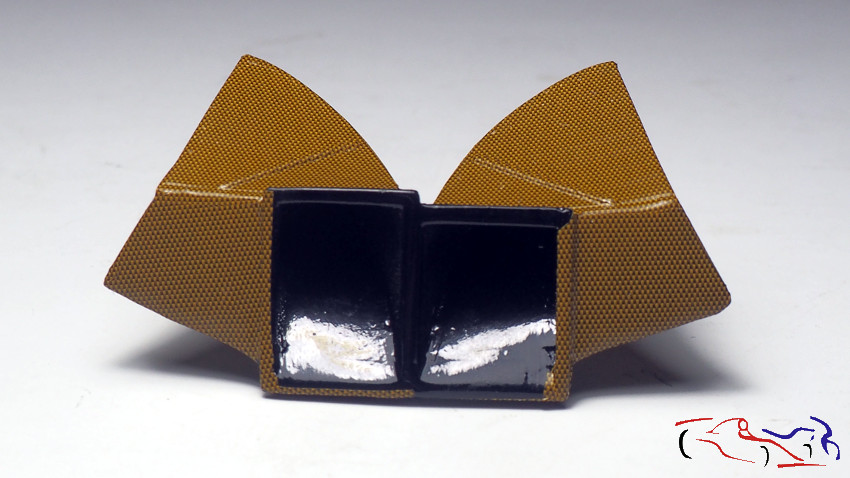
 Otra vista de la pieza con más calcas aplicadas…
Another view of the piece with more applied decals …
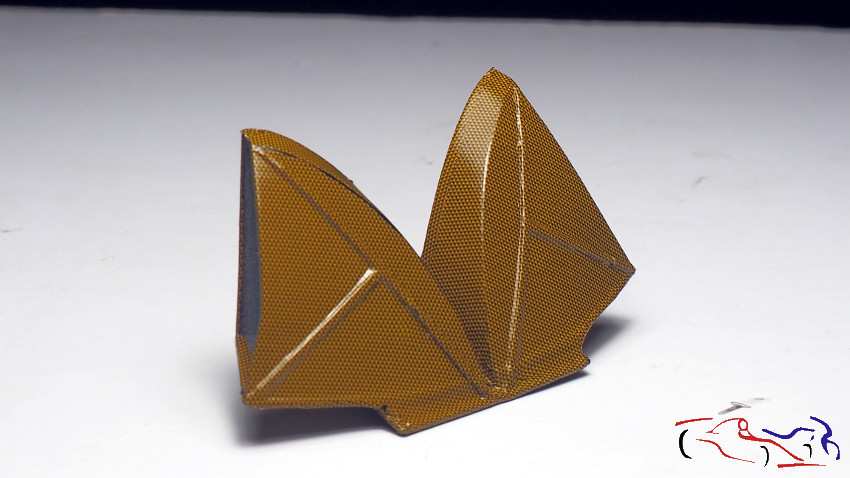
 Y ya está terminado!!
And it’s over!
 Esta es la posición del mismo en el portón trasero. Decir que irá ensuciado posteriormente tal y como aparece en las fotos del coche real:
This is its position in the tailgate. Say that it will go dirty later as it appears in the photos of the real car:
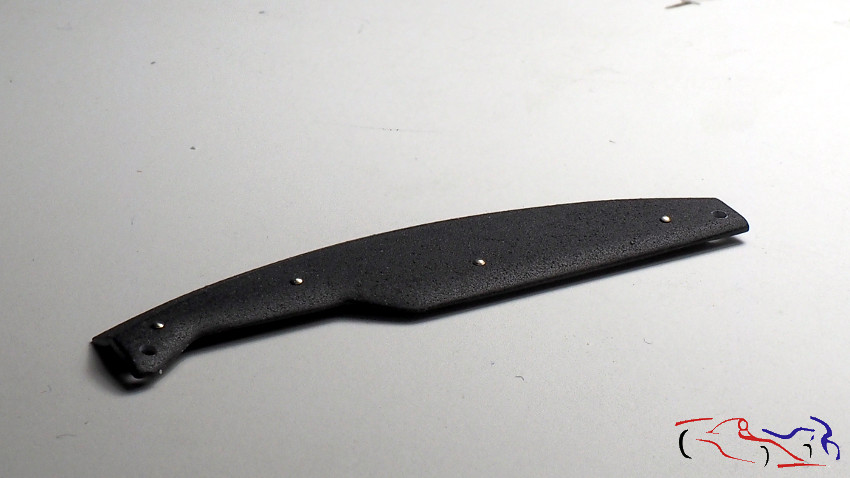
 Pasamos a la pieza superior del salpicadero. Ha sido pintado con la pintura texturizada de Zero, una vez le redondeé el borde exitente encima del salpicadero. También le puse los cuatro remaches existentes en lso modelos reales:
We pass to the upper part of the dashboard. It has been painted with Zero’s textured paint, once I rounded the exciting edge above the dashboard. I also put the four existing rivets on the real models:
 Más piezas de KMP que he imprimado y pintado: los tres filtros con negro semimate y los botes en aluminio, ambos de Zero. Posteriomente les pintaré las conexiones con azul y rojo metálicos:
More pieces of KMP that I have printed and painted: the three filters with semi-black black and the aluminum boats, both from Zero. Later I will paint the connections with metallic blue and red:
 Aquí vemos de nuevo la pieza de los filtros junto al turbo. Ambos pintados con aluminio Metal de Zero:
Here we see again the piece of filters next to the turbo. Both painted with Zero Metal aluminum:
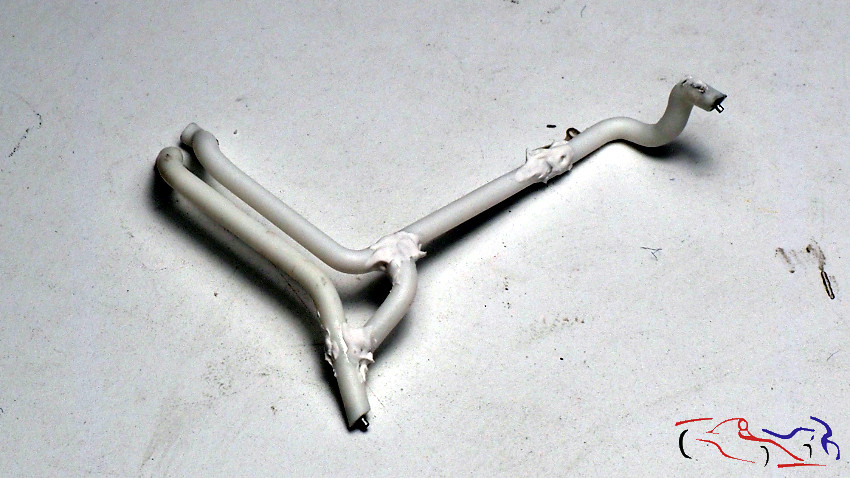
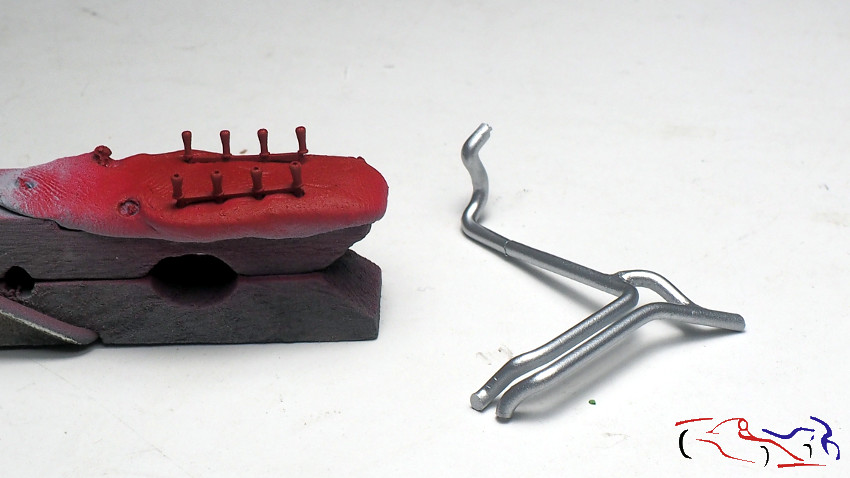
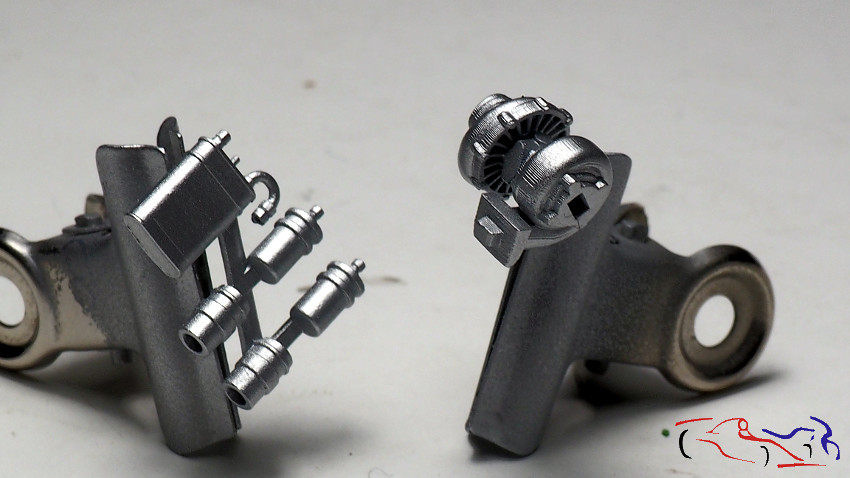 Si bien hemos visto unos tubos en el radiador delantero, más o menos acabados, aquí or muestro el proceso. Los tubos doblados y pegados, con masilla en las uniones. Destacar que las uniones tienen un alambre dentro para asegurarlas así como en los extremos que van acoplados al filtro. Dichos alambres irán metidos en dos piezas que he añadido al filtro con su correspondiente agujerito:
While we have seen some tubes in the front radiator, more or less finished, here I show the process. The tubes bent and glued, with putty in the joints. Note that the joints have a wire inside to secure them as well as at the ends that are attached to the filter. These wires will go into two pieces that I have added to the filter with its corresponding hole:
 Aquí está esa pieza lijada, imprimada y pintada con aluminio metal de Zero. Le acompaña las piezas de KMP que van encima de las bujias (KMP nos da 8 piezas para asegurar que alguna se nos rompa) y que he pintado con rojo Brabham de Zero, que se parece mucho al color original:
Here is that piece sanded, primed and painted with aluminum metal from Zero. It accompanies the pieces of KMP that go over the spark plugs (KMP gives us 8 pieces to ensure that some of them are broken) and that I have painted with Zero Brabham red, which closely resembles the original color:
 Más piezas: las bombas de los frenos y la pieza donde van. Hechas de plástico a scratch e imprimadas con Gravity:
More parts: the brake pumps and the part where they go. Made of scratch in plastic and primed with Gravity:
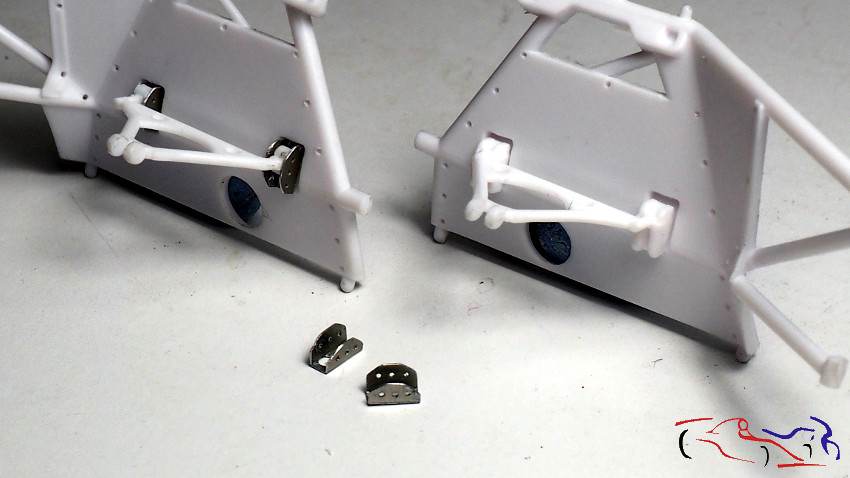
 Pasamos a los triangulos traseros de la suspensión. COmo véis, las fijaciones de la pieza no se asemejan nada a la realidad, por lo que las voy a rehacer. Lo primero, maco las medidas en el metal de los diskettes, y hago los taladros….
We pass to the rear triangles of the suspension. As you can see, the fixings of the piece do not resemble anything to reality, so I will redo them. First, I make the measurements on the metal of the diskettes, and do the drills ….
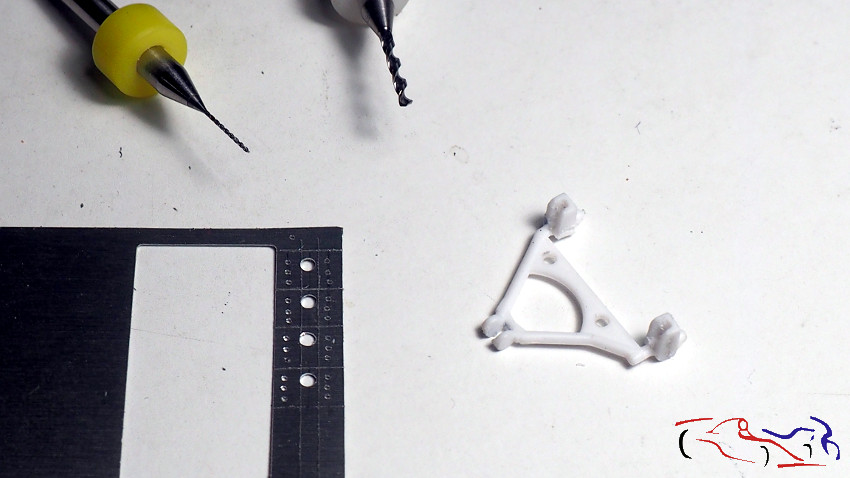 A su vez, tapo los agujeros por los que pasaremos la pieza original, por la parte de atrás. Podeis ver también que he agujereado donde van los remaches de las dos piezas grandes:
In turn, I plug the holes through which we will pass the original piece, through the back. You can also see that I have drilled where the rivets of the two large pieces go:
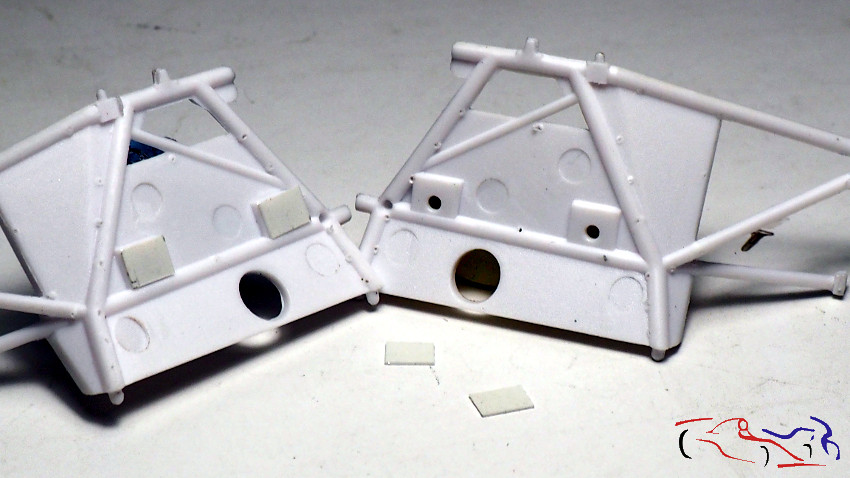 Una vez cortadas y dobladas las piezas de metal, le elimino las esquinas con limas. Estas piezas, las pegaré en los paneles correspondientes. Y como ya no me servirán estas piezas en los triangulos, las eliminaré con cuidado dejando el perno que se introducirá en su lugar:
Once the metal pieces have been cut and folded, I remove the corners with files. I will glue these pieces to the corresponding panels. And since these pieces will no longer serve me in the triangles, I will remove them carefully leaving the bolt that will be inserted in its place:
 Aquí tenemos las piezas pintadas con aliminio Metal de Zero:
Here we have the pieces painted with Zero Metal aluminum:
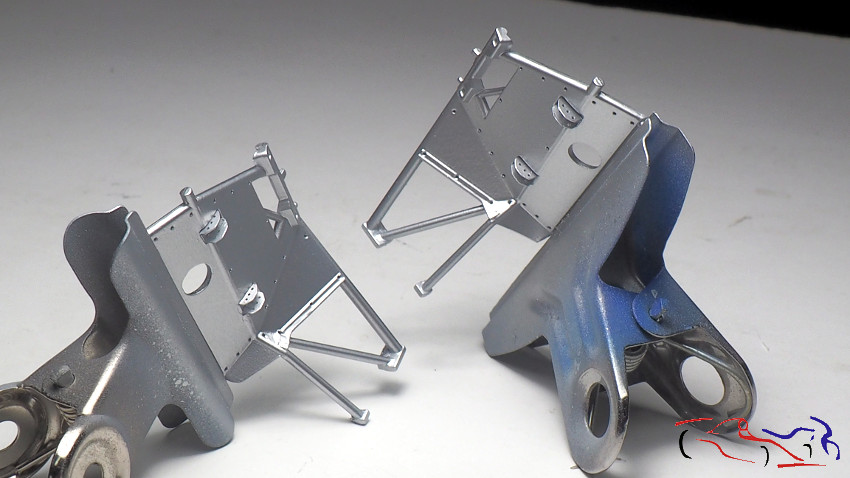
A dichas piezas, les puse calca de Kevlar y aquí las pongo sin pegar para ver el resultado. Aun faltan muchos detalles!!
To these pieces, I put Kevlar decal and here I put them without pasting to see the result. There are still many details missing!
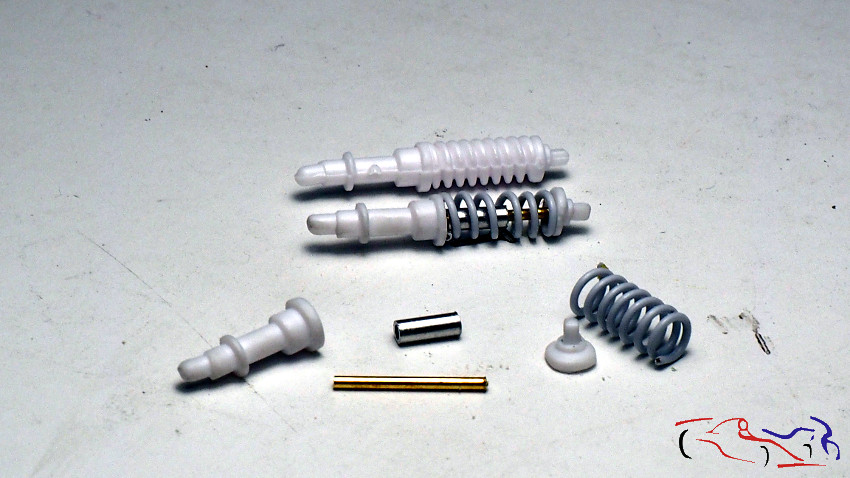
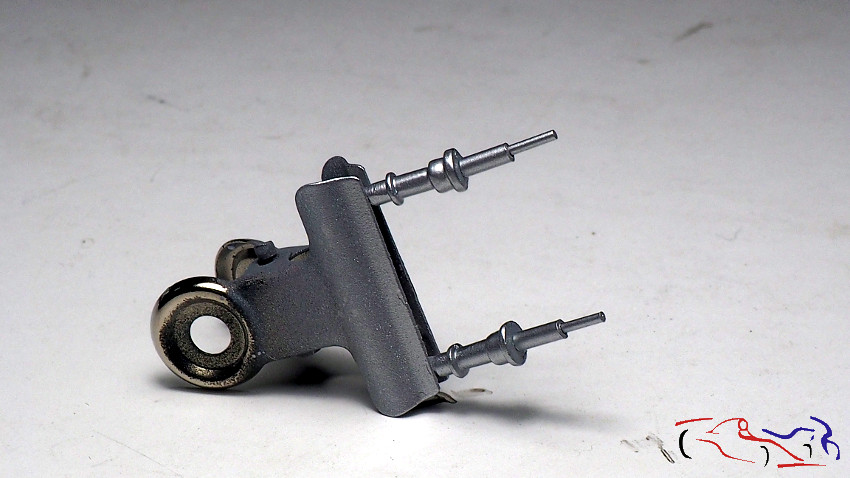
 Otras piezas que es conveniente detallar son los amortiguadores, en este caso los delanteros. Podeis ver el original en la parte superior, y debajo, el modificado sin pegar. Abajo veis todas las piezas, una vez he cortado el muelle original dejando los extremos para utilizarlos, dos tubos e metal para el interior del muelle, y el propio muelle hecho de alambre:
Other parts that are convenient to detail are the shock absorbers, in this case the front ones. You can see the original at the top, and below, the modified one without pasting. Below you see all the pieces, once I have cut the original spring leaving the ends to use them, two tubes and metal for the interior of the spring, and the spring itself made of wire:
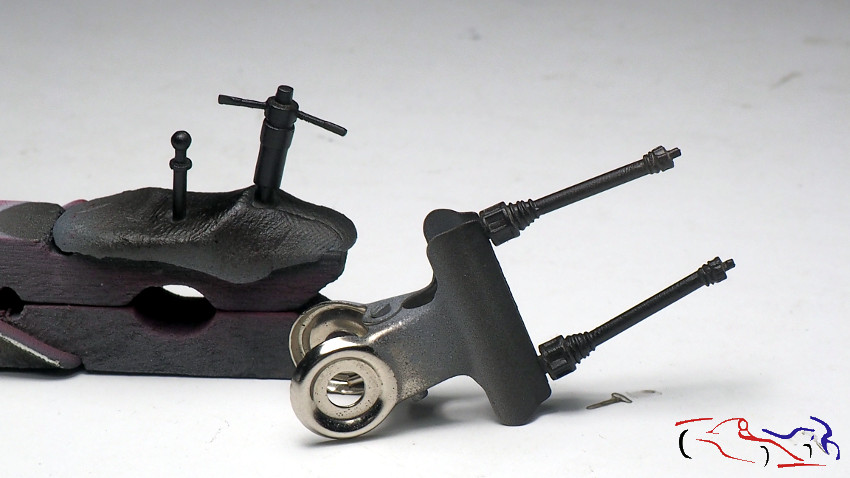
 Pegamos los tubos de metal a la parte inferior del amortiguador, imprimamos y pintamos:
We glue the metal tubes to the bottom of the shock absorber, print and paint:
 Más piezas: palanca de cambios, brazo de dirección y los ejes de las ruedas traseras:
More parts: gear lever, steering arm and rear wheel axles:
 Aquí vemos la pieza de las bombas de freno pintada de color marrón parecido al Kevlar y los muelles, de blanco:
Here we see the part of the brown painted brake pumps similar to Kevlar and the springs, in white:
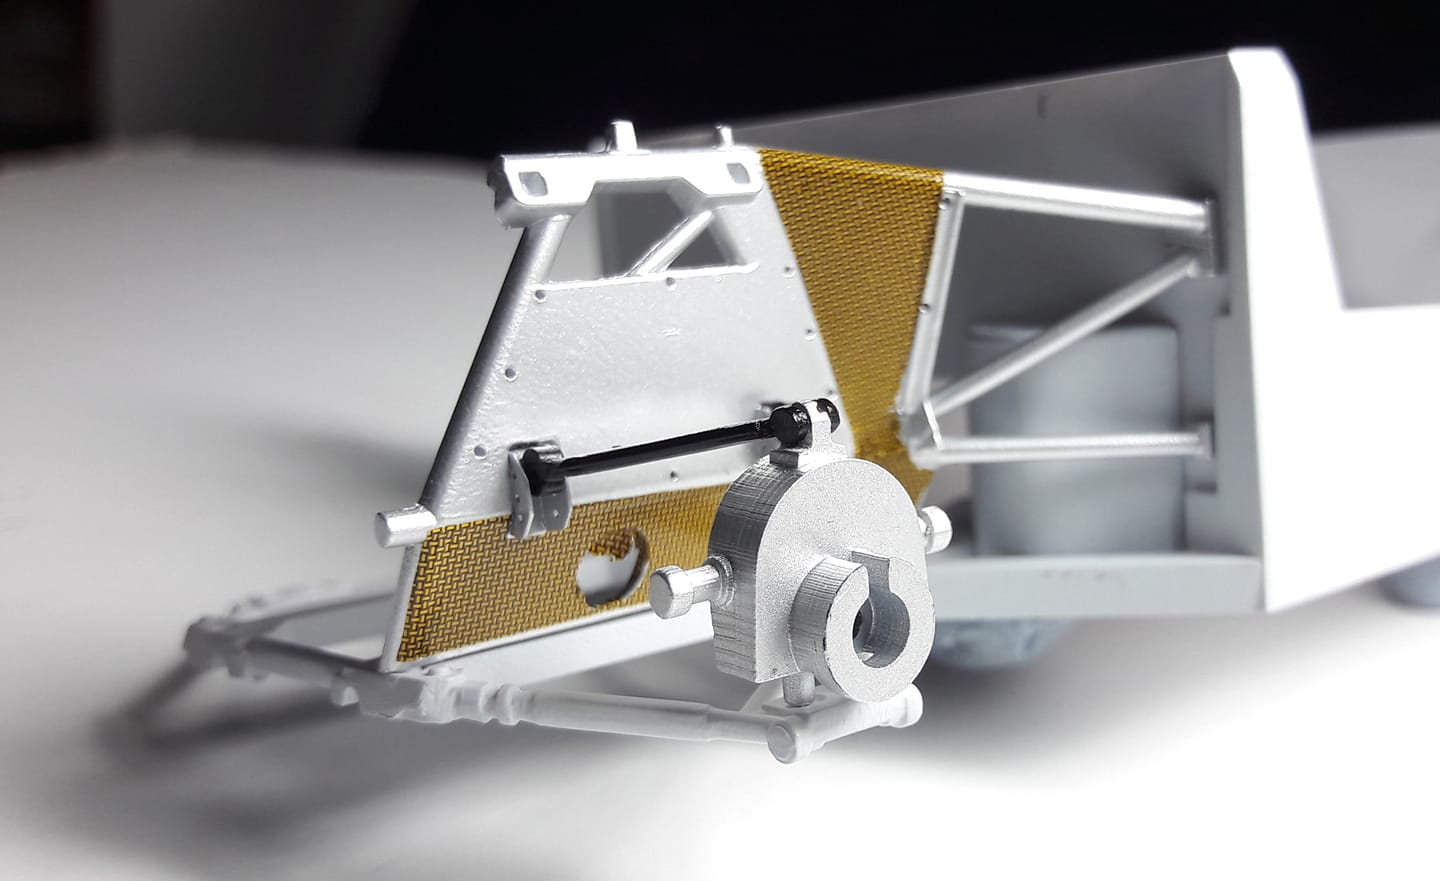
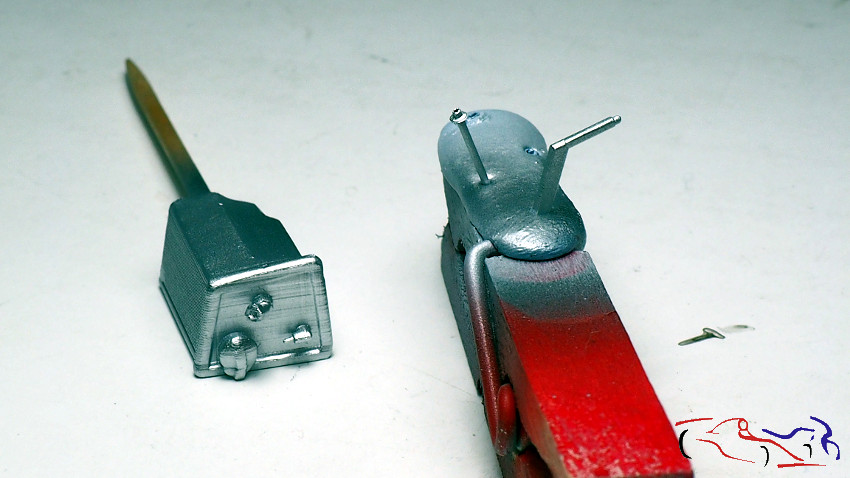
 Más piezas modificadas: esta pieza sujeta la estructura del motor con el cortafuegos trasero. Le he colocado unas pletinas de metal y tuercas, todo imprimado con Gravity y pintado con aluminio Metal de Zero:
More modified parts: this piece holds the engine structure with the rear firewall. I have placed some metal plates and nuts, all primed with Gravity and painted with Metal Zero aluminum:
 En este caso, la pintura es el Metal Cromo de Zero, y las piezas son el deposito de aceite de KMP, el freno de mano y el repartidos de frenada que he renecho con un tubo y una arandela:
In this case, the paint is Zero Chrome Metal, and the pieces are the KMP oil reservoir, the handbrake and the brake distribution I have renewed with a tube and a washer:
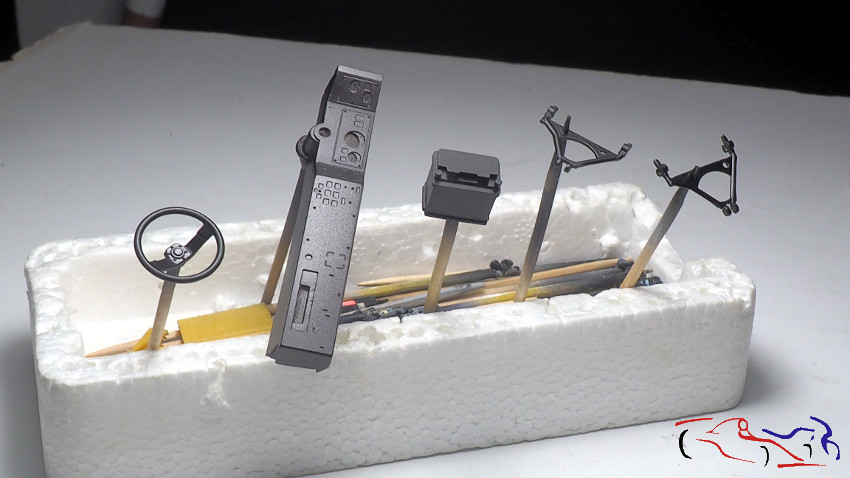
 Seguimos con la pintura de piezas en negro semi mate de Zero, para su posterior montaje o detallado: volante, salpicadero, bateria de KMP, y triángulos de suspension traseros:
We continue with the painting of pieces in semi-matt black from Zero, for later assembly or detailed: steering wheel, dashboard, KMP battery, and rear suspension triangles:
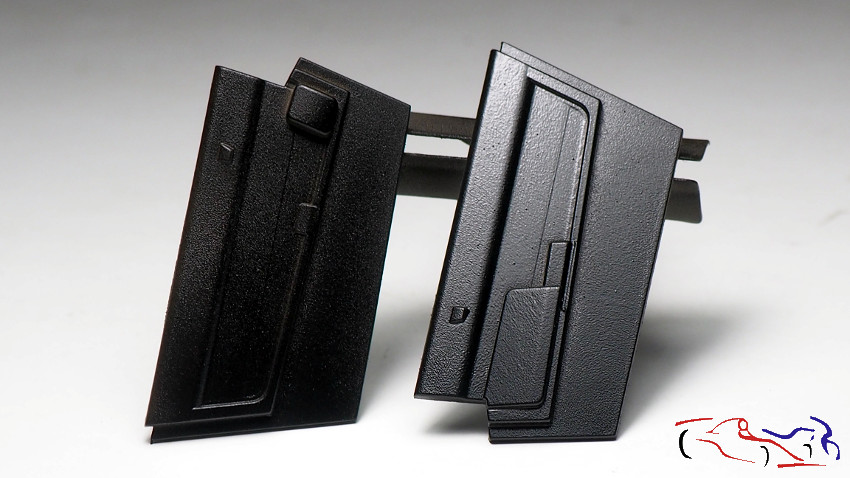
 Los paneles de las puertas, pintados de negro semi mate de Zero:
The door panels, painted in semi-matt black from Zero:
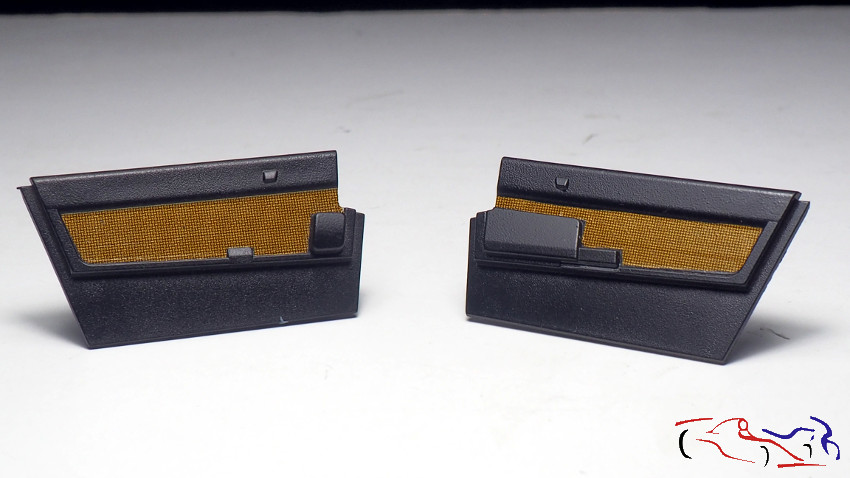
 Y con calca de Kevlar aplicada, recortada por mi. Falta un sombreado de la misma…
And with applied Kevlar decal, trimmed by me. Missing a shading of it …
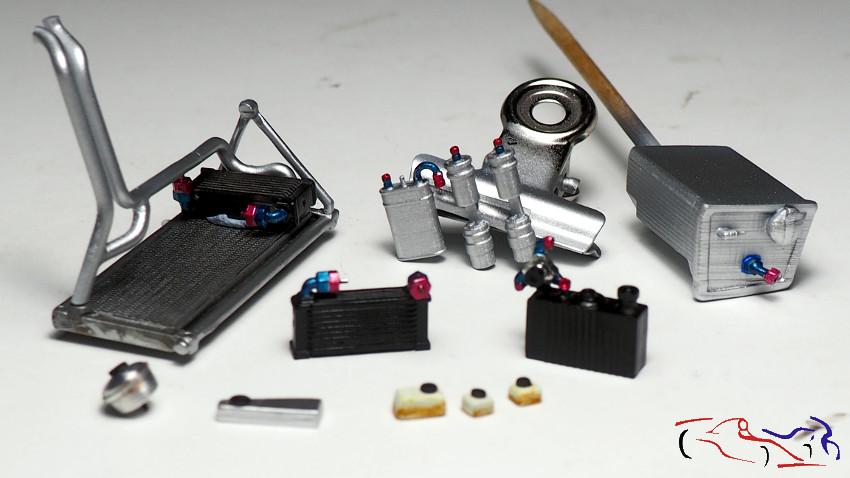
 Aquí vemos muchas piezas ya casi terminadas, y pintadas:
Here we see many pieces already almost finished, and painted:
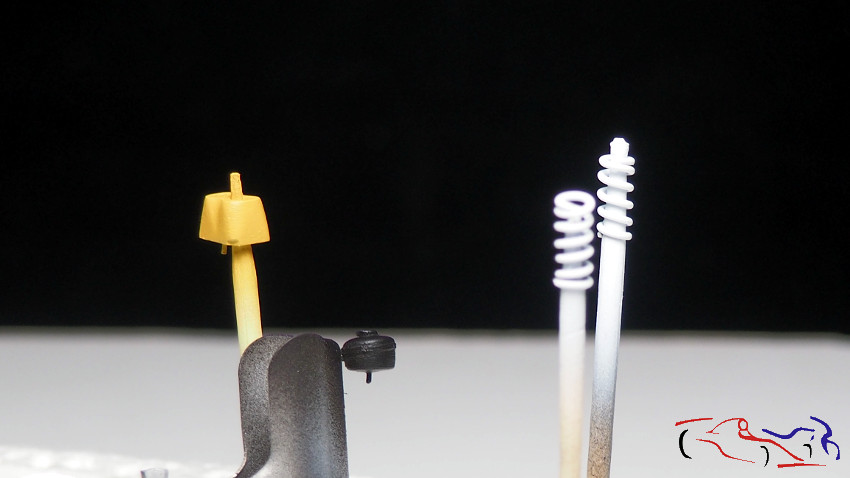
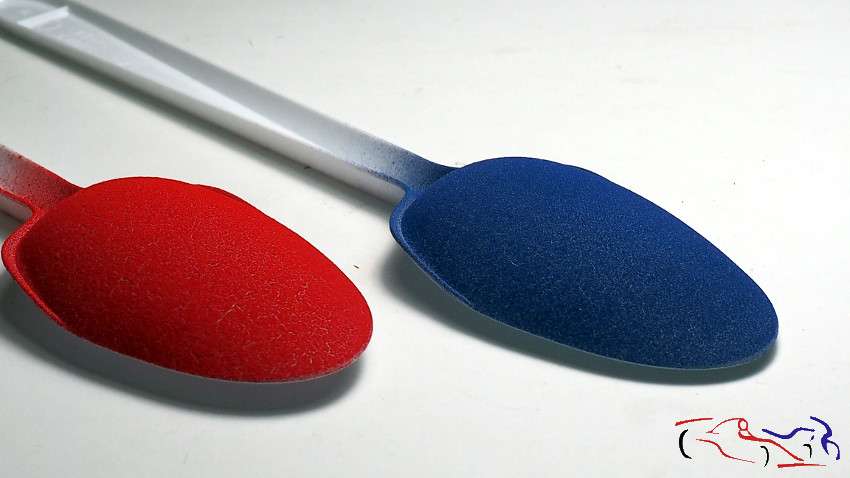
 Y para terminar, los dos test de las pinturas de Zero para los asientos. Es necesario un aero 0.6 para que pueda salir la textura. Aun así tengo que hacer alguna prueba más:
And finally, the two tests of Zero’s paintings for the seats. A 0.6 aero is necessary for the texture to come out. Even so, I have to do some more test:
 Gracias por ver y comentar!!
Thanks for viewing and commenting!!


Hola, ¡¡¡magnífico trabajo!!!, felicidades y gracias por compartirlo.
Saludos desde México
Gracias Jose Antonio!!
Hello!
I love your work – VERY good!
I’m curious about something… the Zero paints flocking (RED & Blue) do you have a link?
Kind regards
Carl
Hi Carl, here you have the link:
Zero textured at SPotmodel
Regards