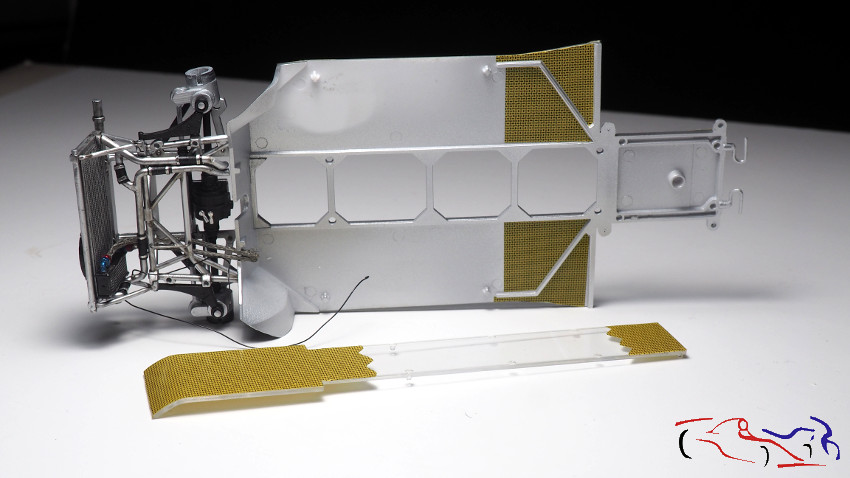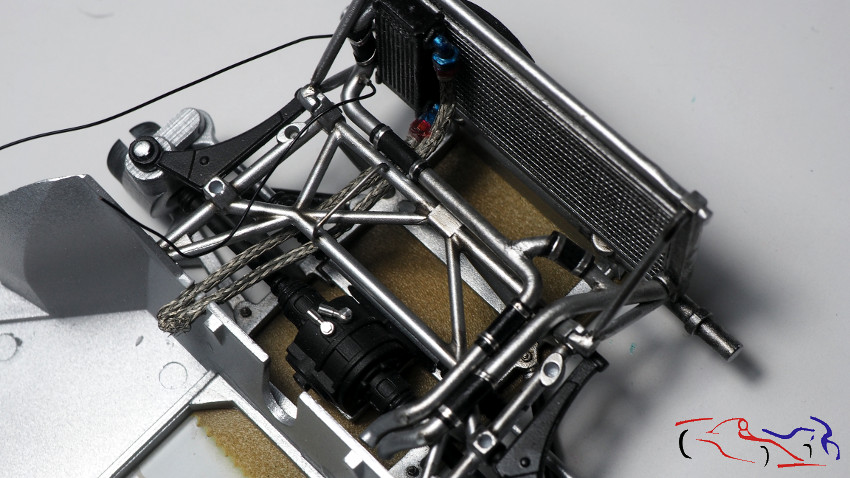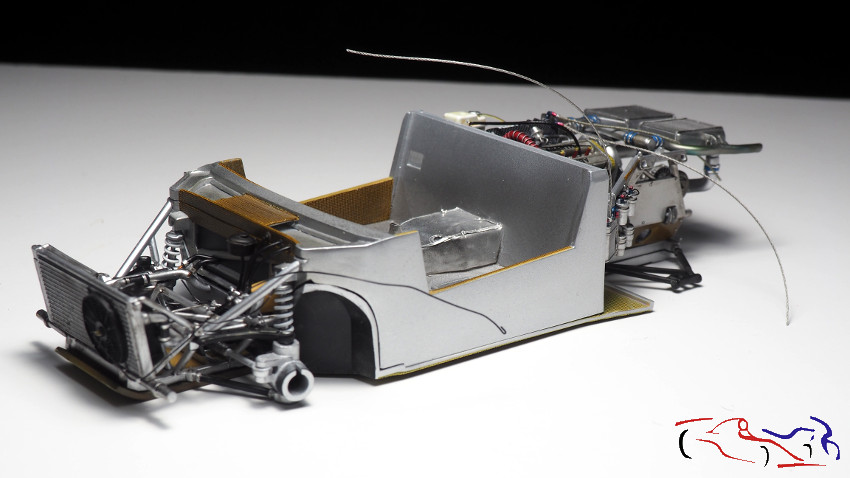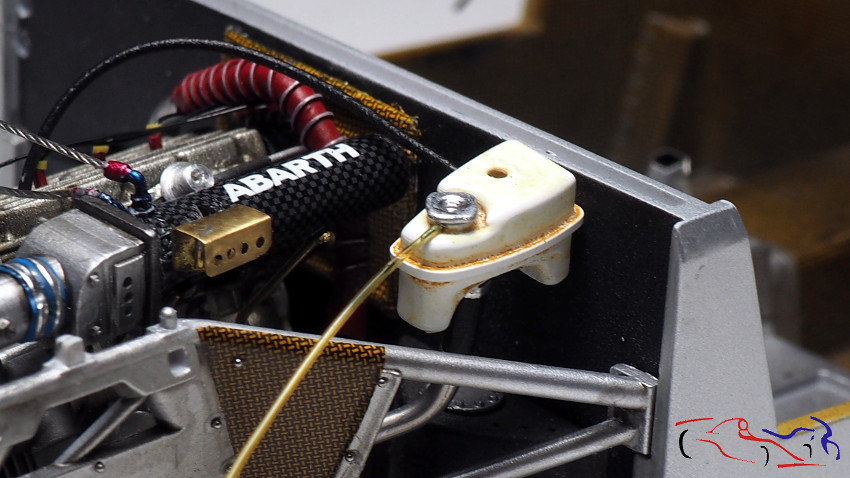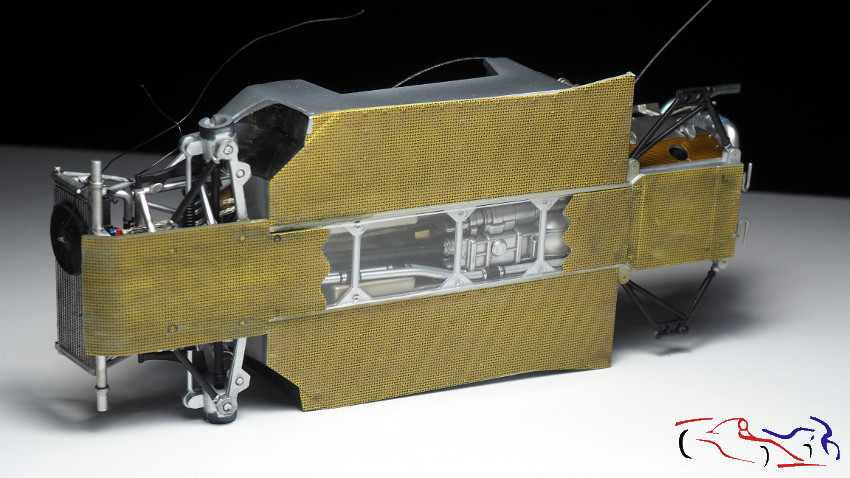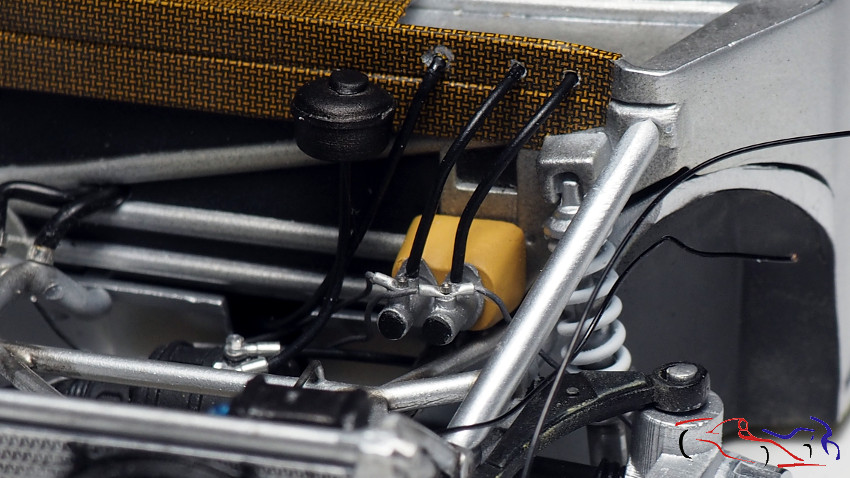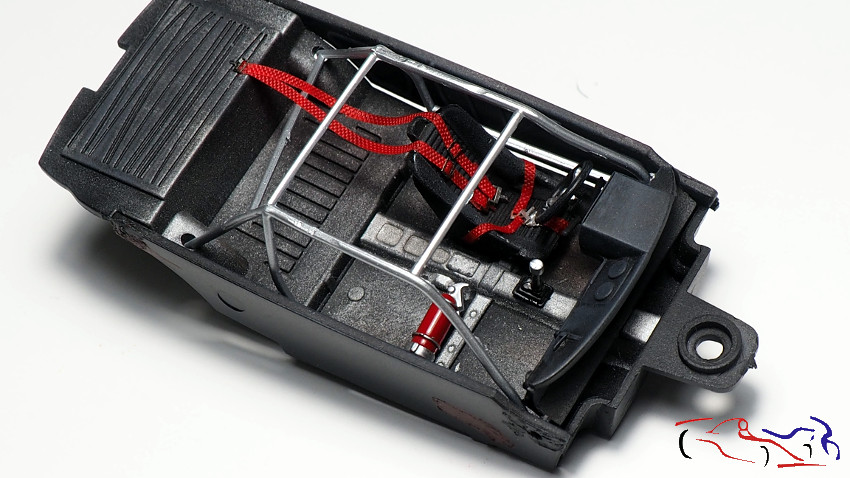

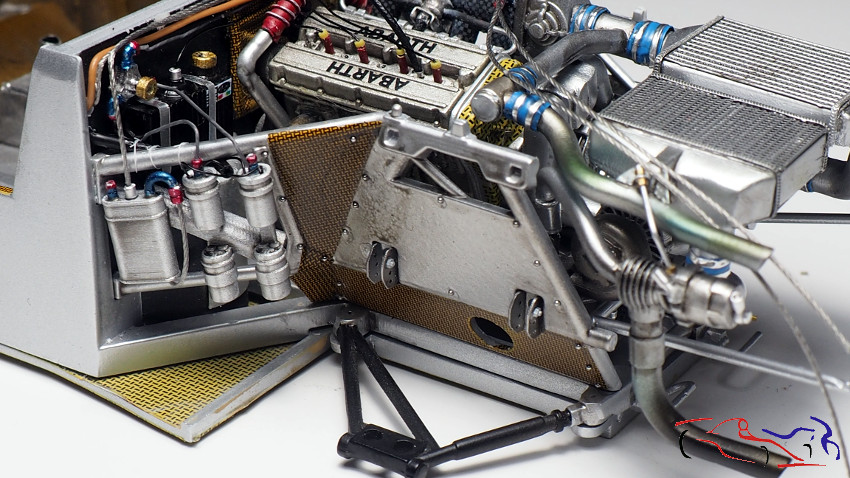
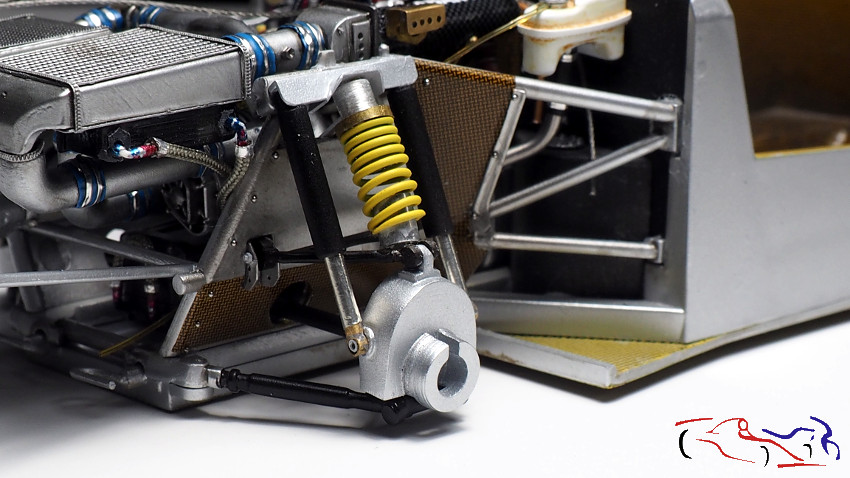
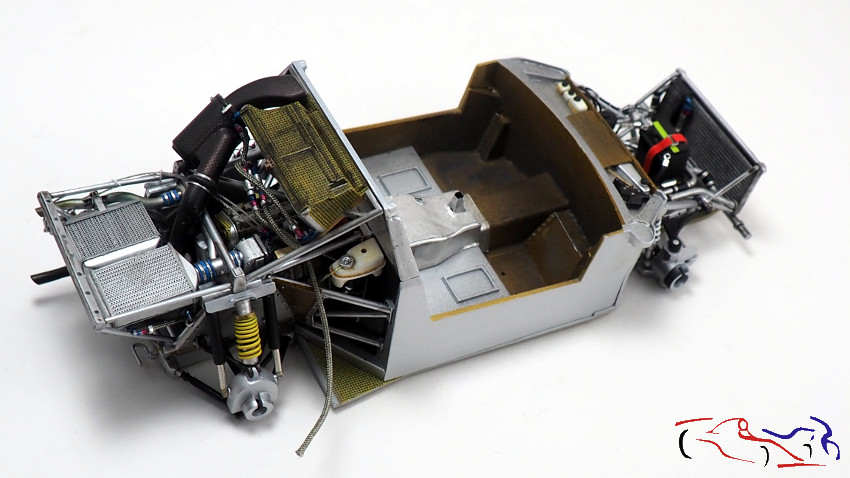
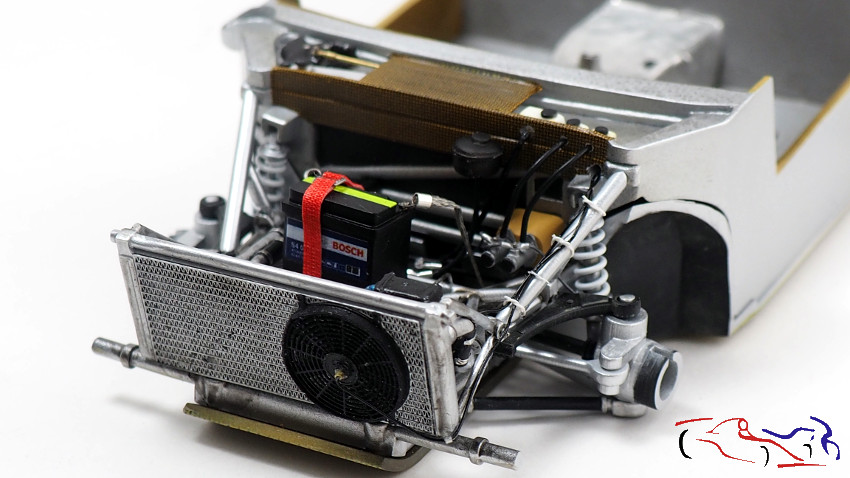
Seguimos con el Lancia Delta S4. En el anterior post, dejamos el motor colocado en el chasis, al cual le vamos a ir añadiendo más piezas. En la siguiente foto, vemos la pieza metálica que soportará el conjunto de la amortiguación, y a la izquierda, una serie de botes y cables que están unidos a la centralita que está por detrás, y antes del cortafuegos. Para los cables, cogí varias medidas y colores, y los estrechos, se hicieron con dos cables de estaño de 0,3 mm retorcidos entre si.
We continue with the Lancia Delta S4. In the previous post, we left the engine placed on the chassis, where we are going to add more parts. In the next photo, we see the metal piece that will support the damping assembly, and on the left, a series of boats and cables that are attached to the switchboard that is behind, and before the firewall. For the cables, I took various sizes and colors, and the narrow ones were made with two 0.3 mm tin cables twisted together.
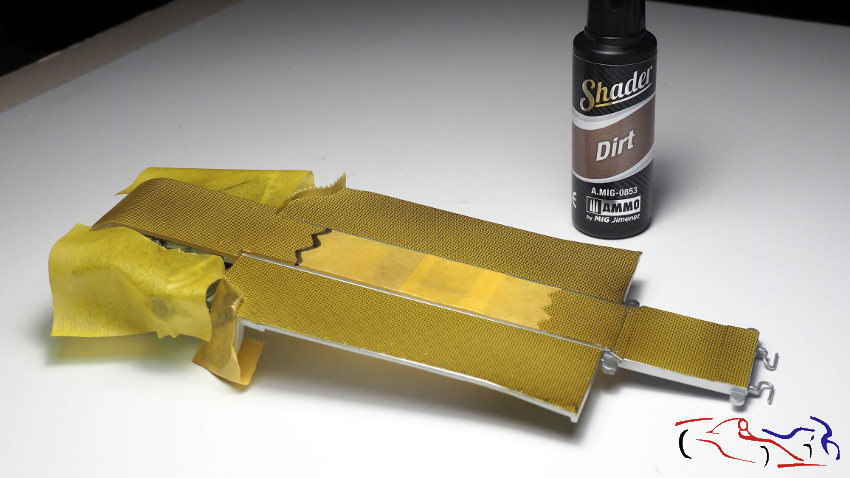
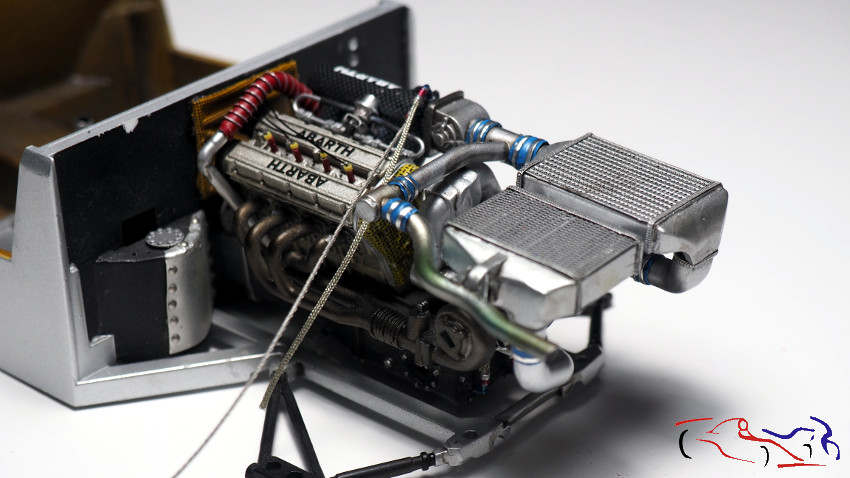
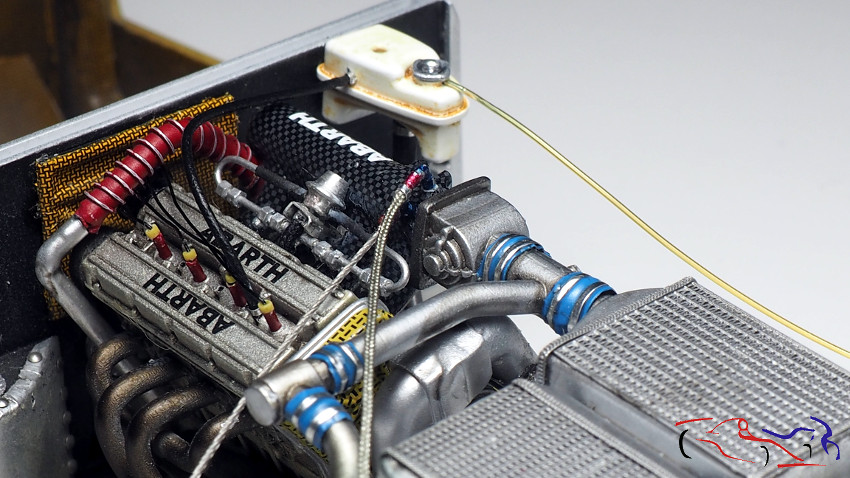
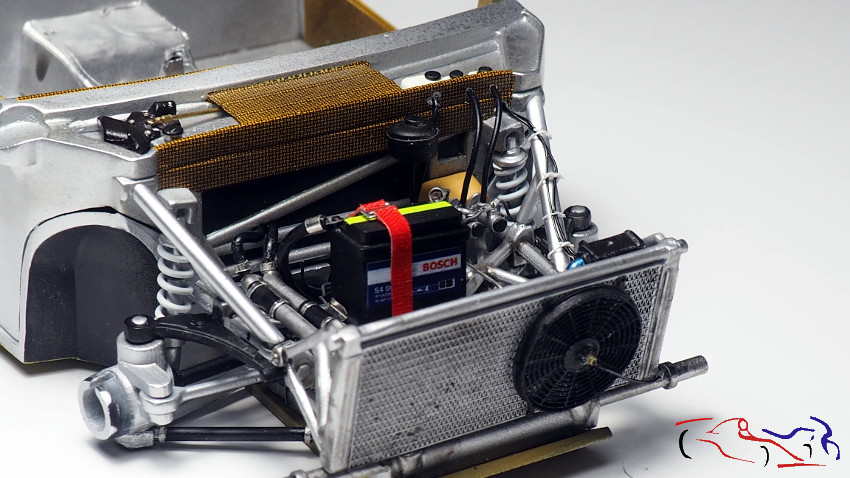
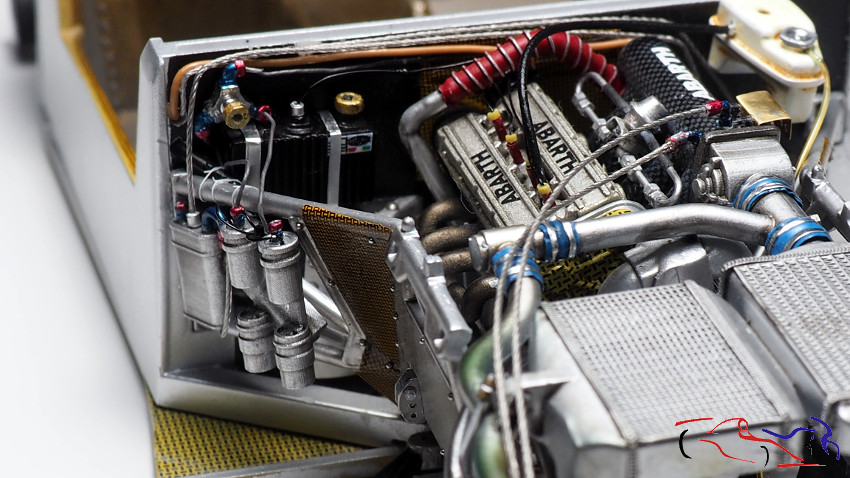
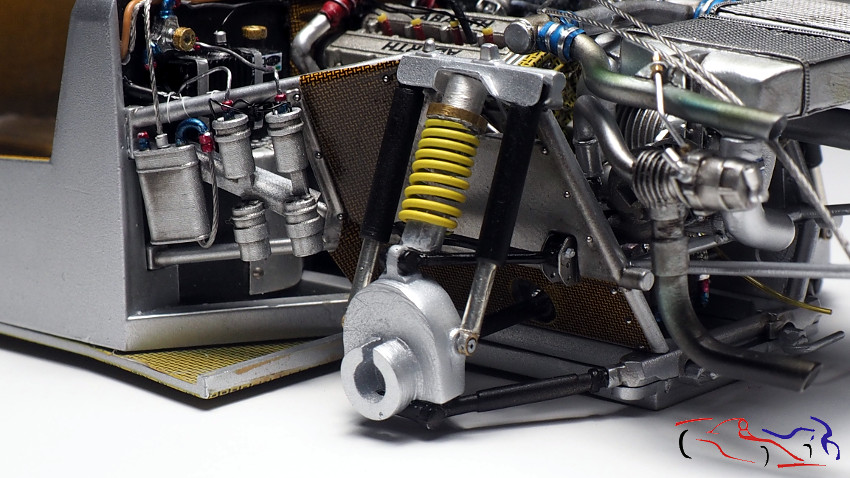
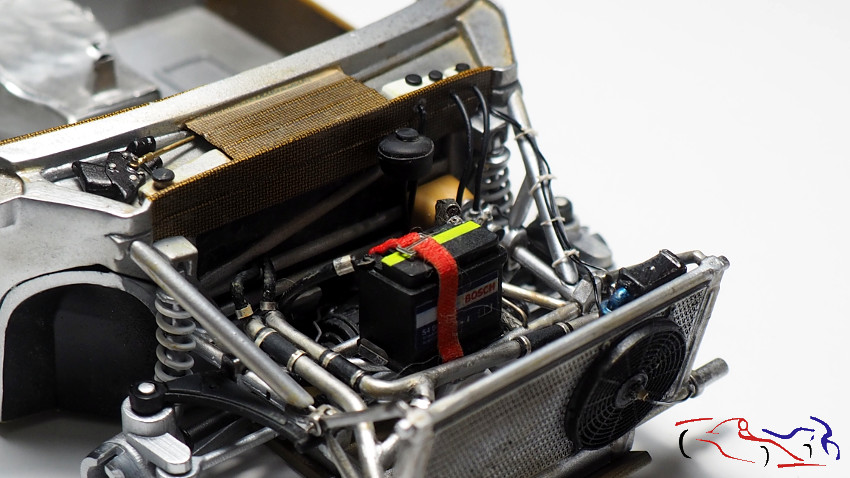
En la siguiente foto, vemos esos cables desde otra perspectiva. A su vez, esos cables que van a lo largo del cortafuegos.
In the next photo, we see those cables from another perspective. In turn, those cables that go along the firewall.
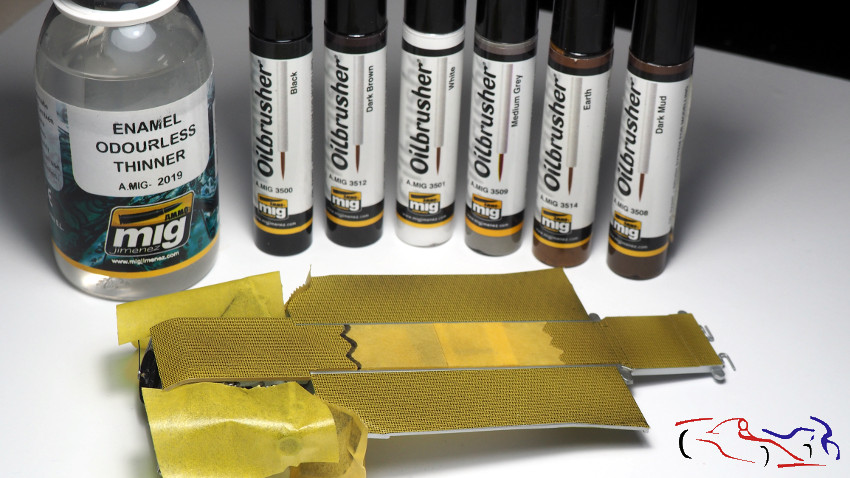
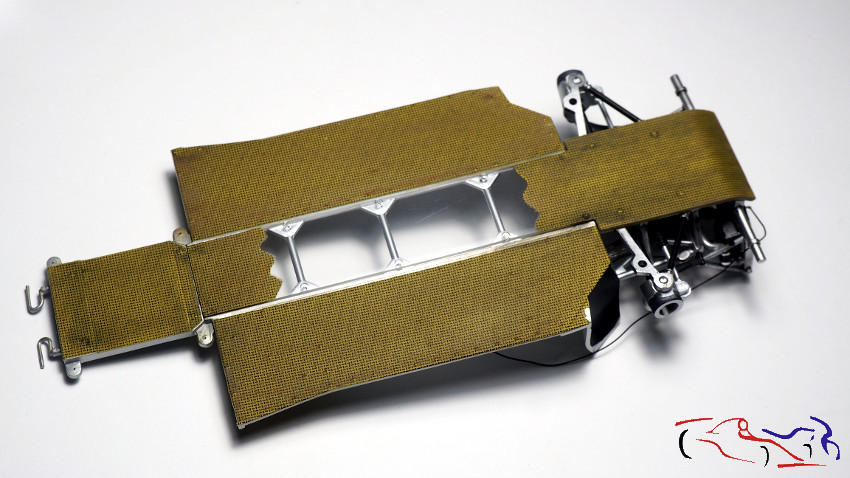
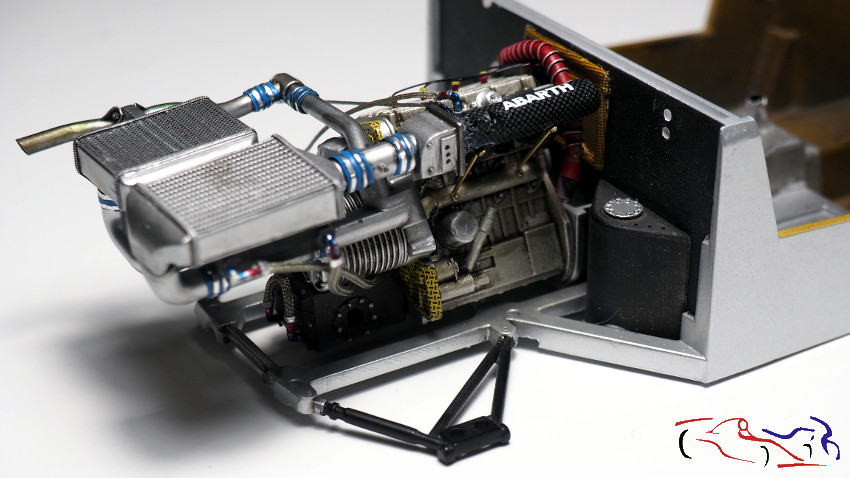
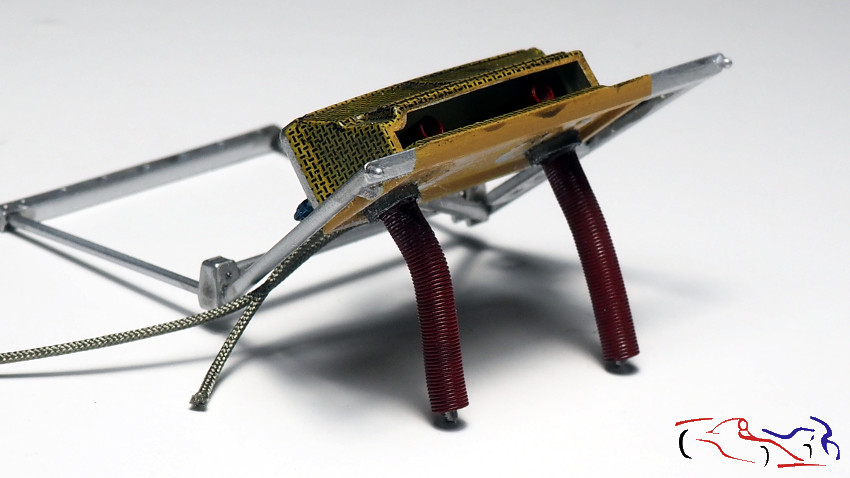
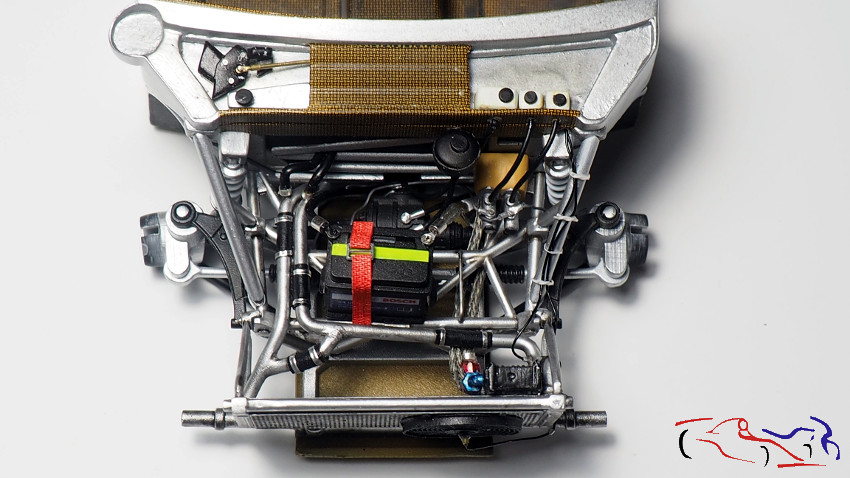
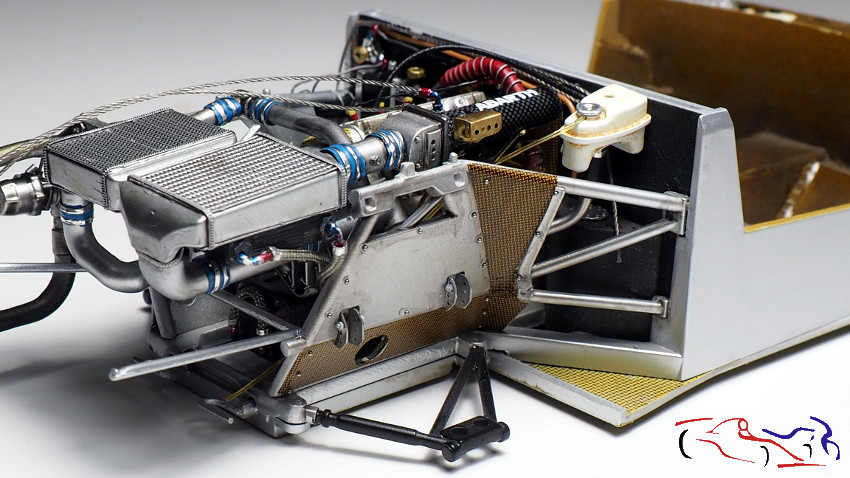
Esta es la vista desde el lado contrario, con la pieza metálica. Decir, que todas estas piezas ya han sido comentadas previamente cuando las fue haciendo.
This is the view from the opposite side, with the metal part. Say, that all these pieces have already been previously commented when I was making them.
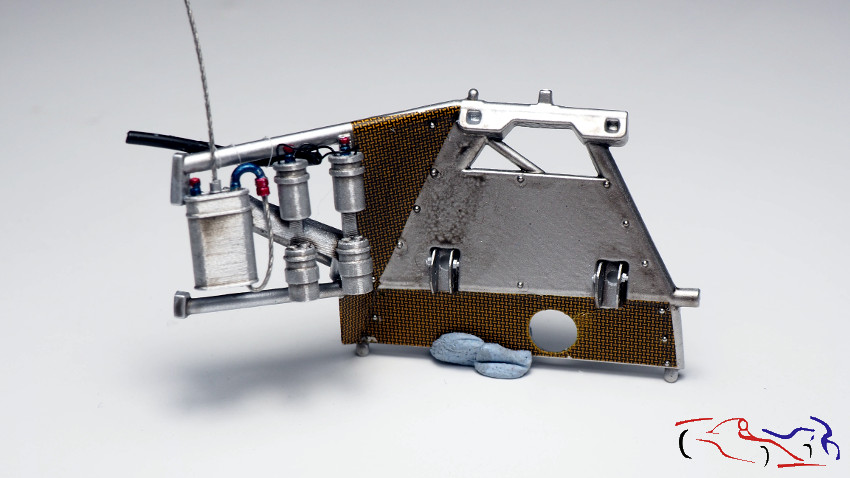
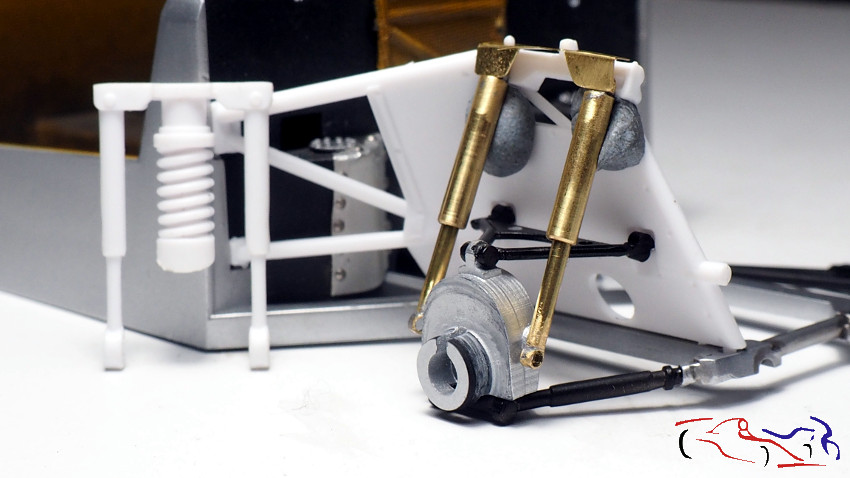
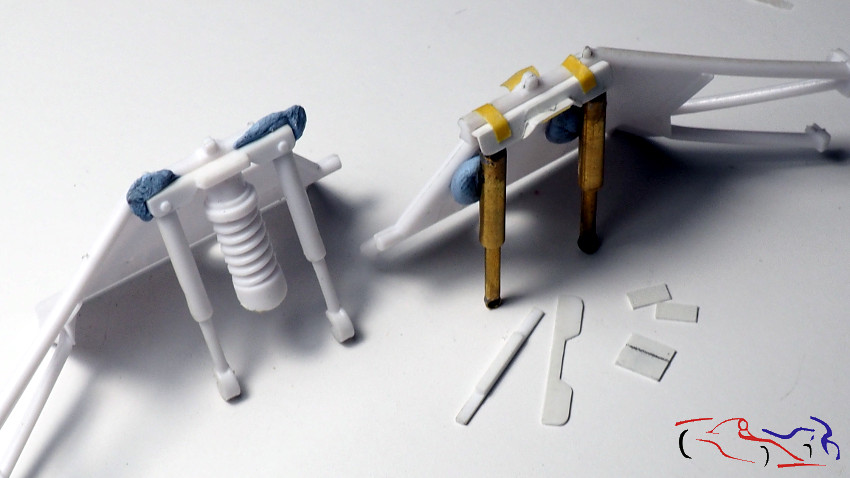
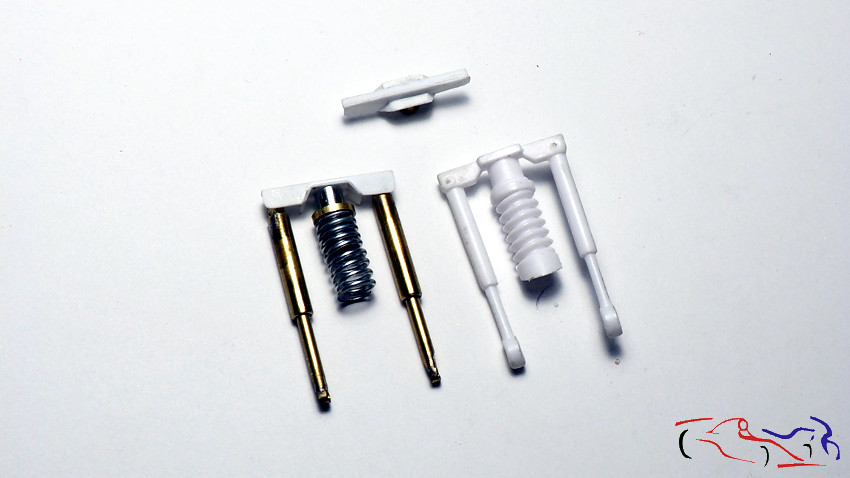
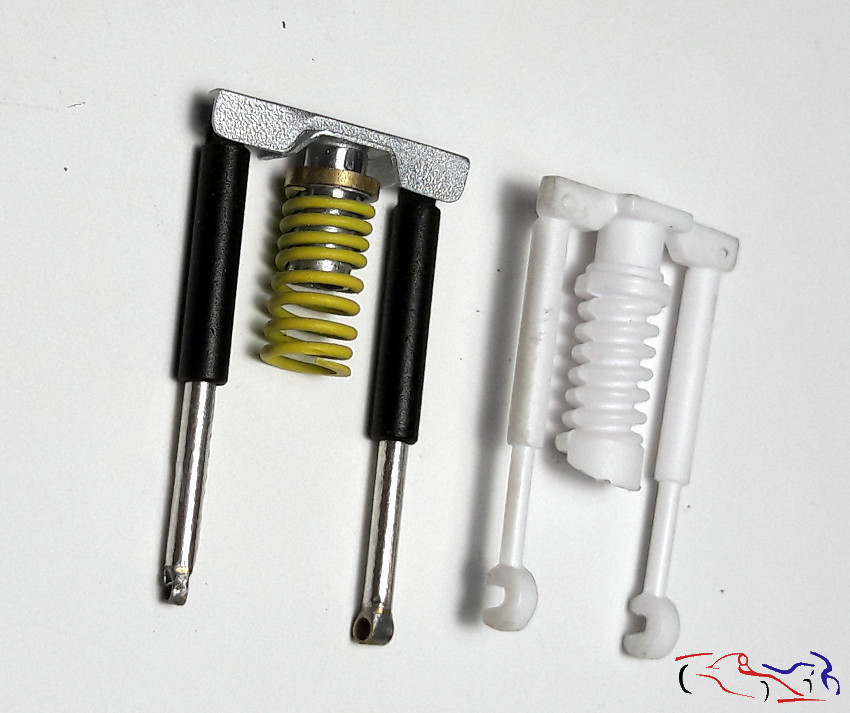
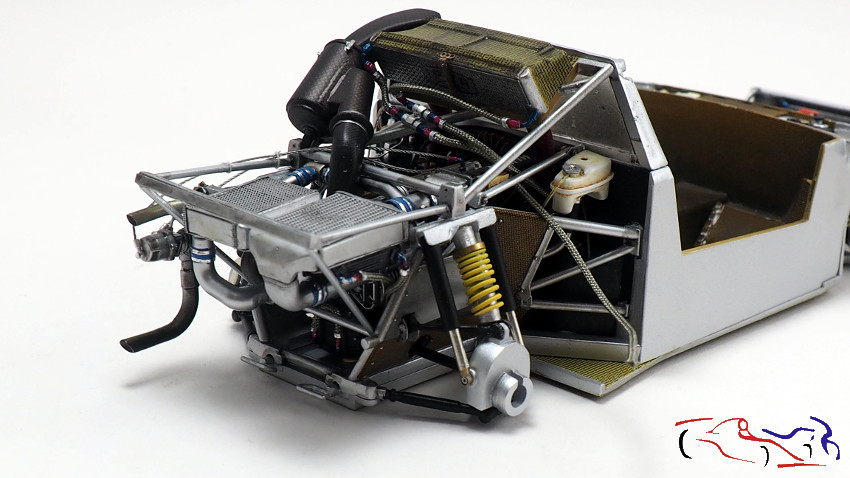
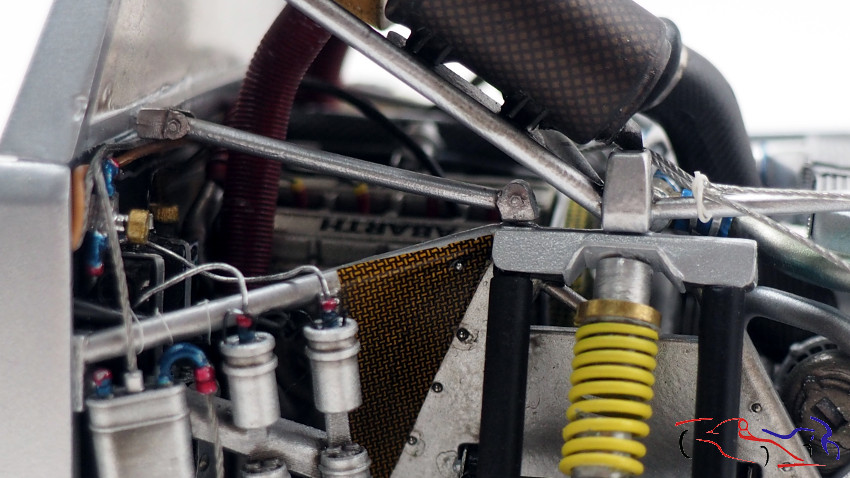
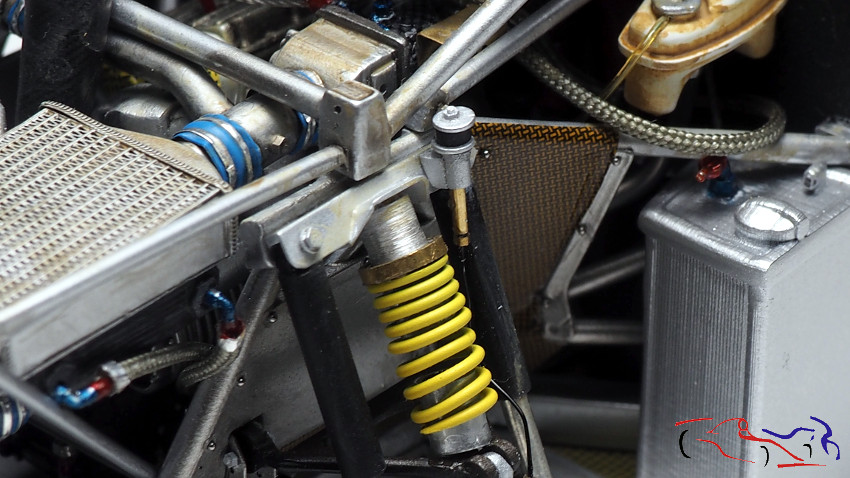
Siguiente paso, es colocar los conjuntos de amortiguador construidos por mi, y que sustituyen a los originales del kit. Dichos conjuntos están explicados en el anterior post.
Next step is to place the shock absorber assemblies built by me, which replace the original ones in the kit. These sets are explained in the previous post.
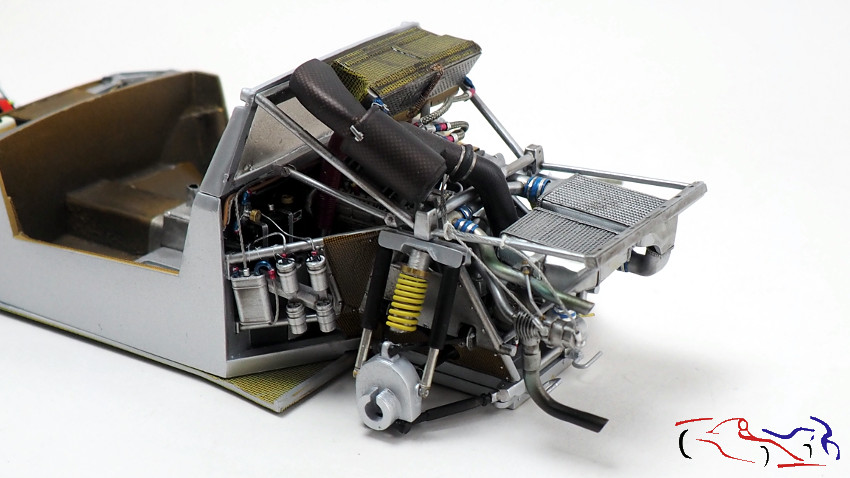
Aquí vemos el conjunto del otro lado:
Here we see the set of the other side:
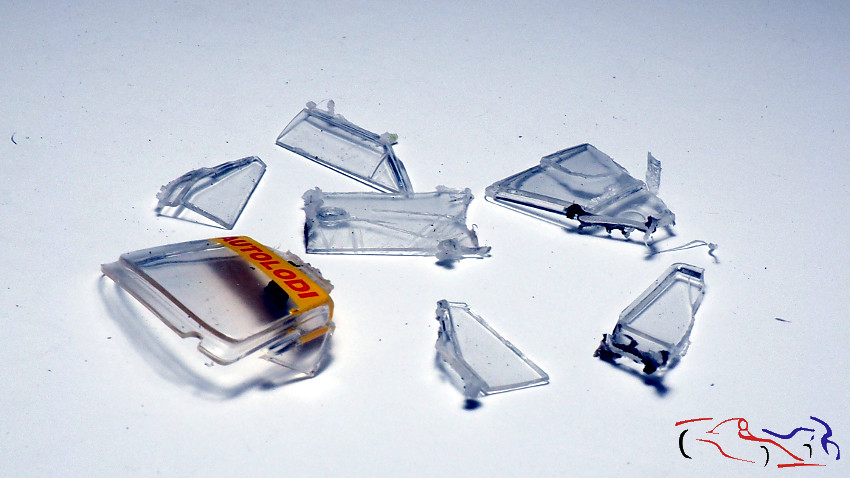
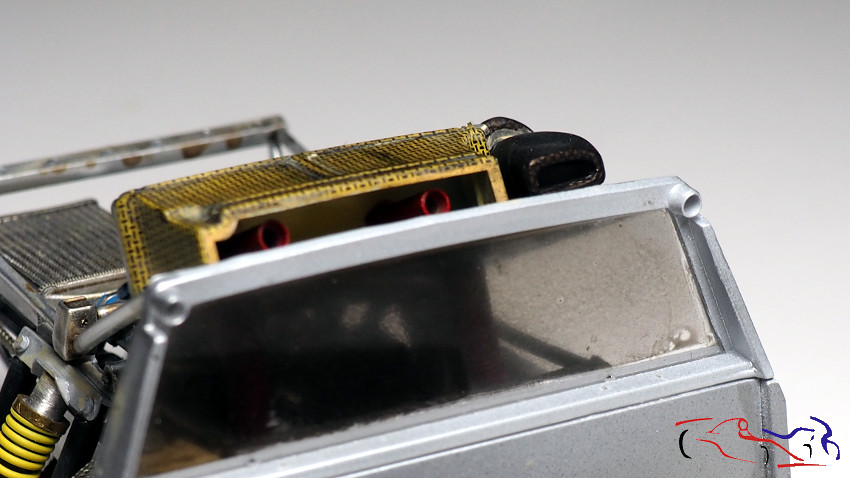
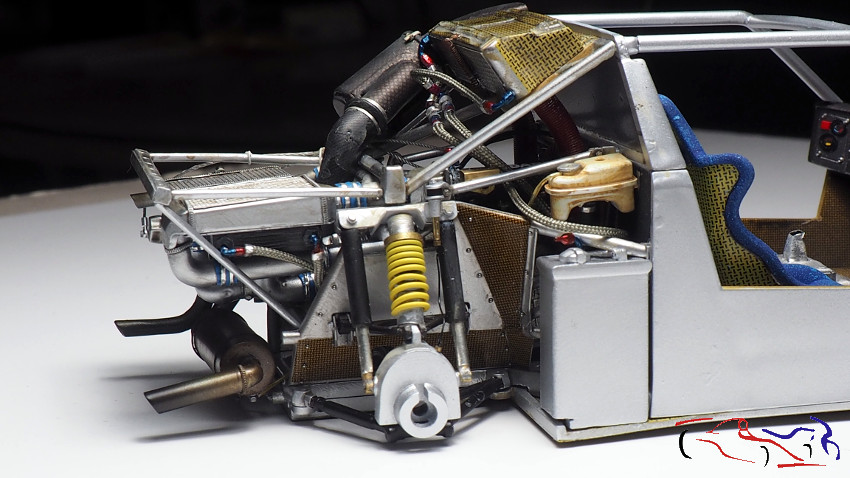
El siguiente paso es colocar el cristal del cortafuegos, y el conjunto superior con las barras metálicas, la entrada de aire y el filtro refrigerador del aceite que va en la parte superior, así como la entrada de aire del turbo con su filtro. Este conjunto lo pegué con ciano fuertemente porque al haber añadido o modificado muchas piezas, algunos puntos de unión no coincidían.
The next step is to place the firewall glass, and the upper assembly with the metal bars, the air inlet and the oil cooler filter that goes in the upper part, as well as the turbo air inlet with its filter. I glued this set with cyano strongly because having added or modified many pieces, some joining points did not fit.
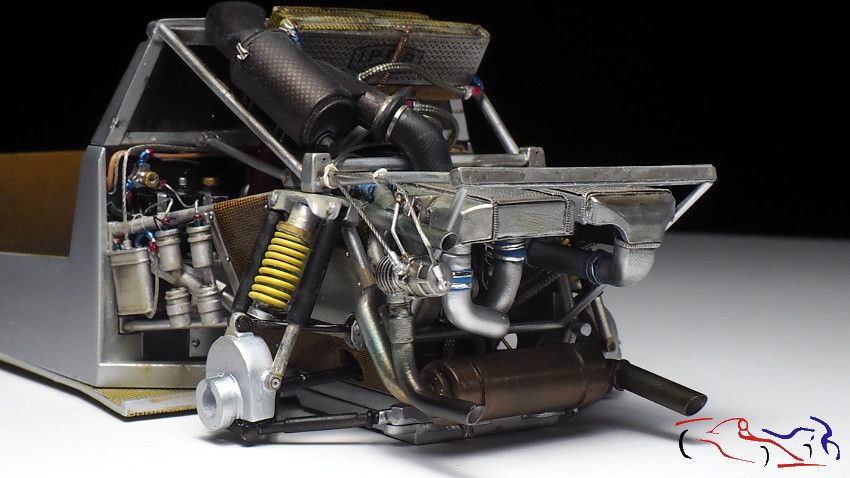
En las siguientes fotos, vemos en detalle distintas vistas del motor:
In the following photos, we see in detail different views of the engine:
También se ha ensuciado ligeremente todo el conjunto con un lavado de color arena de AK, que una vez semiseco, se eliminó lo superficial con un bstoncillo, quedándose el color en las esquinas y bordes:
The entire set has also been lightly soiled with a sand-colored wash from AK, which once semi-dry, the surface was removed with a small brush, leaving the color in the corners and edges:
Siguiente paso fue colocar el silencioso con el tubo de escape:
Next step was to place the silencer with the exhaust pipe:
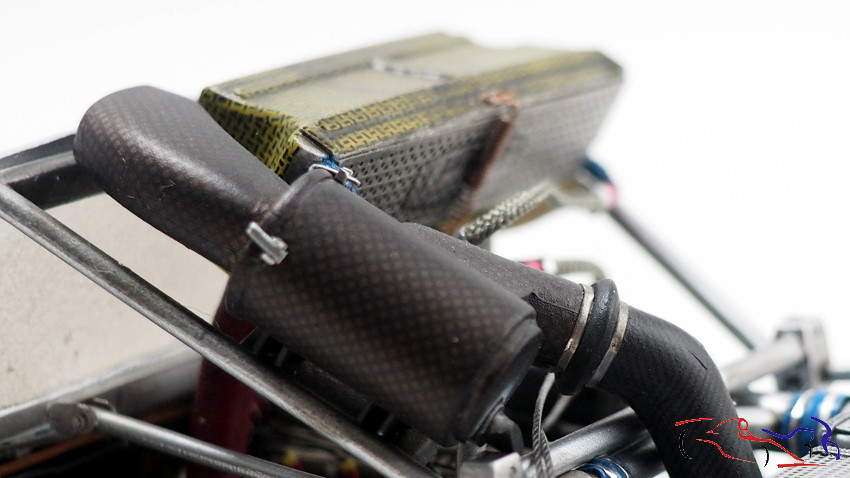
Vemos dentro de la toma de aire del techo, los dos tubos que sirven para refrigerar los frenos traseros:
We see inside the roof air intake, the two tubes that serve to cool the rear brakes:
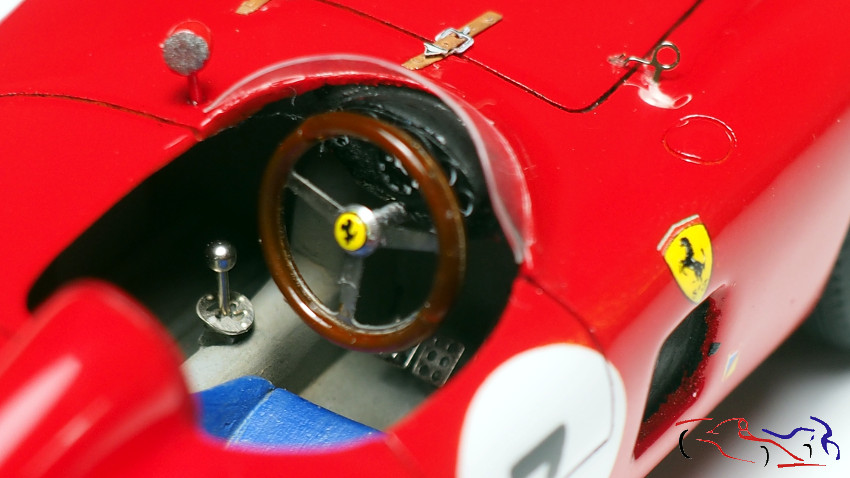
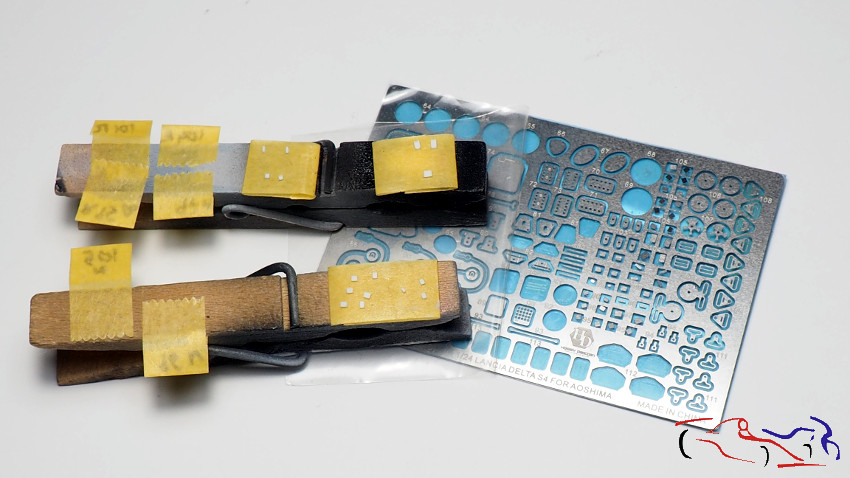
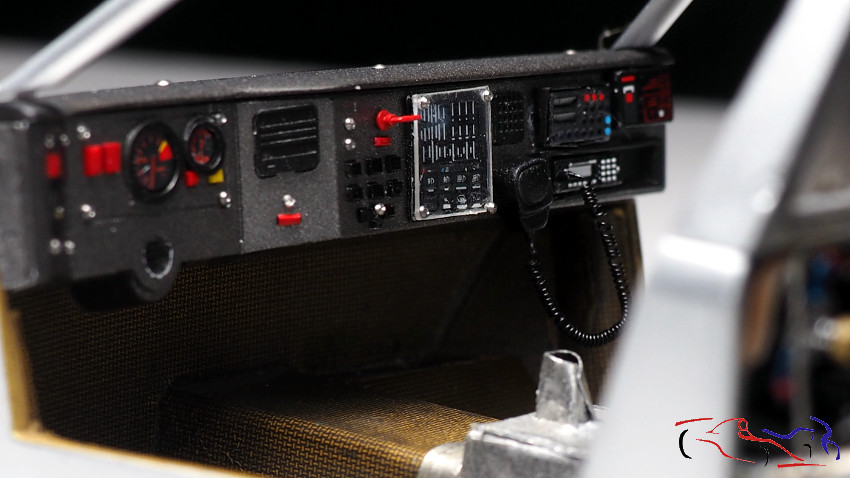
Ahora, el siguiente paso es terminar el salpicadero. Muchas piezas del fotograbado de HD, que nos harán dar un toque muy real al mismo. Una vez separadas del soporte, las coloco por color definitivo en sus soportes:
Now the next step is to finish the dashboard. Many pieces of HD gravure, which will make us give it a very real touch. Once separated from the support, I place them by final color on their supports:

Viendo el detalle, la mayor parte de los pulsardores estaban formados por dos piezas que una vez pegadas daban volumen. Pero el problema es pegarlas porque son muy pequeñas, tener que hacerlo con ciano, y separadas del salpicadero para poder pintarlas aparte. Por lo que decidí cortar trocitos de plástico, del mismo grosor que las dos piezas del fotograbado, e irlas probando directamente en el salpicaderos para comprobar su tamaño: un trabajo pesado!!
Looking at the detail, most of the pulsators were made up of two pieces that once glued together gave volume. But the problem is to stick them because they are very small, having to do it with cyano, and separated from the dashboard to be able to paint them separately. So I decided to cut pieces of plastic, the same thickness as the two pieces of the gravure, and test them one by one directly on the dashboard to check their size: a heavy job!
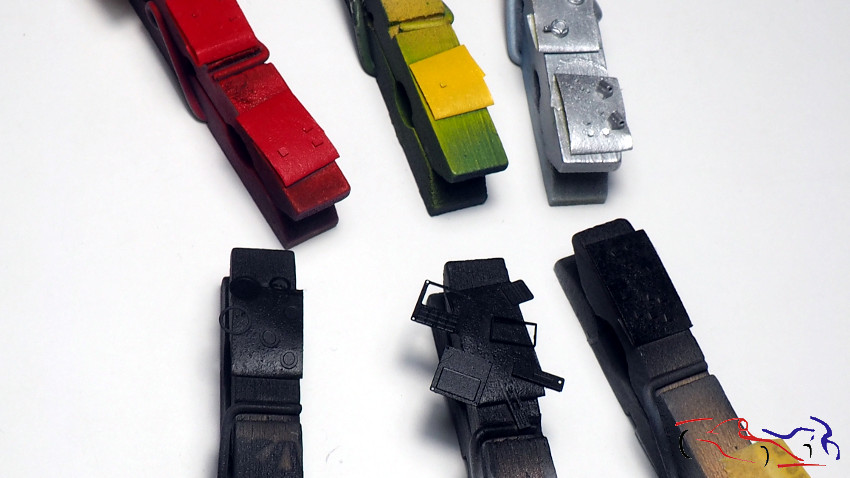
Y aquí, tenemos todas las piezas en sus soportes, imprimadas y pintadas:
And here, we have all the pieces in their supports, primed and painted:
Y aquí, ya todo pegado en su sitio. LAs piezas grandes las pegué con ciano, y las pequeñas con cola blanca. Use las calcas del kit, poniéndolas encima del fotograbado:
And here, everything is already in place. I glued the large pieces with cyano, and the small ones with white glue. Use the decals from the kit, putting them on top of the etched:
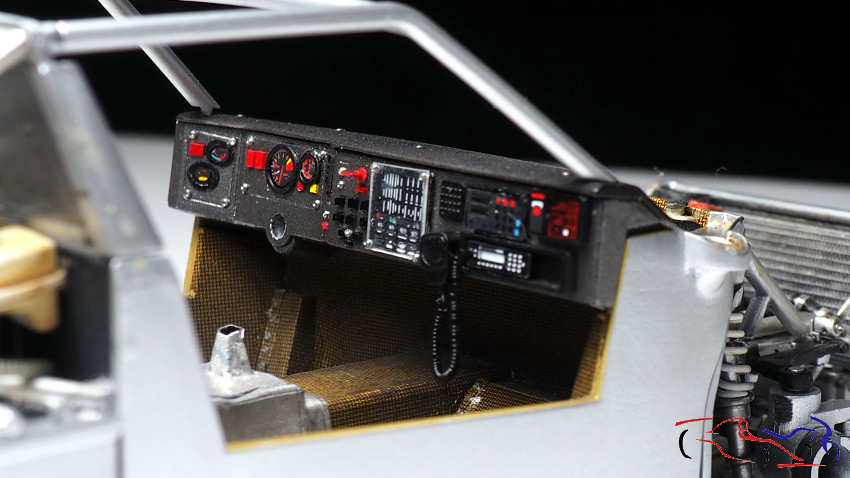
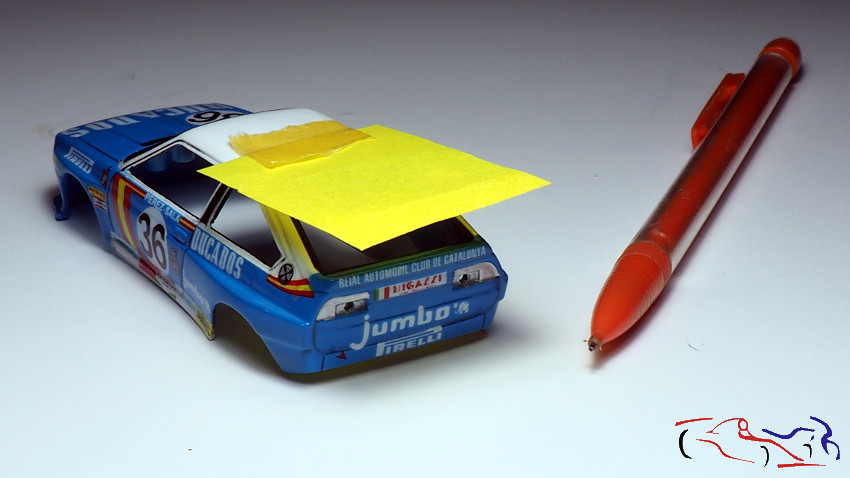
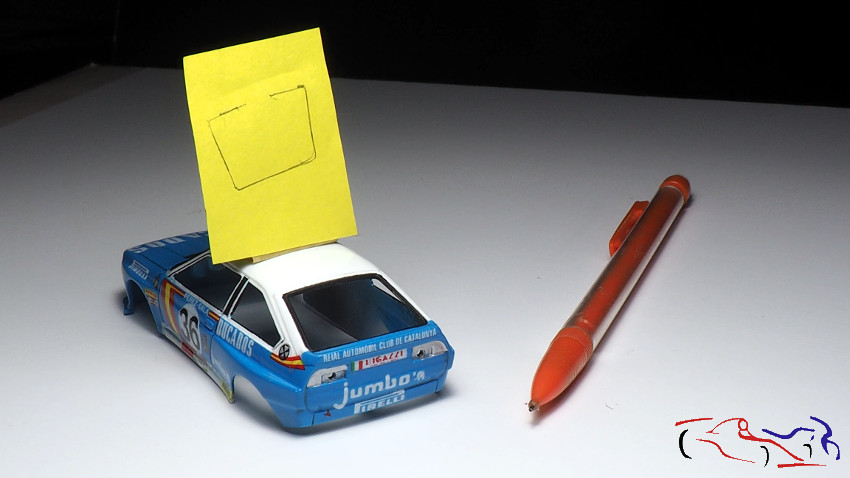
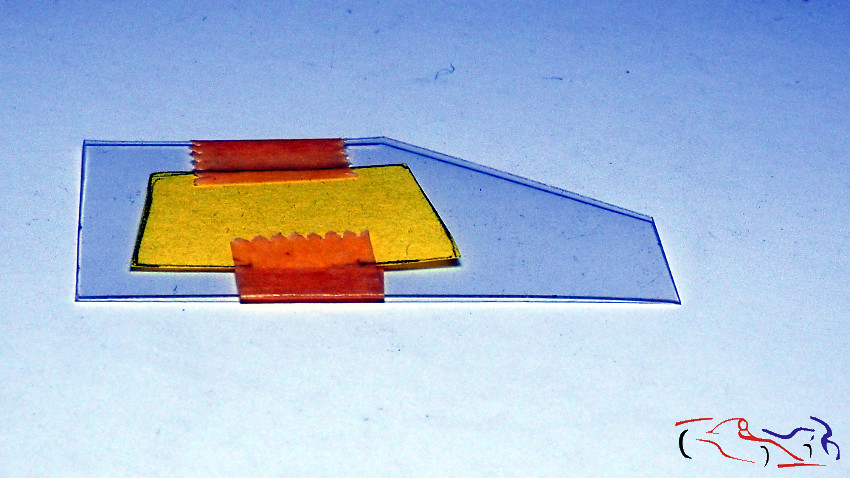
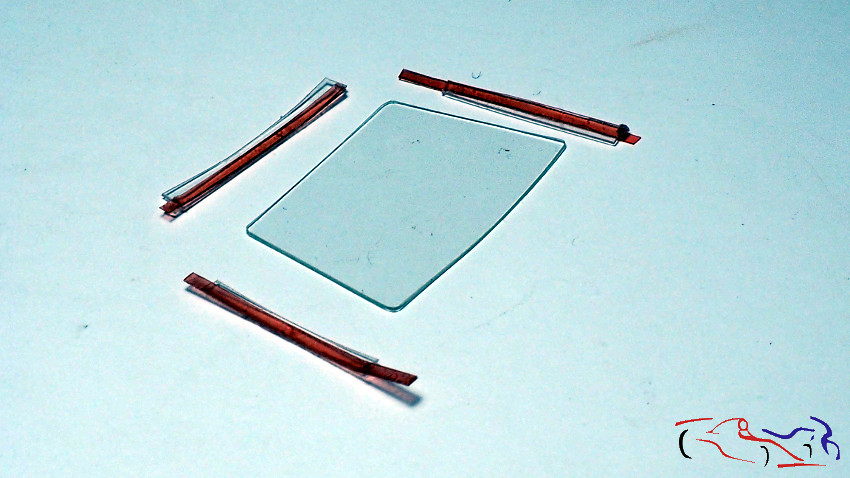
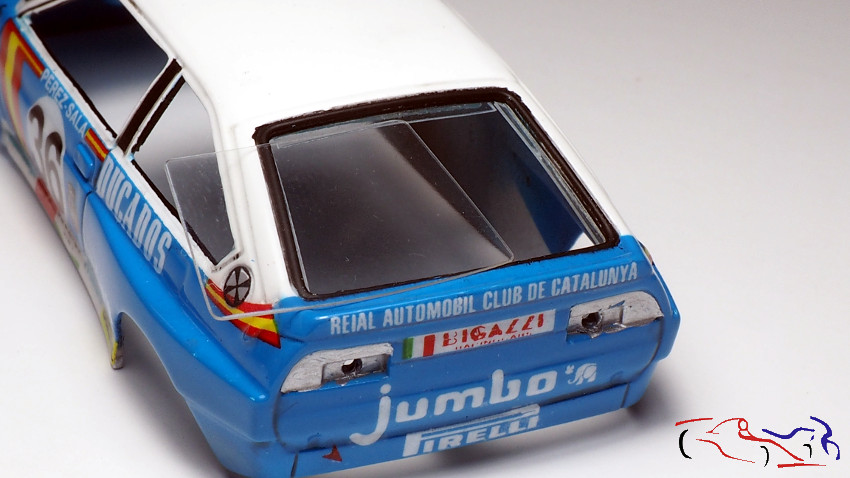
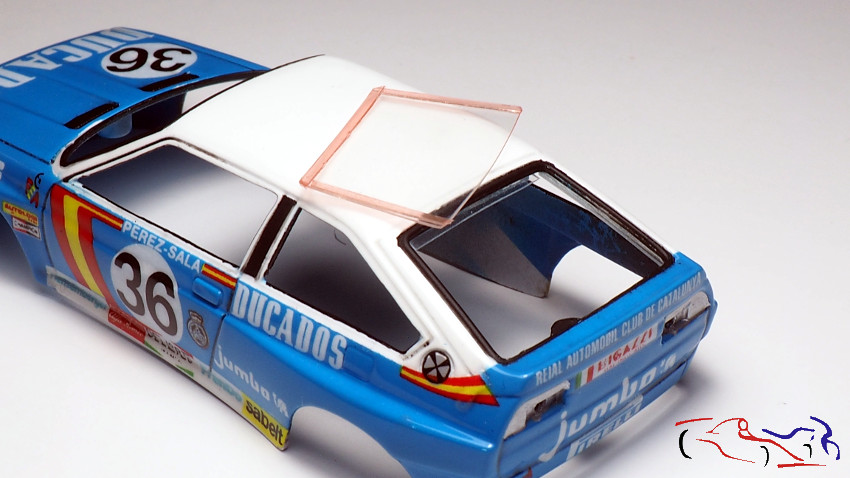
En el caso de la caja de los fusibles, la base son dos fotograbados superpuestos (el superior tenía una ventana para qe se viera la parte de debajo), y el problema era que solo tenía una calca con todo. Por lo que corté la calca en dos, pegué cada parte en su fotograbado, y después, los pegué entre ambos. Y lo iba a pegar pero en el coche Marlboro original, estos fisibles estaban recubiertos por una plancha de metacrilato. Por tanto, cogí la hoja de Evergreen transparente más fina, la recorté y al superpuse, para hacer los agujeros de las esquinas para introducir los tornillos. Una vez terminado, lo pegué con cola blanca. Destacar que no he pulido los cantos para que se vea que es un trozo de plástico y no de cristal.
También se ve el corta corriente en el centro del salpicadero, y los muchos tornillos del set de fotograbado de HD. Decir que a todos los pulsadores y los relojes, tienen una capa de barniz brillante por encima.
In the case of the fuse box, the base is two superimposed photo-etched parts (the upper one had a window so that the bottom part could be seen), and the problem was that i only had one decal for both parts. So I cut the decal in two, glued each part on its photoetch, and then glued them between the two. And I was going to glue it but in the original Marlboro car, has these fissures covered by a sheet of methacrylate. So I took the thinnest transparent Evergreen sheet, trimmed it and overlapped it, to make the corner holes for the screws. Once finished, I glued it with white glue. Note that I have not polished the edges to show that it is a piece of plastic and not glass.
Also visible is the circuit breaker in the center of the dash, and the many screws from the HD gravure set. Say that all pushers and watches have a layer of glossy varnish on top.
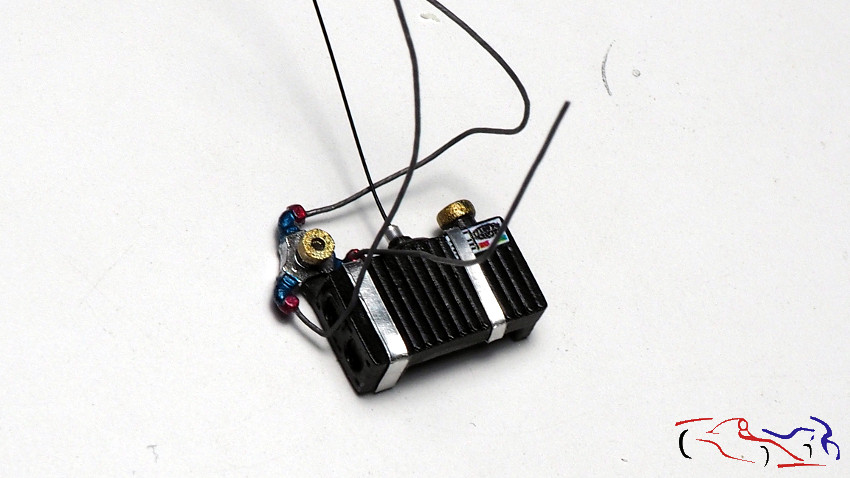
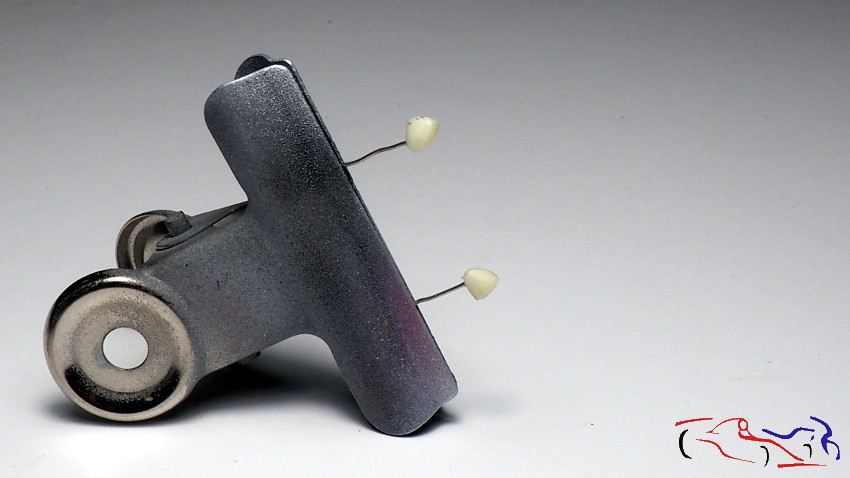
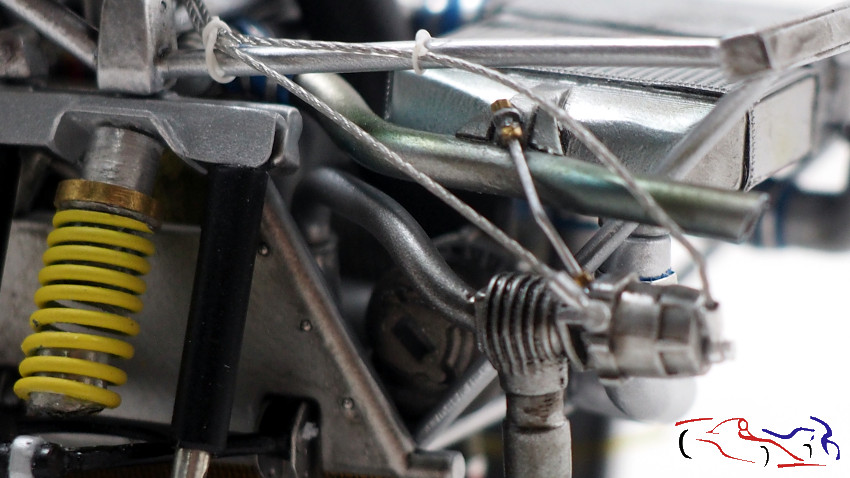
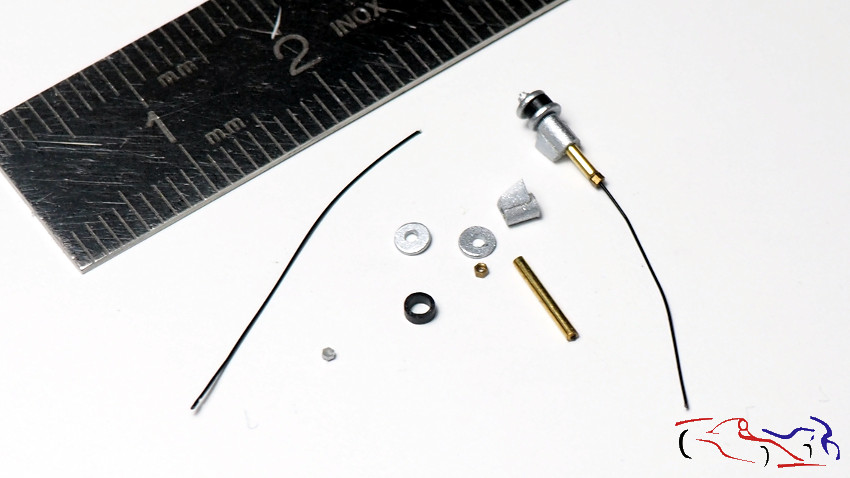
Pasamos a otras piezas de scratch del motor: los cables que sujetan los bujes traseros para que no se separen del coche en caso de accidente. Aquí veis uno terminado y el despiece del otro:
We turn to other scratch parts of the engine: the cables that hold the rear hubs so that they do not separate from the car in case of an accident. Here you see one finished and the breakdown of the other:
Y su posición en el motor. Vemos los tornillos de los amortiguadores ya puestos y el ensuciado con el lavado de color arena de AK:
And its position in the engine. We see the damper bolts already in place and the one soiled with AK’s sand-colored wash:
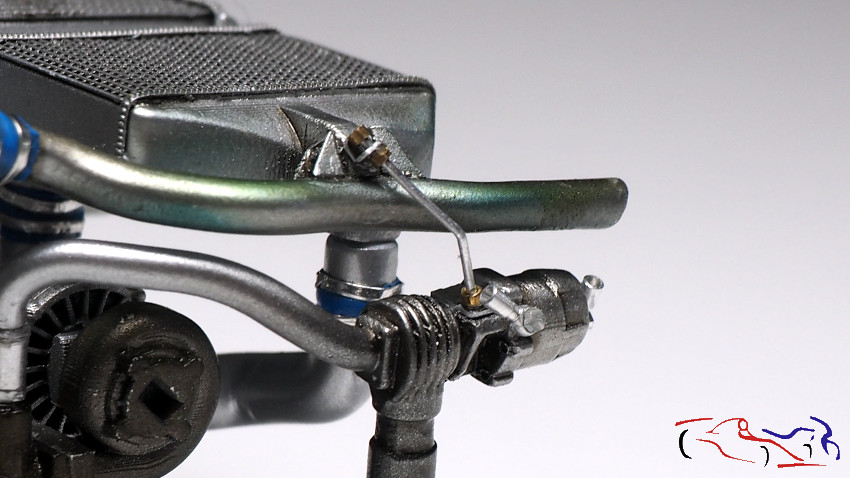
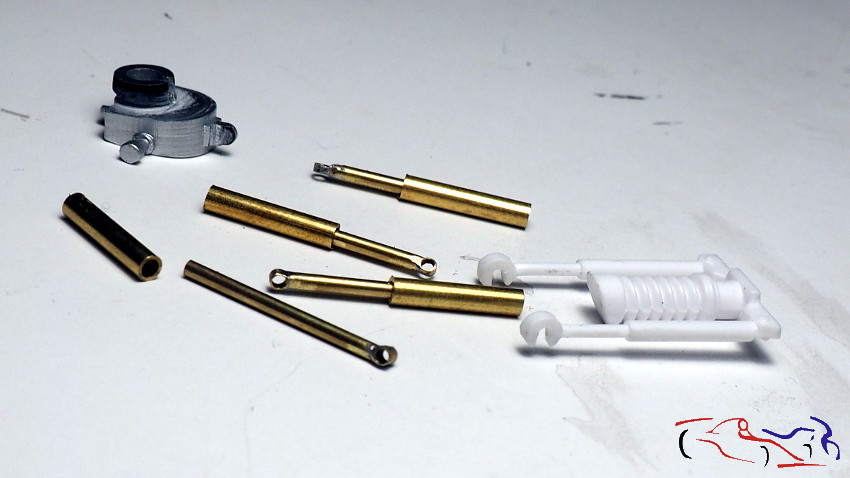
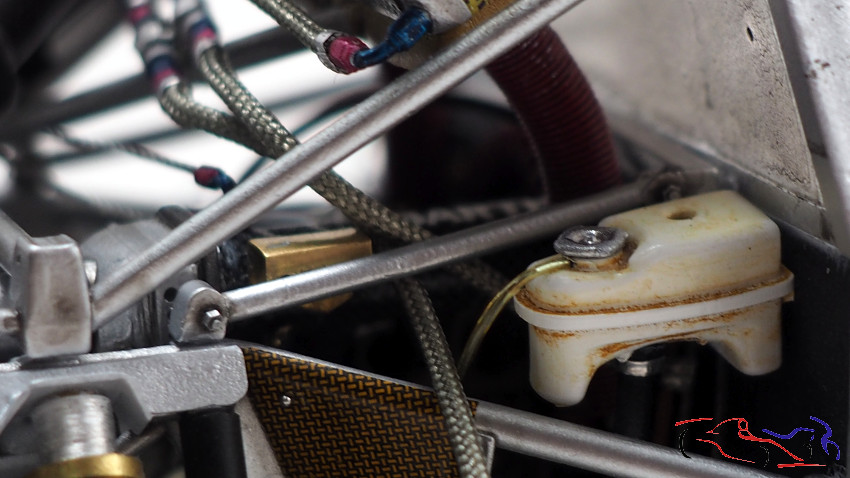
Y más a la derecha, el deposito de aceite del coche, pieza del tk de KMP (le falta conectar un par de tubos:
And further to the right, the car’s oil tank, part of the KMP tk (I still need to connect a couple of pipes:
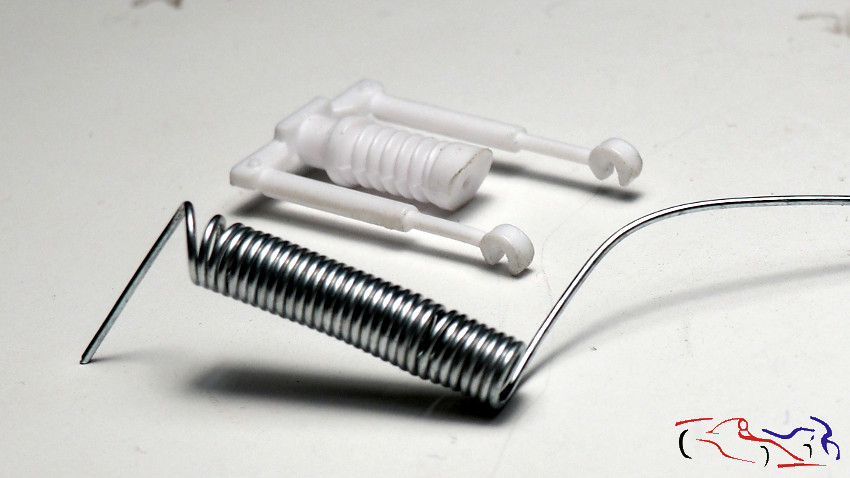
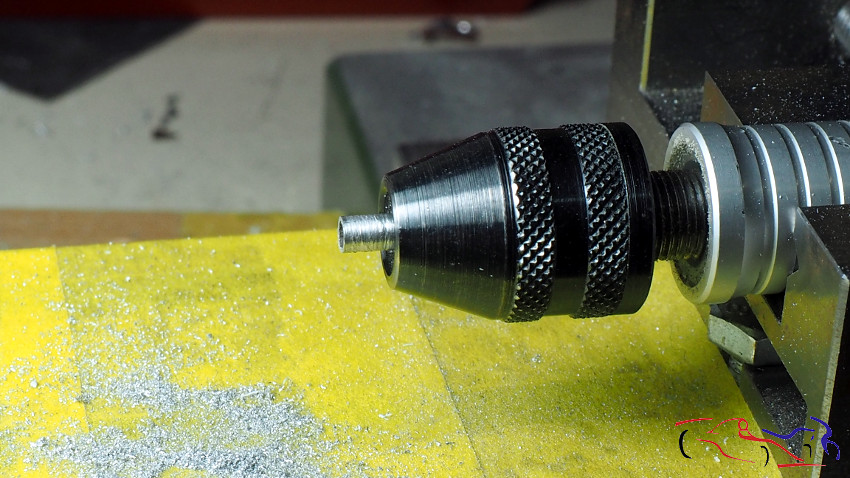
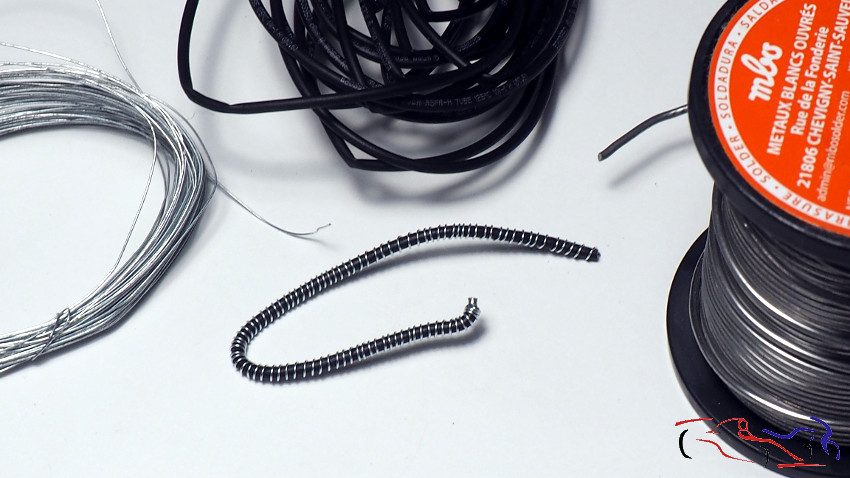
Y uno de esos tubos, es el que hago a continuación con tubo termoretráctil, estaño para el interior, y alambre muy delgado rodeándolo de principio a fin. Después, habrá que imprimarlo, pintarlo de un tono naranja y rasparlo por encima, para que el color del alambre aparezca:
And one of those tubes is the one that I make below with heat shrink tubing, tin for the inside, and very thin wire surrounding it from beginning to end. Afterwards, it will have to be primed, painted an orange tone and scraped over, so that the color of the wire appears:
Gracias por ver y comentar!!
Thanks for viewing and commenting!!