En el post anterior decía que quería empezar con el proceso de poner las calcas, pero se ha truncado. Mi amigo Borja, me sugirió quitar las luces de los laterales que iluminan a los numerales por la noche en las carreras de 24 horas. Y aunque estaba la carrocería pintada, busque dichas luces en Spotmodel, las encontré y me puse con ello. En definitiva, solo eran dos luces que tenía que eliminar.
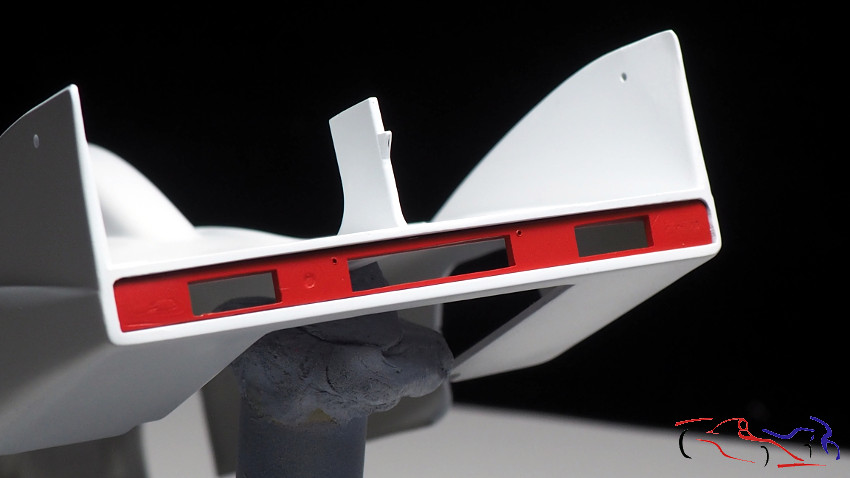
Para empezar este hilo, os muestro como quedan las dos partes que pinté de rojo. La trasera que voy a colocar para que se laque junto a la carrocería……
I wanted to start with the process of putting the decals in the previous post, but it has been truncated. My friend Borja suggested me to remove the side lights that illuminate the numbers at night in 24 hour races. And although the body was painted, I looked for different lights on Spotmodel, I found them and I got on it. In short, there were only two lights that I had to eliminate.
To start this thread, I show you the two parts that I painted in red. The back that I am going to glue so that it will be lacquered with the body ……
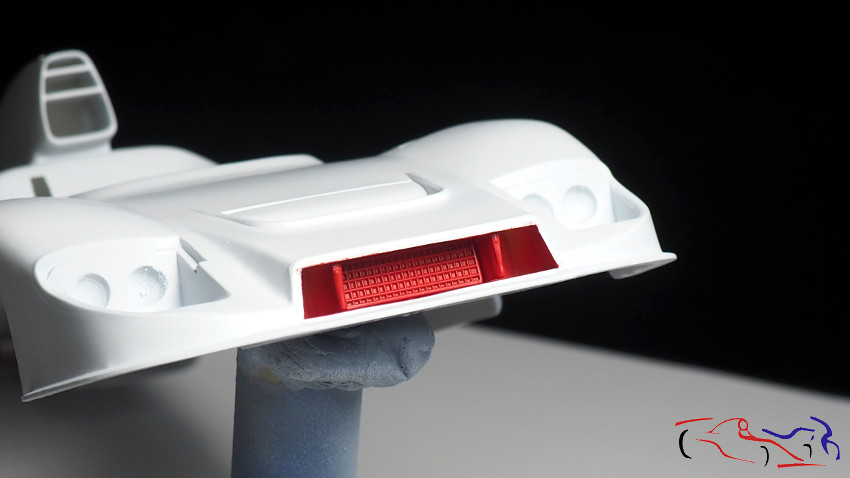
 Y la delantera, con el filtro colocado sin pegar. Me imagino que lo ensuciaré un poco:
And the front, with the filter placed without gluing. I guess I’ll mess it up a bit:
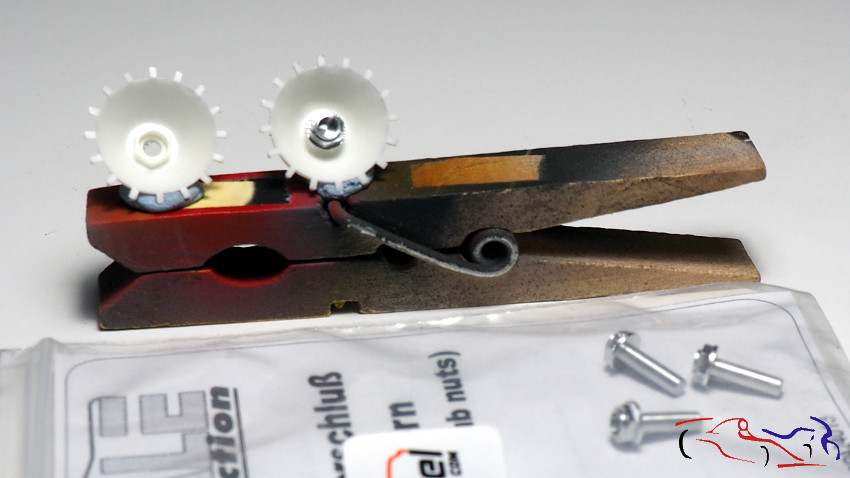
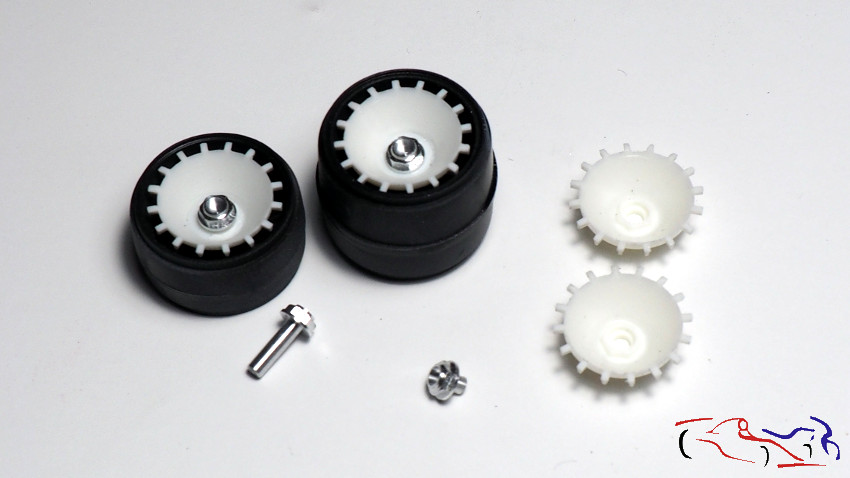
 Aprovecho esta actualización, para mostraros el proceso de los tapacubos de las llantas. Viendo que las tuercas eran complicadas de pintar bien, y que no me gustaba mucho la forma de fijar el tapacubos con unos pernos si forma, empiezo a buscar unas tuercas para sustituirlas. Y como estuve buscando las luces laterales en Spotmodel, busqué unas tuercas y las pedí!! En al siguiente foto os muestro una original y otra con la tuerca de Scale Production superpuesta. Eran válidas!!
I take advantage of this update to show you the process of the wheel hubcaps. Seeing that the nuts were complicated to paint well, and that I didn’t really like the way to fix the hubcap with bolts if it was, I started looking for some nuts to replace them. And since I was looking for the side lights on Spotmodel, I looked for some nuts and asked for them !! In the next photo I show you an original and another with the Scale Production nut superimposed. They were valid !!
 Entonces, con el minitaladro y una muela de base plana y con forma de cilindro, fui limando el centro del tapacubos hasta que la tuercaa original de plástico despareció. Aqui vemos dos tapacubos con sus tuercas riginales, y las dos llantas con los tapacubos superpuestos con las tuercas nuevas. Decir que las llantas delanteras necesitan la tuerca con ese vástago grande para fijarlas, pero he tenido que cortar el vástago en las traseras porque no hace falta para fijarlas.
So with the mini drill and a flat, cylinder-shaped grinding wheel, I was filing the center of the hubcap until the original plastic nut disappeared. Here we see two hubcaps with their rigid nuts, and the two wheels with the hubcaps superimposed with the new nuts. Say the front rims need the lug nut with that big stud to fix them, but I’ve had to cut the stud on the rear because they don’t need to be attached.
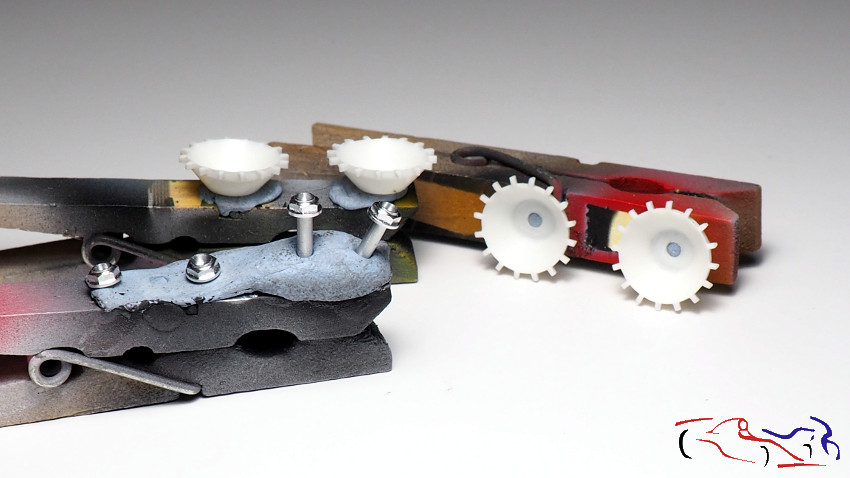
 Y aquí, todo listo para pintarlas:
And here, everything is ready to be painted:
 Pasamos a las luces laterales. Aquí os muestro las origianles del kit. Como bien decía Borja, si bien la forma no es errónea, la base es extremadamente ancha:
We turn to the side lights. Here I show you the originals of the kit. As Borja said well, although the shape was not wrong, the base was extremely wide:
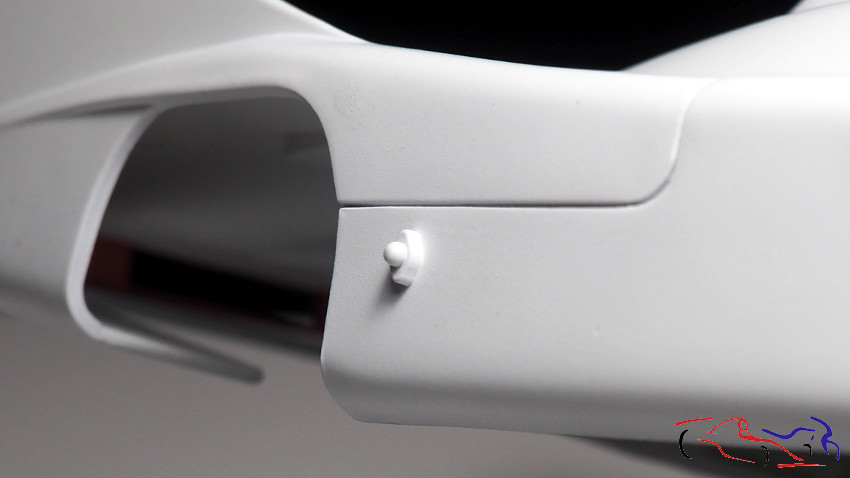 Por lo que procedo a cortar y lijar. Vemos a su lado, al bolsa con las luces que pondré, que se componen de un fotogranbado para la base y una bolita para la luz. Son de Profil24.
So I proceed to cut and sand them. We see next to it, the bag with the lights that I will put on, which consist of a photoengraving for the base and a ball for the light. They come from Profil24.
 Procedemos a enmascarar para imprimar y pintar. Aprovecho a pintar también la parte de atrás ya que vi un punto extra de pintura!!
We proceed to mask for priming and painting. I take advantage to also paint the back as I saw an extra point of paint !!
 Y aquí, todo hecho: imprimado con Gravity y pintado con Zero brillante (que no es brillante!):
And here, all done: primed with Gravity and painted with Brilliant Zero (which isn’t shiny!):
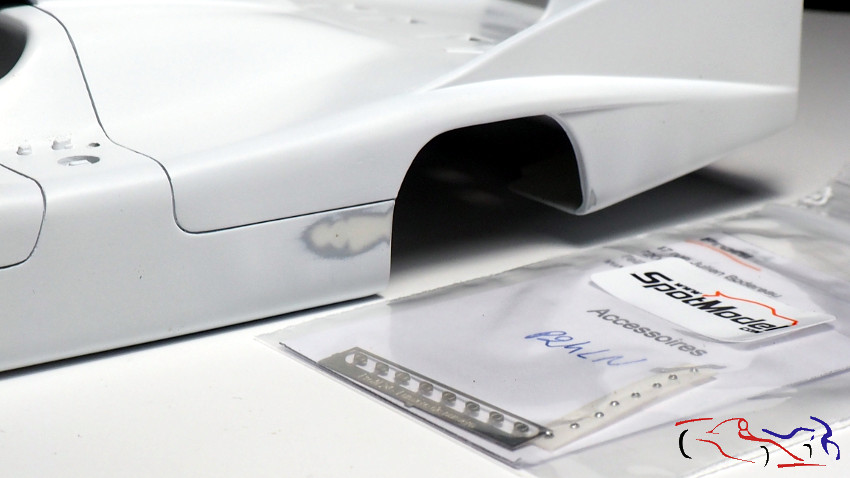
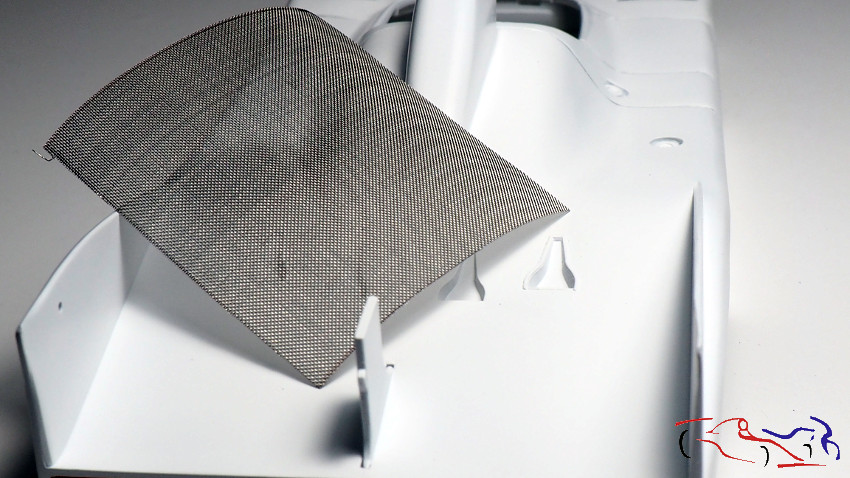
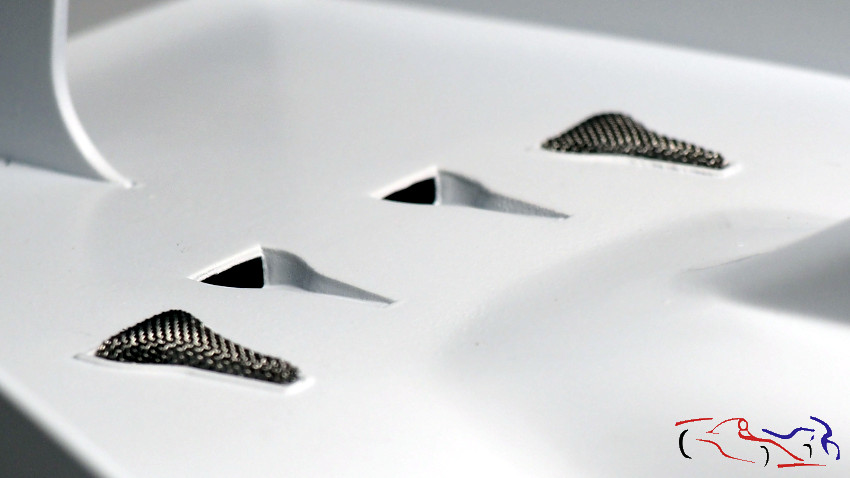
 Y como Spotmodel me iba a mandar lo anterior (y alguan cosilla más….) muy rápido, aproveché y les pedí rejilla para cubrir las entradas NACA de detrás, (de las cuatro, las de los extremos), que permiten el paso de aire a los dos turbos. Aquí veis la rejilla y la entrada de aire a cubrir:
And since Spotmodel was going to send me the above parts (and some other things …) very quickly, I took advantage and asked them for a grid to cover the NACA entrances behind, (of the four, those at the ends), which allow the passage air to the two turbos. Here you see the grille and the air intake to cover:
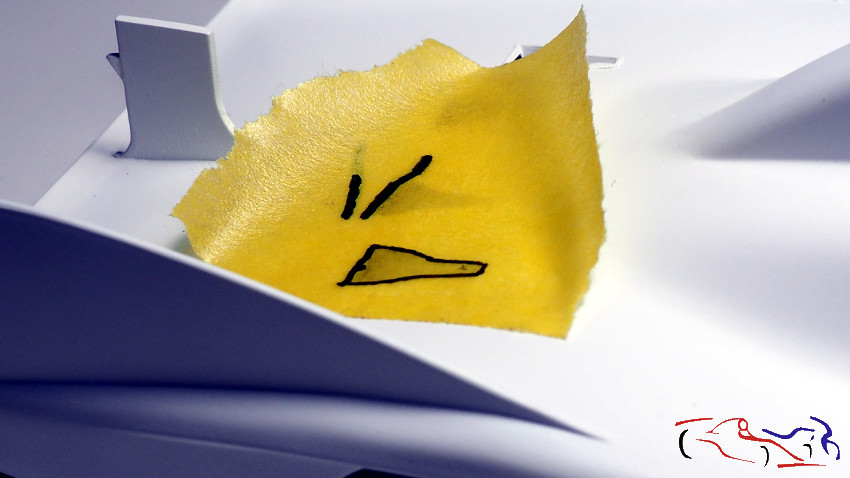
 Pensé en hacer un molde y contramolde para hacer la rejilla por presión, pero al estar la carrocería pintada, no quería dañarla. Entonces usé cinta de enmascarar y dibujé el contormo de la toma NACA:
I thought about making a mold to make the grill by pressure, but since the body was painted, I did not want to damage it. So I used masking tape and drew the outline of the NACA shot:
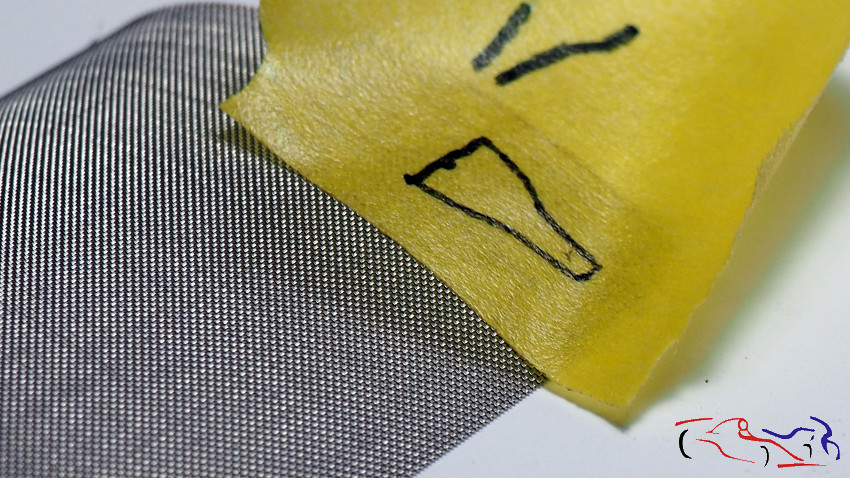
 Eso lo pasamos a la rejilla….
We pass it to the grid …
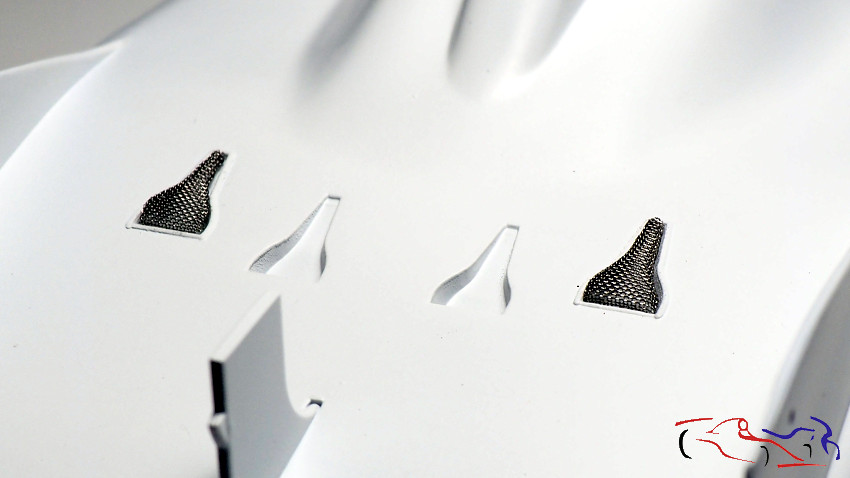
 Y recortamos con una tijeras, dejando un borde, para doblarlo. Para ello, usé unos alicates de punta plana y fui dando forma, con el método de ir probando cada vez que modificaba la rejilla. Ésta, se dejaba doblar e incluso la di forma presionando contra una pieza de hierro. Decir que para las esquinas, recorté la rejilla en ángulo para que hubiera espacio al doblar los laterales. Aquí vemos una puesta y otra por poner:
And we cut it with a scissors, leaving an edge, to fold it. To do this, I used flat-nose pliers and shaped, with the method of testing every time I modified the grid. This one was allowed to bend and it was even shaped by pressing against an iron piece. Say that for the corners, I cut the grid at an angle so there would be space when folding the sides. Here we see one setting and another to be put:
 Y aquí, las dos puestas, siendo el resultado óptimo!!
And here, the two sets, being the result great!!
 Ahora si, espero que lo próximo sean las calcas!!
Gracias por ver y comentar!!
Now yes, I hope the next is the decals !!
Thanks for viewing and commenting!!


