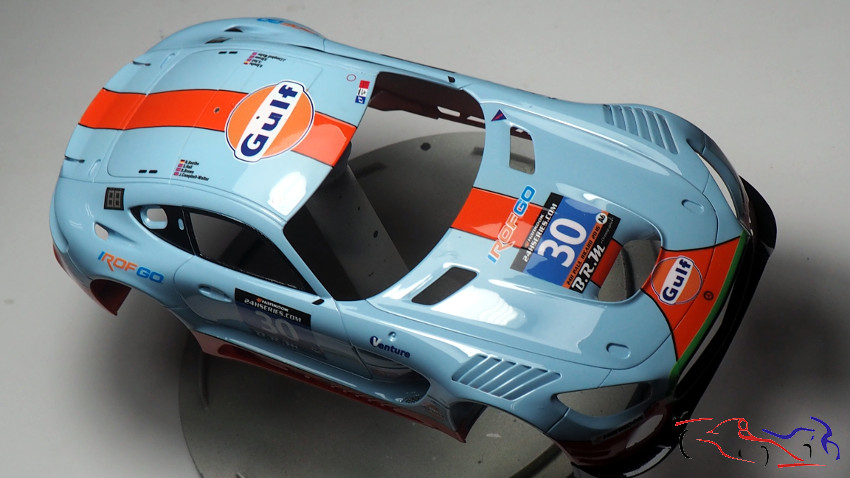
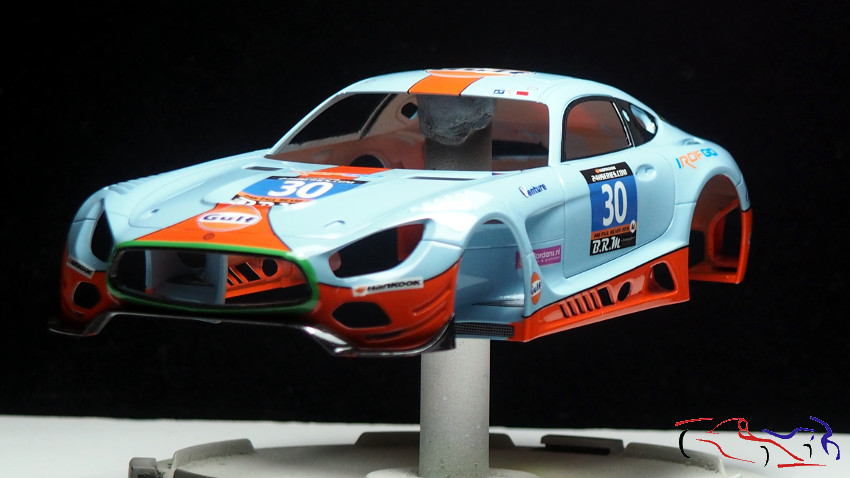
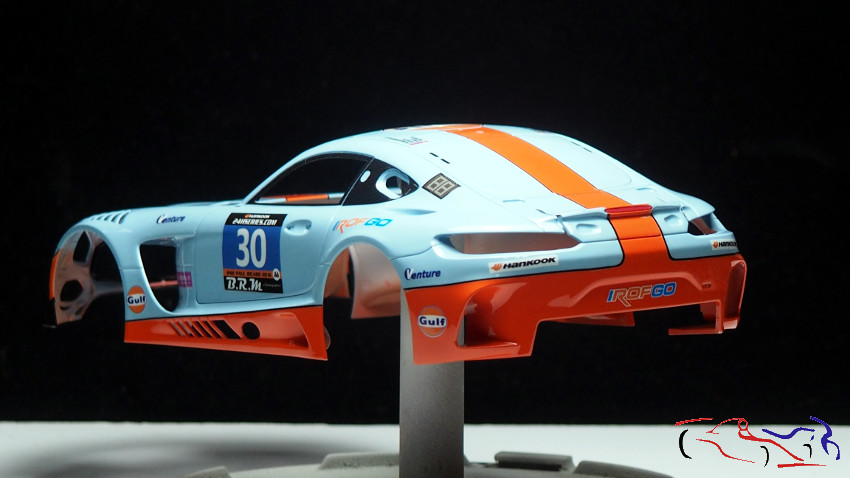
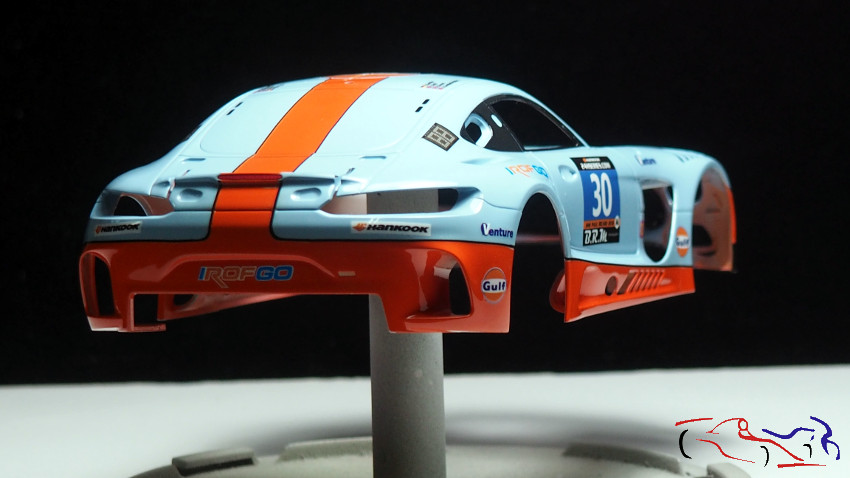
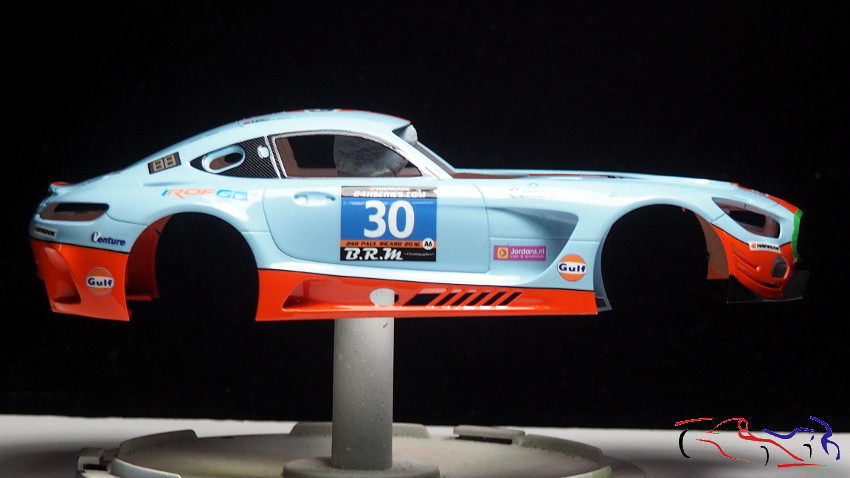
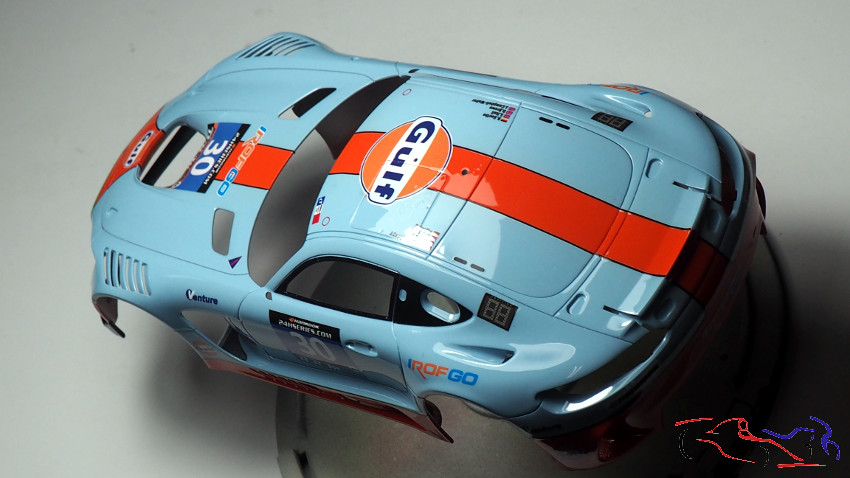
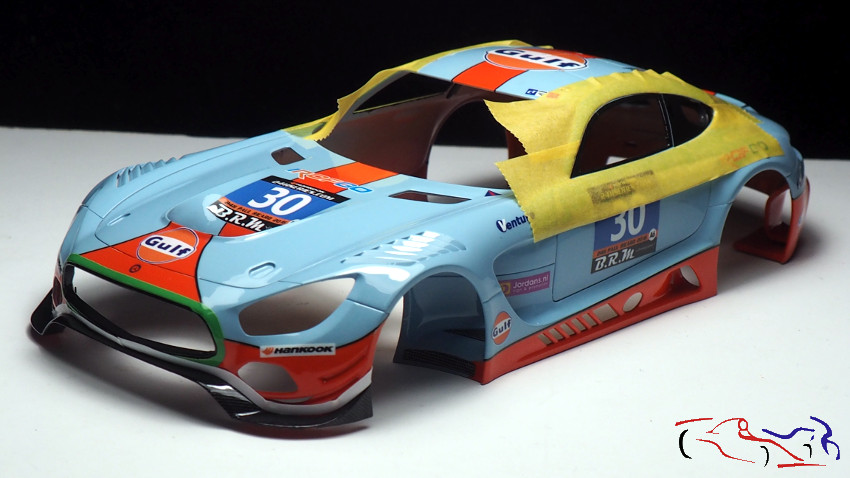
Seguimos con el Mercedes Gulf mostrando como está actualmente, con la laca puesta:
We continue with the Mercedes Gulf showing how it is currently, with the lacquer on:
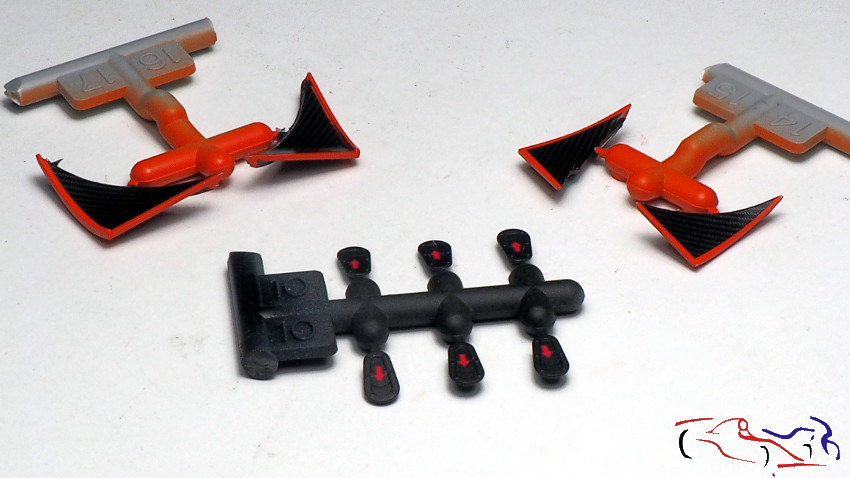
Pero vamos por partes. Os muestro partes de la carrocería que están con las calcas puestas. Las derivas, iban en origen cubiertas con la calca de fibra de carbono, pero en esta decoración, llevan una línea naranja exterior. Para ello, y una vez pintadas las derivas de naranja, la calca de fibra se ha puesto dejando esa línea en el contorno, y cortando el exceso por la parte opuesta. Hubo que usar mucho liquido micro y mucho secador para que se acoplaran bien. También se ven las piezas que abren las pates movibles del coche, con su claca puesta. Estan piezas se barnizaron en mate con Alclad.
But let’s go part by part. I show you parts of the body that are with the decals on. The drifts were originally covered with carbon fiber decal, but in this decoration, they have an orange line outside. To do this, and once the orange drifts have been painted, the fiber decal has been laid leaving that line in the contour, and cutting off the excess on the opposite side. It was necessary to use a lot of micro liquid and a lot of drier so that they fit well. You can also see the pieces that open the movable pates of the car, with its clap on. These pieces were varnished in matt with Alclad.
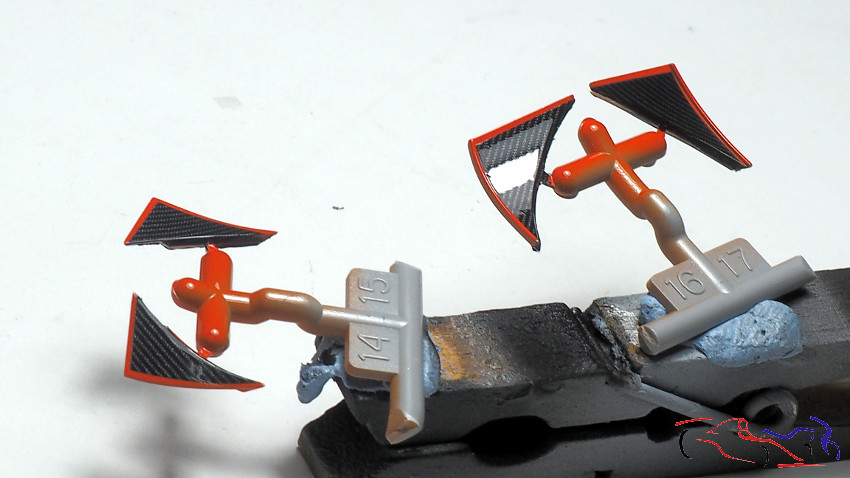
Y al mismo tiempo que lacaba la carrocería, le di brillo a estas derivas:
And at the same time that the body lacquer, I gave shine to these drifts:
Para el alerón trasero, lo barnicé en mate con el spray de Tamiya. Muy bueno pero me hizo unas burbujas en el plano superior, que tuve que lijar.
For the rear spoiler, I hammered it in mate with the Tamiya spray. Very good but I made some bubbles in the upper plane, which I had to sand.
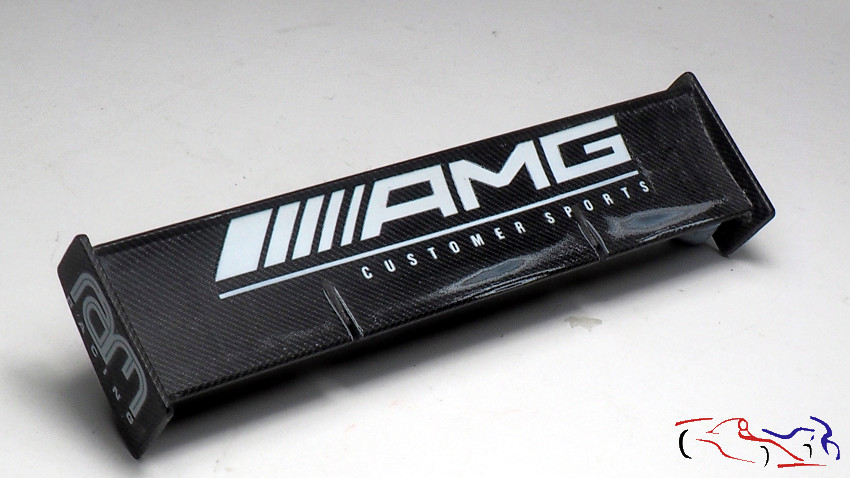
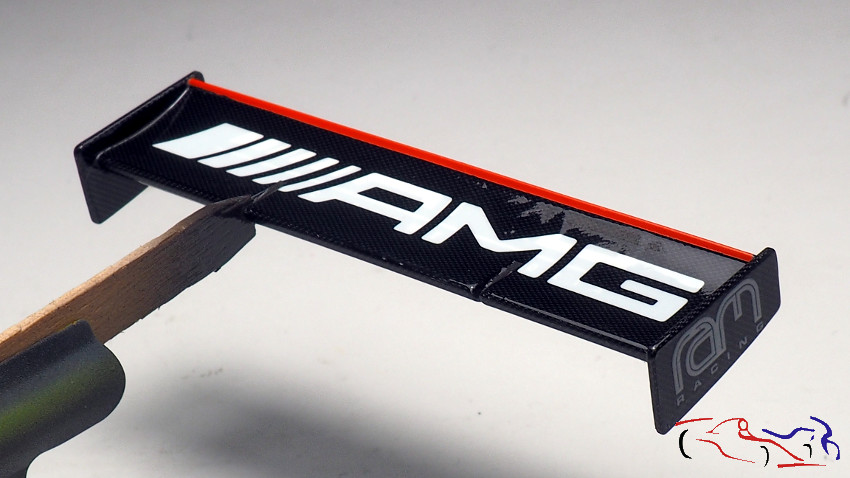
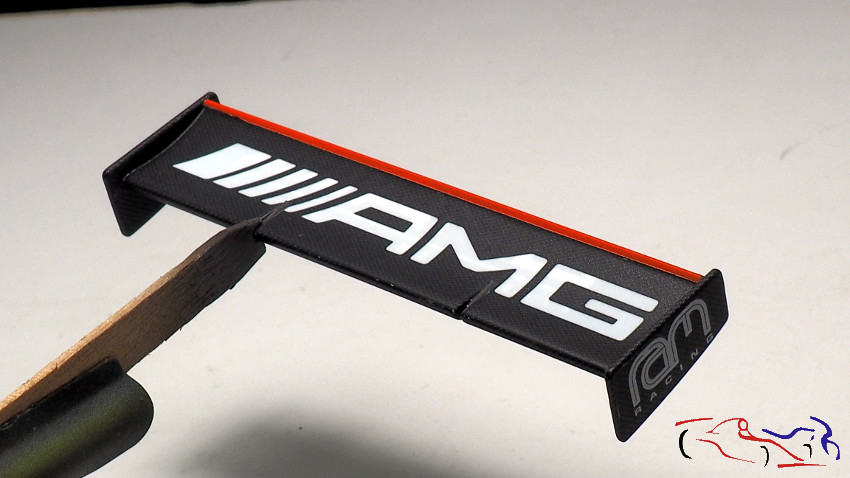
Pero como se llevó parte de la fibra, decidí lijarlo todo, y poner encima la calca de Studio27 sobre la que habái puesto de Slotfabric. Y ahí cometí un fallo: el blanco se la calca inicial se transparenta un poco sobre la segunad. Pero lo voy a dejar así.
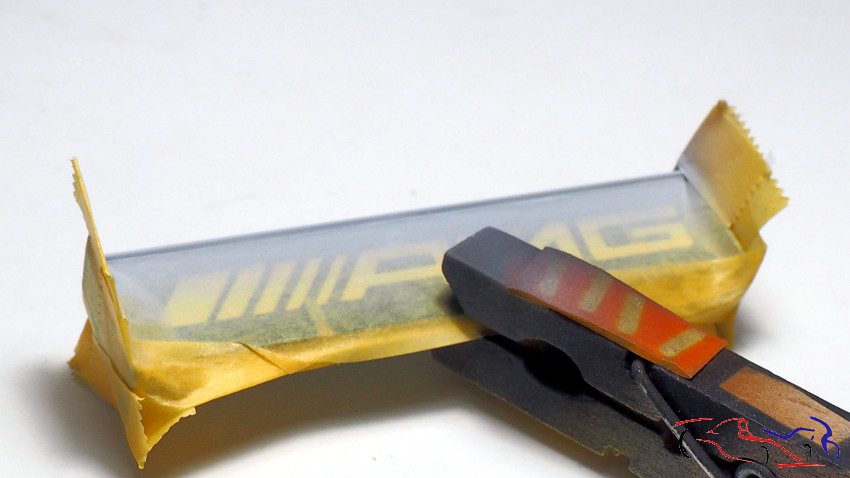
Pero el alerón, si que lleva una franja naranja en el borde trasero, para lo cual uso cinta de enmascarar Tamiya:
But as it took part of the fiber, I decided to sand everything, and put on the decal of Studio27 on which I had put Slotfabric. And there I made a mistake: the white initial decal is transparent a little on the second. But I’m going to leave it like that.
But the spoiler, if it has an orange stripe on the back edge, for which use masking tape Tamiya:
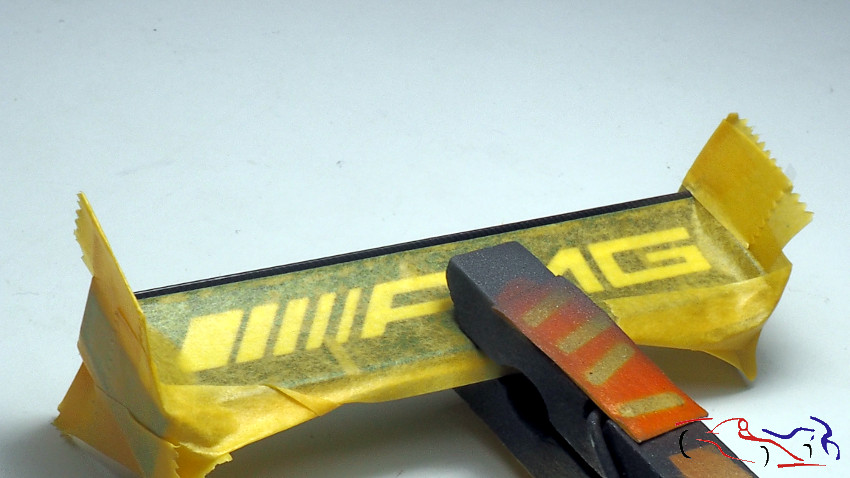
E imprimo con Gravity:
And I primed with Gravity:
 Para después, pintar con naraja Gulf de Gravity:
Later, a two coats of Gravity Gulf Orange:
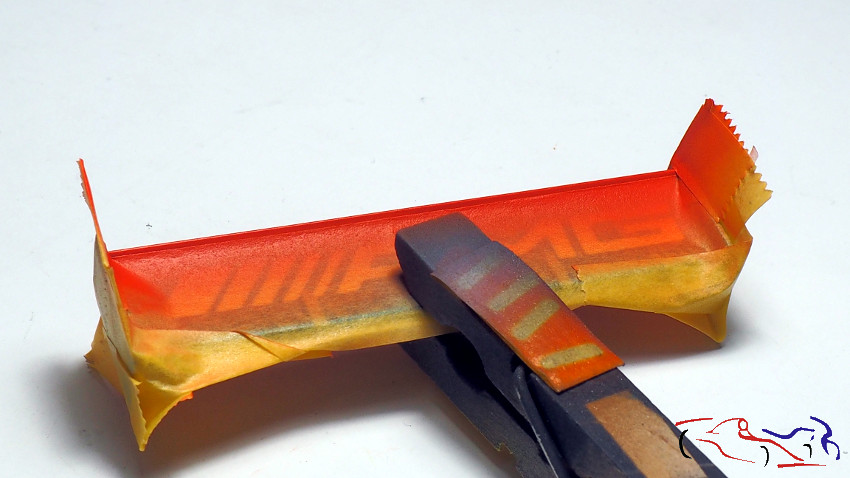 Siendo este el resultado:
Being this the result:
 Y como toda la fibra la estoy dejando acabado mate, lo barnizo con Alclad, con pasadas muy ligeras con poca abertura del aerografo. Muy buen resultado!
And as all the fiber I am leaving is it matte finish, I varnish it with Alclad, with very light passes with little airbrush opening. Very good result!
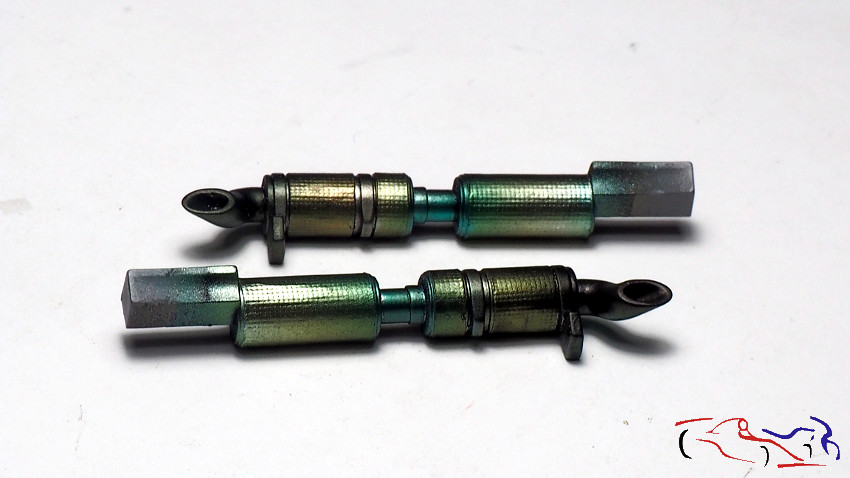
 Aprovecho para barnizar con mate otras partes, como las derivas traseras del chasis..
I take advantage of varnishing other parts with matte, such as the rear drifts of the chassis..
 y los laterales del chasis:
and the sides of the chassis:
 En cuanto a los escapes, una última mano de azul de Alclad y un Smoke muy diluido aplicado con pincel, nos dan este resultado:
As for the exhaust, one last hand of Alclad blue and a very diluted Smoke applied with a brush, give us this result:
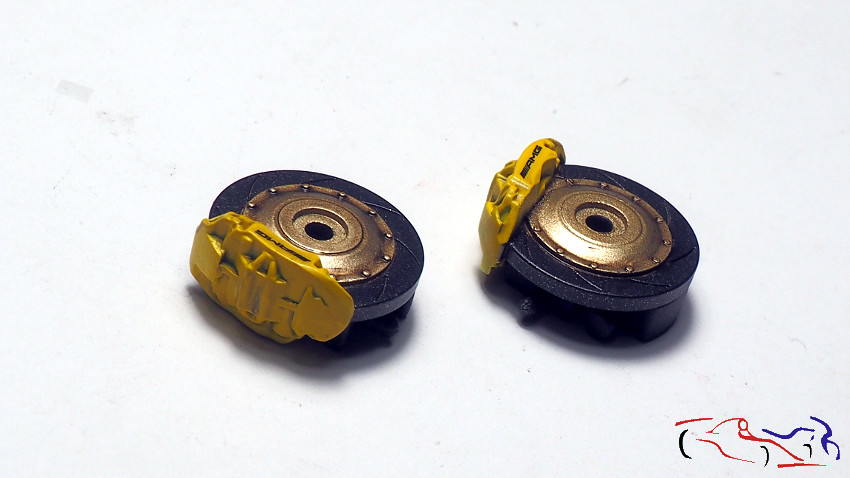
 Tenemos también lso disco de freno con Smoke diluido:
We also have the brake disc with Smoke diluted:
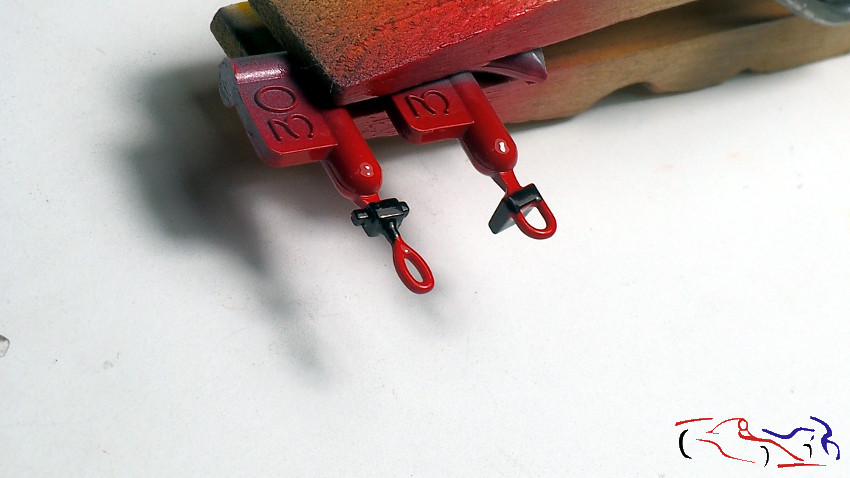
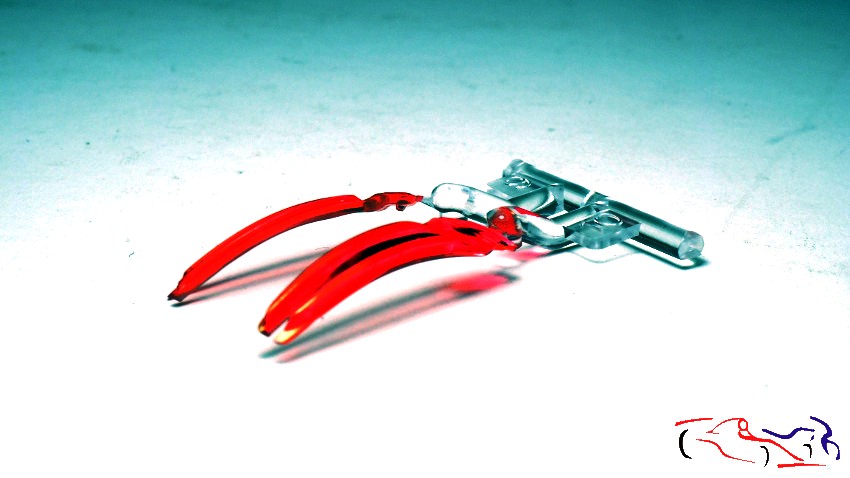
 Aquí os presento los tiradores delantero y trasero, pintados con rojo y lacados. El negro se pintó posteriormente:
Here I present the front and rear handles, painted with red and lacquered. The black was painted later:
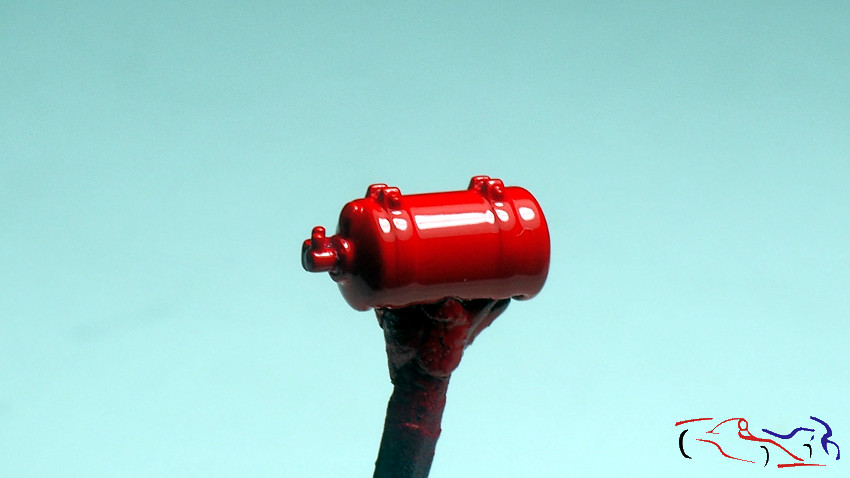
 Pasamos al extintor: pintado de rojo y lacado:
We pass to the extinguisher: red painted and lacquered:
 Enmascaramos para pintar las fijaciones:
Masked to paint the fixings:
 Y pintamos con Molotow en el aerografo:
Y pintamos con Molotow en el aerografo:
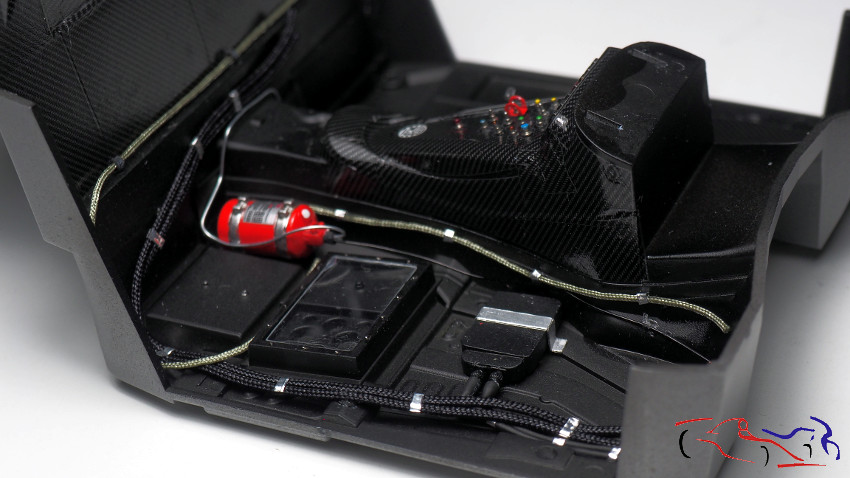
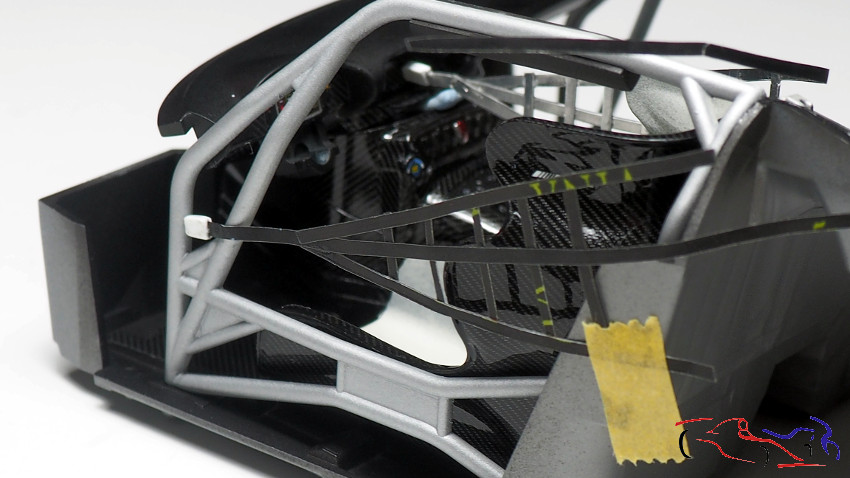
 El resultado lo podéis ver ya en si sitio dentro del cockpit, pero antes le di un lavado de Smoke para dar profundidad a los tonos. También vemos muchos cables que explicaré más adelante:
You can see the result t in the cockpit, but before I gave it a wash of Smoke to give depth to the tones. We also see many cables that I will explain later:
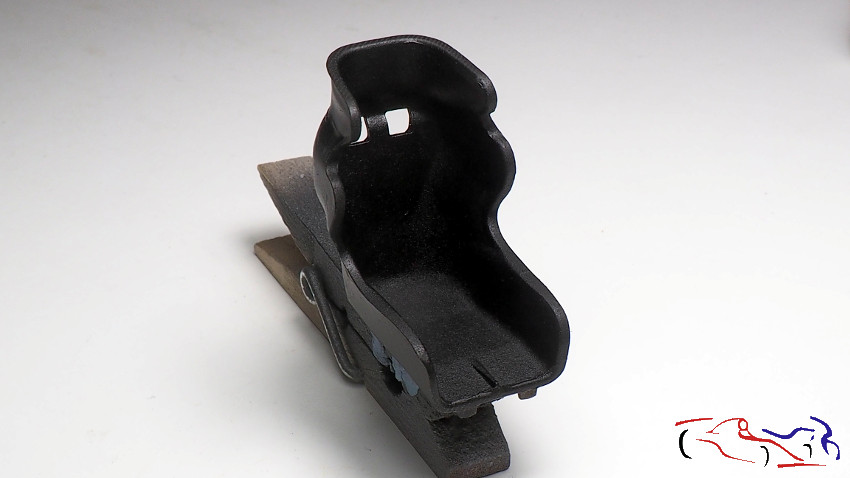
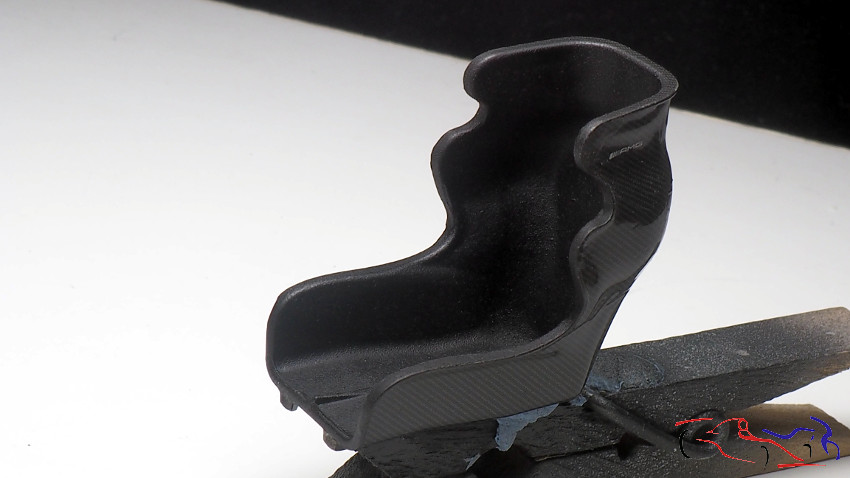
 Al asiento, le apliqué la pintura negro granulosa de Zero en el interior, dando esa sensación rugsa que tienen estos materiales:
To the seat, I applied the black granular paint of Zero inside it, giving that rugged feeling that these materials have:
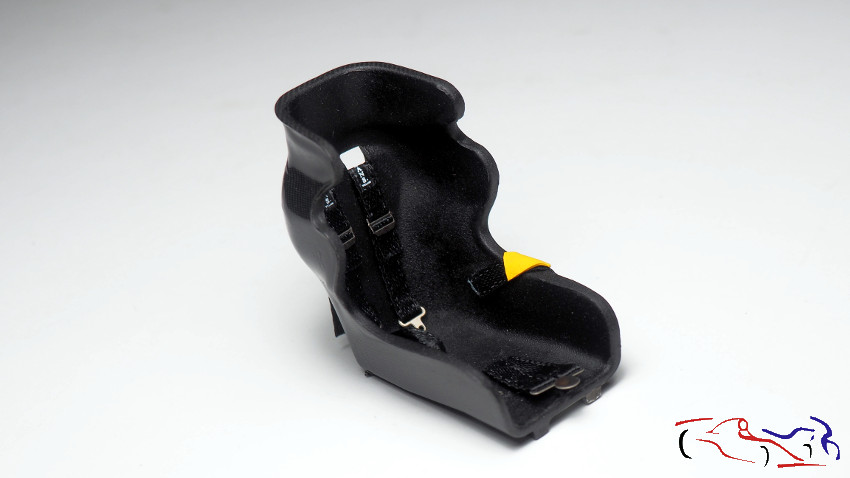
 Después, le puse los cinturones de T2M (marca desaparecida) con el fotograbado de Decalcas:
Then, I put the T2M belts (missing brand) with the gravure of Decalcas:
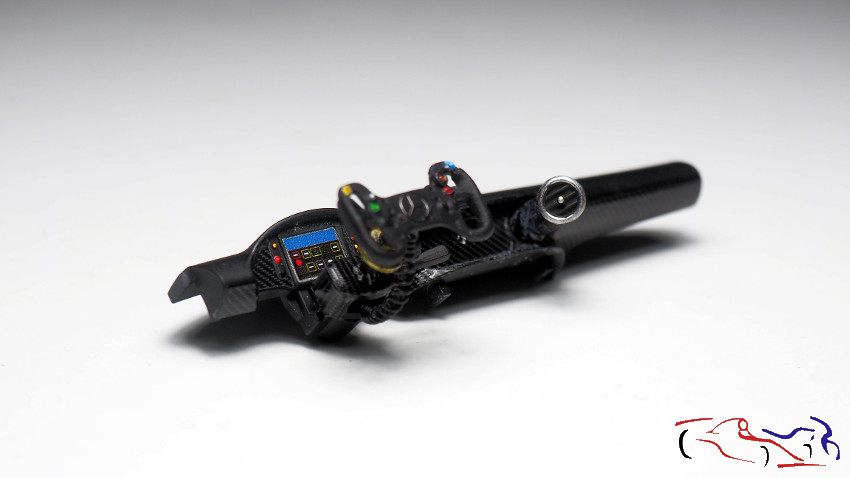
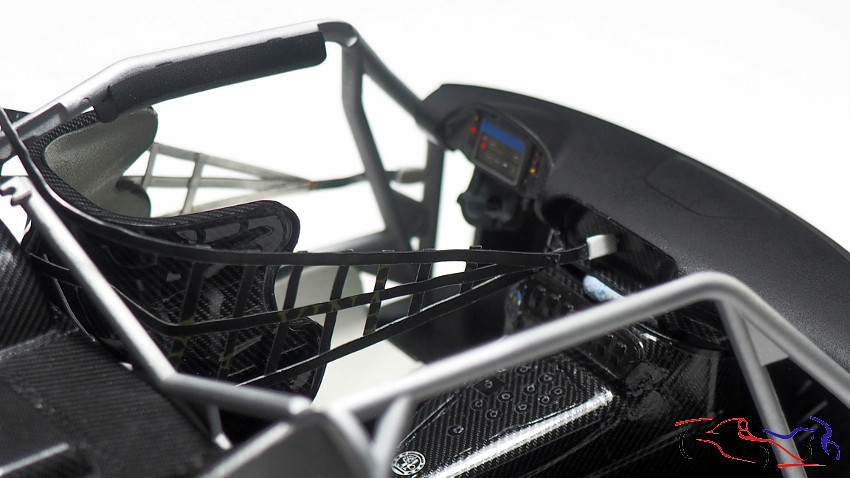
 Aquí tenemos el salpicadero terminado a falat de oner las mallas de seguridad:
Here we have the finished dashboard in the absence of putting the security meshes:
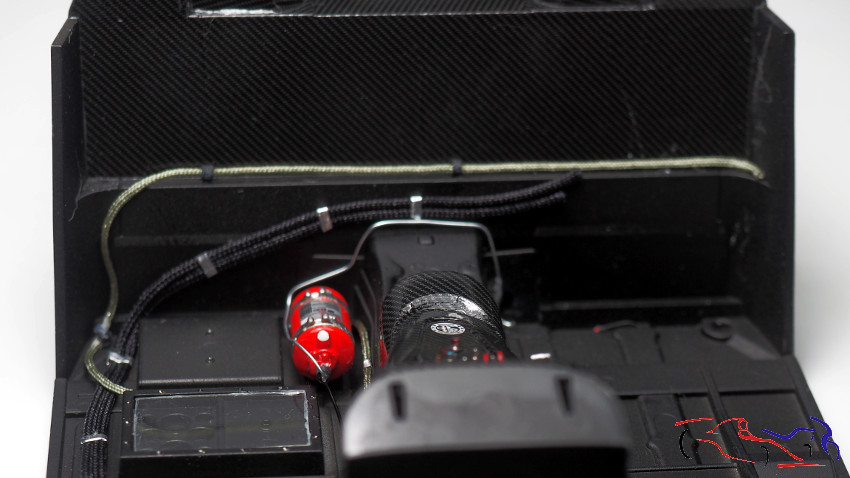
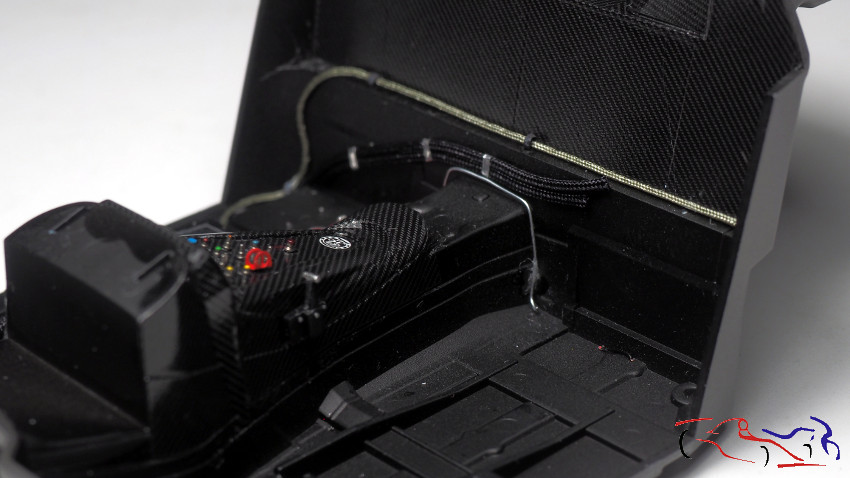
 Vamos con el cockpit. Una vez puesta la fibra, empiezo a poner todos cables, fijándolos con cinta cromo autoadhesiva, y esta sobre su posición con ciano. A la izquierda de la foto, se ve una placa de evergreen trasparente fijada a la base con cola blanca, simulando un cristal que recubre esa pieza en verdad
Let’s go with the cockpit. Once put the fiber, I start to put all cables, fixing them with self-adhesive chrome tape, and is on its position with cyano. To the left of the photo, you see a plate of transparent evergreen fixed to the base with white glue, simulating a crystal that covers that piece in truth:
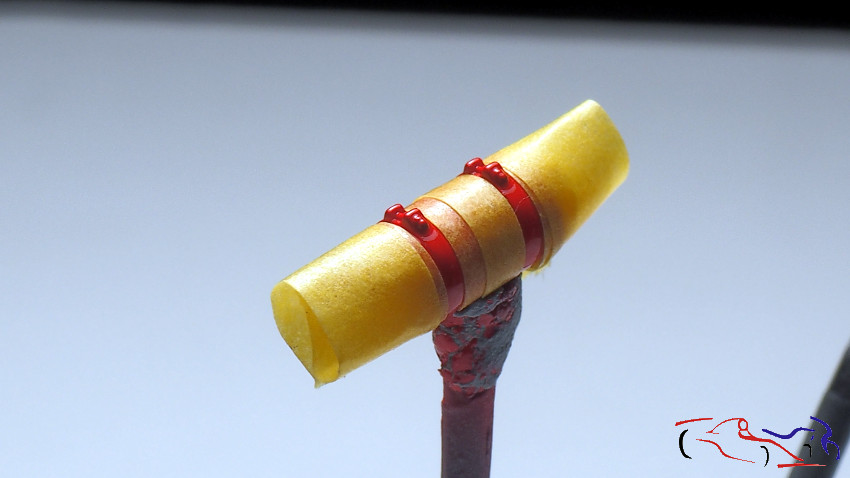
En la siguiente foto, vemos los botones colocados pintados de colores. La pieza roja se hizo con lata de refresco pintada de rojo con aerógrafo, una vez taladrada, cortada y doblada. Dentro, lleva un pulsador de metal:
In the next photo, we see the buttons placed painted in colors. The red piece was made with soda can painted red with airbrush, once drilled, cut and folded. Inside, it carries a metal push button:
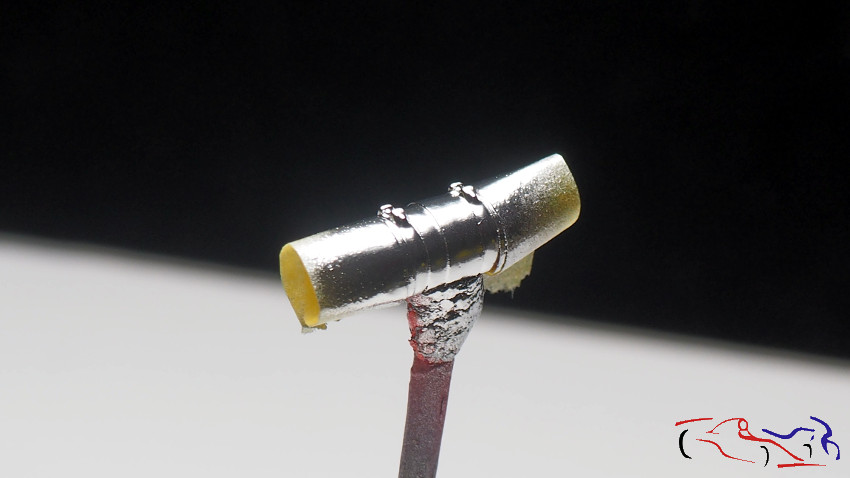
 Aquí vemos otra vista de la pieza roja:
Here we can see another view of the red piece:
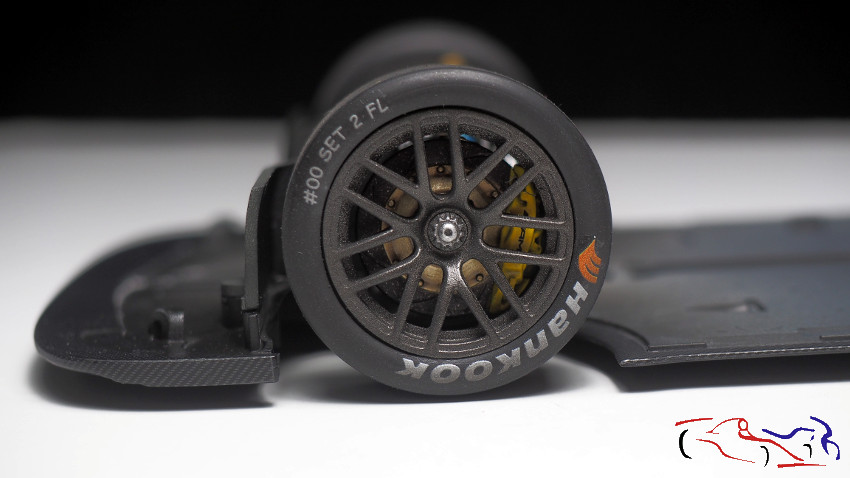
 Y vamos colocando piezas en el chasis, siendo en esta caso los ejes y ruedas traseros:
And we are placing parts in the chassis, being in this case the axles and rear wheels:
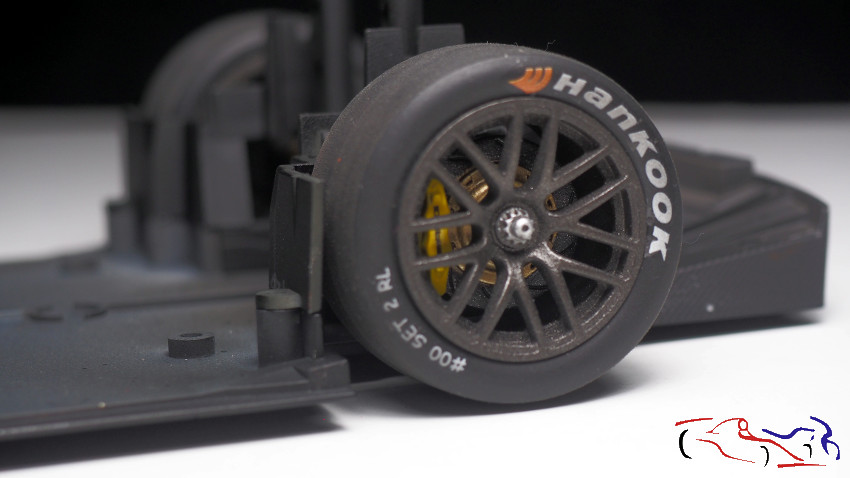
Las ruedas y ejes delanteros:
and the front wheels and axles:
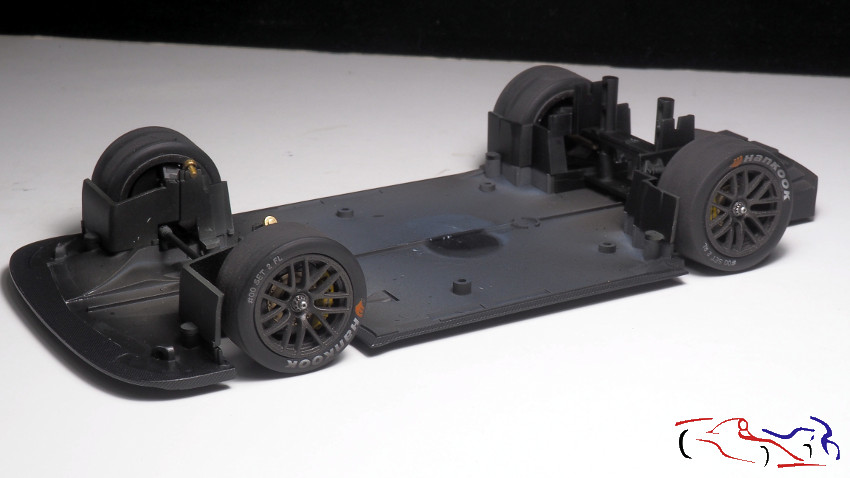
 Y el conjunto completo del chasis
And all together:
 Y pasamos a la carrocería, a la que se le aplicó dos capas de laca Gravity, una ligera y otra húmeda a los 10 minutos:
And we went to the body, which was applied two coats of Gravity lacquer, one light and one wet at 10 minutes:
 Seguimos ahora con las mallas de seguridad del piloto, que tiene a ambos lados del asiento. Las hice con los protectores de botellas de vino, cortados con el cuter y pegamos con ciano. Para las fijaciones, use un trozo de Evergreen cortado a medida y le incluí un alambre para la posterior fijación en el arco de seguridad o en el salpicadero:
We continue now with the security meshes of the pilot, which has in both sides of the seat. I made them with the protectors of wine bottles, cut with the cuter and we paste with cyano. For the fixings, use a piece of Evergreen cut to size and I included a wire for the subsequent fixing in the safety bow or on the dashboard:
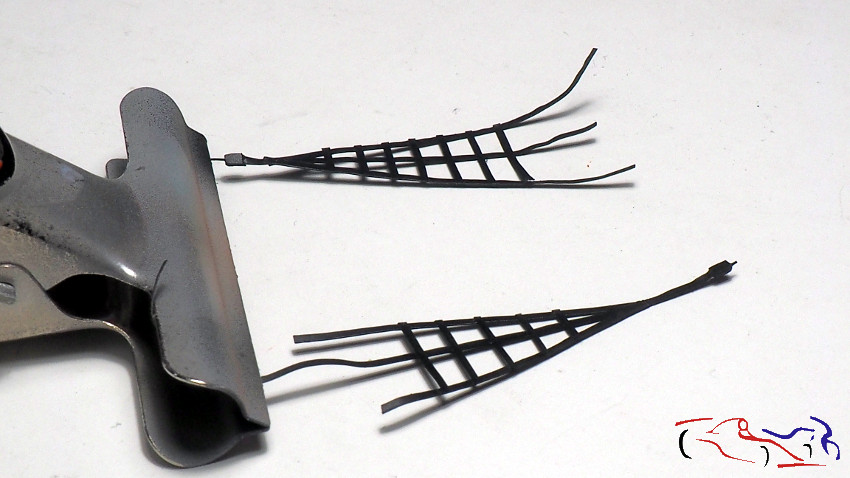 Aquí vemos el derecho que irá fijado al salpicadero:
Here we see the right that will be fixed to the dashboard:
 Y el izquierdo, fijado al arco de seguridad. Ambos se fijarán por detrás al arco de seguridad:
And the left one, fixed to the security arch. Both will be fixed behind the safety arch:
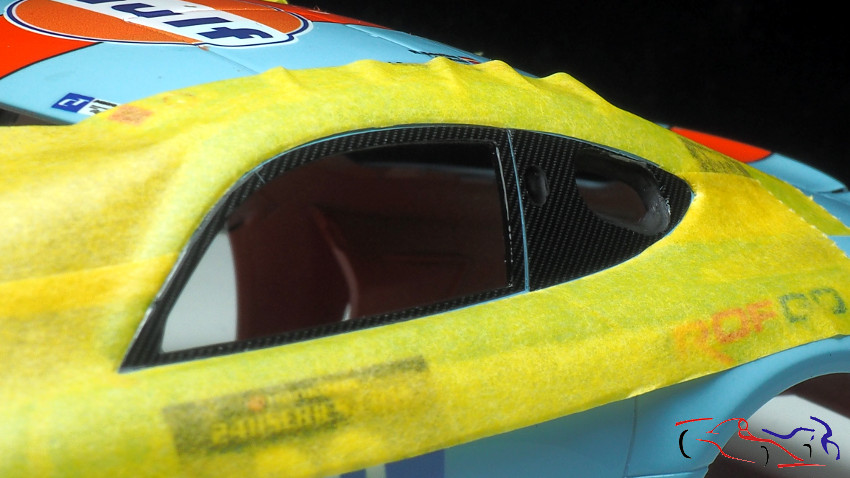
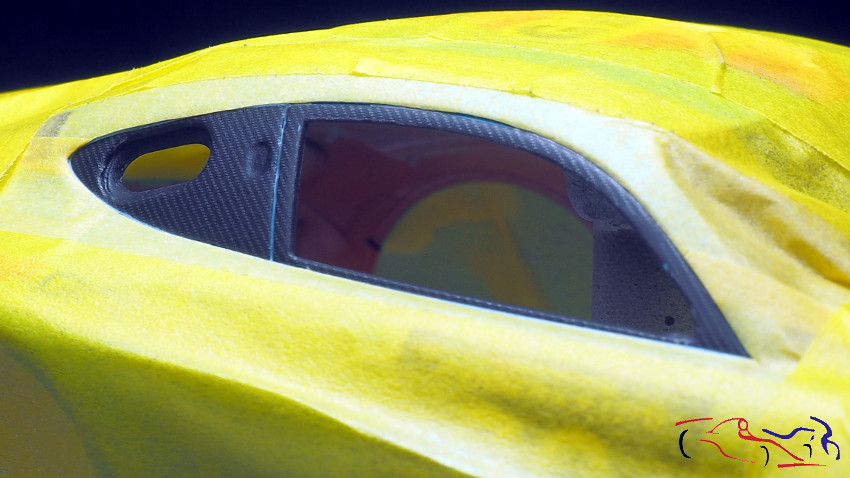
 Una vez lacado, hay que enmascarar para aplicar barniz mate a la fibra de carbono. Vemos la parte de las ventanas con la máscara cortada:
Once lacquered, it is necessary to mask to apply matt varnish to the carbon fiber. We see the part of the windows with the mask cut:
 Ampliando la foto, se ve el recorte realizado:
Enlarging the photo, you can see the cut made:
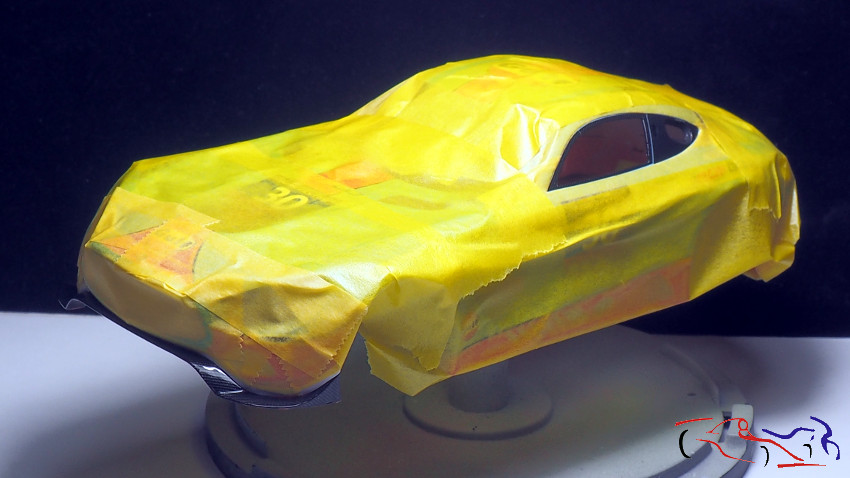
 Y cubrimos toda la carrocería para que no se meta ninguna partícula mate:
And we cover the whole body so that no matte particles get:
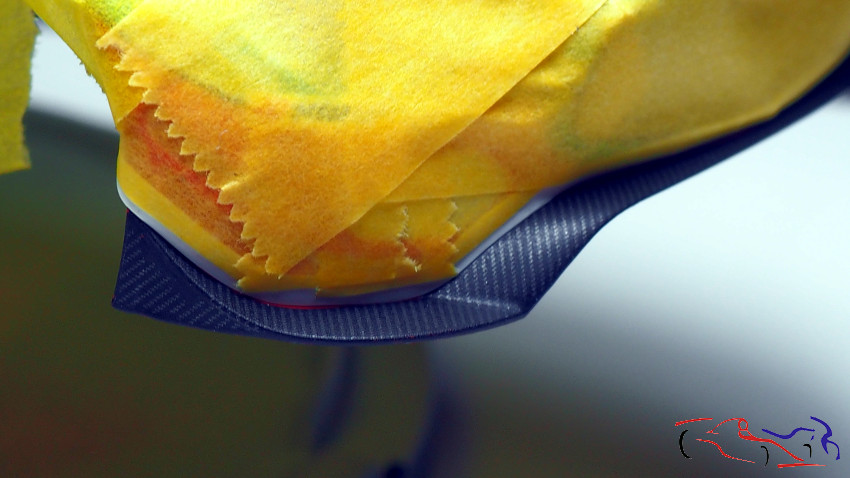
 Un detalle del faldón delantero, también preparado para el barniz mate, de Alclad:
A detail of the front skirt, also prepared for the matt varnish, by Alclad:
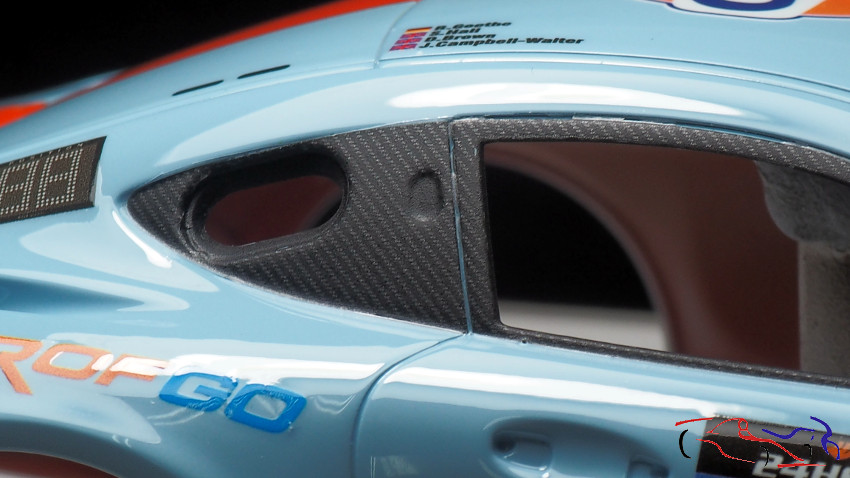
 Y este es el resultado con la máscara:
And this is the result with the mask:
 Y sin la máscara. Falta contornear los paneles de la ventana con negro mate:
And without the mask. Missing contour window panels with matt black:
 Y para terminar, las luces traseras coloreadas con el rotulador rojo Edding 3000:
And to finish, the colored taillights with the red marker Edding 3000:
 Ahora queda montar todas las piezas en la carrocería para terminar la maqueta.
Gracias por ver y comentar!!
Now it remains to mount all the parts in the body to finish the model.
Thanks for viewing and commenting!!


