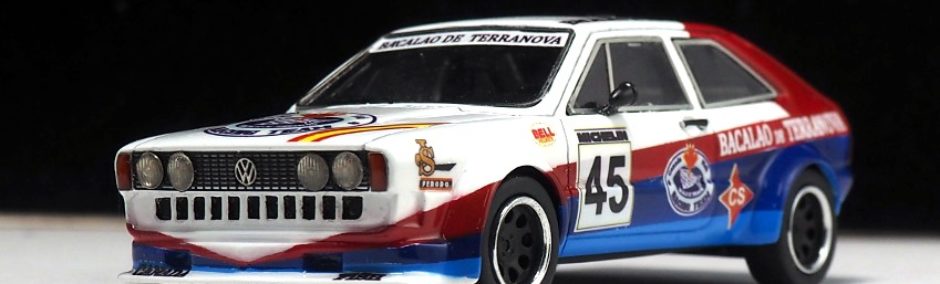
Hola a todos. Vamos con la valoración del kit. Tameo es una gran marca con muchos años a sus espaldas, proporcionando una calidad muy buena en sus productos. La carrocería y el despiece es fantástico si bien, como en todos los kits, hay que hacerles su trabajo de base: rebabas y limpieza del metal, verificación de todos los agujeros y premontaje de todo lo que se pueda. Con estos pasos, el kit resultará fácil de montar, con una calidad excelente. Hay que tener cuidado, por1que todos los extras que se le añadan, tienen su complejidad por el tamaño: debemos medir muy bien los cables y tubos que queramos incluir, y el espacio que nos deja el kit para ello. La imprimación de Gravity Spain que funciona muy bien con los metales, y la pintura y laca de Number5, y las piezas pintadas con LP de Tamiya, añadieron la terminación correcta a un buen kit.
Hello everyone. Let’s get to the kit review. Tameo is a great brand with many years of experience, providing very good quality in its products. The body and parts breakdown are fantastic, although, as with all kits, some basic preparation is required: removing flash and cleaning the metal, checking all the holes, and pre-assembling everything possible. With these steps, the kit will be easy to assemble and of excellent quality. Care must be taken, because any added extras are complex due to their size: you must carefully measure the cables and tubes you want to include, and the space the kit provides for them. The Gravity Spain primer, which works very well with metals, and the Number 5 paint and lacquer, along with the parts painted with Tamiya LP, added the right finish to a good kit.
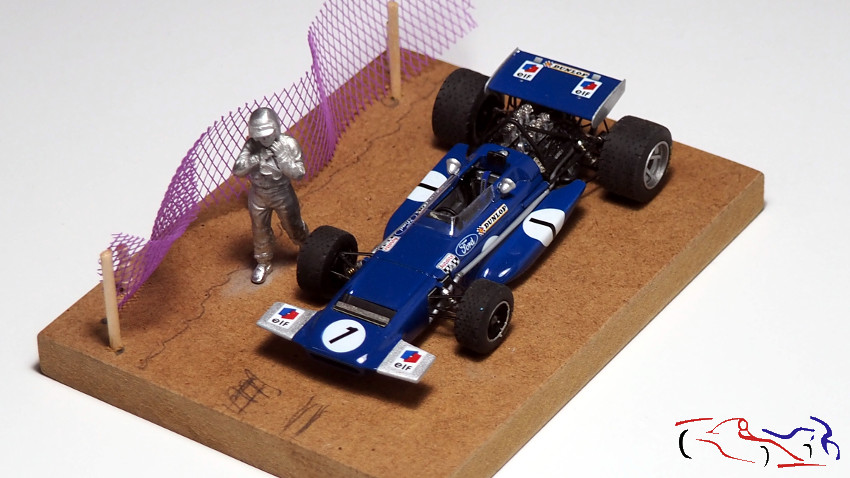
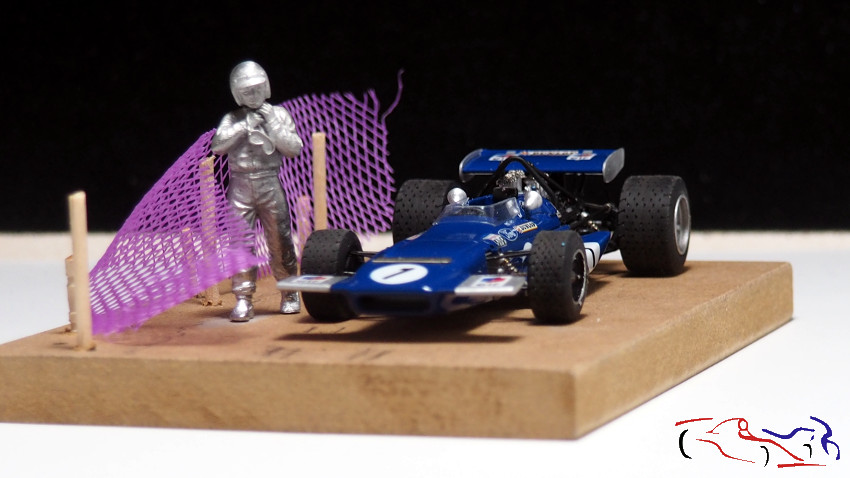
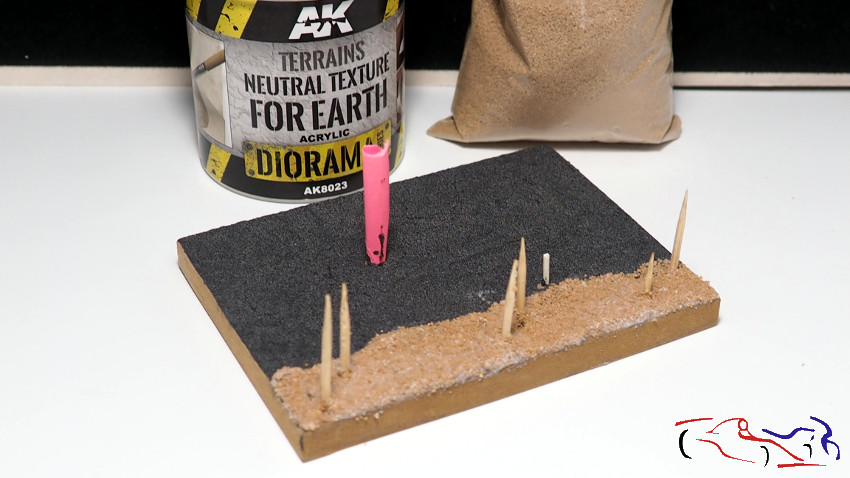
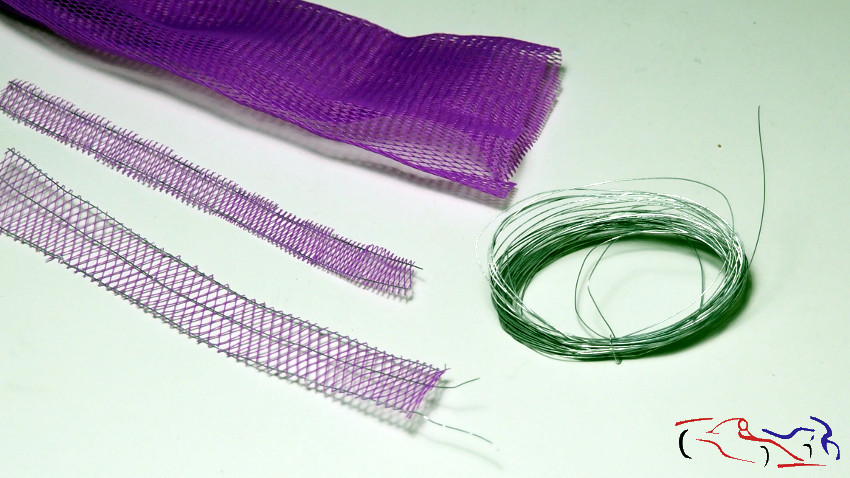
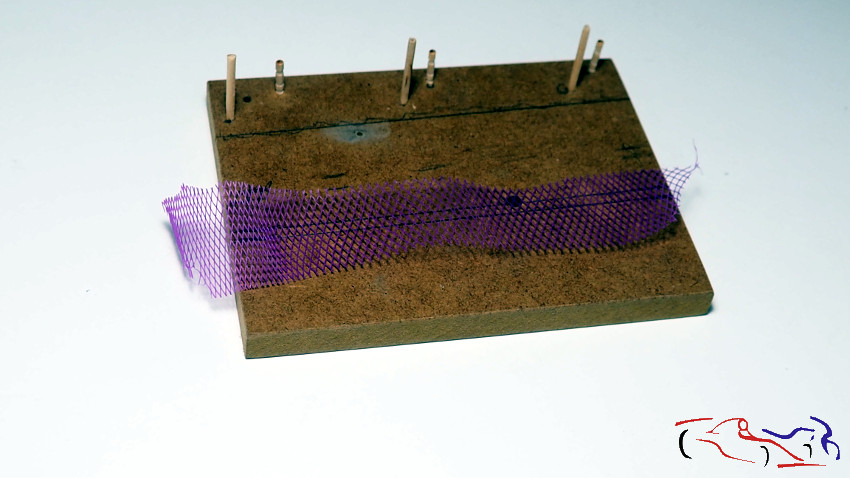
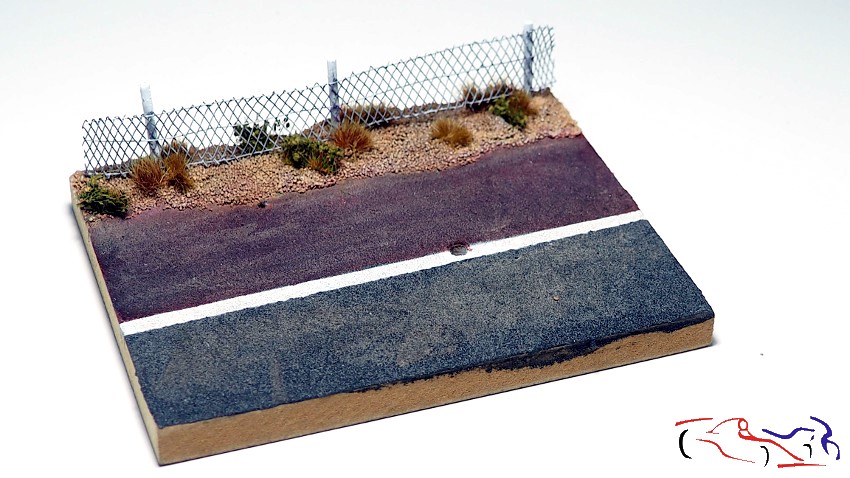
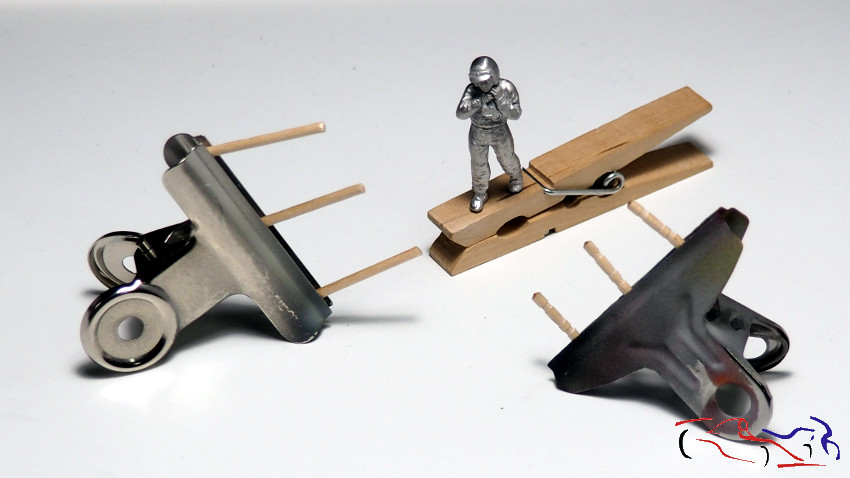
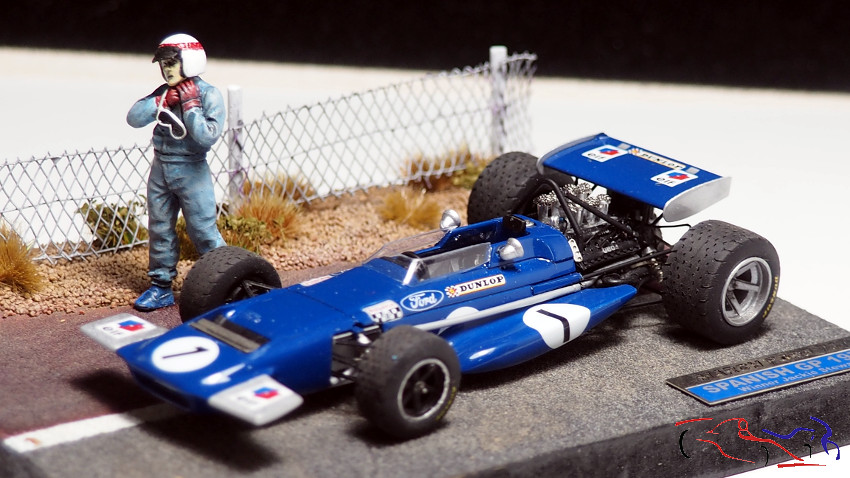
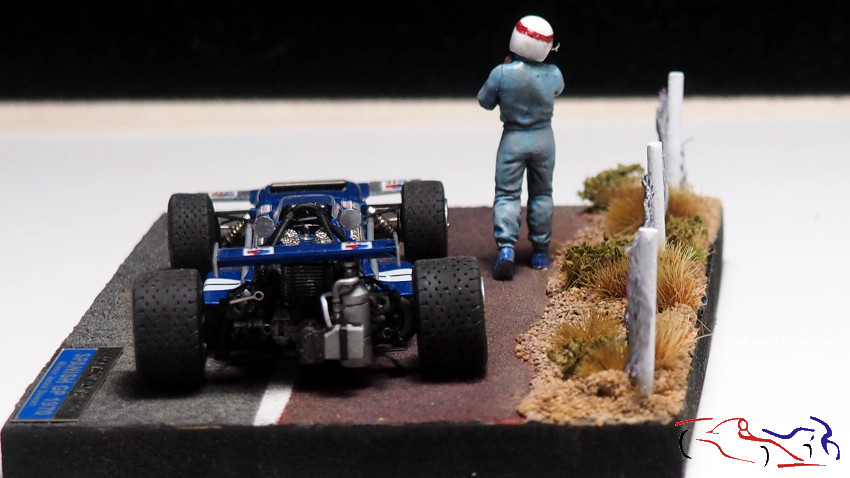
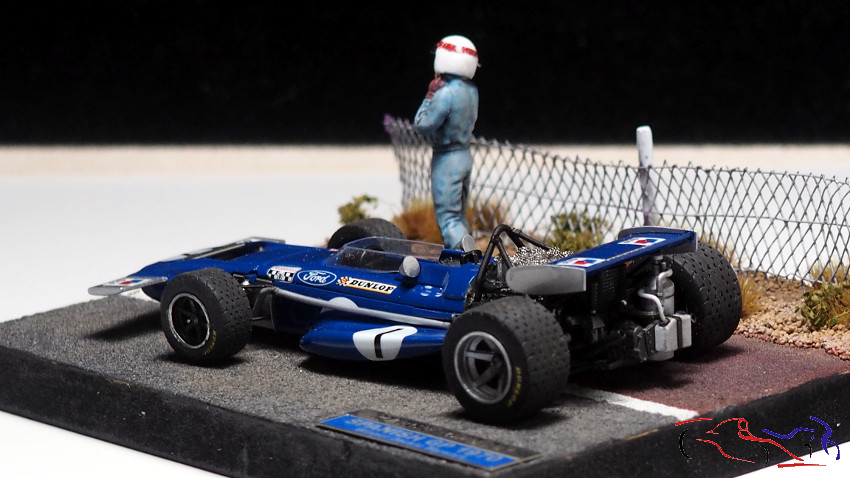
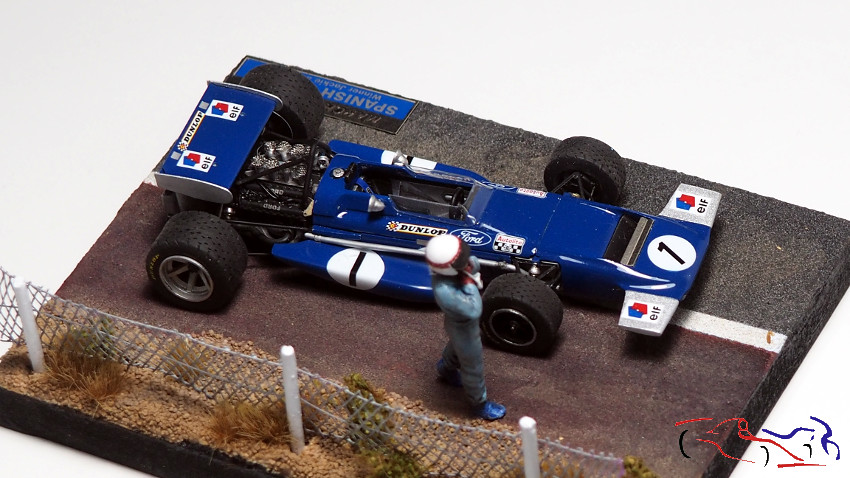
Y como bien os dije, las fotos finales de este coche irían junto a la peana, y aquí os voy a mostrar el proceso de la misma. Primero recogemos los materiales: base de madera con un agujero para fijar el coche, la figura de metal con su agujero para fijarla, red que viene con los ajos en el mercado, y palillos para fijar la red.
And as I mentioned, the final photos of this car would be taken with the base, and here I’m going to show you the process of making it. First, we gather the materials: a wooden base with a hole to attach the car, the metal figure with its own hole for attaching it, the net that comes with garlic from the market, and toothpicks to secure the net.
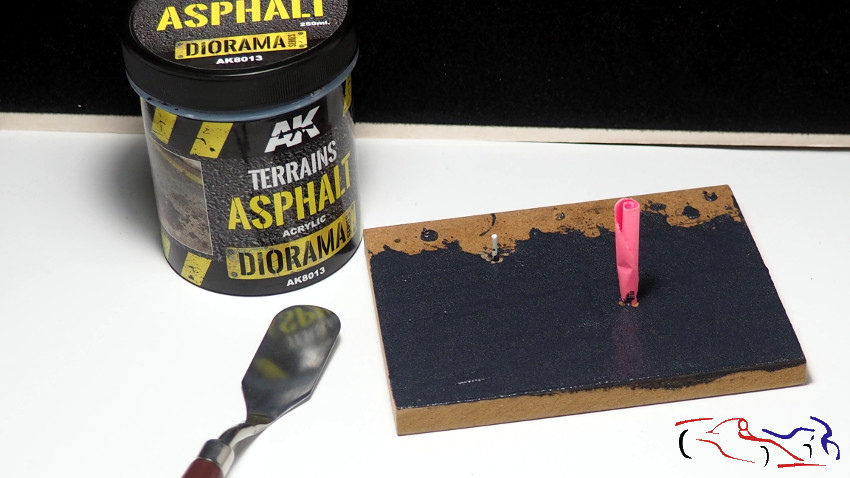
Una vez compuesto las piezas en la viñeta, aplicamos la base de la viñeta; asfalto y tierra (con bolitas de tierra para los trenes eléctricos) de AK. Tapamos los agujeros para que no se tapen al aplicar esos productos.
Once the pieces are assembled on the vignette, we apply the base coat: asphalt and earth (with small balls of earth for electric trains) from AK. We cover the holes so they don’t get clogged when applying these products.
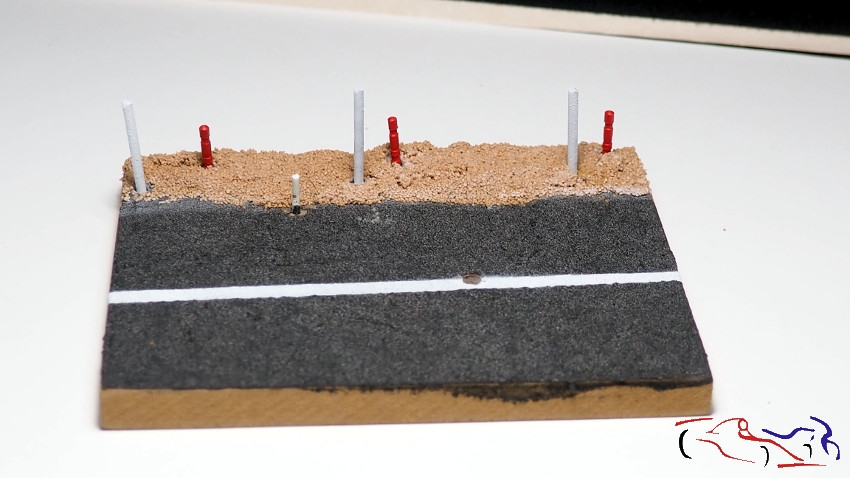
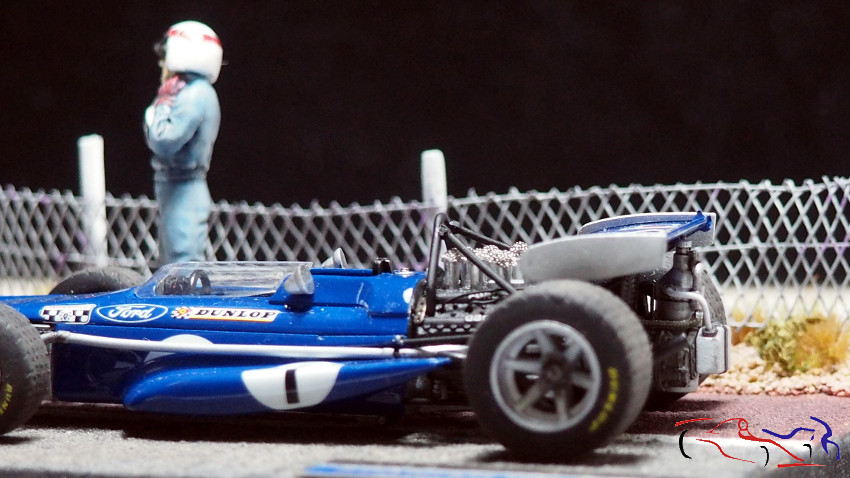
Y empezamos a pintar: enmascaramos para la línea blanca pintada con aero, y los palos de las vallas metálicas. En la segunda foto veis dos tipos de palos, que eran para dos vallas, pero al final, me decidí solo por la valla más alta. A su vez, la parte de asfalto que está entre la línea blanca y la tierra, el arcén, tiene un ligero color rojizo, como se ven en las fotos de la carrera, del circuito del Jarama. Por tanto, le aplico distintos tonos de rojo y negro muy diluidos.
And we started painting: we masked off the white line painted with an airbrush, and the posts for the metal fences. In the second photo you can see two types of posts, which were for two fences, but in the end, I decided to use only the taller fence. The asphalt section between the white line and the dirt, the shoulder, has a slight reddish tint, as you can see in the race photos from the Jarama circuit. Therefore, I applied various shades of very diluted red and black paint.


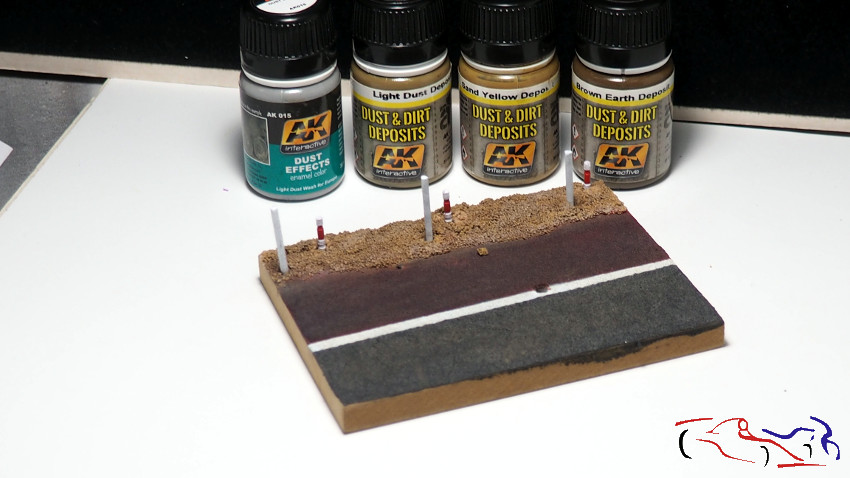
En cuanto al terreno, le aplico igualmente, lavados pero en este caso, de suciedad y de tierras de la marca AK, dando un resultado muy bueno al secarse.
As for the ground, I also apply washes, but in this case, for dirt and soil from the AK brand, giving a very good result when it dries.
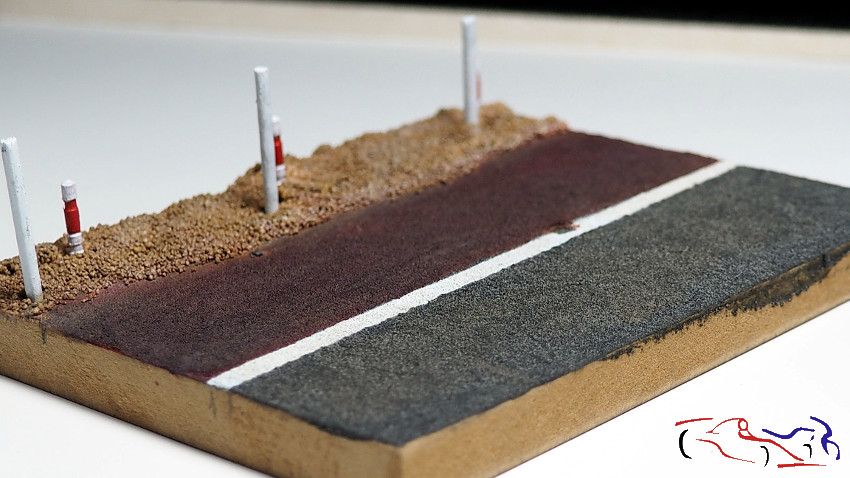
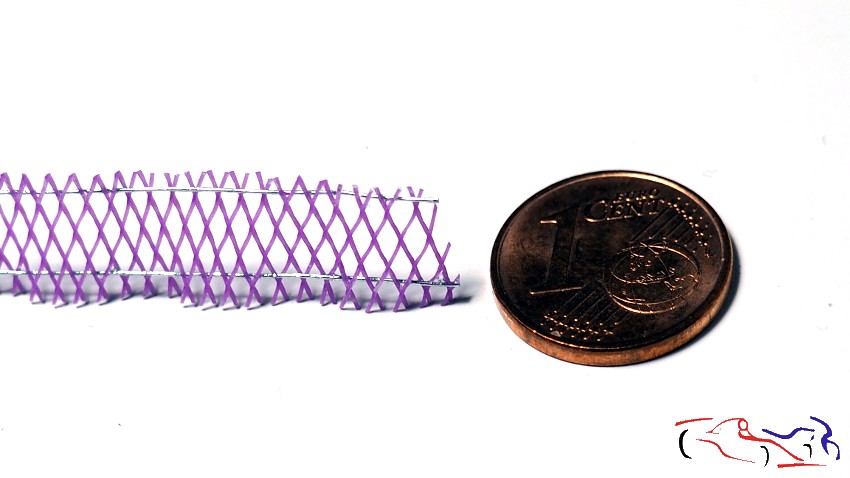
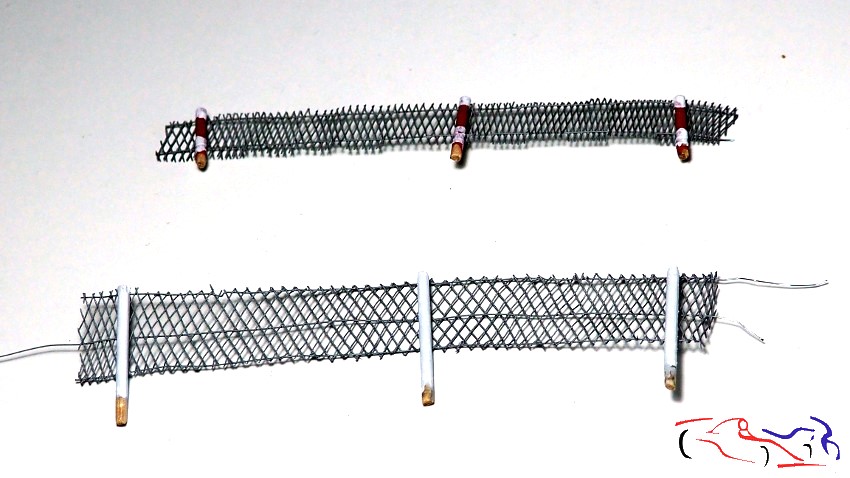
Vamos con la red. Una vez cortada según las medidas de la peana, la estiro para hacer los rombos más grandes. El siguiente paso es meter arriba, abajo y por el medio, un cable muy finito intercalando los rombos, y fijándolo con ciano. Después se imprima y se pinta con aluminio. Esta red se pega a los palos, y éstos a la base. Por ultimo, añadimos unos arbustos de los que vienen ya montados listos para pegar.
Let’s move on to the netting. Once cut to the dimensions of the base, I stretch it out to make the diamonds larger. The next step is to insert a very thin wire through the top, bottom, and middle of the diamonds, securing it with cyanoacrylate glue. Then I prime it and paint it with aluminum foil. This netting is glued to the poles, and the poles to the base. Finally, we add some pre-assembled bushes that are ready to be glued on.
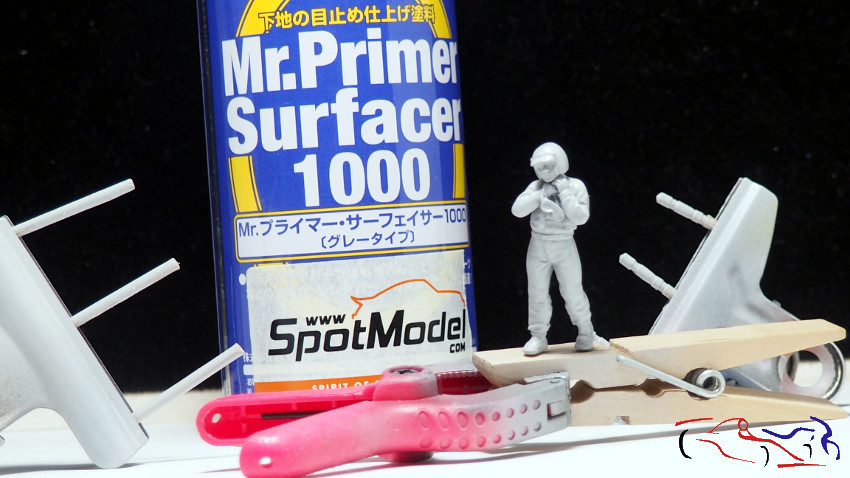
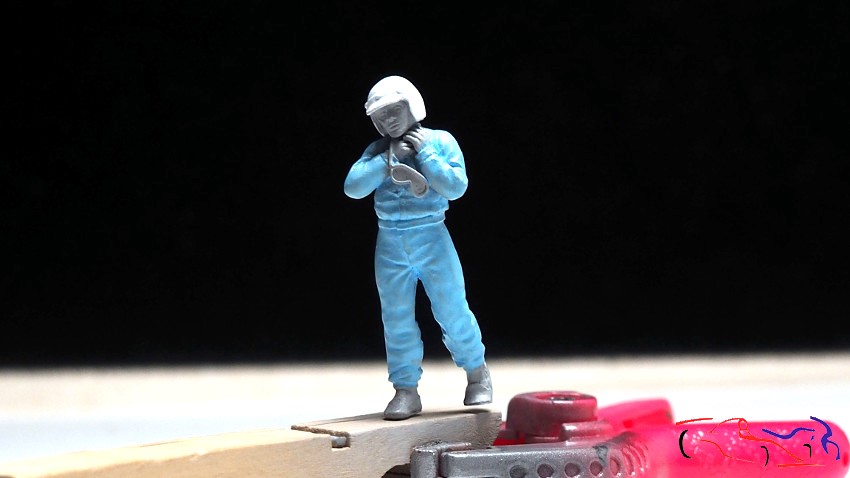
Pasamos a la figura. Después de imprimarse con Mr Primer Surfacer a spray, le aplico varias veces al mono, un color azul claro de Vallejo un poco diluido. Después le doy lavados de ese azul con otro más oscuro, con gris y hasta con negro del Panel Liner de Tamiya. Los guantes rojos y las botas azules, siguen el mismo proceso. Para la cara, aplico color carne, con un lavado en negro para después dar luces con el color carne y marfil.
Let’s move on to the figure. After priming it with Mr Primer Surfacer spray, I apply several coats of Vallejo light blue, slightly diluted, to the jumpsuit. Then I apply washes of that blue with a darker blue, with gray, and even with black from Tamiya Panel Liner. The red gloves and blue boots follow the same process. For the face, I apply flesh tone, with a black wash, and then highlight with flesh tone and ivory.
Y la viñeta está terminada! Decir que el casco blanco con una calca de 1/12 reducida a 1/43 e impresa en papel de calca trasparente, junto a la visera negra, es el punto final de la figura. A la cara no le he dado más detalle porque no soy experto y prefiero dejarla así. Por tanto, con la placa y habiendo pintado de negro el contorno de la base, este proyecto está acabado!!
And the vignette is finished! The white helmet, with a 1/12 scale decal reduced to 1/43 and printed on clear decal paper, along with the black visor, completes the figure. I haven’t added any more detail to the face because I’m not an expert and prefer to leave it as is. Therefore, with the baseplate and having painted the outline of the base black, this project is finished!

Gracias por ver y comentar!!
Thanks for watching and commenting!


