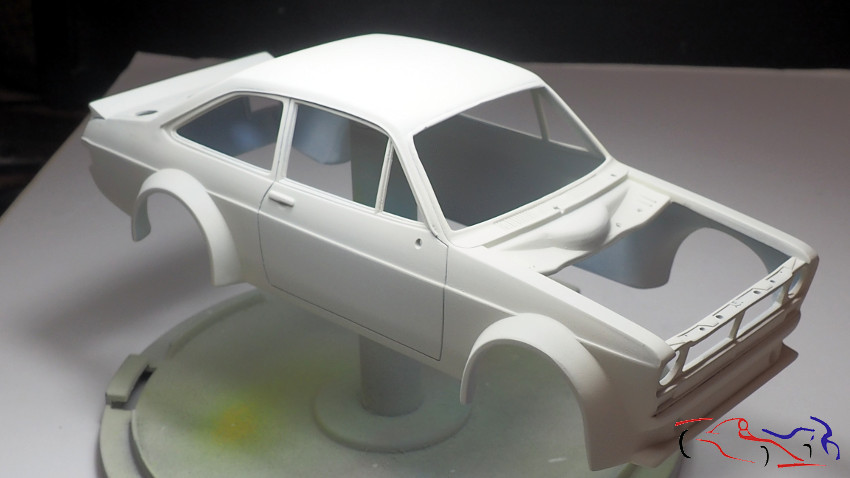
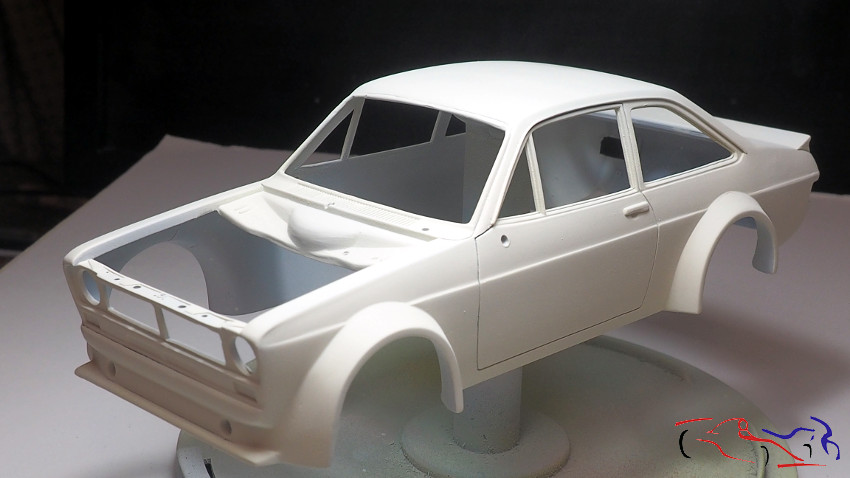
Otra entrada con los trabajos del Ford Scort Zakspeed. En este momento está imprimado en blanco:
Another entry with the works of the Ford Escort Zakspeed. At the moment it is printed in white:
 Pero vamos a ver que pasos hemos dado hasta llegar a esto.
But let’s see what steps we’ve taken to get to this.
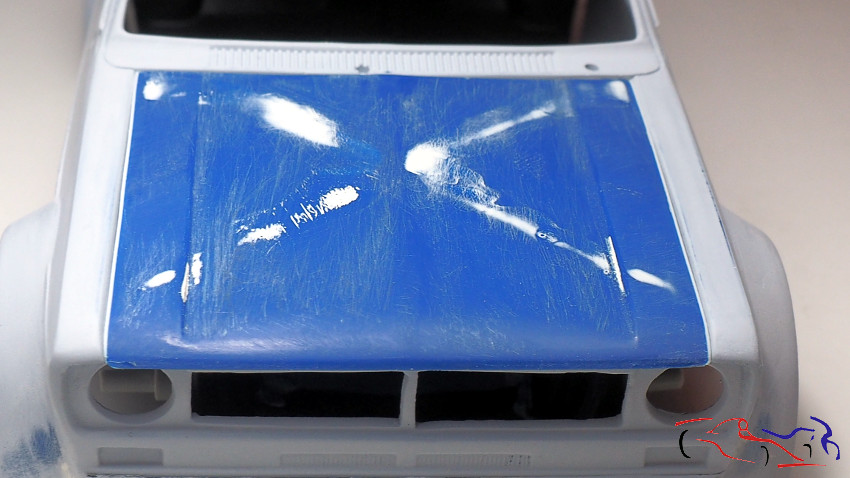
Poniendo la tapa del capó en la carrocería, vemos que no cubre todo el espacio, y hay que rellenar:
Putting the hood of the bonnet in the body, we see that it does not cover all the space, and it is necessary to fill:
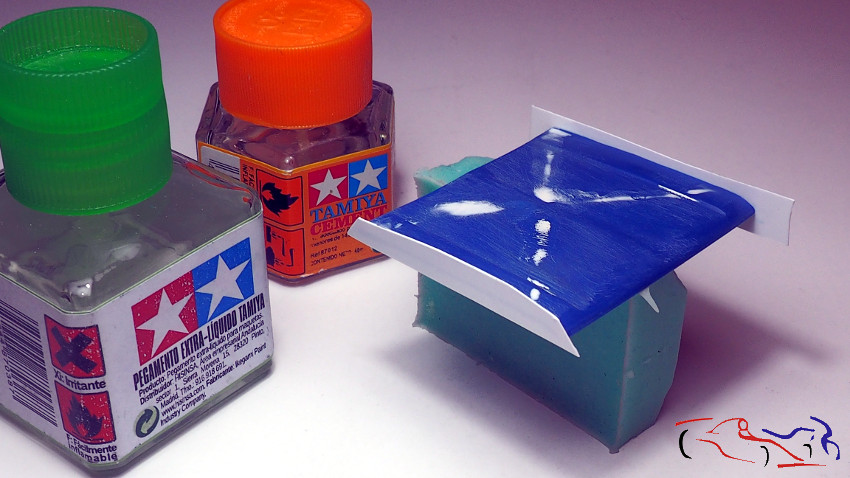
 Para ello, cogemos evergreen de la anchura deseada, y le pegamos una lámina a cada lado. Primero con el pegamento Tamiya naranja, y después perfilamos con el verde:
For this, we take evergreen of the desired width, and we stick a sheet to each side. First with the orange Tamiya glue, and then we profile them with the green one:
 Una vez pegado, recortamos y lijamos. Ahora si encaja en la carrocería:
Once glued, I cut and sand it. Now if it fits the body:
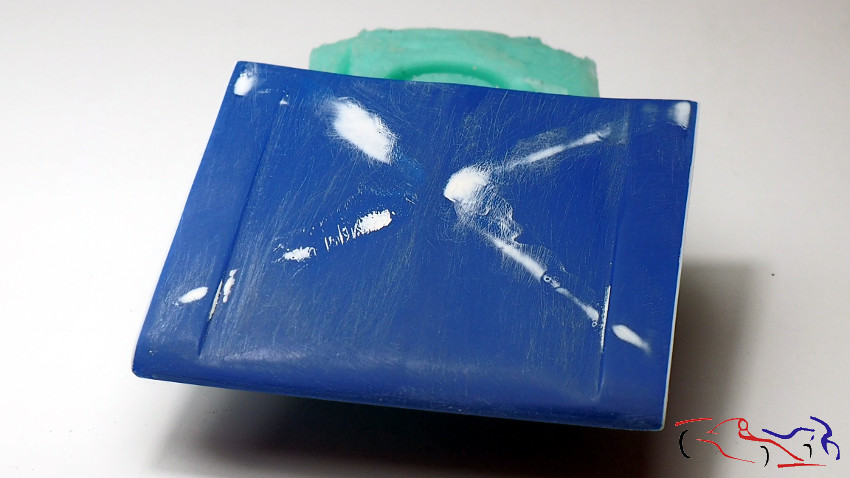
 Aquí vemos las dos tiras de evergreen que se han añadido al capó:
Here we see the two strips of evergreen that have been added to the hood:
 Y lo siguiente es imprimar la carrocería de nuevo corrigiendo algunas imperfecciones del faldón delantero:
And the following is to prime the body again correcting some imperfections of the front apron:
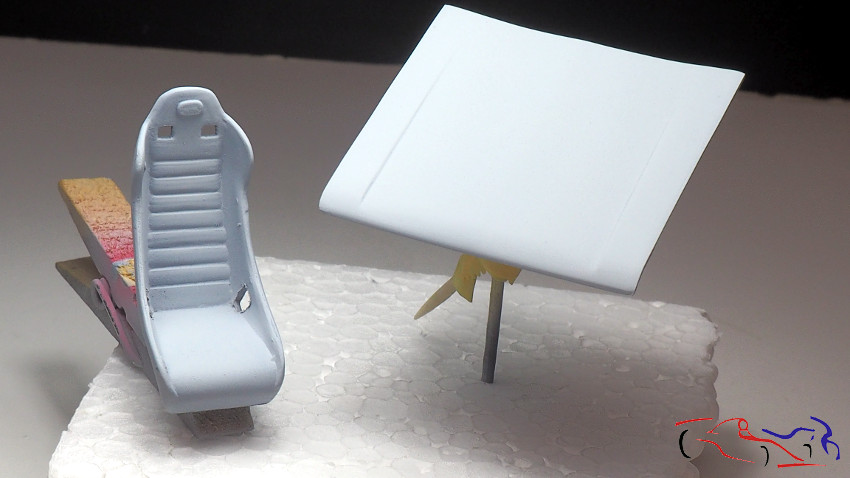
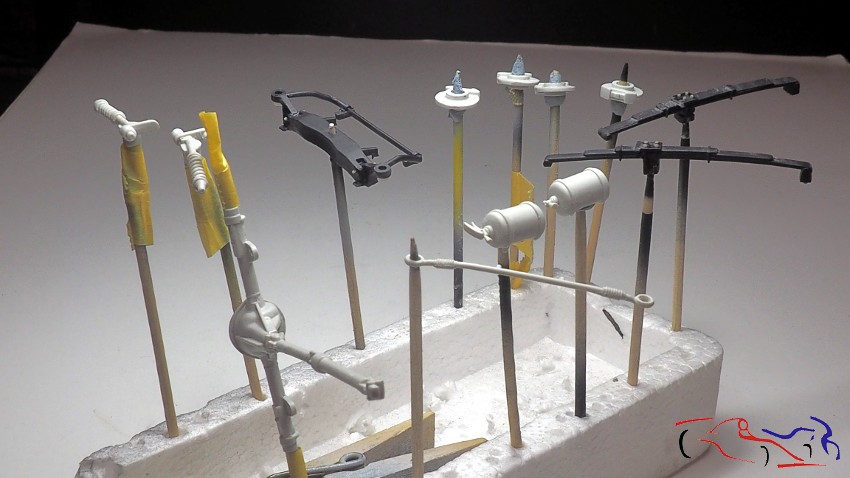
 Aprovechamos a imprimar otras piezas como el asiento y el capó:
We use other parts such as the seat and the hood to print:
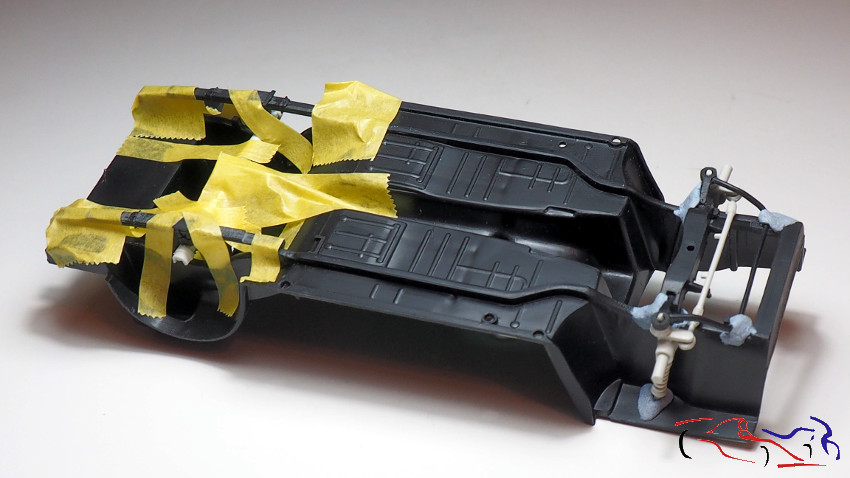
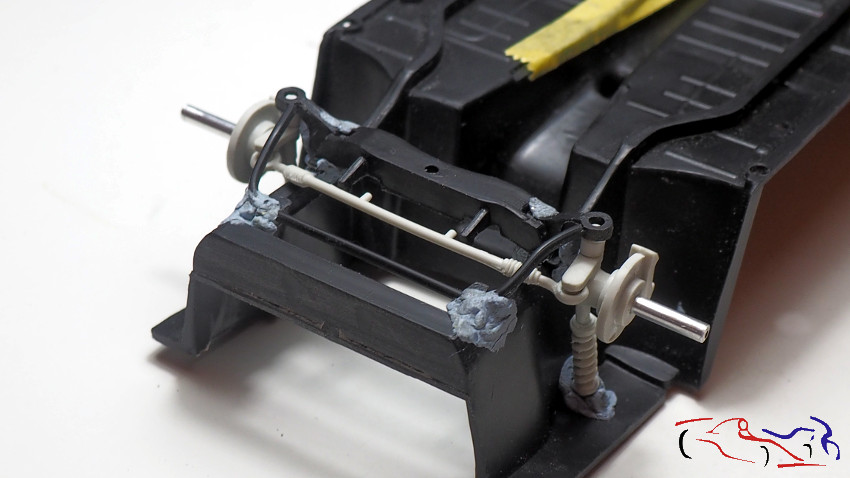
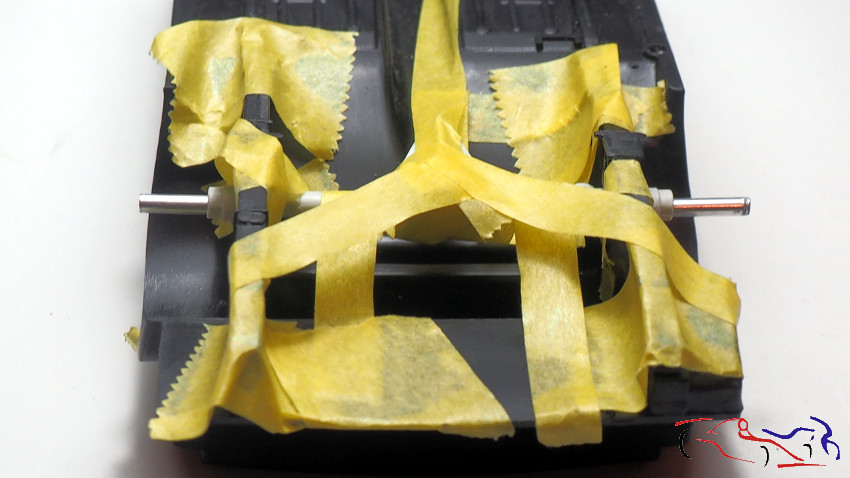
 Y nos vamos con el chasis. Tenemos que fijar los elementos que sujetan las ruedas para probar las de Renaissance, ya que no encajan como las originales del kit. Usamos blue tack y cinta de enmascarar:
And we go with the chassis. We have to fix the elements that hold the wheels to test the Renaissance ones, since they do not fit like the original kit. We use blue tack and masking tape:
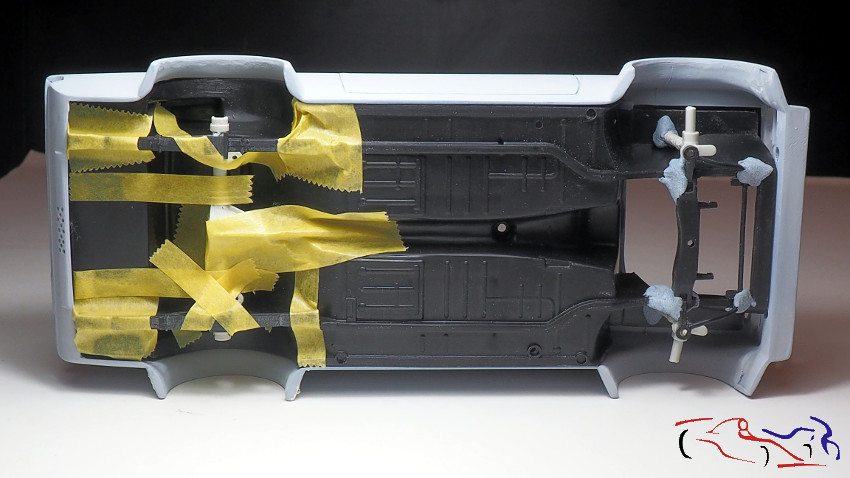
 E introducimos el chasis en la carrocería:
And we introduce the chassis in the bodywork:
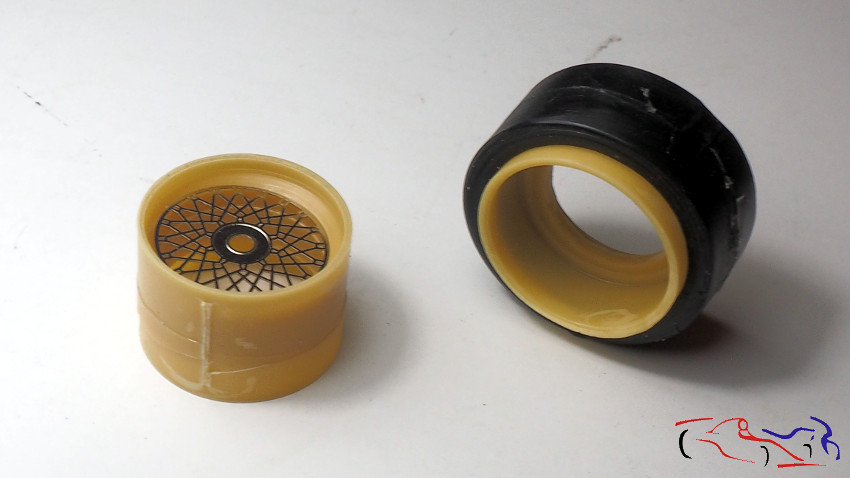
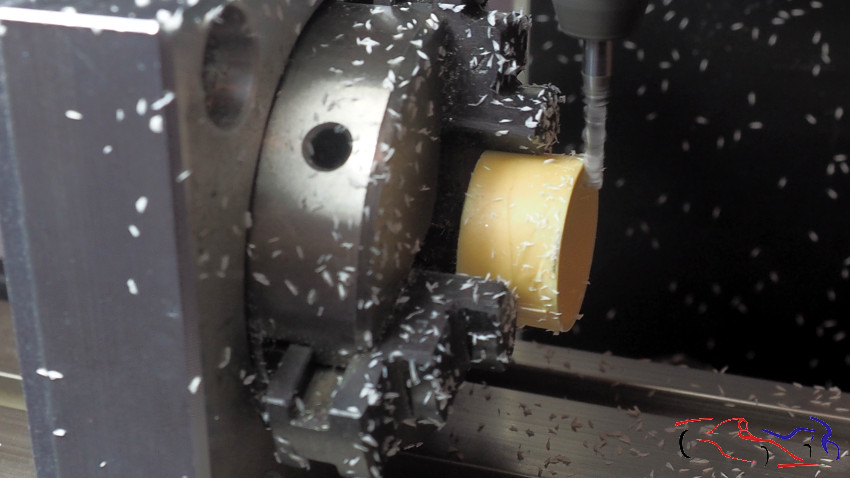
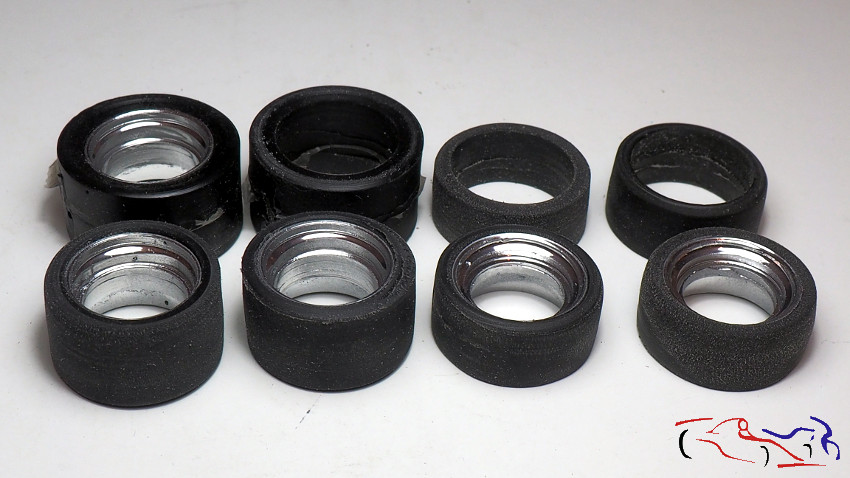
 Ahora vemos las ruedas de Renaissance. Vemos que el fotograbado no encaja en las llantas traseras, y las llantas delanteras son más anchas que el neumático:
Now we see the Renaissance wheels. We see that the photogravure does not fit into the rear tires, and the front tires are wider than the tire:
 Empezamos poniendo las delanteras en la fresadora para eliminar lo que sobra:
We start putting the front ones in the router to eliminate what is left over:
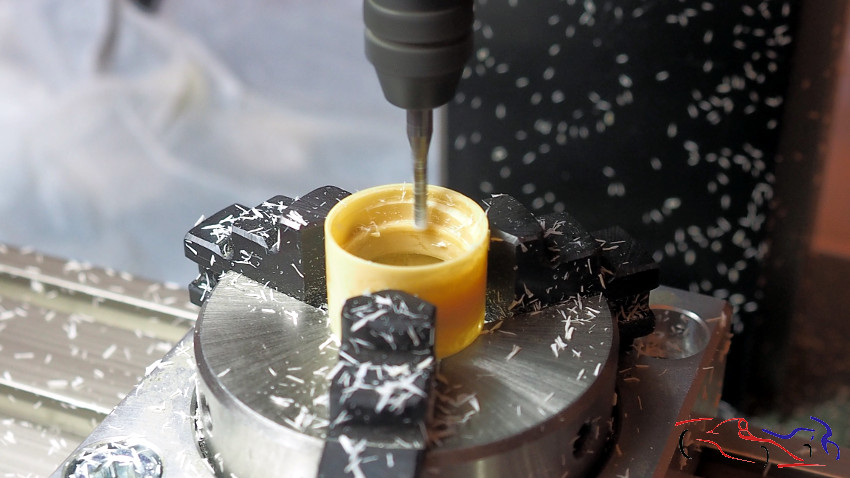
 Y lo mismo con las traseras: debemos aumentar el diémetro donde va alojado el fotograbado:
And the same with the rear ones: we must increase the diameter where the photogravure is housed:
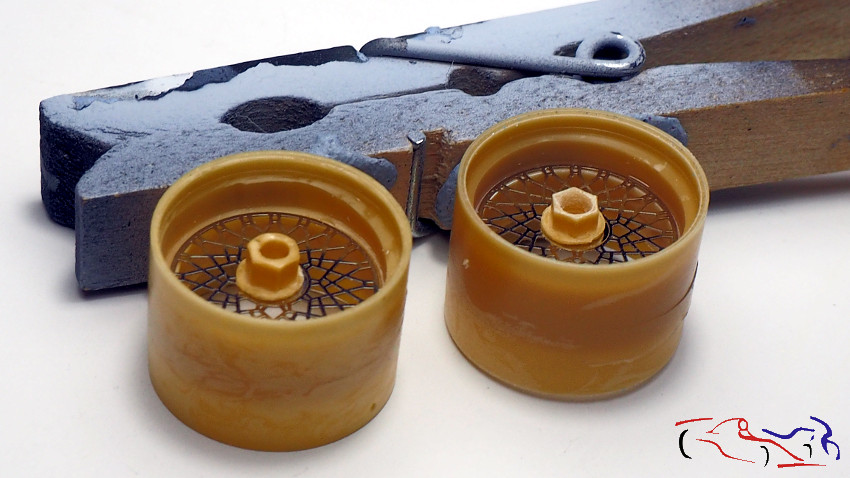
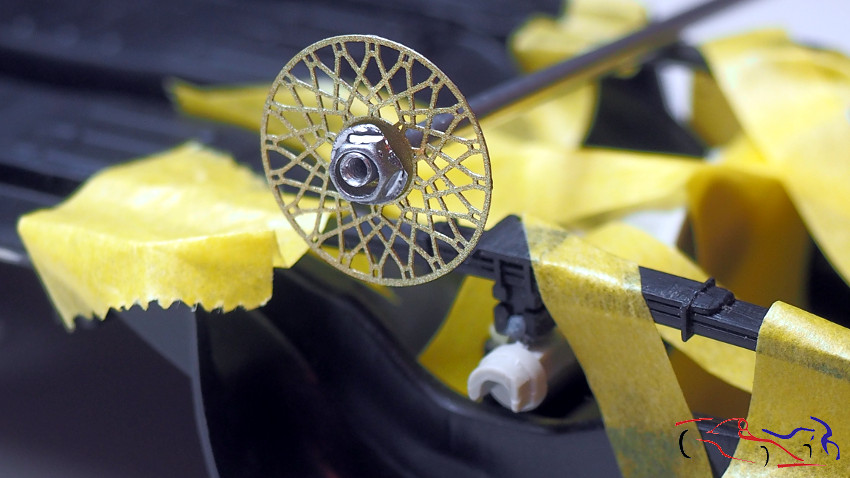
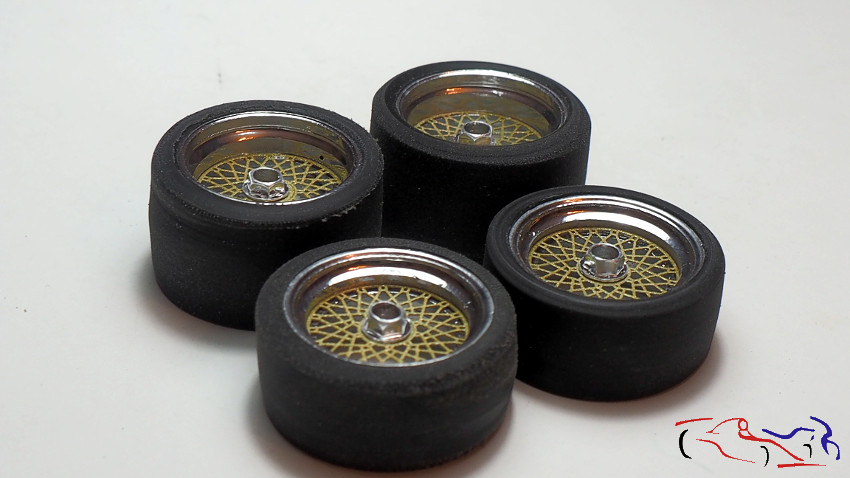
 Y aquí vemos el resultado, aunque la llanta izquierda se ve que no ha salido como quería, pero tenía dos de sobra. También podemos ver, la tuerca central que he modificado, haciéndola menos profunda y lijando la base. A la derecha la modificada:
And here we see the result, although the left tire is seen that it has not gone as it wanted, but had two to spare. Also we can see, the central nut that I modified, making it less deep and sanding the base. On the right, the modified one:
 Y por supuesto, imprimación de Gravity-colors como base de la pintura:
And of course, Gravity-colors primer as the paint base:
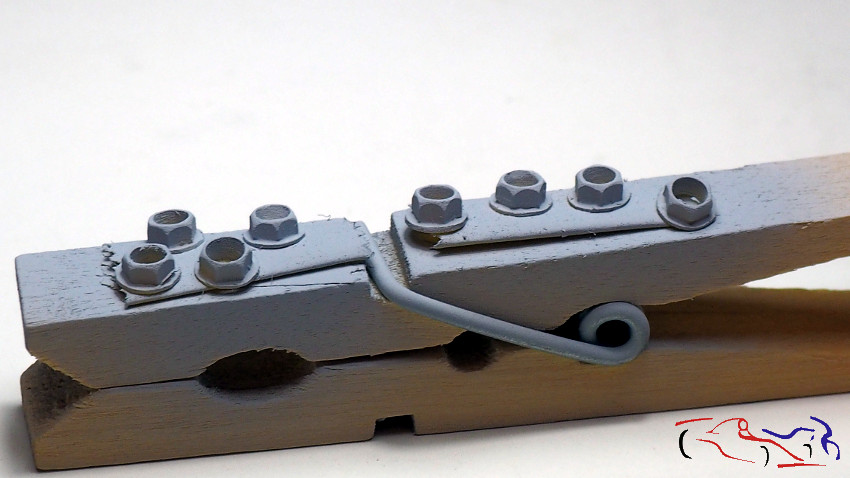
 Aquí vemos las tuercas preparadas para el cromo:
Here are the nuts prepared for the chrome:
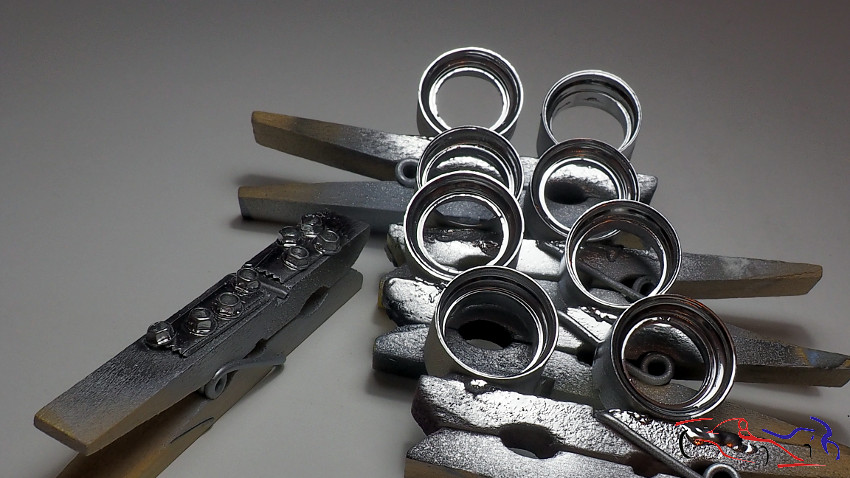
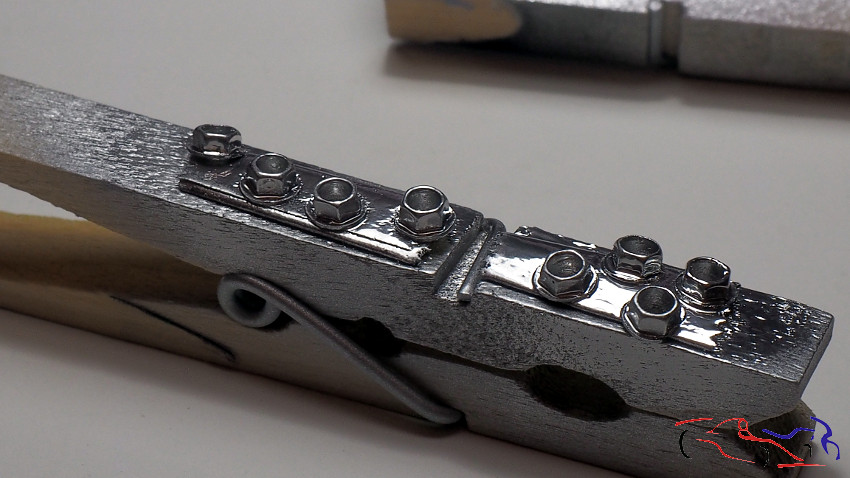
 Y le damos una capa de Chromo Molotov a aerógrafo. Hay que encharcarlas un poco para que aparezca el reflejo!
And we give a layer of Chrome Molotov with the airbrush. You have to drench them a little so that the reflection appears!
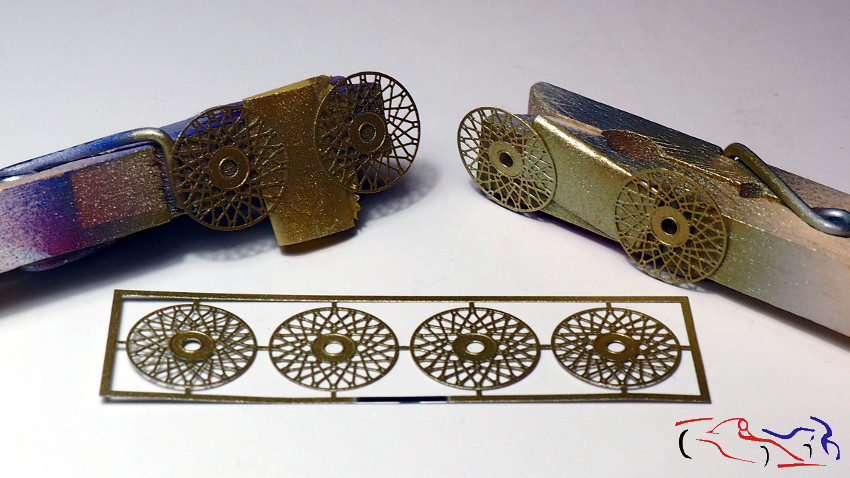
 Y al fotograbado, le damos oro BBS de Gravity-Colors:
And to the gravure, we give gold BBS of Gravity-Colors:
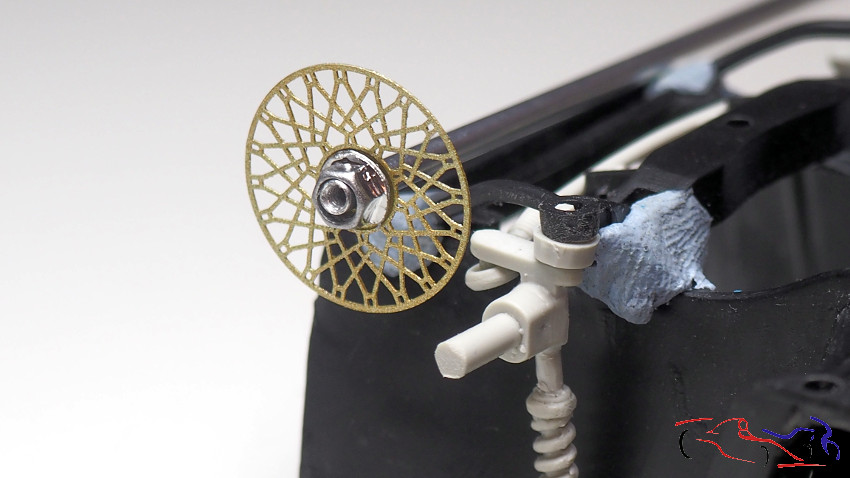
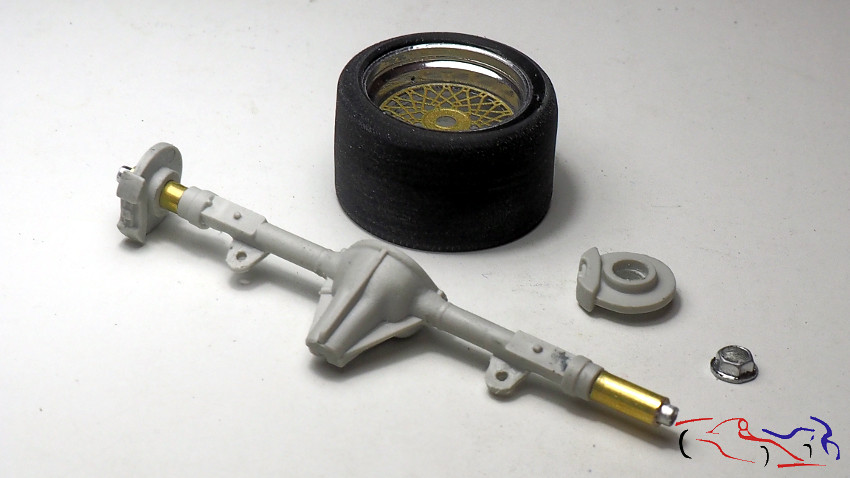
Una vez tenemos las llantas, tenemos que adaptar la fijación original. Pero primero, rebajo un tubo de aluminio por su interior, que será el nuevo eje.
En el caso del eje trasero, haré un taladro en el original blanco para meter el tubo de aluminio:
Once we have the tires, we have to adapt the original fixing. But first, I cut a tube of aluminum reducing its interior, that will be the new axis.
In the case of the rear axle, I will drill into the white original to fit the aluminum tube:
 En el caso del eje delantero, sustituiré el eje blanco de plástico por el de aluminio, cortado a la distancia correcta:
In the case of the front axle, I will replace the plastic white axle with the aluminum axle, cut to the correct distance:
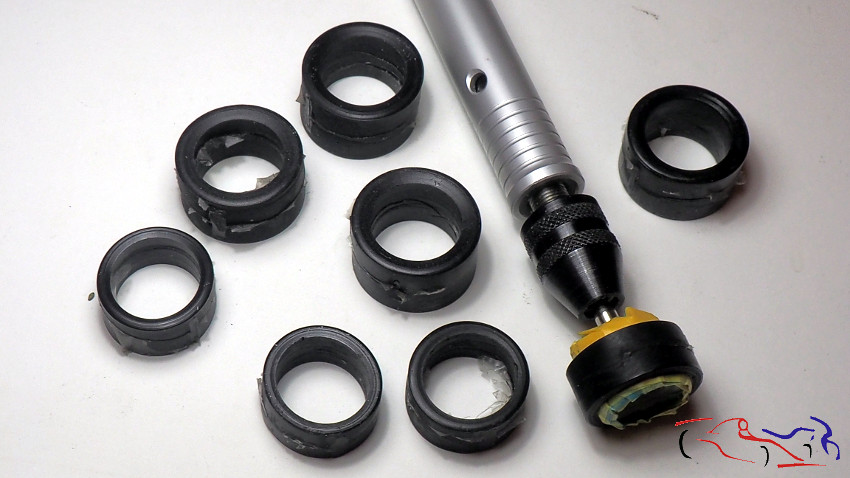
 Aun así, veo que los neumáticos traseros tienen mucho perfil y hay que rebajarlos puesto que este coche llevaba unos perfiles muy bajos. También aprovecho a gastar las delanteras.
Para ello, en la extensión del minitaladro y asi no sufre el eje degiro, pongo una llanta original con el tornillo de los disco de corte, y añado cinta de enmascarar para aumentar el diámetro y quepan los neumáticos:
Even so, I see that the rear tires have a lot of profile and they have to be lowered since this car had very low profiles. I also use to spend the front.
To do this, in the extension of the mini-frame and thus does not suffer the axis degiro, I put an original rim with the screw of the cutting disc, and I add masking tape to increase the diameter and fit the tires:
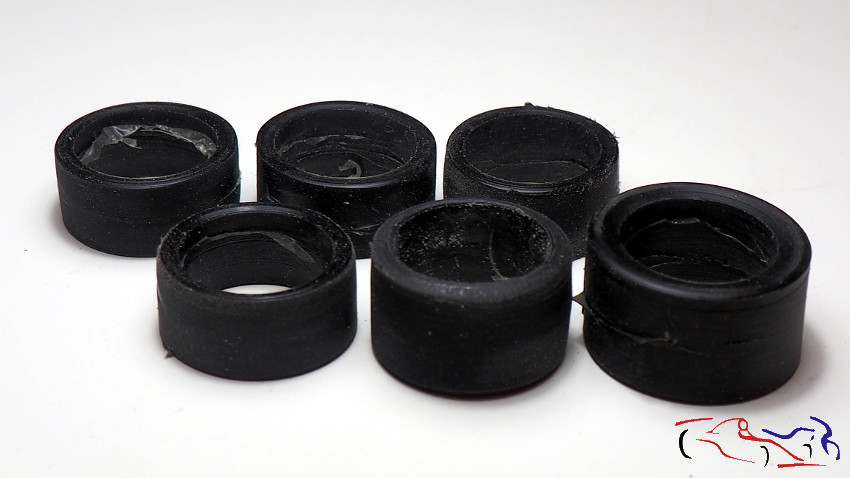
 Y aquí el resultado: a la derecha en primera fila, vemos un neumático trasero sin tratar, y a su izquierda el que ya está tratado.
And here the result: to the right in the first row, we see an untreated rear tire, and to its left the one that is already treated.
 Y en esta foto con las llantas. Primera fila neumáticos gastados y la segunda los originales:
And in this photo with the tires. First row worn tires and the second the original ones:
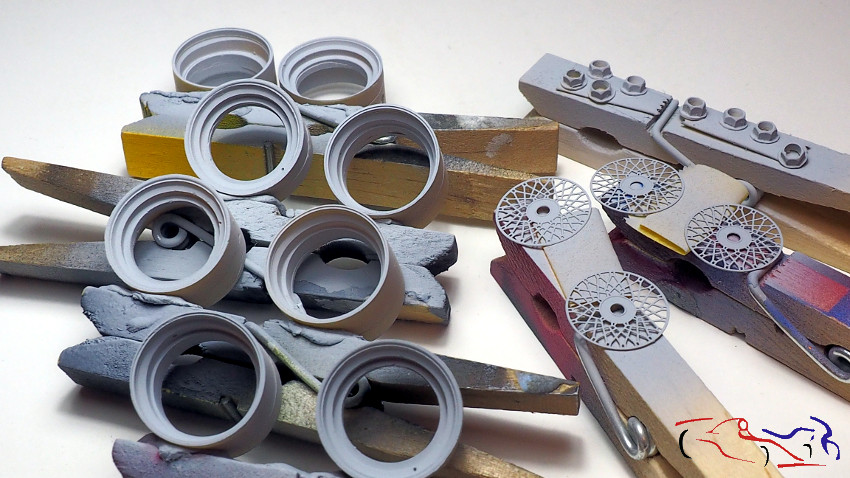
 Y una muestra completos pero sin pegar:
And a complete sample without glued:
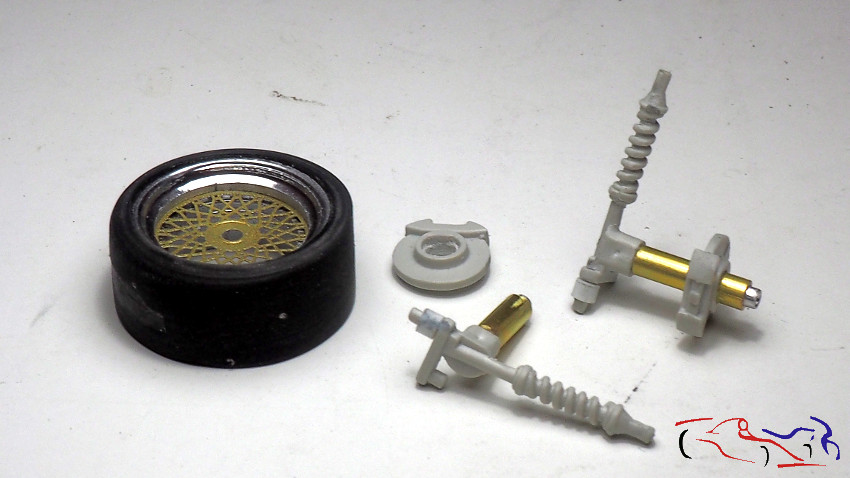
 Vamos con las adaptaciones a los ejes del kit. En los delanteros, ya hemos añadido los ejes de aluminio:
We go with the adaptations to the axes of the kit. In the front, we have already added aluminum axles:
 Lo mismo que en los traseros:
The same as in the back:
 Y vemos que ocurre montado. El eje trasero lo veo bien, pero el delantero, hay que bajar la carrocería 1 mm:
And we see that it happens mounted. I see well the rear axle , but the front, I have to lower the body 1 mm:
 Os muestro el añadido del eje trasero: además del tubo de aluminio, le he puesto un tubo de latón, un poco más corto para que el fotograbado pueda encajar mejor y ayude a su fijación. También estará el disco de freno al que le he aumentado el diámetro interior para que entre el tubo de cobre:
I show you the addition of the rear axle: in addition to the aluminum tube, I have put a tube of brass, a little shorter so that the photogravure can fit better and help to fix it. There will also be the brake disc to which I have increased the inside diameter so that the copper tube enters:
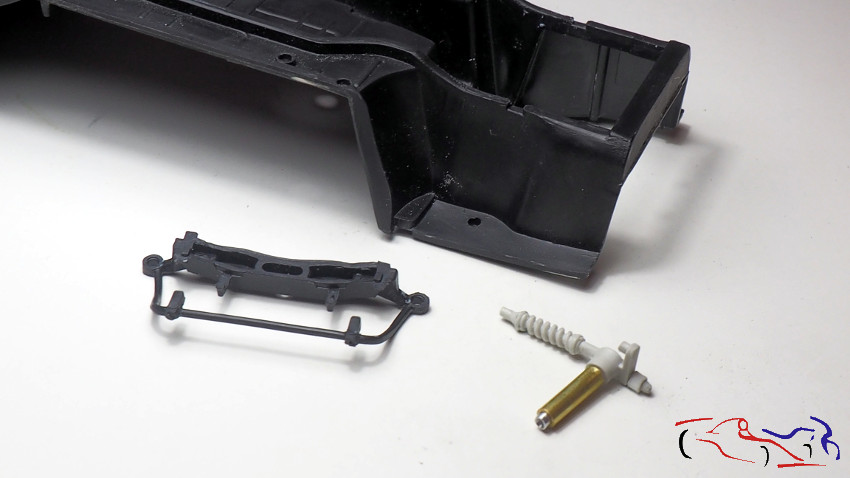
 En el delantero, vemos el añadido y para bajar al carrocería 1 mm, le cortaré ese mm de la parte superior del muelle, y aumentaré la base donde se apoya.
On the front, we see the added and to lower to the body 1 mm, I will cut that mm from the top of the spring, and increase the base where it rests.
 Aquí vemos esas base. La pieza negra tiene en sus extremos dos agujeros y ahí será donde añada ese mm, con una sección de tubo:
Here we see those bases. The black piece has at its ends two holes and there will be where it adds that mm, with a section of tube:
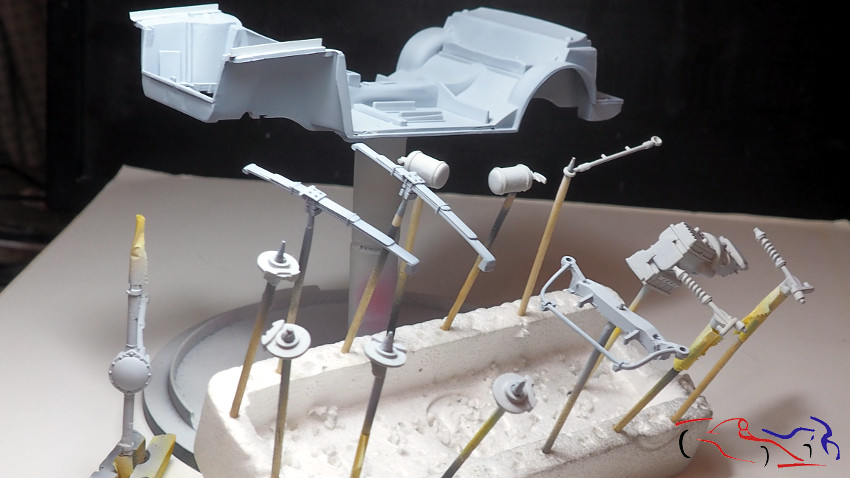
Y aquí todo listo para la imprimación. A las ballestas, le he puesto unos tornillos de resina en su parte central, así como a los supuestos ejes de las suspensiones delanteras.
And here everything ready for the primer. To the crossbows, I have put some resin screws in its central part, as well as the supposed axes of the front suspensions.
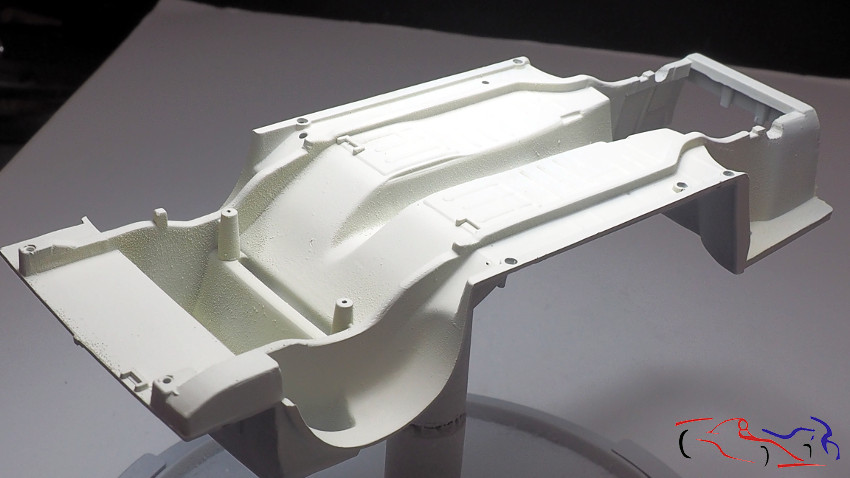
 Todo imprimado, incluso el chasis!
All primed, even the chassis!
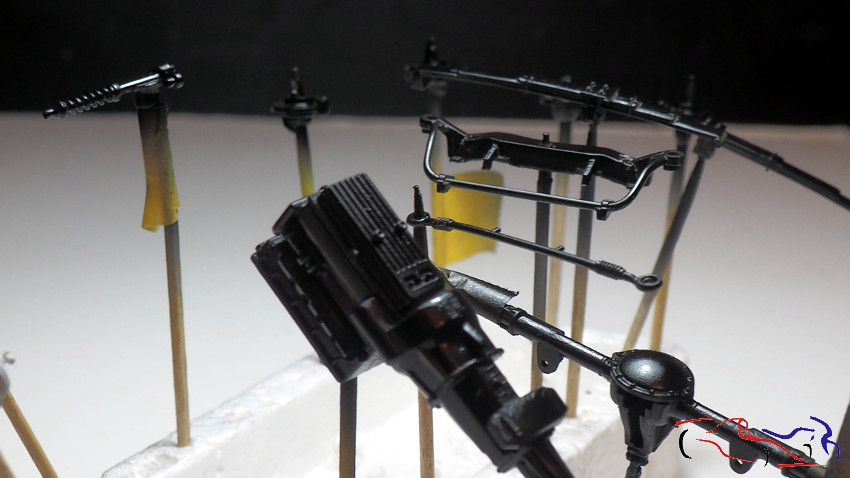
 Y pintamos con negro brillante de Zero:
And we paint with bright black of Zero:
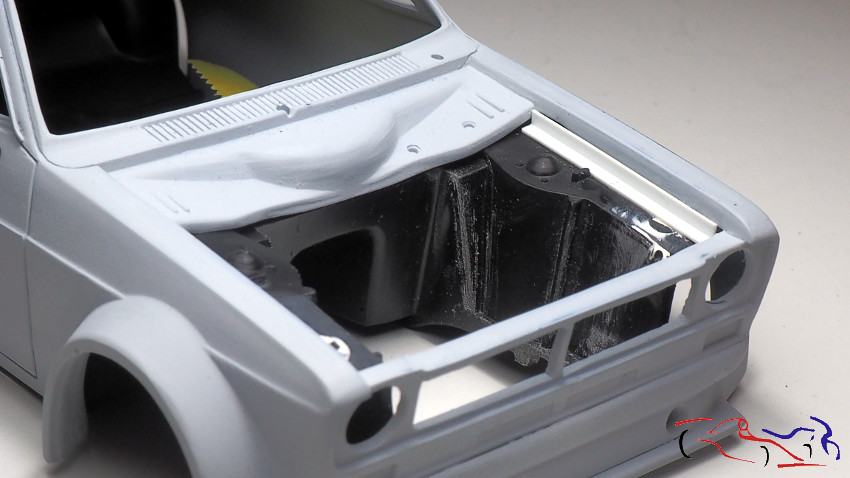
 En la siguiente foto, vemos las escuadras que le he puesto al chasis para que no se vea el hueco que había entre el chasis y la carrocería:
In the next photo, we see the squadrons that I have put to the chassis so that the gap between the chassis and the body can not be seen:
 Imprimación del chasis y carrocería con la imprimación blanca de Zero:
Body and chassis primer with Zero white primer:
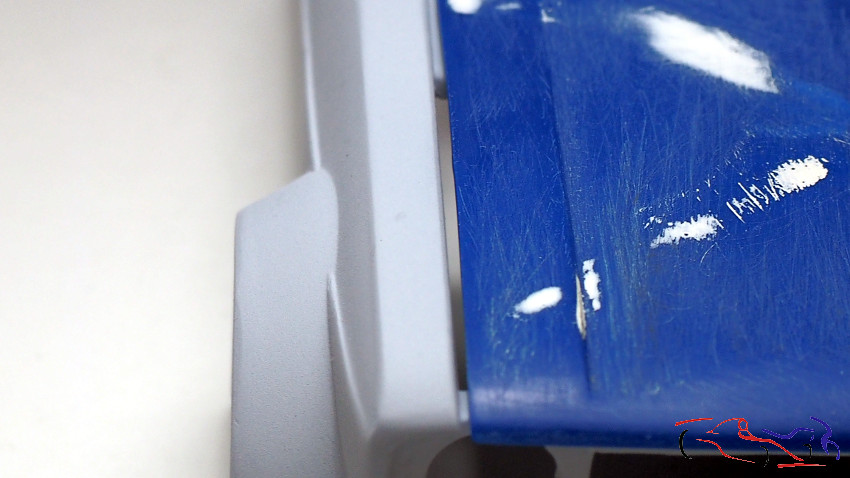
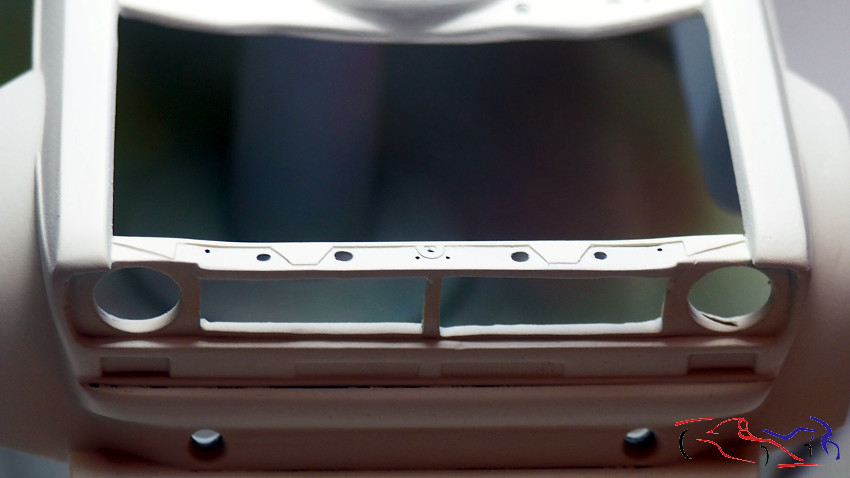
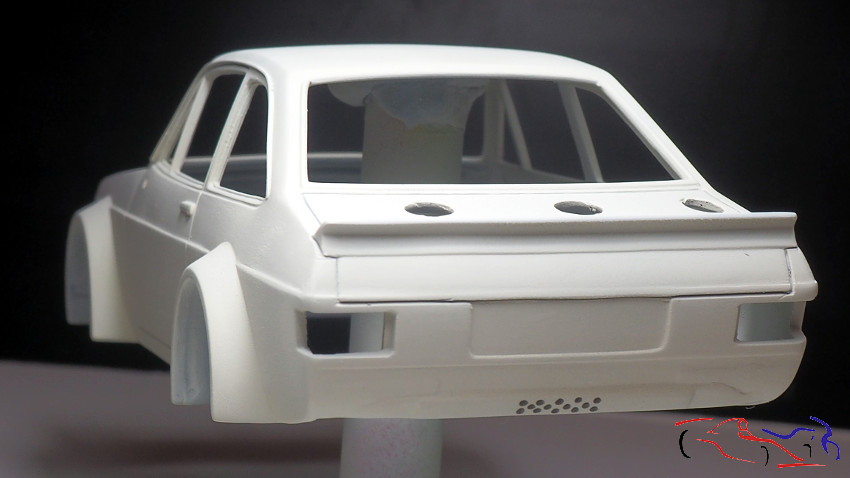
 Cuando estaba viendo la carrocería, había una parte que no me convencía: era la barra delantera que estaba toda lisa. Así que con unas láminas de evergreen y unos agujeros de diferente tamaños, le hemos dado un toque más real:
When I was looking at the body, there was a part that did not convince me: it was the front bar that was all smooth. So with evergreen sheets and holes of different sizes, we have given a more real touch:
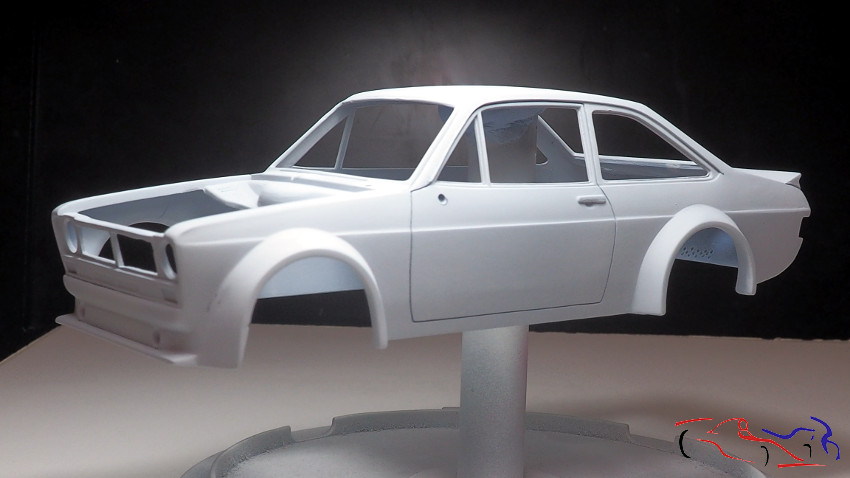
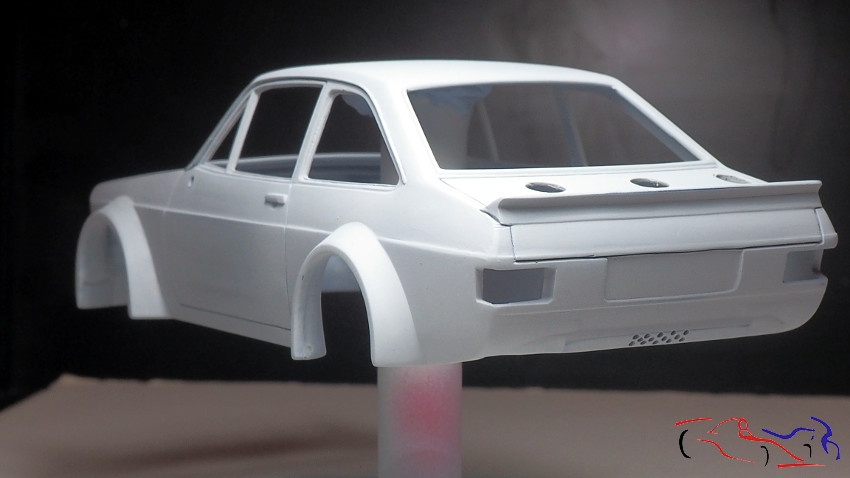
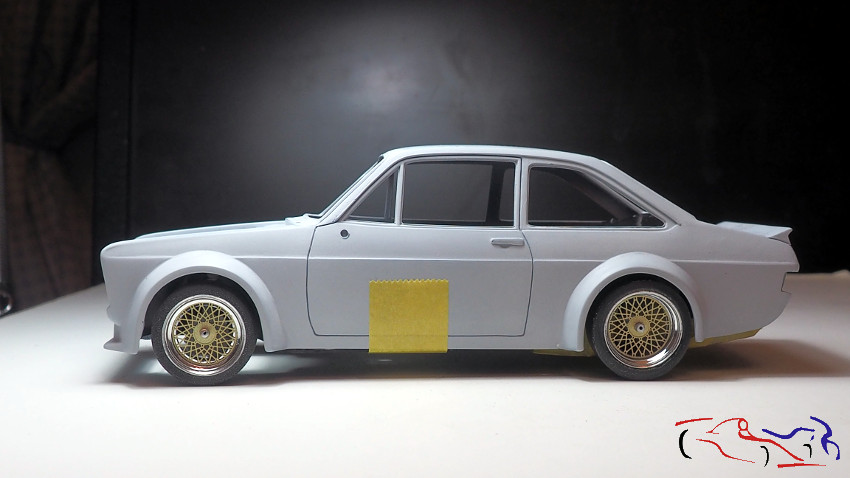
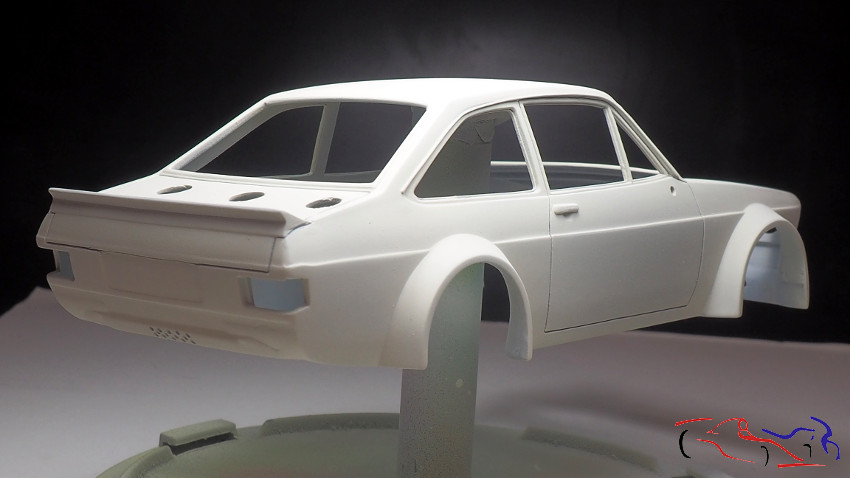
 Y para terminar, dos imágenes de la carrocería:
And finally, two images of the body:
 Gracias por ver y comentar!!
Thanks for viewing and commenting!!


