
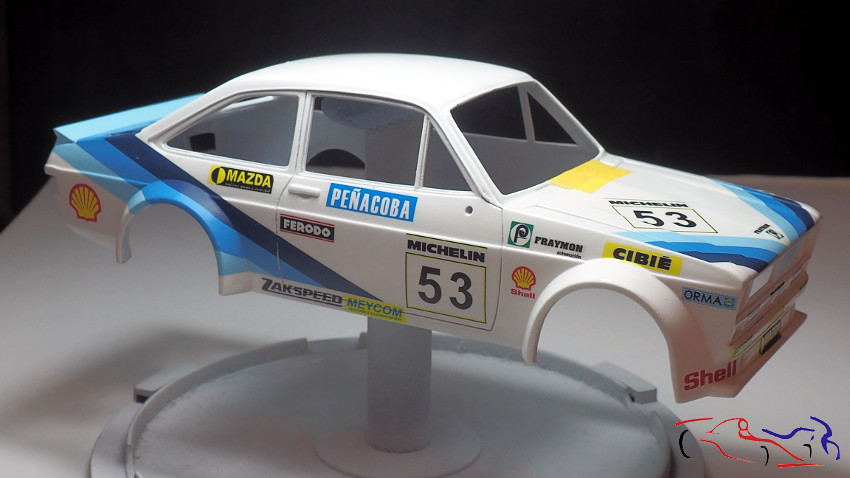
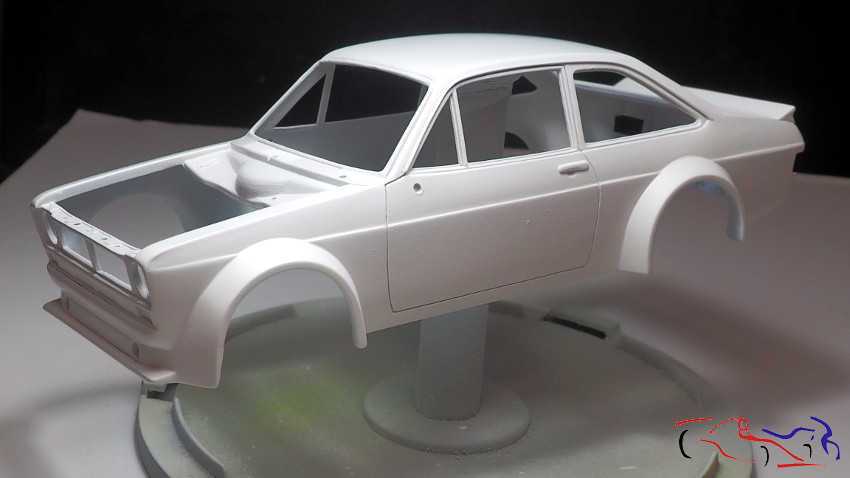
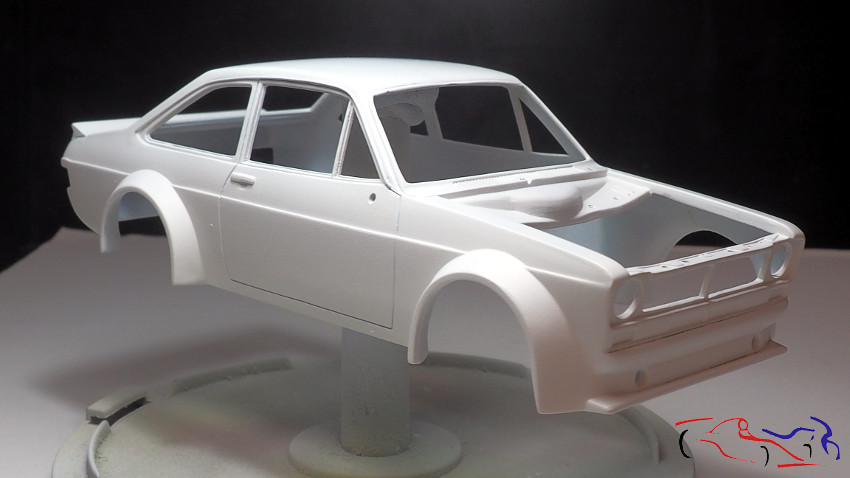
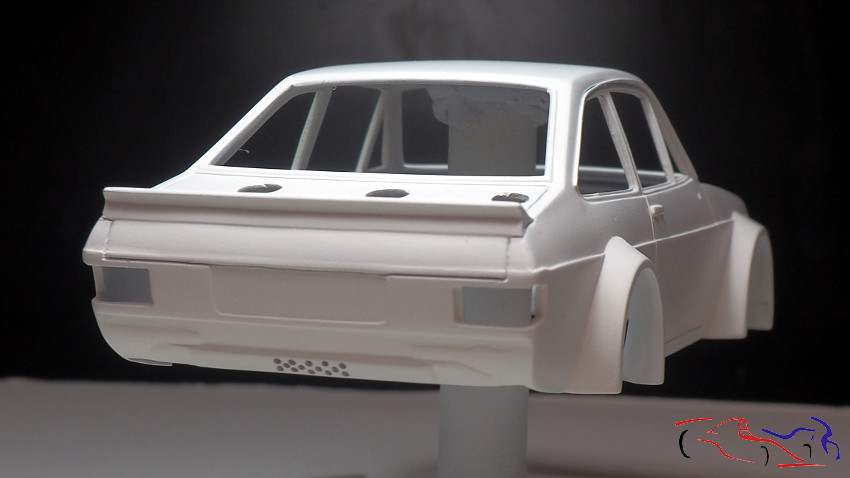
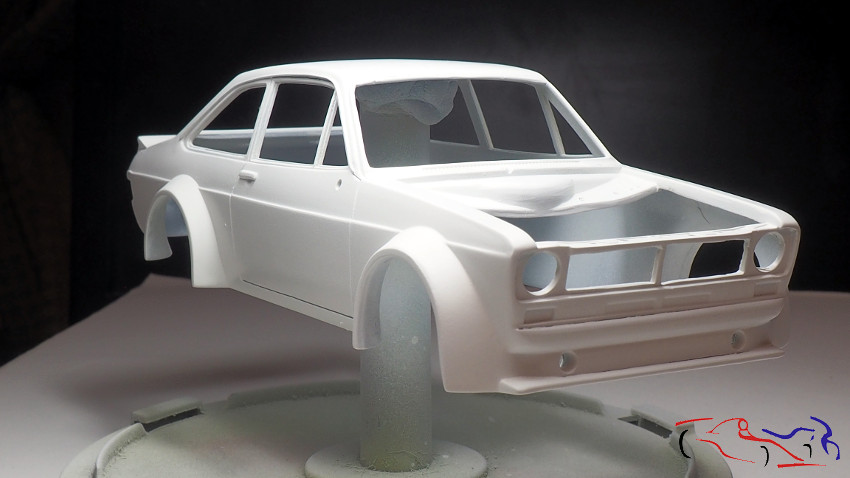
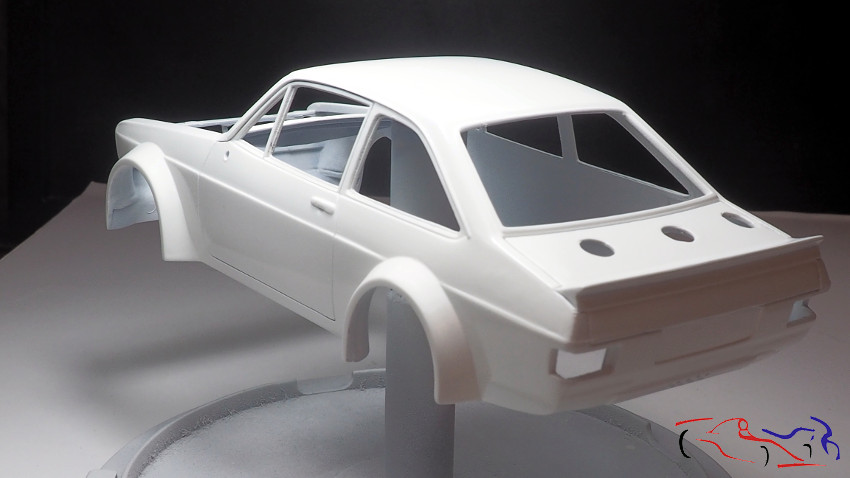
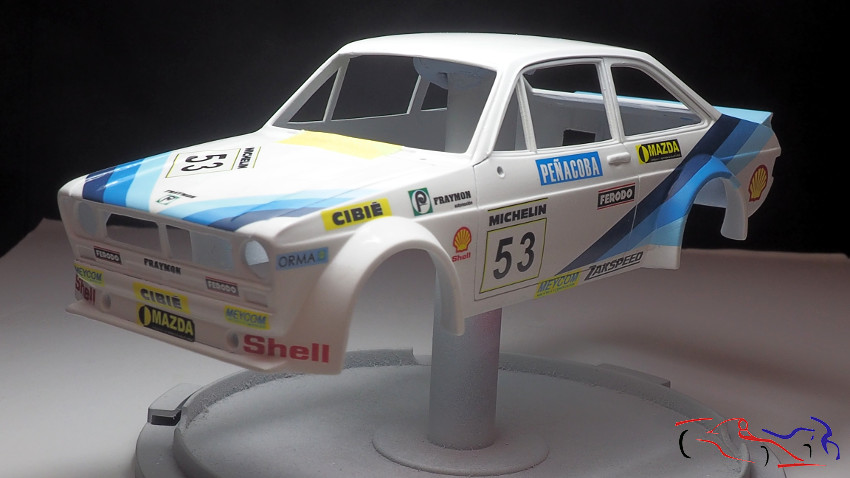
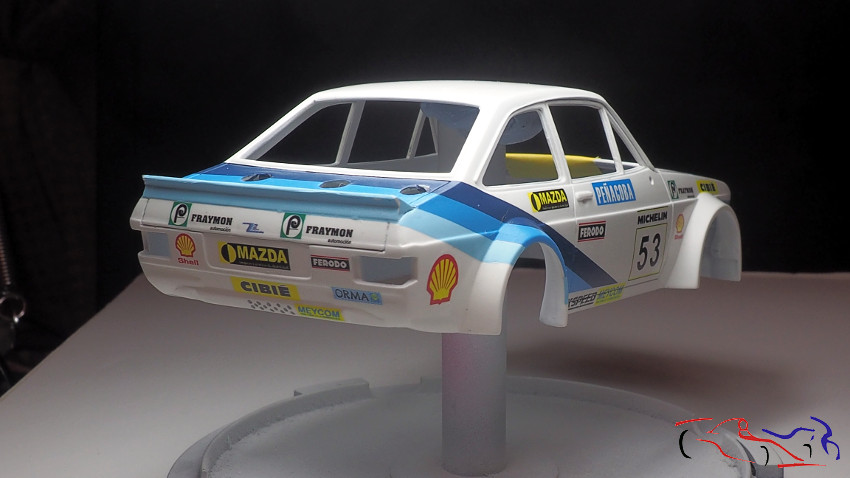
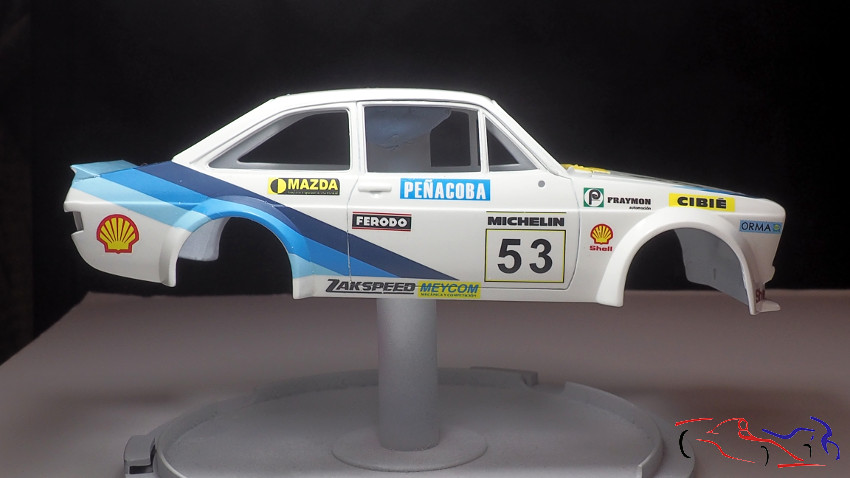
Seguimos con el Ford Escort. Y así es como está en este momento, con las calcas puestas:
We continue with the Ford Escort. And that’s how it is at this moment, with the decals on:
Pero vemos el proceso. Empezamos con la pintura de piezas: los extintores con imprimación blanca, después de pintar los amortiguadores de negro, le ponemos por la parte profunda, una cinta de enmascarar de 0,7 mm:
But let’s go with the process. We started with the painting of parts: the extinguishers with white primer, after painting the black shock absorbers, we put on the deep part, a masking tape of 0.7 mm:
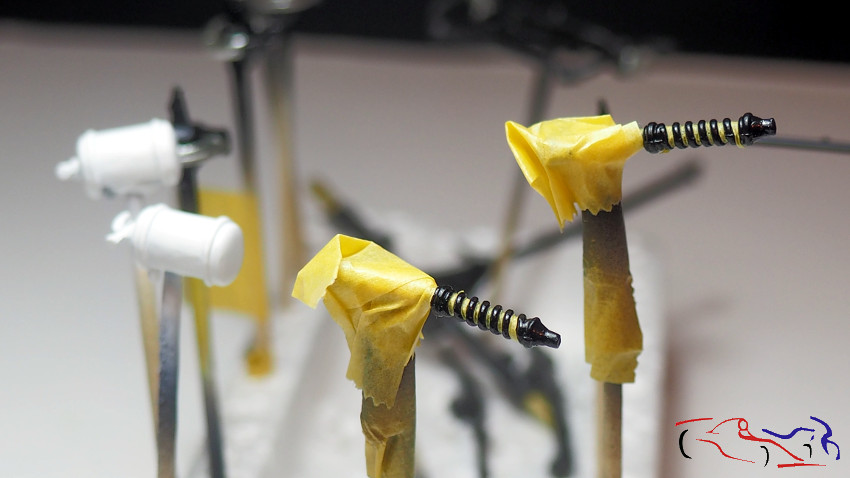
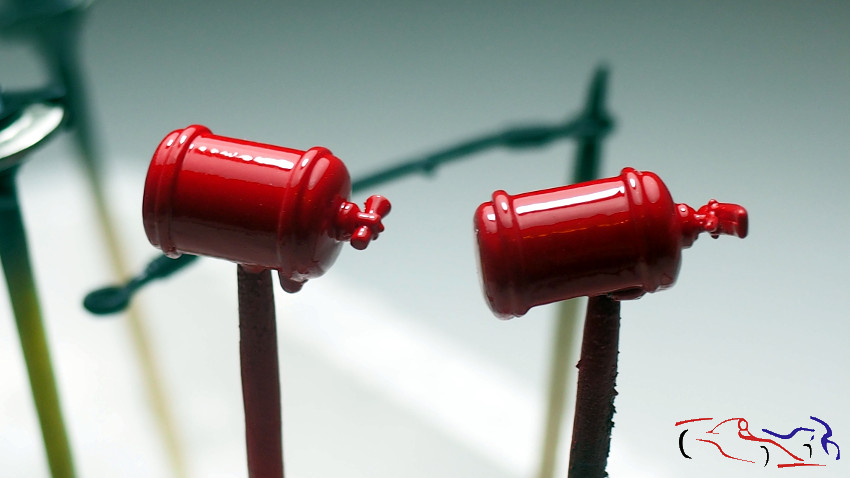
Los pintamos de aluminio y los extintores de rojo:
We paint them in aluminum and fire extinguishers with red:
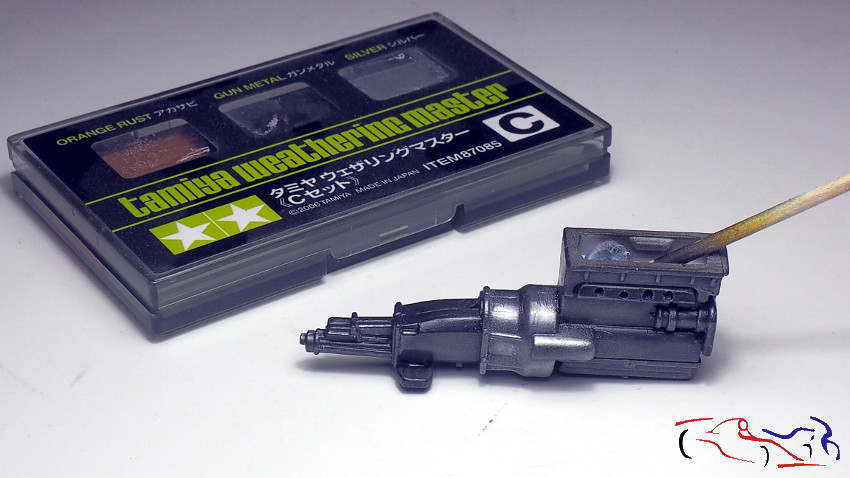
 Al motor, que previamente habíamos pintado de negro, le damos unos tonos de Gun Metal y Silver con los pigmentos del set C de Tamiya:
To the engine, which we had previously painted in black, we give some shades of Gun Metal and Silver with the pigments of the set C of Tamiya:
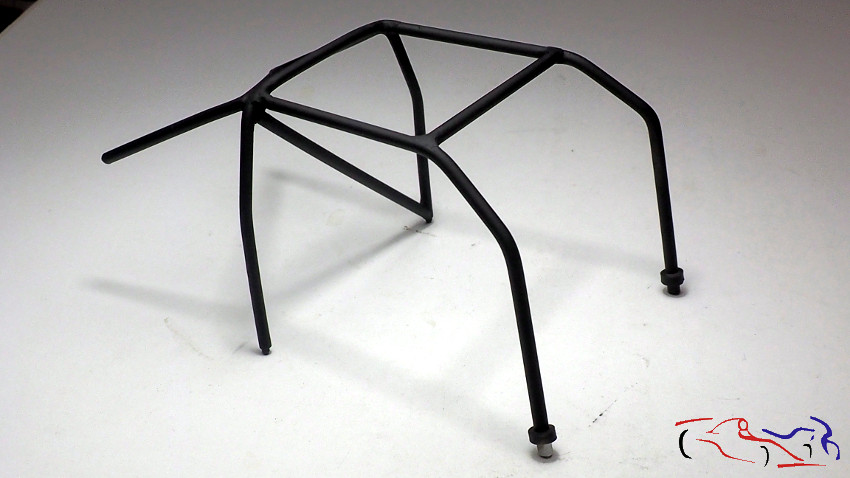
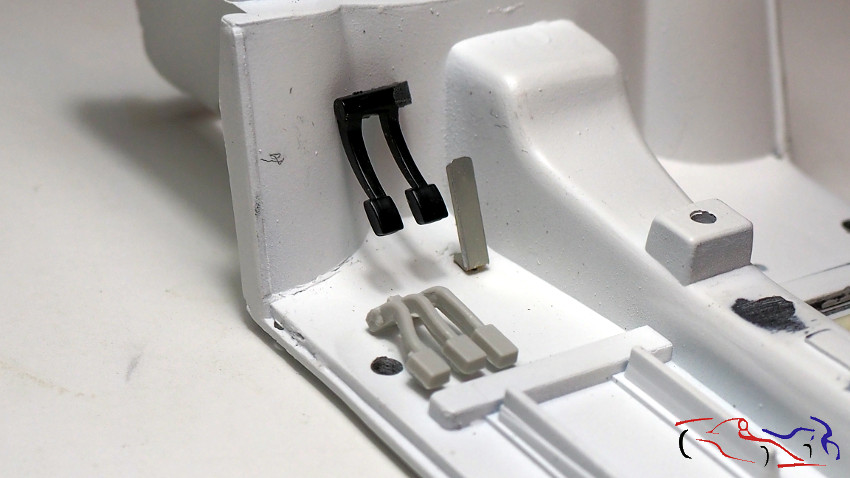
 Para completar el arco de seguridad, le añadimos tubo de Evergreen, pegándolo con ciano y bicarbonato para que haga una mezcla dura. Después repasaremos dichas uniones con una fresa y el minitaladro:
To complete the safety bow, we add Evergreen tube, sticking it with cyan and bicarbonate to make a hard mix. Then we will review said joints with a milling cutter and the mini drill:
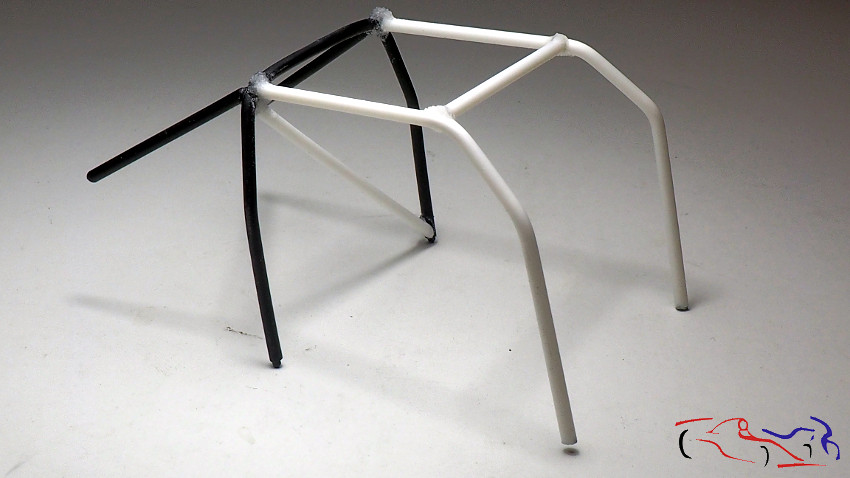
Y a continuación, pintaremos de negro mate de MIG, flojito y poco a poco: el acabado es muy bueno!
And then we will paint MIG black matte, weak and little by little: the finish is very good!
Continuamos con los escapes. Unimos las dos partes y procedemos a modificar la salida, ya que no da buena apariencia:
We continue with the exhaust pipes. We join the two parties and proceed to modify the output, since it does not look good:
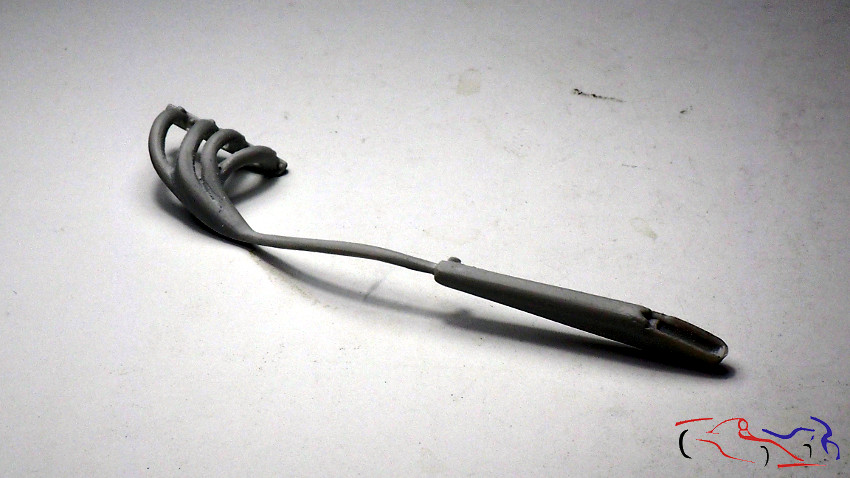
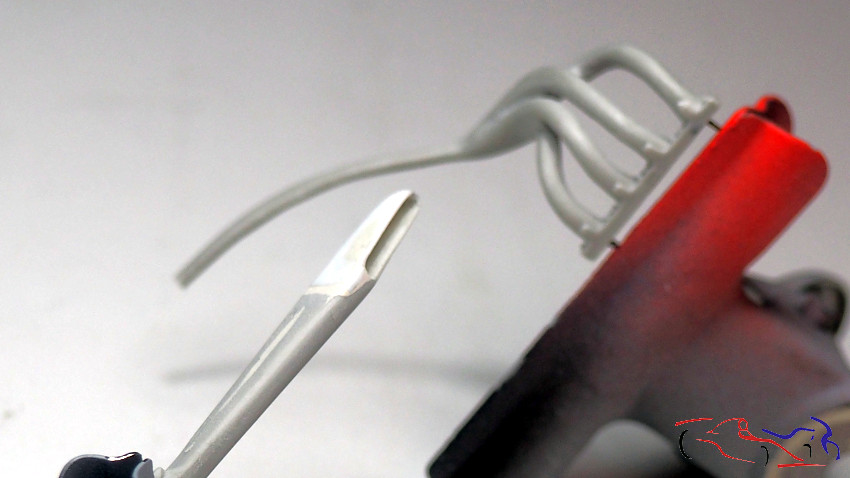
Para ello, limamos la mitad agrandando el interior del tubo de escape, y le ponemos un recorte de evergreen. Una vez pegado, terminaremos la salida con una fresa y el minitaladro:
To do this, we filed half enlarging the inside of the exhaust pipe, and we put a cut of evergreen. Once stuck, we will finish the output with a milling cutter and the mini drill:
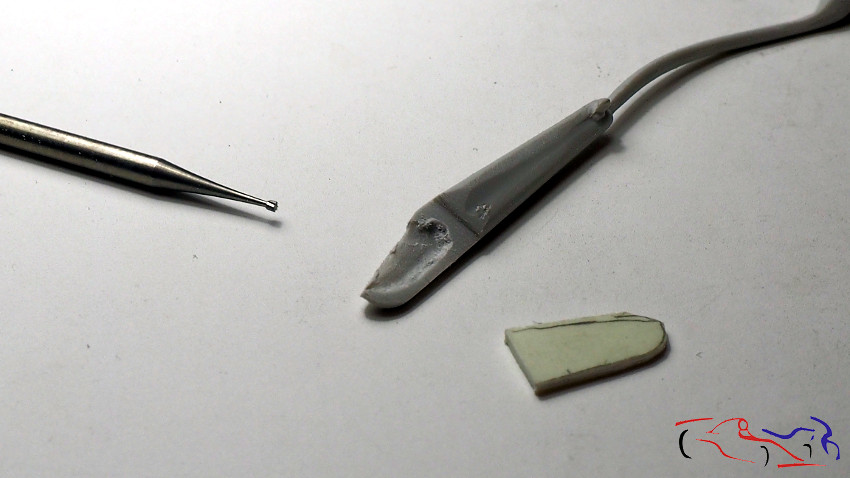
Este es el resultado, mucho más real. Aquí lo vemos listo para pintar, una vez enmasillado y lijado:
This is the result, much more real. Here we see it ready to be painted, once it is caulked and sanded:
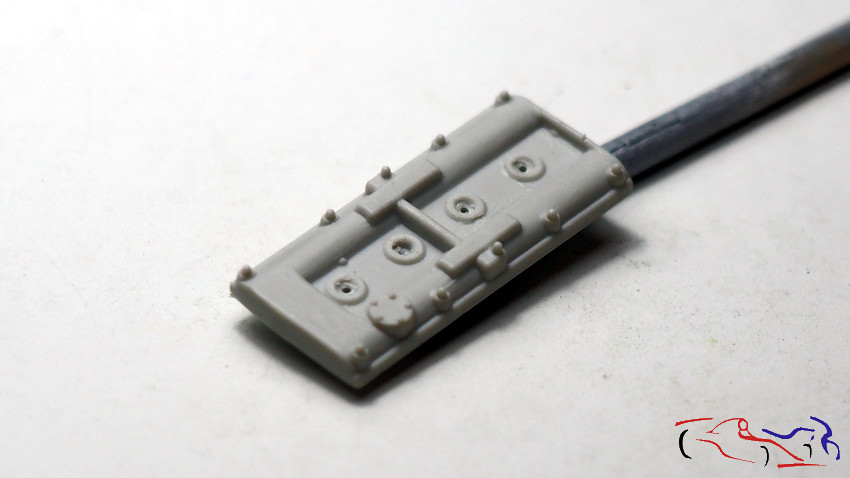
A la tapa de válvulas, le practicamos unos agujeros para meter el cable de bujias:
To the valve cover, we drill some holes to put the spark plug wires:
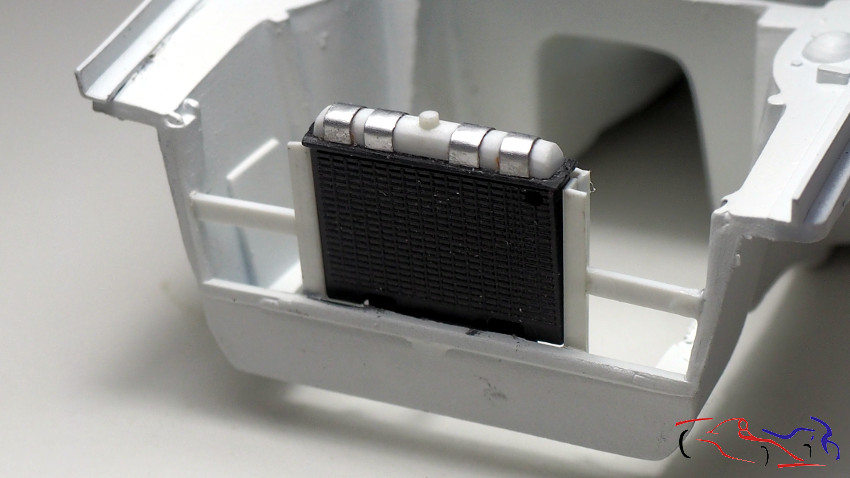
Pasamos al radiador. Le eliminé la parte redonda de arriba, fabricándole otra de plástico. Le di forma añadiéndole tiras de cápsula de botella de vino, así como la entrada del depósito. Aquí lo vemos en su posición dentro del chasis, con el armazón que le he realizado con tiras de Evergreen en forma de esquina:
Let’s go with the radiator. I eliminated the round part from above, making another plastic part. I shaped it by adding strips of wine bottle capsule, as well as the entrance of the deposit. Here we see it in its position inside the chassis, with the frame that I have made with Evergreen strips in the shape of a corner:
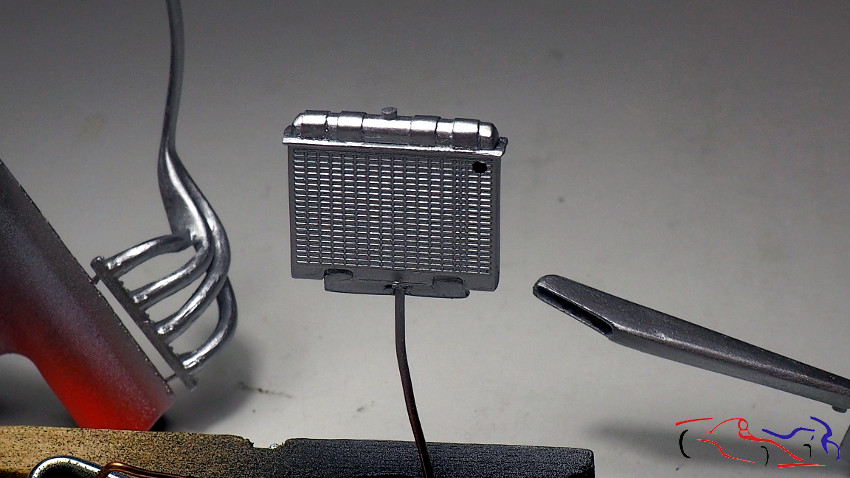
En la siguiente foto, muestro los escapes y el radiador, pintados en Aluminio Metal Color de Vallejo:
In the following photo, I show the exhausts and the radiator, painted in Aluminum Metal Color of Vallejo:
Seguimos con más piezas. Para hacer el acelerador, marco las líneas en la lata de refresco con un cutter:
We continue with more pieces. To make the accelerator, I mark the lines on the soda can with a cutter:
Después de cortarlo y doblarlo, le añado un hilo de cobre para introducirlo en un agujero del suelo del chasis. De igual forma, a los pedales sobrantes de otro kit, le pongo otro hilo de cobre para sujetarlos en el panel del fondo. Vemos a su lado, los pedales originales y se ve porqué decidí sustituirlos:
After cutting and bending it, I add a copper wire to insert it into a hole in the floor of the chassis. Similarly, to the leftover pedals of another kit, I put another copper wire to hold them in the bottom panel. We see beside them, the original pedals and you can see why I decided to replace them:
A los extintores, les di barniz después de pintarlos de rojo:
To the fire extinguishers, I gave them varnish after painting them in red:
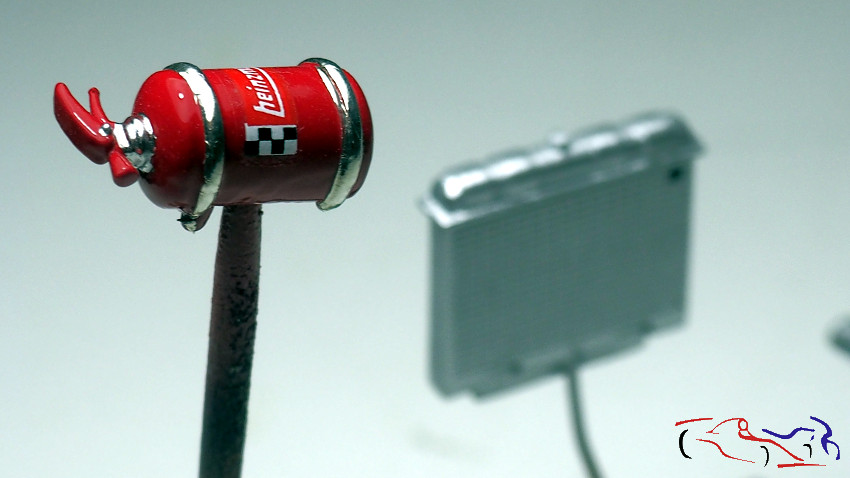
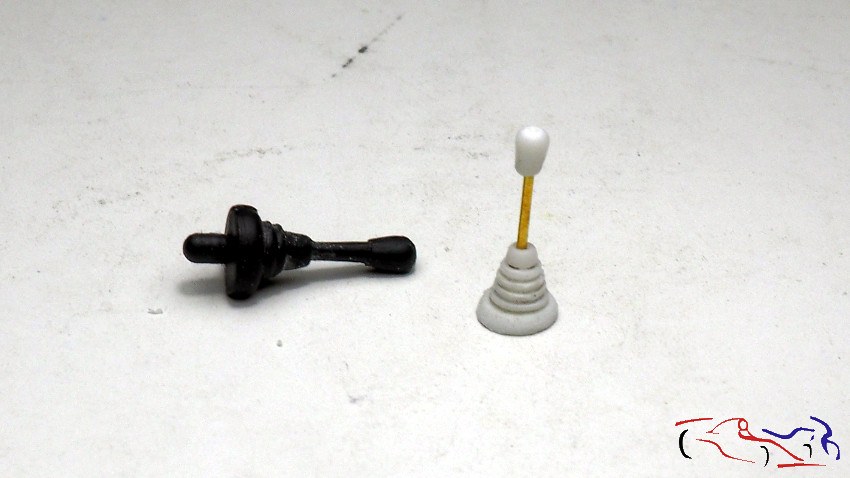
Y una vez secos, le puse la calca, el Bare Metal Foil de las fijaciones, y le pinté de Chromo de Molotov a pincel, la base del mecanismo de uso:
And once dry, I put the decal, the Bare Metal Foil of the fixings, and I painted him from Chromo de Molotov with a brush, the basis of the mechanism of use:
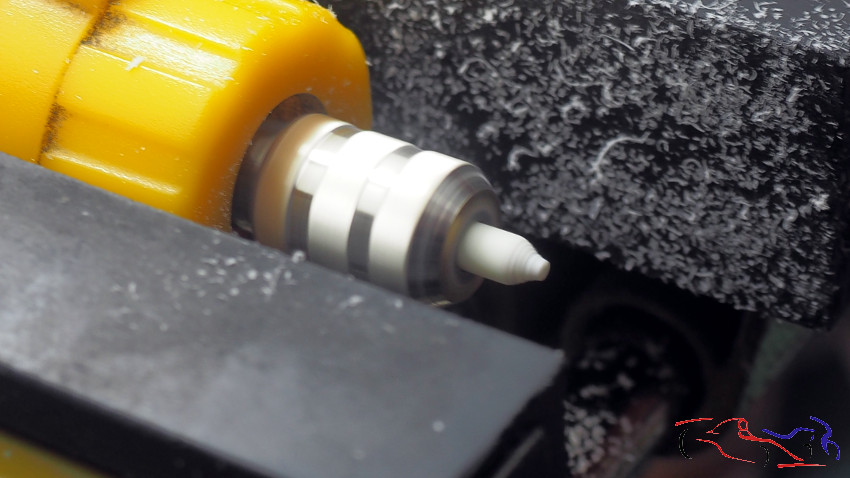
Con el minitaladro a modo de torno, y con un redondo de Evergreen, rehice la base de la palanca de cambios:
With the mini-drill in the form of a lathe, and with a round of Evergreen, I redid the base of the gear lever:
Siendo el resultado la siguiente foto, que comparamos con el original del kit:
The result is in the following photo, which we compared with the original of the kit:
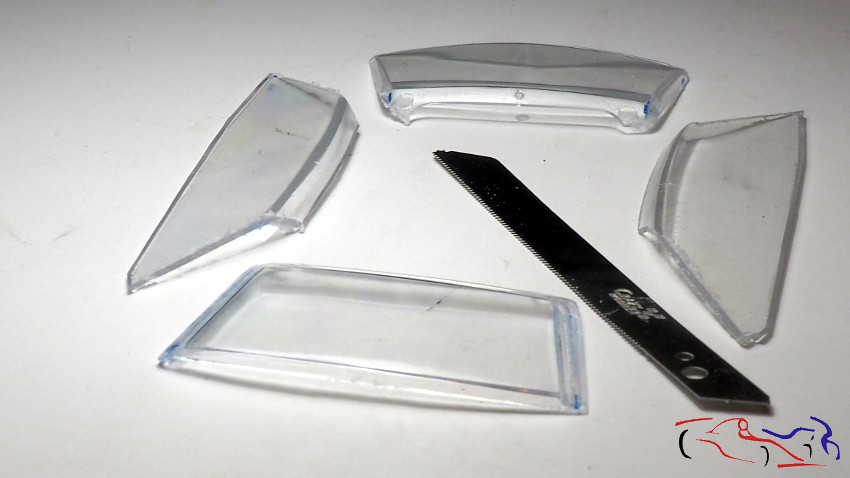
Pasamos a los cristales. Los corté por las esquinas para usar el delantero y trasero, sustituyendo los laterales por láminas transparentes de Evergreen:
We go to the crystals. I cut them at the corners to use the front and back, replacing the sides with transparent Evergreen sheets:
Y pasamos a pintar más piezas con negro mate de MIG, directamente sin imprimar: las calandras delanteras, limpiaparabrisas, fondo de los faros de Renaissance y el fotograbado de los relojes del salpicadero.
And we went on to paint more pieces with black matte MIG, directly unprimed: the front grille, wipers, bottom Renaissance headlights and the photogravure of the dashboard clocks.
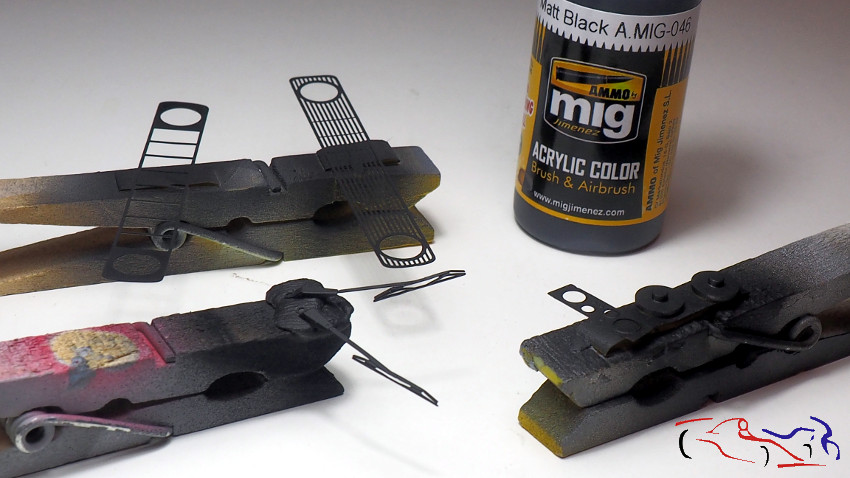
También pintamos el volante, arco de seguridad (ya mostrado anteriormente), entrada de aire del motor y palanca de cambios.
We also painted the steering wheel, safety bow (already shown above), engine air intake and shift lever.
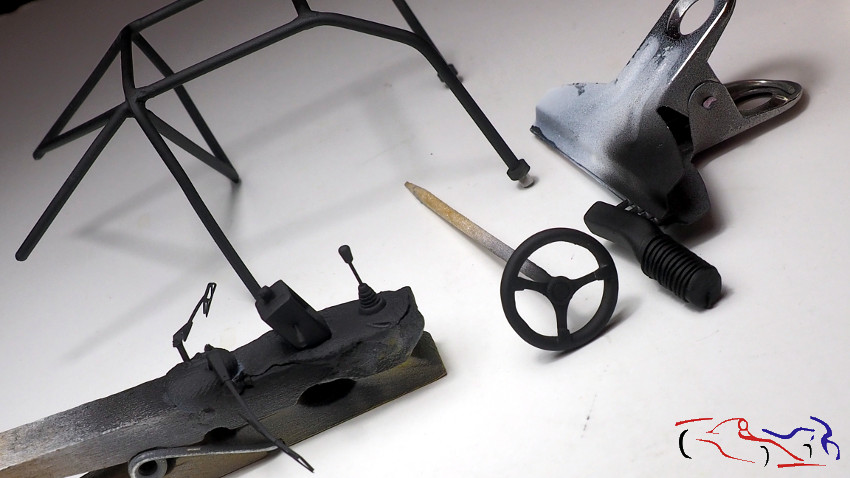
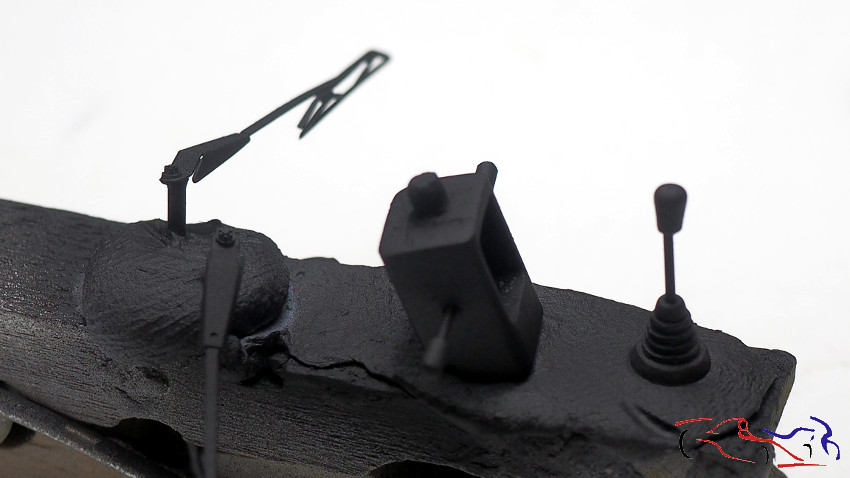
Una ampliación de la palanca, fijación del volante y de los limpiaparabrisas, qie les he puesto un redondo de Evergreen en el eje de giro con un tornillo de resina de Masterclub:
An extension of the lever, fixation of the steering wheel and windscreen wipers, that I have put a round of Evergreen in the axis of rotation with a resin screw Masterclub:
A la cuna, le elimino la base del asiento derecho y le añado unas formas a modo de suelo del chasis:
To the cradle, I remove the base of the right seat and add some forms as a floor of the chassis:

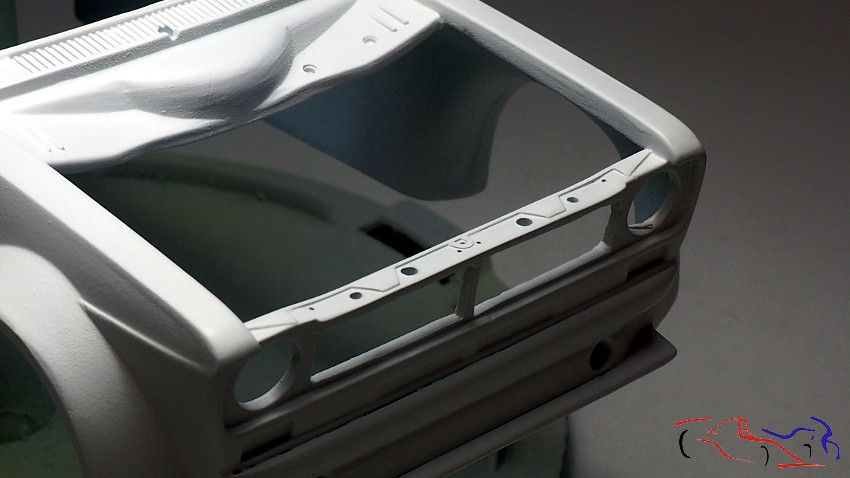
Y pasamos a la pintura final de la carrocería: blanco brillante de Zero
And we went to the final painting of the body: Zero bright white
Después de ello, le doy un par de capas de barniz prediluido de Zero, para aplicar las calcas:
After that, I give him a couple of layers of Zero prediluted varnish, to apply the decals:
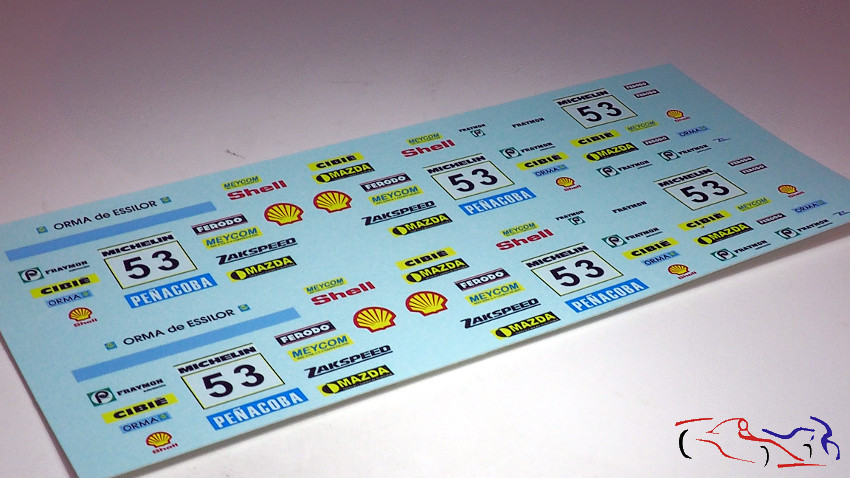
Aquí os muestro las calcas realizadas por Sergio de Decalab. Como veis, hay dos unidades de cada por si cometo algún error!!
Here I show you the decals made by Sergio of Decalab. As you can see, there are two units of each in case I make a mistake !!
Y empezamos con los líquidos micro y un secador de pelo:
And we start with Micro liquids and a hair dryer:

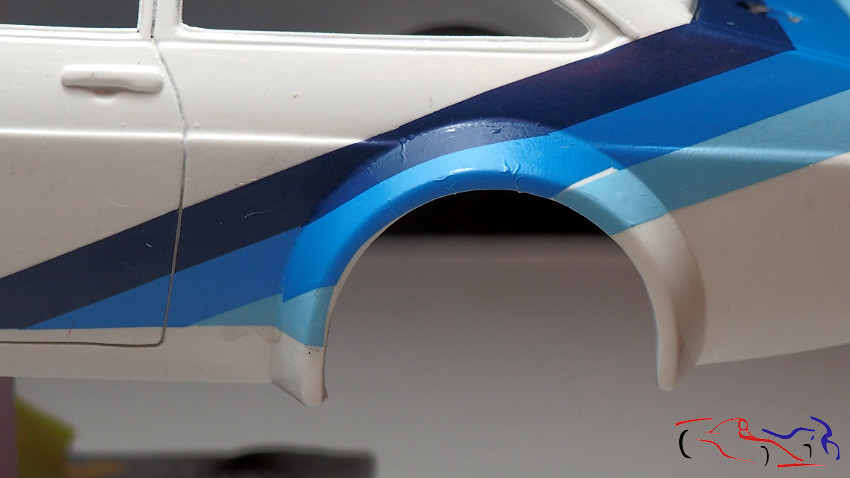
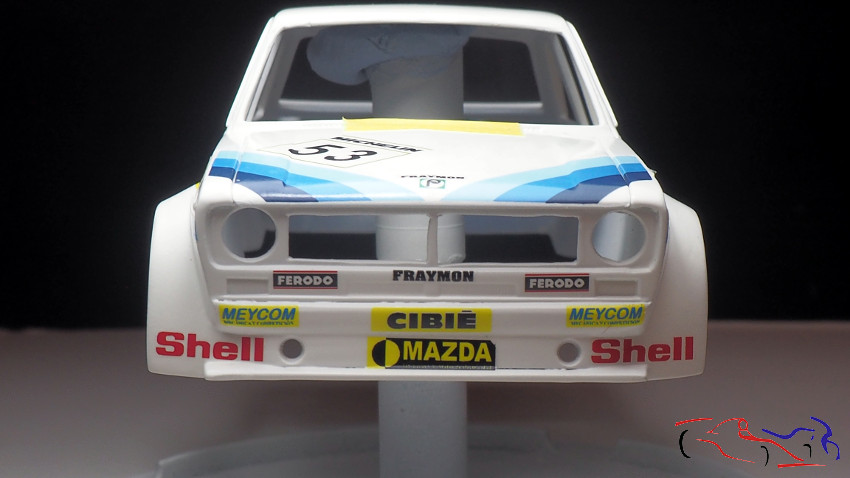
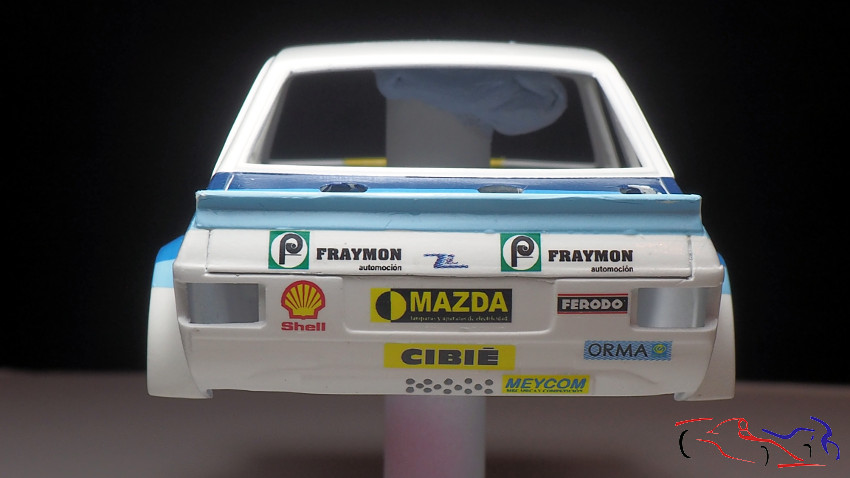
Aquí vemos que las calcas no cuadran muy bien, pero eso lo solucionaremos con las calcas sobrantes del kit original que no pondré, que recorto y coloco encima en los lugares adecuados:
Here we see that the decals do not fit very well, but that will be solved with the leftover decals of the original kit that I will not put, that I cut and place on top in the right places:

Y esto es todo por hoy. Gracias por ver y comentar!!
And that’s all for today. Thanks for viewing and commenting!!


