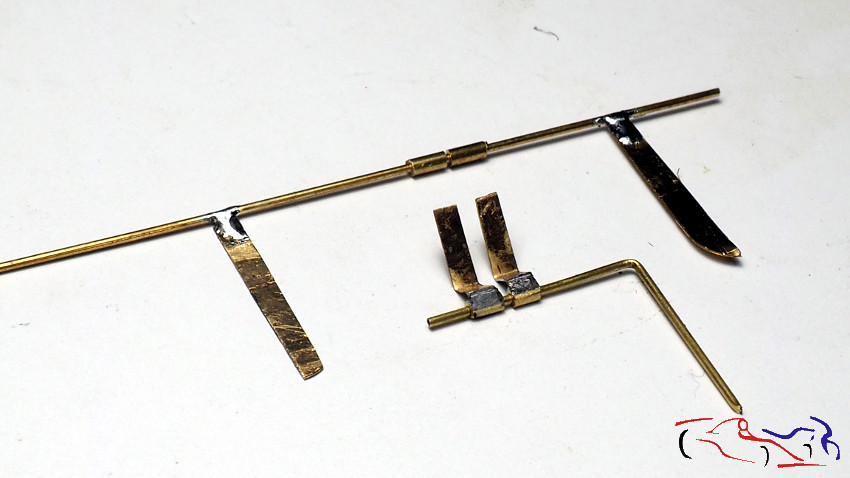
Una vez terminado el Audi R8, volvemos con el Lancia Delta, ya que he estado trabajando sobre las bisagras del capó y de la puerta delantera derecha durante este tiempo pasado. Por tanto, en esta actualización y en la siguiente, solo hablaré de bisagras. Y empezamos con la del capó. Analizando el coche original en fotos, se puede observar que el eje de giro de las bisagras está más abajo que la linea inferior del capó, y que forma una doble L hasta que se fija en dicho capó. Esto es debido a que es necesario que la calandra delantera qué por detrás del capó abierto, o en otras palabras, que el capçó abierto se coloca delante de la calandra. Para ello, realizo las siguientes piezas con latón: la superior será la pieza que va fijada en la trasera de la calandra de forma fija, y las dos de debajo, serán cada una de las pestañas irán metidas en el tubo superiror, y que girarán porque estarán pegadas al capó, de tal manera que el tubo superior, será el eje de giro:
Having finished the Audi R8, we are back to the Lancia Delta, as I have been working on the bonnet and right front door hinges during this past time. So, this and the next update, I will only talk about hinges. And we start with the bonnet hinge. Analyzing the original car pictures, you can see that the pivot axis of the hinges is lower than the lower line of the bonnet, and that it forms a double L until it is fixed on the bonnet. This is because it is necessary that the front grille is placed behind the open bonnet, or in other words, that the open bonnet is placed in front of the grille. For this, I make the following pieces with brass: the upper one will be the piece that is fixed to the rear of the grille in a fixed way, and the two below, will be each one of the tabs that will go into the upper tube, and that will turn because they will be glued to the bonnet, in such a way that the upper tube, will be the axis of rotation:
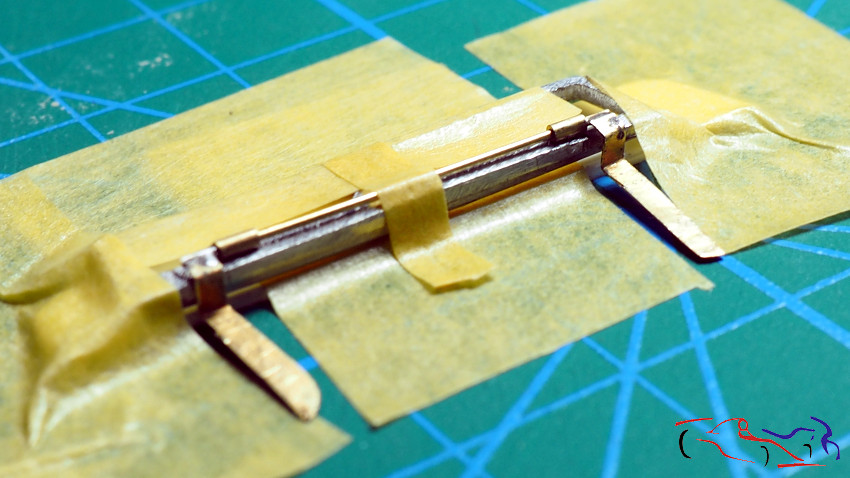
Y para pegarlo a la parte trasera de la calandra, lo sujeto todo para que el ciano haga su efecto. Podemos ver las dos piezas de los extremos, en forma de doble L que serán las que al ir pegadas al capó, girarán a la hora de abrirse.
And to stick it to the rear part of the grille, I hold it all together so that the cyano can make its effect. We can see the two pieces at the ends, in the shape of a double L, which will be the ones that will be glued to the bonnet and will rotate when it is opened.
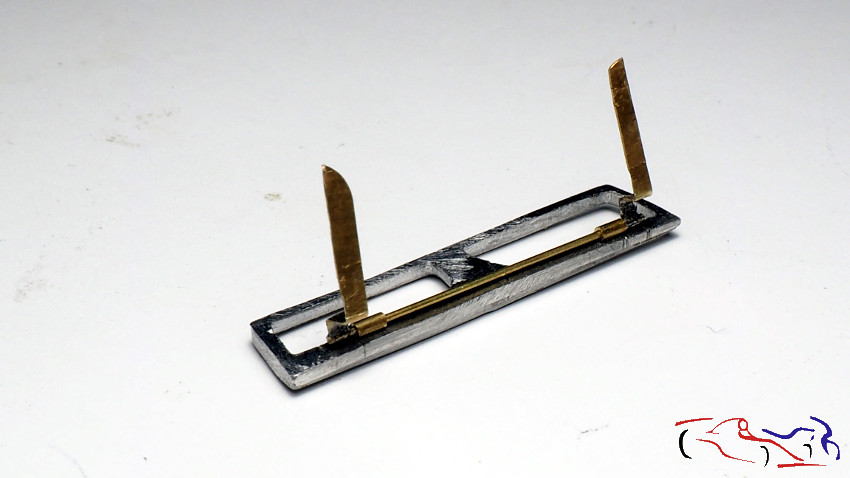
Y este es el resultado. Pero…..la doble L de esas piezas, el tubo y los dobleces, necesitan un espacio mayor del que tenía, por lo que el capò no llegaba a cerrarse. Funciona bien, pero el resultado no es fino. Podéis verlo en el siguiente video: https://youtu.be/BFGUv9JquV8
And this is the result. But…..la double L of those pieces, the tube and the bends, need more space than I had, so the bonnet didn’t close. It works well, but the result is not fine. You can see it in the following video: https://youtu.be/BFGUv9JquV8
Entonces, estuve pensando en hacer la bisagra con imanes: si colocamos un imán, junt a otro que está fijo, el primero se puede mover sin separarse. Si a ese que se puede mover, le pegamos una pieza, esa pieza gira. Esta es la idea. Y para empezar, necesito más espacio con lo que recorto un poco la parte delantera de la pieza donde se apoyan las bisagras. Esta pieza de resina, es la cuna del motor del TK de Claudio de Bellis
So, I was thinking about making the hinge with magnets: if we place a magnet next to another one that is fixed, the first one can move without separating. If we glue a piece to the one that can move, that piece rotates. This is the idea. And to start with, I need more space, so I cut a little bit the front part of the piece where the hinges rest. This resin piece is the engine cradle of Claudio de Bellis’s TK.

Lo siguiente es hacer las bisagras. Para ello, corto unas tiras de latón, de unos 2mm, y las fijo en la mesa con cinta d enmascarar. Despues cojo la tira de imanes alineados y la coloco junto al latón, para que queden unos 3 imanes dentro del ancho del latón, y los fijo con más cinta de enmascarar. Ahora, deposito unas gotas de ciano para que esos 3 imanes, se peguen al latón. Si hubiera tenido imanes de 2mm de largo, los hubiera usado en lugar de poner 3. Estos imanes son de 1mm de diametro y de menos de 1mm de alto.
The next step is to make the hinges. To do this, I cut some strips of brass, about 2mm, and fix them to the table with masking tape. Then I take the strip of aligned magnets and place it next to the brass, so that there are about 3 magnets inside the width of the brass, and fix them with more masking tape. Now, I put a few drops of cyano so those 3 magnets stick to the brass. If I had 2mm long magnets, I would have used them instead of 3. These magnets are 1mm in diameter and less than 1mm high.
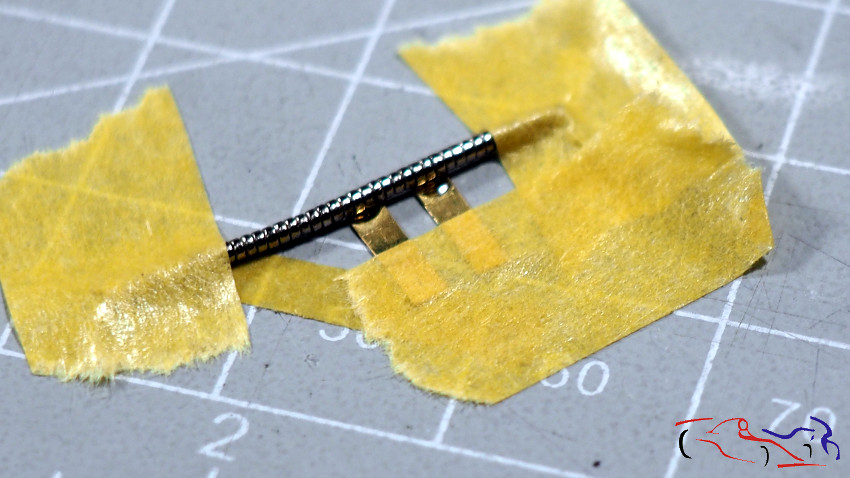
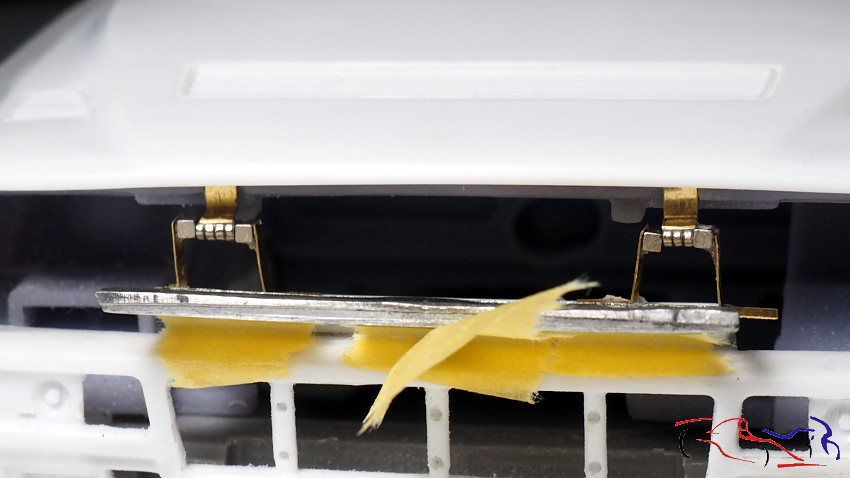
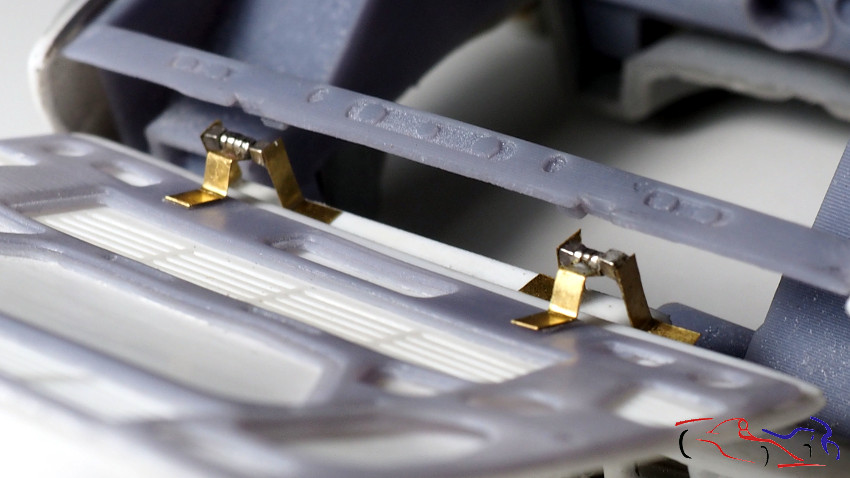
Unas vez secos, separo los imanes que no están pegados, y doblo las tiras de laton en foma de doble L. (las medidas ya las había cogido y en las tiras de laton ya estaban marcados por donde debía doblar). Y ahora, tenía que hacer unas fijaciones para colocar los imanes de los extremos. Para eso, corté más tiras de latón, les pegué en los extremos unos imanes cuadrados, y doblé las tiras en forma de L para fijarlas en la base de la calandra, pero por dentro de ésta, como aparece en la siguiente foto. La calandra está horizontalmente girada hacia la cámara para dejar ver el juego de imanes.
Once they are dry, I separate the magnets that are not glued, and I bend the brass strips in a double L shape (I had already taken the measurements and the brass strips were already marked where I had to bend). And now, I had to make some fixings to place the magnets at the ends. For that, I cut more brass strips, glued some square magnets on the ends, and bent the strips in an L shape to fix them to the base of the radiator grille, but inside it, as shown in the following picture. The grille is horizontally turned towards the camera to show the magnet set.
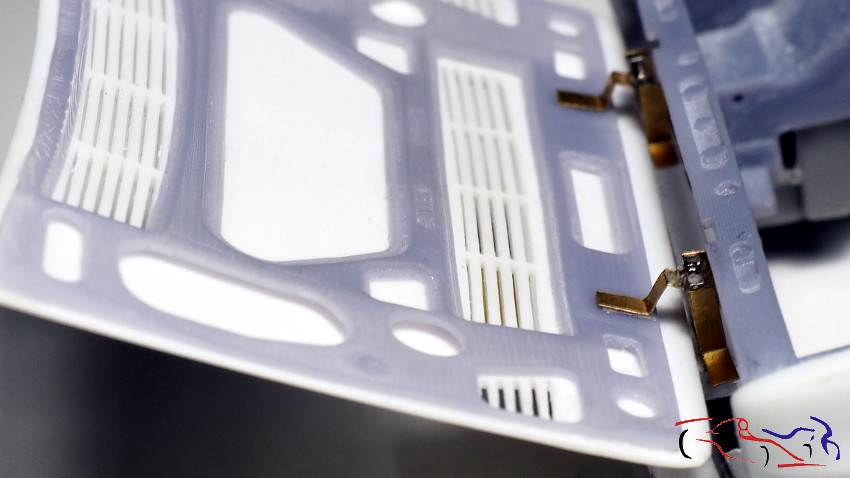
En as siguientes fotos, vomos como queda una vez abierto, sorteando la calandra delantera:
In the following pictures, you can see how it looks like once it has been opened, avoiding the front grille:
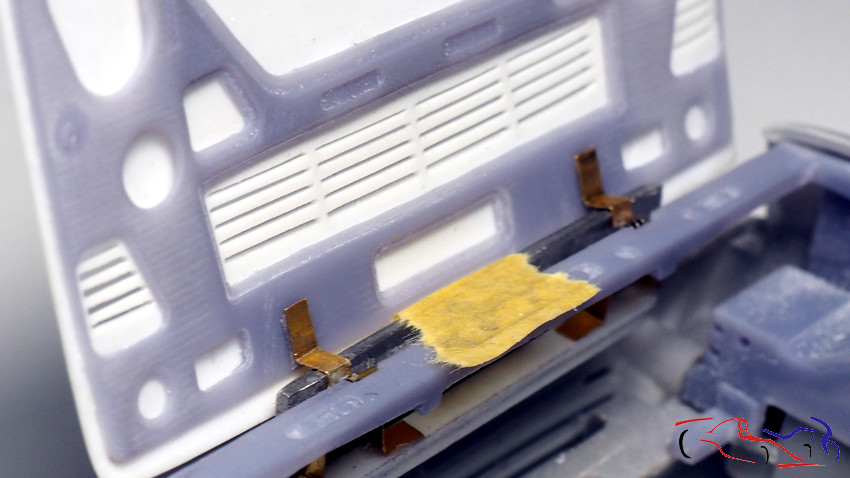

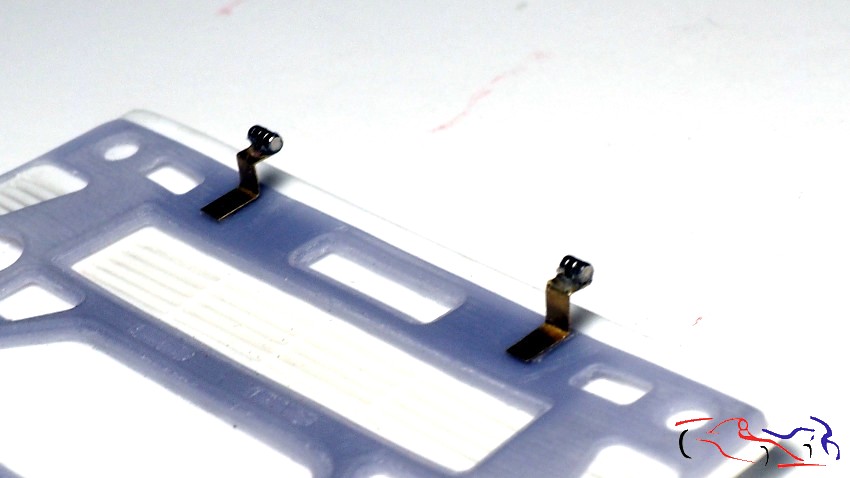
SI quitamos la calandra, vemos como quedarían las bisagras:
In the following pictures, you can see how it looks like once it has been opened, avoiding the front grille:
Deciros, que las bisagras del capó, las pegué al mismo después de fijas las piezas d elos imanes cuadrados, y poniedo las piezas movibles en su posición de cerrado. puse cinta adhesiva de doble cara sobre éstas, y coloqué el capó en su posición sobre la carrocería. Presioné y ya estaba listo. También hau que destacar, que usar bisagras con imanes te permiten quitar y poner las piezas sin problemas, por ejemplo, para pintarlas. Aquí os muestro el capó separado de la carrocería.
Just to let you know I glued the bonnet hinges to the bonnet after fixing the square magnets, and putting the movable parts in their closed position. I put double-sided tape over them, and put the bonnet in its position on the bodywork. I pressed and it was ready. It’s also worth noting that using hinges with magnets allows you to remove and put on the parts without any problems, for example, to paint them. Here I show you the bonnet separated from the bodywork.
Pero para haceros una idea de como funciona, en este video lo veréis claramente: https://youtu.be/UyEZtN1d9Ms
But to give you an idea of how it works, you can see it clearly in this video: https://youtu.be/UyEZtN1d9Ms
Una vez tenemos claras las bisagras del capó, vams con las de las puertas, y lo primero que hacemos es rebajar el grosor de todos los perfiles de las puertas, ya que facilitarán su apertura. Usamos el minitaladro y afinamos con lima:
Once we are clear about the bonnet hinges, we move to the door hinges, and the first thing we do is to reduce the thickness of all the door profiles, as they will make it easier to open them. We use the mini drill and sharpen them with a file:
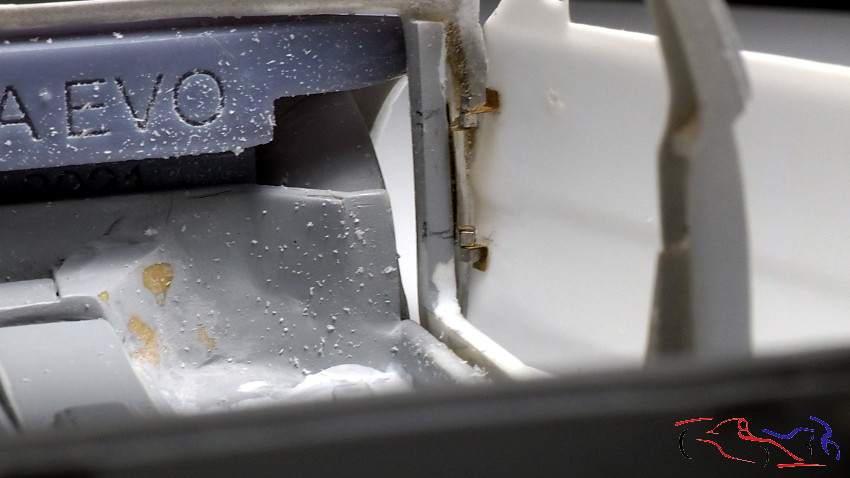
Y empezamos con la puerta del copiloto, y con la misma técnica de los imanes, haciendo estas piezas: una central que irá pegada a la carrocería y dos en los extremos con forma de L:
And we start with the passenger door, and with the same technique as with the magnets, making these pieces: a central one that will be glued to the bodywork and two at the ends in the shape of an L:

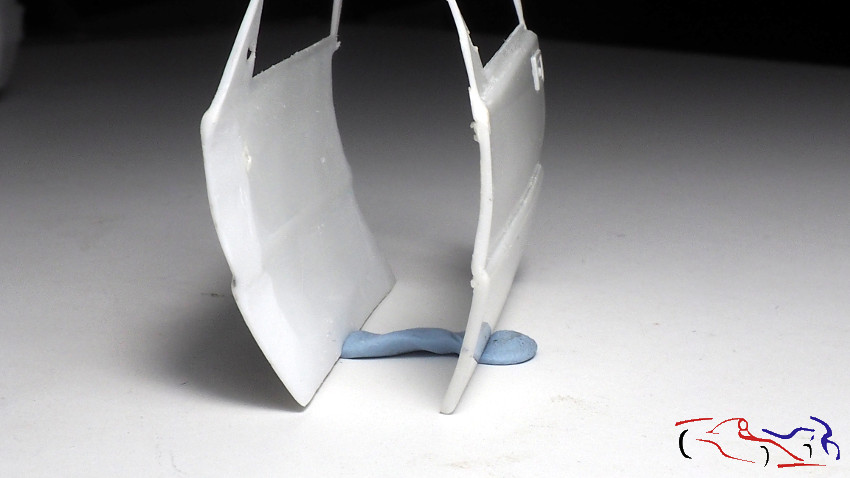
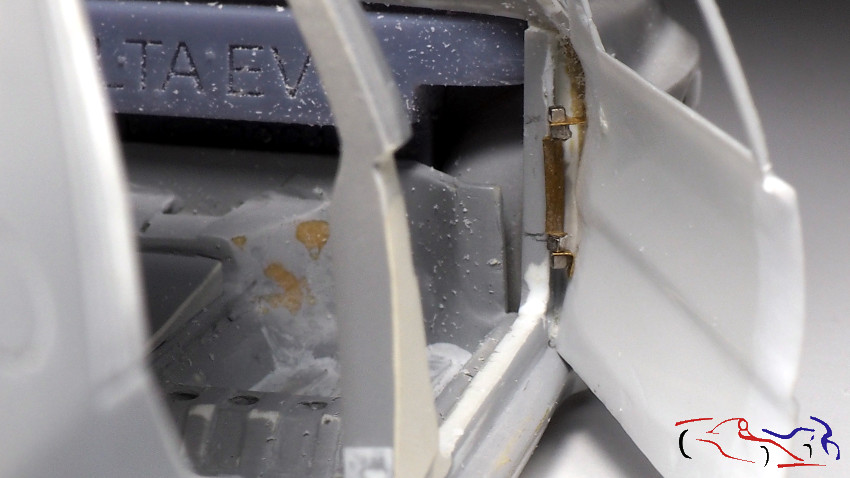
Pero el problema es el espacio, y la curvatura de la puerta. Recordemos que la bisagra tiene que ser totalmente vertical, para que se abra correctamente. En este caso, al abir la puerta, choca con la base de la bisagra…
But the problem is space, and the curvature of the door. Remember that the hinge has to be completely vertical in order to open correctly. In this case, when opening the door, it hits the base of the hinge…
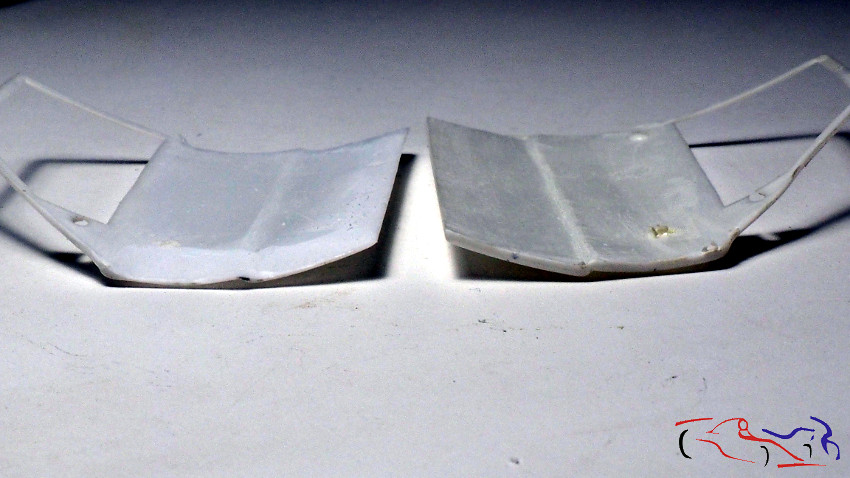
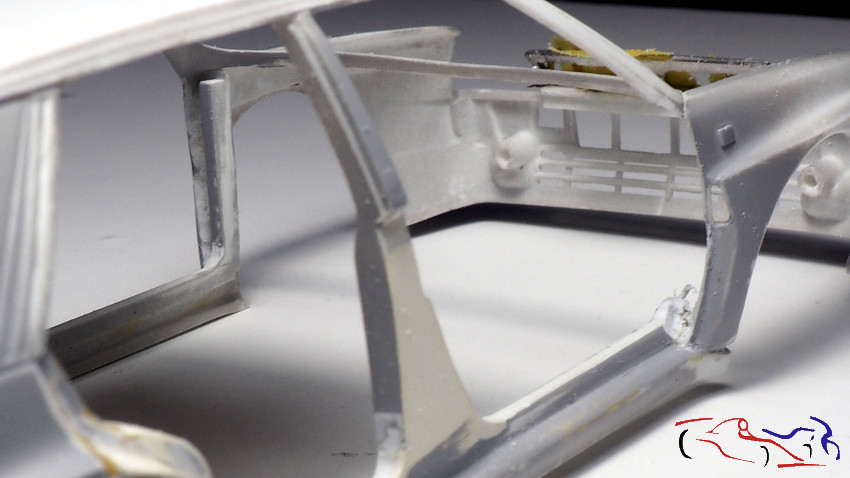
Entonces, pasamos al plan B, con bisagra de ejes de latón, pero primero, eliminamos el interior de la carroceria para operar y adelgazar mejor la carrocería. Podeis ver el lado derecho ya eliminado, y el izquierdo, sin eliminar. Deciros que esta parte que elimino, fue la que añadí en su momento:
Then, we went to plan B, with a brass axle hinge, but first, we removed the inside of the body to operate and thin the body better. You can see the right side already removed, and the left side, without removing. Tell you that this part that I remove, was the one that I added at the time:
Y aquí veis el tipo de bisagra que voy a usar.
And here you see the type of hinge I’m going to use.
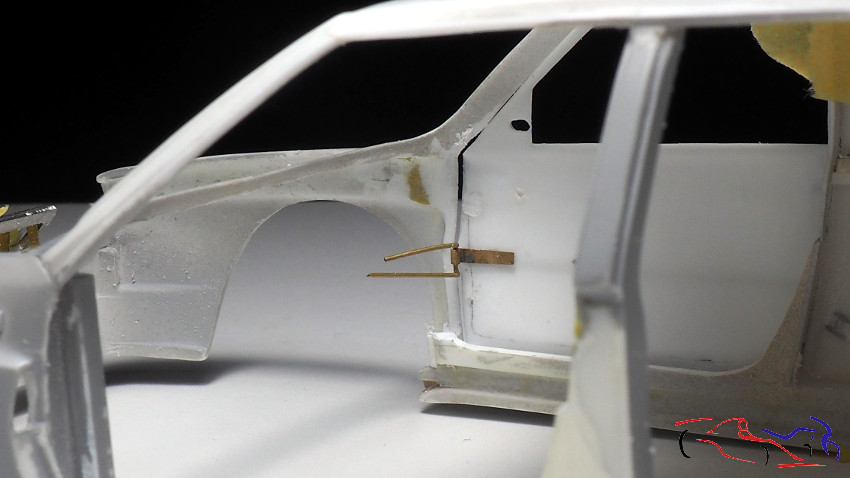
Deciros que este fue un primer intento, que cambié posteriormente, dejando los vástagos en la puerta….pero eso ya lo explicaré en el siguente post!! Gracias por ver y comentar!!
I have to tell you that this was a first attempt, which I changed later, leaving the stems in the door…. but I’ll explain that in the next post! Thanks for watching and commenting!


Mire usted, me encanta ver sus trabajos, a la vez que siento una sana envidia, pero algunas de sus ideas son aprovechables dentro de mis capacidades, claro esta.
Gracias por su trabajo.
Buenos trabajos. Una pregunta. Donde suele comprar los tubos de laton y demás? Xq en Canarias desgraciadamente no se venden. Muchas gracias
Hola. Los tubos de latón los compro por ebay o en Spotmodel: Spotmodel – Albion Alloys
Spotmodel – Trumpeter