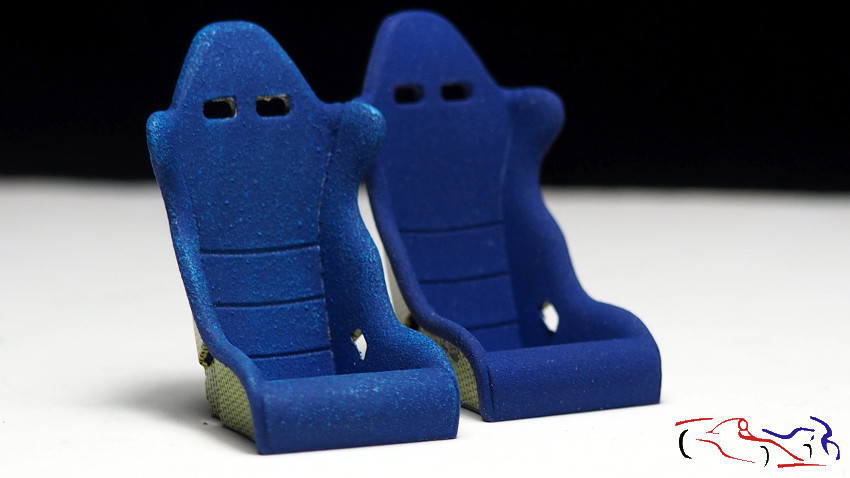
Hola a todos de nuevo. Sigo trabajando en el Delta S4 con muchos detalles extras, ya que el kit lo agradece!. Y esta es una de las últimas imágenes hechas para ver como quedan los asientos:
Hi again, everybody. I’m still working on the Delta S4 with many extra details, since the kit allows you! And this is one of the last images made to see how the seats look:
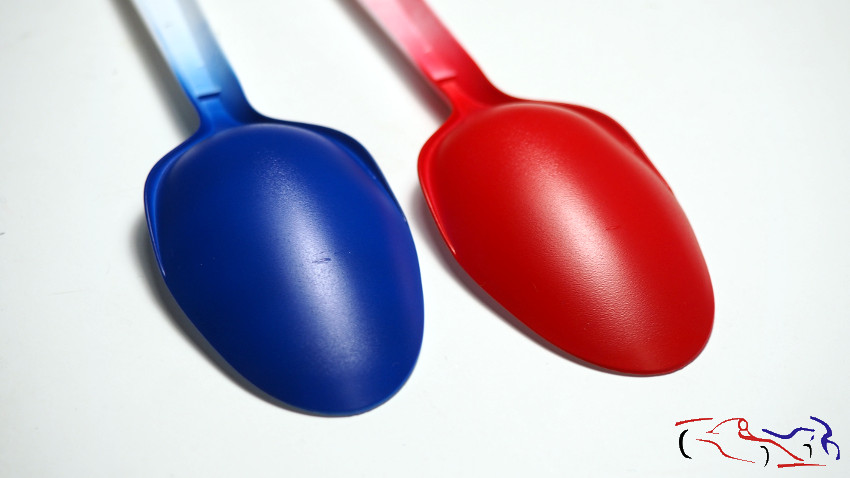
 Y vamos con ellos: viendo los test de la pinturas texturizadas de Zero en colores rojo y azul, decidí aplicar un color base para que cubriese mejor. Y así lo hice: aquí tenéis la capa base….
And we go with them: seeing the tests of Zero’s textured paints in red and blue colors, I decided to apply a base color to cover it better. And so I did it: here you have the base layer …
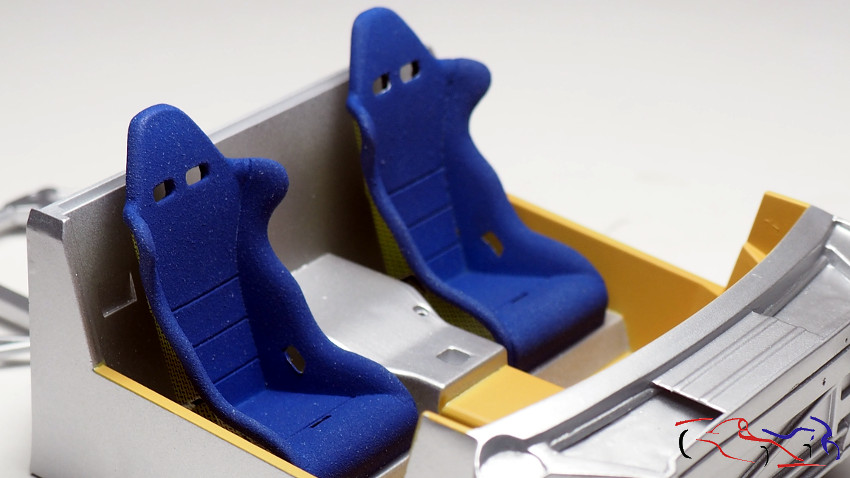
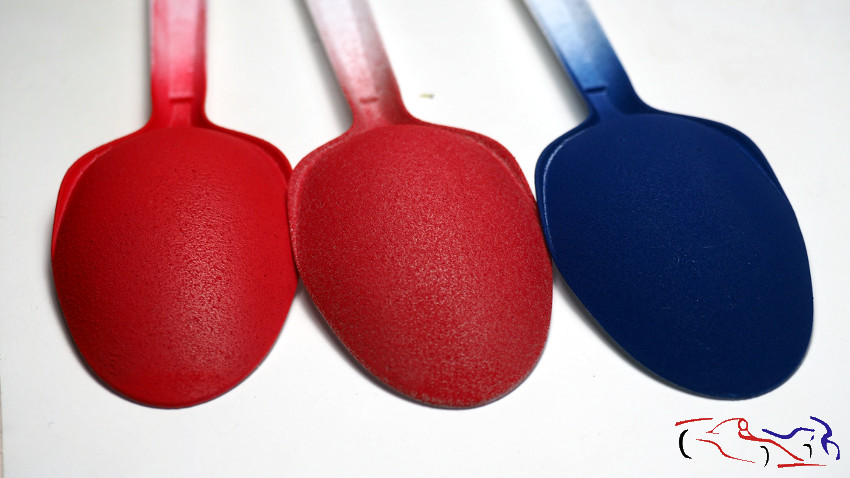
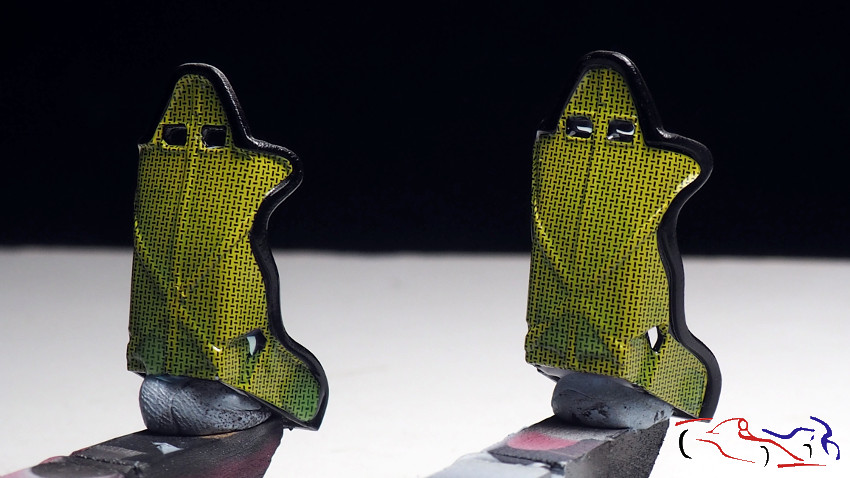
…y aquí con la pintura texturizada. Ahora si que puedo pintar lso asientos!!
… and here with textured paint. Now I can paint the seats!
 Para ello, aplico masking de Micro sobre el kevlar de los asientos..
To do this, I apply Micro masking on the seat kevlar ..
Pintamos la base azul…
We paint the blue base …
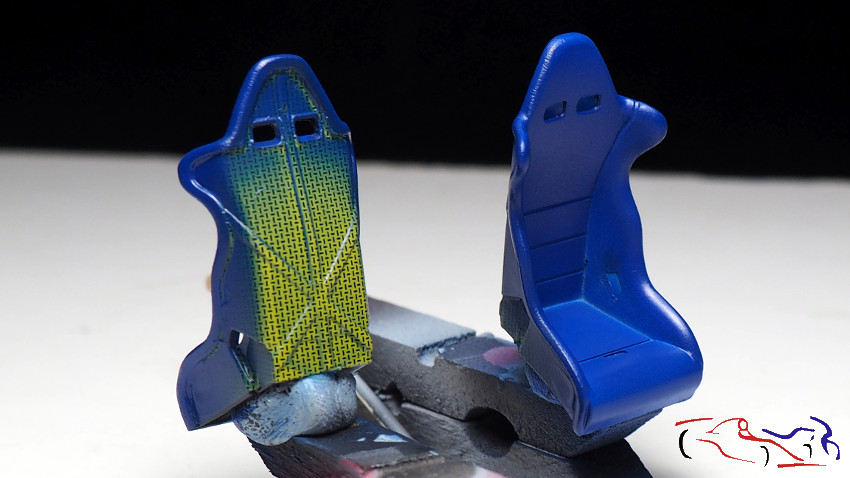
Y aquí la pintura texturizada con boquilla de 0,6 en el aerógrafo…
And here it is with the textured paint with 0.6 nozzle on the airbrush …
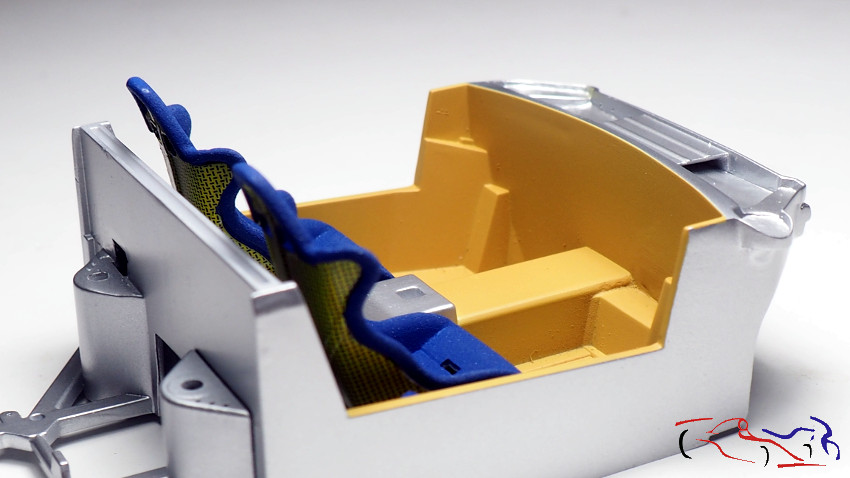
Aquí vemos como queda en el cockpit!!
Here we see how it looks in the cockpit!
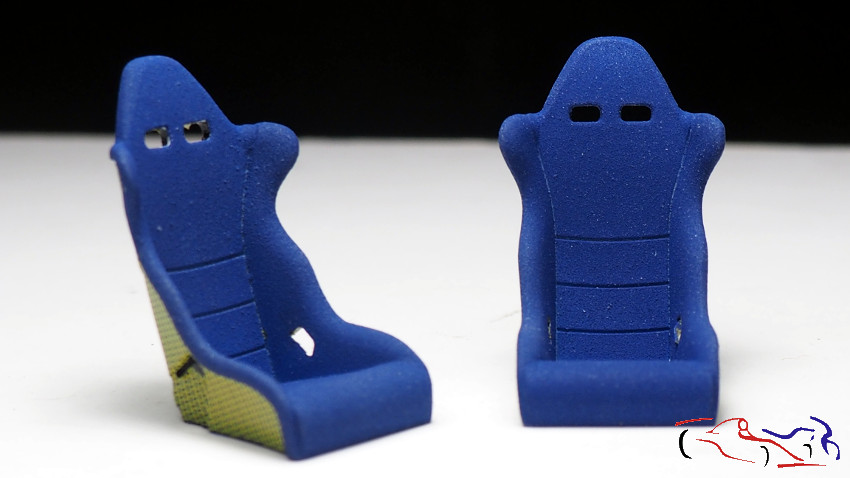
 Y para darle un poco más de profundidad o desgaste, aplico pincel seco con azul claro. Vemos la diferencia en el asiento de la izquierda:
And to give it a little more depth or wear, I apply dry brush with light blue. We see the difference in the left seat:
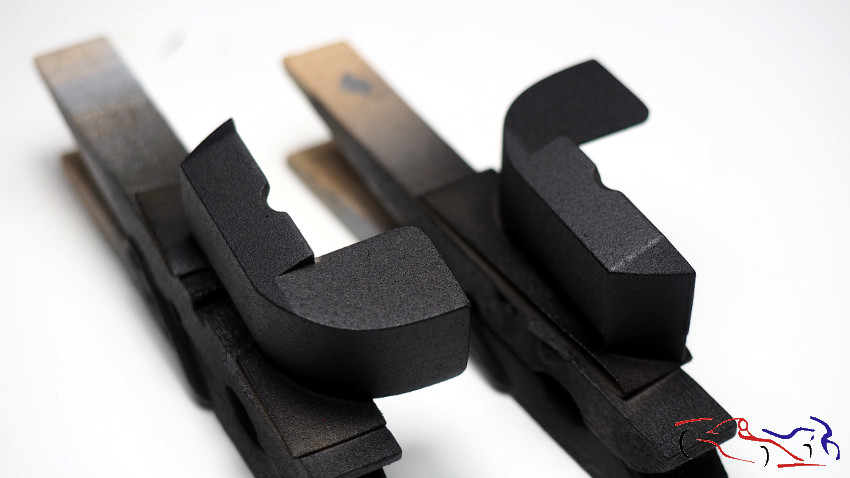
Pasamos a otra pieza que he aplicado pintura texturizada, pero en este caso de color negro: son las piezas donde van alojadas las ruedas traseras, pero que van fijadas al portón trasero:
We move to another piece that I have also applied textured paint, but in this case of black color: they are the pieces where the rear wheels are housed, but they are fixed to the tailgate:
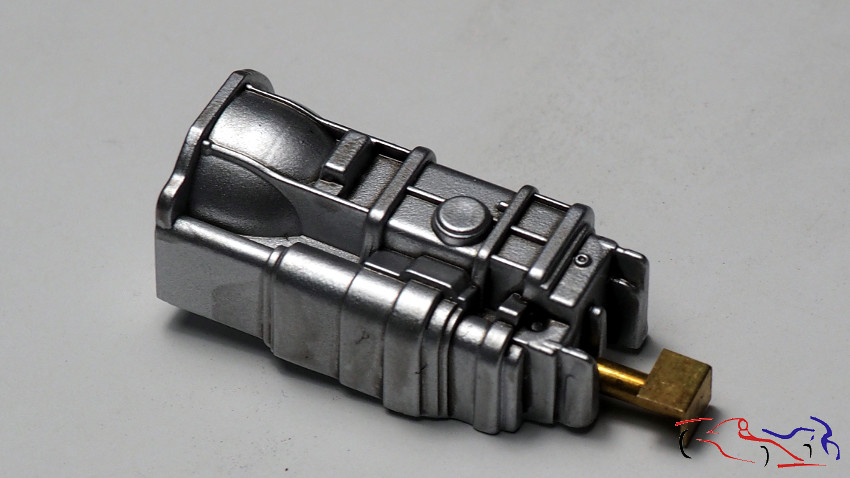
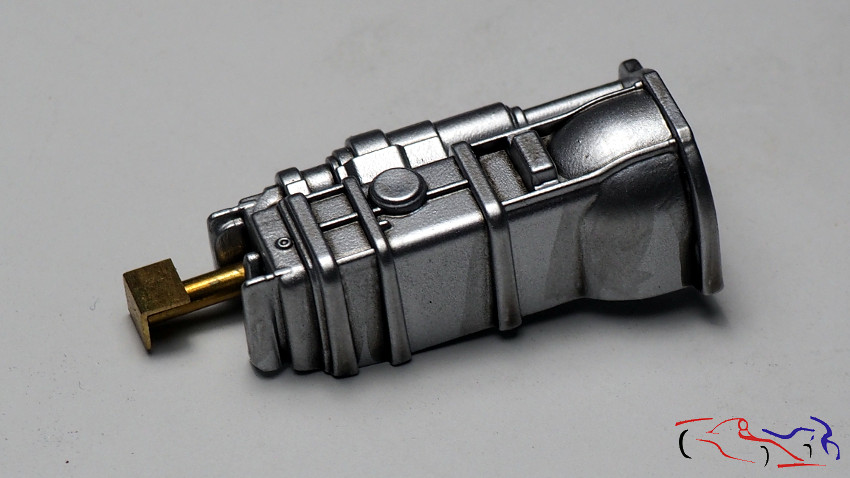
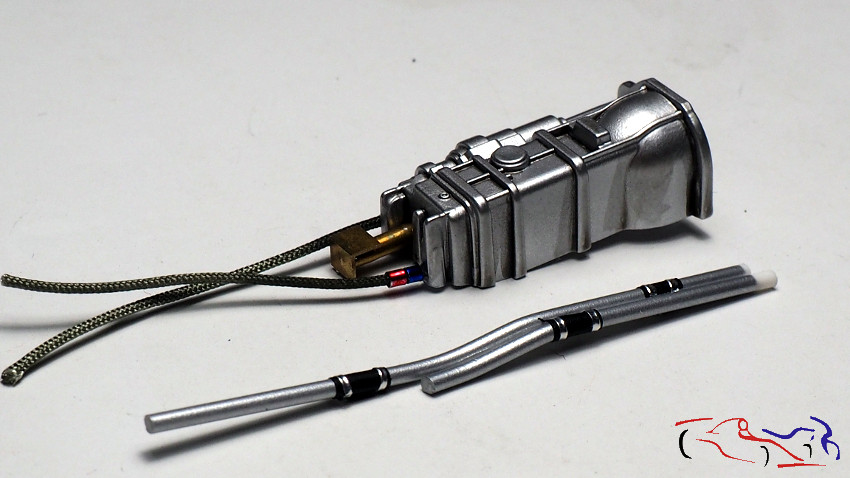
Y de aquí, por proximidad, nos vamos con la transmisión. Es una pieza que teoricamente no se verá por tener el carter tapado por una calva de kevlar. Pero ya que lo voy a detallar un poco, eliminaré parte de esa calca y al ser transparente la pieza, se verá. Una vez pintada la pieza con Metal Aluminium de Zero, le doy unos lavados con humo para añadir profundidad. Además, le añado dos piezas de cobre, un redondo y un angulo. Ahí es donde iría la base de la palanca de cambios:
And from here, by proximity, we move with the transmission. It is a piece that theoretically will not be seen having the carter covered by a bald kevlar. But since I’m going to detail it a bit, I will remove part of that decal and we will look it being transparent the piece. Once the piece is painted with Zero Aluminum Metal, I give it some smoke washes to add depth. In addition, I add two pieces of copper, a round and an angle. That’s where the base of the gearshift would go:
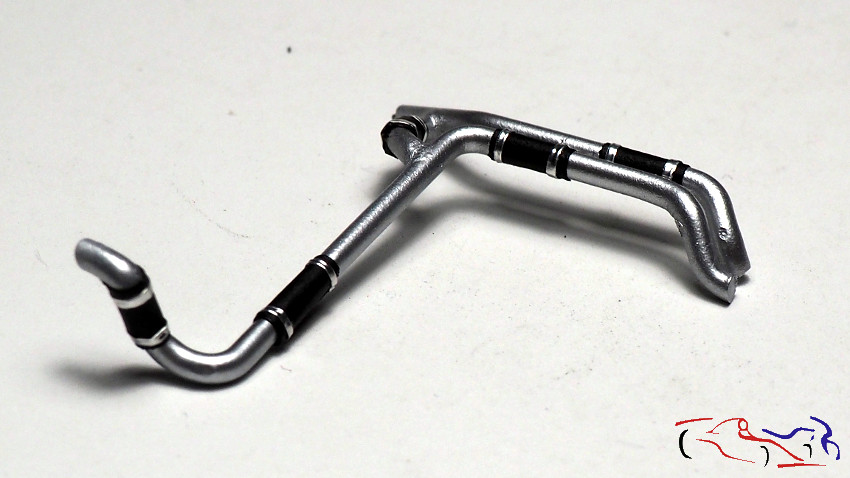
 A su vez, le añado dos latiguillos con us conectores en rojo y azul, dos tuberías que son los conductos del aceite del motor al radiador delantero. y que pasan por ese lugar:
In turn, I add two hoses with us connectors in red and blue, two pipes that are the conduits of the engine oil to the front radiator. and that pass through that place:
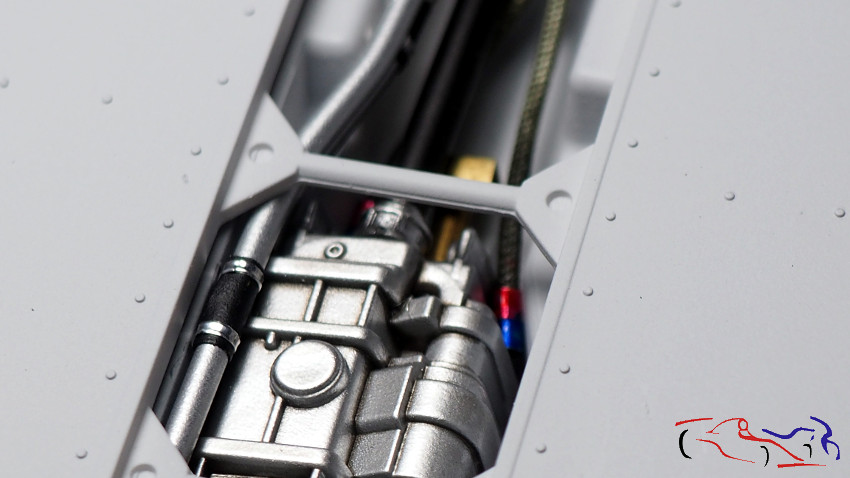
 Si lo colocamos en su lugar, este sería su aspecto:
If we put it in its place, this would be its appearance:
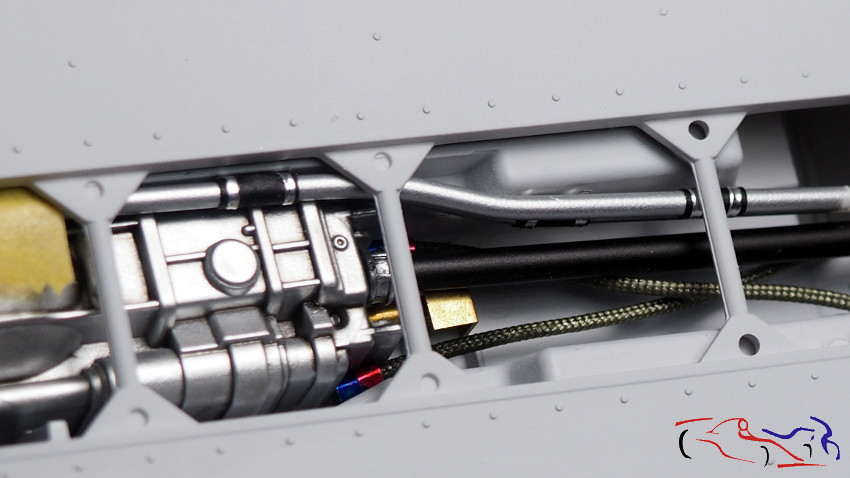
 Podemos ver también la barra negra de transmisión en el medio:
We can also see the black transmission bar in the middle:
 Finalmente, sombreamos la zona con colores Alclad sobre el Aluminio:
Finally, we shade the area with Alclad colors on Aluminum:
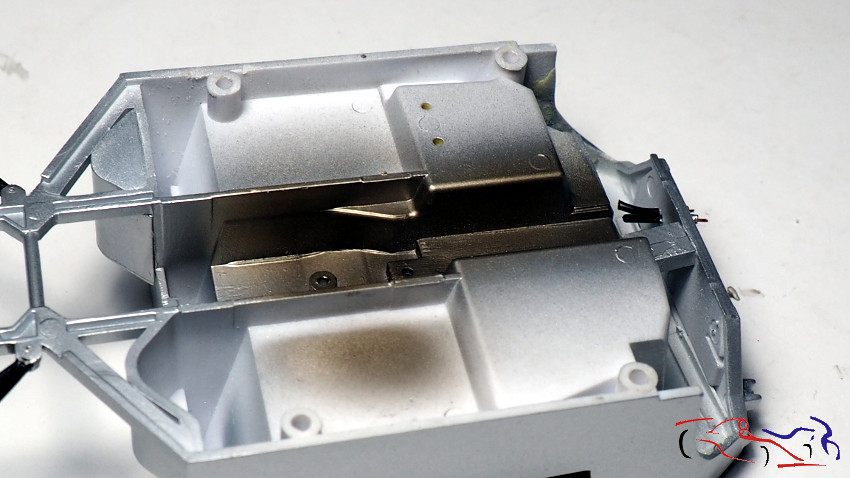
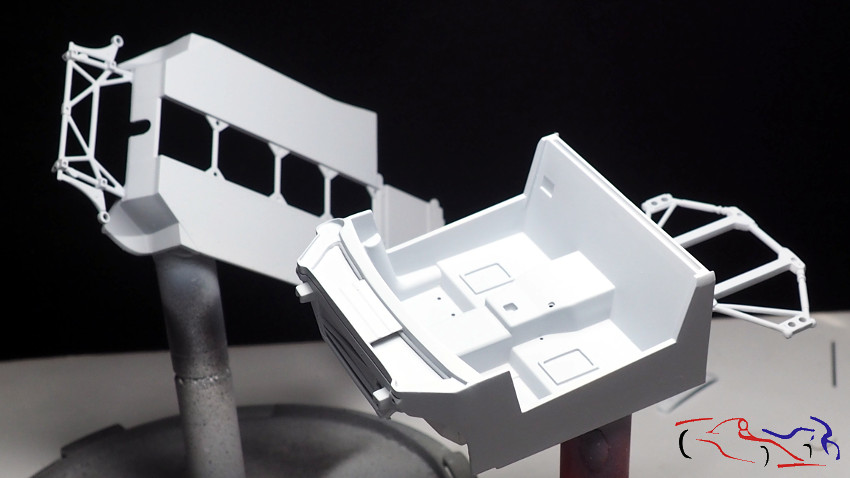
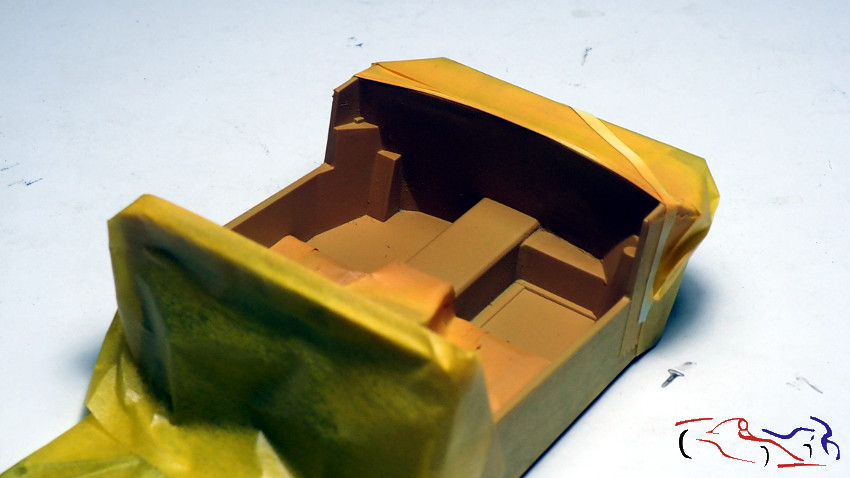
Ahora le vamos a dar la vuelta a esta pieza del habitáculo:
Now we are going to turn this piece of the cabin around:

La imprimamos con Gravity junto con la base del coche:
We prime it with Gravity along with the base of the car:
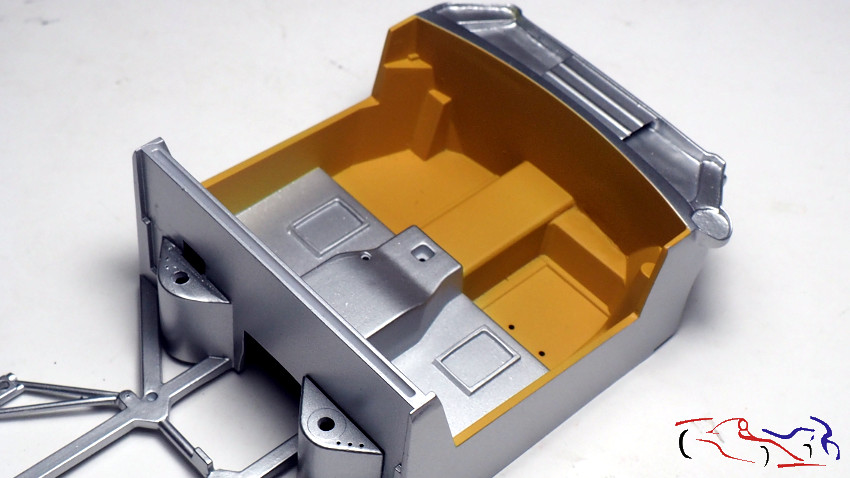
 Y las pintamos con Metal Aluminium de Zero:
And we paint them with Zero Aluminum Metal:
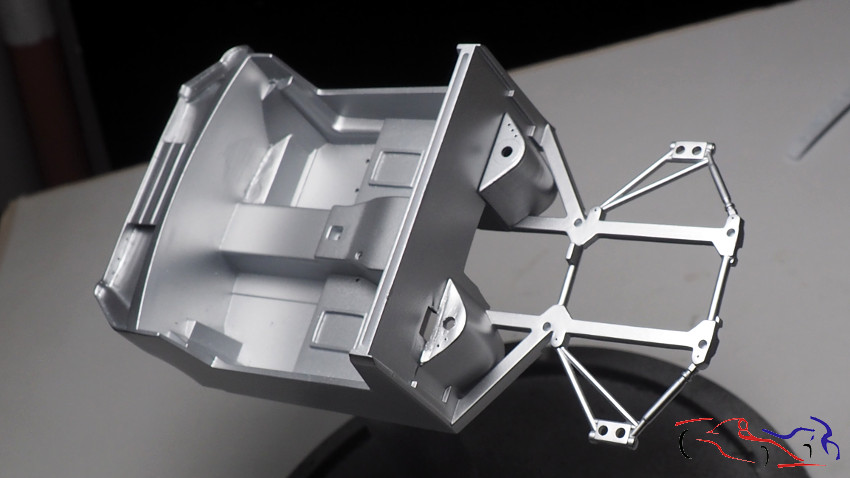
Si juntamos las dos piezas, este es su aspecto en su parte inferior:
If we put the two pieces together, this is their appearance at the bottom:
Como vamos a aplicar Kevlar en todo el cockpit, le damos una base con el color de Zero, habiendo enmascarado el resto:
As we are going to apply Kevlar throughout the cockpit, we give it a base with the color of Zero, having masked the rest:
 Y aquí el resultado:
And this is the result:
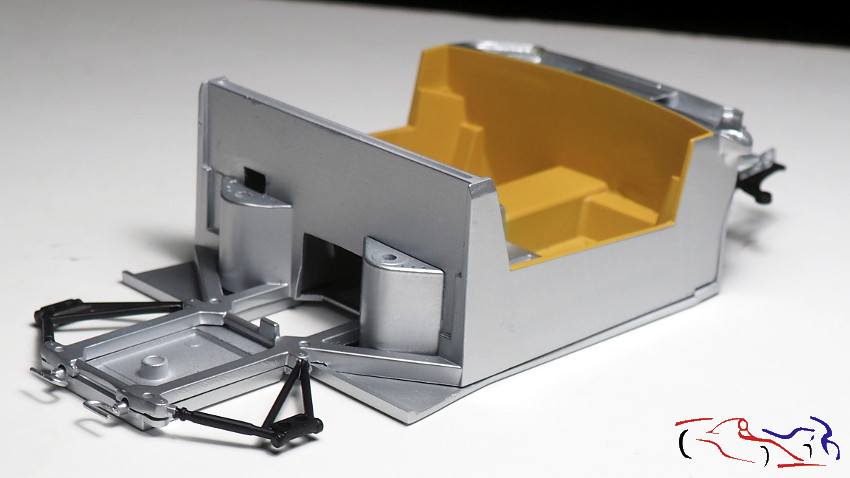
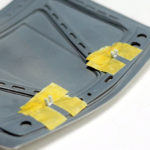
 Pintamos también, los triángulos de la suspensión trasera de negro semi mate de Zero, habiendo enmascarado todo previamente. En la foto, aparecen las piezas del cockpit y chasis superpuestas:
We also painted, the triangles of the rear suspension of semi-matt black from Zero, having masked everything previously. In the photo, the superimposed cockpit and chassis parts appear:
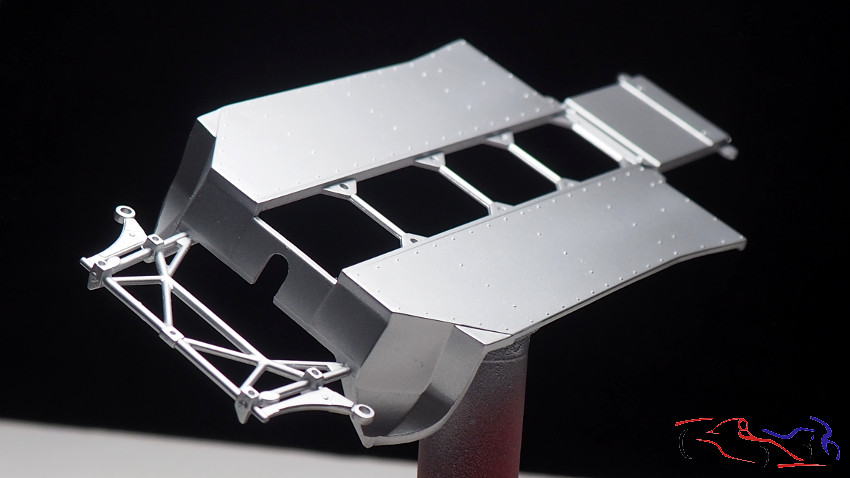
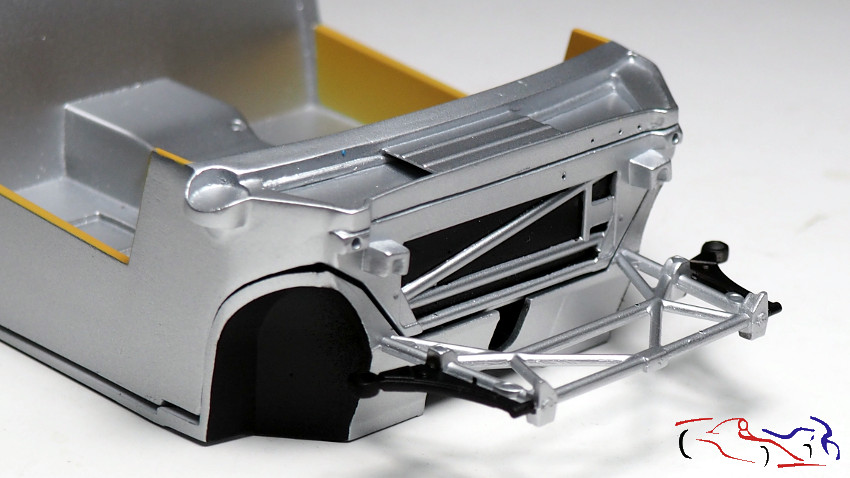
En la siguiente foto, vemos la parte delantera de ambas piezas, con el fondo negro del frontal pintado con semi mate de Zero, habiendo enmascarado las piezas metálicas.
In the following photo, we see the front of both pieces, with the black background of the front painted with semi-matt from Zero, having masked the metal parts.
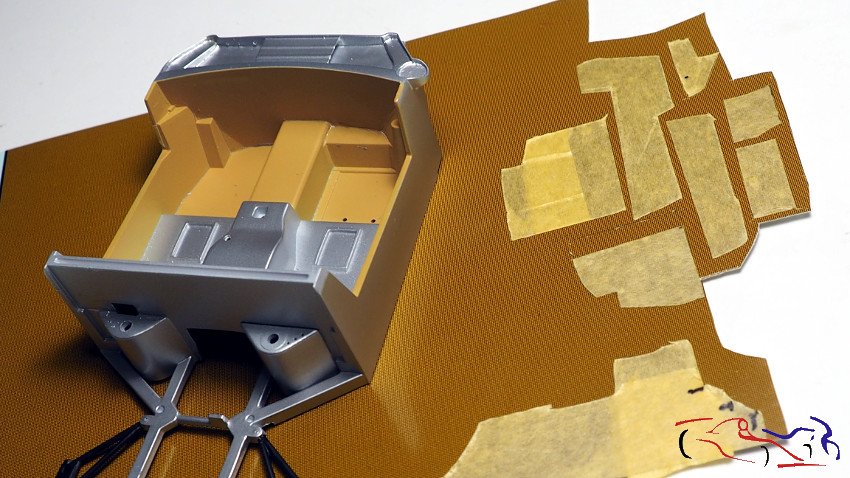
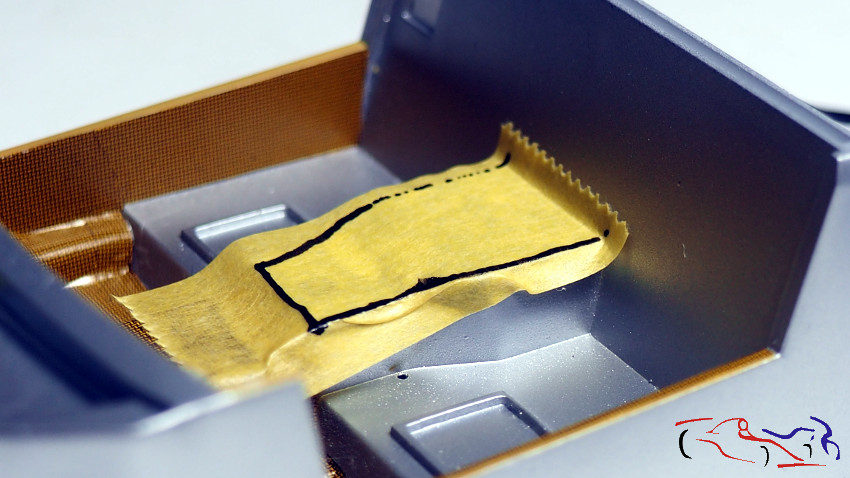
Y pasamos al proceso de creación de las calcas de Kevlar. Primero vamos poniendo cinta de enmascarar y las cortamos directamente con el cutter. Observamos el corte ya realizado en la base izquierda de la cinta:
And we move on to the process of creating the Kevlar decals. First we put masking tape and cut them directly with the cutter. We observe the cut already made on the left base of the tape:
…y las ponemos en la hoja de calcas, listas para cortarse y aplicar:
… and we put them on the decal sheet, ready to cut and apply:
 Este es el resultado. Comentar que he recortado las calcas un poco más grandes para que solapen unas con otras, tal y como ocurre en realidad:
This is the result. I can say that I have cut the decals a little bigger so that they overlap with each other, just as it actually happens:
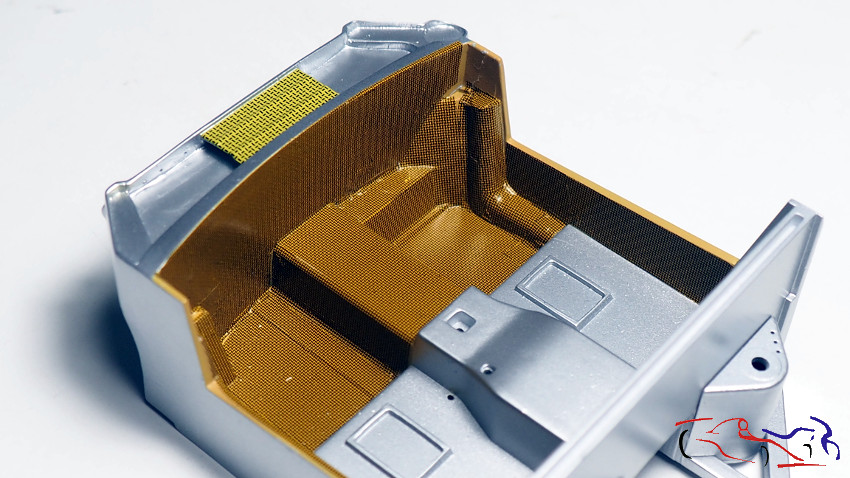 Notad la calca original del kit más amarilla…que más adelante sustituiré!
Notice the original decal of the yellowest kit … which I will replace later!
Seguimos con esta pieza. Vemos que las fotos no llevan una cronología exacta, y es debido a que las he colocado en diferente orden para explicar procesos más o menos completos. Por eso, vemos en la siguiente que no hay ninguna calca de Kevlar puesta, ya que estaba con pruebas del radiador delantero. En la foto vemos las piezas base del kit sobre las que detallaremos:
We continue with this piece. We see that the photos do not have an exact chronology, and it is because I have placed them in different order to explain more or less, the complete processes. Therefore, we see in the following that there is no Kevlar decal on, since I was with tests of the front radiator. In the photo we see the base pieces of the kit on which we will detail:
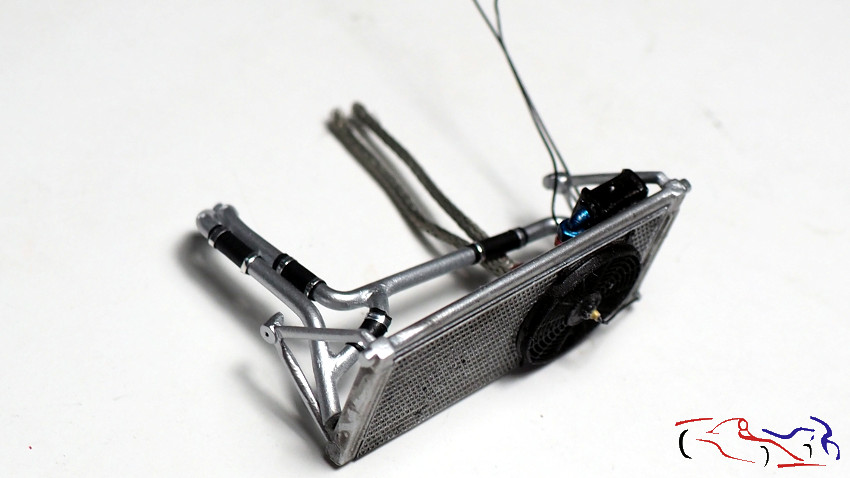
 En el anterior post, dejamos los tubos del radiador pintados con Metal Aluminium de Zero. Ahora véis la pieza con las juntas hechas con cinta de enmascarar pintadas de negro semimate, y sus fijaciones, con cinta autoadhesiva metálica:
In the previous post, we left the radiator tubes painted with Zero Aluminum Metal. Now you see the piece with the joints made with masking tape painted in semi-black, and its fixings, with metallic self-adhesive tape:
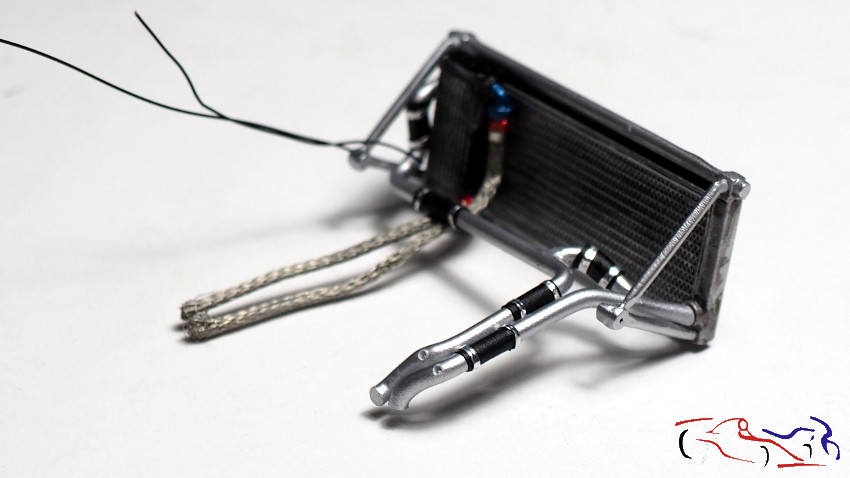
 Y la pegamos al radiador. Vemos también un filtro con sus correspondiente latiguillos trenzados y un par de cables, uno del ventilador y otro de una sonda del tubo de refrigeración:
And we stick it to the radiator. We also see a filter with its corresponding braided hoses and a pair of cables, one from the fan and one from a cooling tube probe:
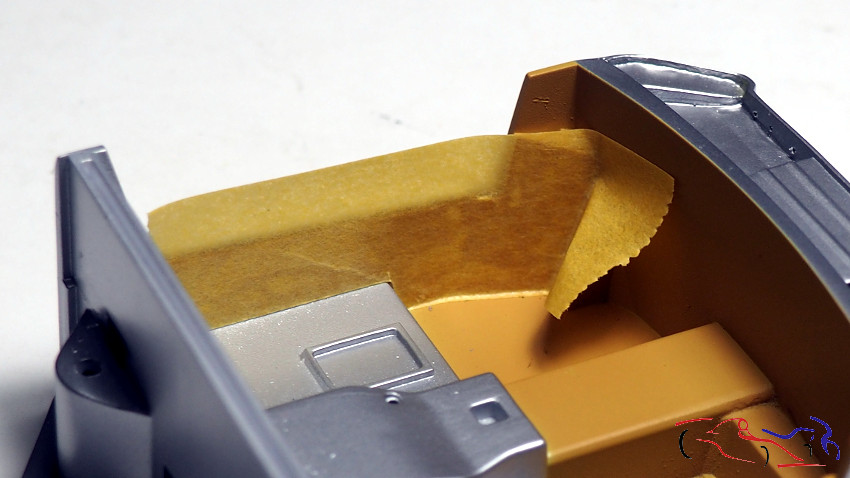
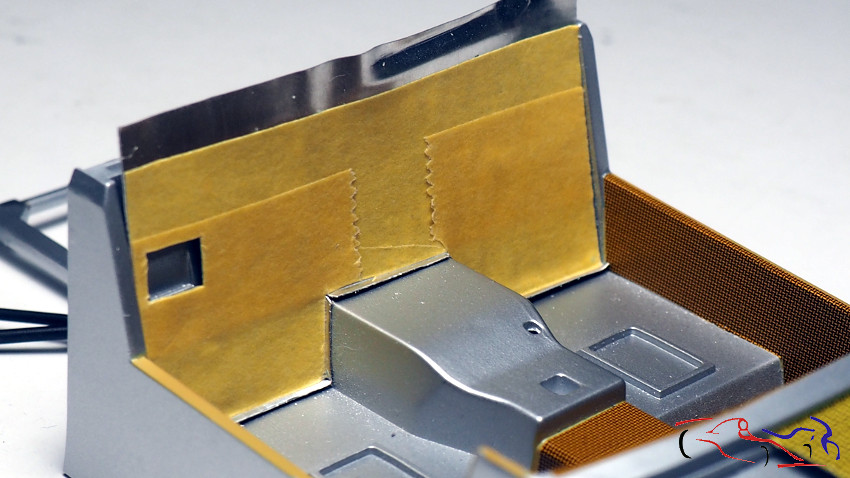
 Volvemos al cokpit, y vamos a simular la manta térmica que hay colocada para proteger a los pilotos. Empezamos con la parte superior que hay entre los backets, siendo el proceso similar al de las calcas de Kevlar, pero en este caso pintamos ya que hay espacio:
We return to the cokpit, and we will simulate the thermal blanket that is placed to protect the pilots. We start with the upper part between the backets, the process being similar to that of Kevlar decals, but in this case we paint since there is space:
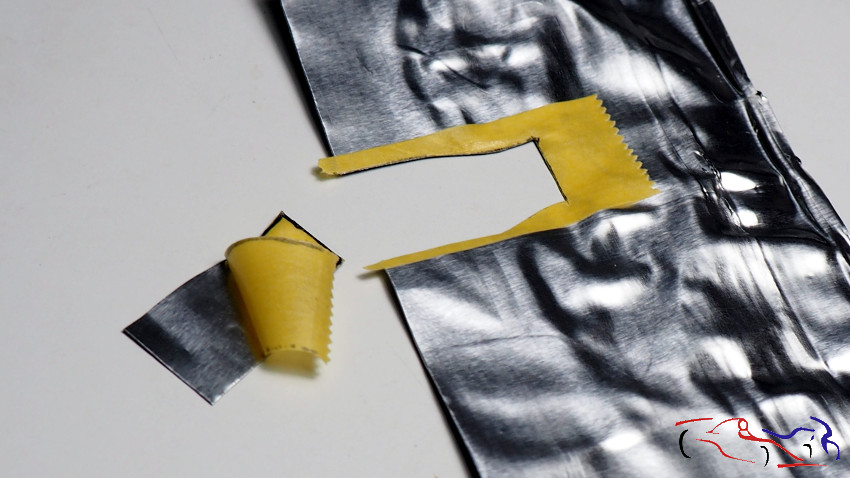
 Lo pasamos a una vitola (cápsula) que traen las botellas de vino, que es un material ductil y maleable, fácil de cortar:
We pass it to a capsule brought by the wine bottles, which is a ductile and malleable material, easy to cut:
 Lo cortamos con el cutter y separamos la máscara:
We cut it with the cutter and separate the mask:
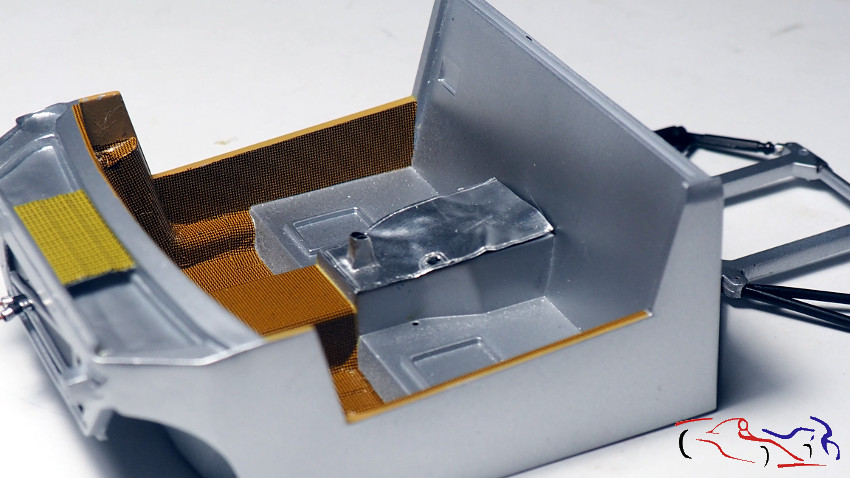
 Aquí se ve la pieza superpuesta en su sitio con las costuras hechas con la parte de detrás del cutter, y con el añadido de la palanca de cambios:
Here you see the piece superimposed in place with the seams made with the back of the cutter, and with the addition of the gearshift:
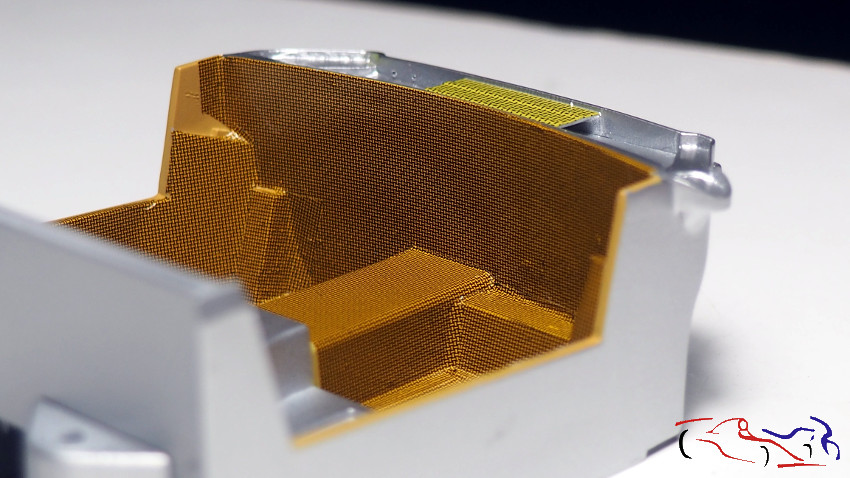
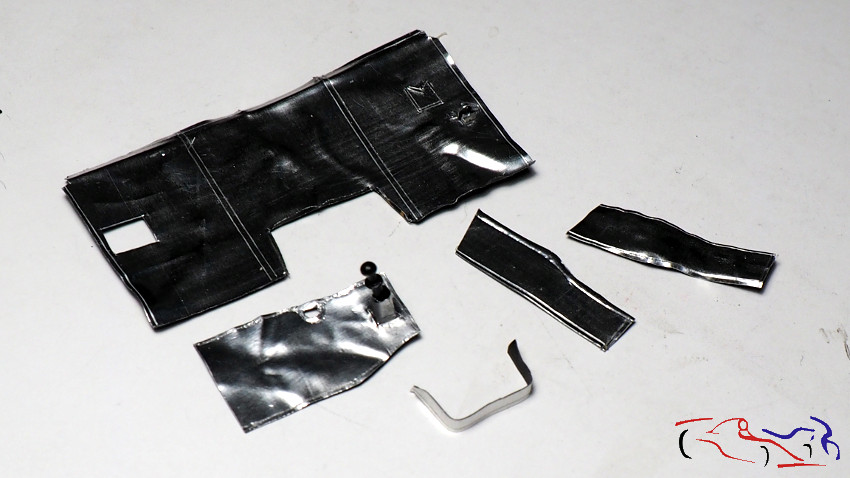
Hacemos lo mismo con la trasera del cockpit, dejando las partes de abajo más largas para que solape.
We do the same with the back of the cockpit, leaving the lower parts longer so that it overlaps.
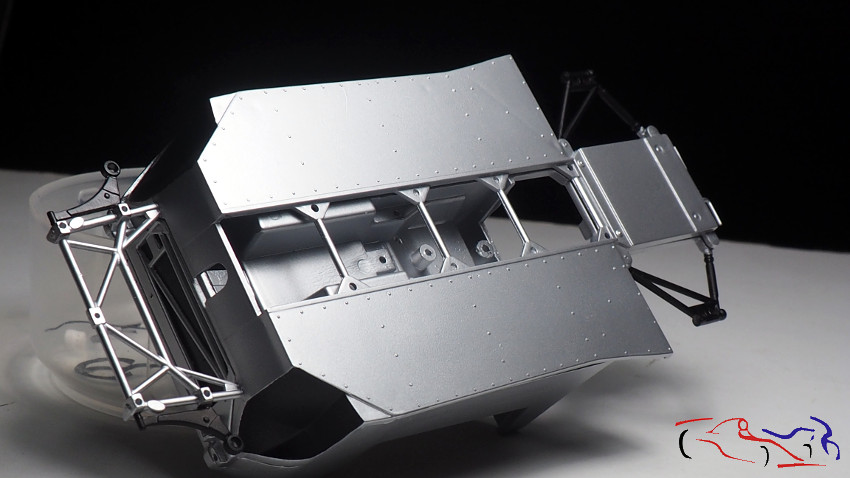
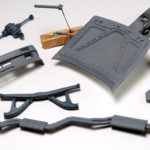
 Aquí vemos todas las piezas:
Here we see all the pieces:
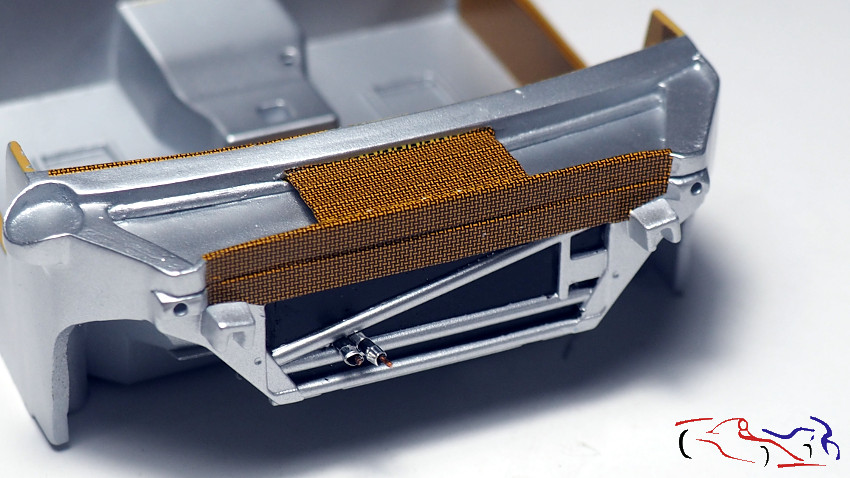
 Por último, he aplicado la misma calca de Kevlar a la parte delantera, eliminando la que traia el kit de origen:
Finally, I applied the same Kevlar decal to the front, eliminating the one that the original kit brought:
 Esto es todo por ahora, gracias por ver y comentar!!
This is all for now, thanks for watching and commenting!
Very nice tutorial congratulations!
You mentioned using Kevlar decals a lot but I don’t remember reading whose Kevlar decals you used, so can you say whose Kevlar decals you used? Excellent template work too.
Hi Matthew, happy you like it!!
The decals used are #1324 from your company!! Excelents!!
super details!! shocking job!!
Pingback: Lancia Delta S4 Marlboro – Beemax 1/24 (XIV) | MODELIA