Continuamos con el Lancia Delta S4.
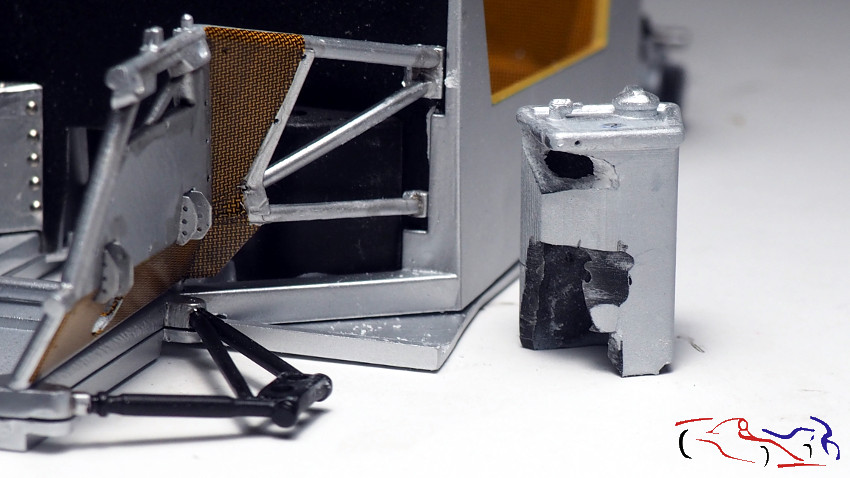
Después de ver fotos del compartimento del motor, he visto que la parte trasera del cortafuegos es de color negro satinado en lugar de aluminio. Para ello enmascaro y pinto con negro satinado de Zero.
We continue with the Lancia Delta S4.
After seeing pictures of the real engine compartment, I have seen that the back of the firewal was satin black instead of aluminum. To do this, I masked and painted with satin black from Zero.
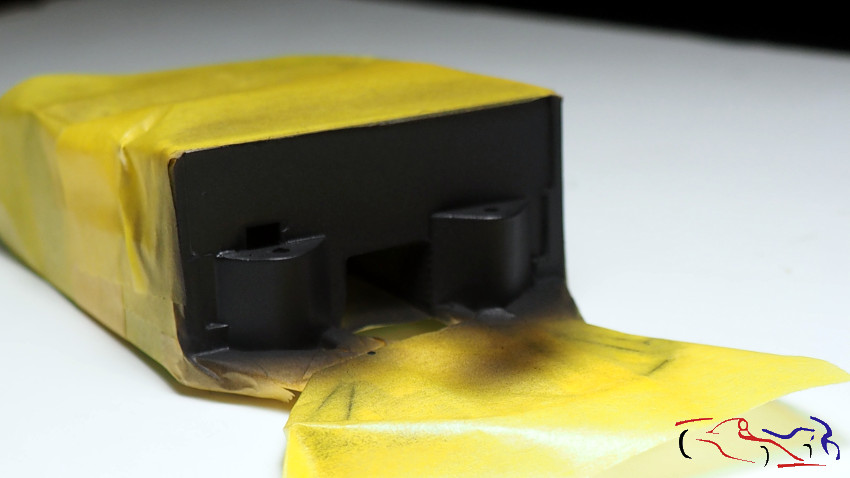
Aquí tenemos el resultado:
Here we have the result:
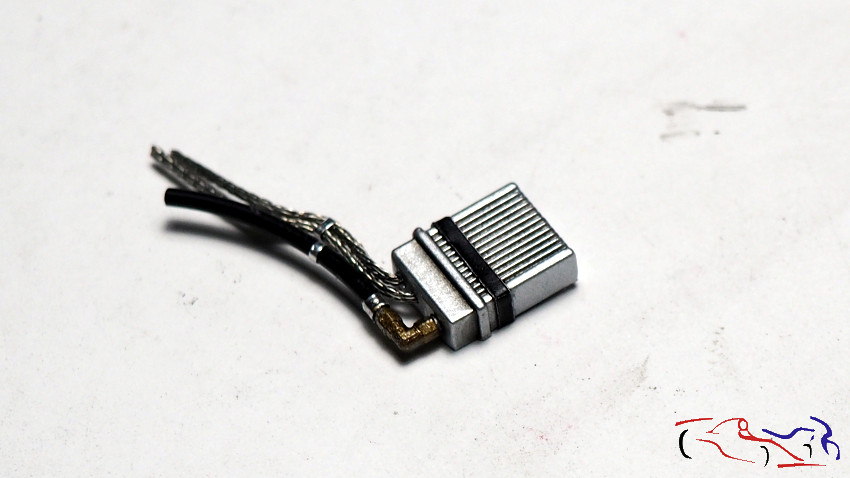
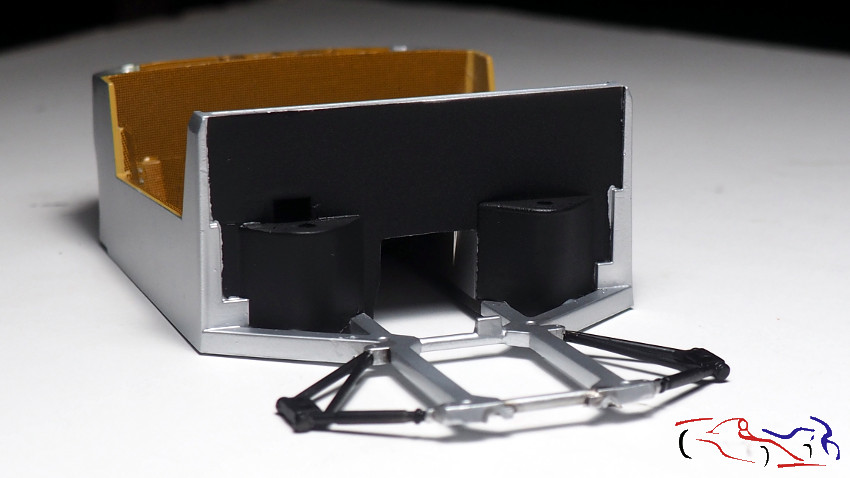 A continuación, corto un trozo de capsula de botella de vino, lo pego y le añado unos remaches. A su vez, coloco la pieza de la estructura tubular para adapar el depósito de KMP:
Next, I cut a piece of wine bottle capsule, glue it and add some rivets. At the same time, I placed the piece of the tubular structure to adapt the KMP tank:
 Aquí vemos todo lo que he tenido que modificar el depósito para que entre en el lugar correspondiente:
Here we see everything I had to modify the deposit to enter it in the corresponding place:
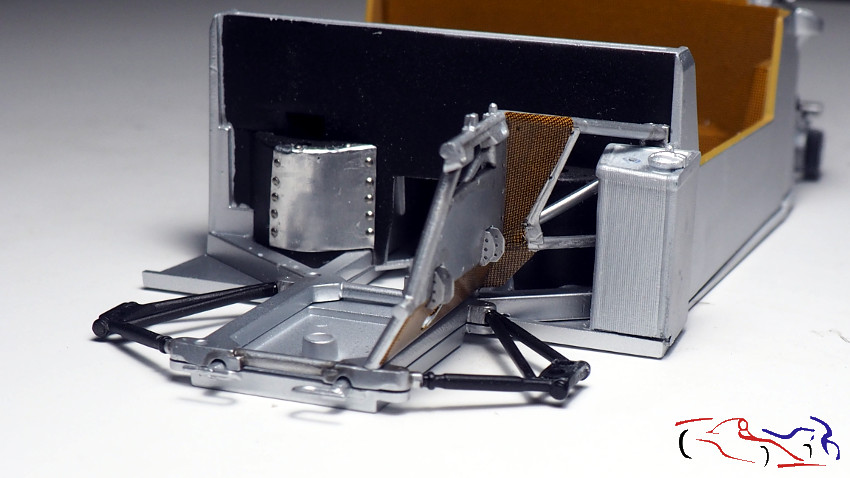
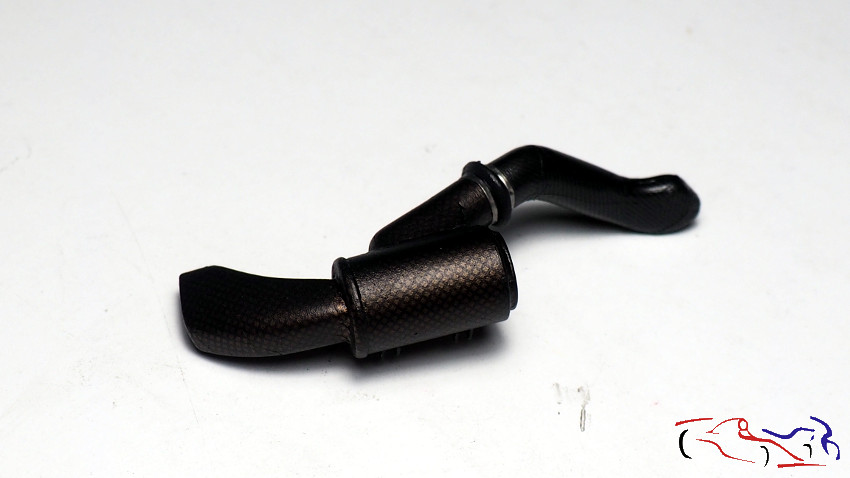
 Pasamos a otra pieza que casi no se ve, ya que está detrás del asiento del copiloto. Después de pintarlas, le hice unos agujeros en su parte superior para introducir los coreespondientes tubos. Le puse también una cinta pintada de negro hecha de cápsula de botellas de vino. Después, le di unos lavados de color humo acrilico de Tamiya:
We move on to another piece that can hardly be seen, since it is behind the passenger seat. After painting them, I made some holes in its upper part to introduce the core tubes. I also put a black-painted ribbon made from a bottle of wine capsule. Afterwards, I gave Tamiya acrylic smoke colored washings:
 Pasamos al filtro del aire. Anteriormente, lo había dejado con la calca, aunque en esta foto no tenía puesta la parte del final:
We pass to the air filter. Previously, I had left it with the decal, although in this photo I did not have the end part on:
 Como había que apagar esos tonos de la calca, use humo muy diluido, aplicándolo en capas finas hasta dejarlo en el tono que deseaba:
As I had to turn off those tones of the decal, I use very diluted smoke, applying it in thin layers until leaving it in the tone you wanted:
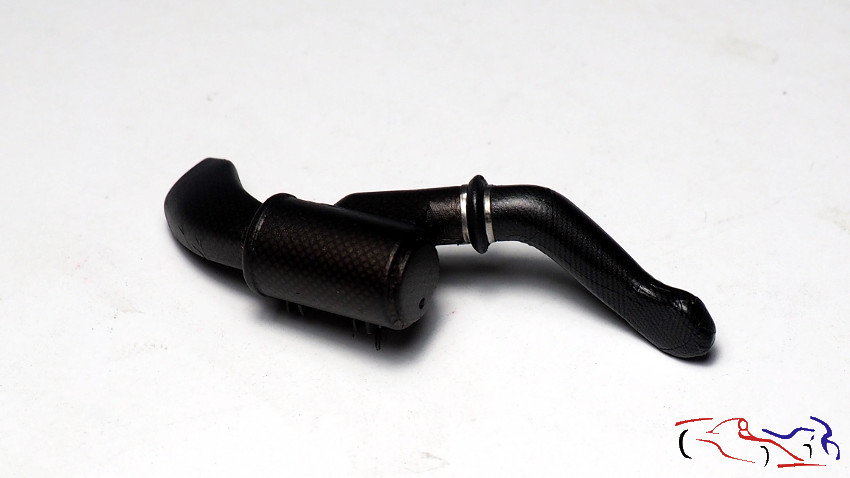
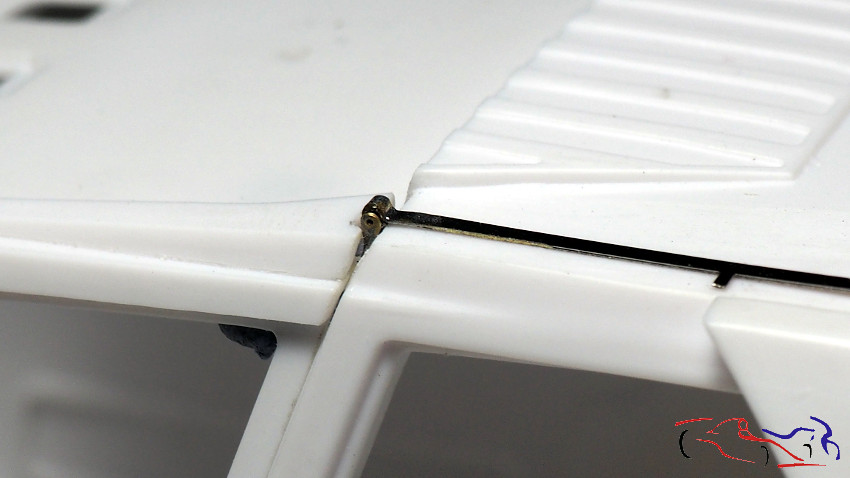
 También, le añadí las fijaciones de ambos tubos hechas con metal autoadhesivo:
Also, I added the fixings of both tubes made with self-adhesive metal:
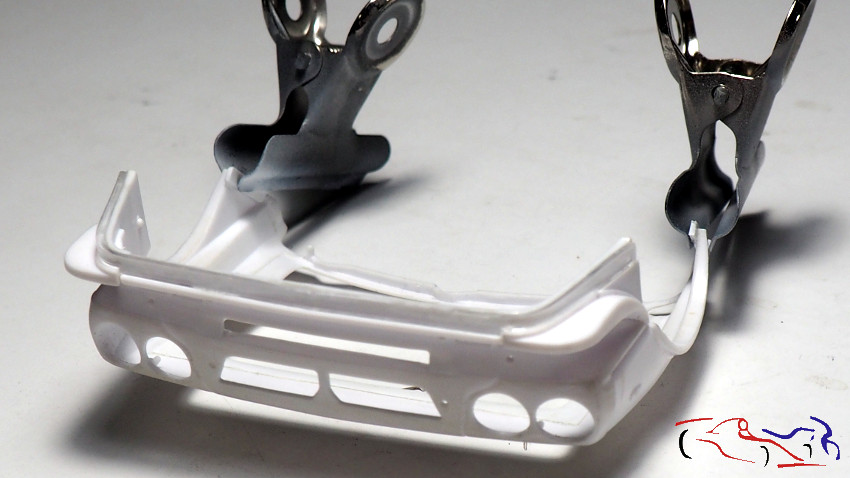
 Pasamos ahora a una parte importante de mis modificaciones: las fijaciones para mantener el capot delantero y el portón trasero cerrados. Además, de las bisagras de este último.
Empezamos por el capó. Mantendré las piezas originales del kit en lo referente a la fijación y giro del mismo. Eliminaré las fijaciones que utilizaba el kit delante del parabrisas y para sutituirlos, usaré imanes de 1×1 mm que irán en los laterales. Para insertarlos, añado unas piezas de Evergreen en cada lateral del capó:
We now turn to an important part of my modifications: the fixings to keep the front hood and the tailgate closed. In addition, the hinges of the latter.
We start with the hood. I will keep the original parts of the kit in relation to the fixation and rotation of it. I will remove the fixings that the kit used in front of the windshield and to replace them, I will use 1×1 mm magnets that will go on the sides. To insert them, I add some pieces of Evergreen on each side of the hood:
 Aquí veis dichas piezas, más grandes para poder adaptarlas a la carroceria.
Here you see these larger pieces to adapt them to the body.
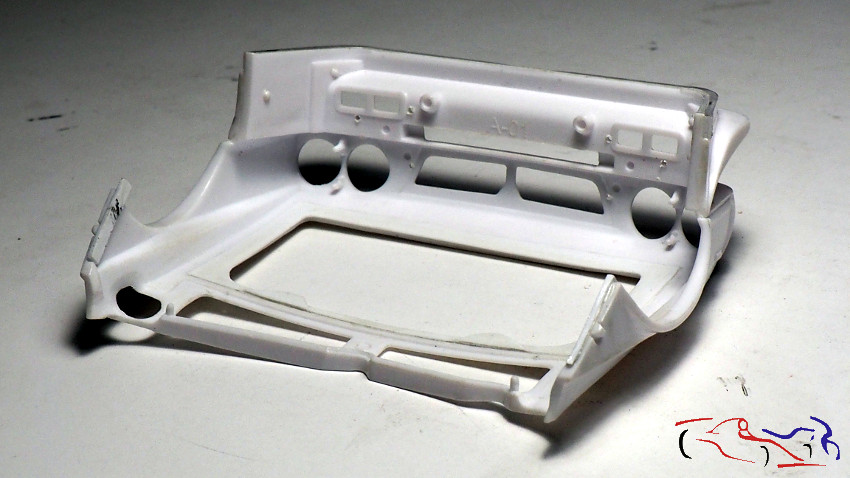 En esta foto, vemos la pieza blanca con los dos agujeros donde se fija el capot, que voy a eliminar. También vemos los laterales añadidos donde incrutaremos los imanes:
In this photo, we see the white piece with the two holes where the hood is fixed, which I will remove. We also see the added sides where we will embed the magnets:
 En esta foto vemos los dos puntos en los que se fija el capót a la carrocería, y que eliminaré.
In this photo we see the two points where the bonnet is fixed to the body, and that I will eliminate.
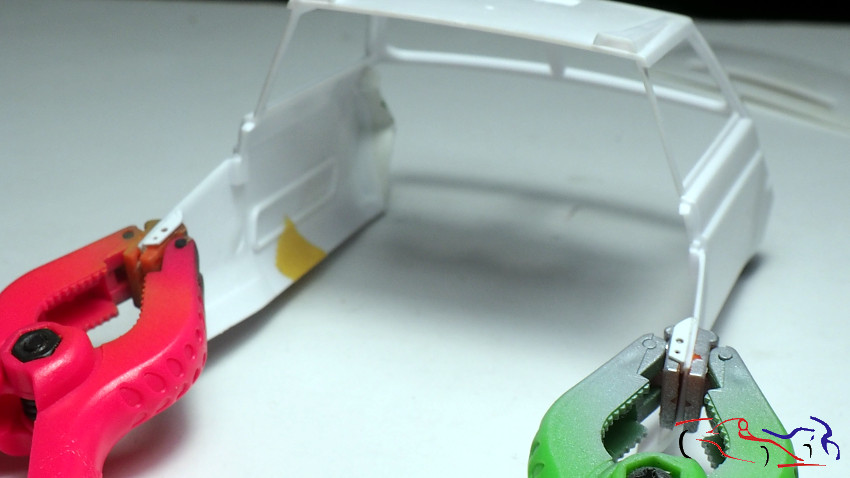
En la siguiente foto vemos el capo a la izquierda y la carrocería a la derecha, amabas piezas con los correspondientes imanes incrustrados.
In the next photo we see the bonnet on the left and the body on the right, you loved pieces with the corresponding embedded magnets.
 Otra foto de la carrocería con los imanes.
Another photo of the body with the magnets.
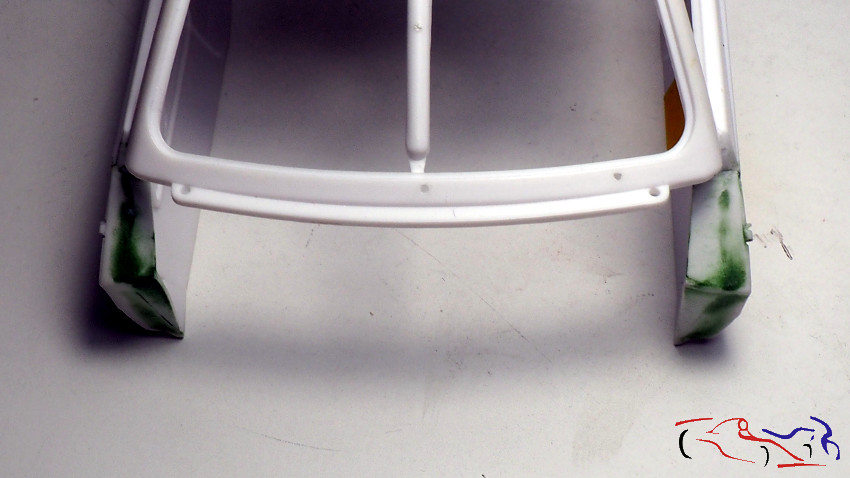
 Pasamos al porton trasero. Añado una pletinas en los laterales para aumentar el espacio donde incrustar el imán y asemejarlo al coche real.
We pass to the tailgate. I add a strips on the sides to increase the space where to embed the magnet and resemble it to the real car.
 A su vez, en la carrocería, añadimos otras pletinas de plástico donde poner los imanes.
In turn, in the body, we add other plastic plates where to put the magnets.
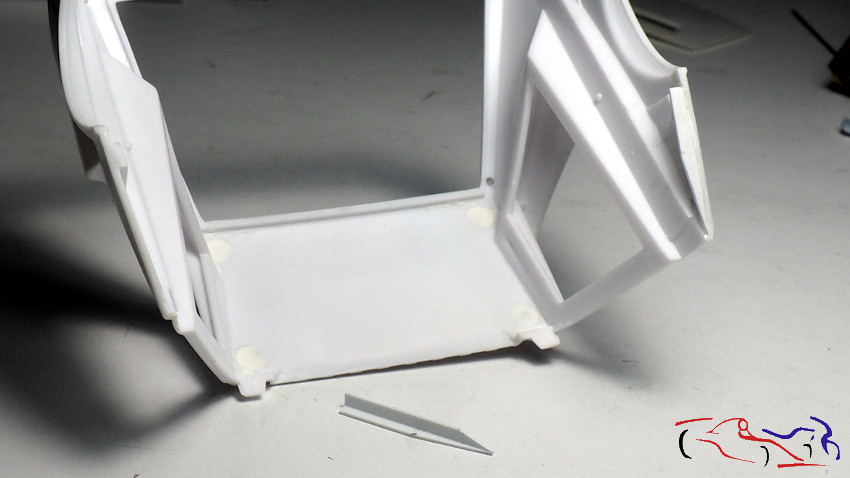
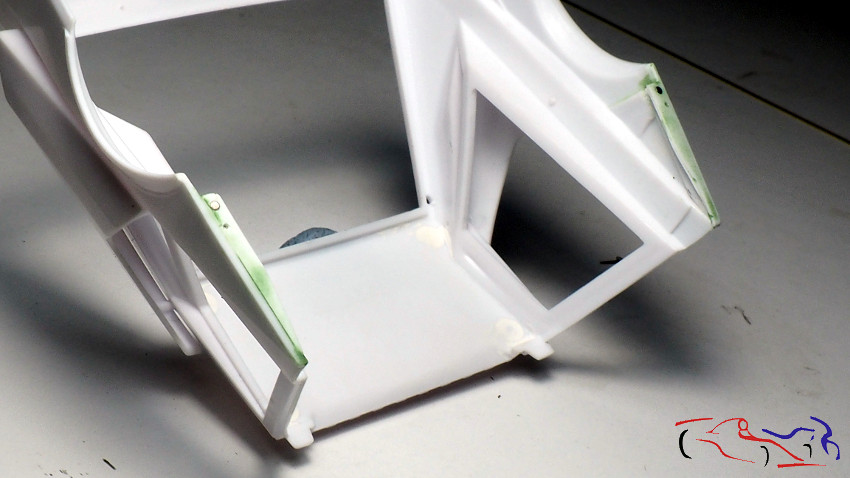
 Vemos un lado de la carrocería en detalle
We see one side of the body in detail
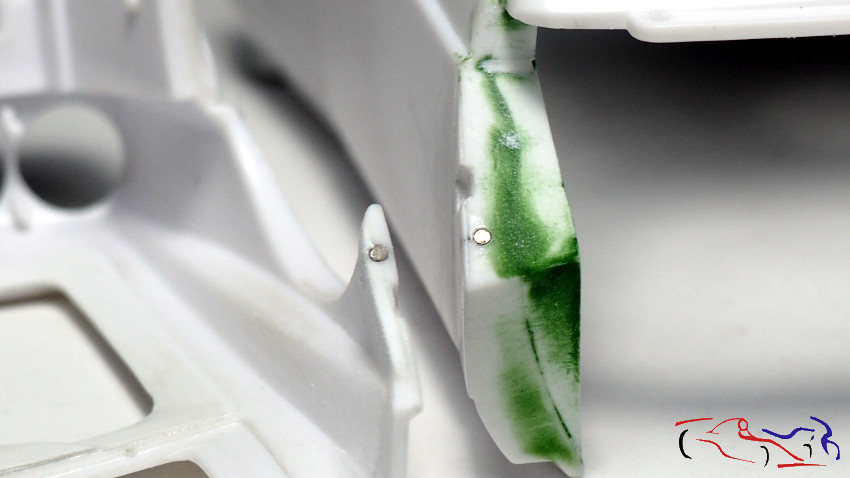
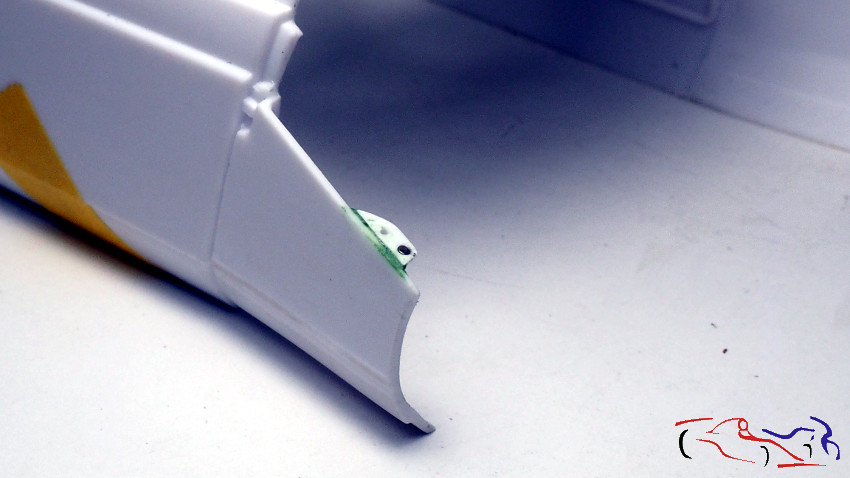
 Ahora vemos las pletinas de la parte del portón, con los imanes y el putty verde dado para tapar las grietas.
Now we see the plates of the gate part, with the magnets and the green putty given to cover the cracks.
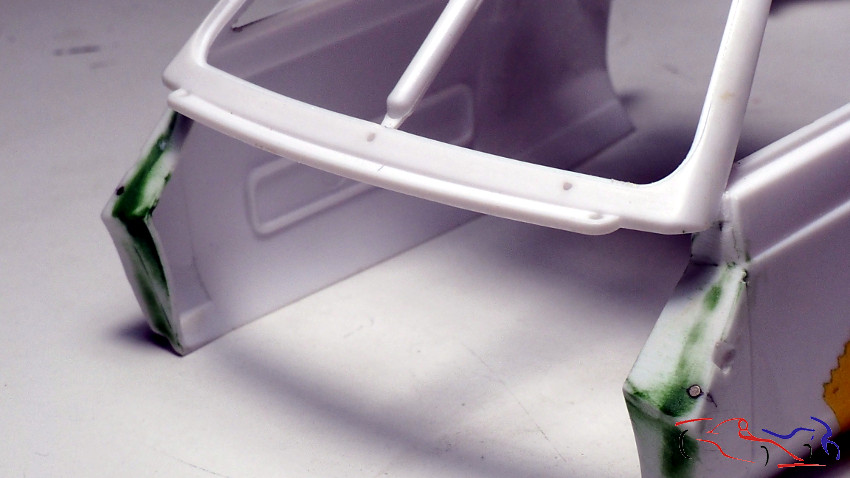
 Y aquí las modificaciones traseras de la carrocería.
And here the rear modifications of the body.
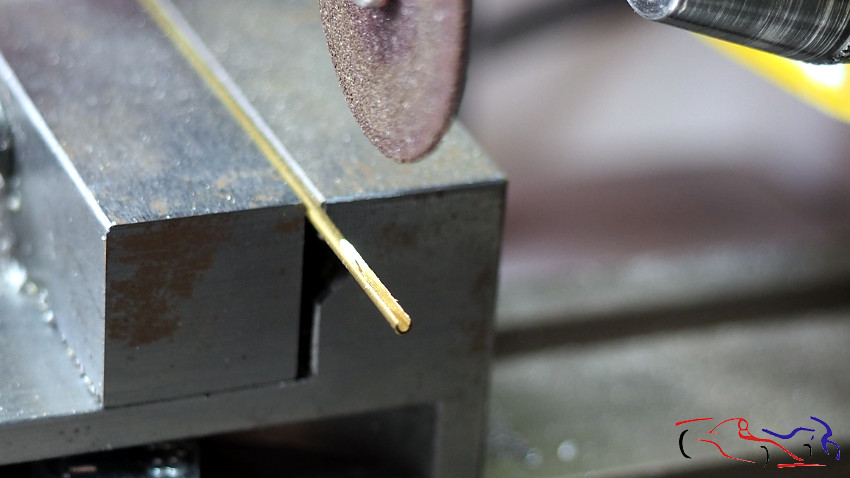
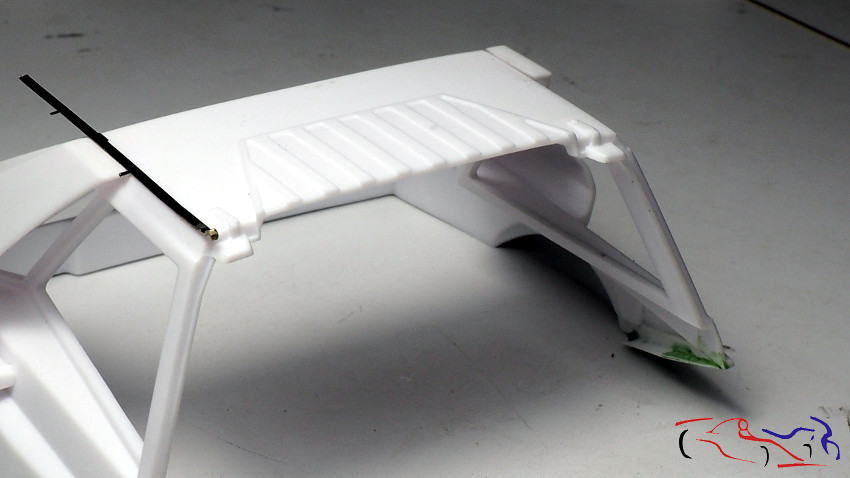
 Pasamos a las bisagras. Vamos a hacer una pieza fijada a la carrocería, con un tubo sobre el que se ponga y pivote la pieza del portón. Para hacer esta pieza, necesitaba un tubo partido por la mitad que uniré a una pletina. Para ese tubo, cojo uno de latón y le hago una ranura con el minitaladro.
We pass to the hinges. We are going to make a piece fixed to the body, with a tube on which the gate piece is placed and pivoted. To make this piece, I needed a split pipe in half that I will attach to a plate. For that tube, I take one of brass and make a slot with the mini drill.
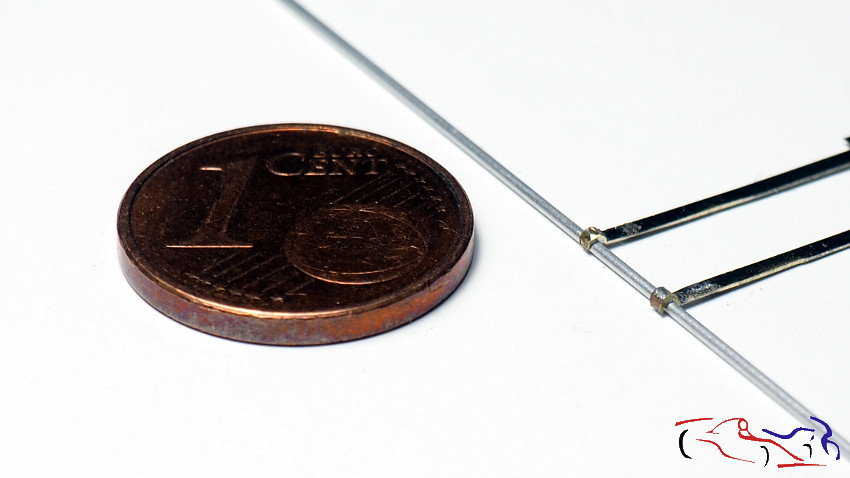
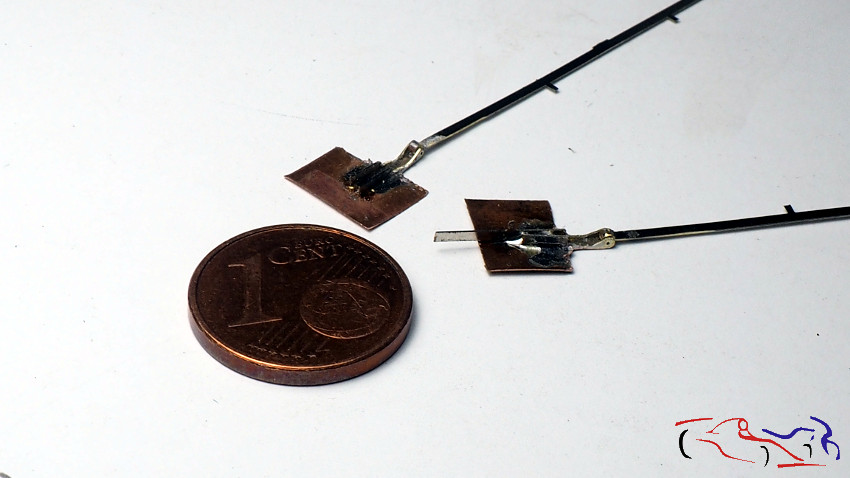
 Una vez hecha la ranura, sueldo unas pletinas de un resto de fotograbado de Tameo. Sueldo dos pletinas para hacer las de lso dos lados. Luego las corto y afino con el mintaladro.
Once the groove is made, I pay some plates of a rest of Tameo photogravure. I pay two plates to make two sides. Then I cut and refine them with the mini drill.
 Una vez afinadas, aquí os las muestro sobre una varilla para que se vea el resultado.
Once tuned, here I show you on a rod to see the result.
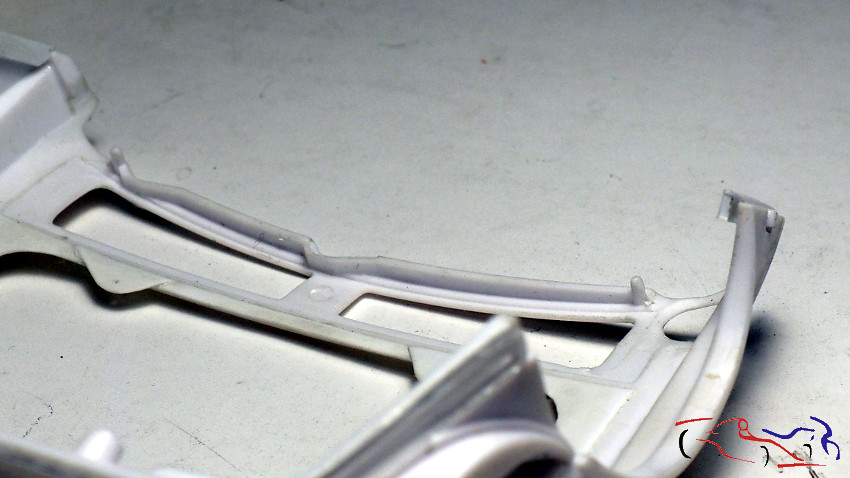
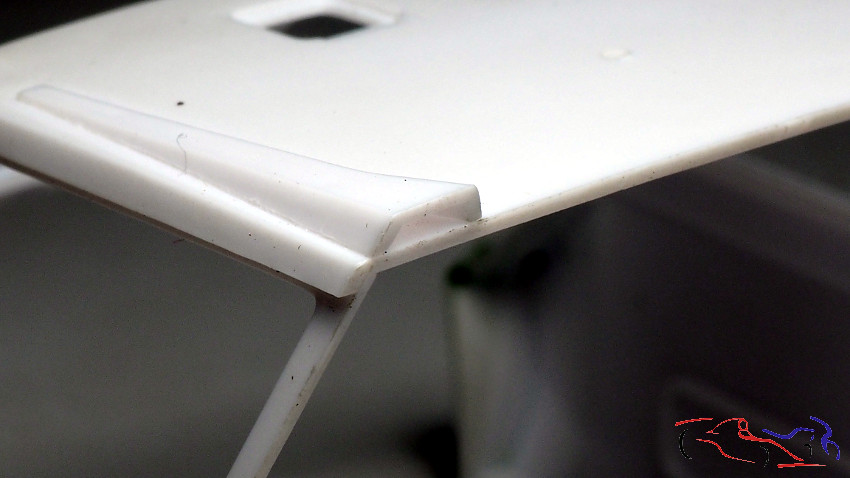
 Para ver el resultado, elimino las bisagras de plástico del portón. Aquí se ve la diferencia entre una original y la que estoy modificando. Así mismo, en el kit, el portón se apoyaba sobre la carrocería con dos pivotes, los cuales se elimarán.
To see the result, I remove the plastic hinges from the gate. Here you can see the difference between an original and the one I am modifying. Also, in the kit, the gate rested on the body with two pivots, which will be removed.
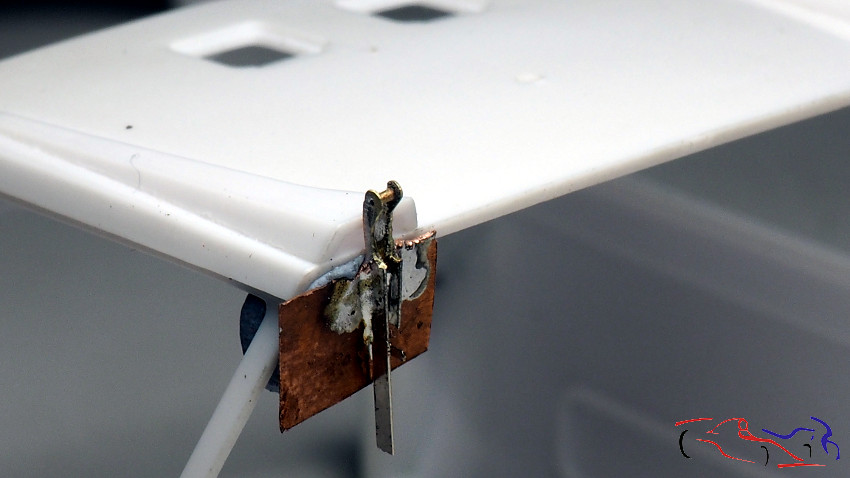
 Vamos a hacer ahora, las piezas que irán en la carrocería. Usamos otro tubo de cobre al que soldaremos dos pletinas de cobre, con el ancho de los tubos que corté anteriormente, tal y como se ve en la foto.
We are going to do now, the pieces that will go in the body. We use another copper tube to which we will weld two copper plates, with the width of the tubes that I cut previously, as seen in the photo.
 En esta foto, vemos las piezas laterales soldadas al tubo, y a un trozo de latón para darle dureza a la pieza.
In this photo, we see the side pieces welded to the tube, and a piece of brass to give hardness to the piece.
 Si vemos donde irá esa pieza, podemos comprobar que tendremos que hacer un agujero para que se asiente bien.
If we see where that piece will go, we can verify that we will have to make a hole so that it sits well.
 Una vez hecho ese recorte, apoyamos la pieza realizada sin eliminar el sobrante, para ver el resultado.
Once that cut is done, we support the piece made without removing the excess, to see the result.
 Y aquí vemos como quedará la bisagra. Una vez fijas ambas piezas, el portón se apoyará y girará para mantenerse abierto.
And here we see how the hinge will look. Once both pieces are fixed, the gate will rest and turn to keep open.
 Gracias por ver y comentar!
Thanks for viewing and commenting!


Estupendo trabajo!!! Felicitaciones.
Me alegra que te guste Miguel!!