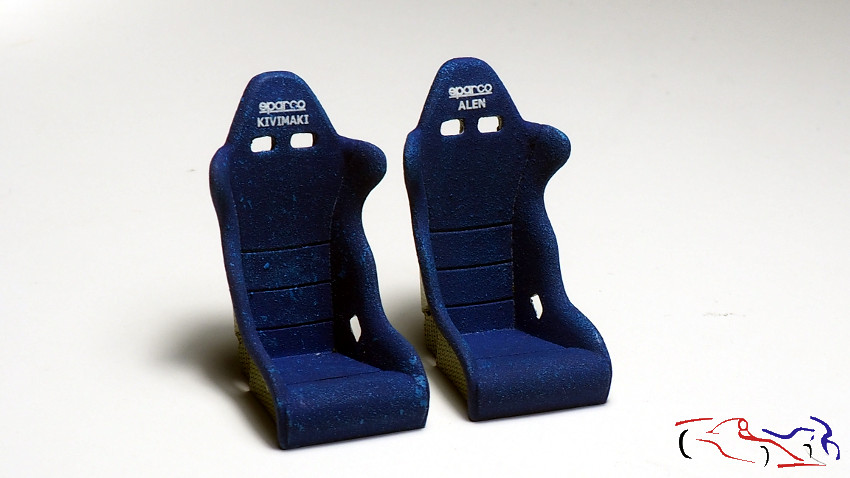
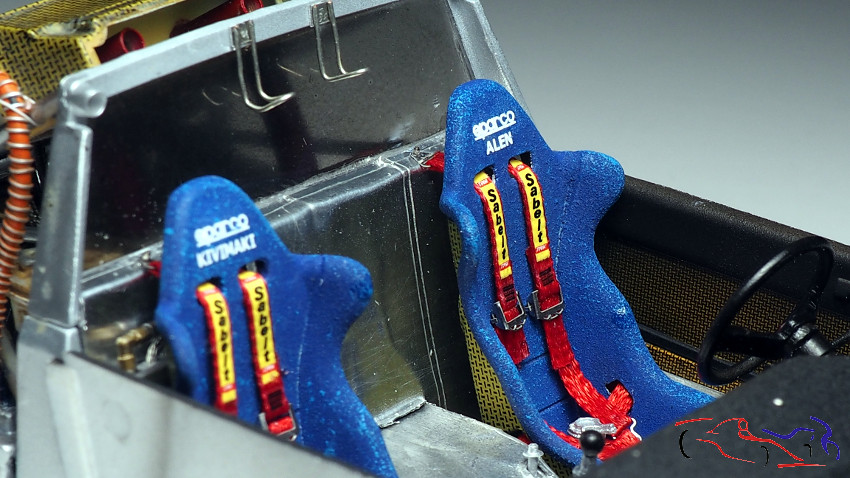
Continuamos con el Lancia Delta S4, que al final de este post, dejamos el chasis listo para acomenter la carrocería en el siguiente paso. Pero empezamos por los asientos que los dejamos pintados meses atrás. Les colocamos las calcas de Alen y Kivimaki, ya que esta unidad les perteneció, con lo que llevaban los mismos asientos. Las calcas están puestas sobre el liquido de Tameo, el super fuerte. Después les apliqué un capa fina de barniz mate de Ammo-MIG.
We continue with the Lancia Delta S4, which at the end of this post, we leave the chassis ready to attack the body in the next steps. But we start with the seats that we left painted months ago. We put the decals of Alen and Kivimaki on them, since this unit belonged to them, so they had the same seats. The decals are placed on the liquid of Tameo, the super strong. I’ve then applied a thin coat of Ammo-MIG Matte Varnish to them.
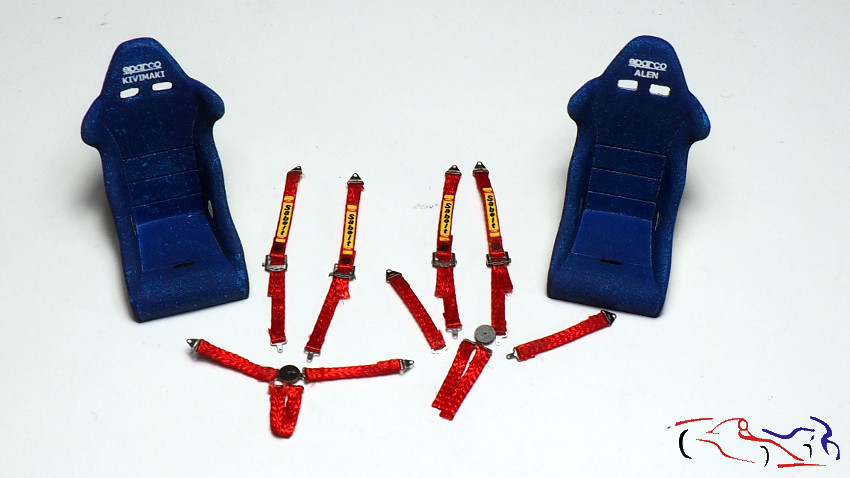
Y ahora, es el turno de los cinturones, usando el juego de ebillas que venian en el TK de HD. Con paciencia y pegando con ciano. Los pondré an los asientos cuando coloque éstos en el cockpit, puesto que van fijados con tornillos al cortafuegos trasero.
And now, it is the turn of the belts, using the set of them that came in the HD TK, with patience and hitting with cyano. I will put them on the seats when I put them in the cockpit, since they are bolted to the rear firewall.
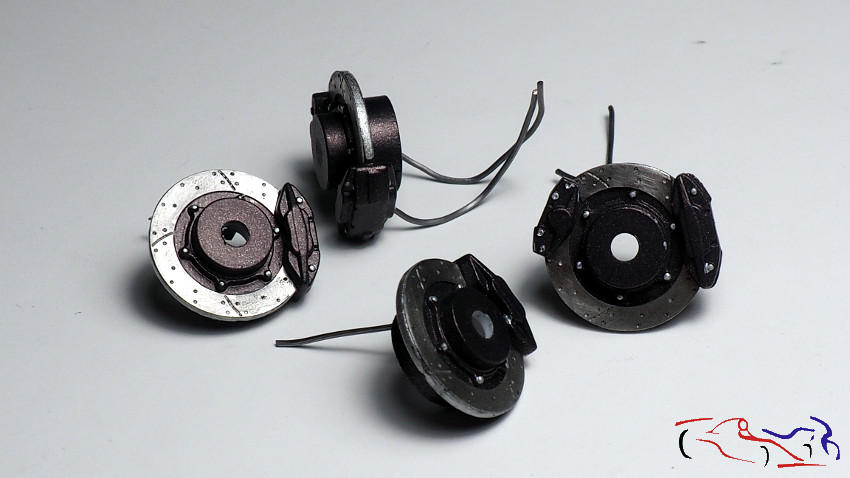
Pasamos a los discos de freno. Como los fotograbados estaban muy relucientes, los froté con una lija dando circulos, y después les di un lavado en negro mate diluido. También les puse los cables del freno realizados con estaño de 3mm.
We move on to the brakes. Since the etchings were very shiny, I rubbed them in circles with sandpaper and then washed them in diluted matte black. I also put the brake cables made with 3mm tin.
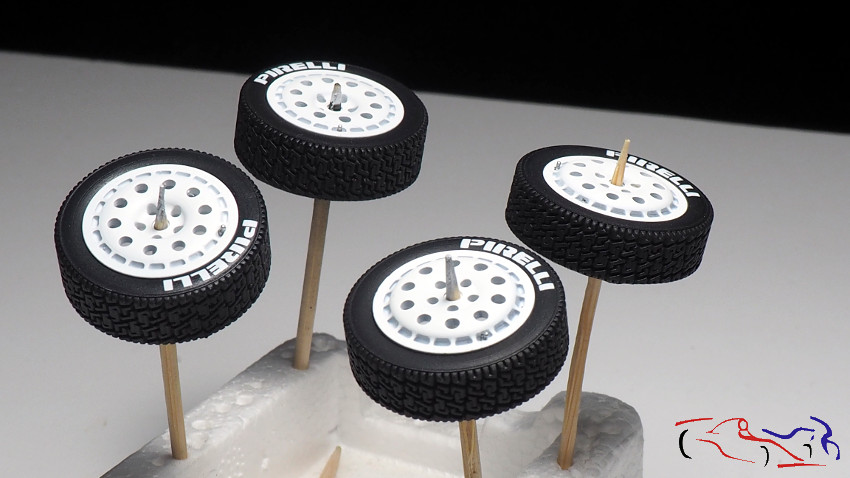
Siguiente paso son las ruedas, y como decidí ensuciar un poco el interior del coche, unas ruedas totalmente limpias no encajaban con el resto, aunque la carrocería irá limpia. Por tanto, primer paso era proteger las ruedas, y lo hice con el barniz mate de AMMO-MIG.
Next step are the wheels, and since I decided to get the inside of the car a little dirty, some totally clean wheels didn’t fit with the rest, although the bodywork will be clean. Therefore, the first step for doing it was to protect the wheels, and I did it with AMMO-MIG matt varnish.
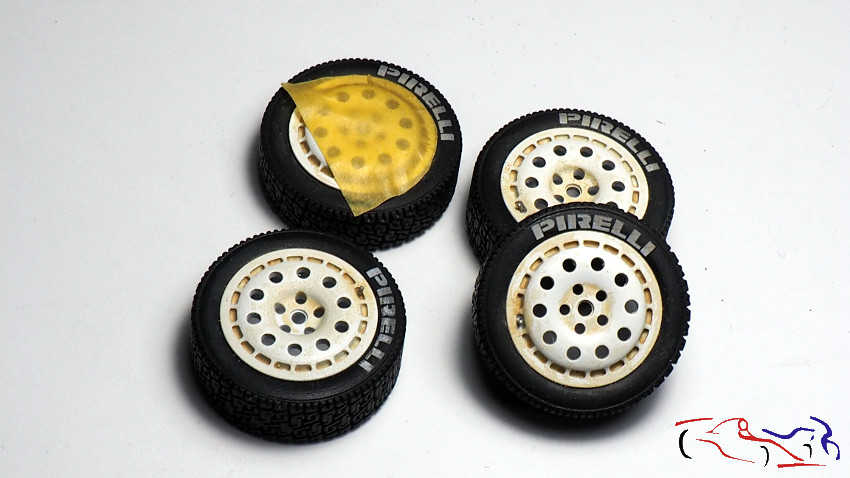
Para ensuciarlas, utilicé el producto “Depósitos de polvo y suciedad” de AK. Se aplica con pincel sin miedo, y una vez se ha aplicado, se pasa un trapo de tela limpio por la superfcie hasta que se elimina lo que tu deseas. De este modo, la rueda izquierda es la original limpia, la del medio con el producto aplicado, y la derecha, la rueda finalizada.
To get them dirty, I used AK’s “Dust and dirt deposits” product. It is applied with a brush without fear, and once it has been applied, a clean cloth is passed over the surface until you want is removed. Thus, the left wheel is the original clean one, the middle one with the product applied, and the right wheel is the finished wheel.

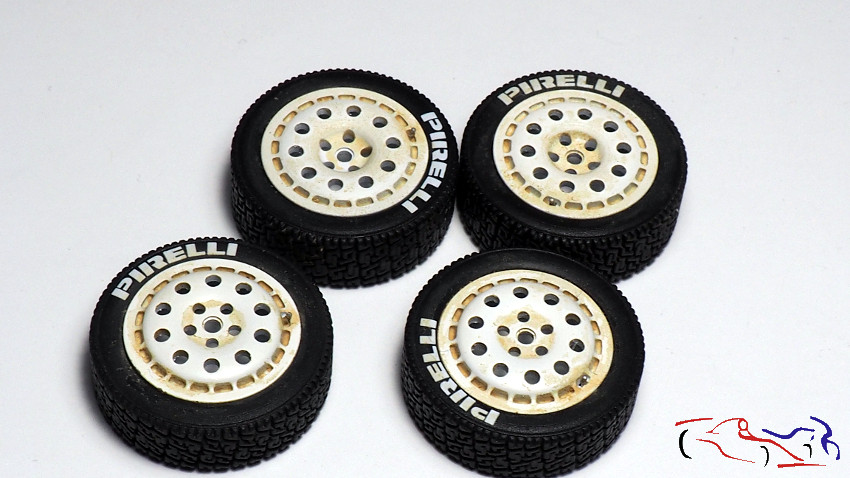
Aquí vemos las cuatro terminadas, y como se ve, el ensuciado es muy sutil, y suficiente para mostrar que las ruedas se han usado.
Here we see all four finished, and as it looks, the fouling is very subtle, and enough to show that the wheels have been used.
Ahora solo nos queda gastar el neumático, es decir gastar la calca de Pirelli. Para ello, con una plantilla que proteja la llanta, aplicamos negro mate XF1 diluido, sobre todo en el borde del neumático, siendo este el resultado. Ruedas listas para colocar!!
Now we only have to wear the tire, i mean wear the Pirelli decal. To do this, with a template that protects the rim, we apply diluted XF1 matte black, especially on the edge of the tire, this being the result. Wheels ready to fit !!
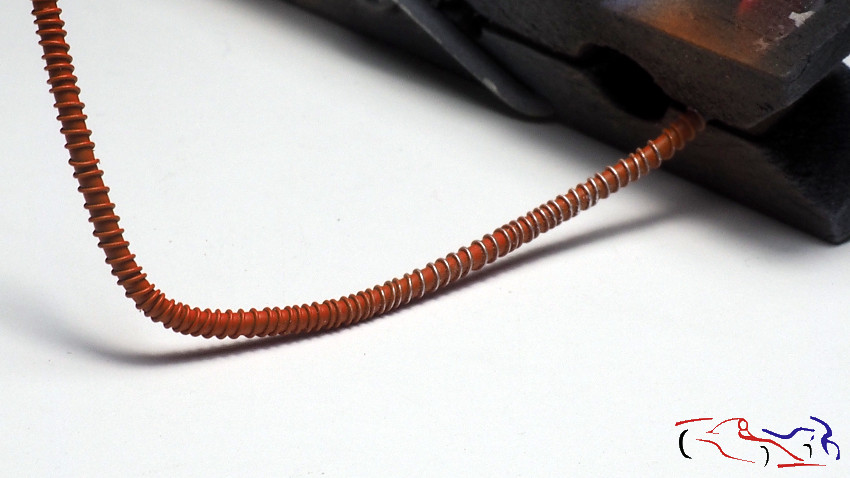
Más piezas. En este caso es un tubo de desagüe del depósito de aceite del lado izquierdo. Está hecho con tubo termotractil, con un alambre de estaño por dentro, y un alambre fino enrollado por fuera. Está imprimado y pintado con el color naranja de Gulf. Una vez seco, se va quitando al pintura del alambre exterior con una lija fina de grano 1000. Como se ve en la imagen, la parte izquierda de la pieza está sin lijar, y en la derecha ya se le ha eliminado la pintura.
More pieces. In this case, it is a drain pipe from the oil tank on the left side. It is made of heat-bending tube, with a tin wire inside, and a fine wire wound on the outside. It is primed and painted in Gulf Orange. Once dry, the paint is removed from the outer wire with a fine sandpaper of 1000 grit. As you can see in the image, the left part of the piece is not sanded, and the paint has already been removed on the right.
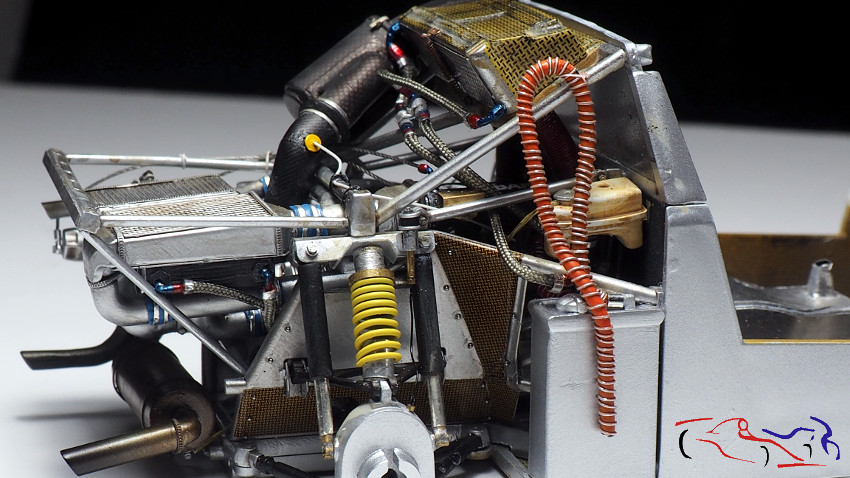
Y aquí lo vemos en su posición final. La parte inferior va tapada con la carrocería.
And here we see it in its final position. The lower part is covered with the body.
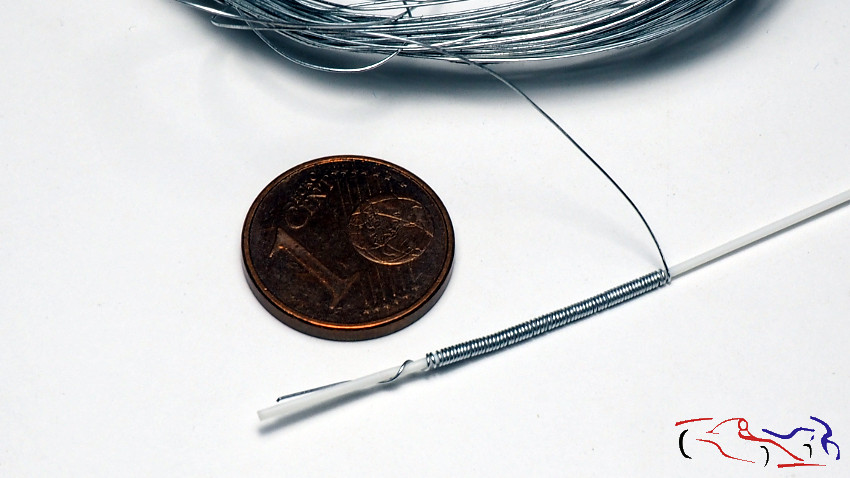
Y habéis visto alguna vez un coche de rally sin la luz del copiloto? Pues así la hacemos: alambre muy finito enrollado a una varilla de plástico…
And have you ever seen a rally car without the passenger light? Well, that’s how we do it: very thin wire wound around a plastic rod …
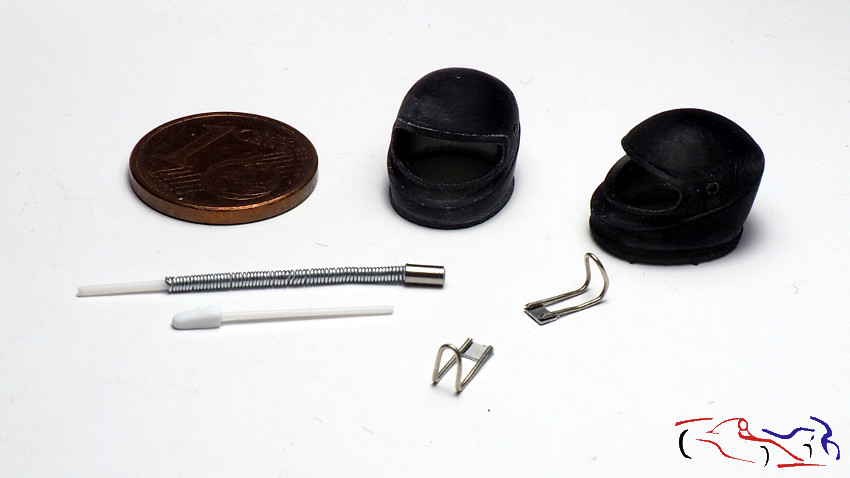
..a la que ponemos un trozo cortado de tubo de aluminio. Debajo suyo, está la pieza que fijará la luz al arco de seguridad, tallada en plástico. A la derecha, las dos piezas que tienen en el cockpit para dejar los cascos cuando no los llevan puestos, con dos cascos a modo de ejemplo. Estas piezas las hice con el alambre que tienen algunos cables eléctricos dentro de la funda.
..to which we put a cut piece of aluminum tube. Below it is the piece that will fix the light to the safety arch, carved out of plastic. On the right, the two pieces they have in the cockpit to leave the helmets when they are not wearing them, with two helmets as an example. I made these pieces with the wire that some electrical cables have inside the sleeve.
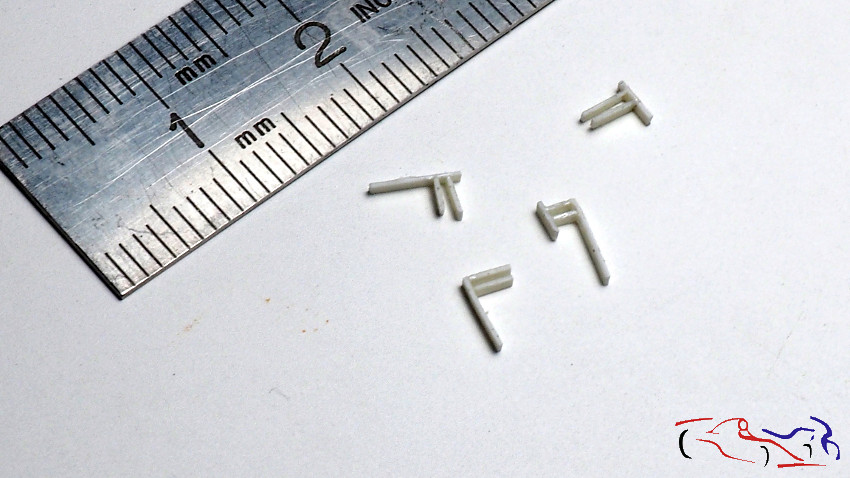
Lo siguiente, es un test para hacer las clavijas eléctricas de los coches. Se usan en los coches de rallyes para desconectar los cables que van por ejemplo a los portones, para que éstos se puedan retirar sin problema, o las conexiones d elos faros supletorios. Corté tiras de plástico, las corté y las fui pegando por partes como se ve en la foto. Al final, corto los que sobra y listo. Pero em parecieron muy grandes. Las siguientes pruebas serán con lámina de cobre, más fina!!
The following is a test to make the electrical plugs of the cars. They are used in rally cars to disconnect the cables that go for example to the gates, so that they can be removed without problem, or the connections of the supplementary headlights. I cut plastic strips, I cut them and I was gluing them by parts as seen in the photo. At the end, I cut the leftovers and that’s it. But they seemed very big to them. The following tests will be with copper foil, finer !!
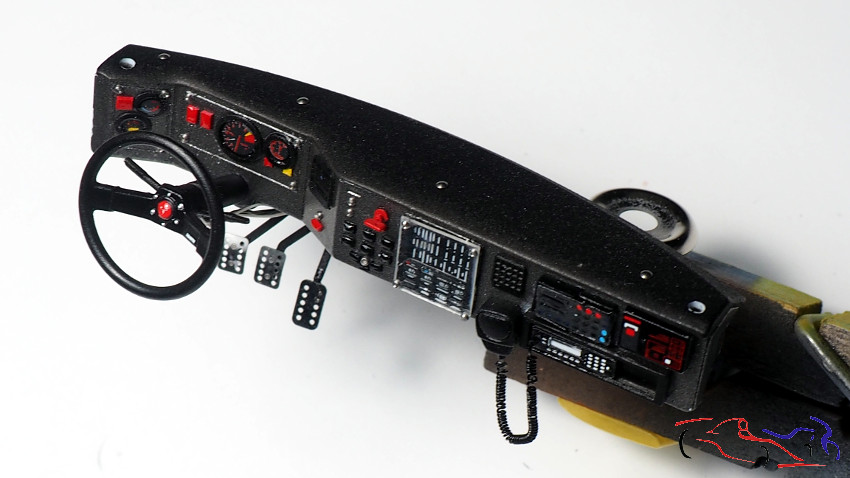
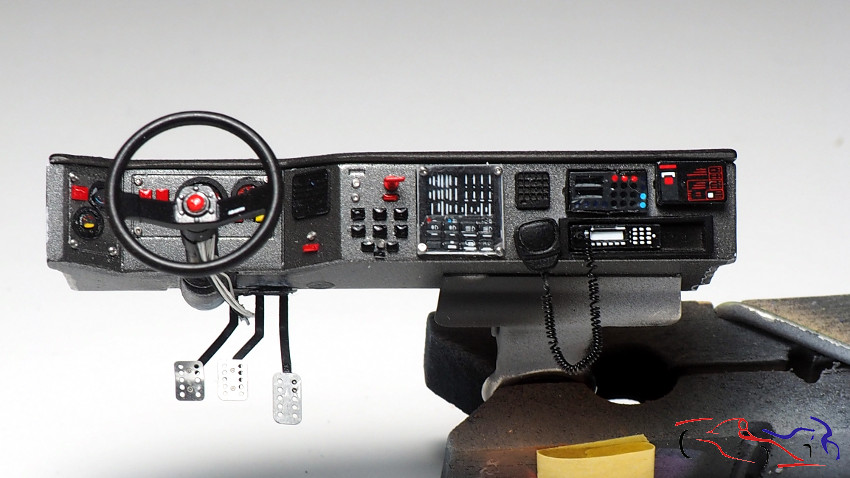
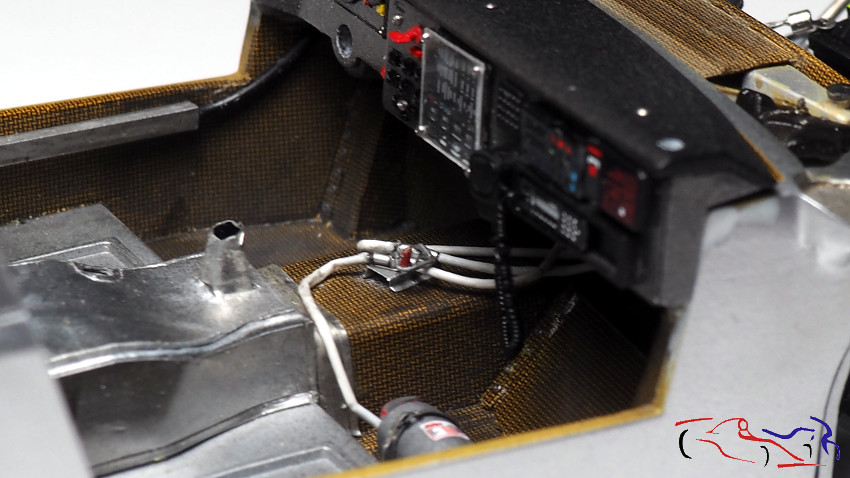
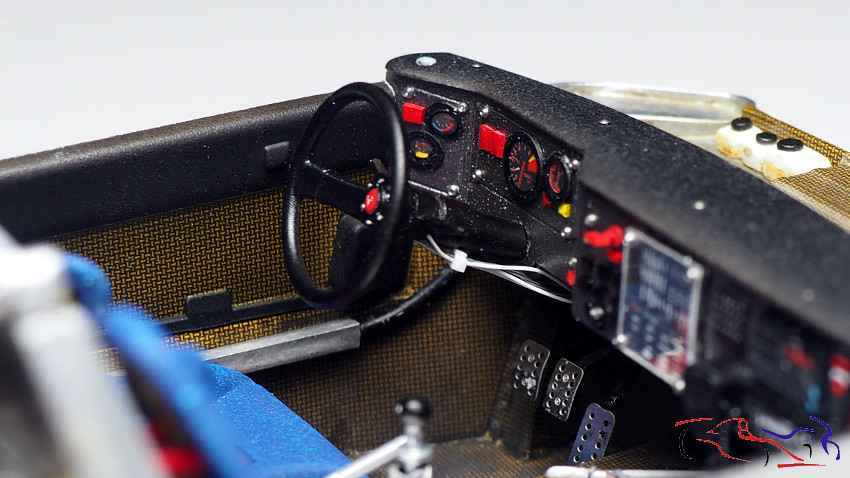
Pasamos al salpicadero. COmo véis, ya tiene los pedales de fotograbado del TK de HD, y el volante. También le puse unos cables al volante, de pelos de alambre y otros hechos de plástico estirado.
We go to the dashboard. As you can see, it already has the HD TK photo-etched pedals, and the steering wheel. I also put some cables to the steering wheel, made of wire hair and others made of stretched plastic.
Tanto al centro del volantes como a los relojes, les apliqué resina trasparente que seca con luz UV.
Both in the center of the steering wheels and the watches, I applied transparent resin that dries with UV light.
Otra pieza que hice es el disparador manual de los extintores. Este coche lo llevaba delante de la palanca de cambios. Lo hice con hojalata, dándole forma con unos alicates, y añadiendo algún tubo. Para el mecanismo, usé un alambre doblado, que en sus esquinas aplasté a modo de eje de giro.
Another piece I made is the manual trigger for the fire extinguishers. This car had it in front of the gear stick. I did it with tin, shaping it with pliers, and adding some tube. For the mechanism, I used a bent wire, which I flattened at its corners as a turning axis.
Pasamos al cortafuegos trasero. Esta parte lleva un protector tal y como le puse a la parte central por donde pasa la transmisión, y está explicado en el post nº 7 (VII) (click aquí para acceder). A modo de recordatorio, el material usado son las cápsulas de las botellas de vino. Este material lo pegamos con cola blanca a la pieza de plástico.
We went to the rear firewall. This part has a protector as I put the central part through which the transmission passes, and it is explained in post nº 7 (VII) (click here to access). As a reminder, the material used is the capsules from the wine bottles. We glue this material with white glue to the plastic piece.
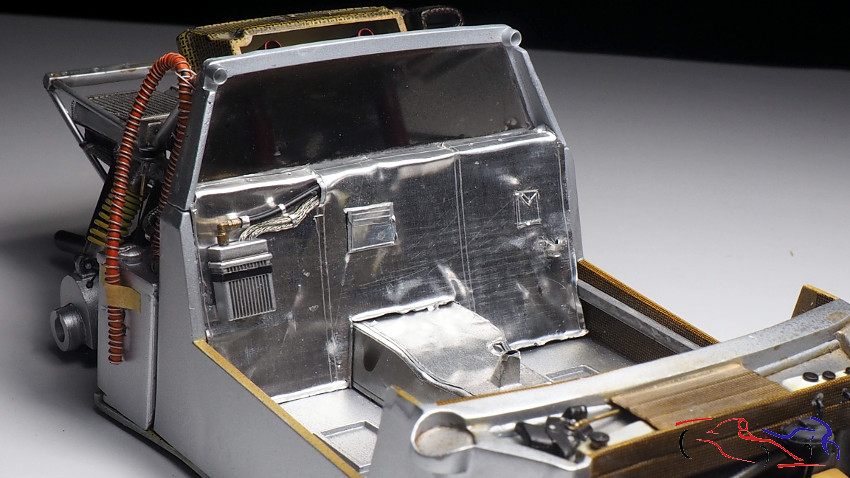
Otra pieza que se hizo en su momento y que he añadido es la que está situada detrás del asiento del copiloto, Realmente no se qué es pero lelva unos tubos por detrás de la protección. La colocamos con ciano:
Another piece that was made at that time and that I have added is the one that is located behind the passenger seat, I really don’t know what it is but it has some tubes behind the protection. We place it with cyano:
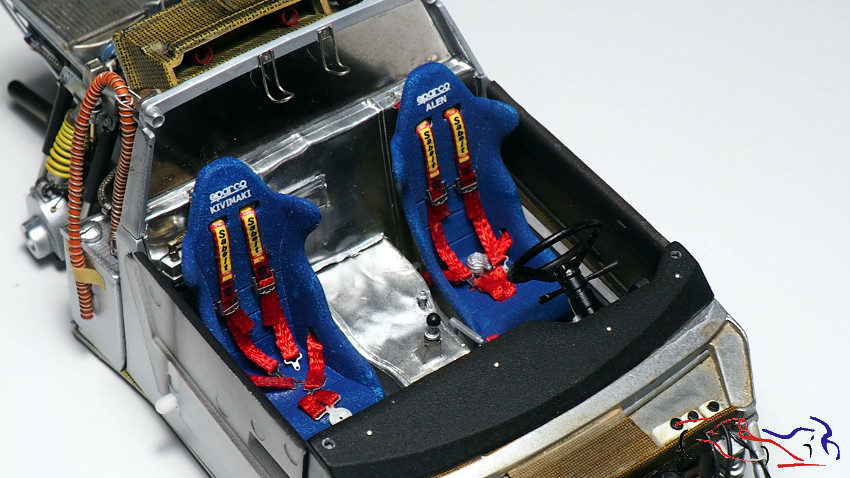
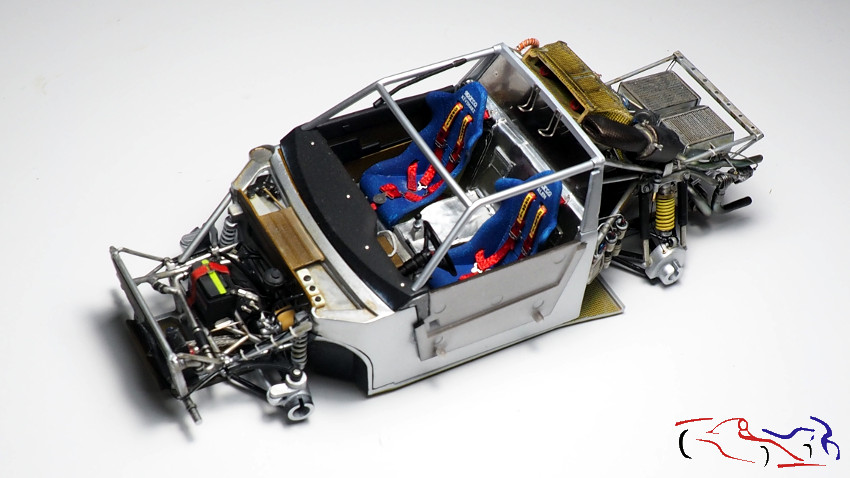
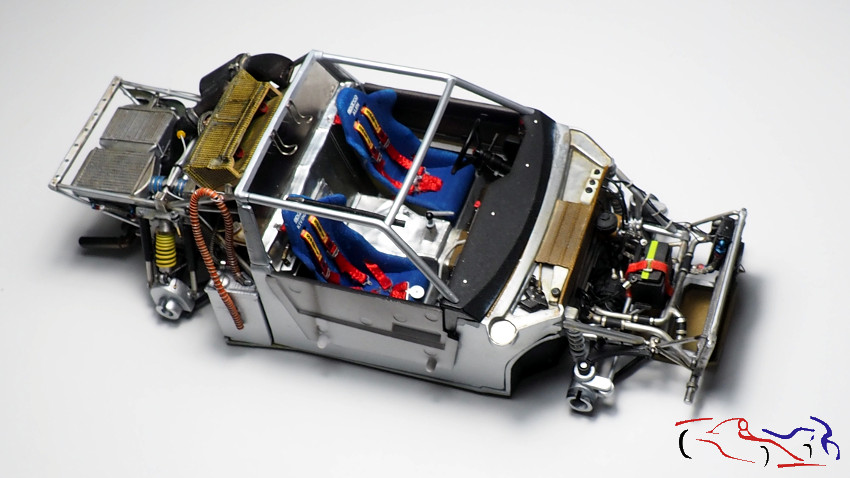
Y este es el resultado una vez pegados los asientos y sus cinturones. Estos van fijados detrás con dos tuercas y pegados al asiento con ciano.
And this is the result once the seats and their belts are glued. These are fixed behind with two nuts and glued to the seat with cyano.
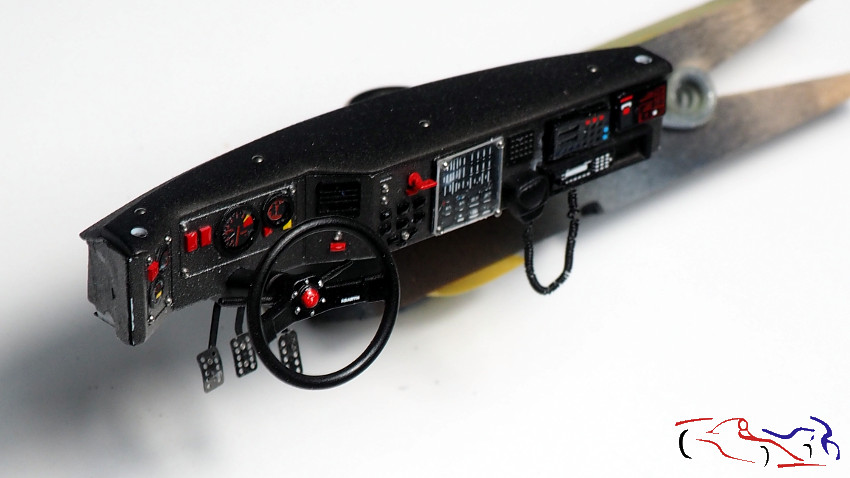
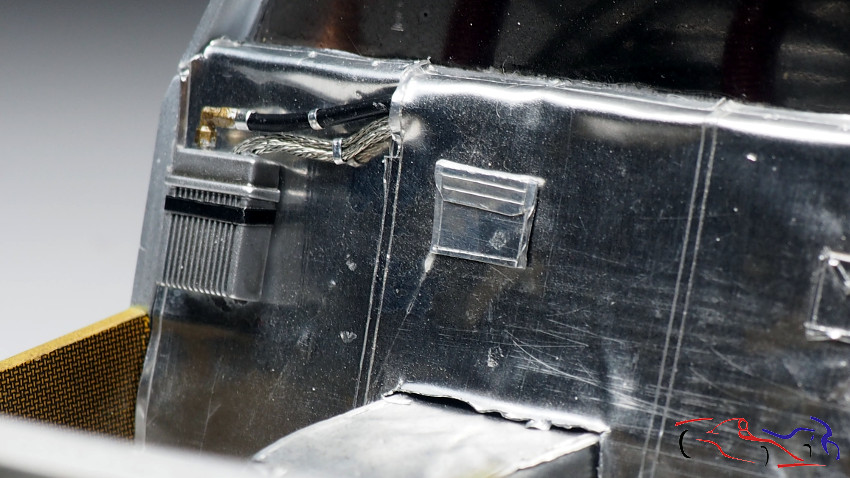
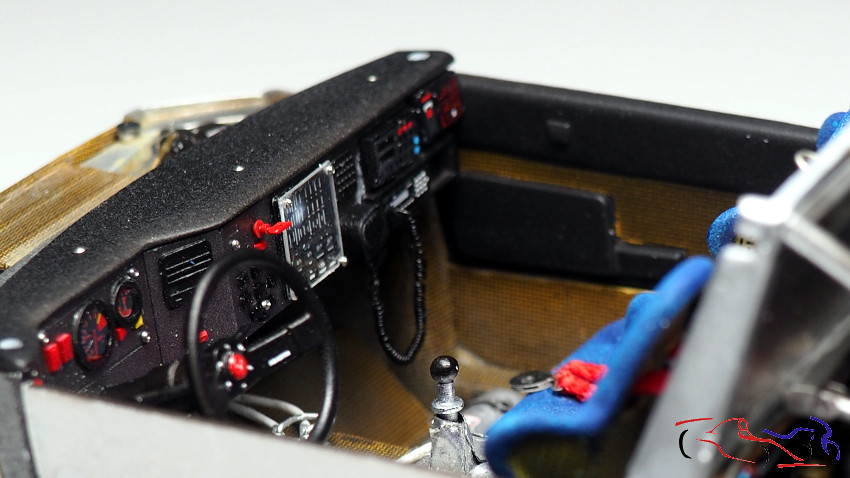
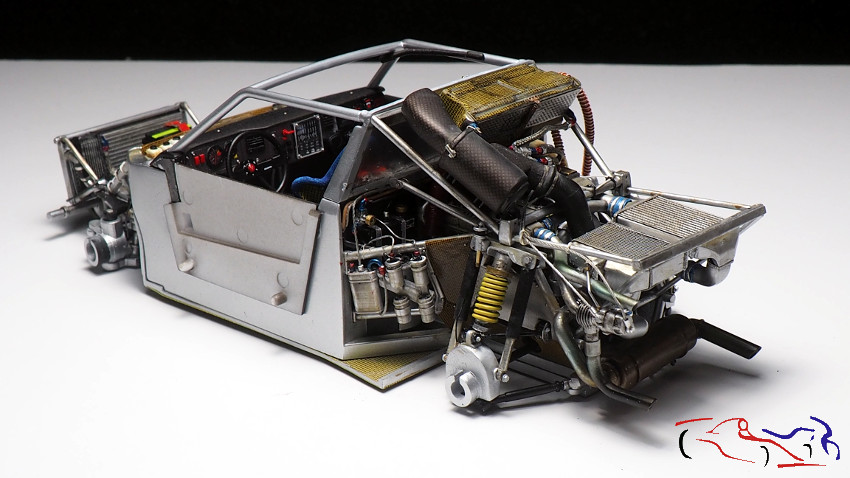
En las siguientes fotos, vemos los paneles de las puertas, una canalización por debajo de la puerta izquierda, el salpicadero, volante y sus conexiones, los pedales….
In the following photos, we see the door panels, a channel under the left door, the dashboard, steering wheel and its connections, the pedals …
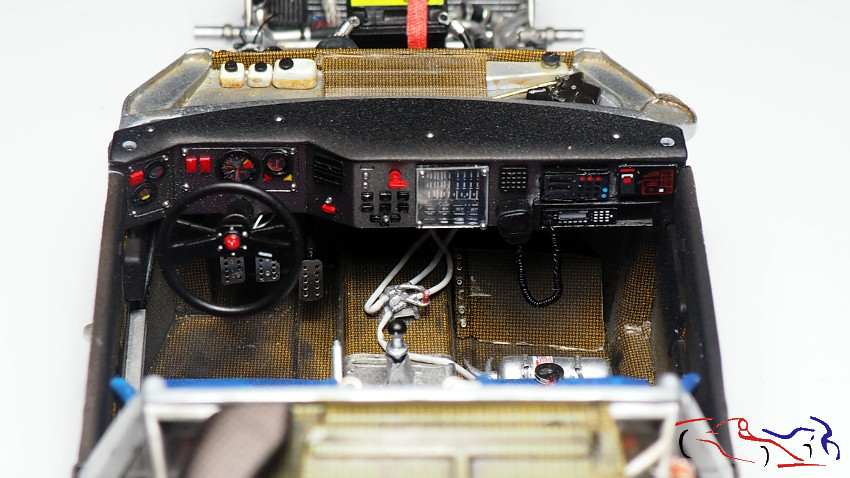
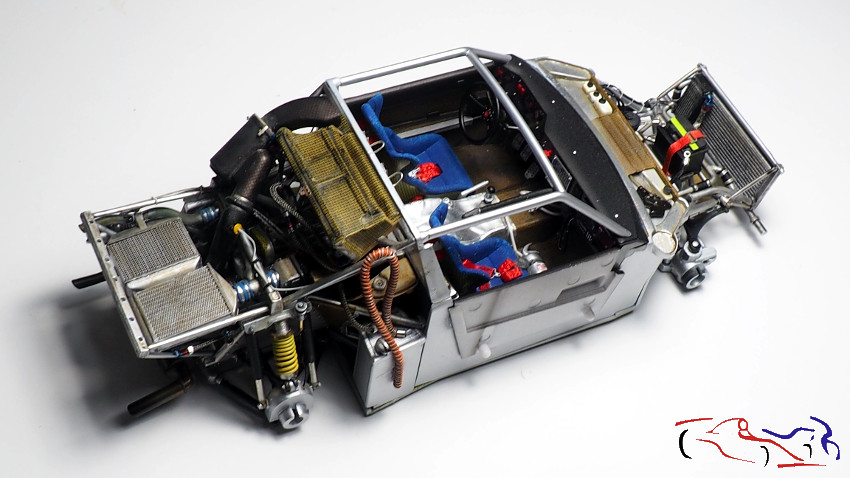
Para terminar, unas fotos del conjunto completo con las barras antivuelco y la luz del copiloto:
Finally, some photos of the complete set with the roll bars and the passenger light:
Solo faltan los conectores eléctricos del capó y del portón, para dejarlo terminado, pero ya nos volveremos a meter con la carrocería!
Only the electrical connectors of the hood and the tailgate are missing, to finish it, but we will get back to the bodywork!
Gracias por ver y comentar!!
Thanks for viewing and commenting!


Excellent !
Thanks Yannick!! 🙂
Wow!!!
Thanks Miguel!!!