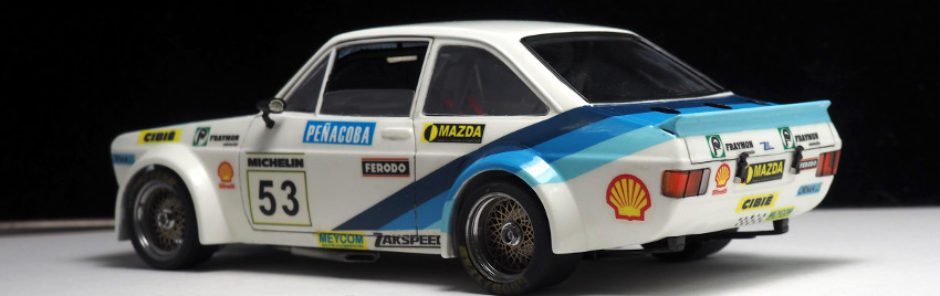
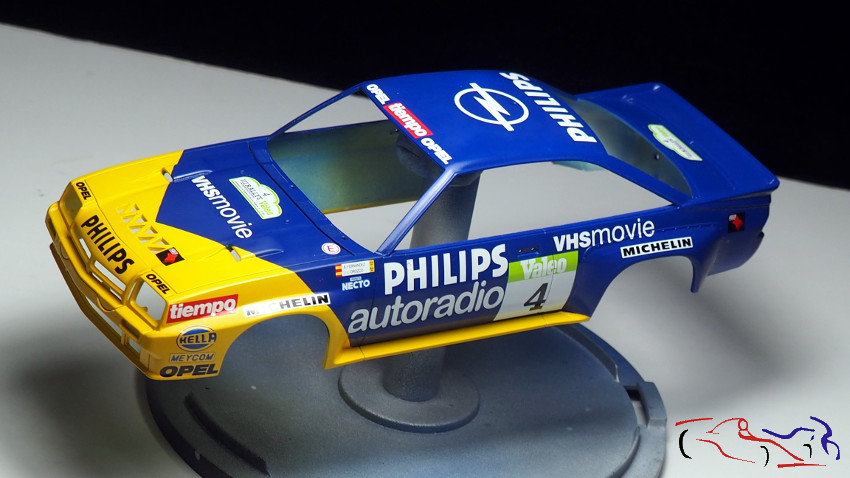
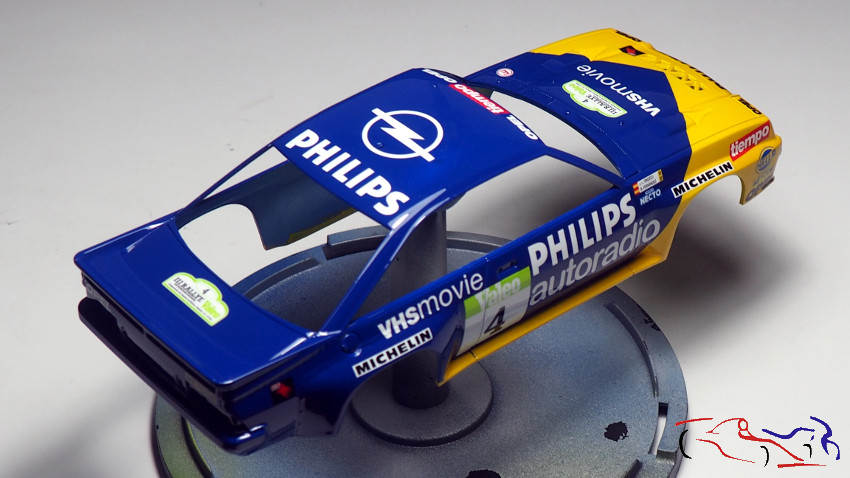
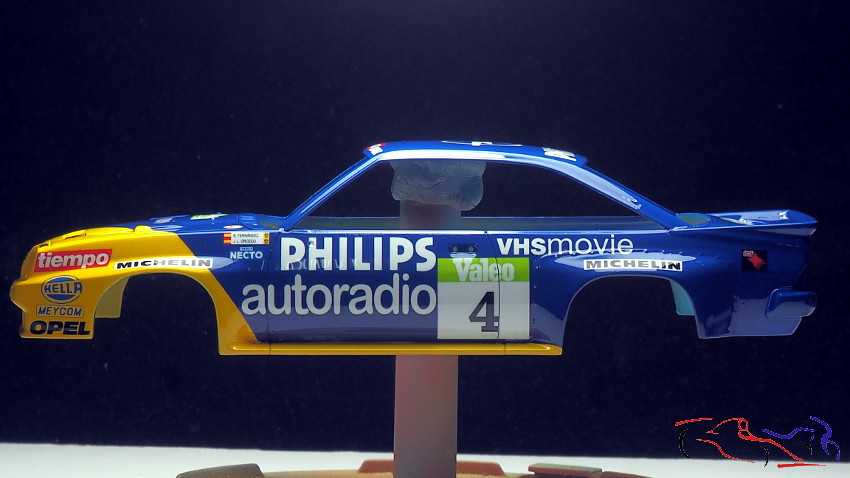
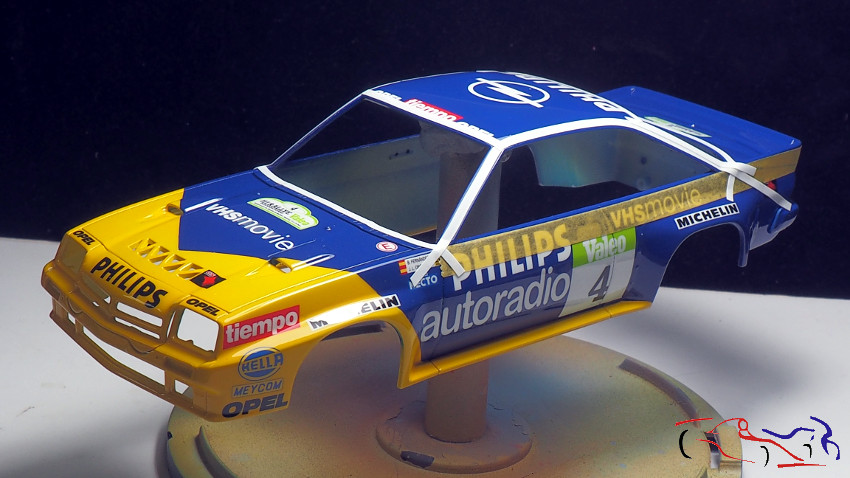
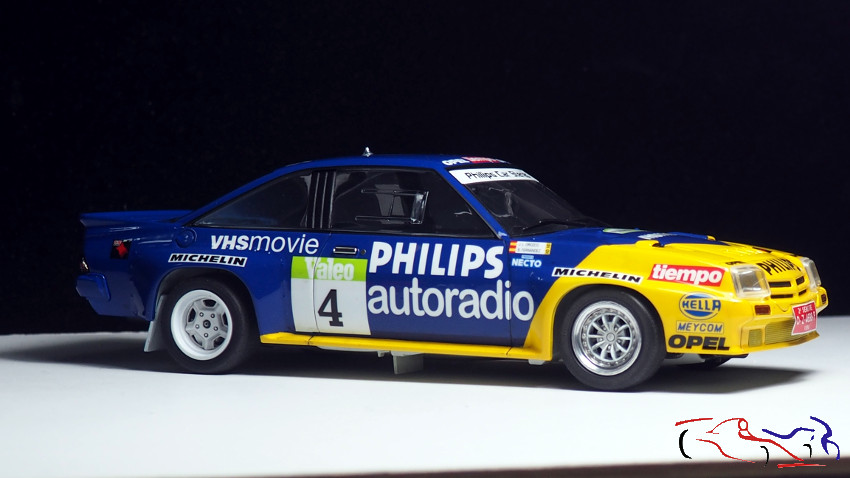
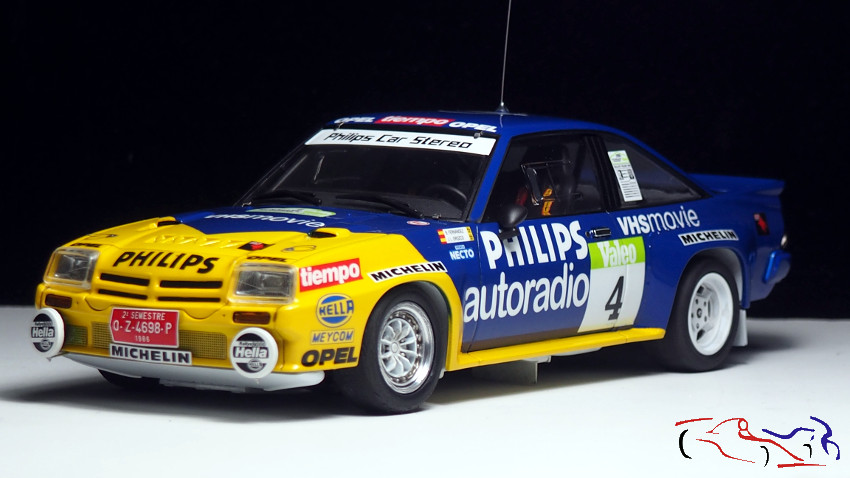
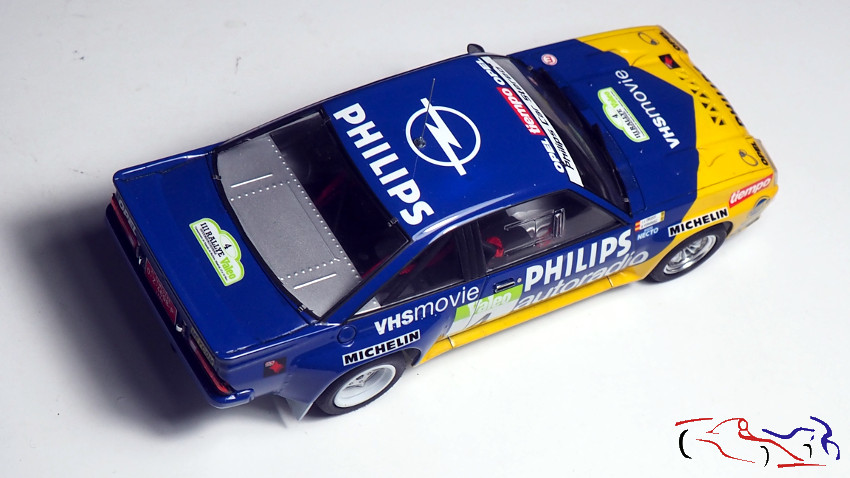
Y también llega ya el final para este modelo!! Esta es la foto final:
And the end also comes for this model! This is the final photo:
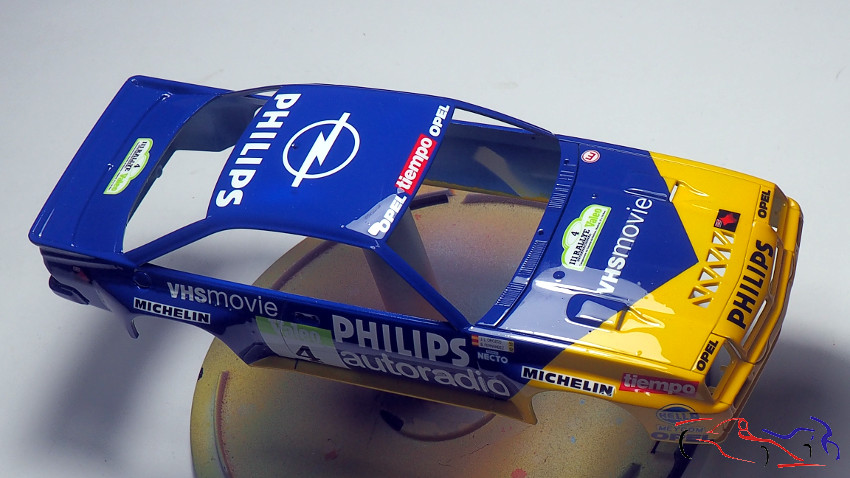
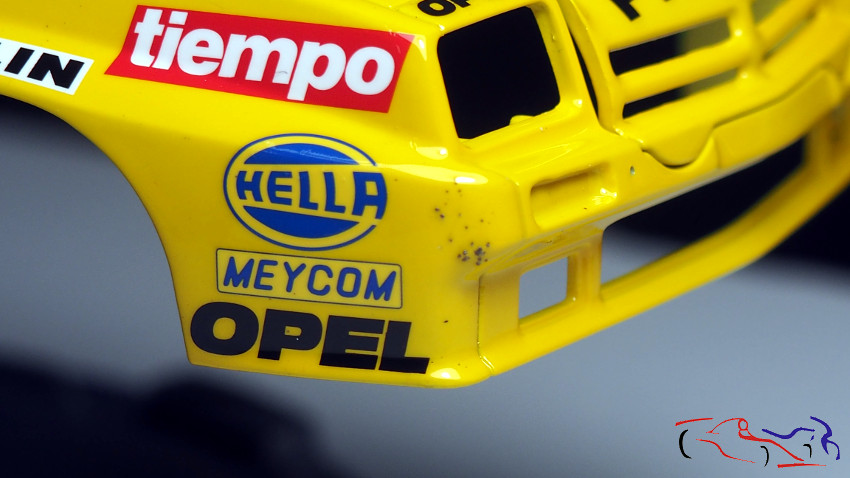
 Pero el proceso lo dejé a falta de calcas, y aquí están! Muy buenas con cuatro posibles decoraciones. La mía, la del rallye Valeo!!
But I left the process in the absence of decals, and here they are! Very good with four possible decorations. Mine, the rally Valeo !!
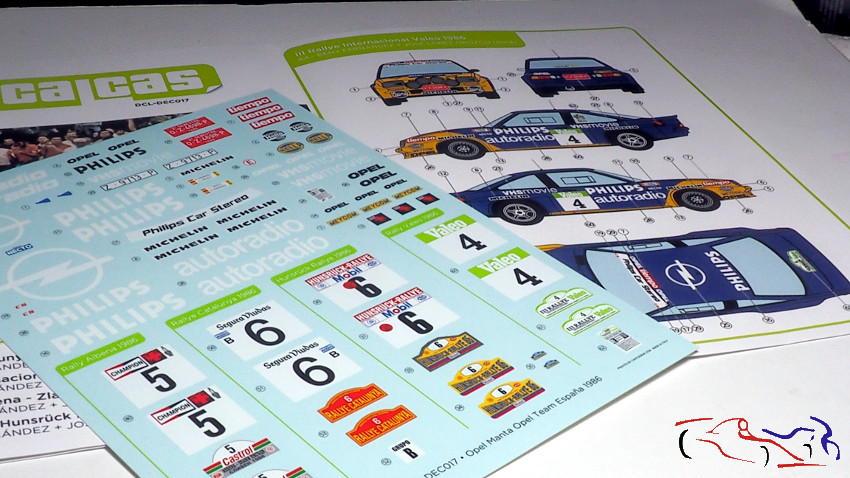 Ponerlas ha sido un verdadero placer: finas y resistentes!! Además, las medidas exactas!! (por qué será que las conozco bien!! :-))
Putting them has been a real pleasure: thin and resistant! In addition, the exact measurements! (why will it be that I know them well !! :-))
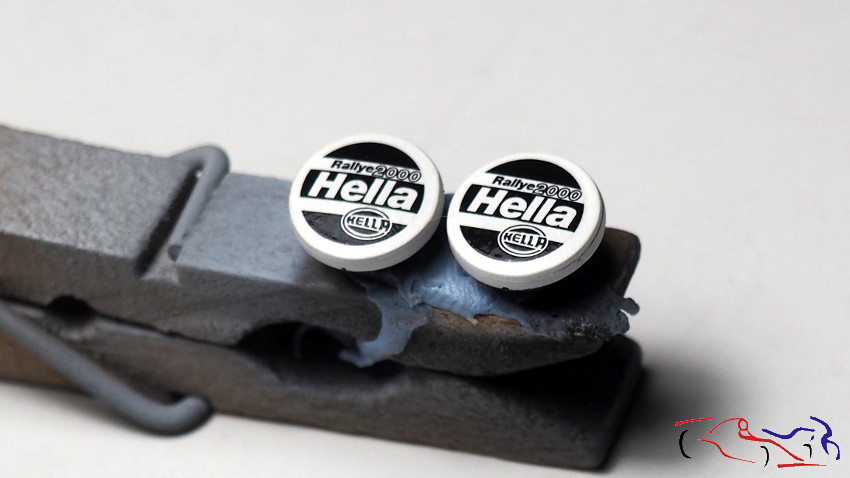
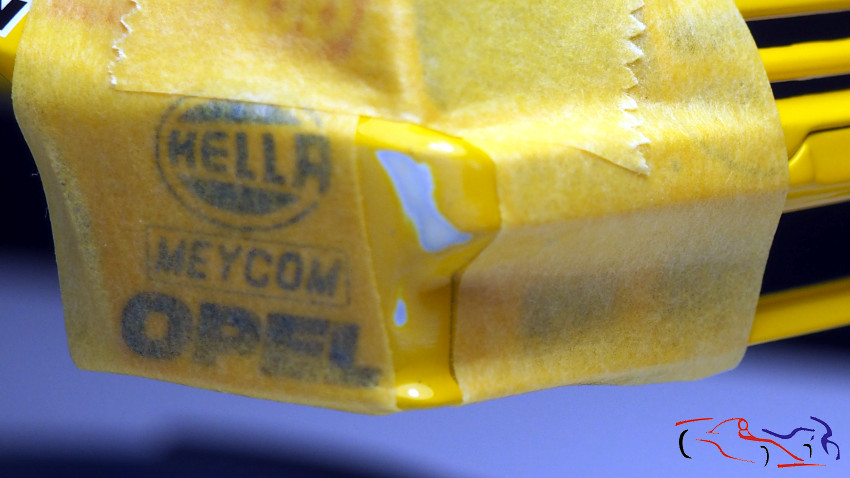
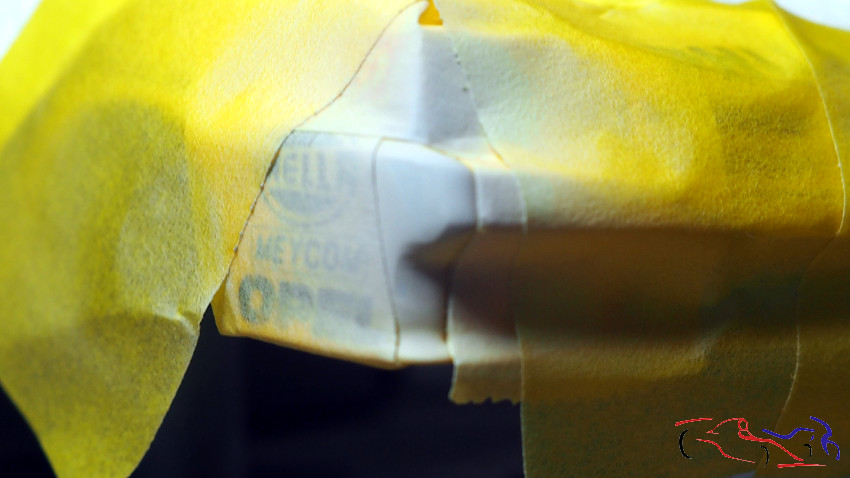
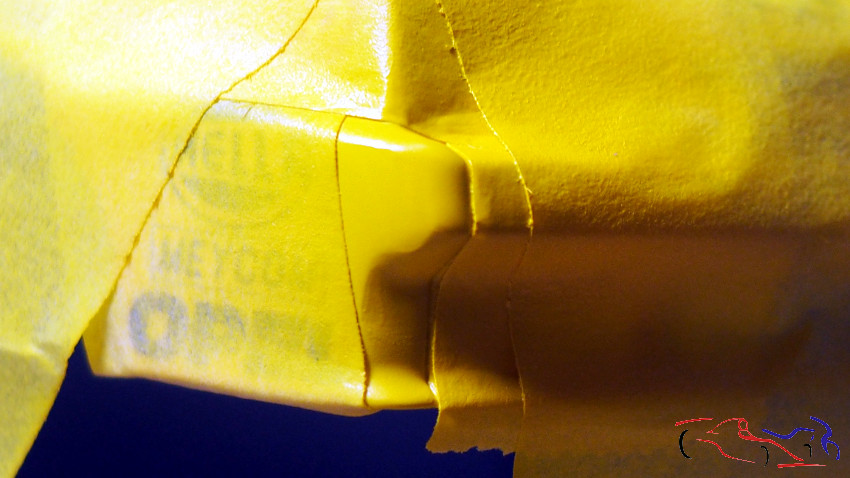
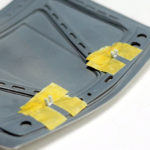
Otro detalle de las calcas, son las que llevan los faros auxiliares, que previamente sin el cristal he tapado con Evergreen y pintado.
Another detail of the decals, are the ones that carry the auxiliary headlights, that previously without the glass I have covered with Evergreen and painted.
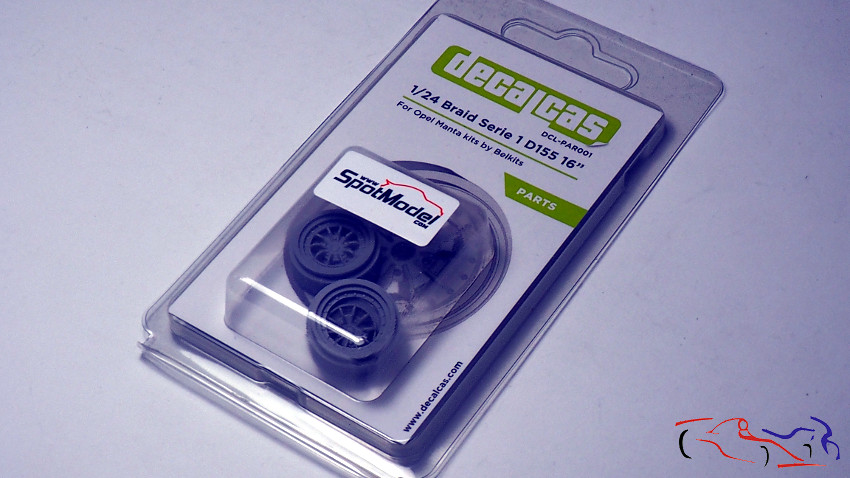
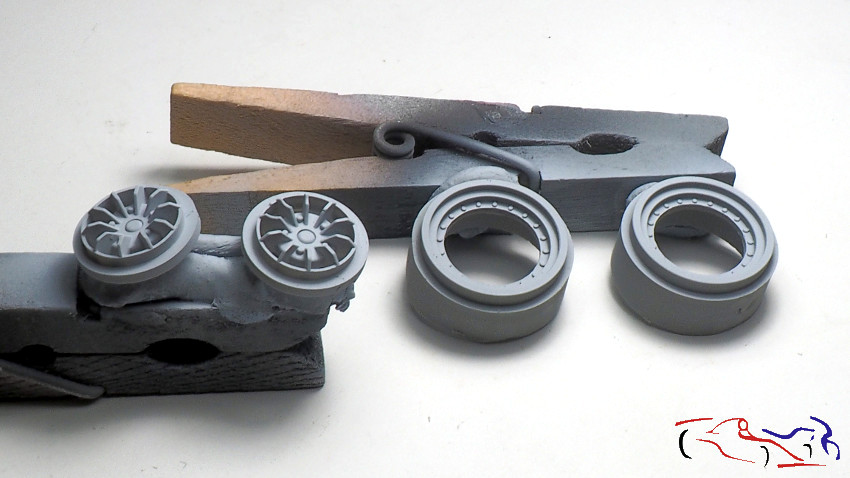
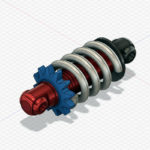
 Otra novedad de Decalcas: las llantas Braid de 10 palos, realizadas en dos partes. Muy buenas con un buen detalle. En este caso son para las ruedas delanteras:
Another new feature of Decalcas: the 10-piece Braid wheels, made in two parts. Very good with a good touch. In this case they are for the front wheels:
 Lo primero, imprimar con Gravity!!
First, the primer with Gravity !!
 A los aros, le pasamos con chromo a spray, y al núcleo lo pintamos de blanco:
I put chromo spray to the rings, and the core is painted in white:
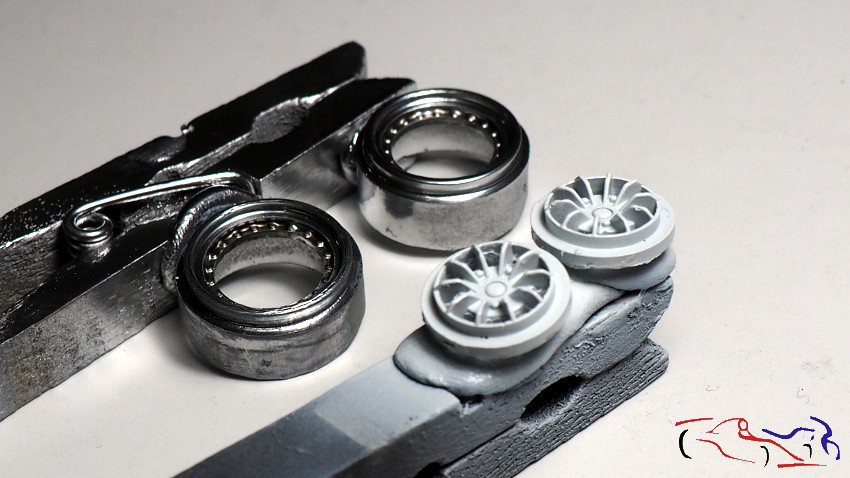 Y aquí están en su lugar, con un lavado de Smoke de Tamiya diluido al 50%. Falta ensombrecerlas con negro mate diluido:
And here they are in place, with Tamiya Smoke wash diluted to 50%. Missing is a layer with black matte diluted:
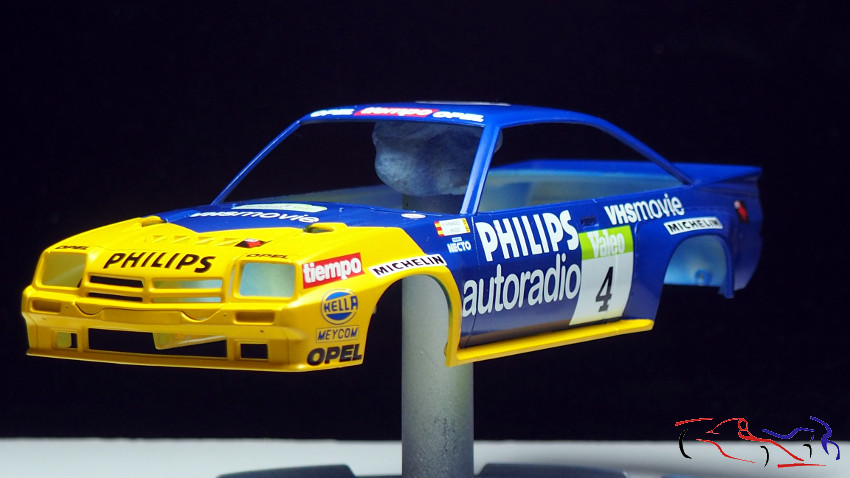
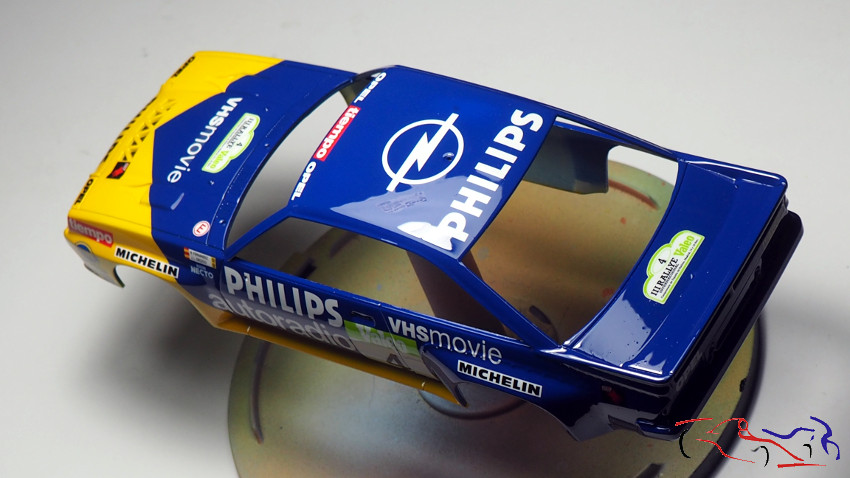
 Y después de las calcas, la laca: tres capas de Gravity, dos finas y una tercera mas húmeda, dejando 5/10 minutos entre cada capa:
And after the decals, the lacquer: three layers of Gravity, two thin and a third more humid, leaving 5/10 minutes between each layer:
 Pero no siempre salen las cosas bien!! Apoyé la carrocería al lacar y pasó esto: se llenó de unas puntitos de algo que tenía sobre la mesa al lacar!
But things do not always go well! I supported the bodywork when lacquering and this happened: it was filled with little dots of something I had on the table when I painted it!
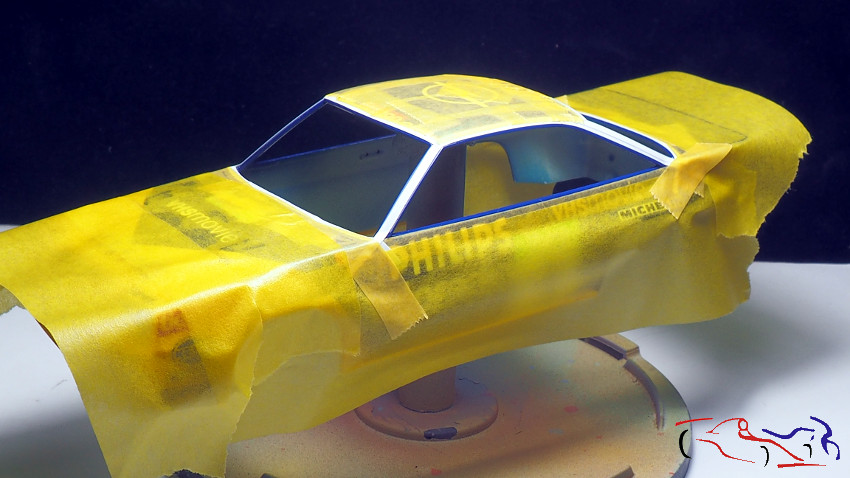
 Pues nada, al lío!! Máscara y lija:
So let’s go to the work! Mask and sandpaper:
 …imprimamos…
…primer…
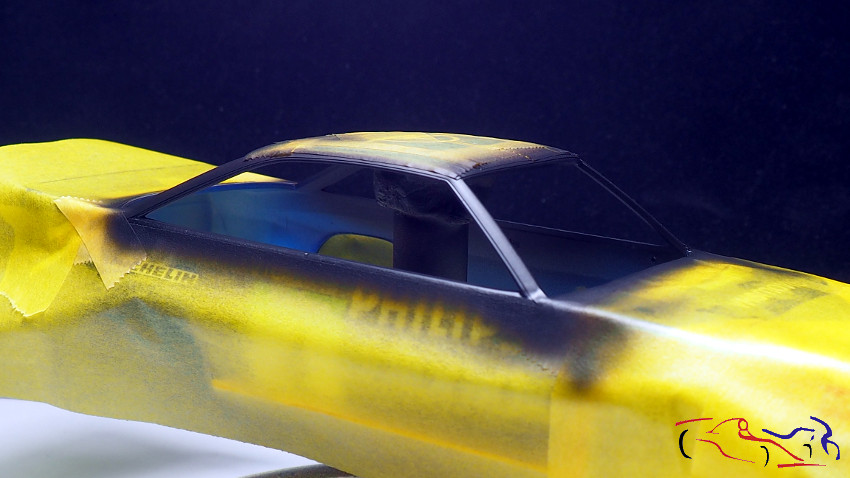
 …y pintamos de amarillo! Después laqué otra vez toda la carrocería!!
… and we painted it yellow! Then I clearcoated the whole body again!
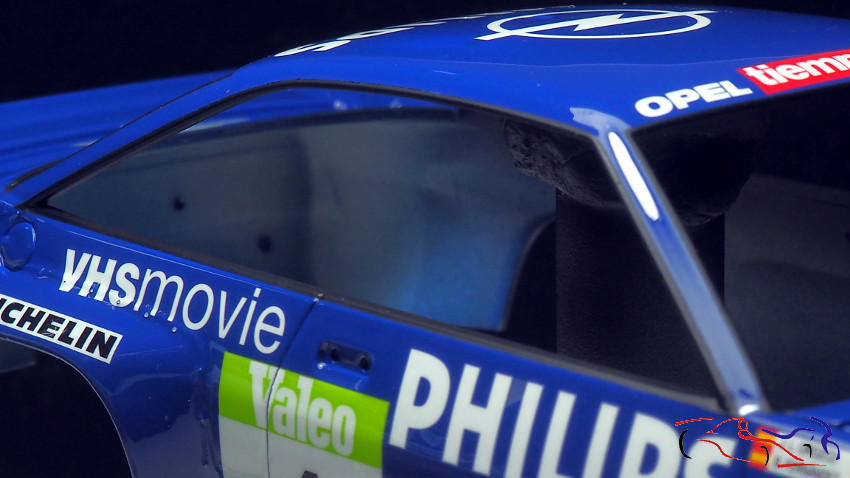
 Toca el turno de las partes negras: con máscara delimitamos los bordes de las ventanas:
Now is the turn of the black parts: we delimit the edges of the windows with mask:
 A partir de ahí, tapamos el resto:
From there, we cover the rest:
 Y pintamos con negro X18 de Tamiya:
And we painted it with black X18 from Tamiya:
 Y este es el resultado:
And this is the result:
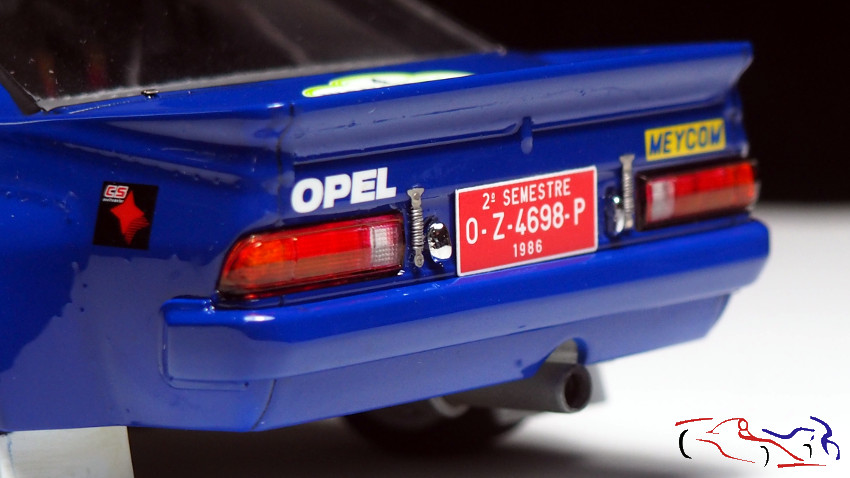
 Pasamos a los faros traseros: los cristales pintados con rotulador edding 3000, y el fondo del faro con Molotow:
Let’s move to the rear lights: the glasses painted with edding 3000 marker, and the bottom of the lighthouse with Molotow:
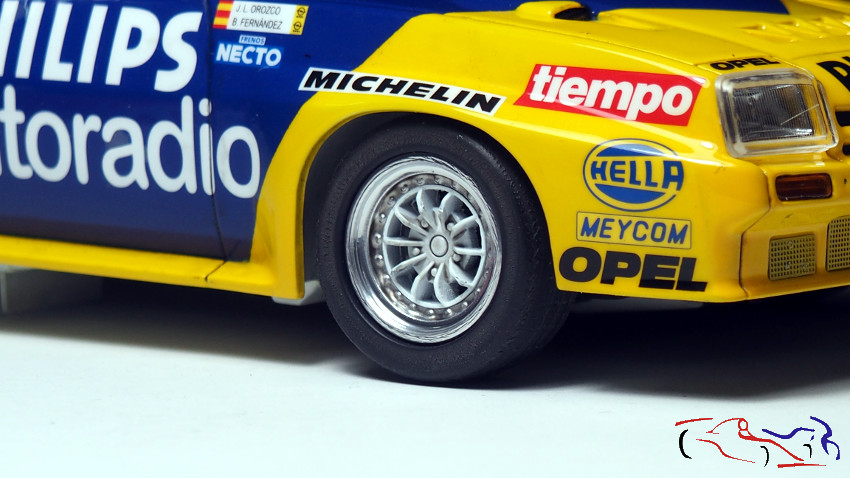
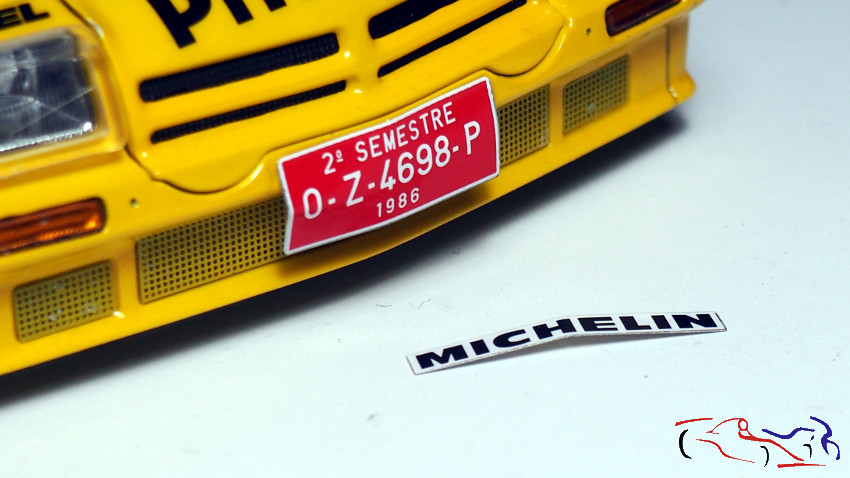
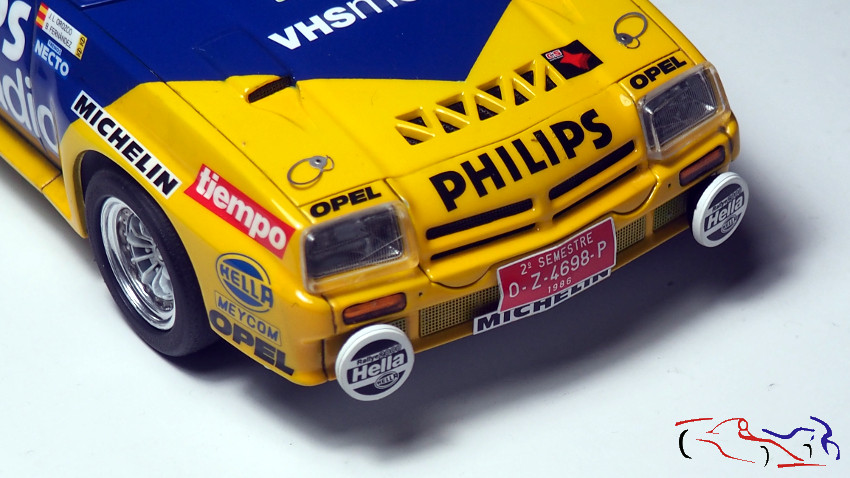
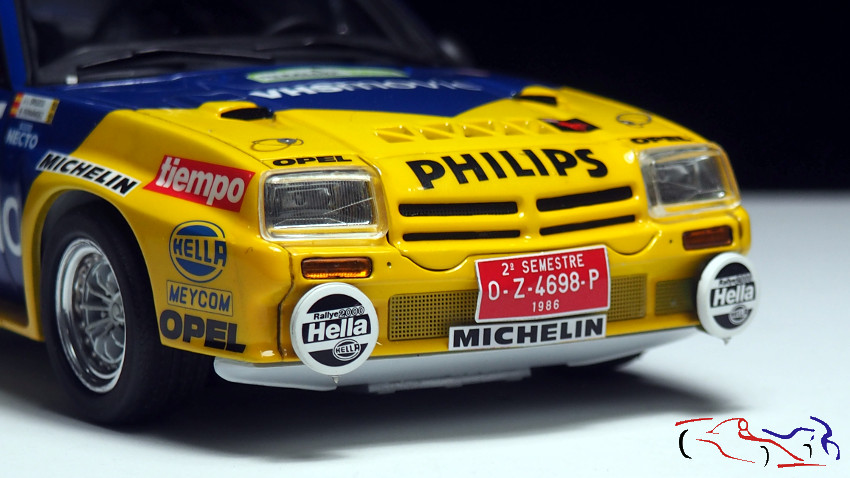
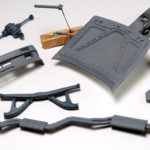
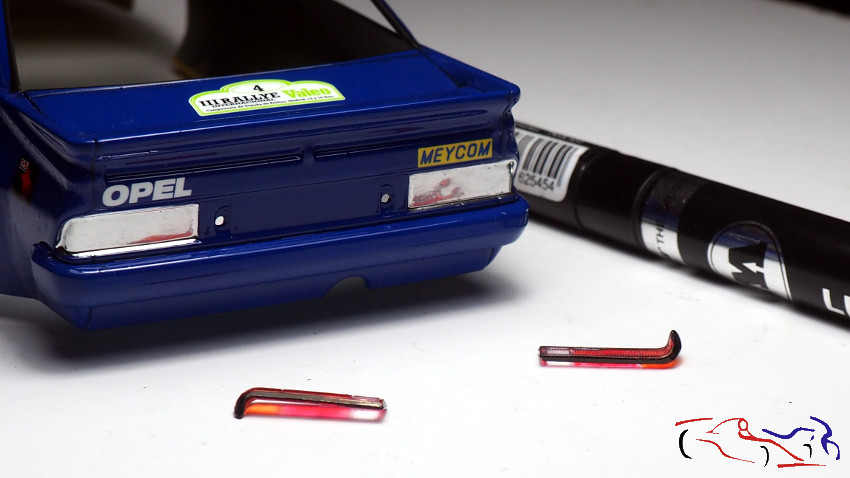 Las matrículas y la base de “Michelin” están hechas con lata de refresco, dobladas acorde a las fotos existentes!
License plates and base “Michelin” are made with soda can, folded according to existing photos!
 Los intermitentes delanteros tienen el mismo proceso que los faros traseros
The front turn signals have the same process as the rear lights
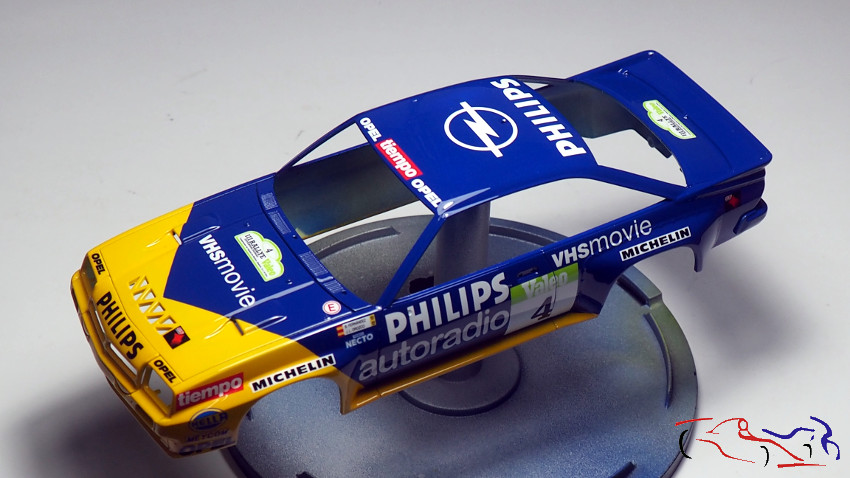
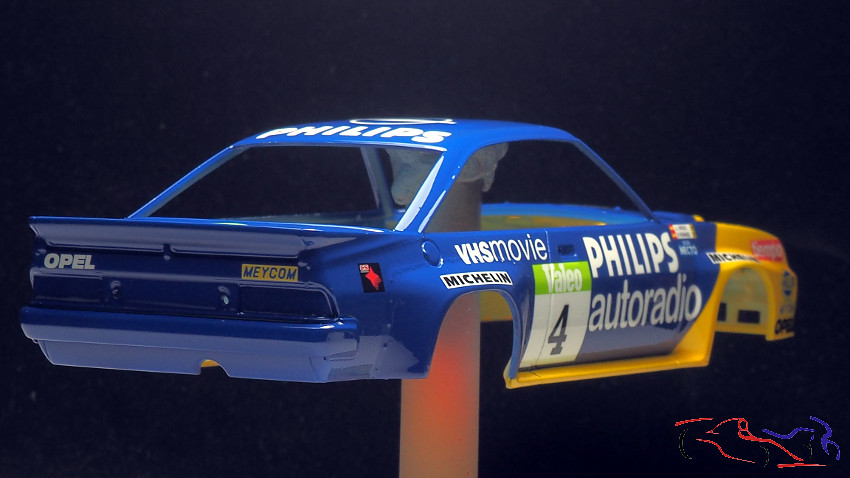
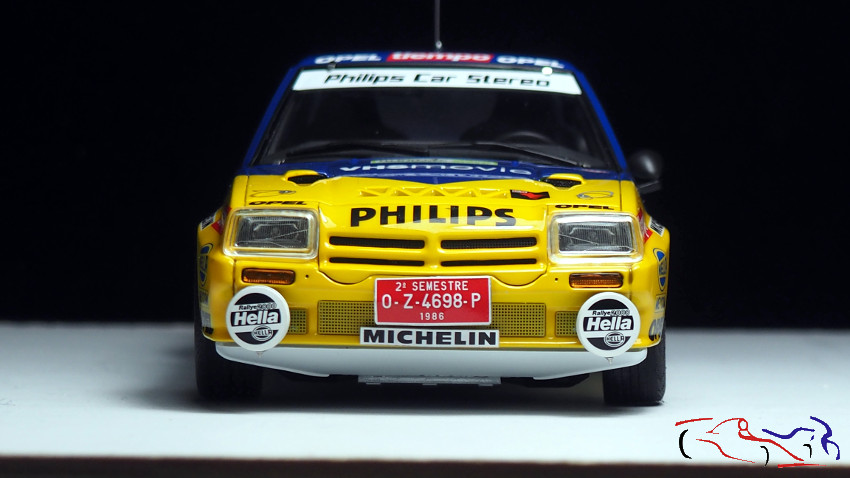
 Vemos la matrícula y los faros puestos:
We see the license plate and the headlights:

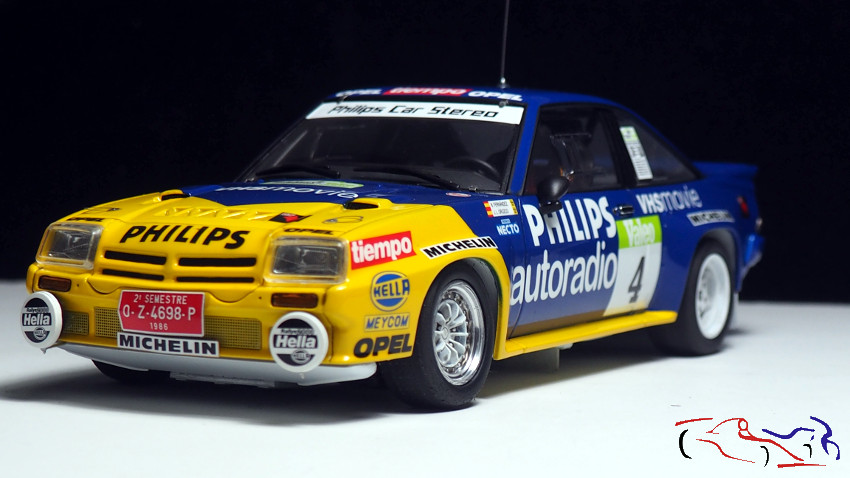
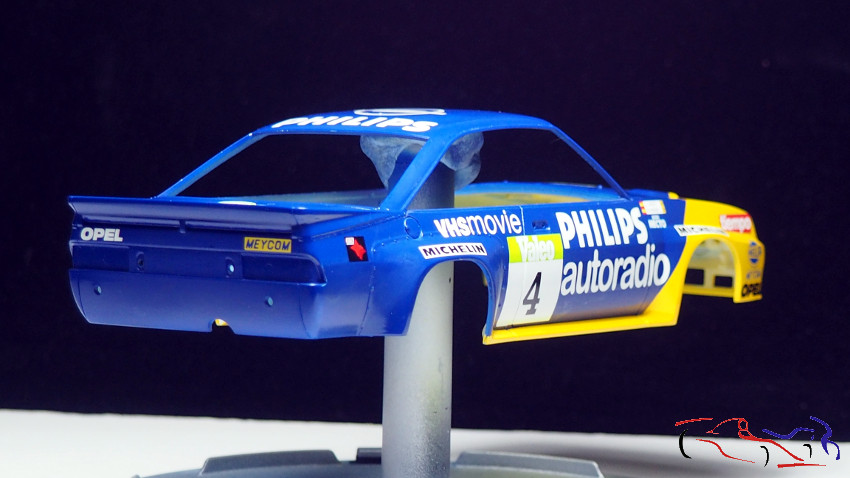
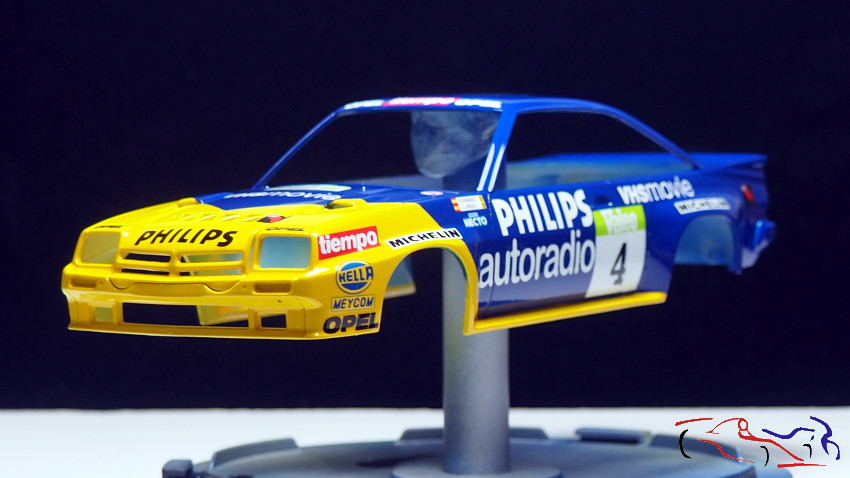
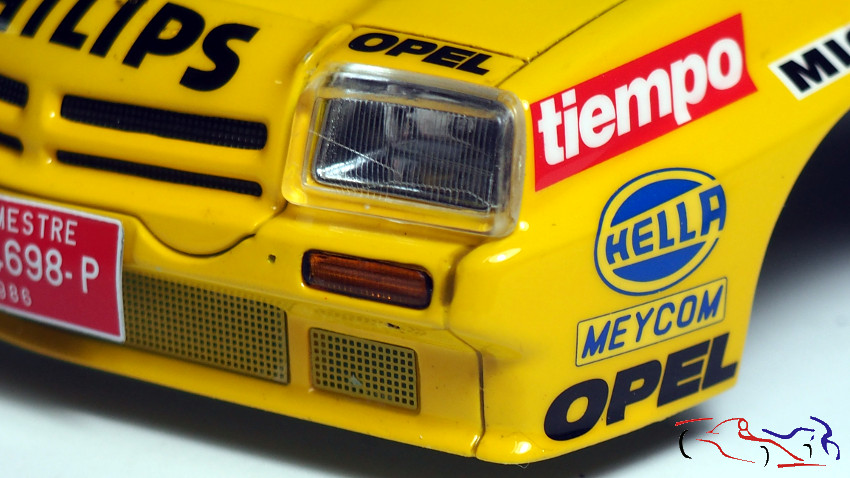
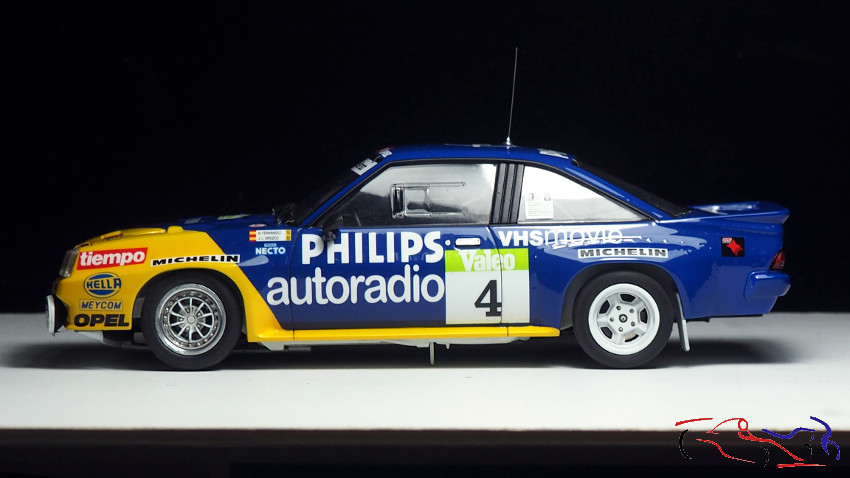
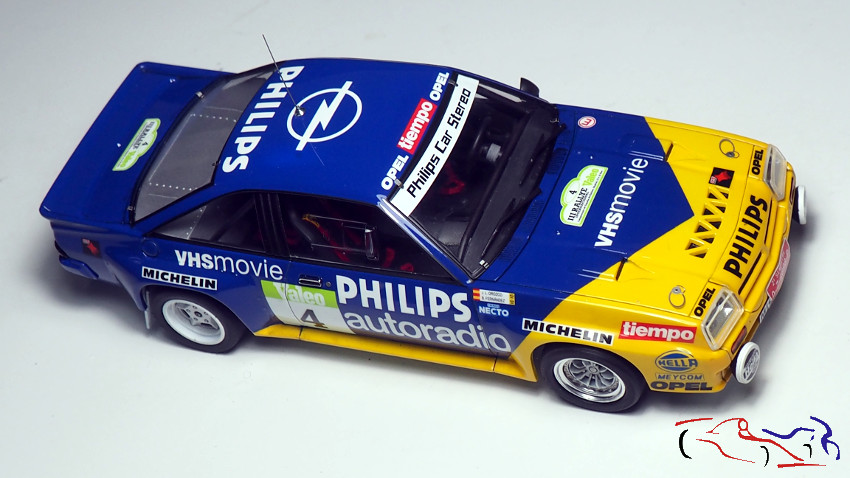
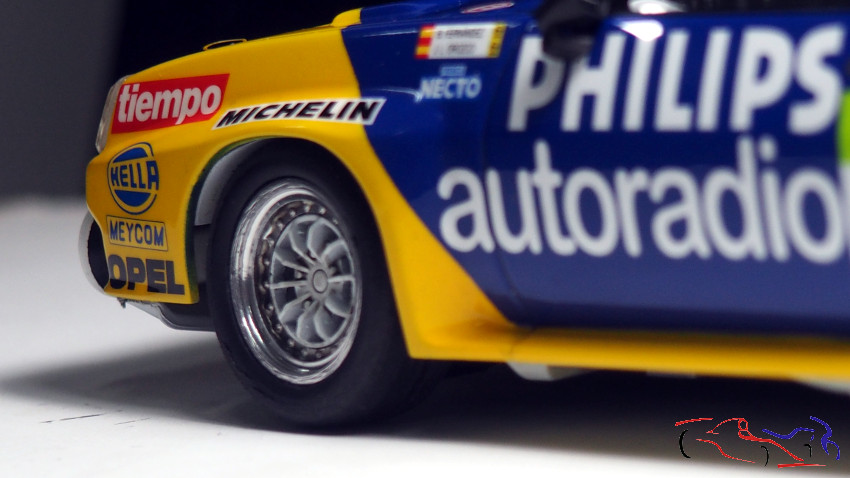
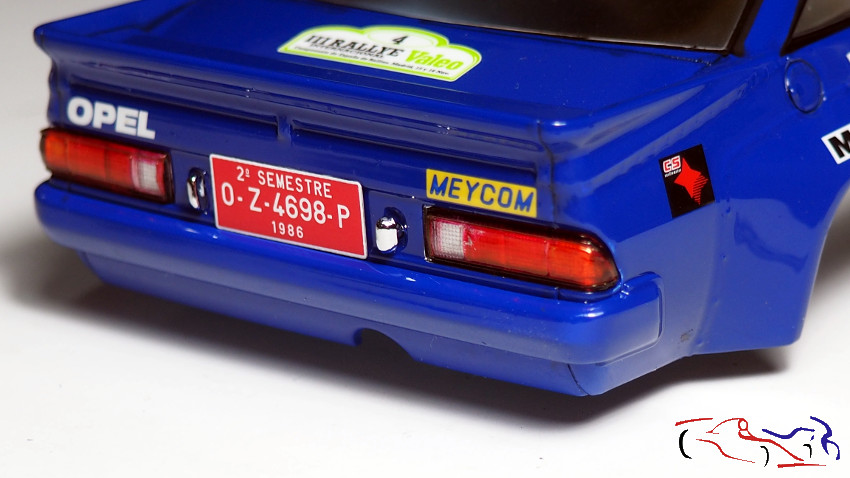 Y aquí las fotos finales con todo puesto!
And here the final photos with everything added!
 Gracias por ver y comentar!!
Thanks for viewing and commenting!!
Trabajo fantástico!!!..verlos me anima mucho a decidirme por alguno de los modelos que has hecho..enhorabuna!!
me encantan tus trabajos, me podrías decir que laca usas para los coches que quedan geniales
Hola Diego. Si ves los post, leerás que la laca que uso es Gravity.
Gracias por comentar!!
Hola Jesus. Soy Kostinha de Kostinha Scale Models. Que cromo en spray es lo de las ruedas? Que gran trabajo!
Saludos