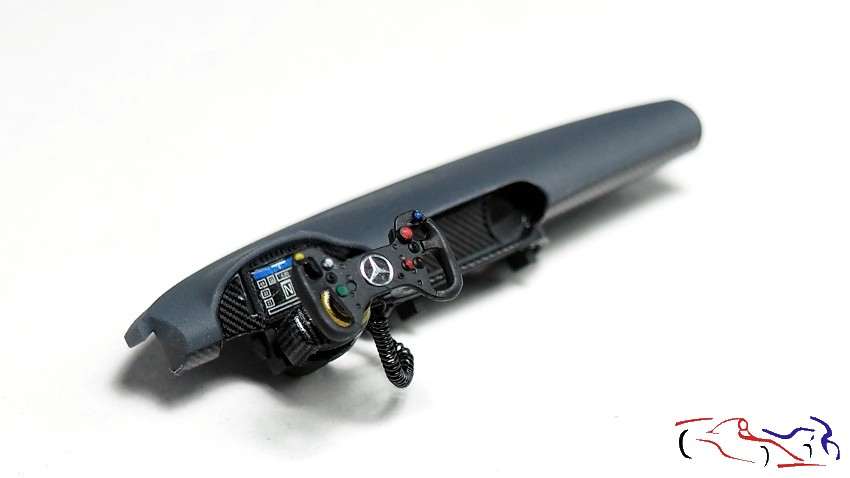
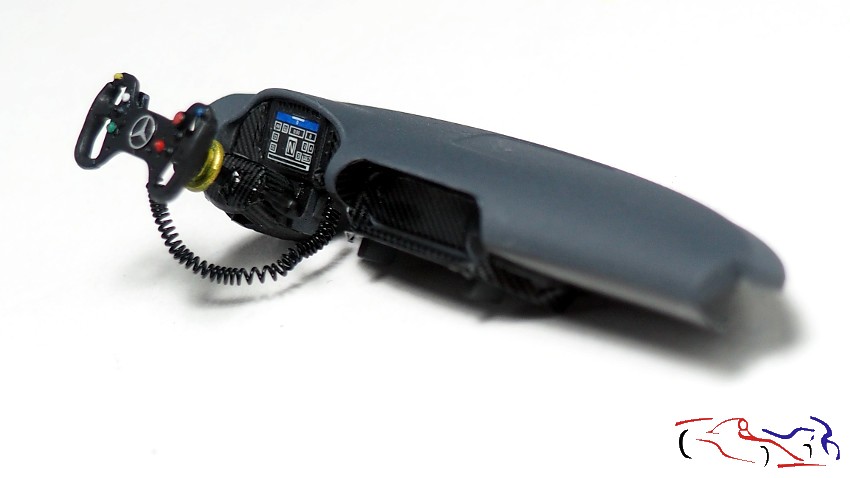
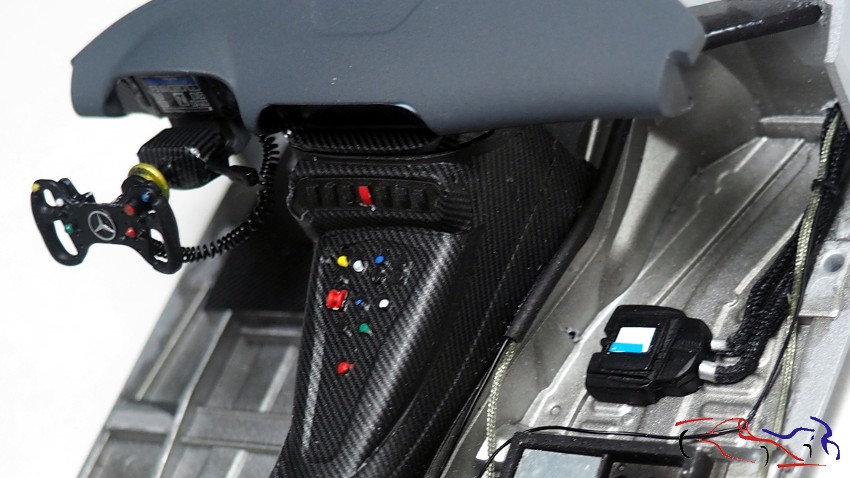
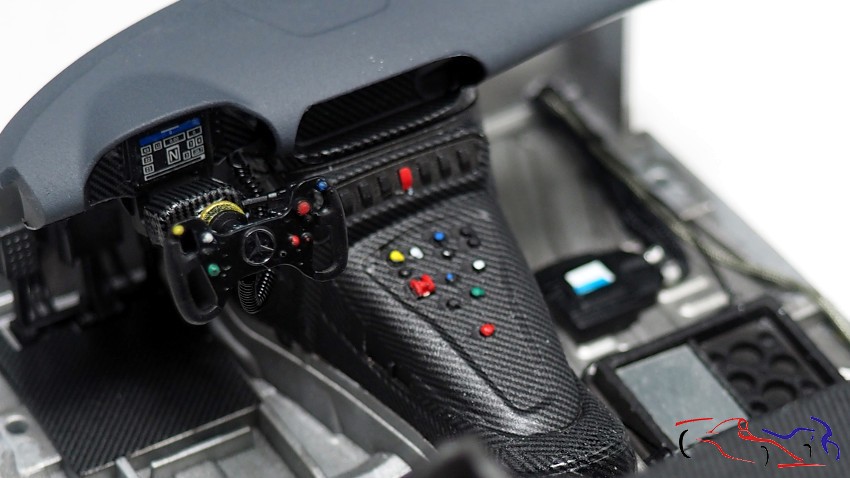
Más novedades en el proceso de contrucción del Mercedes AMG GT3 EVO. Y ya tenemos el salpicadero casi listo, con las calcas de fibra, el volante y el cable que lo une para cuando se separa:
More news on the construction process of the Mercedes AMG GT3 EVO. And we already have the dashboard almost ready, with the fiber decals, the steering wheel and the cable that connects it for when it is separated:
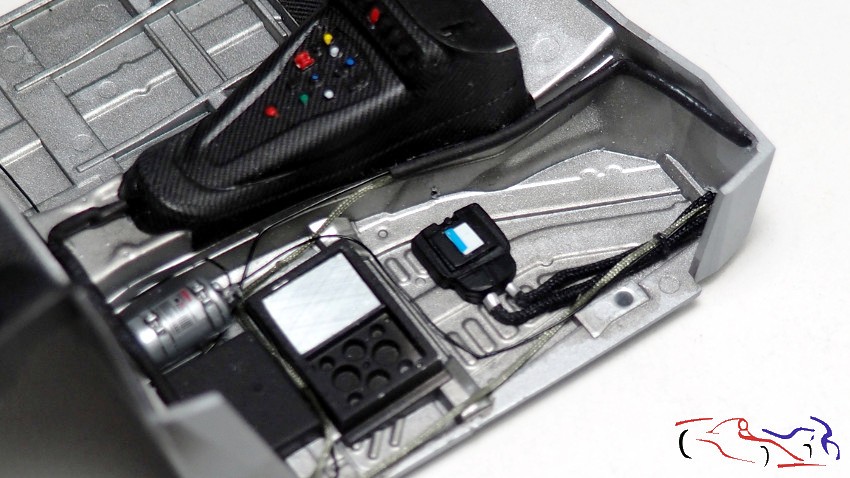
Y si continuamos con el cockpit, he añadido algunos cables junto con la centralita y el extintor. Tampoco quier poner mucho detalle pues se va a ver poco. En las dos ultimas fotos, he colocado el salpicadero para ver como resulta el conjunto:
And if we continue with the cockpit, I have added some cables along with the control unit and the fire extinguisher. I don’t want to put too much detail because it won’t be very visible. In the last two photos, I have placed the dashboard to see how the whole thing turns out:
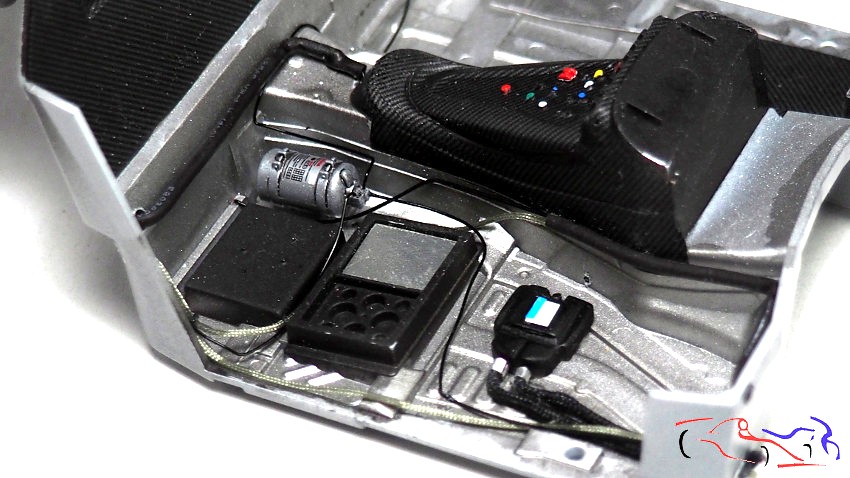
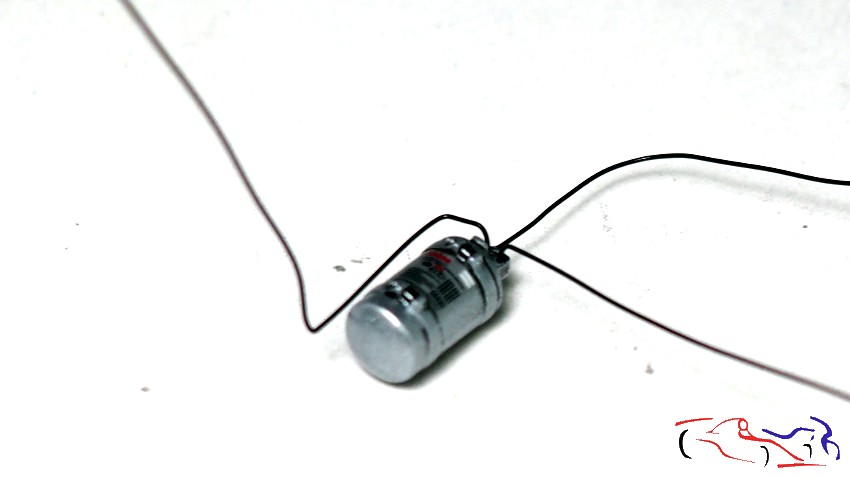
Aquí véis es extintos, al que le he añadido tres cables de 0,3mm, colocados en 3 agujeros realizados con boca.
Here you see the extinct ones, to which I have added three 0.3mm cables, placed in 3 holes made with a drill bit.
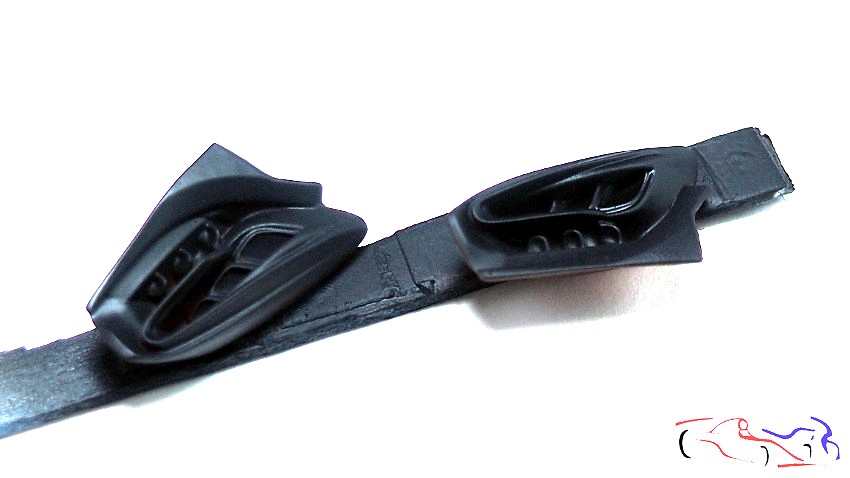
Más procesos del cockpit, del asiento en este caso: le he puesto los cinturones de algun fotograbado y tela que tenía, además de las barreras laterales de seguridad. Éstas se ponen en los laterales del asiento y se enganchan en el salpicadero y las barras antivuelco. Las he hecho con restos de cinturones pegados con ciano:
More cockpit work, in this case the seat: I put the seat belts from some photo-etched parts and fabric I had, as well as the side safety barriers. These are placed on the sides of the seat and are hooked onto the dashboard and the roll bars. I made them with leftover seat belts glued with cyano:

Del aleron trasero, pinté las derivas con azul de Tamiya, y añadi la calca cuando estuvo seco. El alerón lo cubriré con laca brillante, para enmascaran dichas derivas y pulverizar con semimate sus caras superior e inferior.
For the rear wing, I painted the tailpipes with Tamiya blue, and added the decal when it was dry. I will cover the wing with gloss lacquer to mask the tailpipes and spray its upper and lower surfaces with semi-matte.

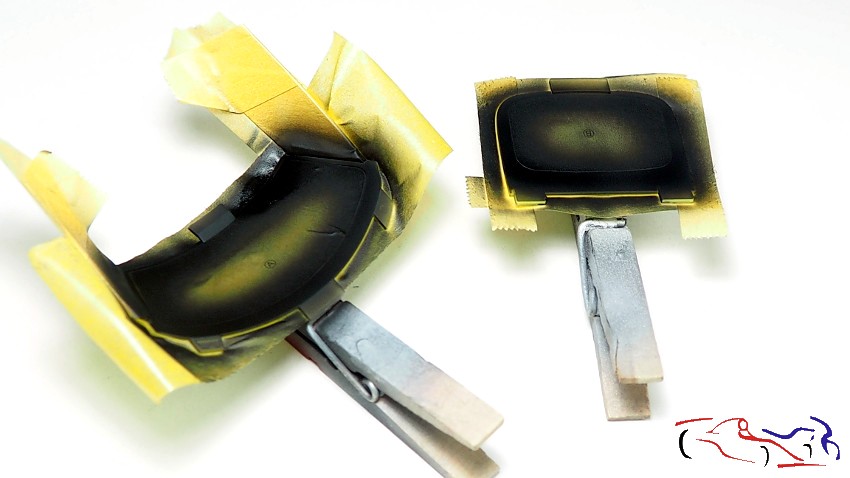
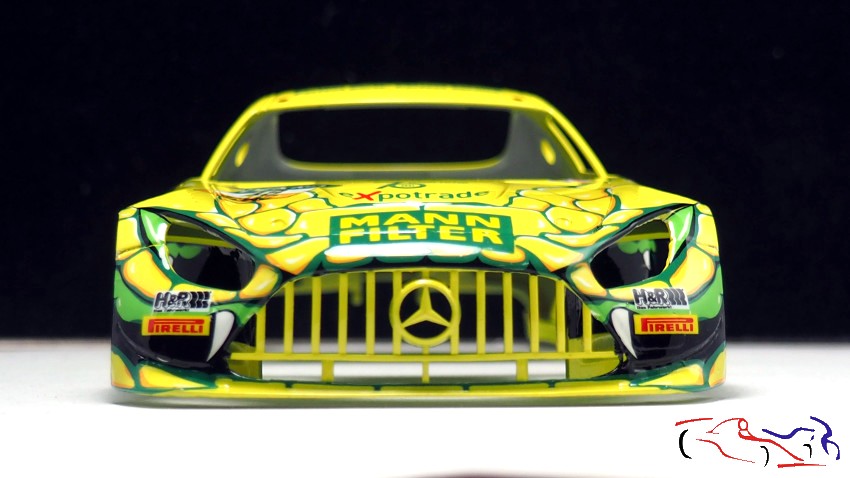
También pintamos los faros con negro semi mate LP de Tamiya
We also painted the headlights with Tamiya LP semi-matte black.
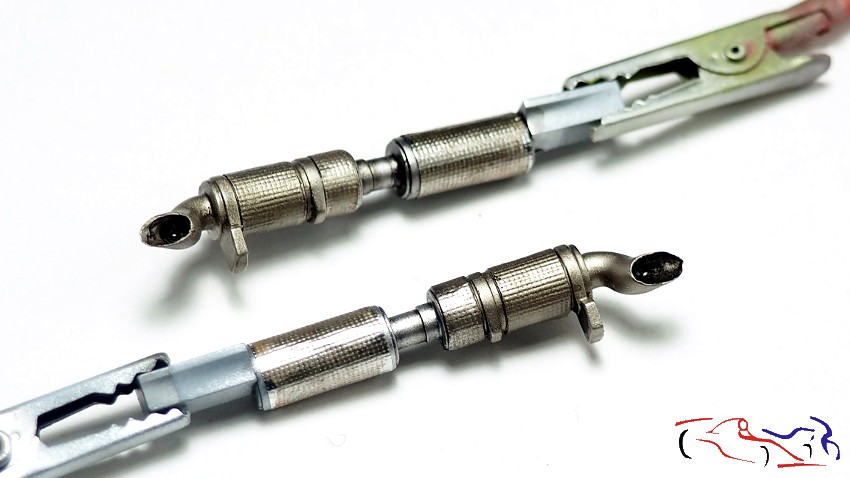
Y terminamos también los tubos de escape. El paso final ha sido pulverizar muy suavemente la parte extrema con Metal quemado de Alclad, para pasar otro ligero panelado con el Panel Liner negro de Tamiya:
And we also finished the exhaust pipes. The final step was to very lightly spray the end with Alclad Burnt Metal, followed by another light panelling with Tamiya Black Panel Liner:
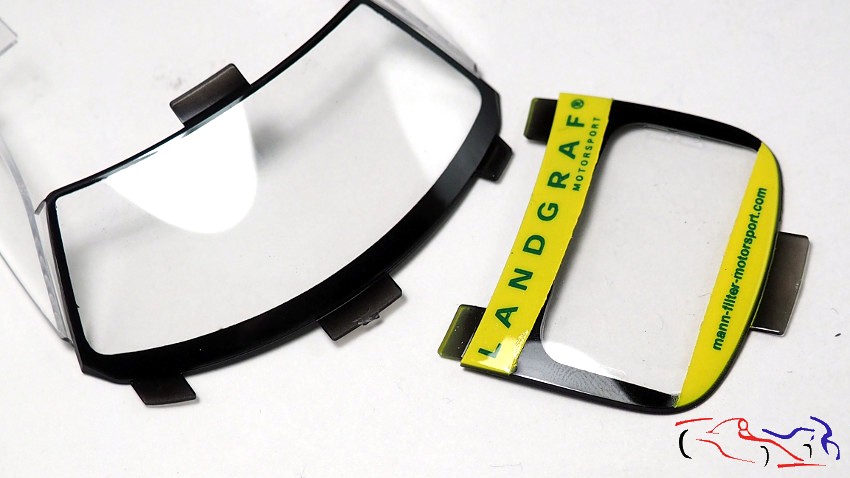
Con los cristales, enmascaramos y los pintamos con el negro semi mate LP de Tamiya. En el caso del trasero, podéis ver que una vez quitadas las máscaras, veis las dos franjas amarillas que fueron pintadas, y que después de poner las calcas, fueron lacadas. El resultado es excelente:
With the windows, we masked and painted them with Tamiya LP semi-matte black. In the case of the rear, you can see that once the masks were removed, you can see the two yellow stripes that were painted, and that after applying the decals, were lacquered. The result is excellent:
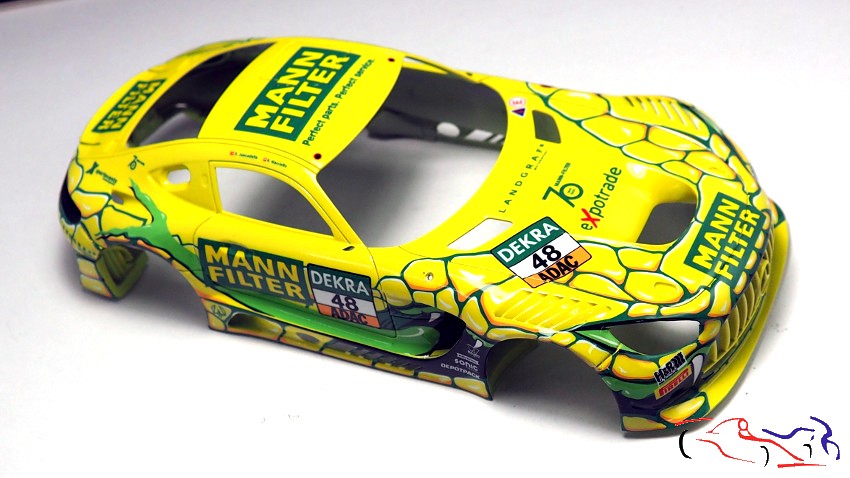
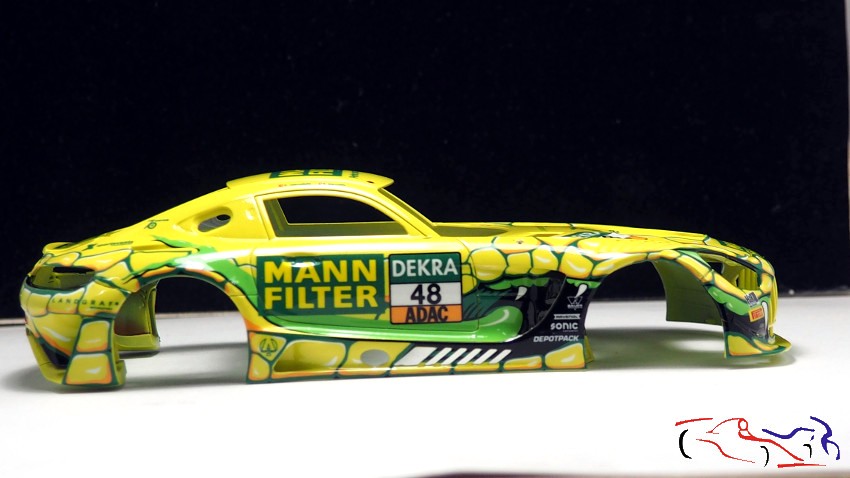
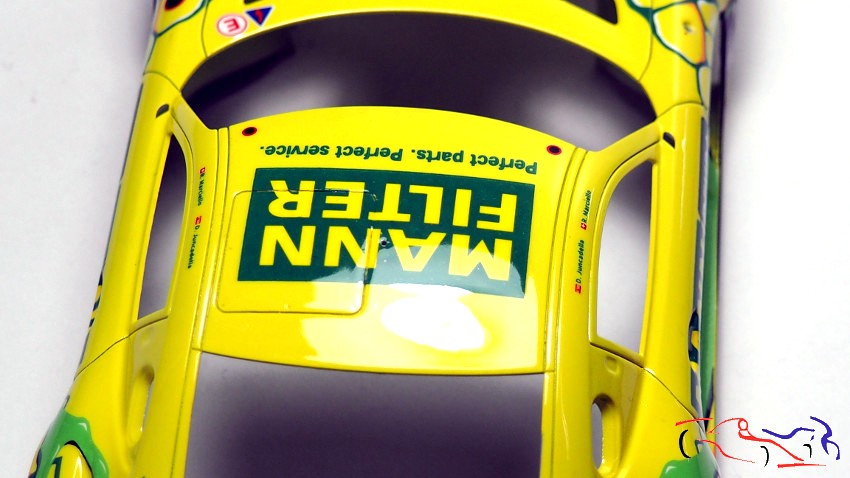
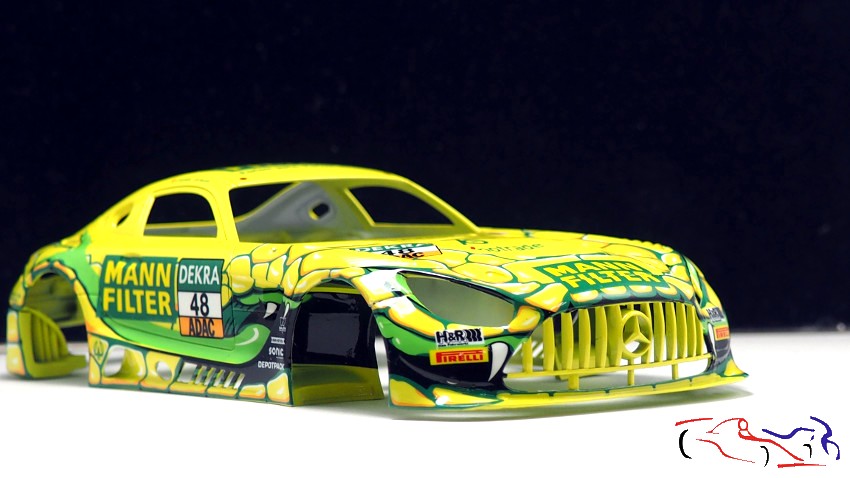
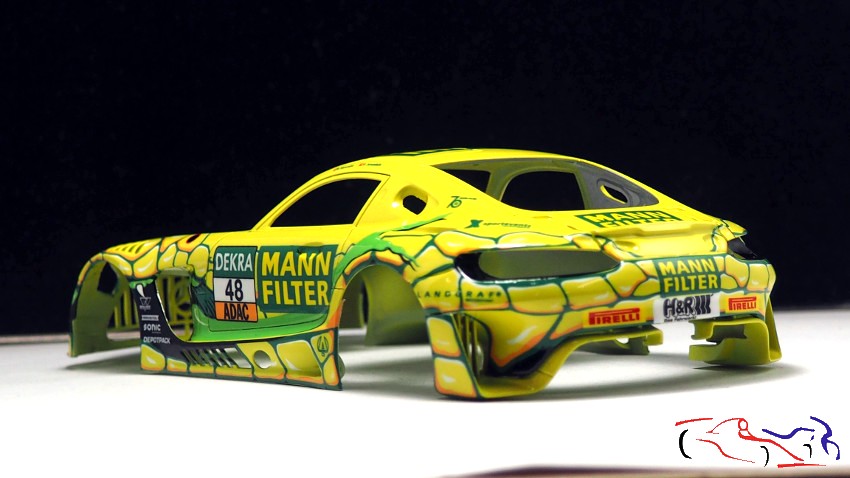
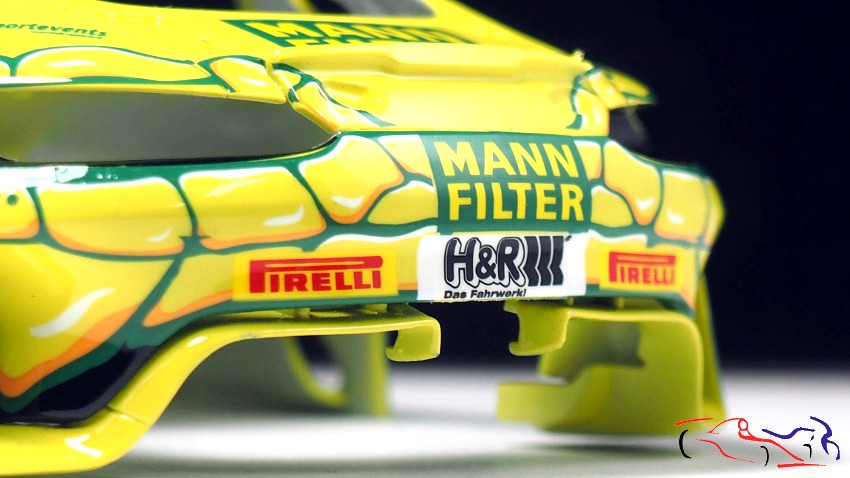
Y para termionar este post, os muestro la carrocería una vez lacada con laca Number5. Su resultado es fantástico como podréis comprobar en las siguientes fotos. Yo le di dos manos suaves, donde no se veia el brillo, y una posterior humeda donde ya se vió el brillo:
And to finish this post, I show you the bodywork once it has been lacquered with Number5 lacquer. The result is fantastic as you can see in the following photos. I gave it two soft coats, where the shine was not visible, and a subsequent wet coat where the shine was visible:


Ahora toca dejar secar bien y pulir la carrocería con lijas al agua. Gracias por ver y comentar.
Now it’s time to let it dry well and polish the body with wet sandpaper. Thanks for watching and commenting.


