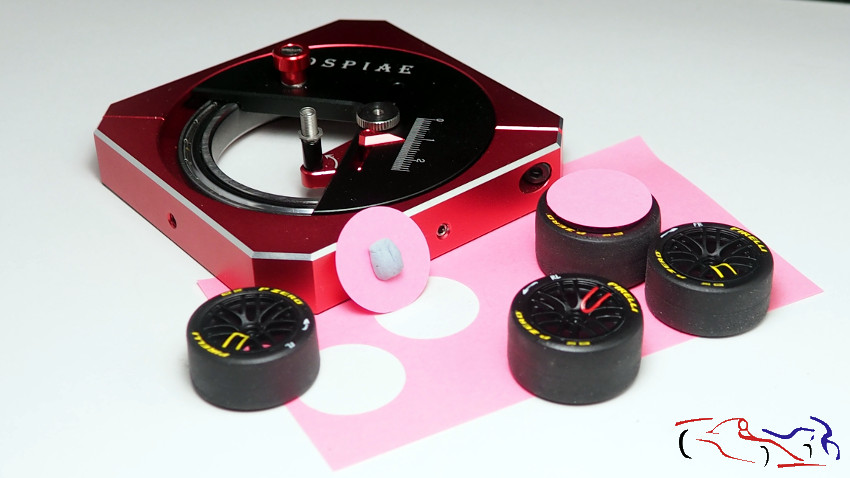
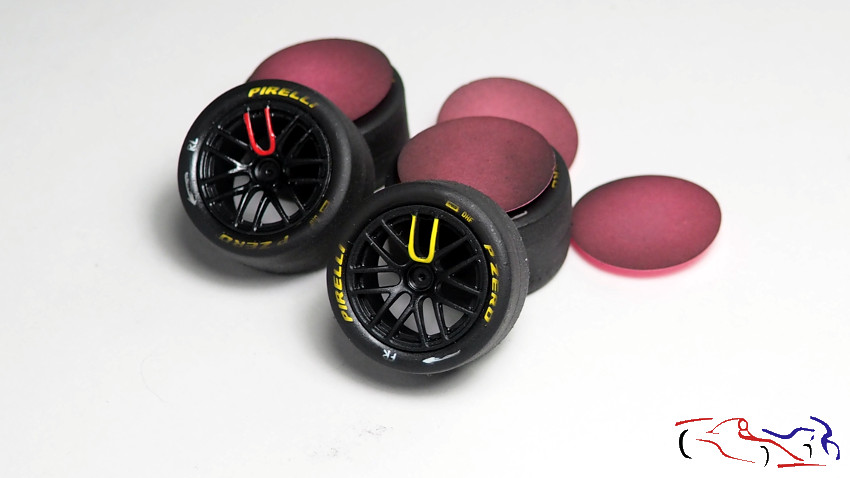
Hola de nuevo. Seguimis con piezas del chasis o cockpit. Y empezamos este post con las ruedas, que vamos a ensuciar un poco por su parte exterior. Para ello, cortamos circulos de papel, que colocamos en las ruedas, con un poco de bluetack, para que haya cierta distancia con el neumatico, y asi, el borde no sea tan brusco. La pintura es negra mate XF1 de Tamiya bastante disuelto. Ahora solo falta darle una capa de barniz mate para igualar todas las superficies.
Hello again. We continue with the chassis or cockpit parts. And we start this post with the wheels, which we are going to dirty a little on the outside. To do this, we cut paper circles, which we place on the wheels, with a little bluetack, so that there is some distance from the tire, and so the edge is not so abrupt. The paint is Tamiya XF1 matte black, quite diluted. Now we just need to give it a coat of matte varnish to even out all the surfaces.
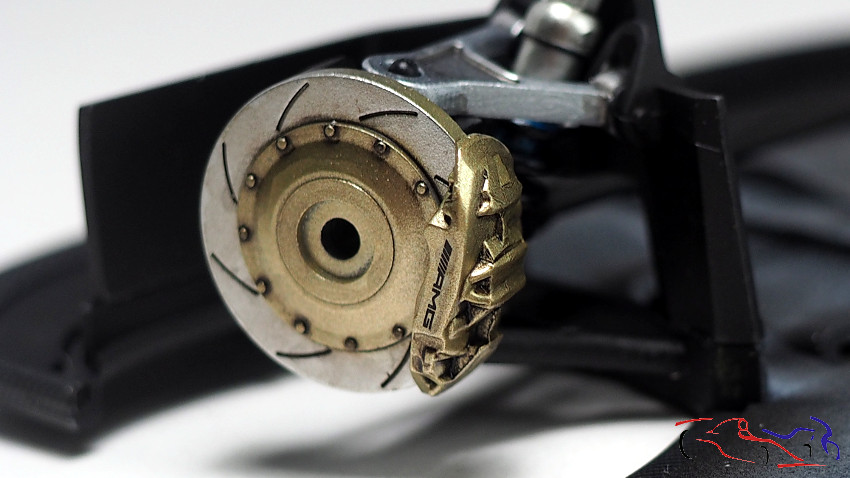
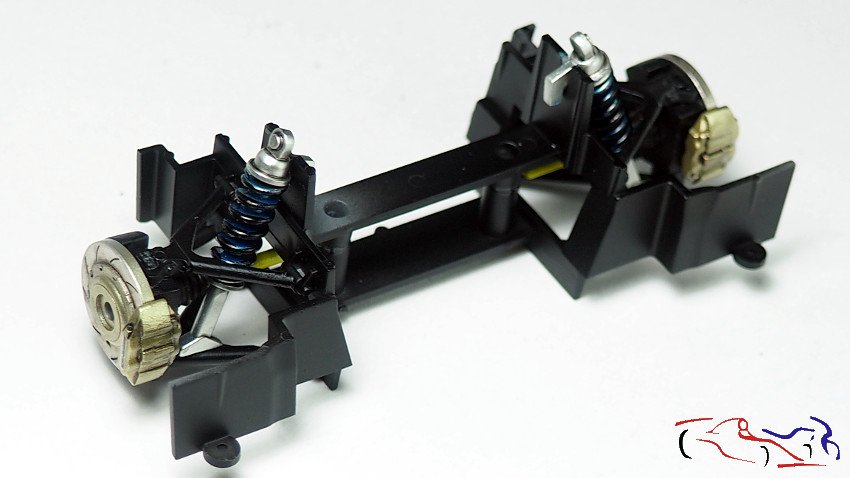
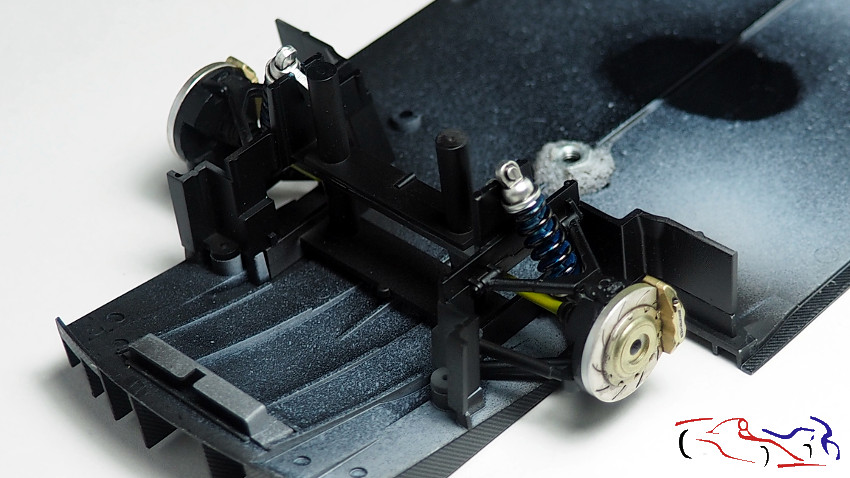
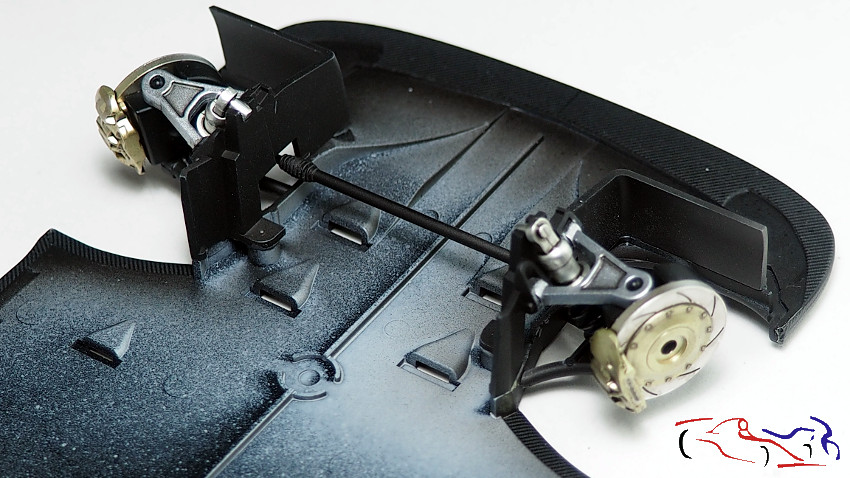
Pasamos a los discos de freno. Una vez pintados, les damos una aguada de Paner Liner negro de Tamiya, y cuando está seco, lo pegamos según las instrucciones al chasis.
We move on to the brake discs. Once painted, we give them a coat of Tamiya black Paner Liner, and when it is dry, we stick it to the chassis according to the instructions.


Con aluminio de Zero, pintamos el arco de seguridad, y le añadimos las espumas de seguridad el piloto, que pintamos con Negro Satinado LP5 de Tamiya (las sujetamos con esas pinzas “mini” encontradas en Amazon):
Using Zero aluminum, we painted the safety arch, and added the pilot’s safety foams, which we painted with Tamiya Satin Black LP5 (we held them in place with those “mini” clamps found on Amazon):

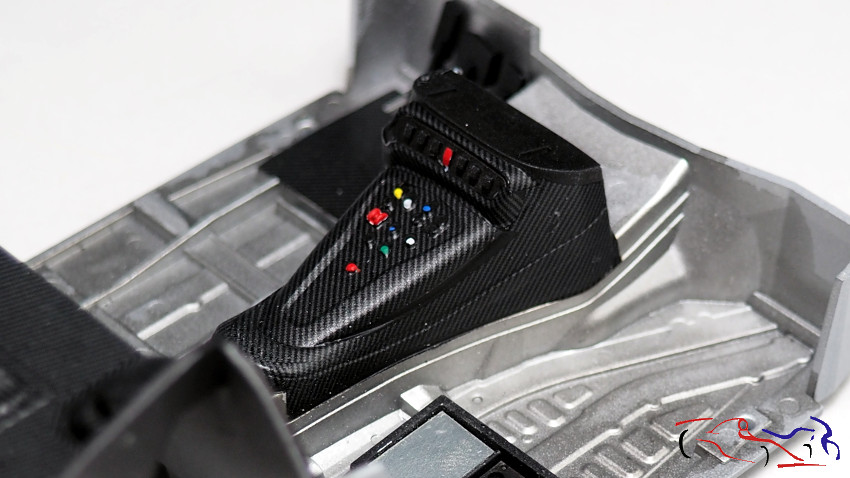
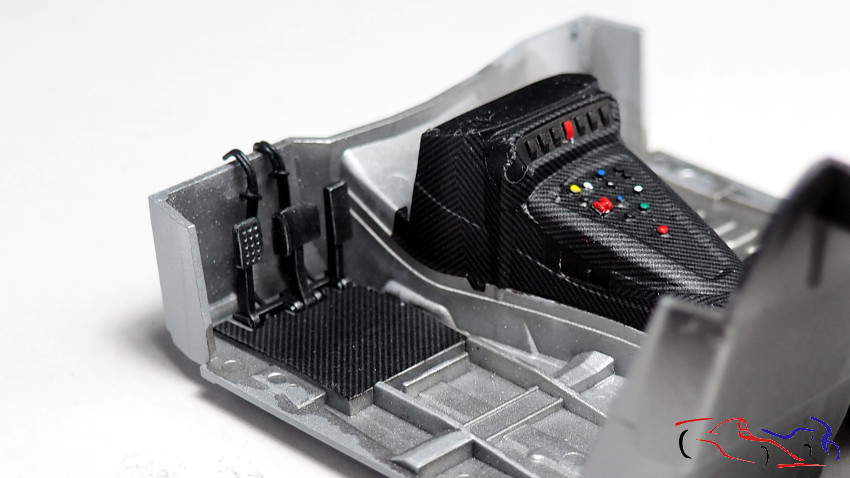
En el cockpit, pintamos los botones de la consola central con un palillo, y le ponemos unos cables en los pedales:
In the cockpit, we paint the buttons on the center console with a toothpick, and put some cables on the pedals:
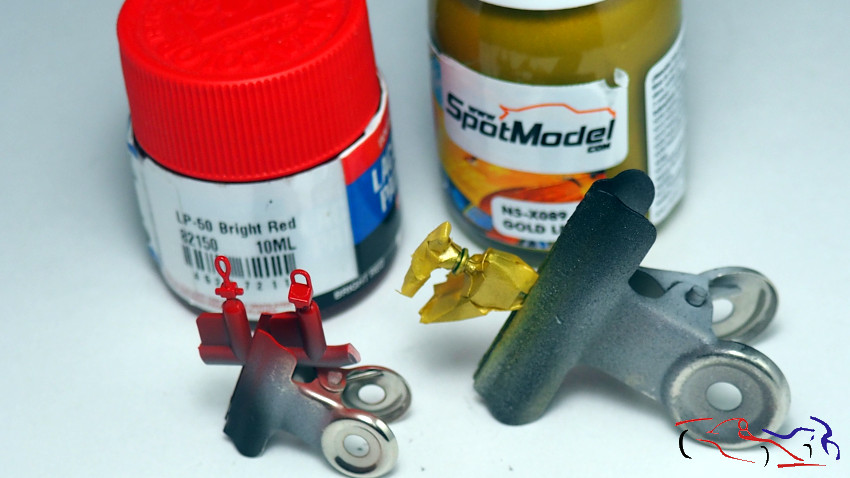
Ahora es tiempo de pintar: Rojo LP50 de Tamiya para los enganches y GOLD de Number5 para el tirador del volante:
Now it’s time to paint: Tamiya LP50 Red for the couplings and Number5 GOLD for the steering wheel handle:
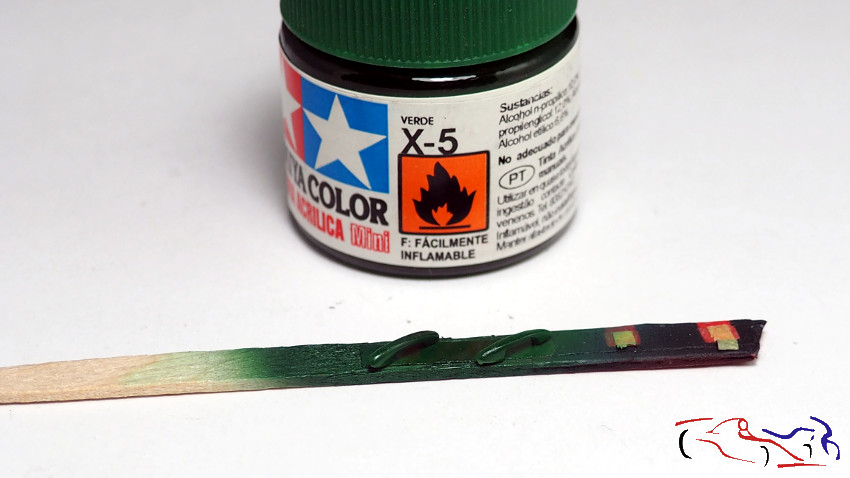
….Verde oscuro X5 de Tamiya para los picaportes de las puesrtas….
….Tamiya Dark Green X5 for the door handles….
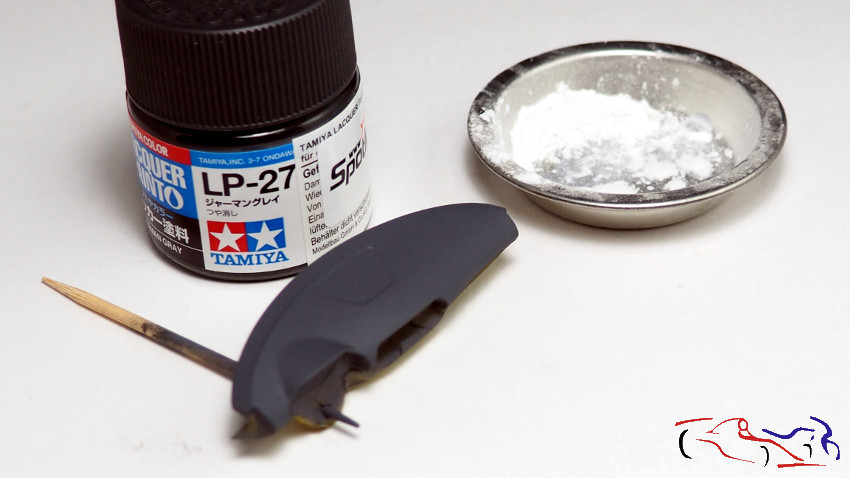
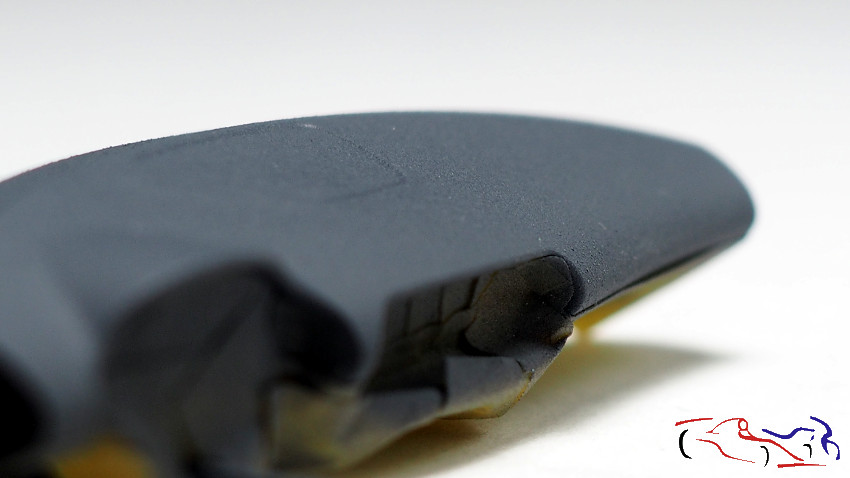
… y gris alemán LP27 de Tamiya para la parte superior del salpicadero. Pero para darle un poco de textura, mezclo la pintura con polvos de talco. Esta mezcla la aplico sin ningun problema con una aguja de 0,4, con pasadas muy ligeras, para que se vaya viendo la textura al aplicarlo. COmo véis, el resultad es muy bueno!! Esos si, una profunda limpieza al acabar es totalmente necesaria:
…and Tamiya German grey LP27 for the top of the dashboard. But to give it a bit of texture, I mix the paint with talcum powder. I apply this mixture without any problem with a 0.4 needle, with very light strokes, so that the texture can be seen when applying it. As you can see, the result is very good!! However, a deep cleaning at the end is absolutely necessary:

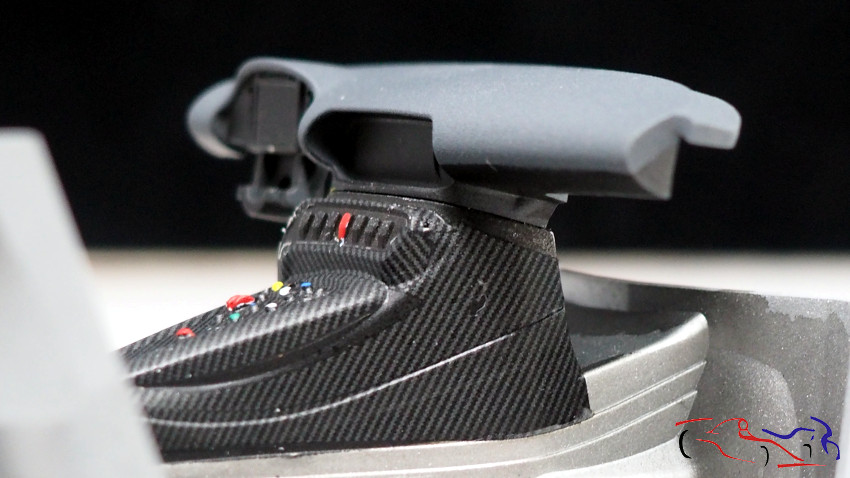
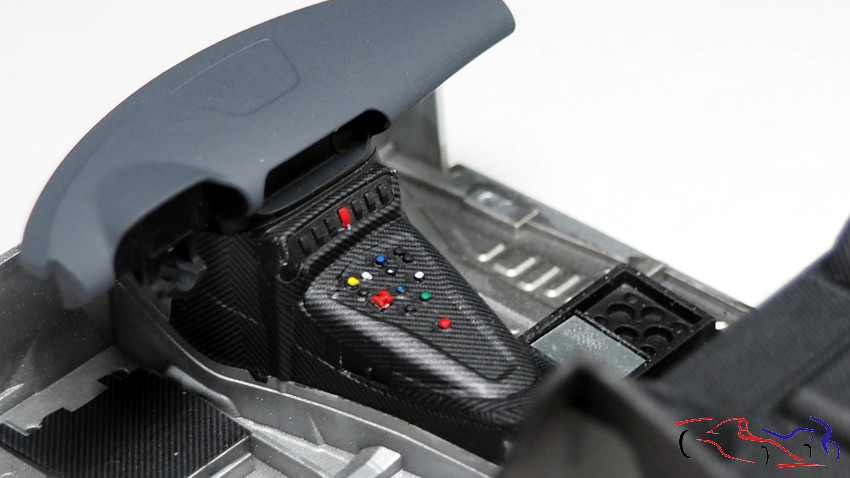
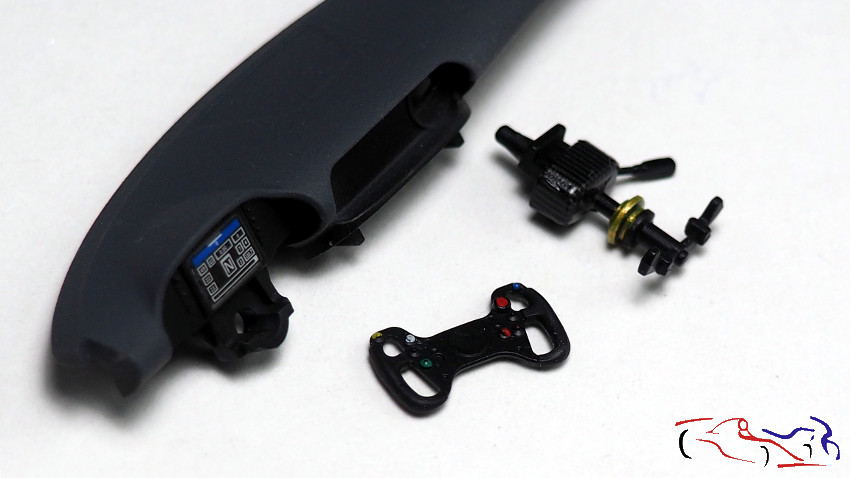
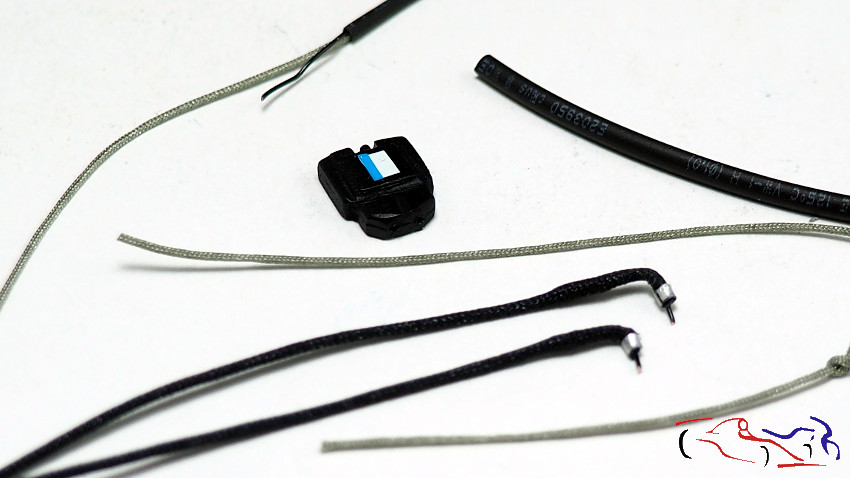
una vez que el cockpit está encauzado, empezamos a buscar detalles, con los tubos y cables que hay en él. Uno de esos detalles es la centralita, que ja hice a scratch desde cero:
Once the cockpit is in place, we start looking for details, with the tubes and cables in it. One of those details is the control unit, which I already made from scratch:
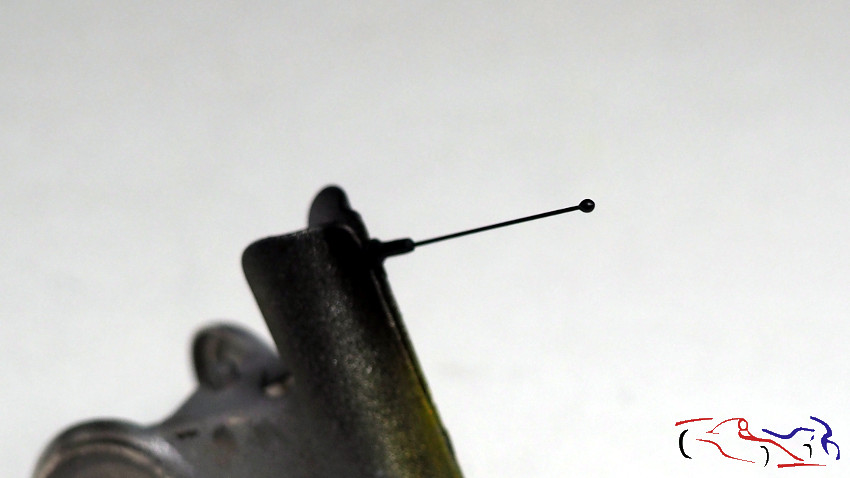
Y sobre el techo, la antena. Le cambié el cable estirando plastico, y poniendo un para de gotas de resina UV en el extremo. Se pintó con negro satinado LP5 de Tamiya:
And on the roof, the antenna. I replaced the cable by stretching plastic and putting a couple of drops of UV resin on the end. It was painted with Tamiya LP5 satin black:
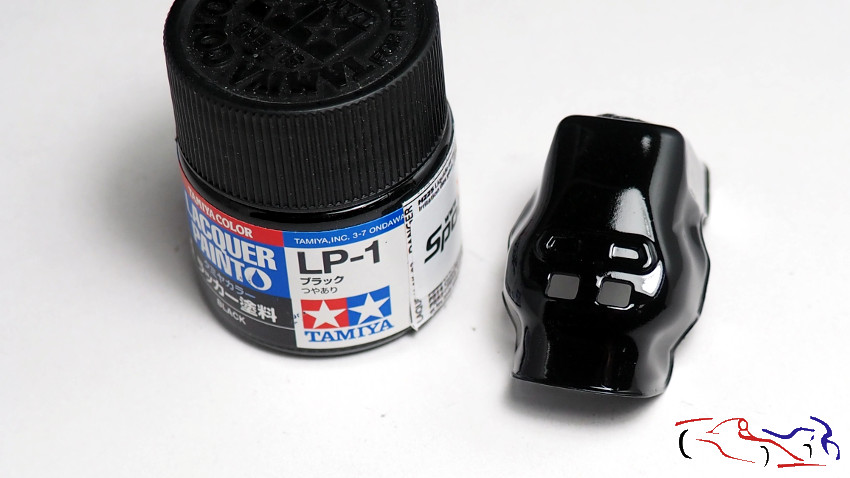
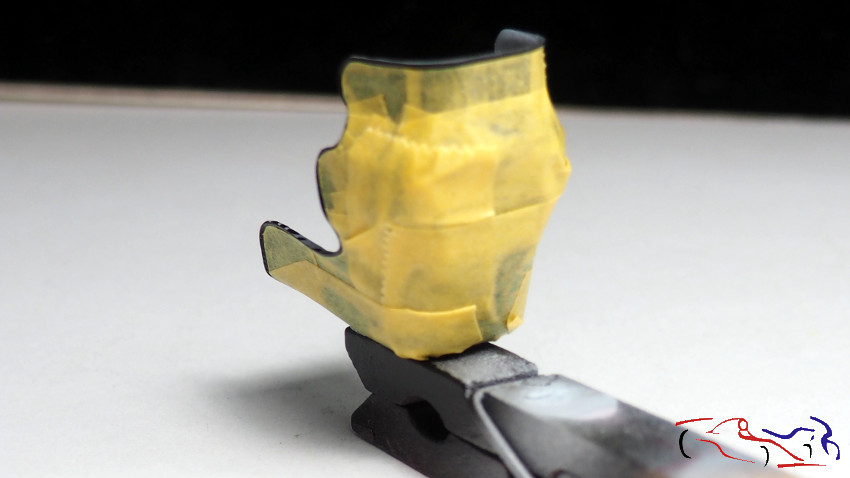
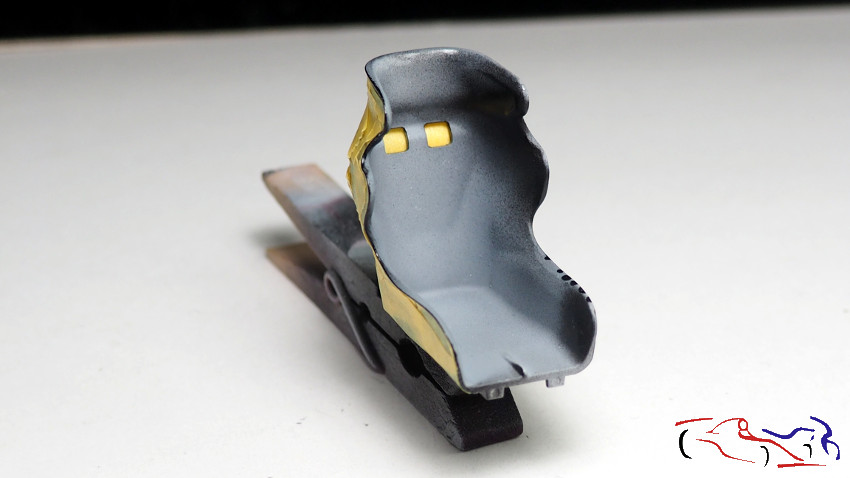
Y ahora, los asientos. estos son los pasos: pintamos con negro brillante LP de Tamiya, ponemos las calcas de fibra, barnizamos con Zero diluido, y enmascaramos:
And on the roof, the antenna. I replaced the cable by stretching plastic and putting a couple of drops of UV resin on the end. It was painted with Tamiya LP5 satin black:
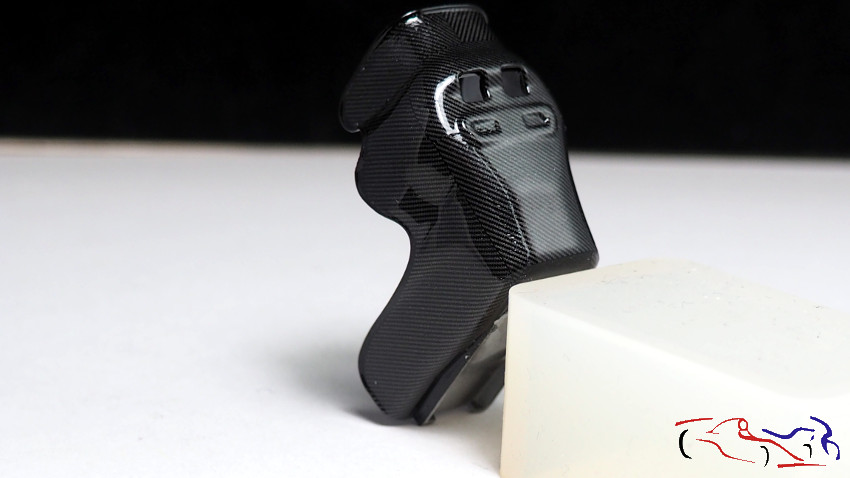
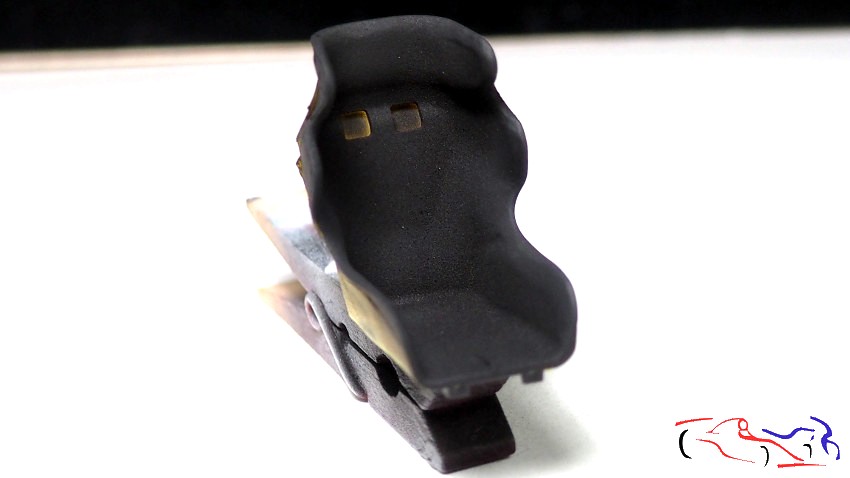
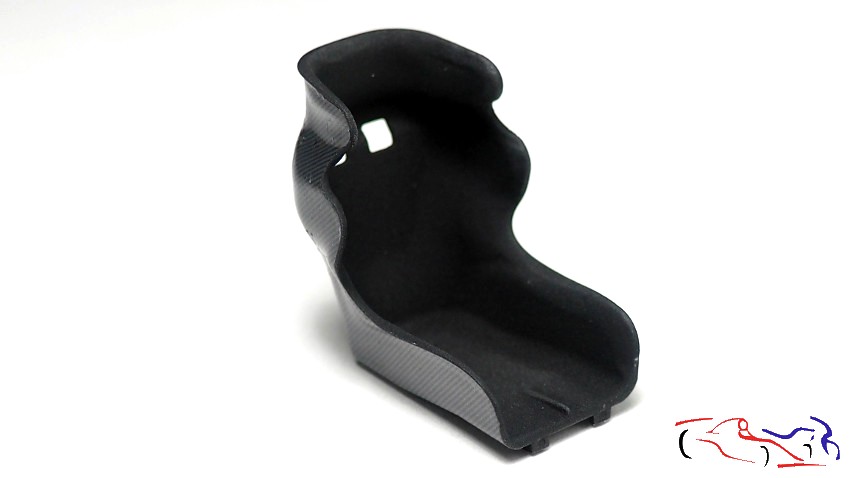
A continuación pintamos con negro mate LP de Tamiya, mezclado con polvos de talco, d ela misma manera que el salpicadero, siendo el resultado el que veis, con una textura muy fina:
Next we paint with Tamiya LP matte black, mixed with talcum powder, in the same way as the dashboard, the result being what you see, with a very fine texture:
ESto es el final para esta entrega. Gracias por mirar y comentar!!
This is the end for this installment. Thanks for watching and commenting!!


