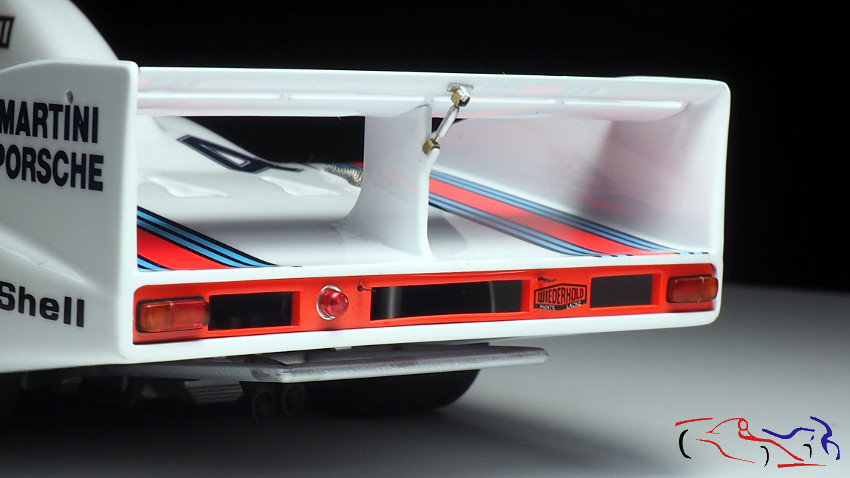
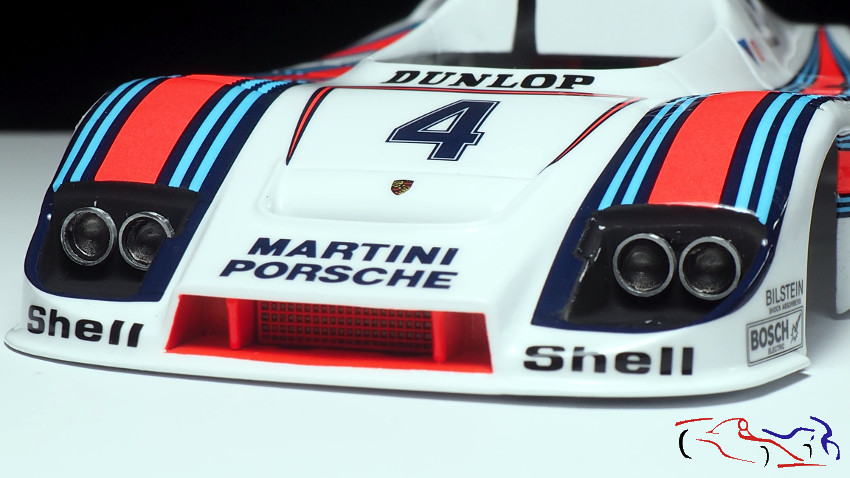
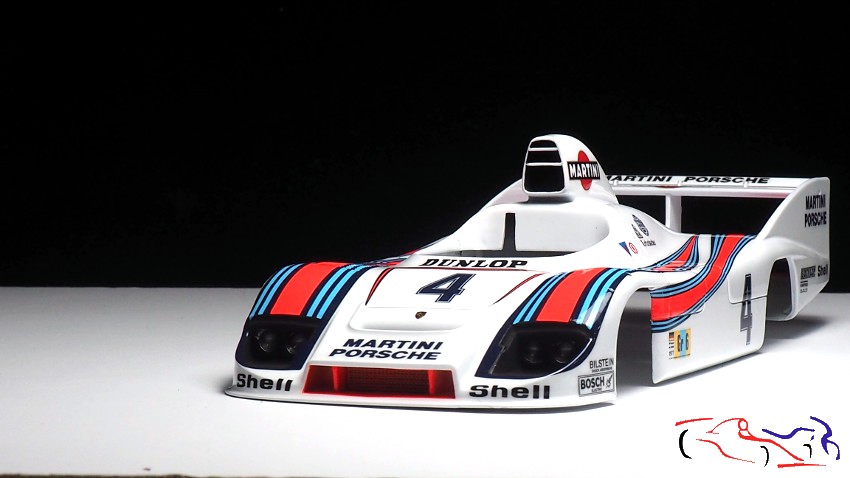
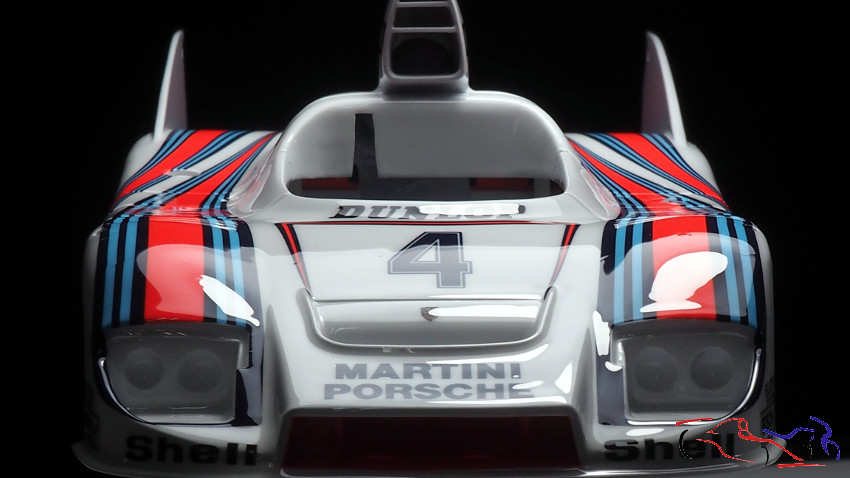
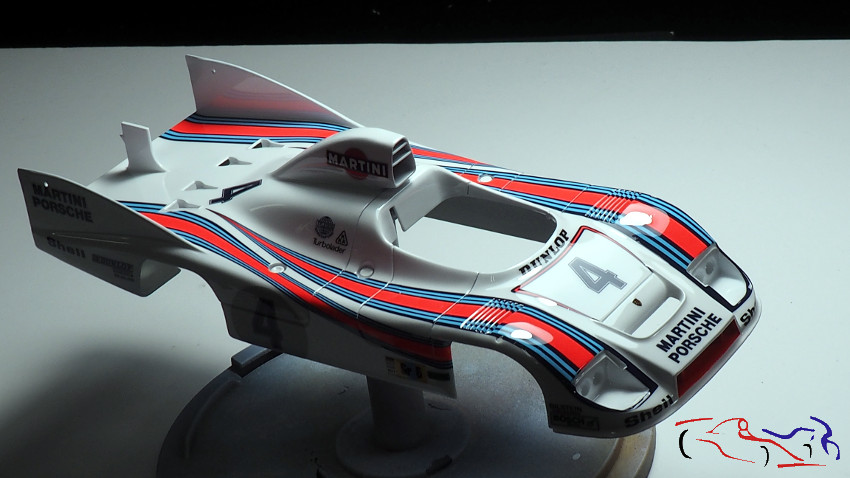
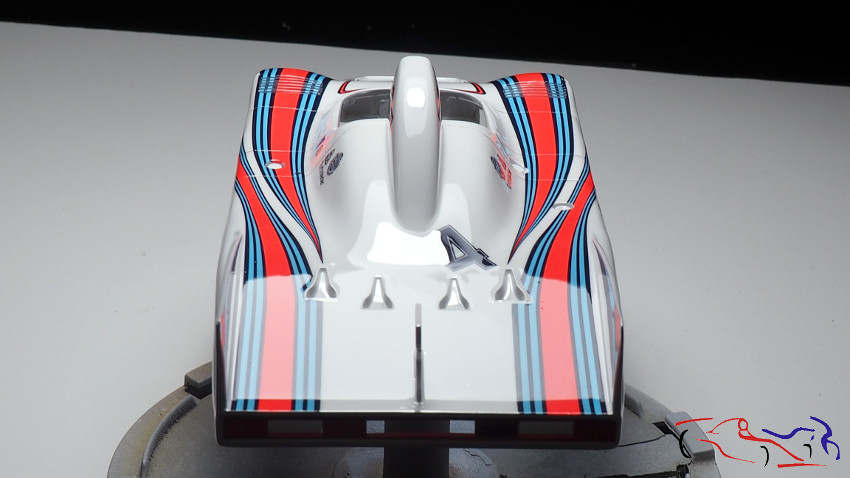
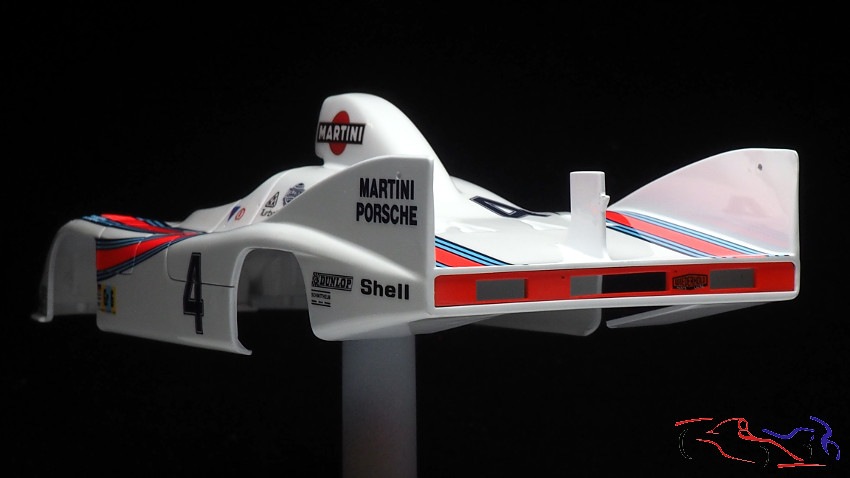
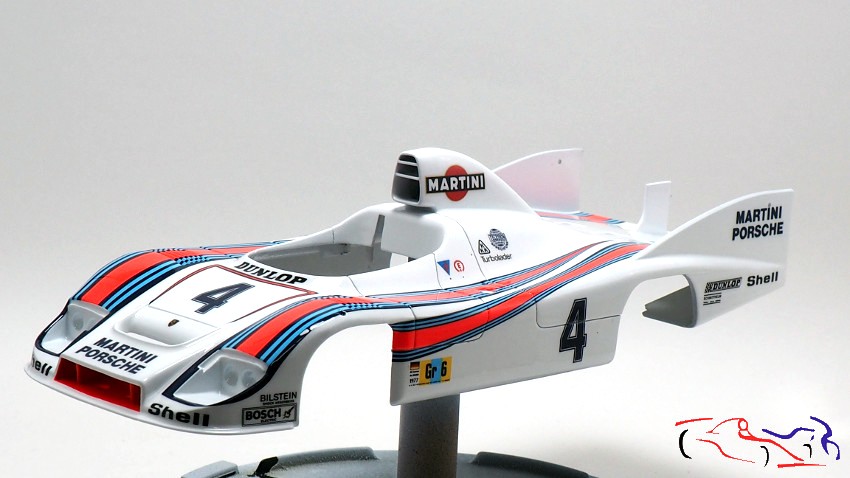
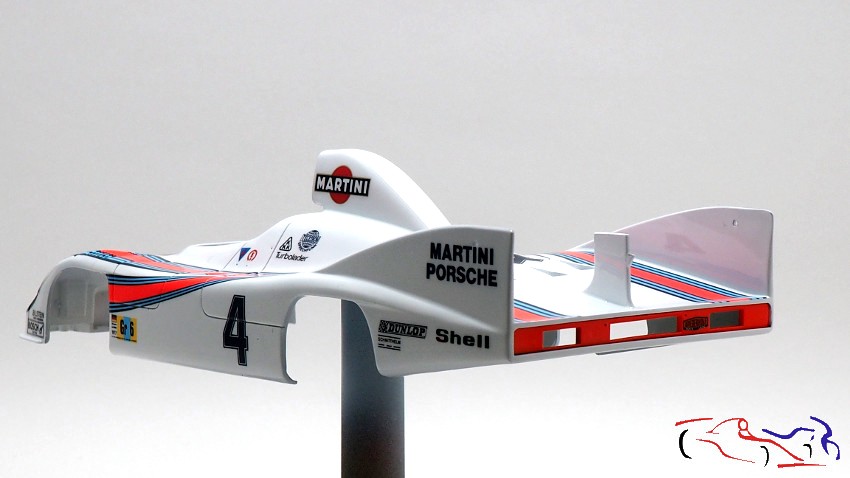
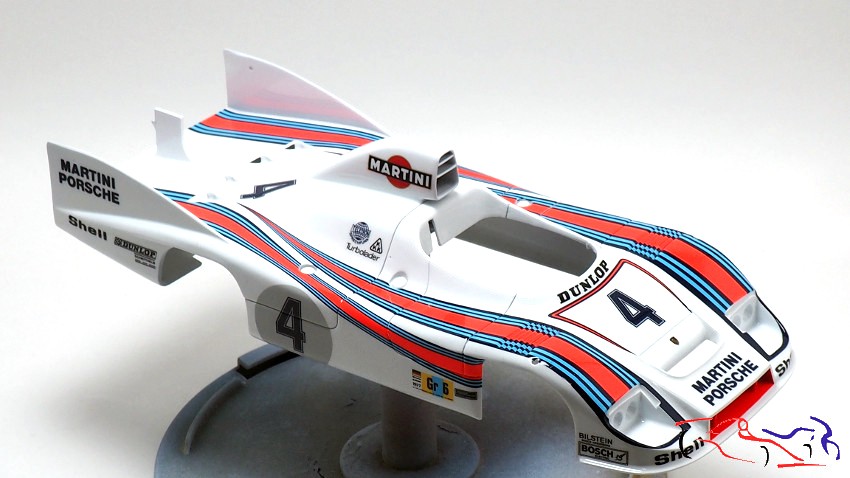
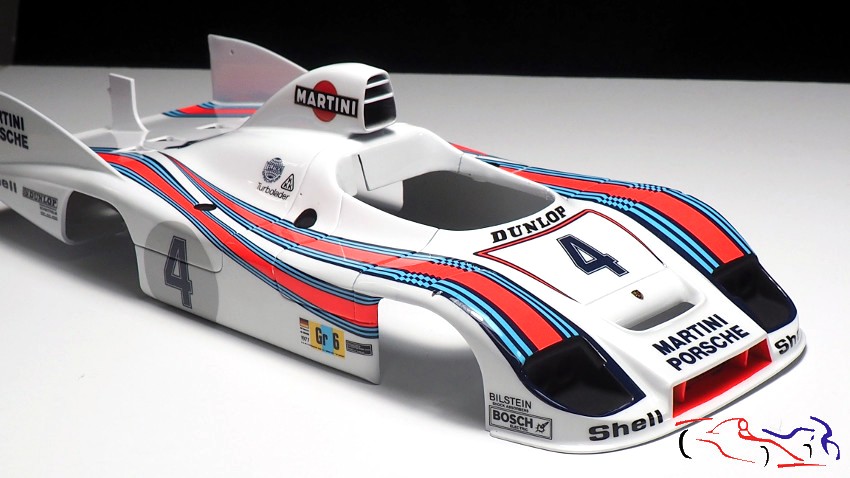
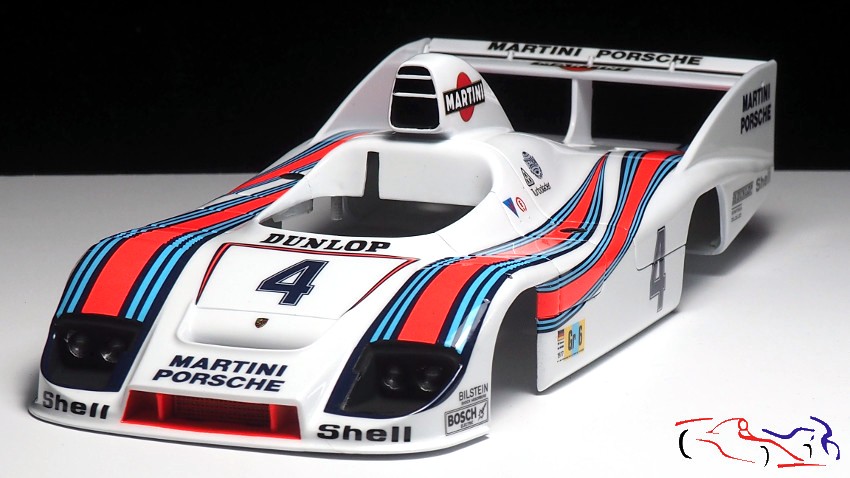
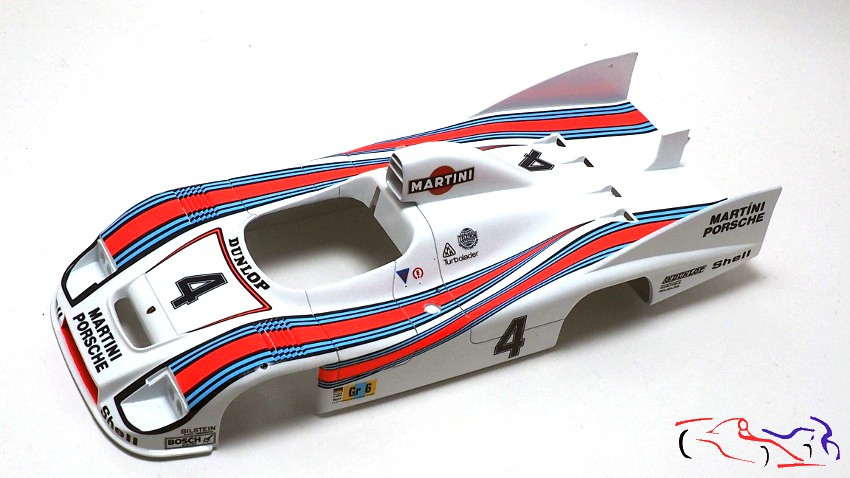
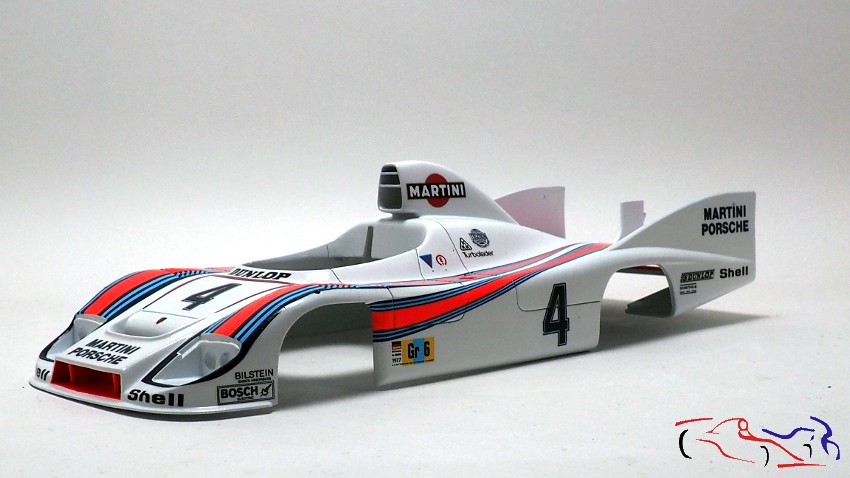
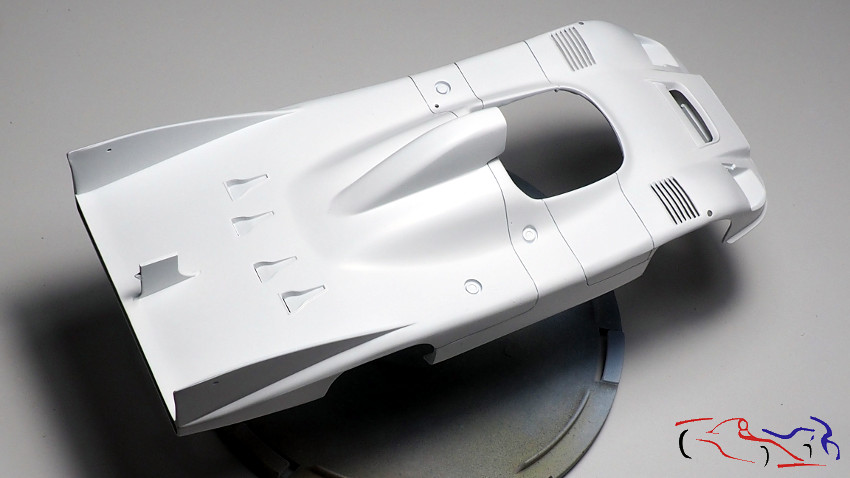
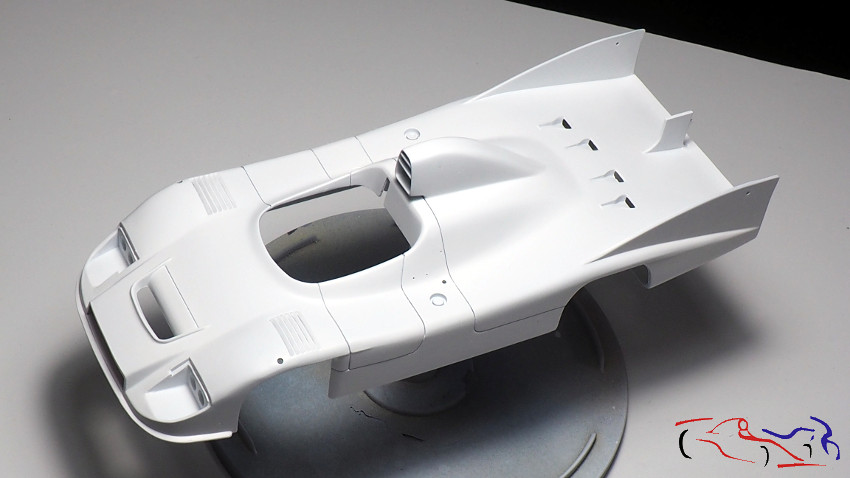
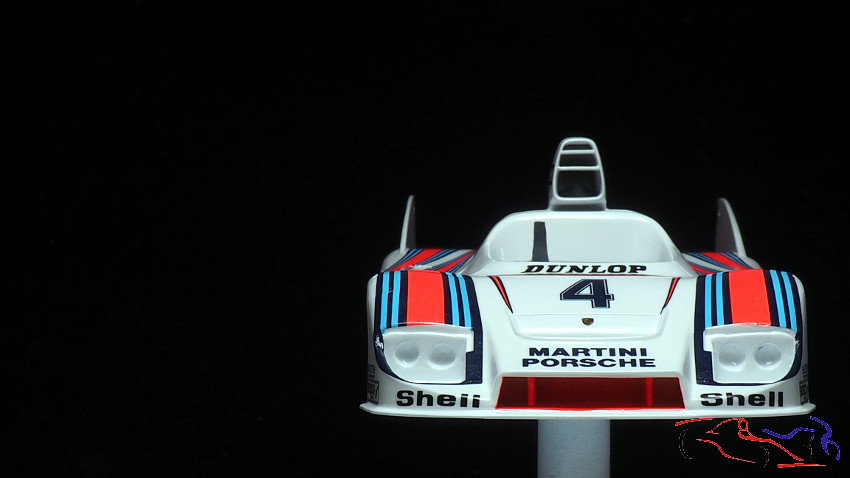
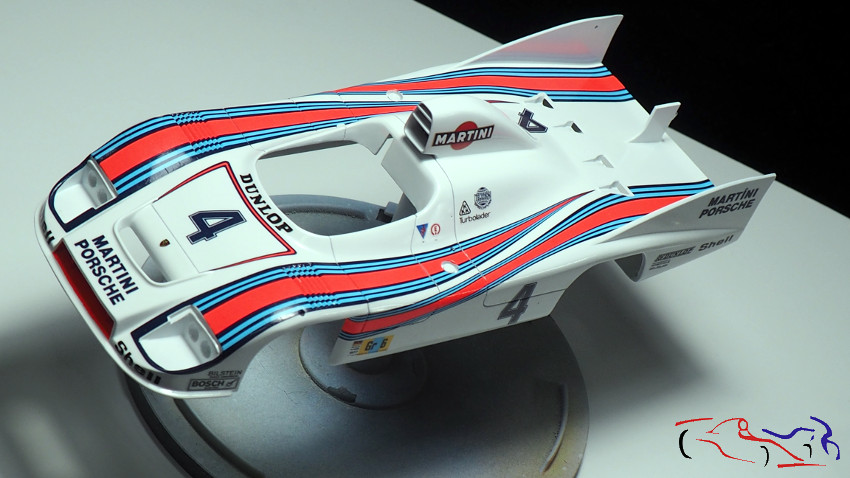
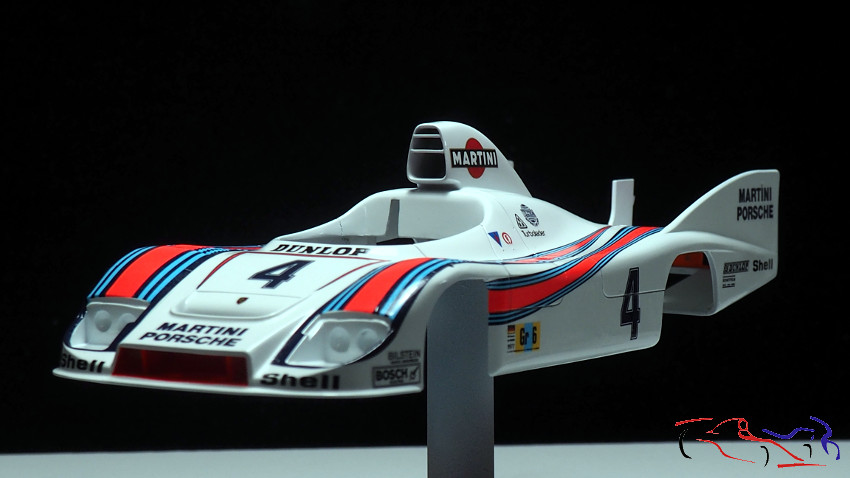
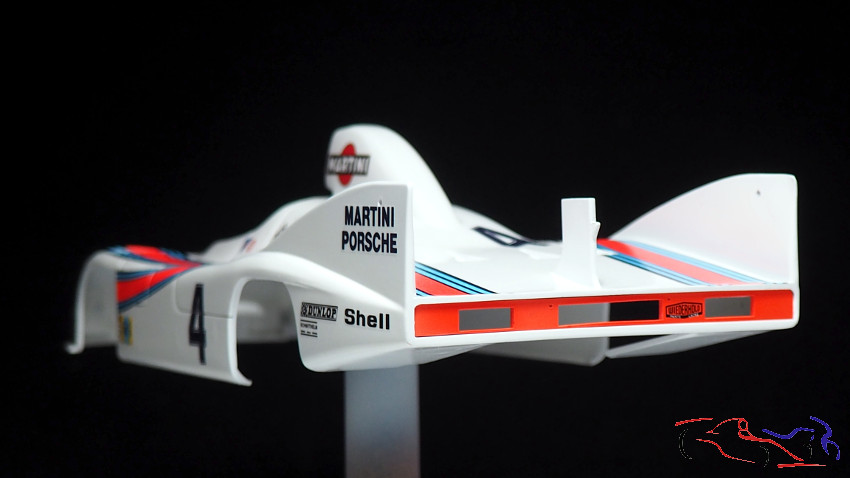
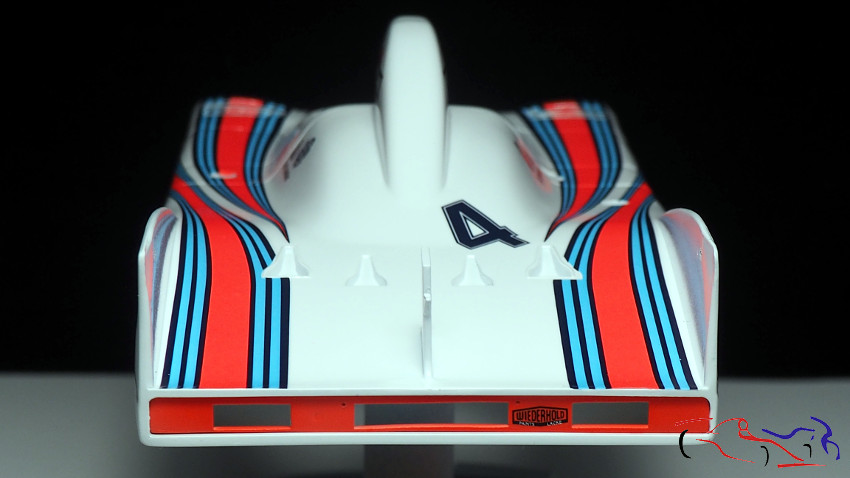
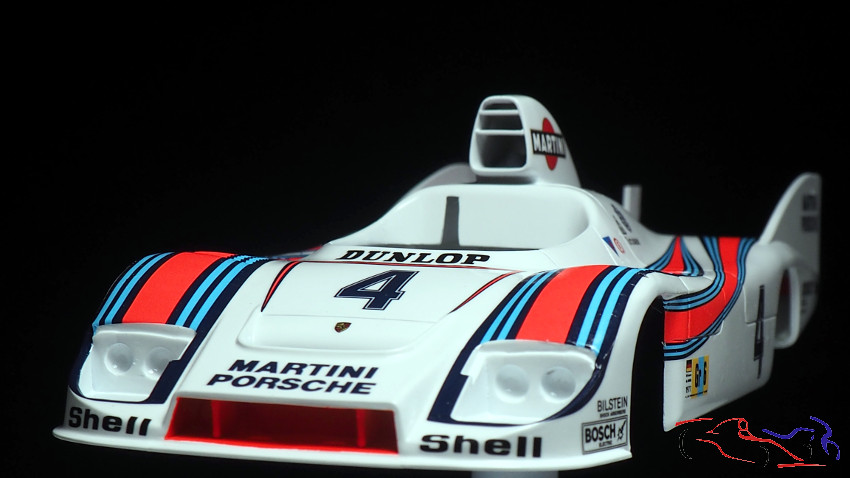
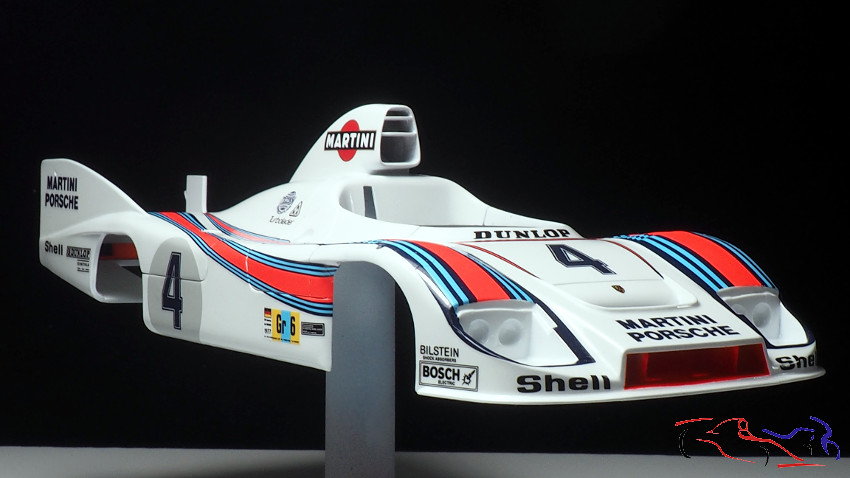
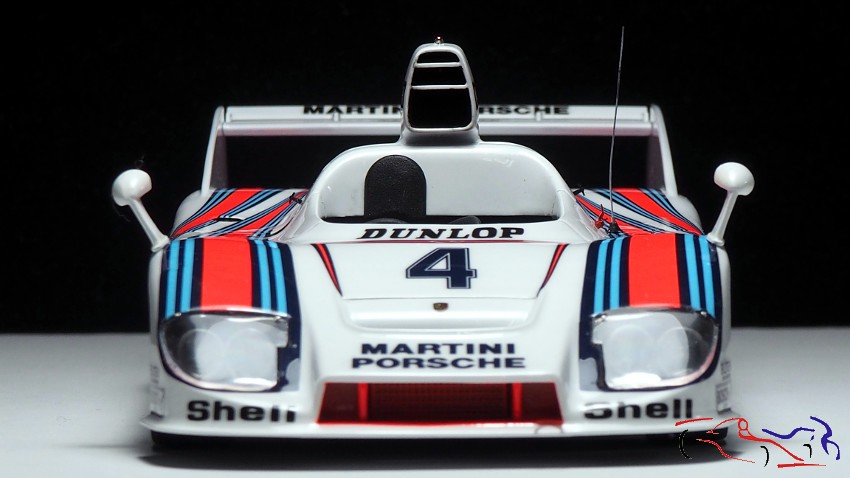
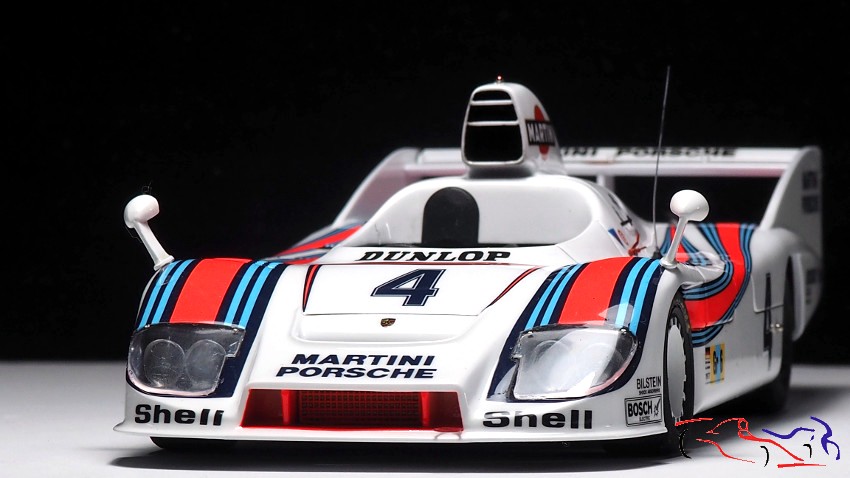
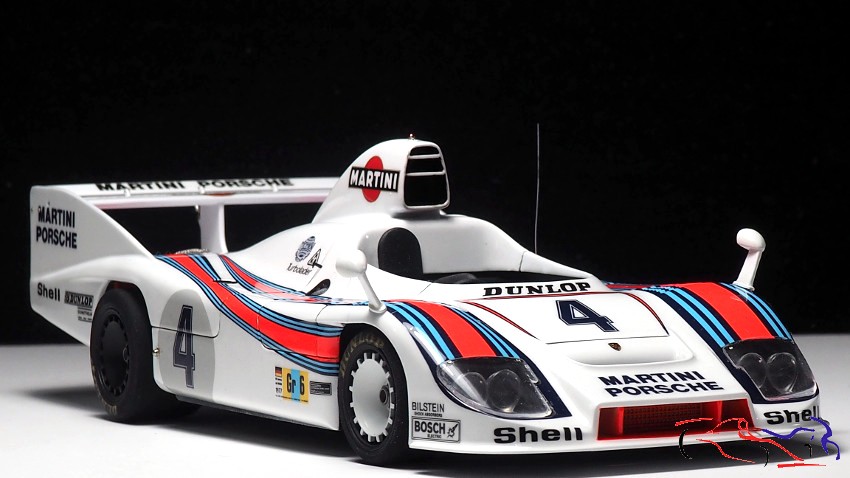
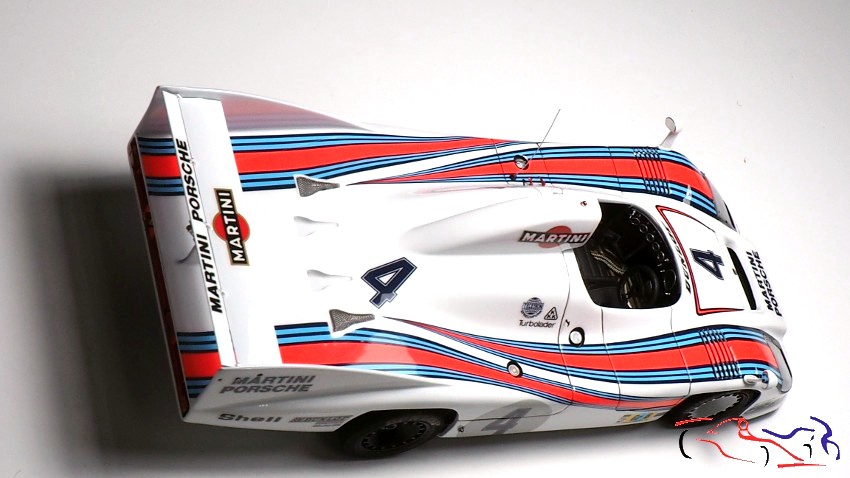
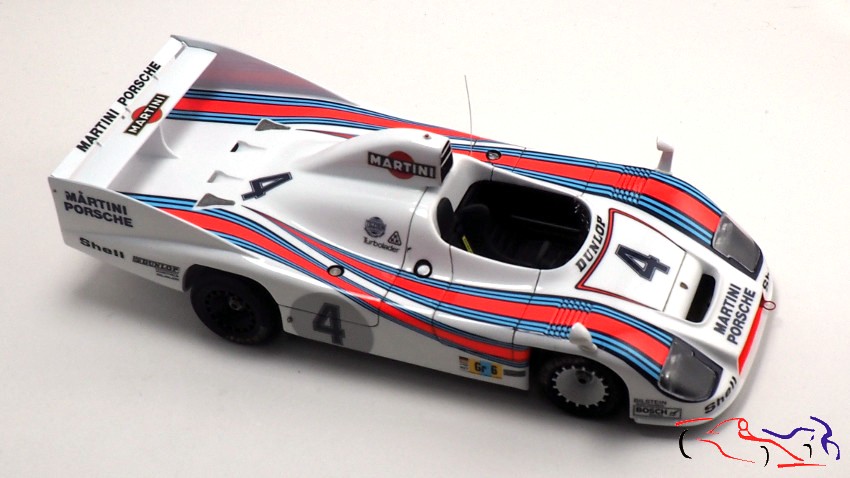
Otro empujón a la maqueta. Y este es el estado actual, con todas sus calcas puestas, lista para recibir la laca:
Another push to the model. And this is the current state, with all its decals on, ready to receive the lacquer:
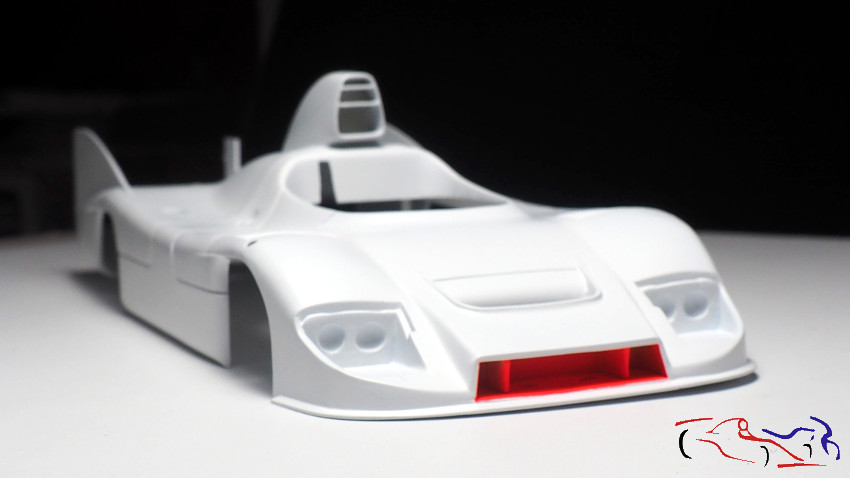
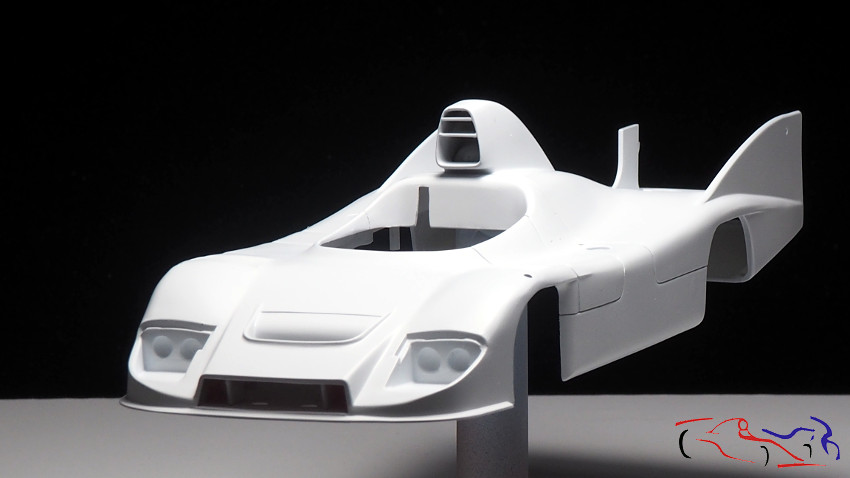
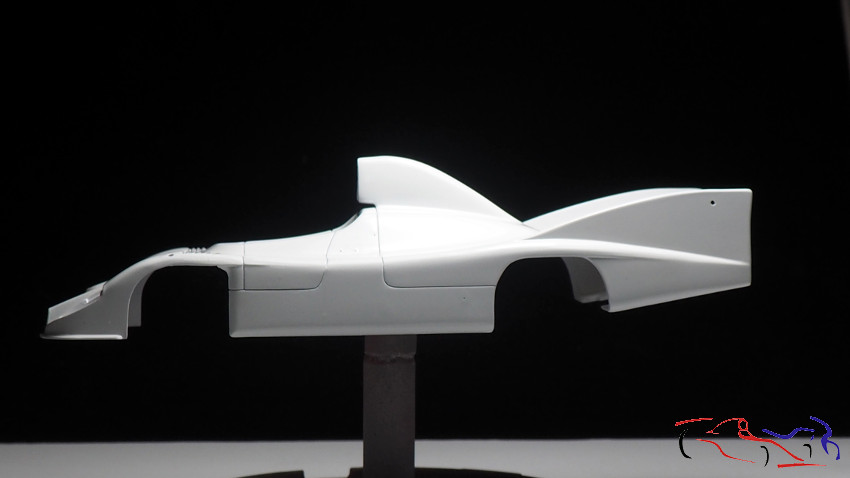
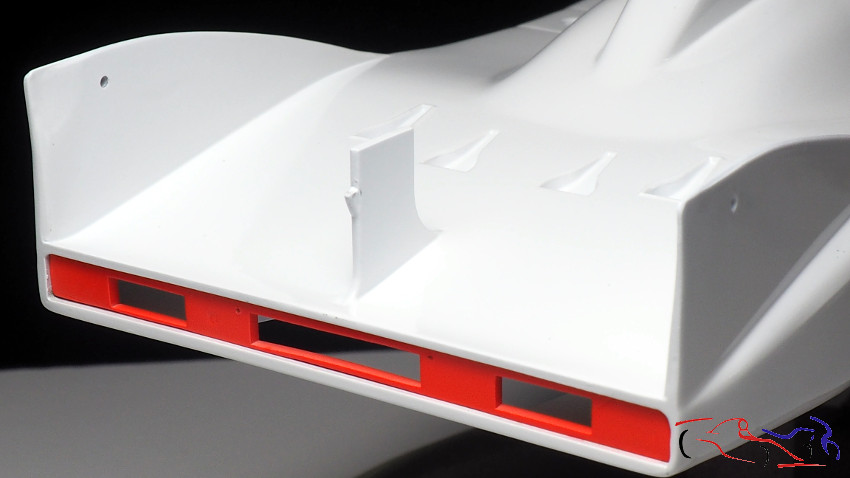
 Pero vayamos paso a paso. En el anterior post, dejamos la carrocería pintada lista para barnizar y poner calcas. Por tanto, ya hemos barnizado la carrocería con el barniz prediluido de zero: dos capas dejando un brillo aceptable y suficiente para las calcas:
But let’s go step by step. In the previous post, we left the body painted ready for varnishing and decaling. Therefore, we have already varnished the body with the Zero pre-diluted varnish: two layers leaving an acceptable and sufficient gloss for the decals:

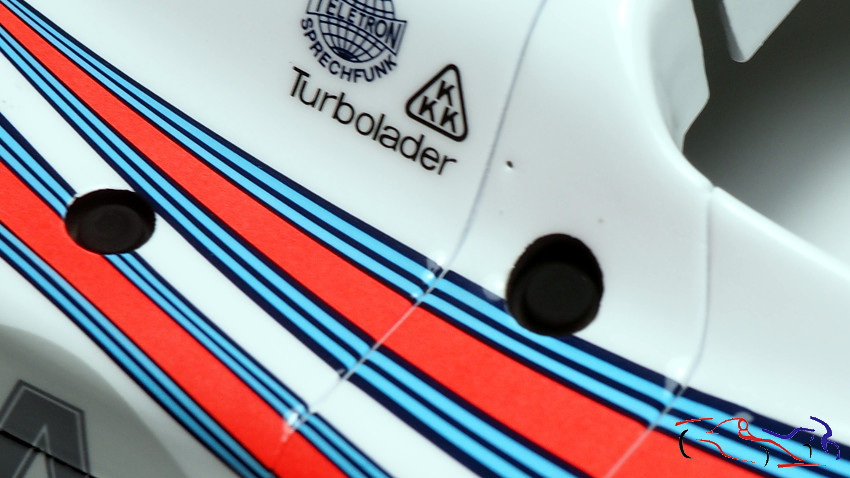
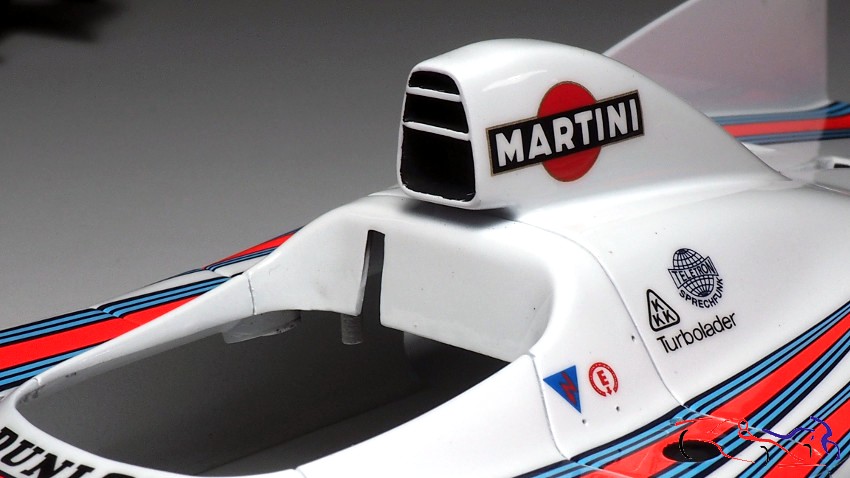
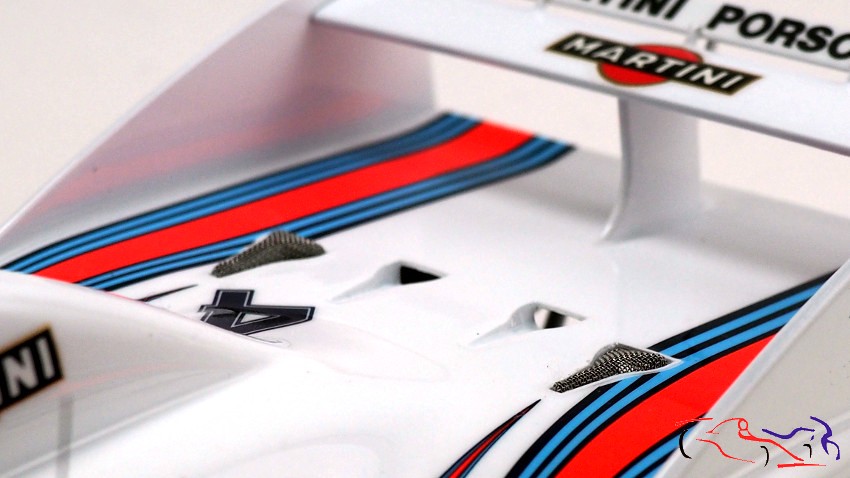
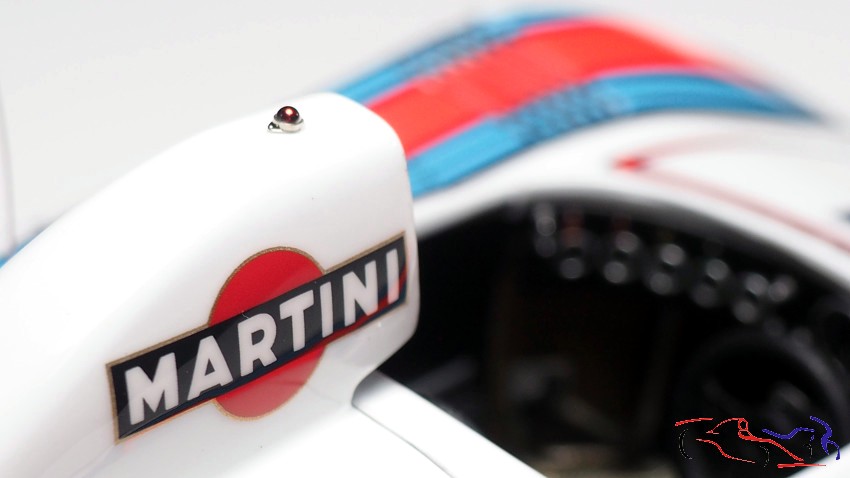
 Y empezamos a ponerlas. Decir que estas de Shunko, son como de goma, que cuesta pegarlas y es necesario e imprescindible el secador. Para las curvas, he usado el producto Micro número 2, una vez puesta la calca. Esta es la foto del primer día:
And we started to put the decals. Say that these Shunko are like rubber, that it costs to stick them and the dryer is necessary and essential. For the curves, I have used the Micro product number 2, once the decal has been applied. This is the photo from the first day:
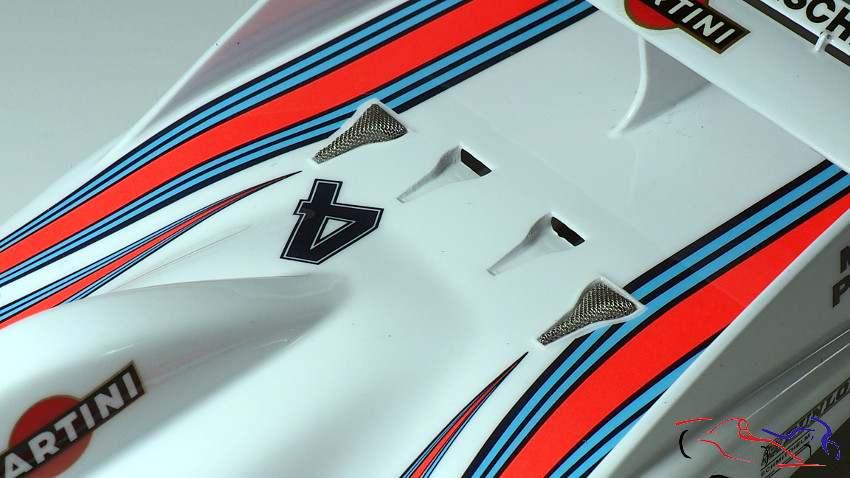
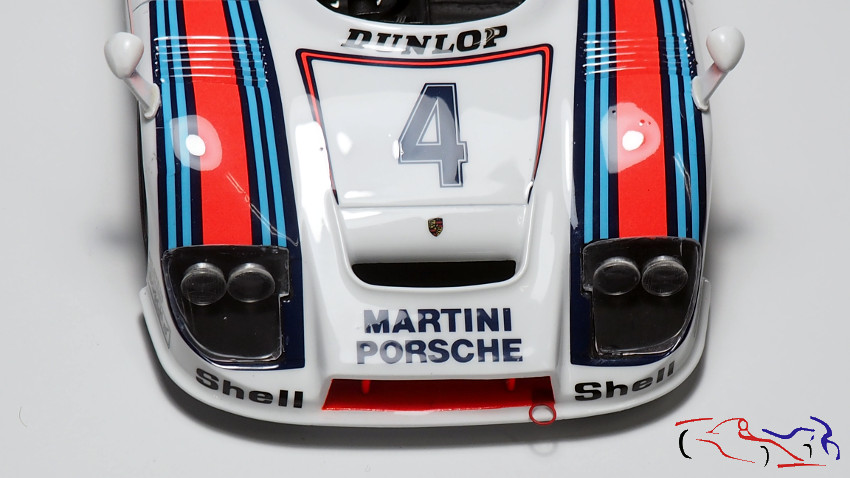
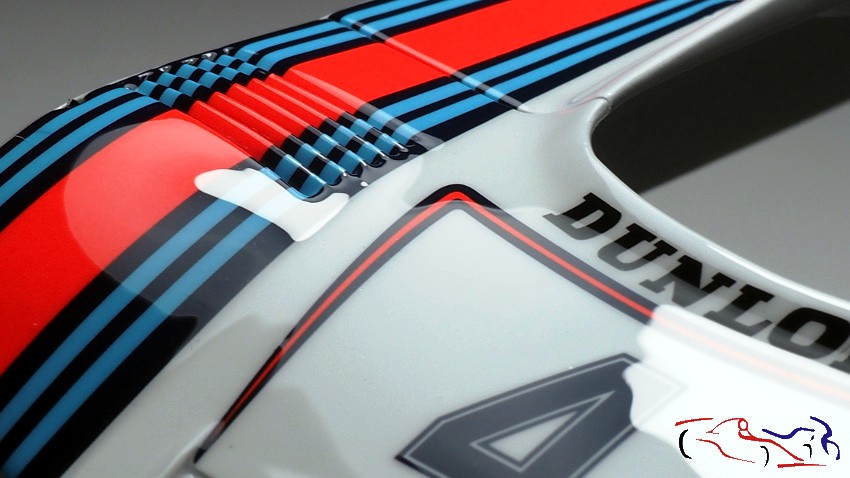
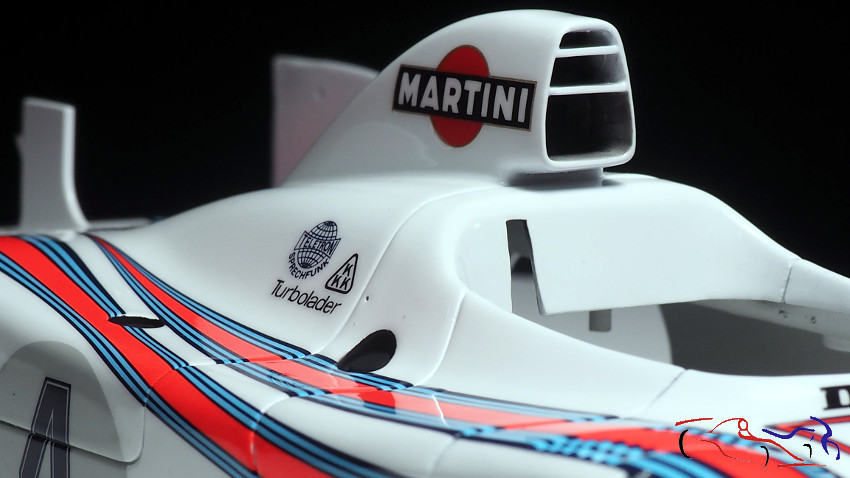
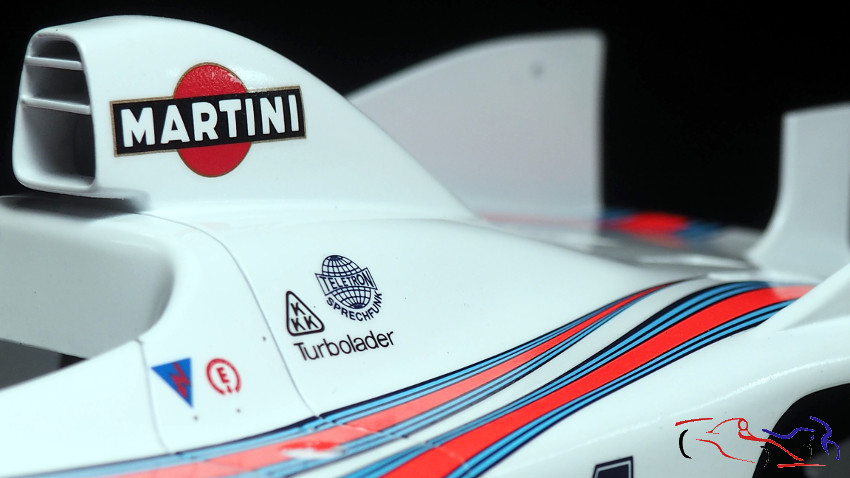
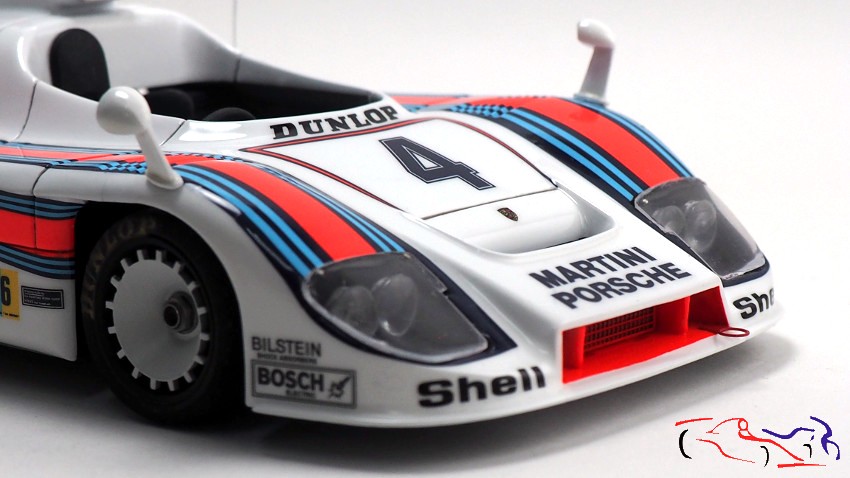
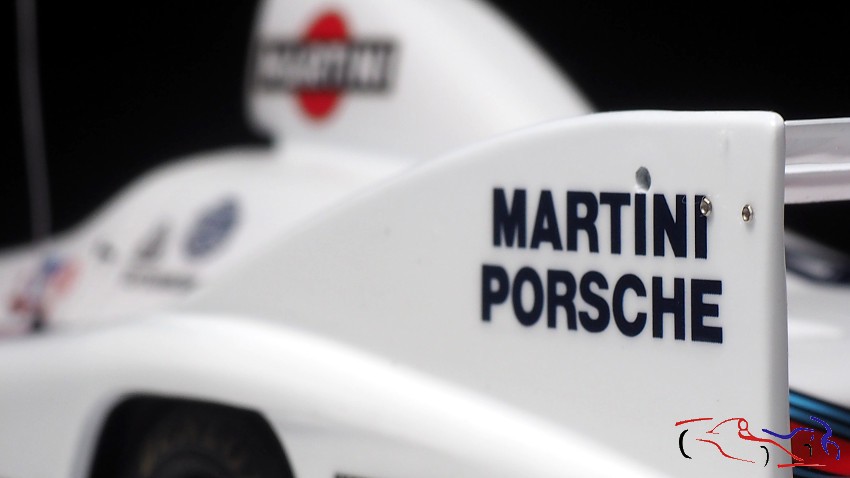
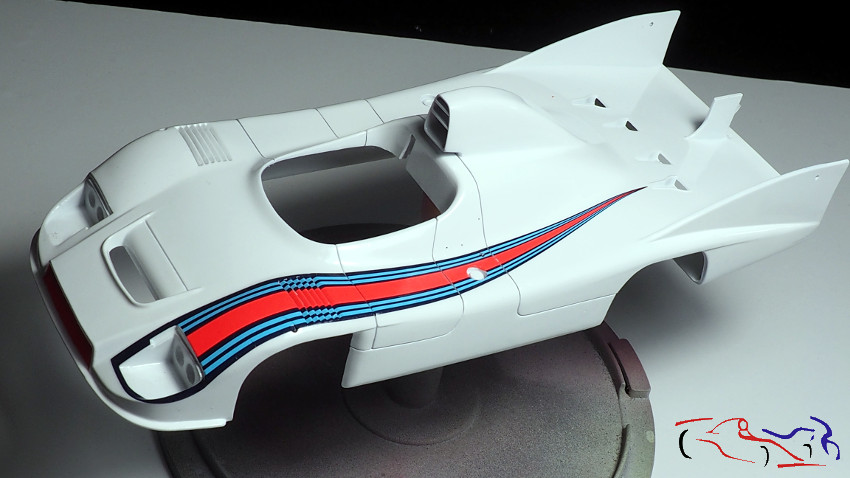 Ya en el segundo dia, puse el resto de las franjas Martini. Para las rejillas, dejé que se secara la calca un poco, que se pegara bien por las partes superiores, y con un cutter nuevo, corté las calcas en los agujeros por su parte de delante, para que la parte de detrás, se adheriera a la rejilla. Para favorecer esa tarea, corté un palilo de madera en ángulo, para poder introducirlo en los huecos y poder presionar.
On the second day, I put the rest of the Martini stripes. For the grids, I let the decal dry a little, stick well to the tops, and with a new cutter I cut the decals into the holes on the front so that the back would adhere to the grid. To facilitate this task, I cut a wooden stick at an angle, so that I could insert it into the holes and be able to press.
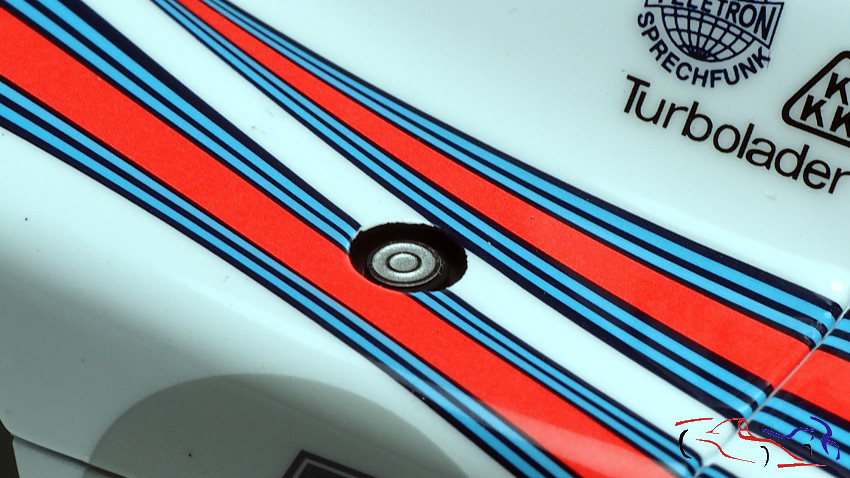
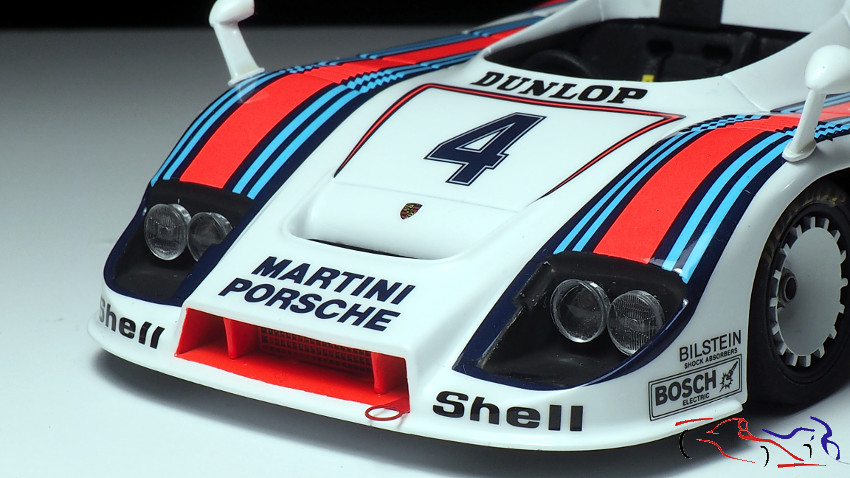
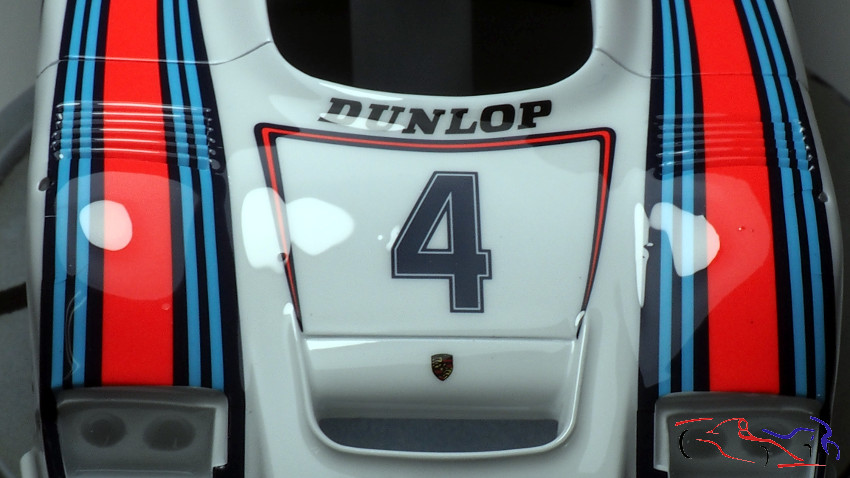
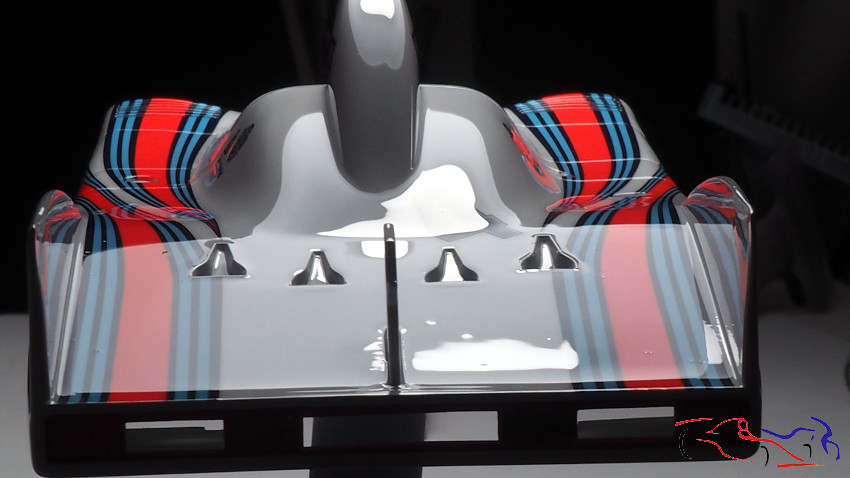
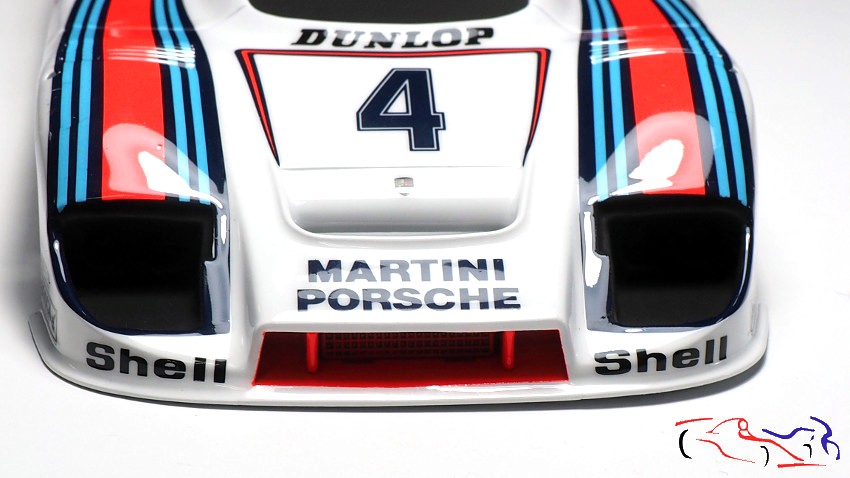
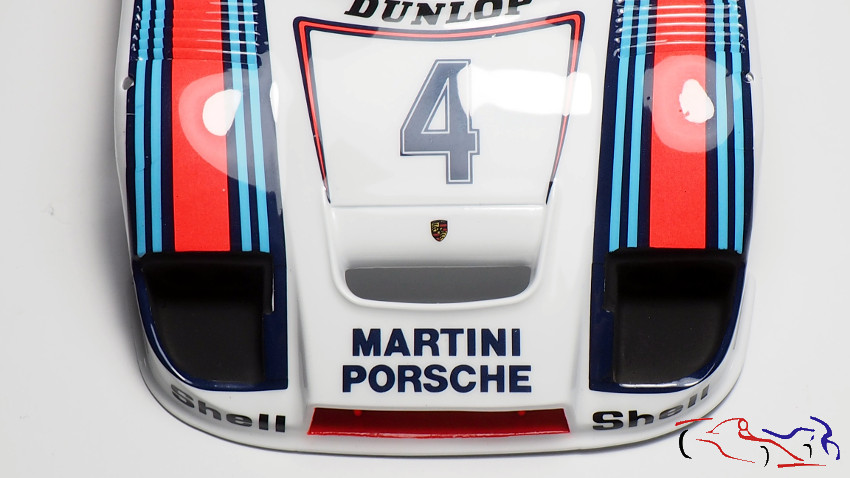
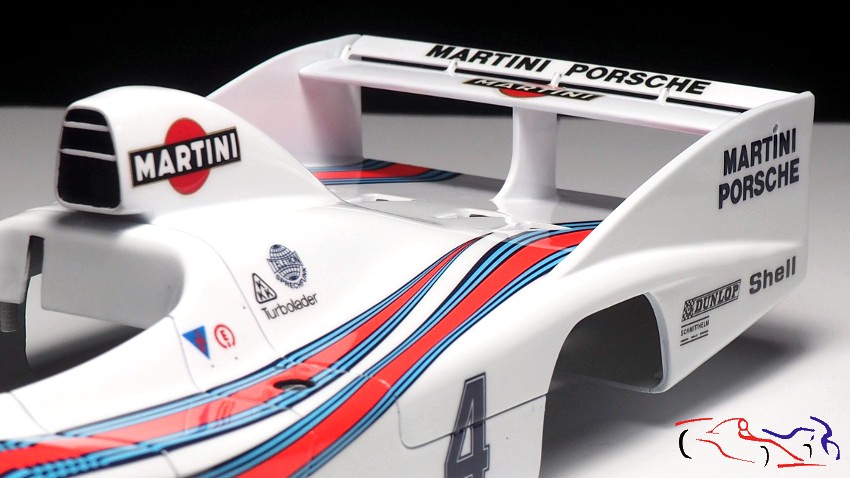
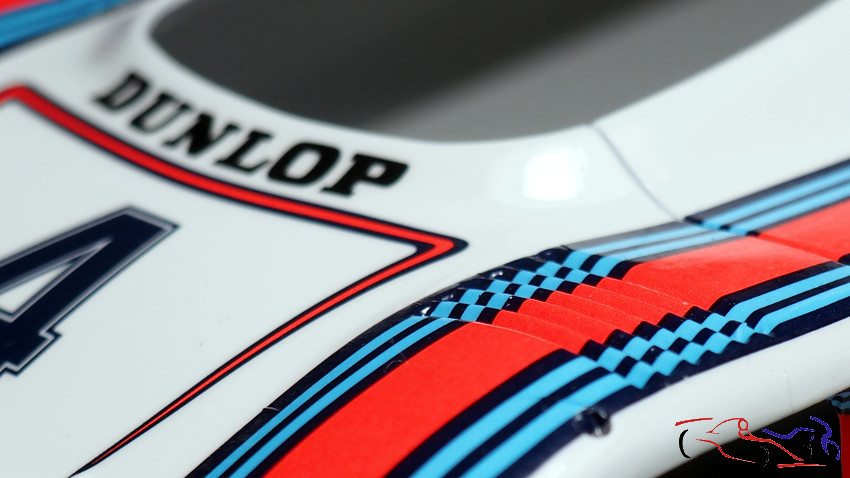
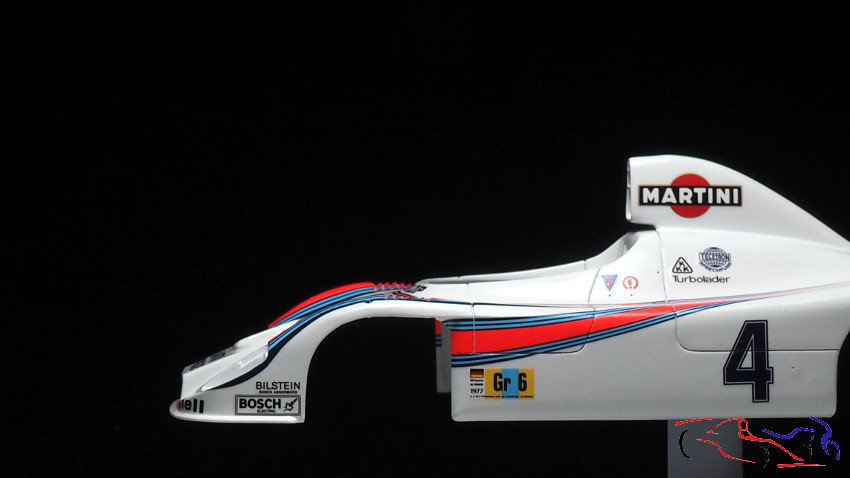
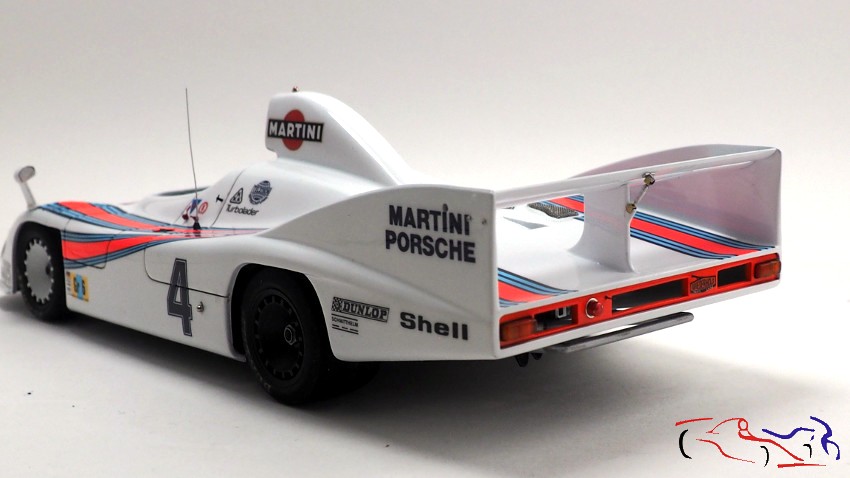
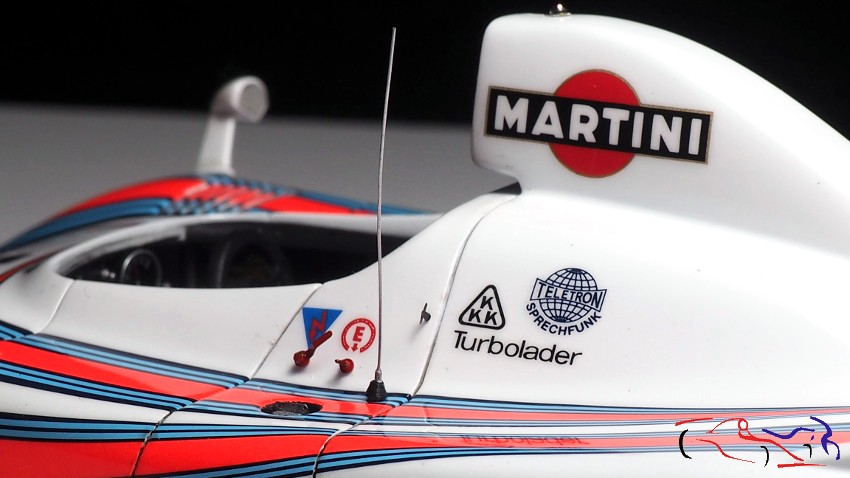
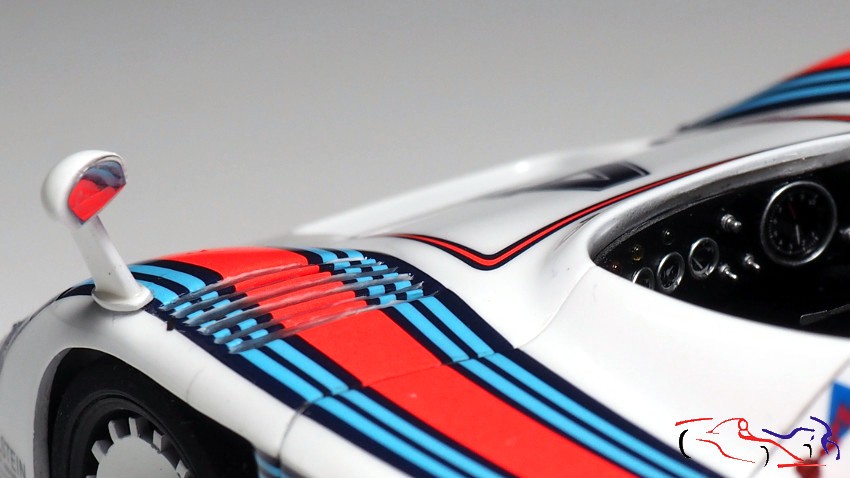
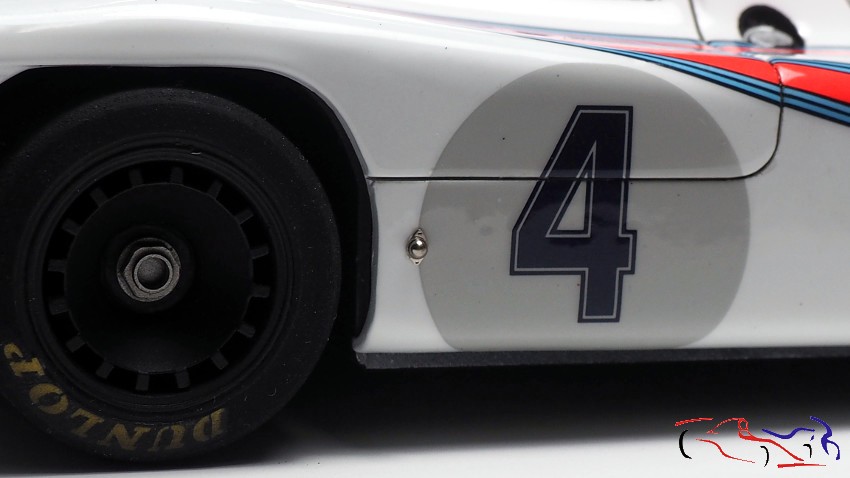
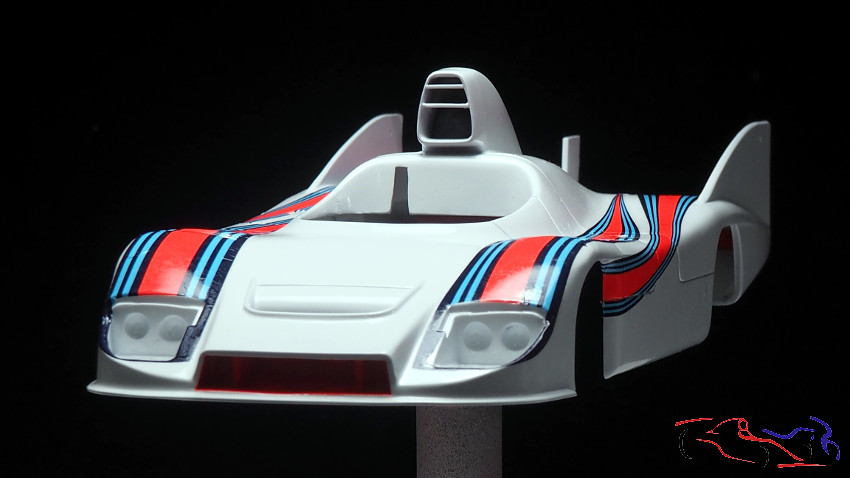 Y en el tercer día, puse el resto de las calcas, poniendo primero las de un lado, y las otras del lado contrario, de acuerdo con las posiciones d elas calcas del lado anterior. Para las lineas de panel, dejé secar la calca, y con una cuchila nueva, corto por el medio, usando de nuevo el palillo para fijar los lados del corte.
And on the third day, I put the rest of the decals, putting first the ones on one side, and the others on the opposite side, according to the positions of the decals on the previous side. For the panel lines, I let the decal dry, and with a new blade, cut in the middle, using the toothpick again to fix the sides of the cut.
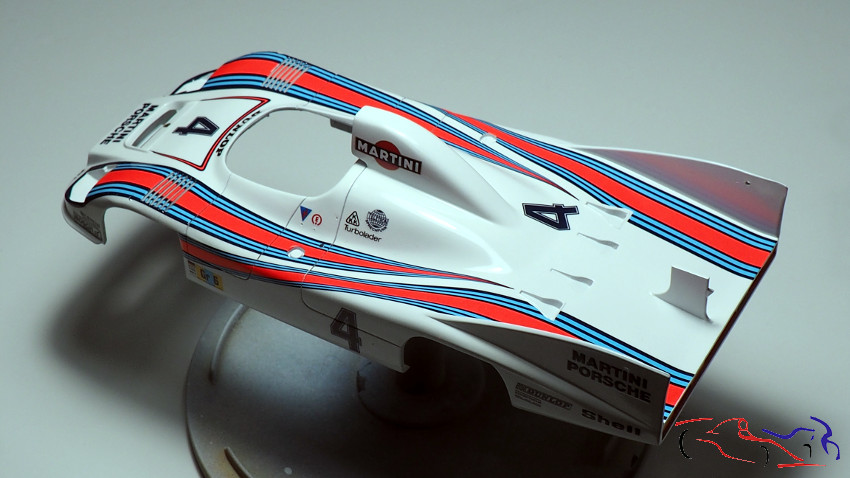
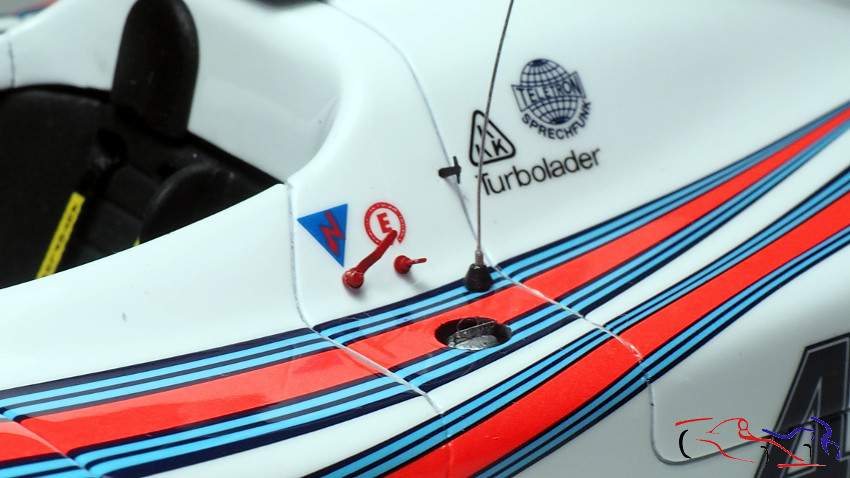
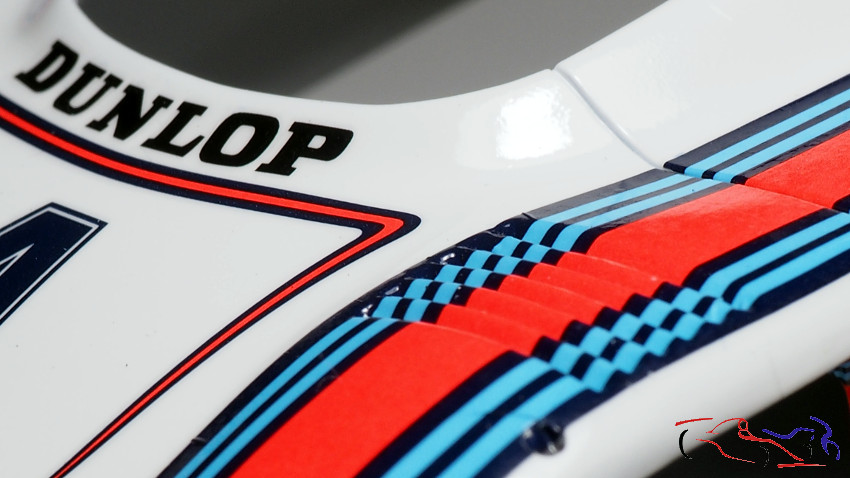
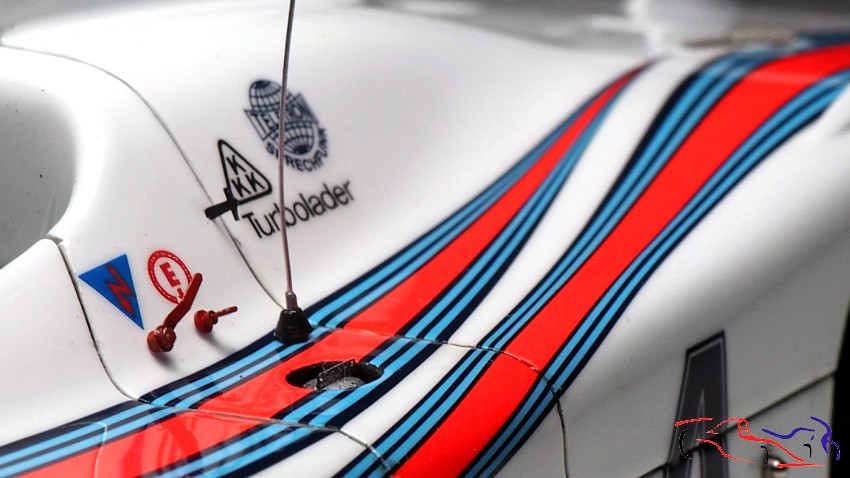
 La palabra “Dunlop”, venía totalmente horizontal en una calca, por lo que tuve que separar todas las letras e ir poniéndolas en su buena forma correcta.


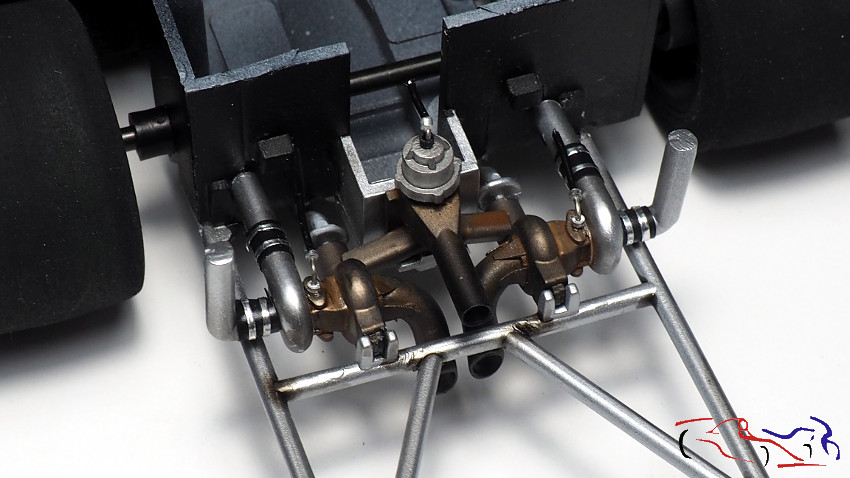
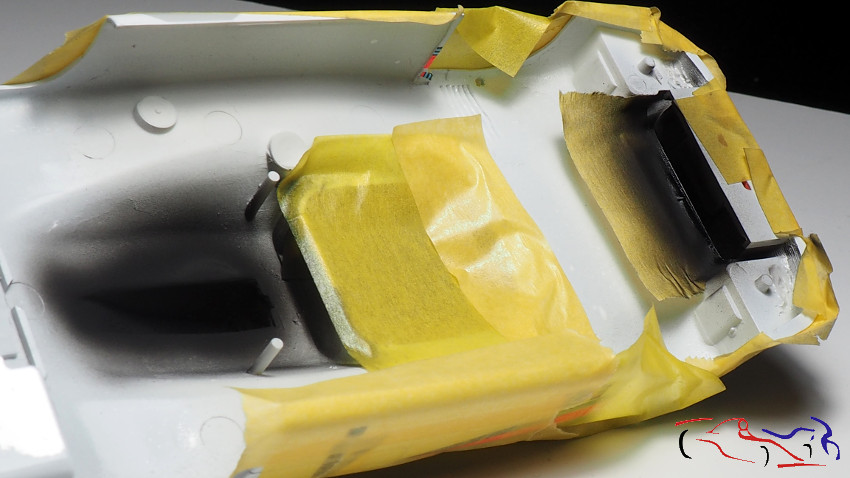
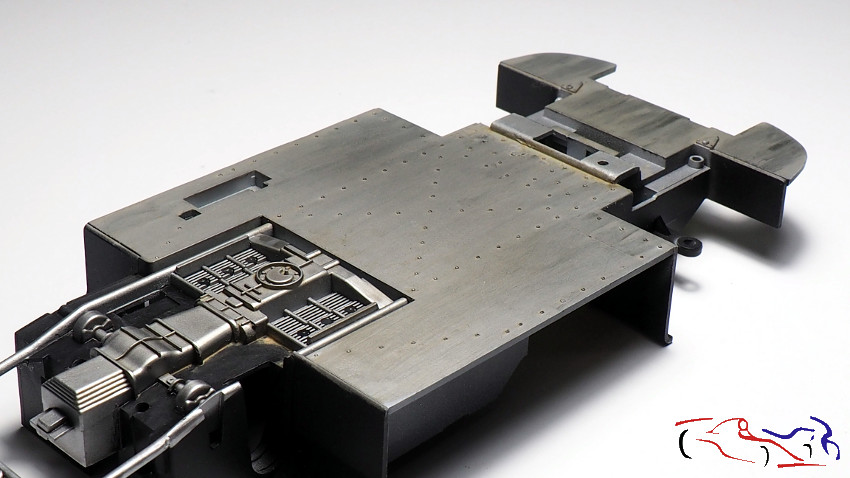
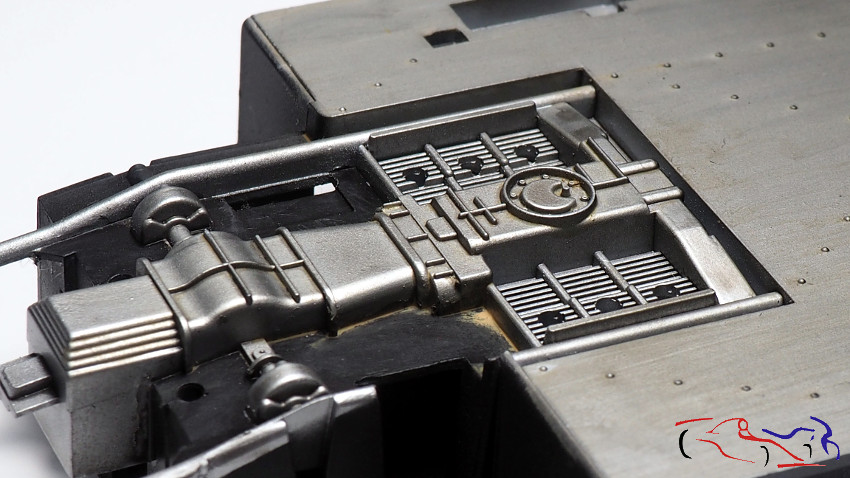
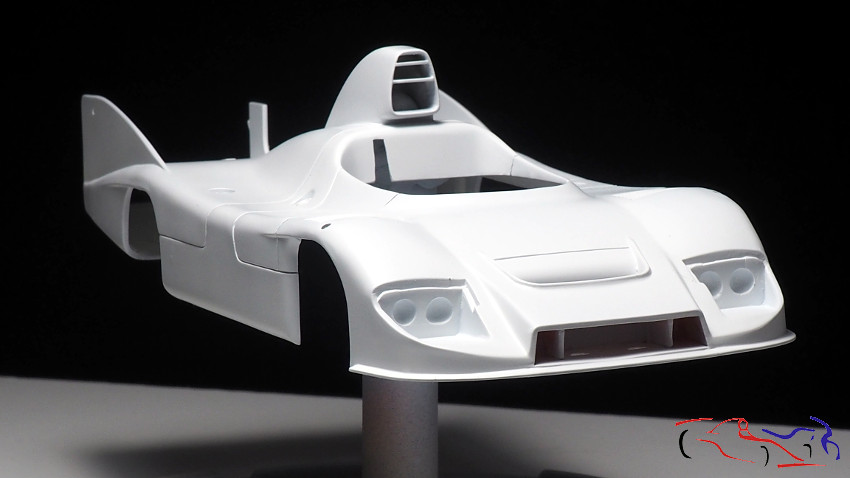
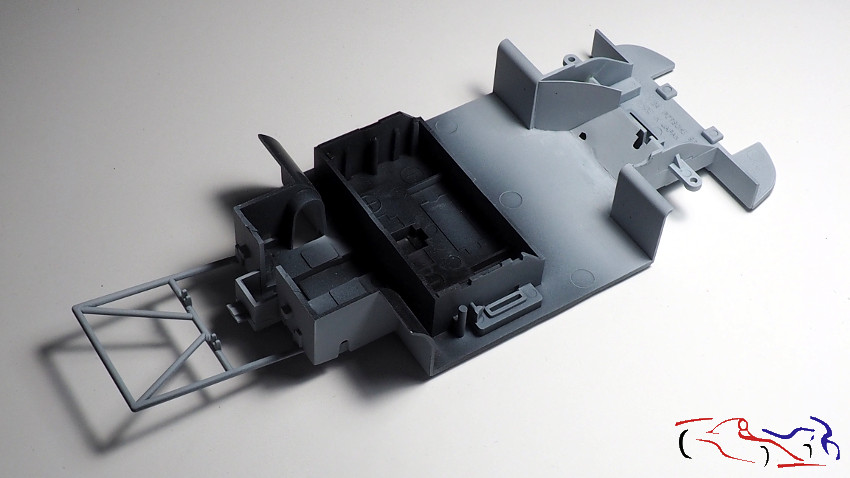
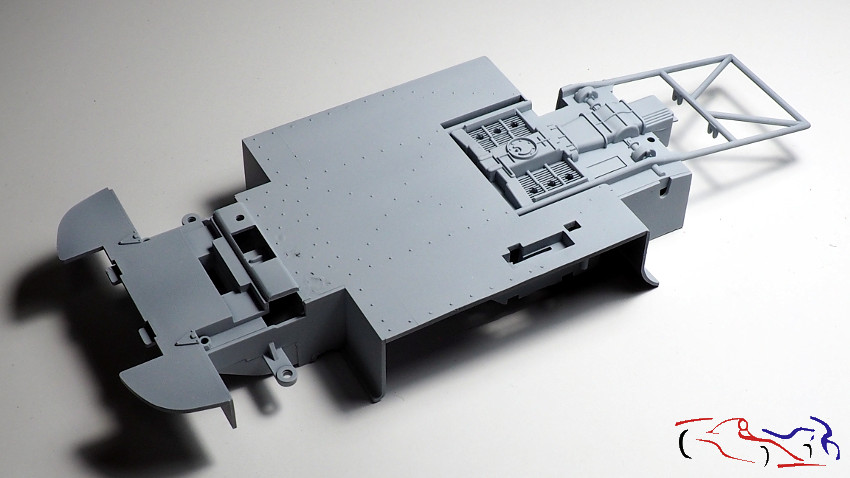
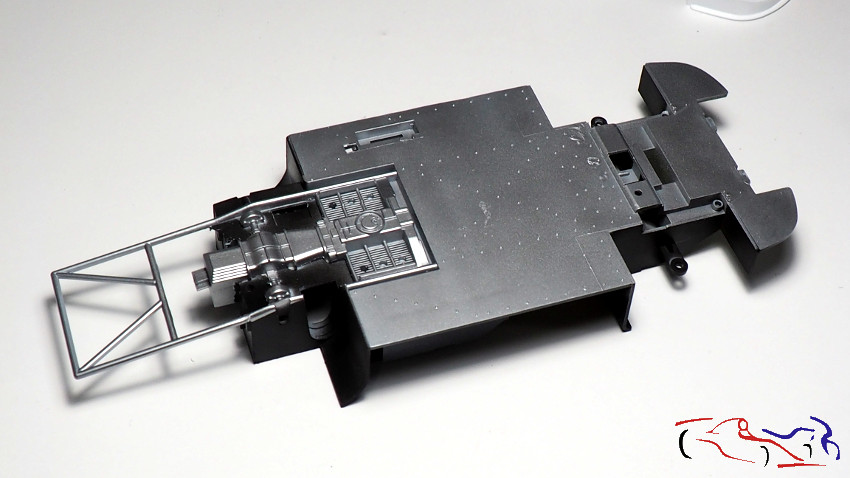
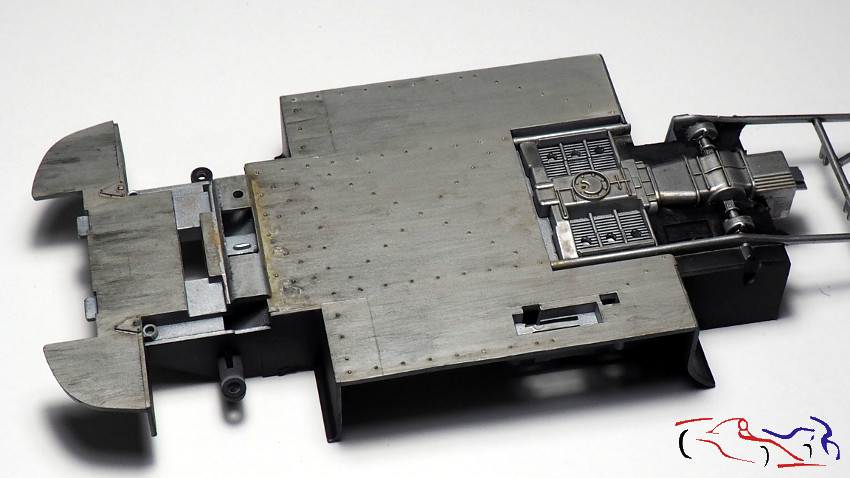
Ya dejamos la carrocería lista para lacar, y mos metemos con el chasis, que actualmente lo tenmos así, pintado con AK aluminio mate, aunque parece negro:
We already left the body ready to lacquer, and we get into the chassis, which we currently have it like this, painted with AK matt aluminum, although it looks black:
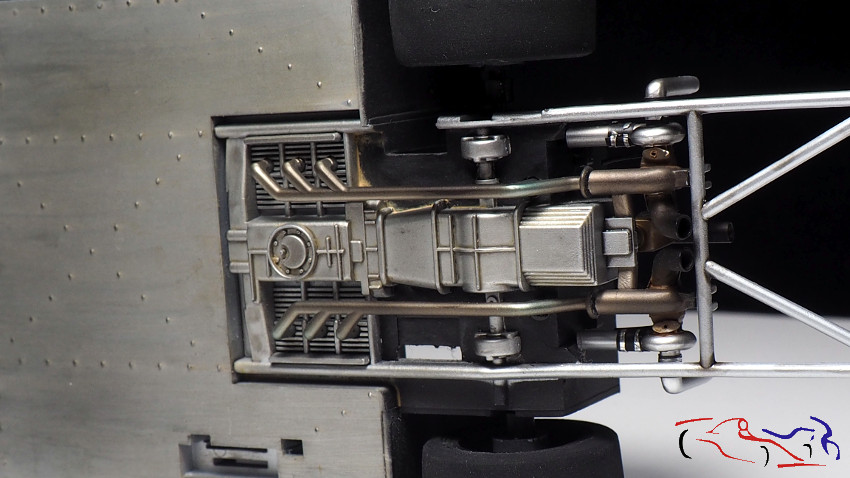
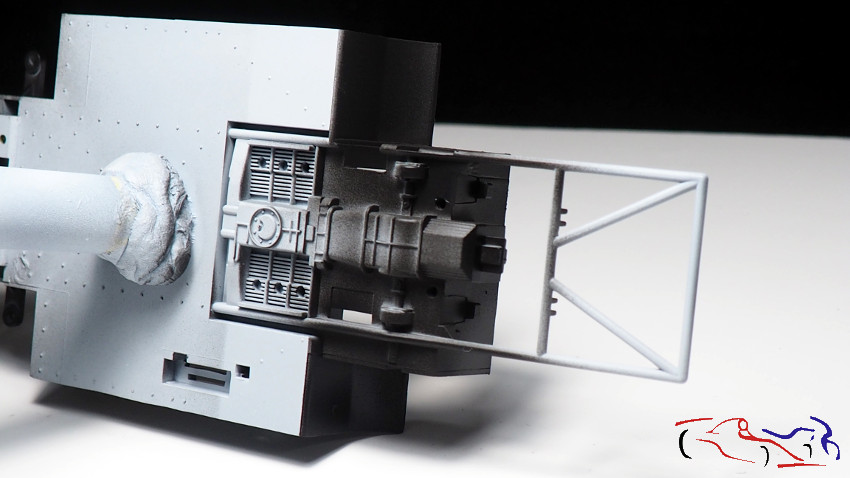
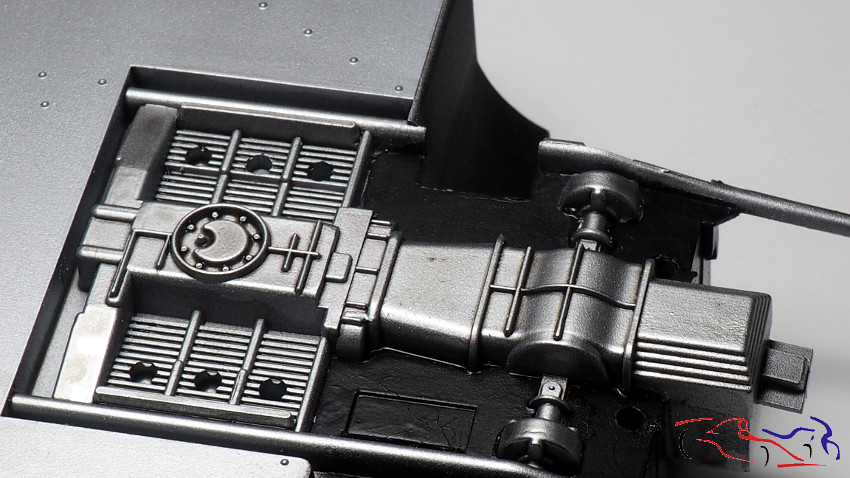
 En principio, le doy un lavado de Smoke acrílico al motor:
In principle, I give an acrylic Smoke wash to the engine:
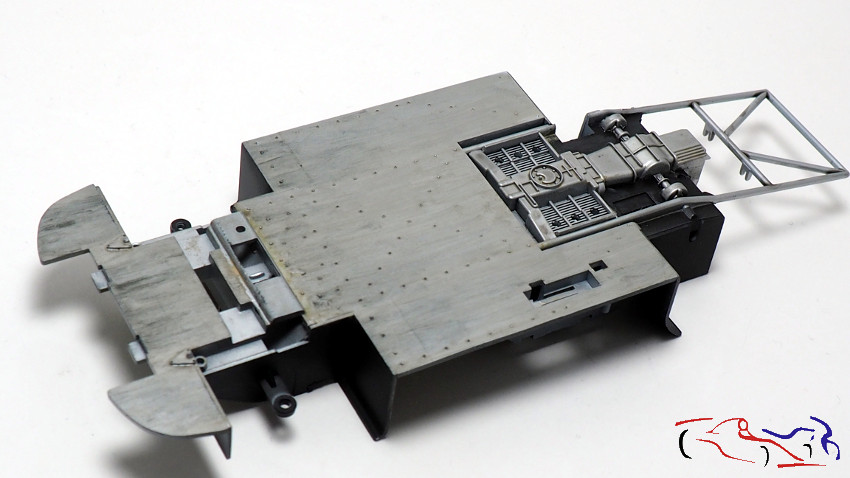
 Para pasar a poner puntos de Oilbrushers de MIG, de varios colores repartidos de manera aleatoria. Previamente, con una lija de tela, con mucho grano, marqué el chasis para simular roces del mismo con el suelo, arcenes, etc…
To go on to put MIG Oilbrushers points, of various colors distributed randomly. Previously, with a cloth sandpaper, with a lot of grain, I marked the chassis to simulate rubbing of it with the ground, shoulders, etc …
 Con un pincel plano, y con disolvente MIG, voy dando pasadas longitudinales para que se vayan fundiendo los colores. Después lo limpié con papel de cocina, si presionar mucho. Si veis, en los bordes de ataque, hay unas marcas negras. Esto lo hice poniendo después puntos negros de la misma pintura, y con un bastoncillo, empecé a frotar, pero de atrás a delante, consiguiendo ese acabado:
With a flat brush, and with MIG solvent, I am giving longitudinal passes so that the colors melt. Later I cleaned it with kitchen paper, with no pressing too hard. If you see, on the leading edges, there are some black marks. I did these after putting black dots from the same paint, and with a stick, I started rubbing, but from back to front, achieving that finish:
 Una vez seca la pintura, el acabado se hace más sutil:
Once the paint dries, the finish becomes more subtle:
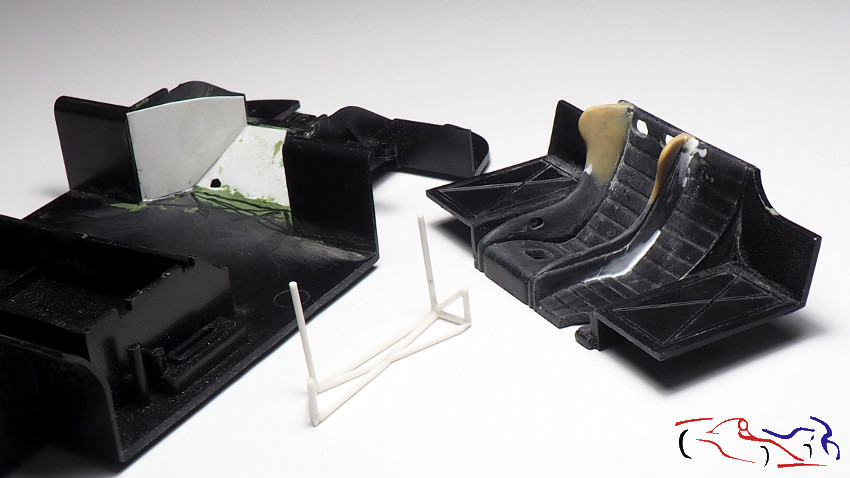
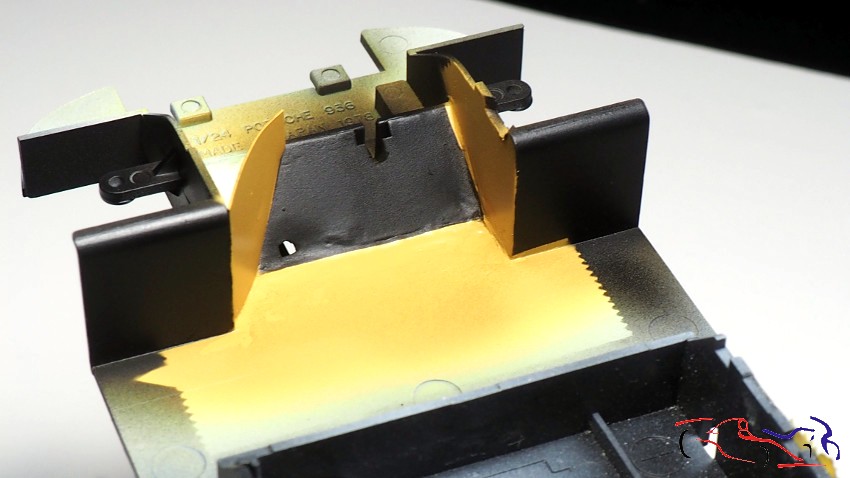
 Pasamos al cockpit. Hacemos unas plantillas con cinta de enmascarar, y las pasamos a calca de Kevlar:
We go to the cockpit. We make some templates with masking tape, and we pass them to Kevlar decal:
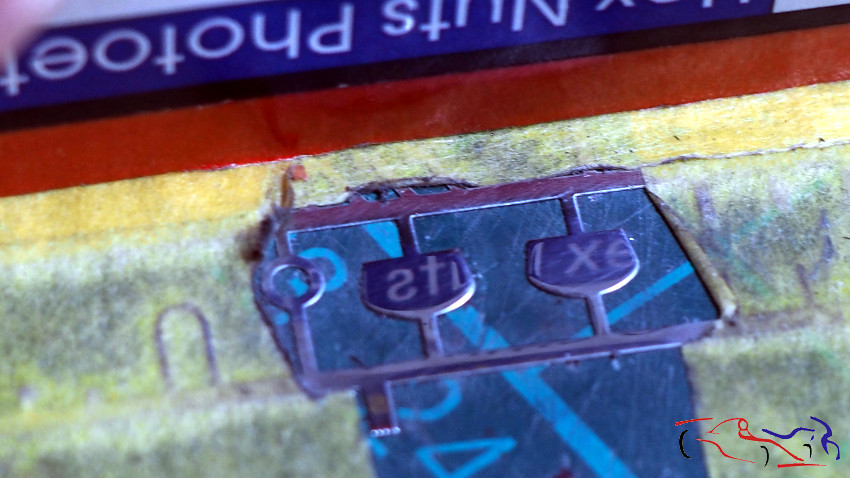
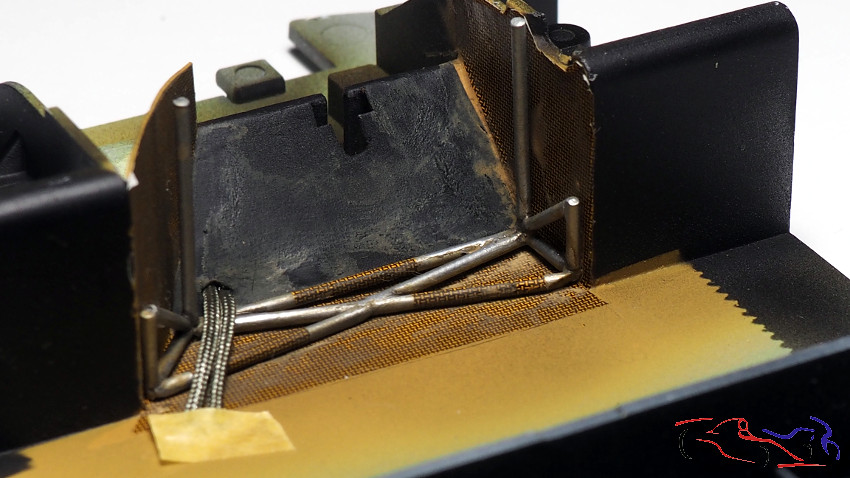
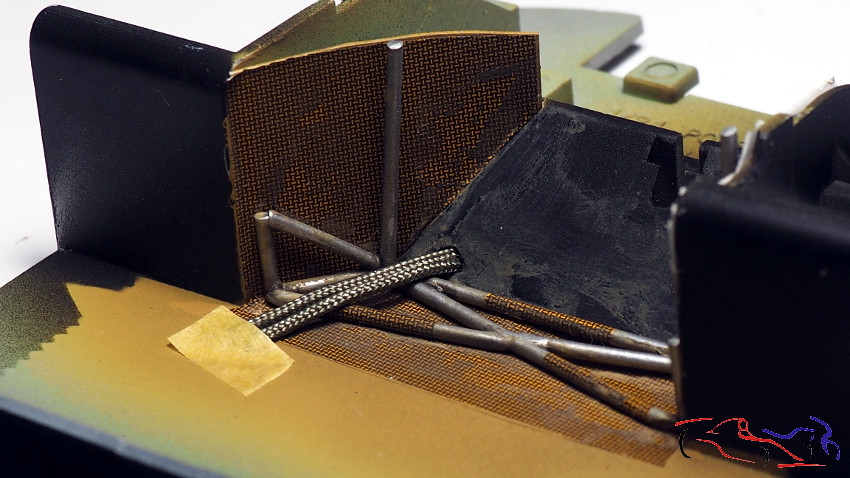
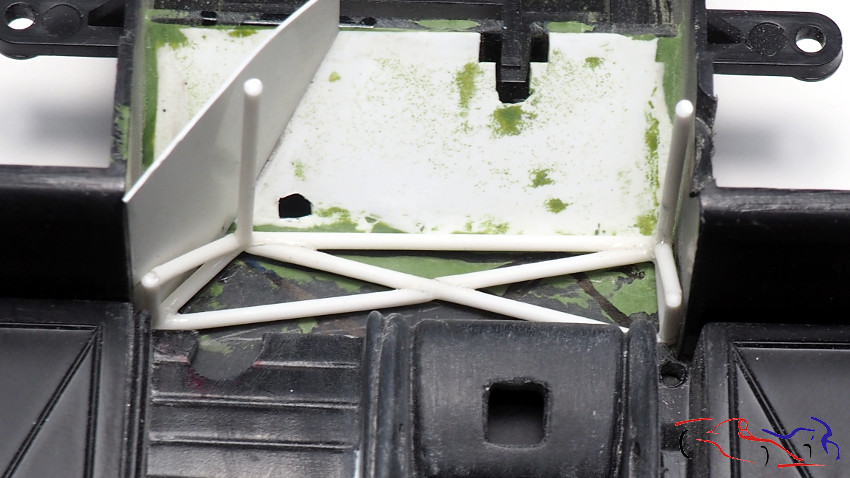
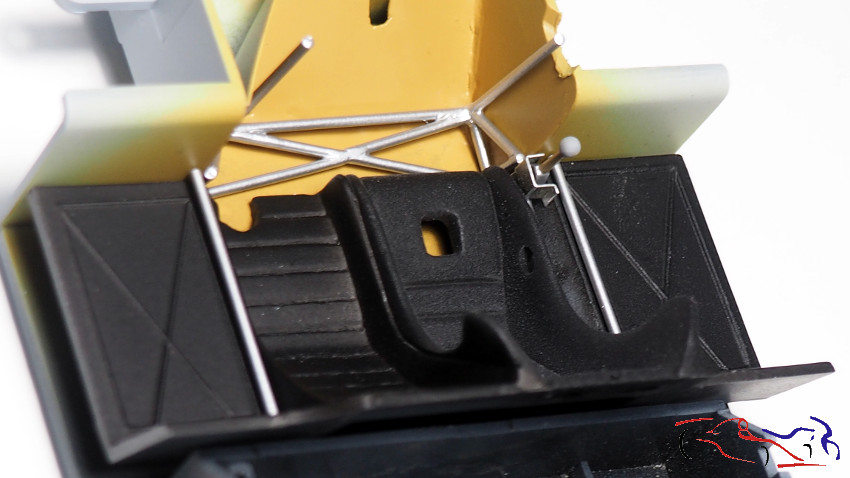
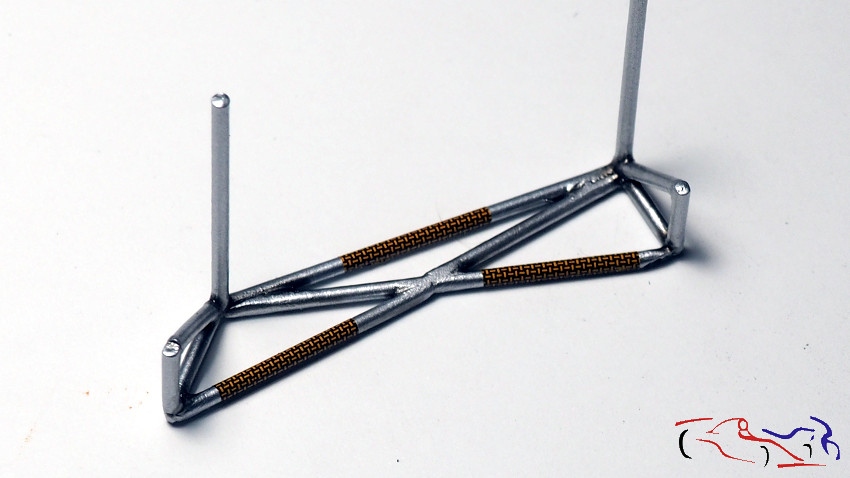
 También cortamos unos trocitos que colocamos en el entramado de barras del interior, a modo de fijaciones del chasis:
We also cut a few pieces of the same Kevlar decal that we put in the lattice of bars inside, as a fastening of the chassis:
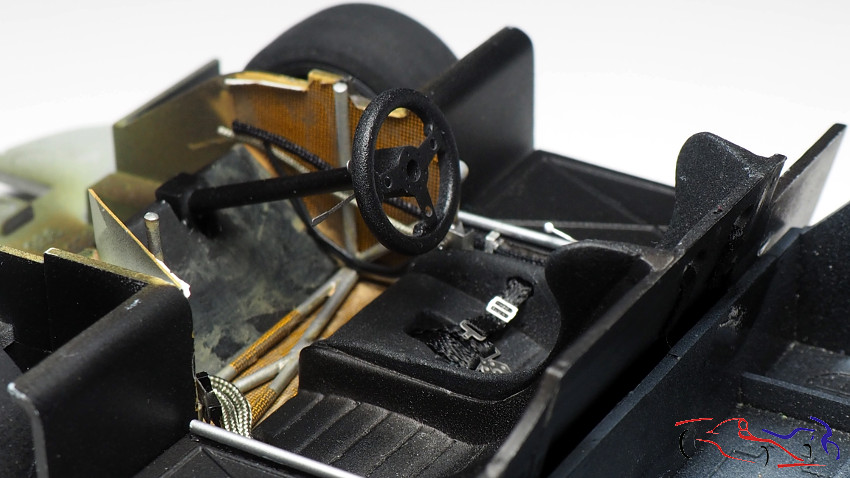
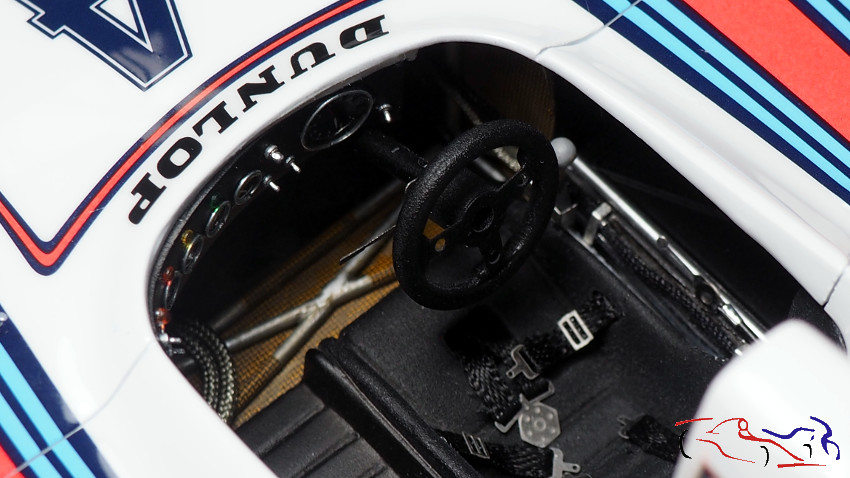
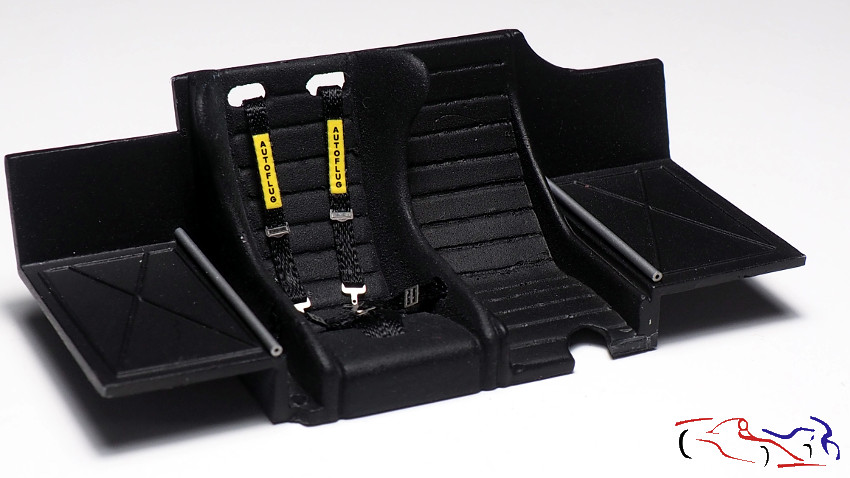
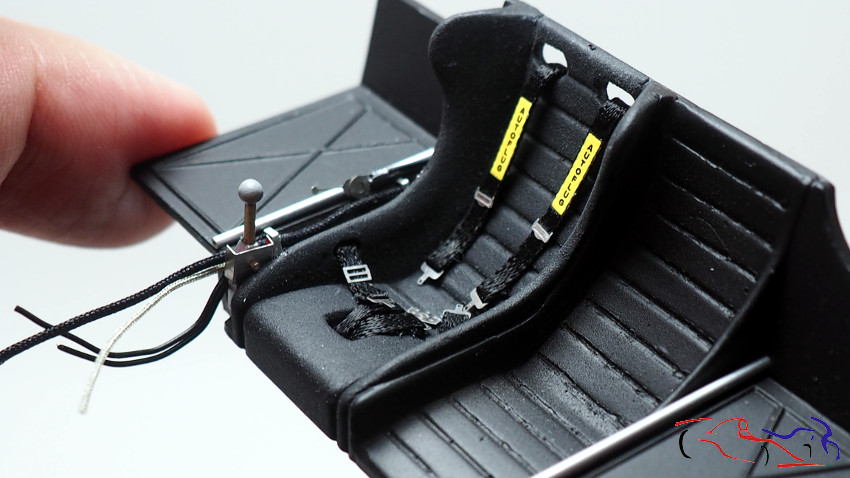
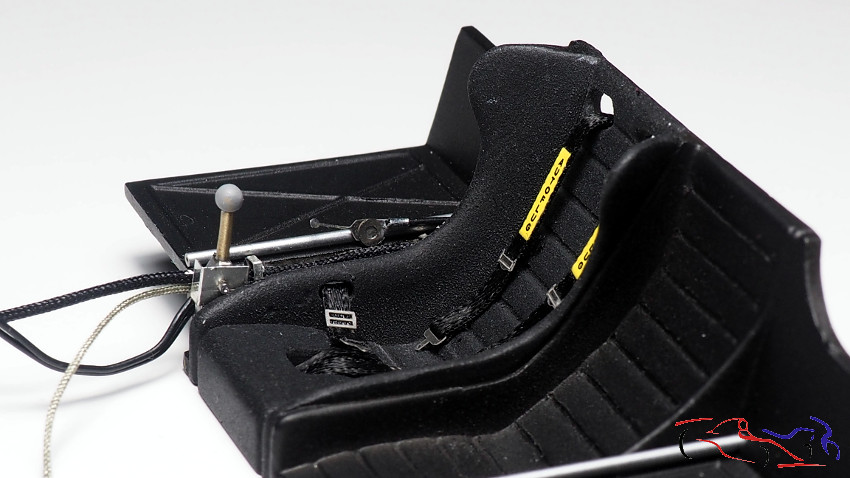
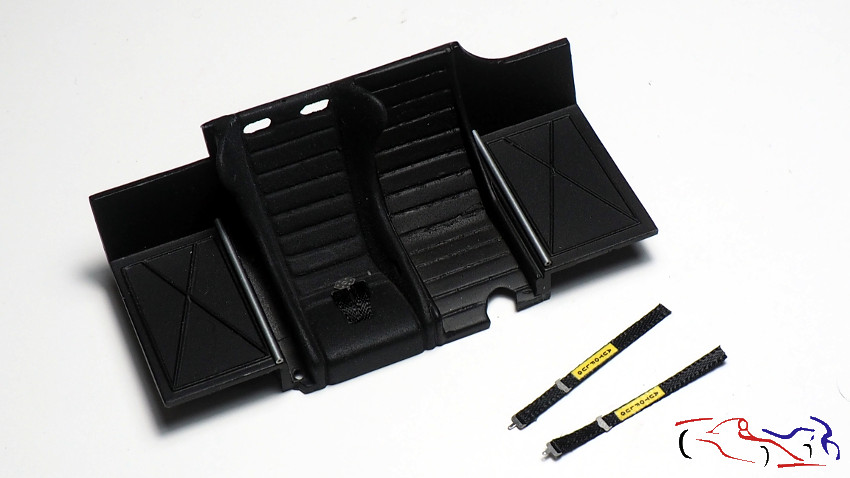
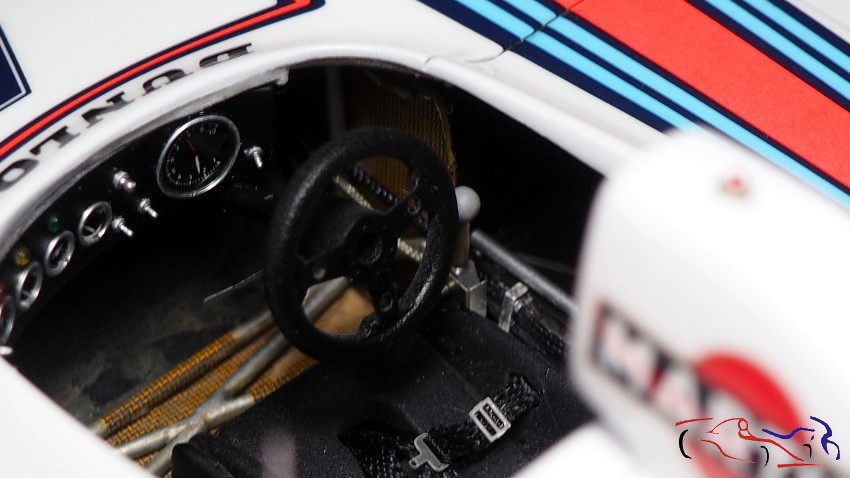
 Y en el backet, empezamos adetalalrlo. Lo primero, los cinturones negros. La calca es de Studio27, puesta sobre el cinturaon con el fijador de calcas super strong de Tameo; poner el liquido y dejar la calca encima sin tocarla. El resultado es muy bueno.
And in the backet, we started to adapt it. First of all, the black belts. The decal is from Studio27, placed on the belt with the Tameo super strong decal fixer; put the liquid and leave the decal on top without touching it. The result is very good.
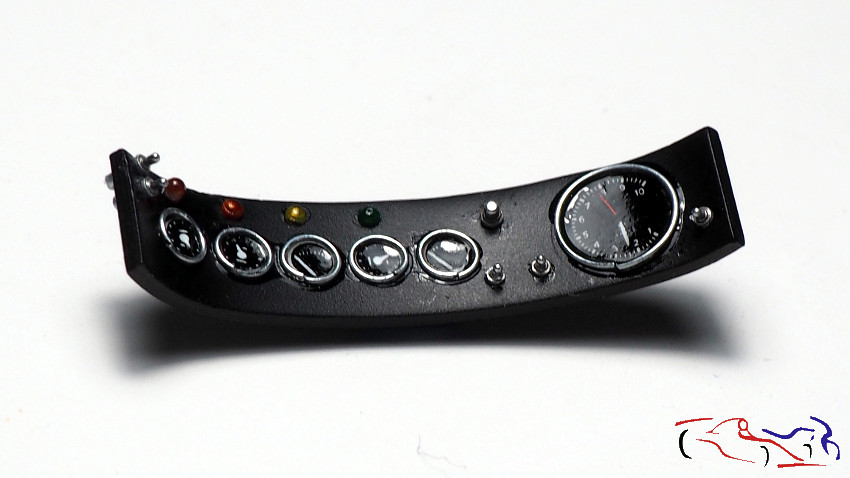
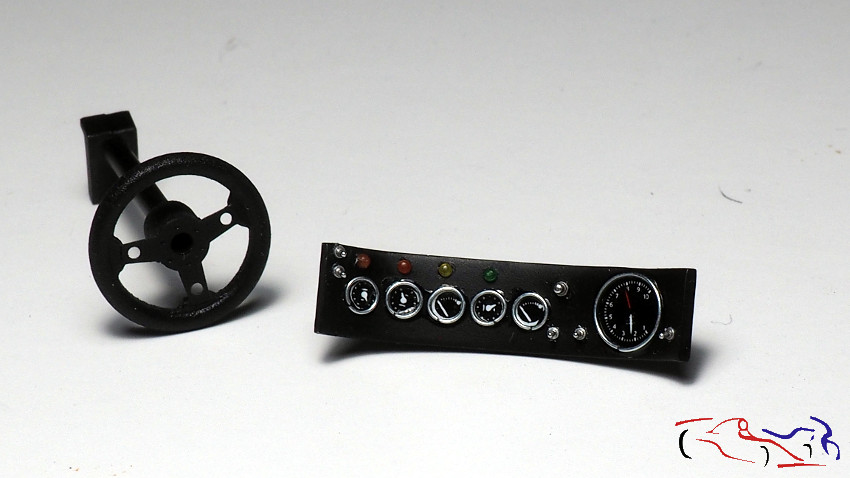
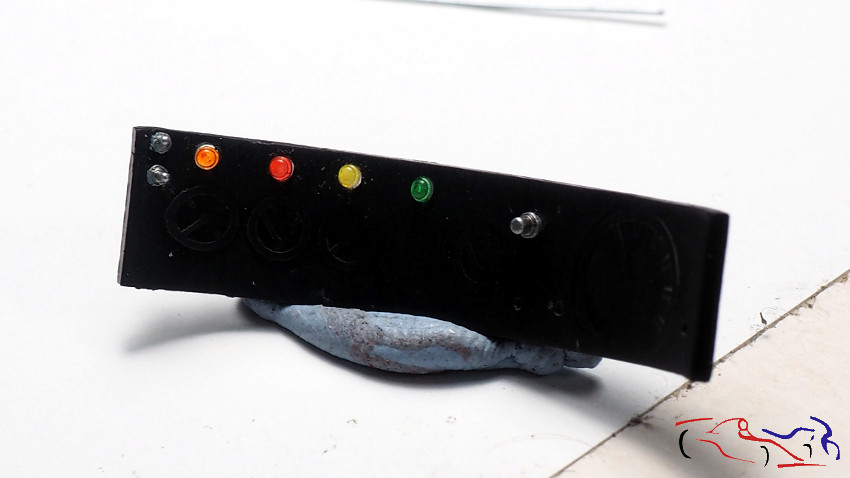
 Y ahora el salpicadero. He eliminado todos los botones, interruptores y luces, haciendo un agujero después en cada lugar. Lijé la base de los relojes para dejar unicamente una ligera marca que me sirviera para colocar después las calcas. Imprimí y pinté de negro satinado. Y para probar las nuevas luces de Decalcas, pinté cuatro con rotulador Edding, poniendo después una gota de barniz. El resultado es muy bueno!!
And now the dashboard. I have removed all the buttons, switches and lights, making a hole afterwards in each place. I sanded the base of the clocks to leave only a slight mark that would help me to place the decals later. I printed and painted it with satin black. And to test the new Decalcas lights, I painted four with an Edding marker, then put on a drop of varnish. The result is very good!!
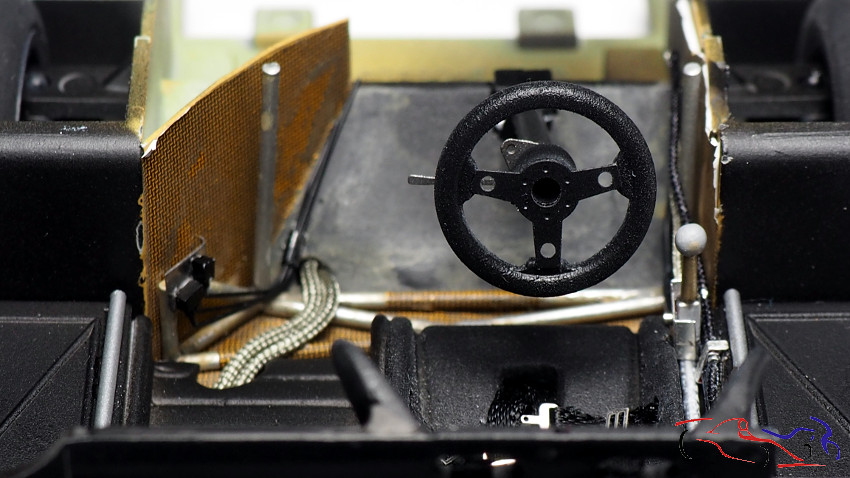
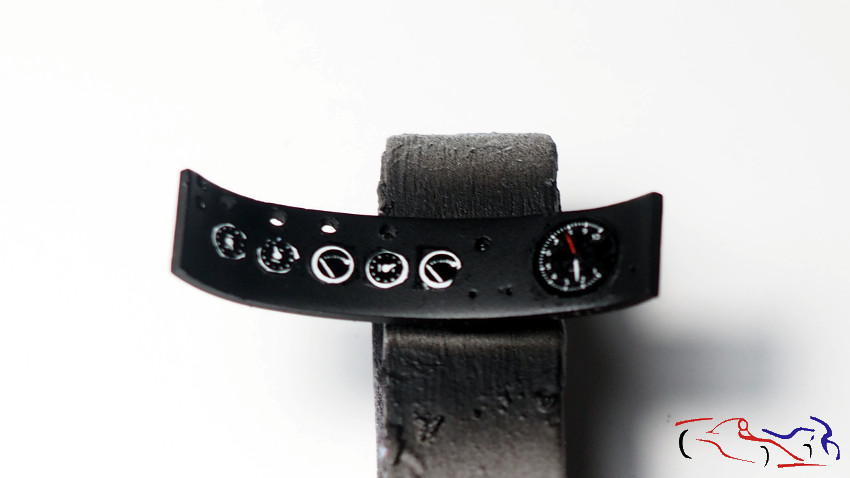
 Una vez hecha la prueba, coloco las calcas. EL reloj grande es de la hoja de Shunko, y los otros pertenecen a Virages:
After testing, I put the decals on. The large clock is from Shunko’s leaf, and the others belong to Virages:
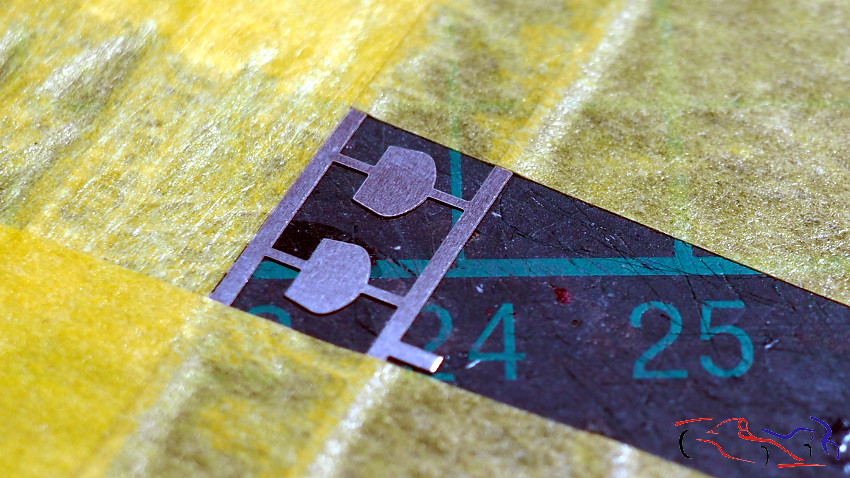
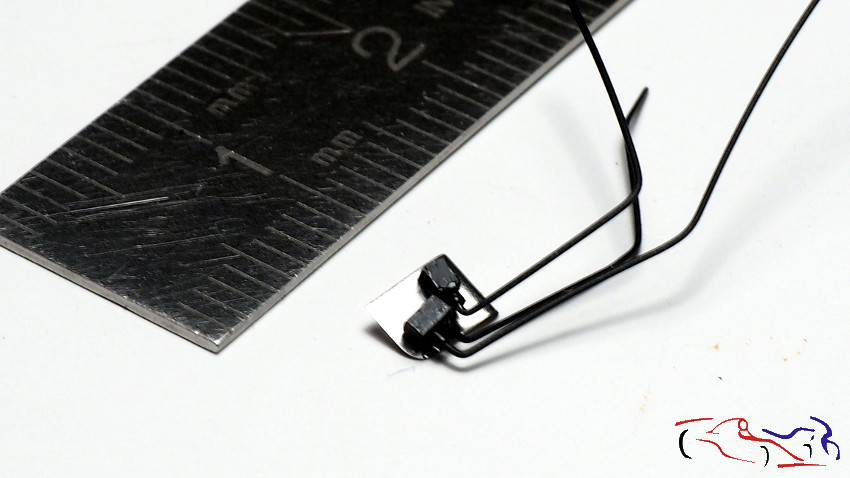
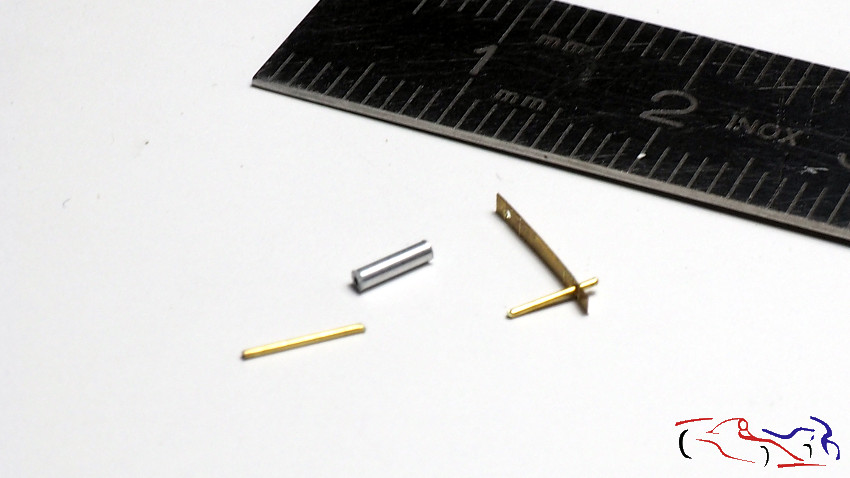
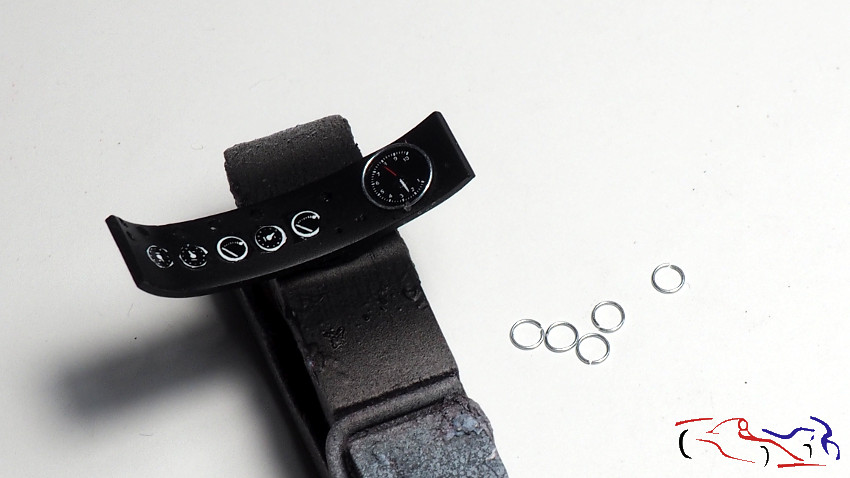
 Para los bordes de los relojes, utilizo hilo de aluminio modeado en un tubo del diámetro deseado, y cortado posteriormente. Aquí vemos el grande ya colocado con cola blanca diluida, y los pequeños, a al espera de su colocación:
For the edges of the watches, I use aluminum wire modeled on a tube of the desired diameter, and cut later. Here we see the big one already placed with diluted white glue, and the small ones, waiting for their placement:
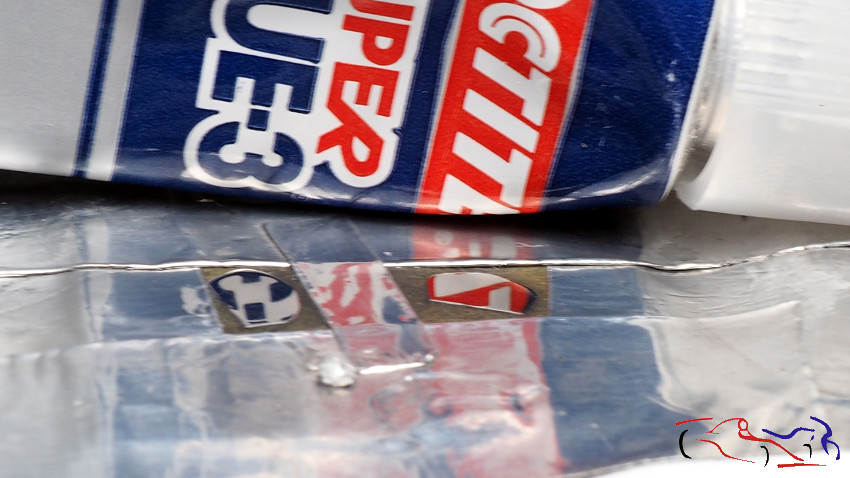
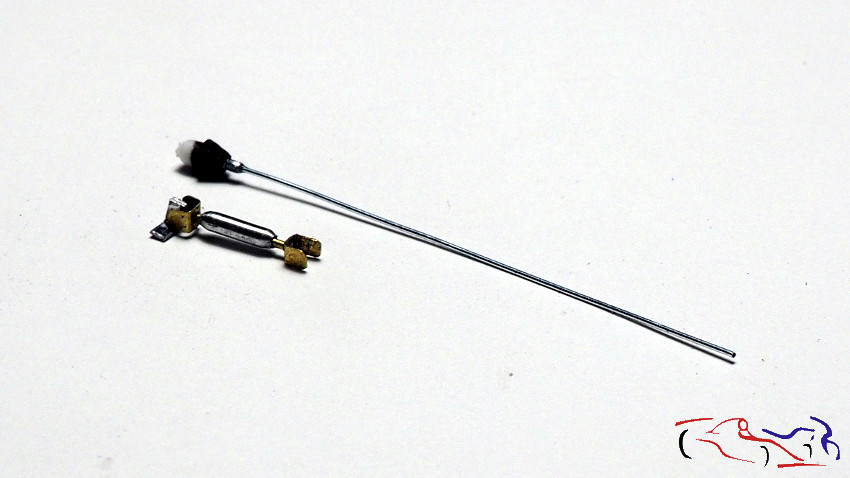
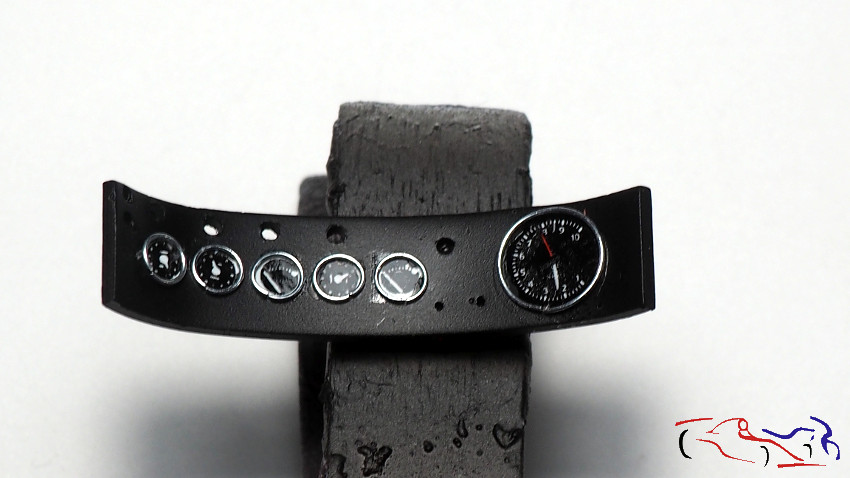
 Y aquí, están todos los aros puestos. Falta poner una gota de barniz o una gota de resina transparente UV, que tengo que probar:
And here are all the hoops on. It remains to put a drop of varnish or a drop of UV transparent resin, which I have to try:
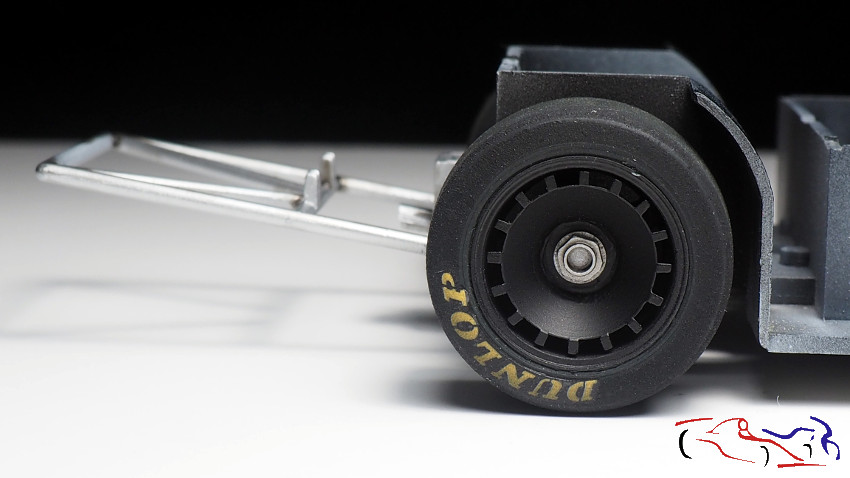
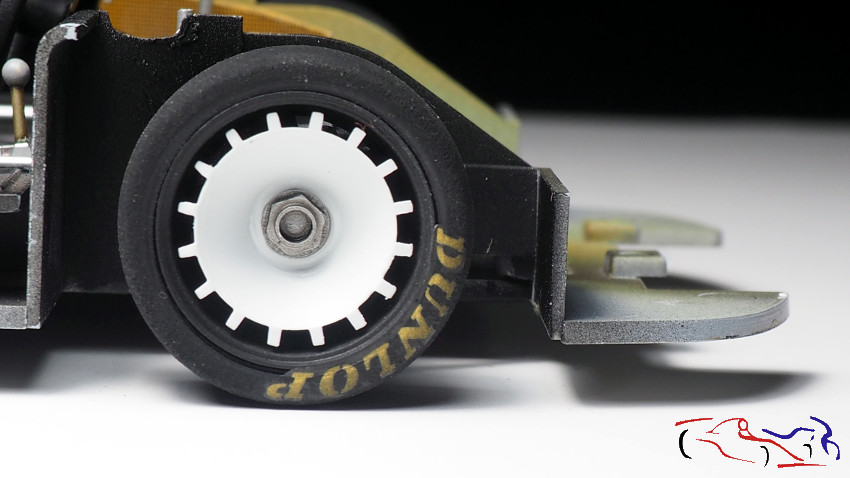
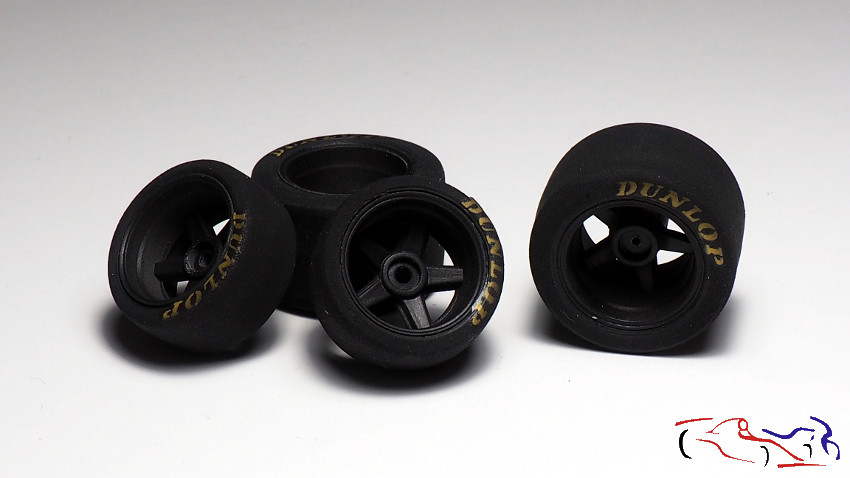
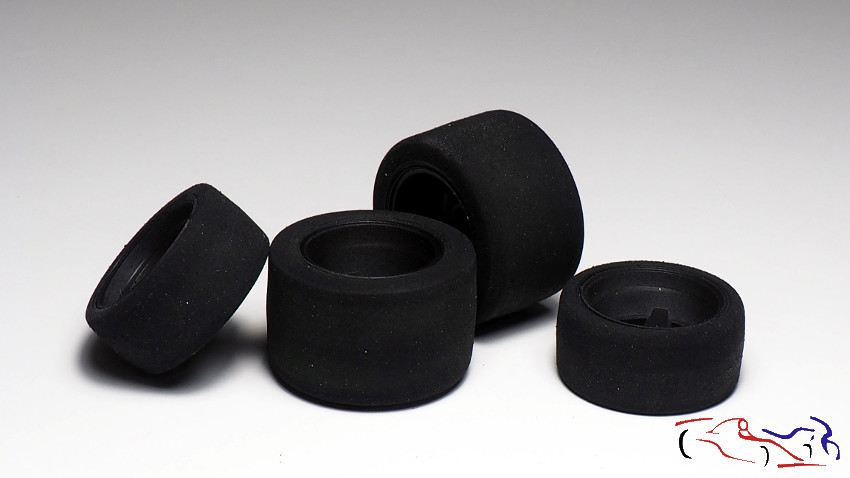
 A los neumáticos, los lijé poniéndolos en una llanta colocada en el minitaladro, igualando y gastando toda la superficie incluyendo el lateral, para eliminar las marcas preimpresas:
I sanded the tires by putting them on a rim placed on the mini drill, leveling and wasting the entire surface including the side, to remove preprinted marks:
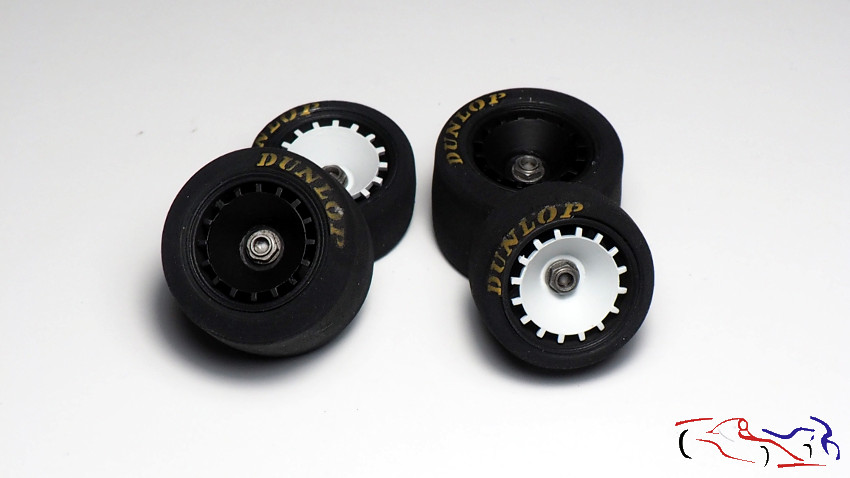
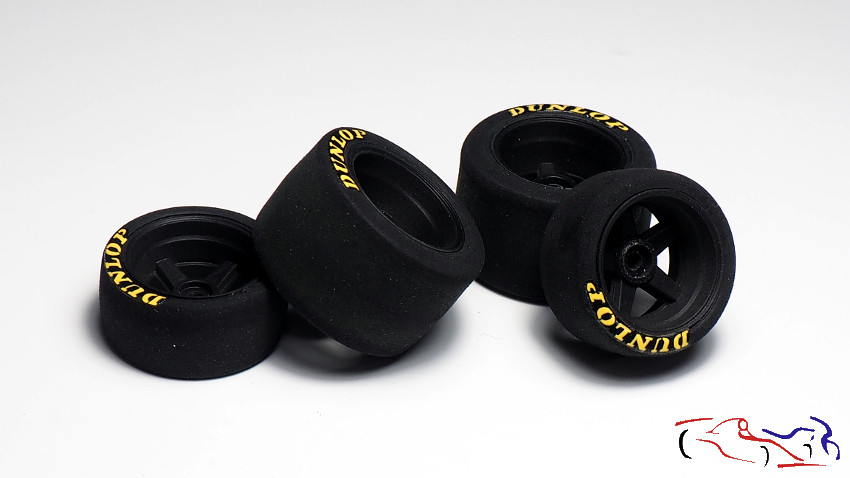
 Después les puse las calcas, con el mismo método que en los cinturones. Falta mi desgaste habitual que le doy con negro mate diluido:
Then I put the decals on them, with the same method as on the belts. My usual finish is missing which I give it with diluted matte black:
 Ahora si, lo siguiente es la laca.
Gracia spor ver y comentar!
Now yes, the next thing is the lacquer.
Thanks for viewing and commenting!


 Para terminar, una foto con la guía Komakai como peana, buena fuente de información!
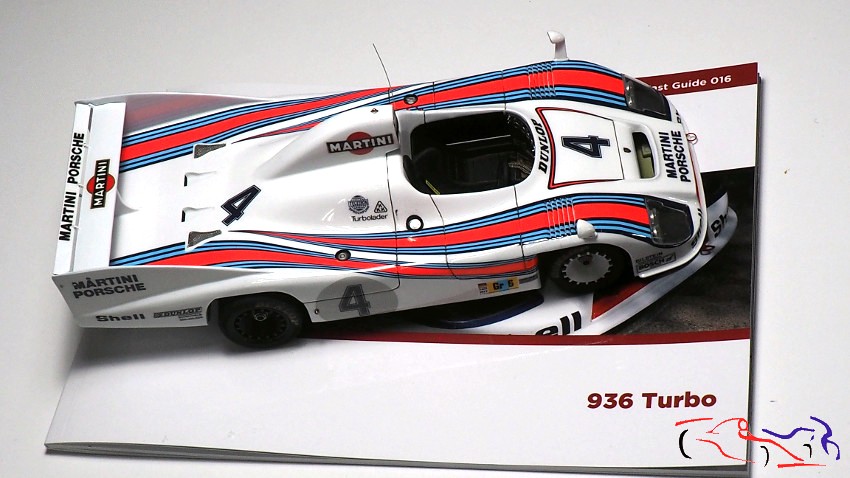 Gracias por ver y comentar!