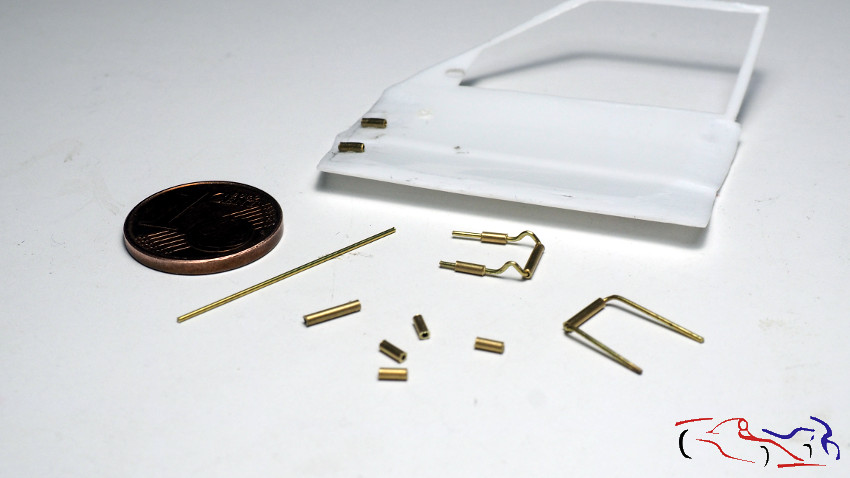
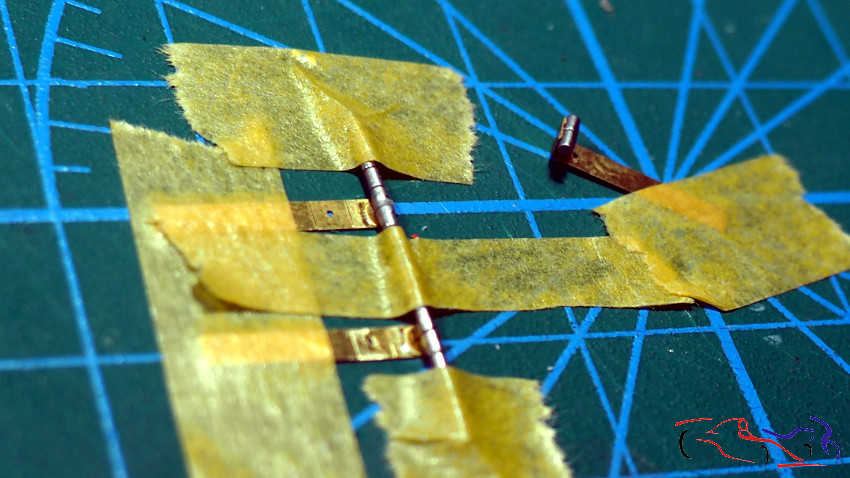
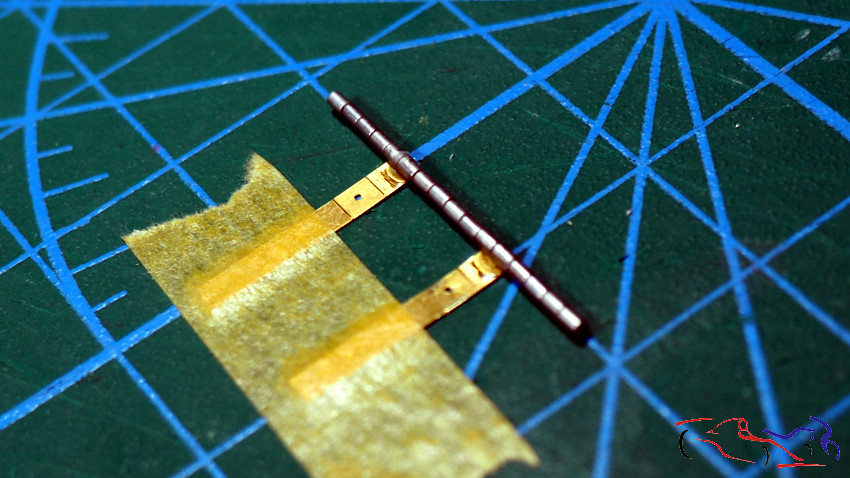
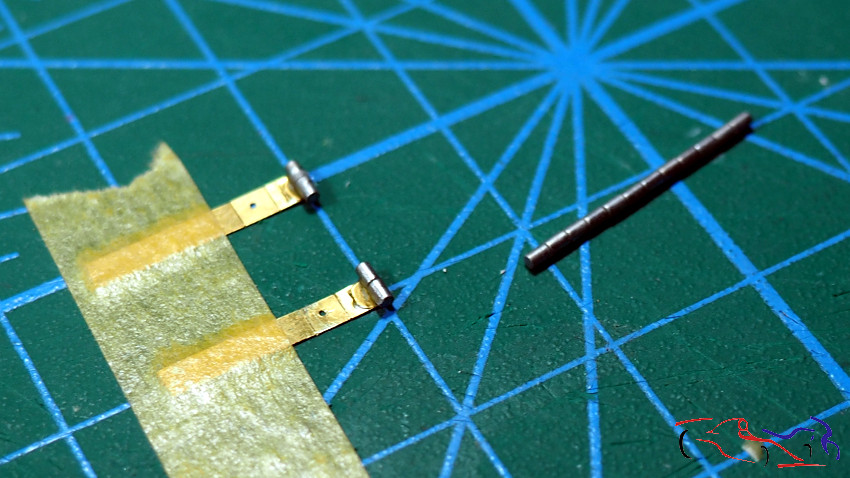
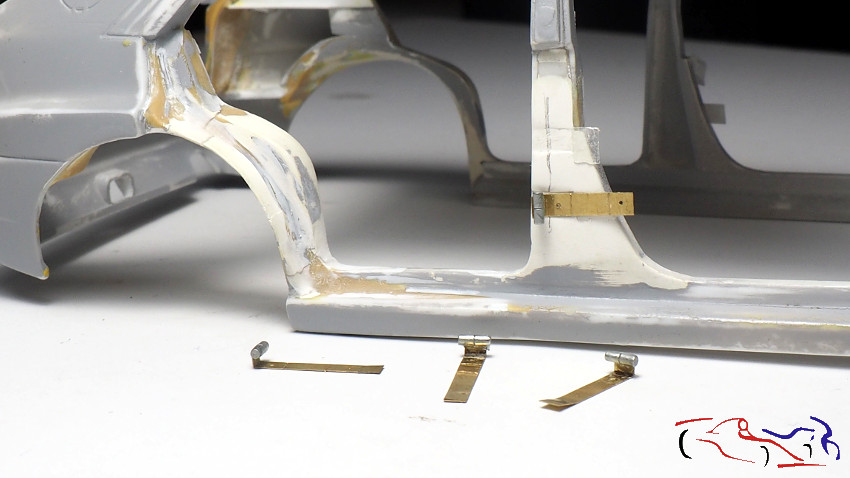
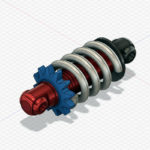
Continuamos con otra entrada del Lancia Delta. En la entrada anterior, nos quedamos en un tipo de bisagra que después de probarla, no me gustaba mucho. Y aquí está la nueva. Como veis en el centro, he puesto una bisagra completa, y alrededor, el resto de piezas para hacerla. La base en una varilla que ha sido doblada en esa forma después de introducirla dentro de un tubo para que se gire. Ese tubo irá pegado en la carrocería, y los extremos de la varilla, se introduciran en sendos tubos pegados en la puerta:
We continue with another entry of the Lancia Delta. In the previous one, we stayed on a type of hinge that after testing it, I didn’t like very much. And here is the new one. As you can see in the centre of the picture, I have put a complete hinge, and around it, the rest of the pieces for making it. The base is a rod that has been bent into that shape after inserting it into a tube to turn it. That tube will be glued to the body, and the ends of the rod will be inserted into the tubes glued to the door:
En la siguiente foto, podéis ver la bisagra pegada a la carrocería:
In the following picture, you can see the hinge attached to the body:
…y con los dos tubos pegados en la puerta:
…and with the two tubes added to the door:

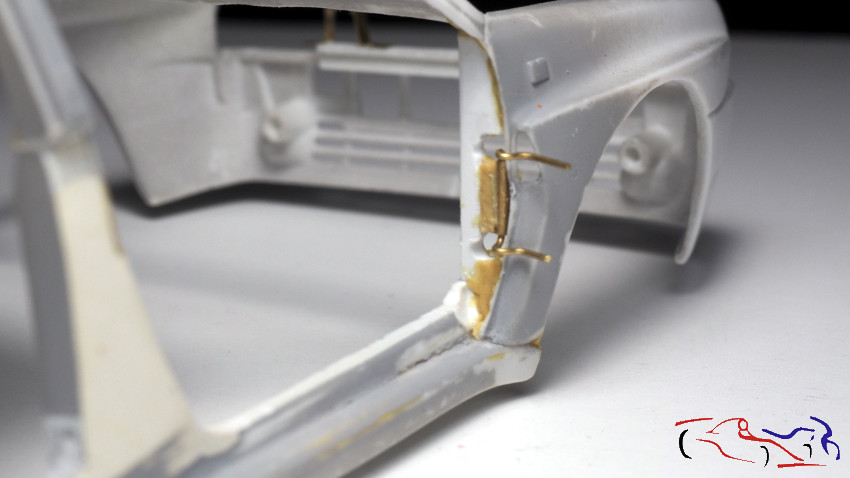
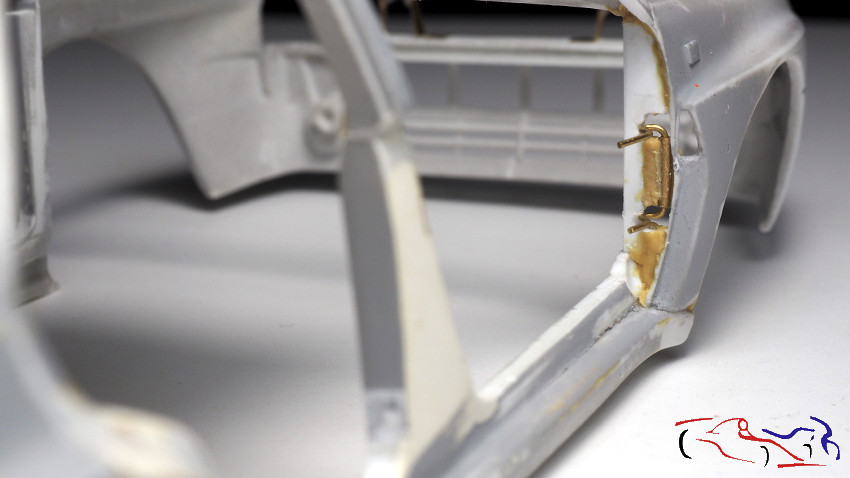
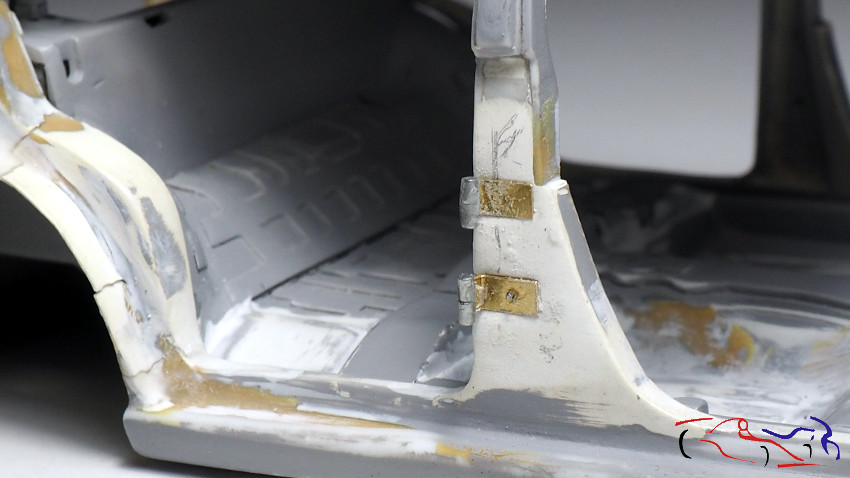
Pero para este trabajo, tuve que retirar la parte interior que había puesto en la carrocería, y de esa manera, poder situar mejor la bisagra:
But for this job, I had to remove the inner part that I had put on the body, so that I could better position the hinge:

Por supuesto, las uniones fueron rellenadas con masilla epoxy…
Of course, the joints were filled with epoxy putty…
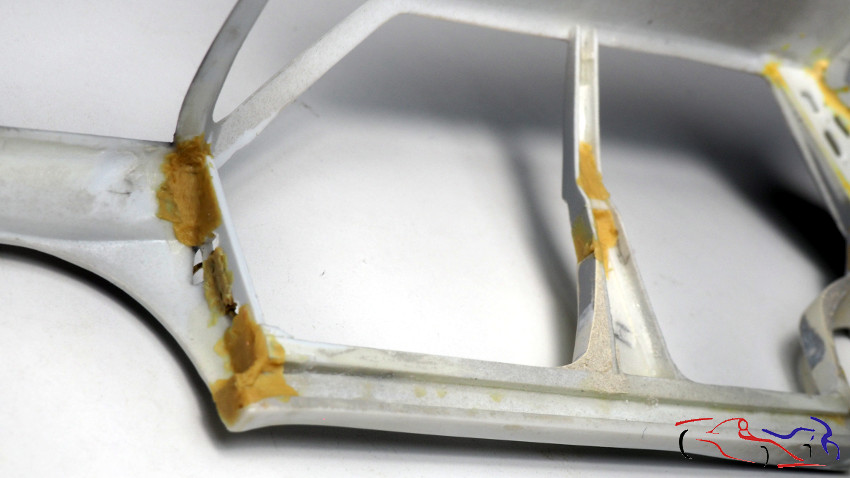
..haciendo de esta manera, las bisagras de las dos puertas delanteras.
…making the hinges of the two front doors in this way.
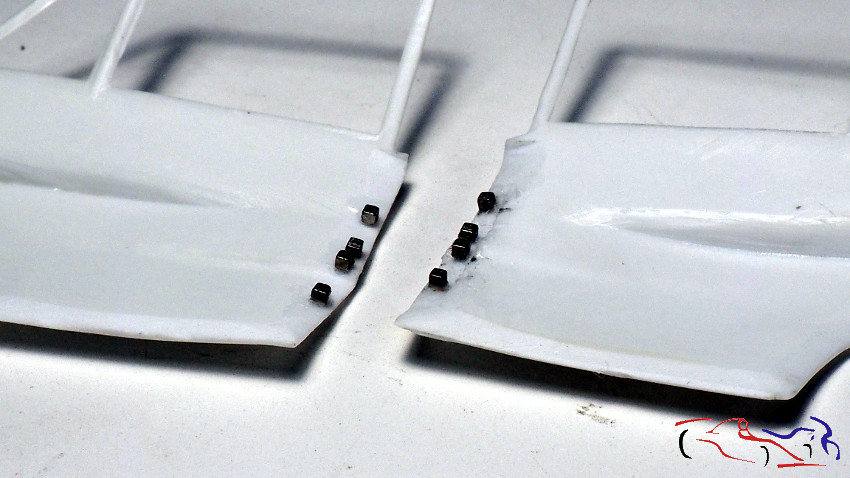
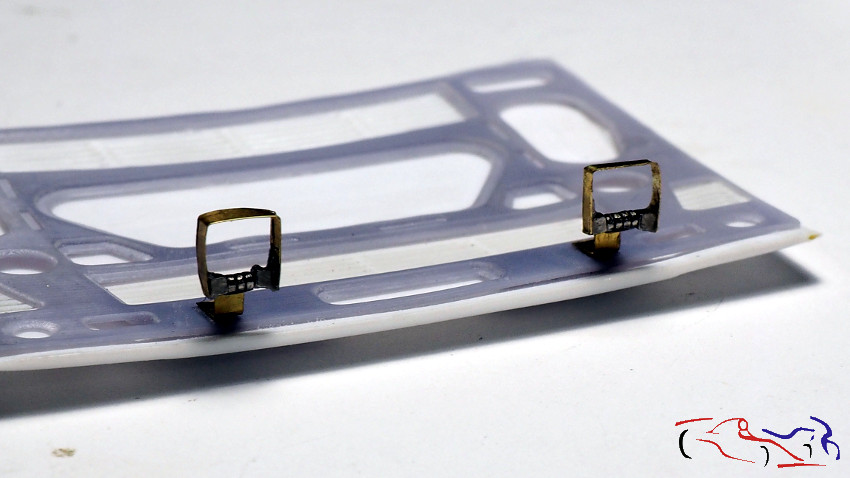
Para las puertas traseras, me decidí por usar imanes. Primero realizo la parte de las bisagras que van en los pilares centrales de la carrocería, pegando los imanes a una tira de latón, lo más perpendiculares posible a la barra. Primero junto todos los imanes para poder manejarlos mejor, y después los separo cuando ya están pegados:
For the rear doors, I decided to use magnets. First I made the hinges that go on the central pillars of the body, gluing the magnets to a brass strip, as perpendicular as possible to the bar. First I put all the magnets together to be able to handle them better, and then I separate them when they are already glued:
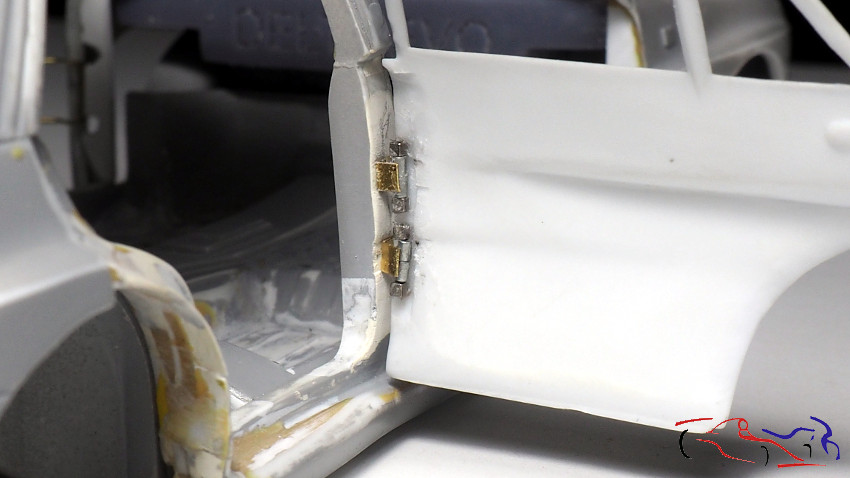
Doblo la última parte de la tira unos 45 grados, por una marca que había marcado antes de pegar los imanes, y los situo en su lugar, con cinta de doble cara. Marco sobre el pilar, y rebajo su hueco para poder colocarlos más fácilmente. También practico un agujero en el medio para fijarlos mejor, con un remache de metal.
I bend the last part of the strip about 45 degrees, along a mark I had made before gluing the magnets, and place them in place, using double-sided tape. I mark on the pillar, and lower the hole so that I can place them more easily. I also drill a hole in the middle to fix them better, with a metal rivet.
Para las puertas, utilizo imanes cuadrados, que pongo en las bisagras, arriba y abajo, Después coloco la puerta y pego con ciano dichos imanes, que dando de esa manera al abrirse:
For the doors, I use square magnets, which I put on the hinges, top and bottom. Then I place the door and glue the magnets with cyanide, which give the door the same effect when it opens:
Y aquí, las dos puertas del lado derecho abiertas!! Las del izquierdo seguirán el mismo proceso.
And here, the two doors on the right-hand side are open! The ones on the left will follow the same process.
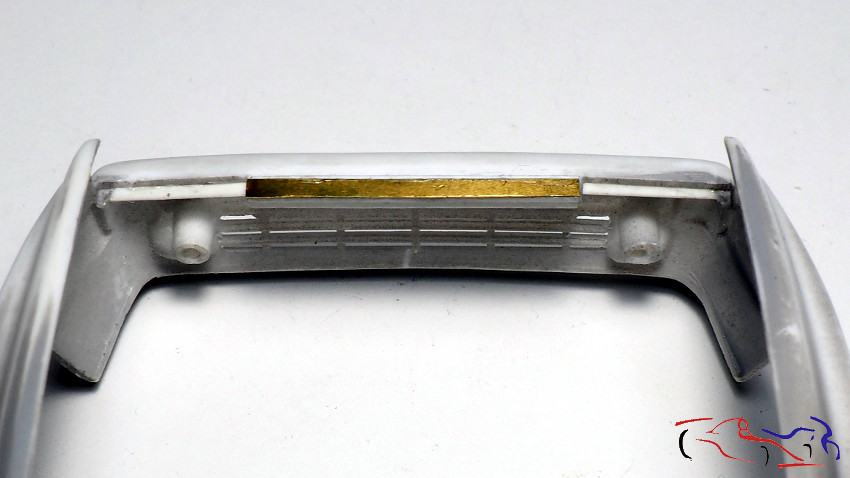
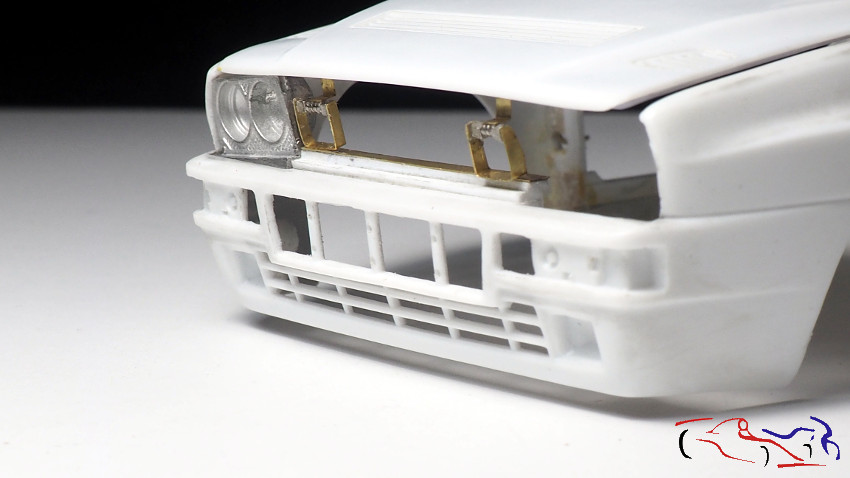
Y desde las puertas, nos vamos a asegurar las bisagras del capó. Primero levantamos la situación de las bisagras, añadiendo una base de latón a la base. En la segunda foto, vemos el frontal con el faro de la derecha:
And from the doors, we go to secure the bonnet hinges. First we raise the hinge situation, adding a brass base to the base. In the second photo, we see the front with the headlight on the right:
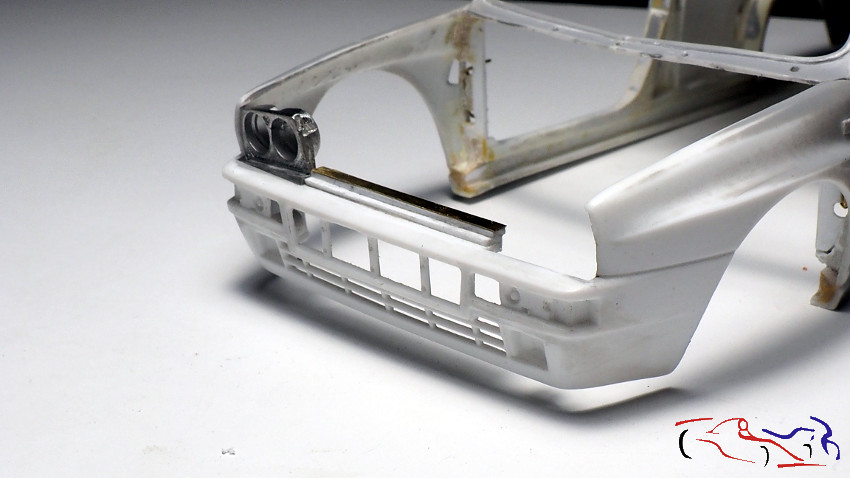
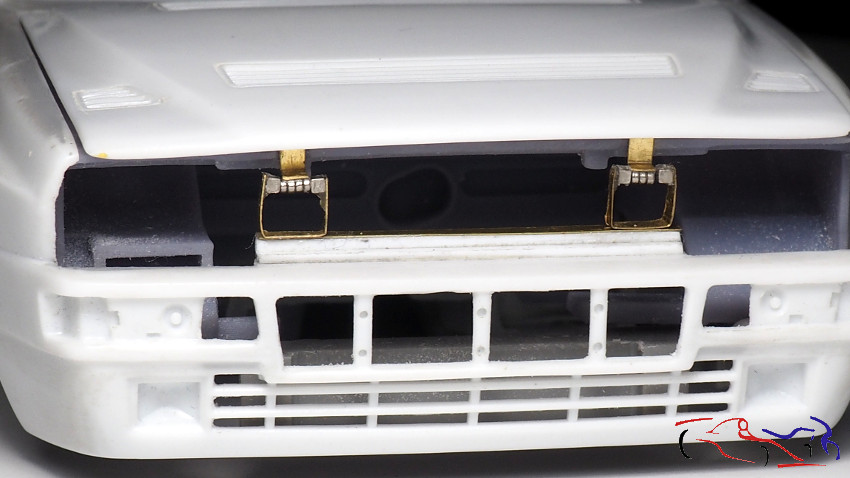
Creamos la parte de las bisagras que van pegadas a la carrocería, Pero para pegarlas, las unimos al capó, y después de situarlo en el hueco de la carrocería, lo pegamos con ciano:
We create the part of the hinges that are glued to the bodywork, but to glue them, we join them to the bonnet, and after placing it in the hollow of the bodywork, we glue it with cyano:
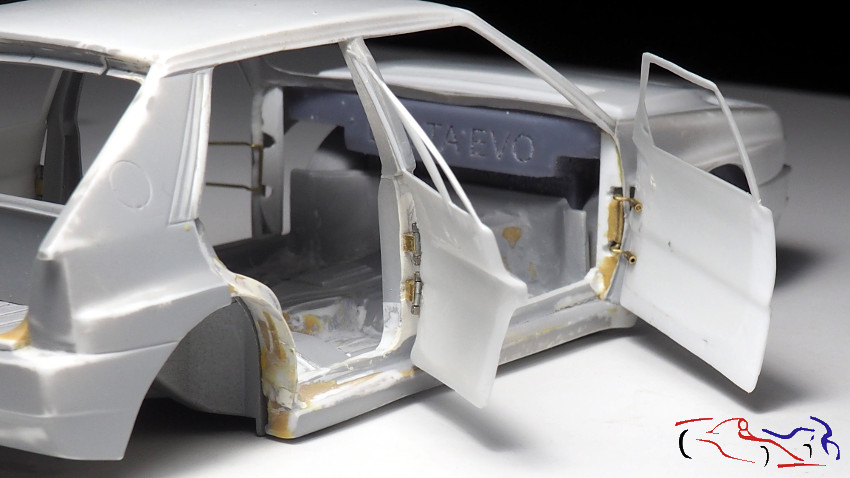
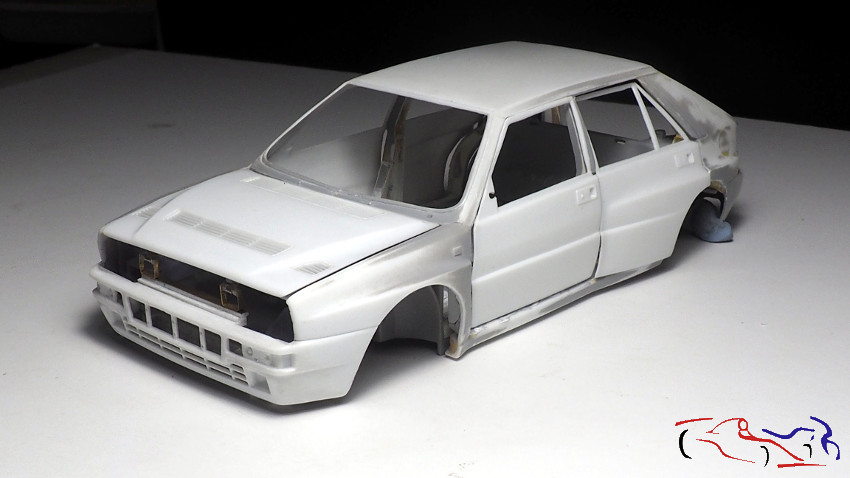
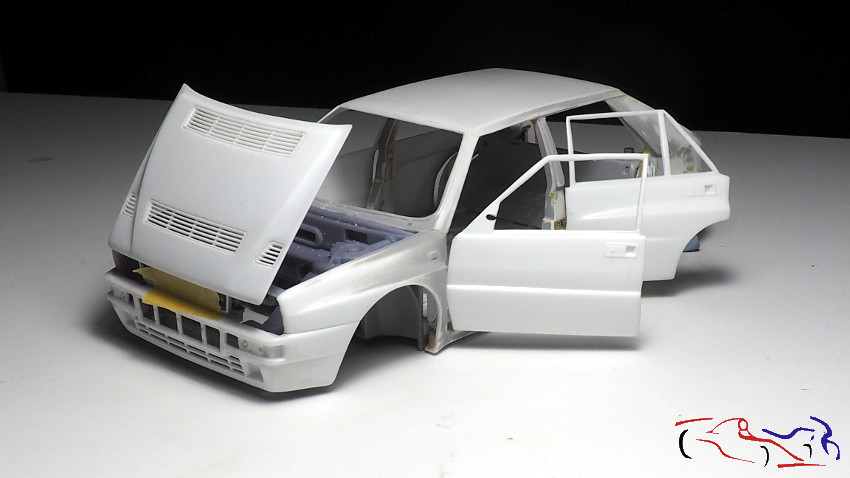
Ahora vemos la carrocería cerrada, y abierta!!
Now we see the body closed, and open!
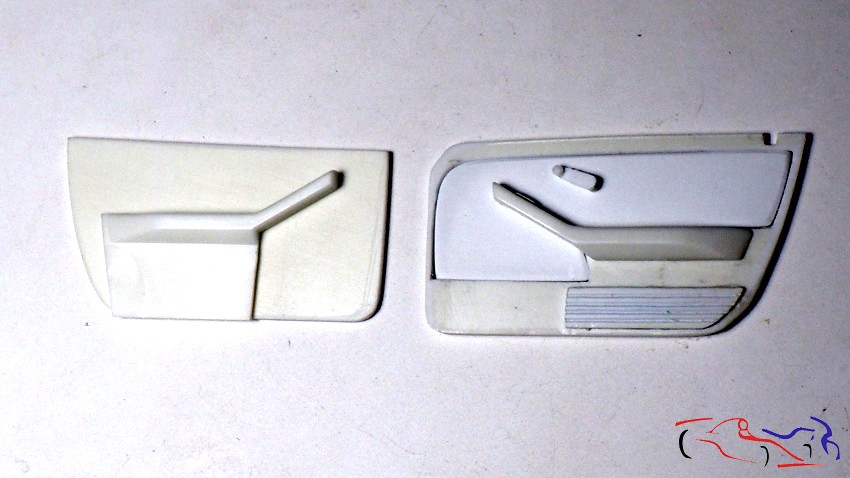
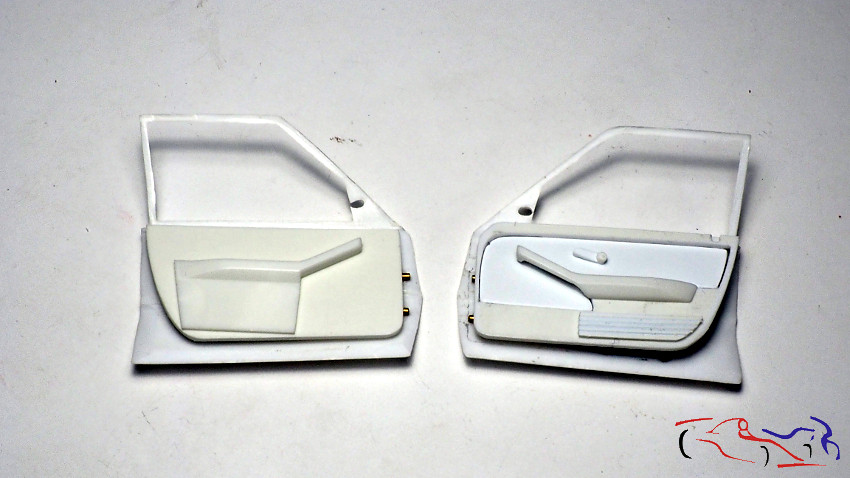
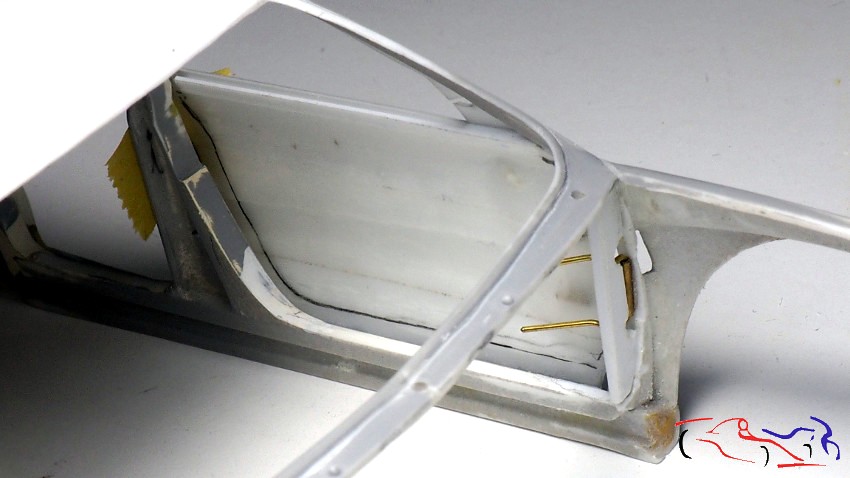
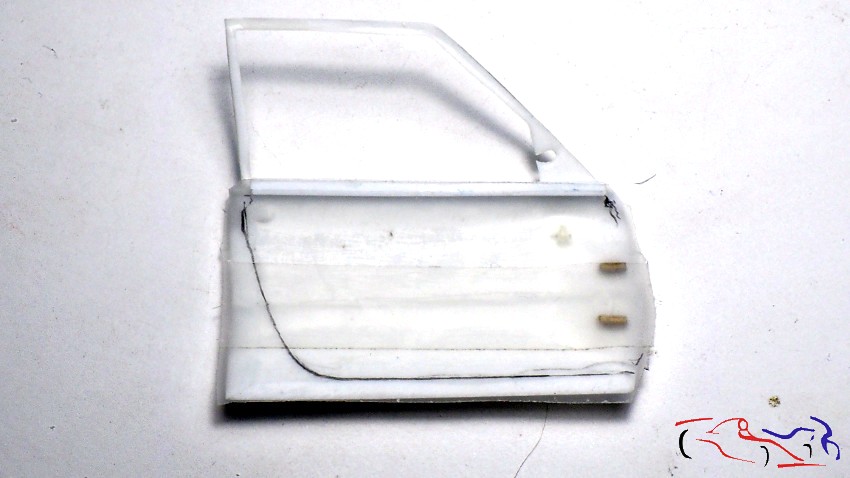
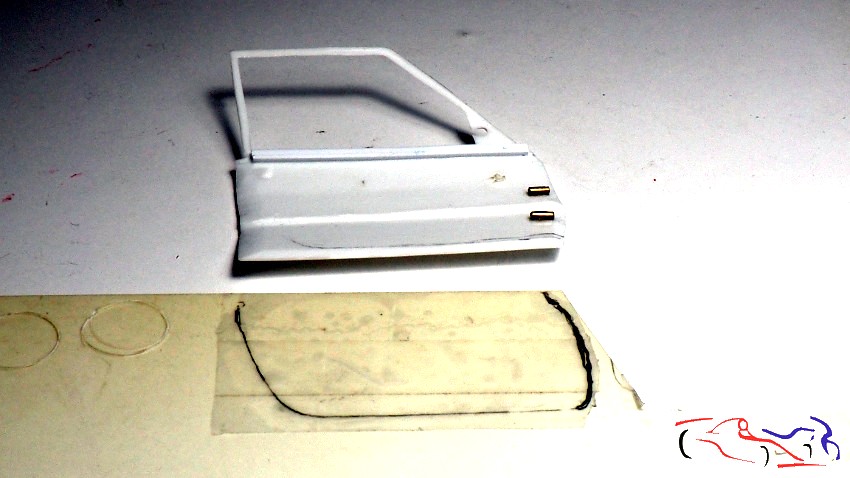
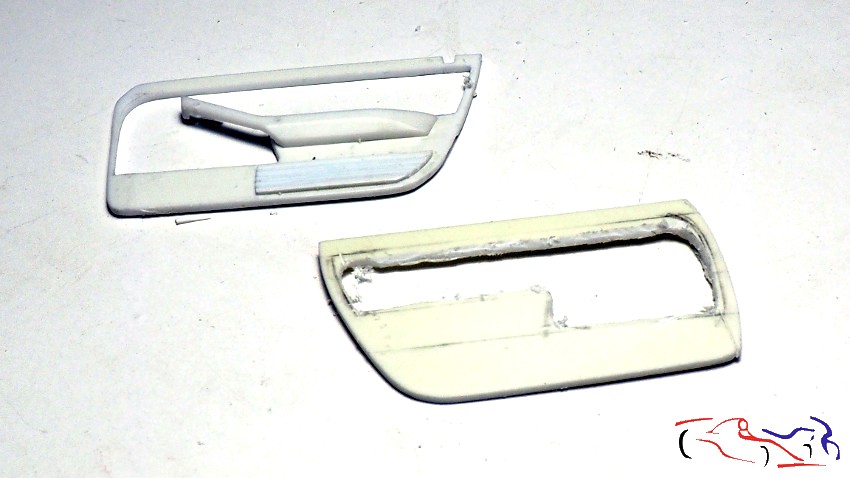
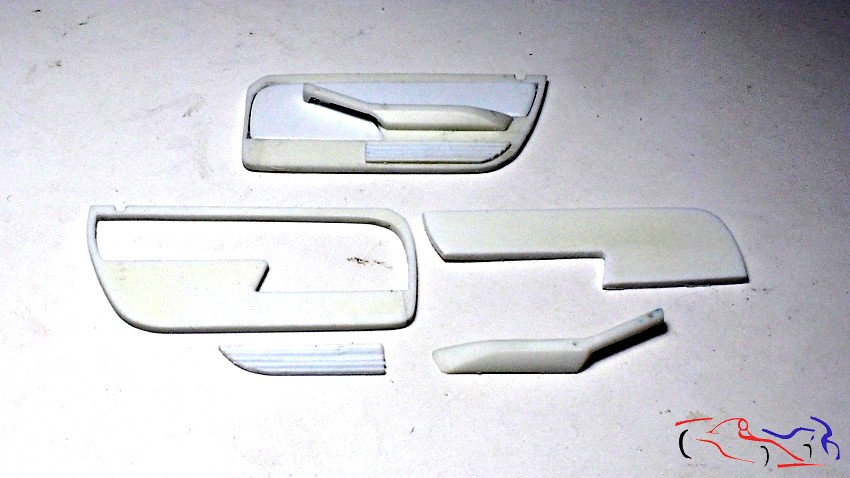
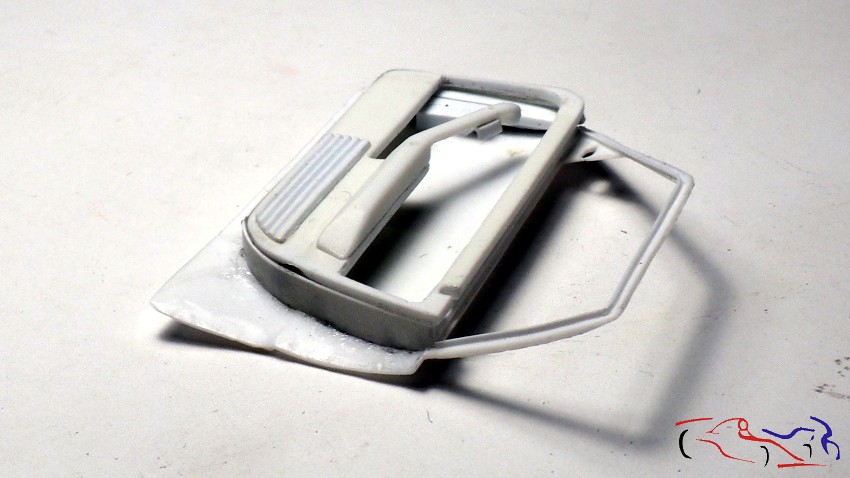
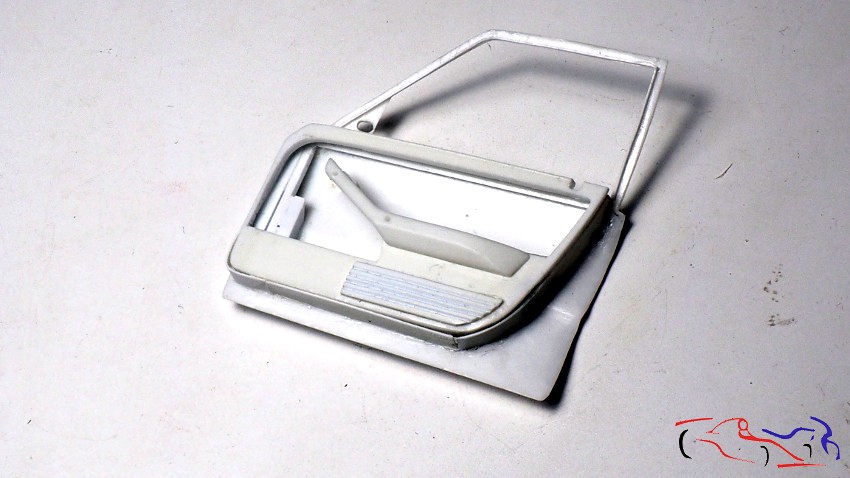
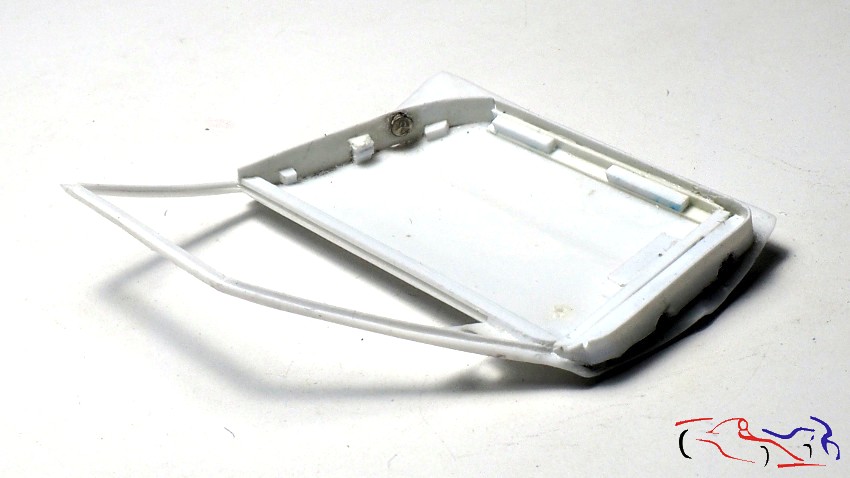
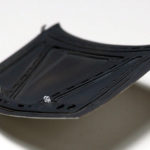
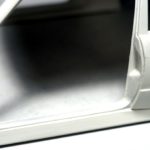
Ahora es el turno de los interiores de las puertas: e la primera foto, el interior original delantero. A la derecha el mofificado. Y en las dos siguientes fotos, su situación en la puerta
Now it’s the turn of the door interiors: in the first picture, the original front interior. On the right, the modified one. And in the next two photos, its position on the door.
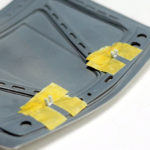
Y como se hace ese interior? Partimos de la puerta, a la que colocamos cinta adhesiva. Colocamos la puerta en su lugar, y dibujamos el hueco de la puerta desde el interior de la carrocería. Retiramos la puerta y la cinta adhesiva, poniéndola en un trozo de plástico. Recortamos por la marca pintada, retiramos la cinta adhesiva, y ya tenemos el panel interior. Deberemos rebajar tod el contorno ya que irá una tira de plastico muy fino por todo el alrededor, ya que el guarnecido va en negro, y los laterales en blanco, y asi se pinta mejor, todo separado!
And how is this interior made? We start from the door, to which we put adhesive tape. We put the door in place, and draw the door opening from the inside of the body. Remove the door and the masking tape and place it on a piece of plastic. Cut out the painted mark, remove the masking tape, and we have the inner panel. We will have to cut all the contour as it will be a very thin strip of plastic all around, as the trim goes in black, and the sides in white, and so it is better painted, all separate!

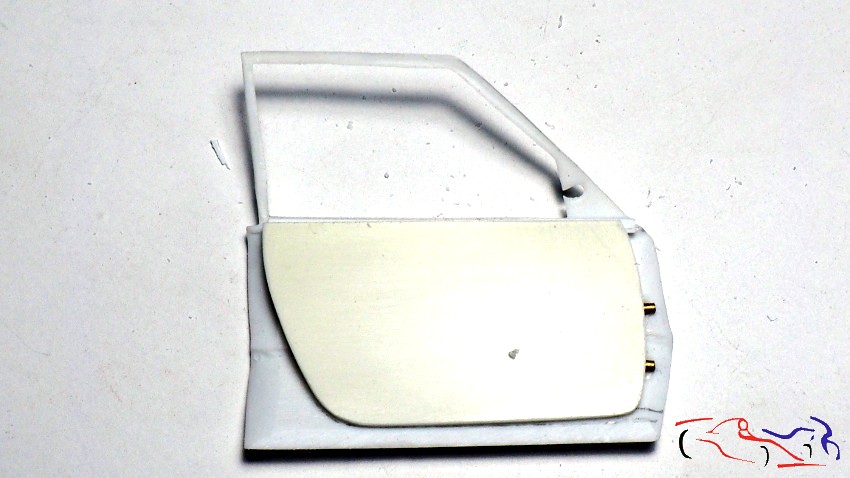
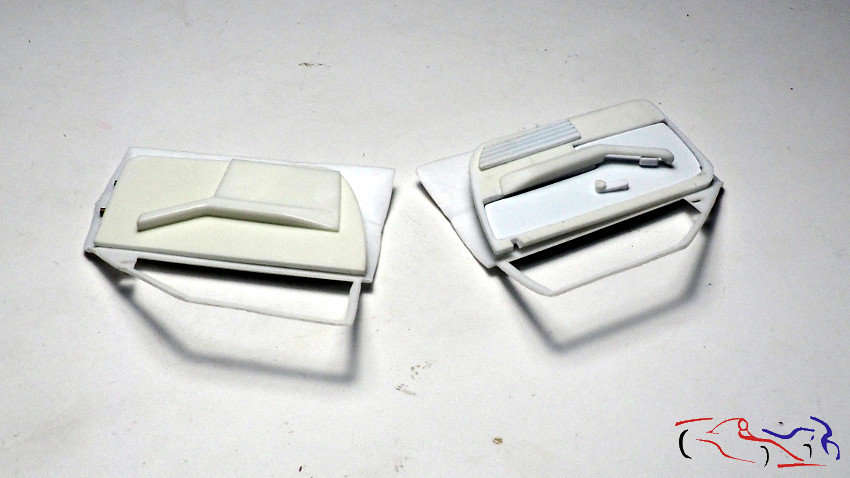
Una vez hecho el contorno, hacemos un hueco. Y sobre el hueco, hacemos una pieza con la misma forma dle hueco según las imágenes de la época, porque esa parte va pintada como si fuera terciopelo.. En la parte del contorno, pegamos el resposabrazos y agarradera, y un embellecedor inferior, asi como le hacemos una marca para el pestillo de la puerta
Once the outline is done, we make a hole. And on the hollow, we make a piece with the same shape of the hollow according to the images of the time, because that part is painted as if it were velvet… In the part of the contour, we glue the armrest and handle, and a lower trim, as well as we make a mark for the latch of the door.
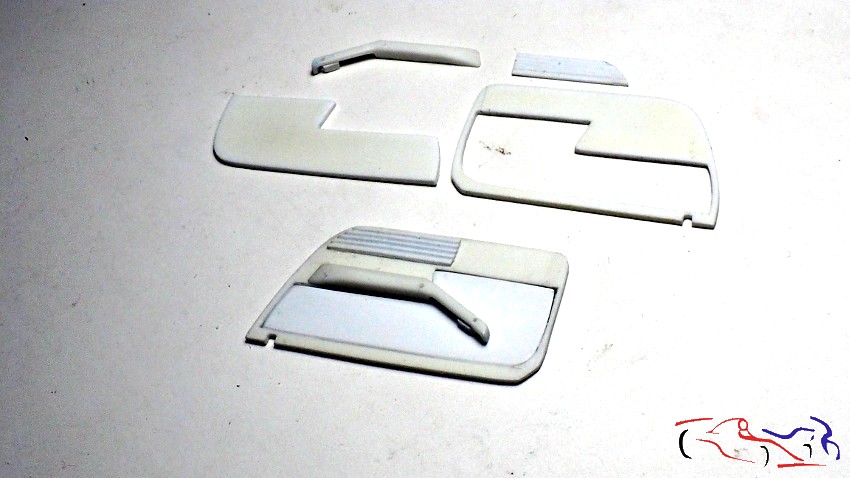
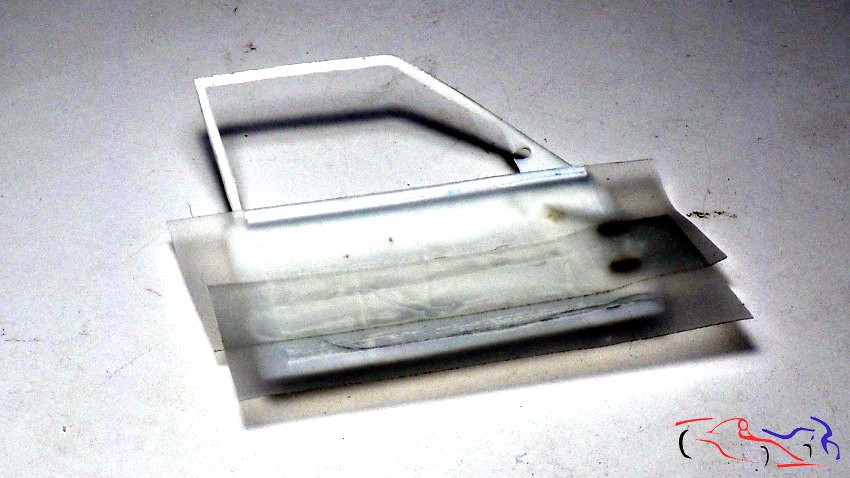
El siguiente paso, es hacer los laterales del interior, sobre una base que descansará lo realizado en el paso anterior. También, le ponemos al marco interior de la puerta, esa tira fina donde irá colocado las tiras negras de plastico que impermeabilizan el interior cuando la puerta está cerrada. Otra incorporación añadida es una ranura en la parte superior del guarnecido, para colocar el cristal y que quede más fijo y real.
The next step is to make the sides of the interior, on a base that will rest what was done in the previous step. Also, we put to the inner frame of the door, that thin strip where will be placed the black plastic strips that waterproof the interior when the door is closed. Another addition is a groove in the upper part of the trim, to place the glass and make it more fixed and real.
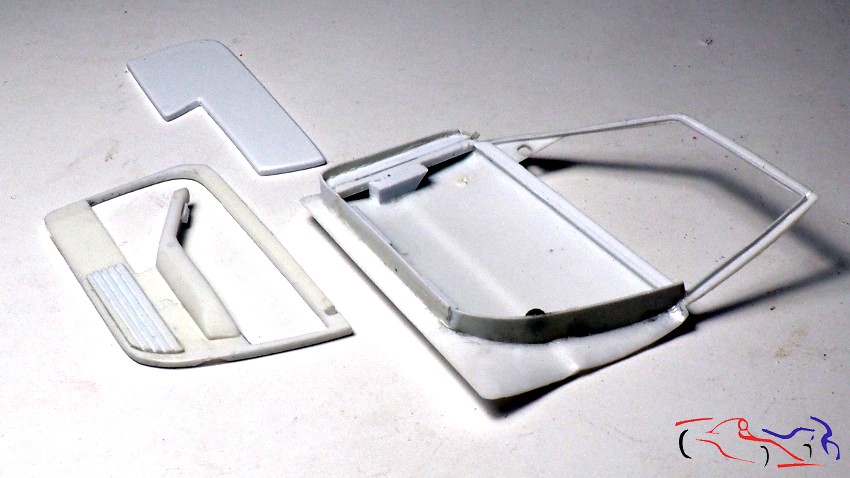
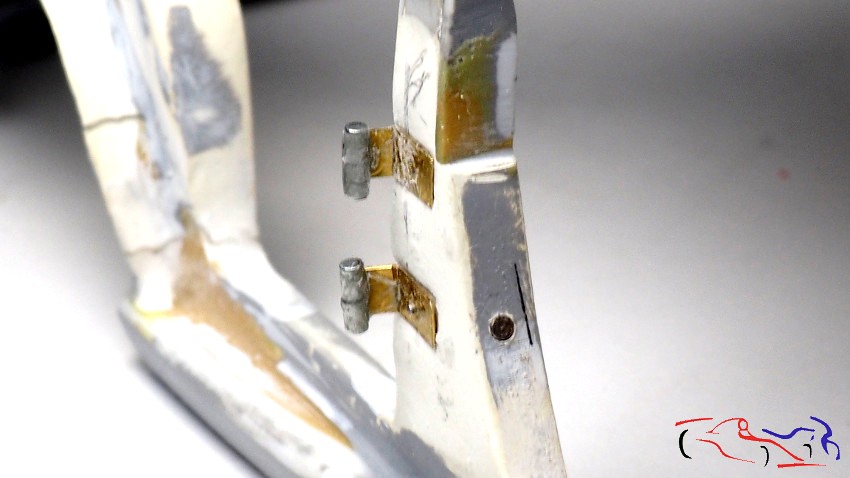
Finalizaremos con la colocación de dos imanes, para que la puerta se quede cerrada y no se abra. Hacemos un agujero en el lateral delantero del pilar centra de la carrocería, de 1 mm de diametro, y colocamos el imán. Ponemos la puerta en su lugar sin el guarnecido, y en el lateral, dejamos caer otro imán, que pegaremos con ciano en el lugar que se quede, atraido por el imán de la carrocería, tal y como puestra la segunda foto.
We will finish with the placement of two magnets, so that the door remains closed and does not open. We make a hole in the front side of the central pillar of the body, 1 mm in diameter, and place the magnet. We put the door in place without the trim, and on the side, we drop another magnet, which will stick with ciano in the place that remains, attracted by the magnet of the body, as shown in the second photo.
Ahora toca enmasillar todo finamente para después imprimar. Ha sido un proceso largo y tedioso porque hay que hacer cuatro puertas, y cada una con su medidas correspondientes. Gracias por ver y comentar.
Now it’s time to putty everything finely and then prime it. It has been a long and tedious process because four doors have to be made, and each one with its corresponding measurements. Thanks for watching and commenting.

hola Jesus, top trabajo y mucha paciencia como siempre.. saludo desde Marbella 😉
Thanks Gregory!!
Impressive technique and idea to build a hinge with magnets. Soon I have to open a BMW 2002 and build hinges. Will consider your technique. The whole work looks spectacular. You are a master in my eyes.
Thanks a lot!! If you need something from my side, please, let me know and we can work together!!