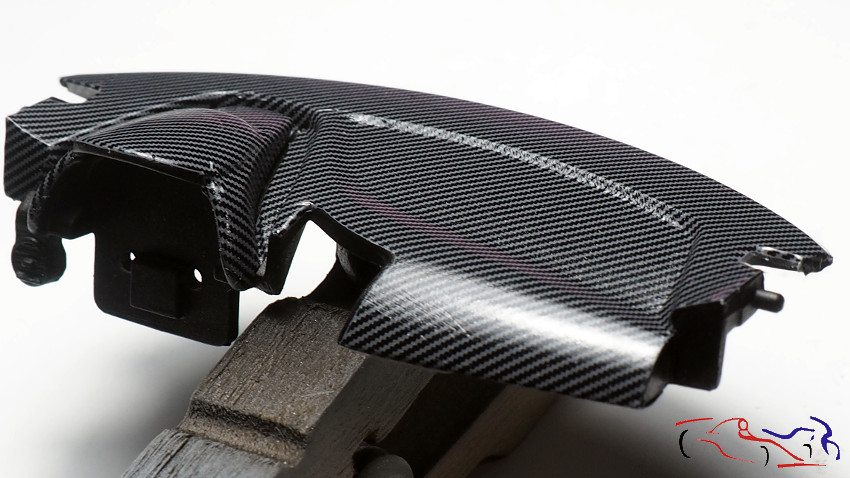
En esta actualización voy a hablar solo de calcas: de las del kit, de las de fibra de la hoja de calcas de Racing43, de las de fibra que he recortado yo, y de las de LB Production de la carrocería. En total han sido unas 5 tardes que he pasado colocando casi todo el tema de las calcas. Y empezamos con las de fibra: En las siguientes fotos, os muetro algunas piezas que no he tenido que tocar, y que venian en la hoja de calcas de Racing43. Decir que son un poco duras, para lo que los liquidos micro y el secador de pelo, son unos utiles muy necesarios. También he encontrado que algunas calcas no encajan bien en las piezas. La terminación será en satinado ya que ese acabado me gusta más, excepto en el asiento, que lo voy a lacar, y después de hacerlo, haré una máscara para pintar la parte delantera. Y este es el resultado:
In this update I’m going to talk only about decals: the ones from the kit, the fibre ones from the Racing43 decal sheet, the fibre ones I cut myself, and the LB Production decals from the bodywork. In total I have spent about 5 afternoons fitting almost all the decals. And we start with the fiber: In the following pictures, I show you some pieces that I have not had to touch, and that came in the Racing43 decals sheet. I have to say that they are a bit hard, so the micro liquids and the hair dryer are very necessary tools. I have also found that some decals do not fit well on the parts. The finish will be satin as I like that finish better, except for the seat, which I’m going to lacquer, and after doing it, I’ll make a mask to paint the front part. And this is the result:

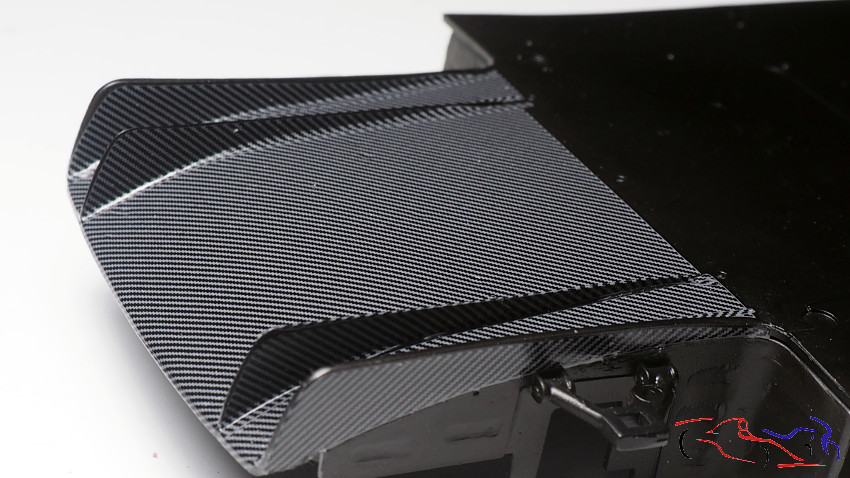
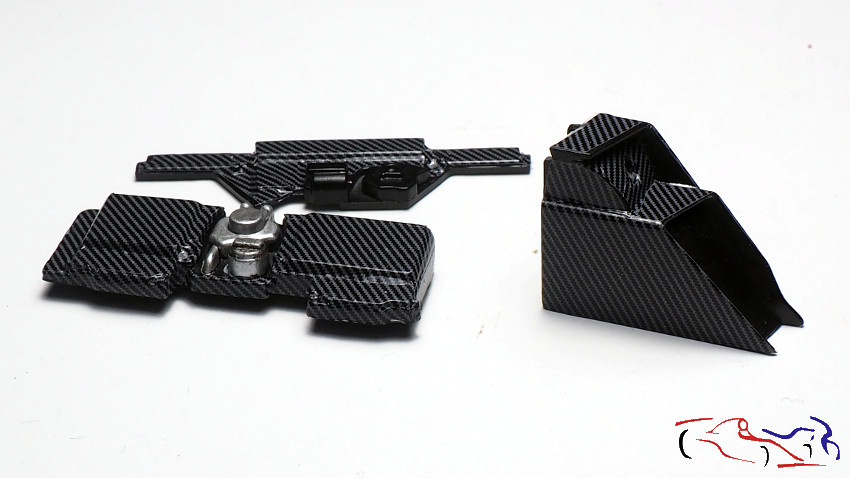
Vamos ahora con piezas donde yo he creado las calcas, porque no venían en la hoja. La primera es la pieza de la izquierda, en la foto de la izquierda. Esa pieza tenía calcas para las partes superiores, estando los alterales sin ella. por tanto, hice patrones con cinta de enmascarar, los pasé a la hoja de calcas y las recorté. La fibra era la misma que la de fRacing43 pero en la hoja venían dos recuadros que usé para recortar las mias. Sin embargo, en la foto de la derecha, la fibra que use era de TMF, ya descatalogada, siguiendo el mismo proceso.
Let’s go now to the pieces where I have created the decals, because they were not included in the sheet. The first one is the piece on the left, in the photo on the left. That piece had decals for the upper parts, being the alterals without it. Therefore, I made patterns with masking tape, transferred them to the decal sheet and cut them out. The fibre was the same as fRacing43’s but on the sheet there were two squares that I used to cut out my own. However, in the photo on the right, the fibre I used was from TMF, already discontinued, following the same process.
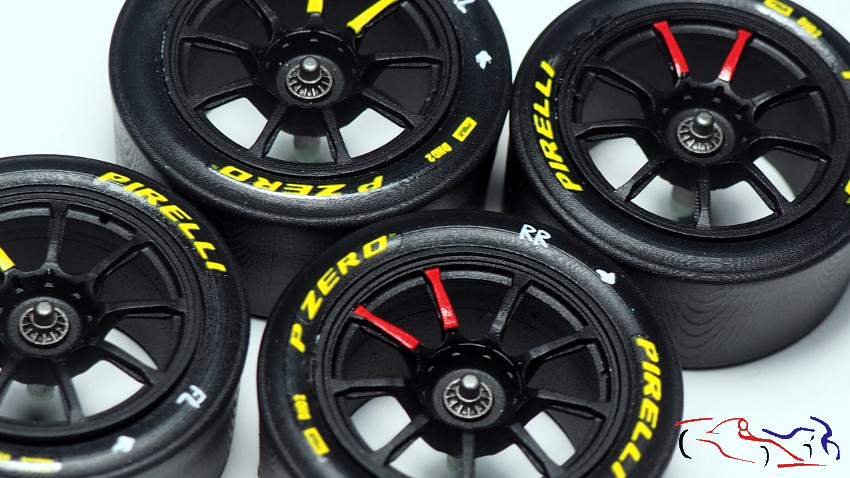
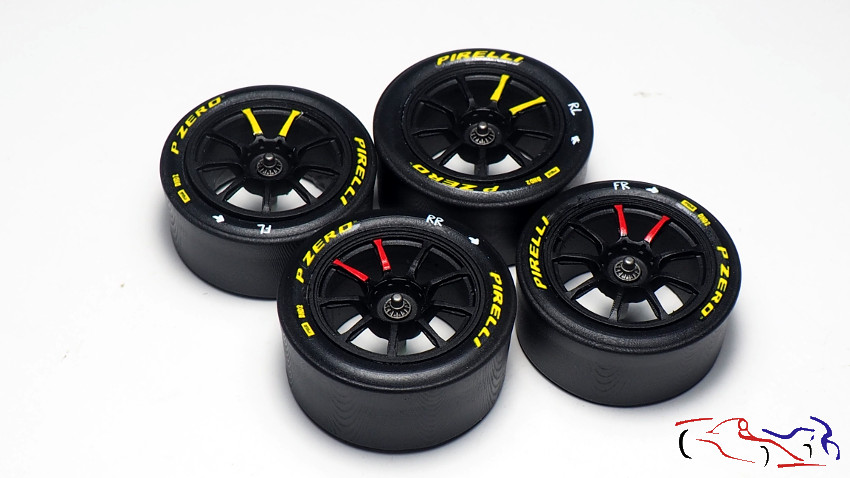
Pasamos a las ruedas, y coloco las calcas de LB Production: hay que diferenciar las derechas (con las dos barras rojas en los radios) y las del lado izquierdo (con las dos barras amarillas). Además, añadí las calcas del sentido de marcha (la flecha blanca) y de la posición de las mismas, es decir, F – Front, R – Rear, L – left, R – Rigth, que van de dos en dos, es decir, FR & RR para las del lado derecho, y FL & RL, para las del izquierdo. Estas calcas blancas son de Decalcas.
We move on to the wheels, and I put the LB Production decals: we have to differentiate between the right-hand ones (with the two red bars on the spokes) and the left-hand ones (with the two yellow bars). I also added the decals for the direction of travel (the white arrow) and their position, i.e. F – Front, R – Rear, L – left, R – Right, which go in pairs, i.e. FR & RR for the right side, and FL & RL, for the left side. These white decals are from Decalcas.

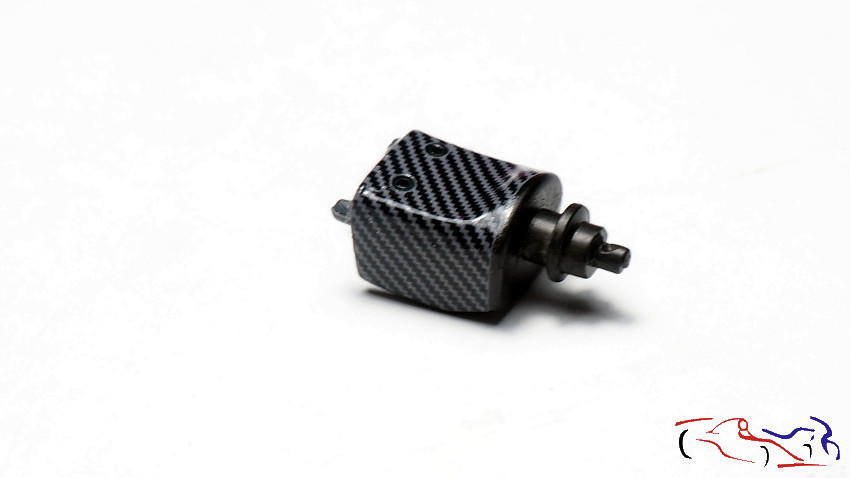
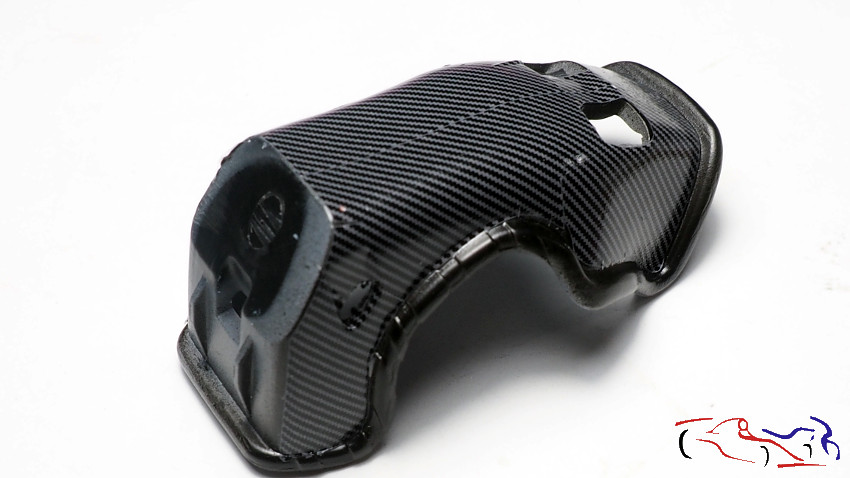
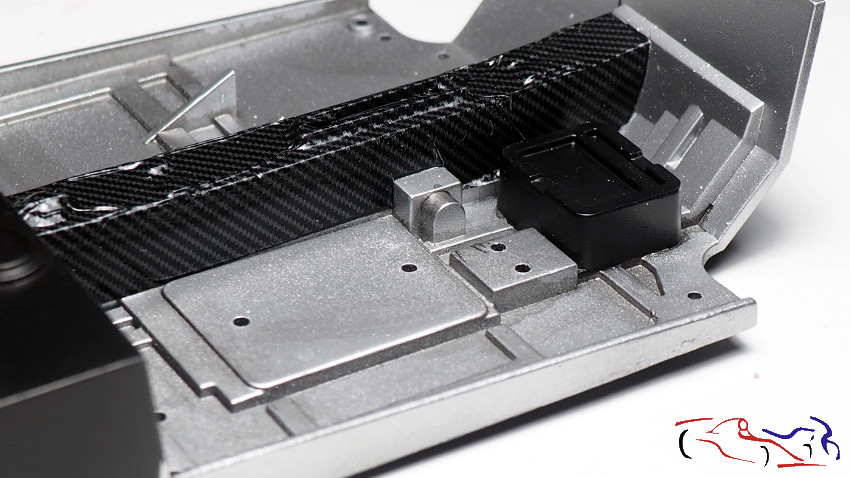
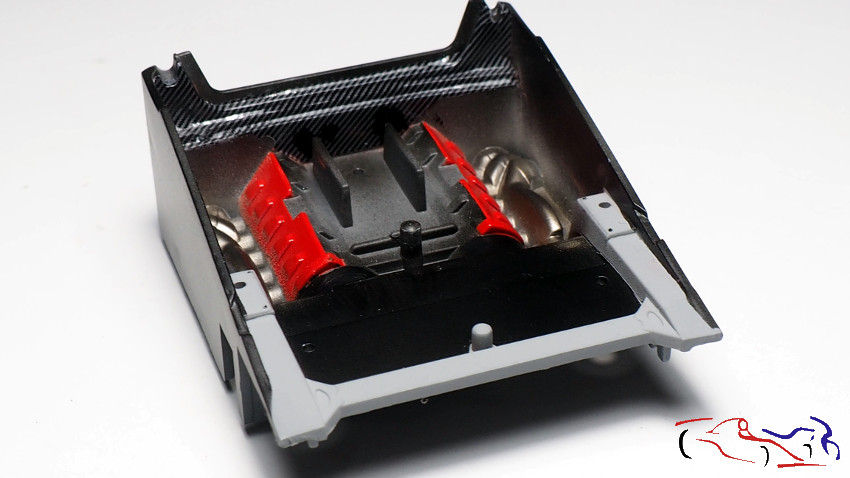
A continuación, os muestro la caja donde va el motor, que va hecha de fibra, pero no en la hoja de calcas, no están las calcas de todo los lados. De hecho, faltan dos que se ven bastante: una es la parte donde se ve ahora fibra (esa calca la recorté yo), y la de la parte inferior negra, por delante del vástago que aparece en la parte de abajo. Deciros que no siempre se acierta, y que la fibra existente la pusse antes de pintar, y al enmascarar, la máscara se llevó parte de la que habia puesto, en los laterales de ese panel. Pero cosrte otras y las puse. Cuando tenga una foto de todo, os la enseño.
Next, I show you the box where the engine goes, which is made of fibre, but not on the decal sheet, the decals are not on all the sides. In fact, there are two missing decals that are quite visible: one is the part where the fibre is now visible (I cut that decal myself), and the one on the lower black part, in front of the piston rod that appears at the bottom. I have to tell you that you don’t always get it right, and that I put the existing fibre before painting, and when masking, the mask took part of the one I had put, on the sides of that panel. But I sewed others and put them on. When I have a photo of everything, I’ll show it to you.
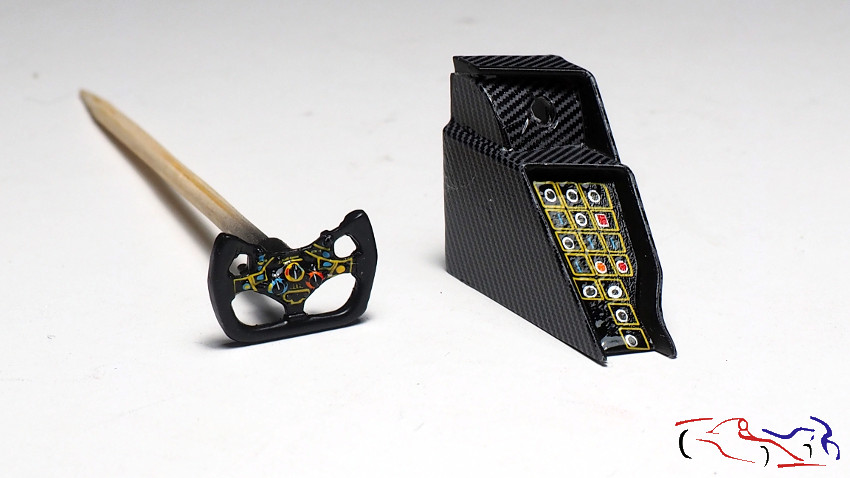
Y como no, en el cokpit tenemos el volante, con sus muchos botones de colores, y la consola de los controles. Para el volante, tuve que aplicar pmucho líquido y presión, para que se adaptara a todas las formas prominentes que tenía.
And of course, in the cokpit we have the steering wheel, with its many coloured buttons, and the control console. For the steering wheel, I had to apply a lot of liquid and pressure, so that it would adapt to all the prominent shapes it had.
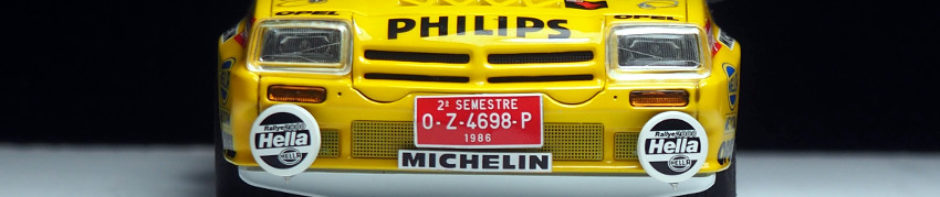
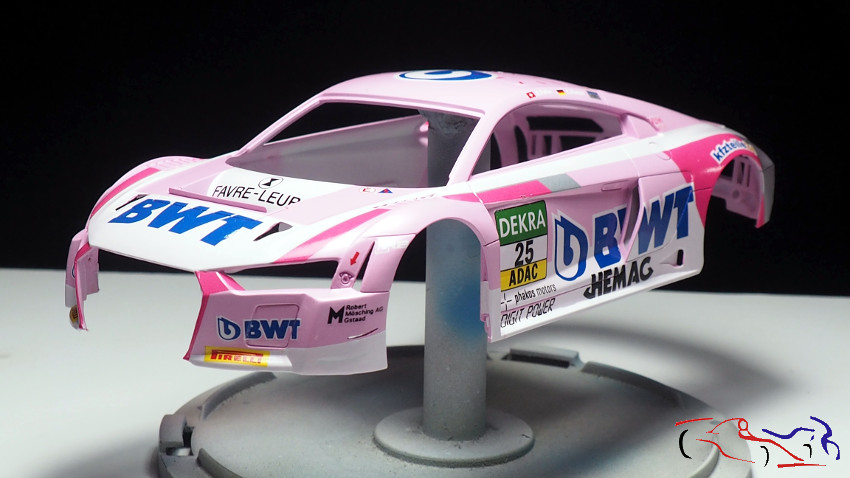
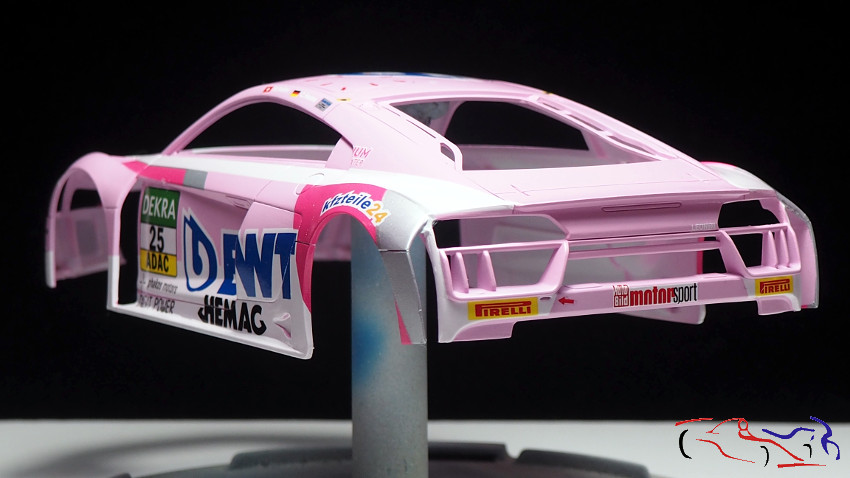
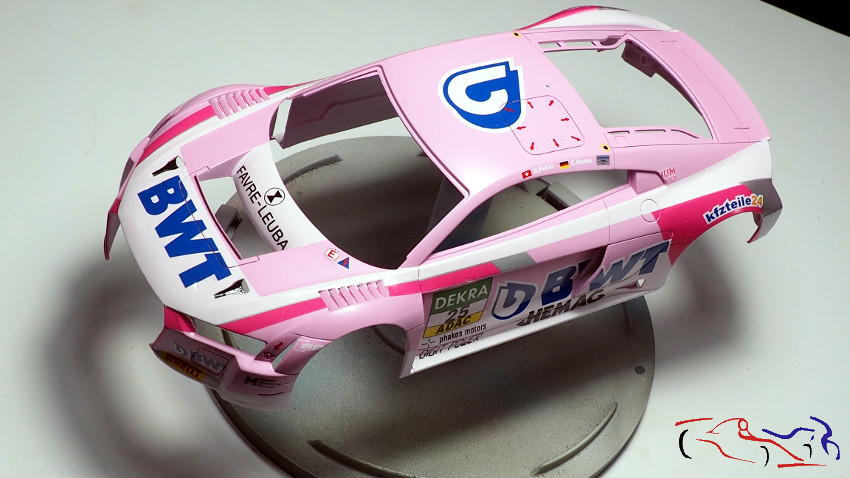
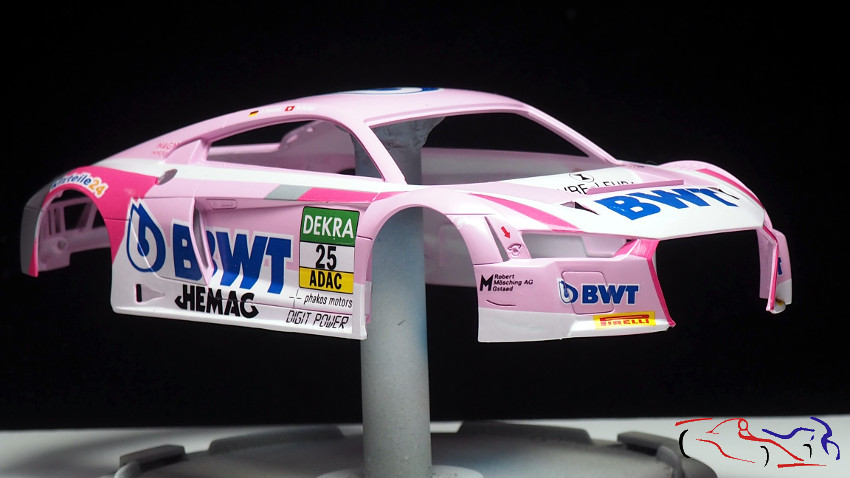
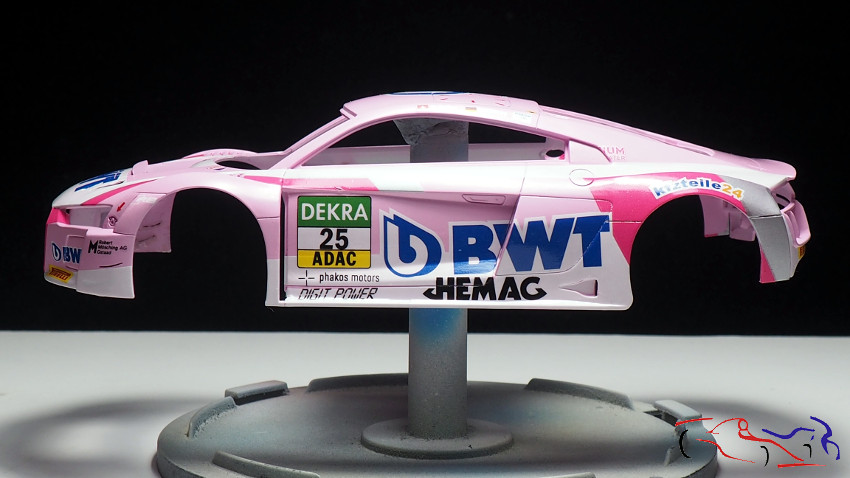
Y para teminar, las fotos de la carrocería. La hoja lleva calcas para poner todos los colores menos el rosa de la base, o llso logos por separado si quieres pintar el blanco, rosa fuerte y gris, además del rosa d ela base. Yo elegí las calcas, y para ello, hay unas que tienes que poner antes de otras, porque van debajo. Usé los liquidos Micro y el secador. Estas calcas son muy finas, y se adpatan y trabajan muy bien!!
And to finish, the photos of the bodywork. The sheet has decals to put all the colours except the pink of the base, or the logos separately if you want to paint the white, hot pink and grey, in addition to the pink of the base. I chose the decals, and for this, there are some that you have to put before others, because they go underneath. I used the Micro liquids and the hairdryer. These decals are very thin, and they adapt and work very well!.
Y esto es todo por hoy. Gracias por ver y comentar!!
And that’s all for today. Thanks for watching and commenting!


