Continuamos con el Lancia, en una etapa sin mucho color ya que el trabajo con cutter, lijas, limas, pegamentos, masillas e imprimaciones, lo máximo que podemos tener es el gris de la imprimación o el amarillo de las masillas!! Pero se intenta que se ven bien los cambios realizados y las piezas modificadas o nuevas.
We continue with the Lancia, in a stage without much colour because the work with cutter, sandpaper, files, glues, putties and primers, the maximum we can have is the grey of the primer or the yellow of the putties! But we try to make the changes made and the modified or new parts look good.
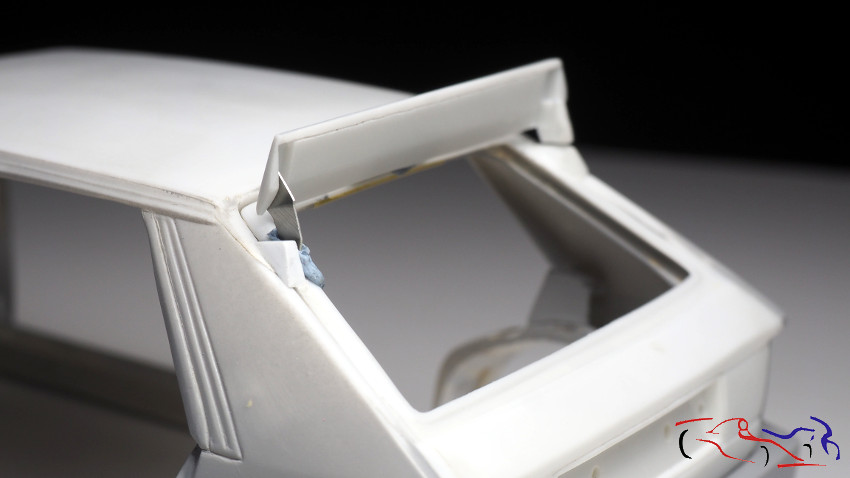
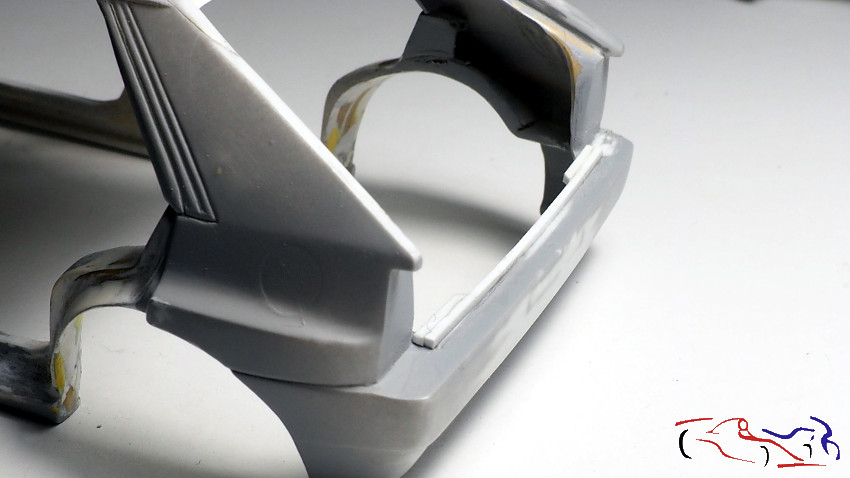
En esta entrada, vamos a trabajar con la parte trasera de la carrocería. Y empezamos con el alerón superior trasero, que lleva el portón. En la siguiente foto, veis la unión original en la parte derecha, y la modificada a la izquierda. Decir que la base triangular del portón se ha rehecho, asi como la fijación propia del alerón, realizada en metal:
In this entry, we are going to work with the rear of the bodywork. And we start with the upper rear spoiler, which carries the tailgate. In the following picture, you can see the original joint on the right side, and the modified one on the left. The triangular base of the tailgate has been redone, as well as the metal fixing of the spoiler itself:
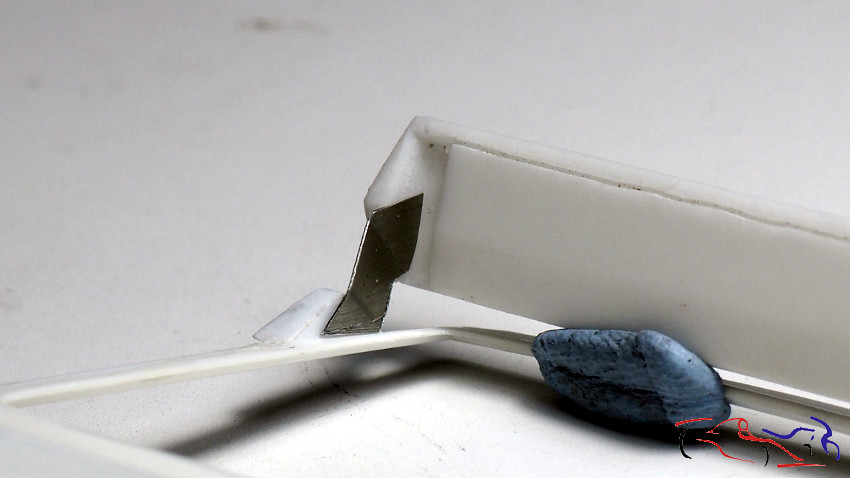
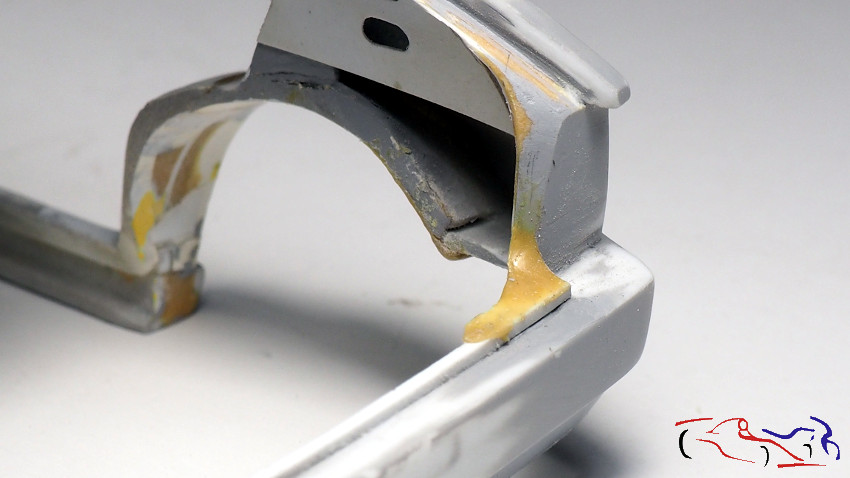
Aquí vemos como la pieza de metal unirá el alerón con el portón. Aun hay que retocar esta parte!!
Here we can see how the metal piece will join the spoiler to the tailgate. This part still needs some work!
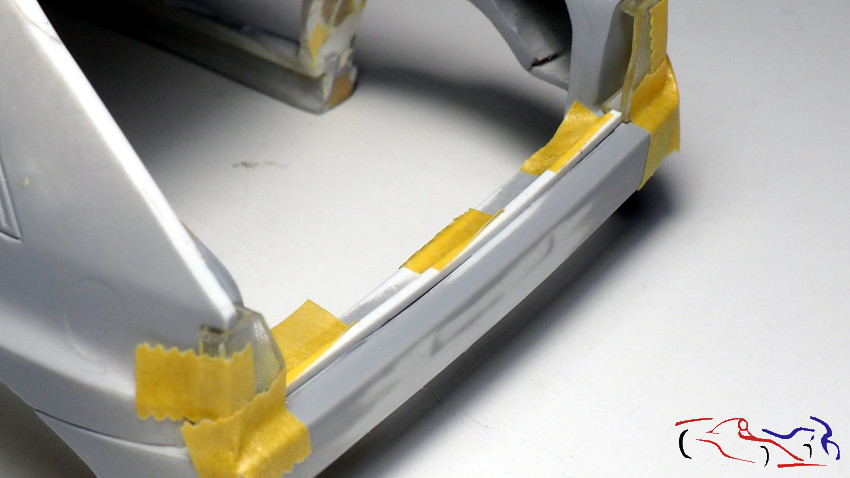
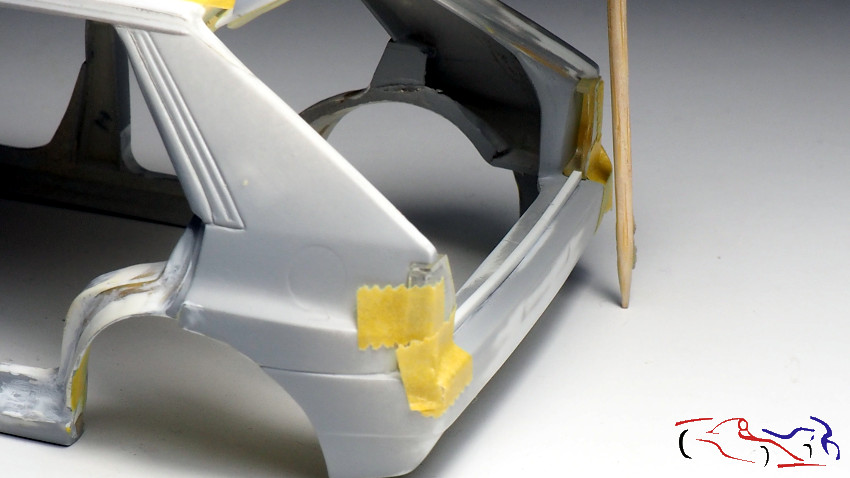
Y siguiendo con la carrocería, el portón se apoya sobre una guía que recorre toda la base, con una ligera curvatura. Cogemos un listón cuadrado, lo cortamos y lo fijamos con cinta para darle la curvatura necesaria. En ese punto, le ponemos una gota del pegamento Extra-thin de Tamiya, en la parte exterior de la unión, donde no hay cinta. Una vez seco, quitamos la cinta y reforzamos la unión con más gotas de pegamento, verificando con el portón y las luces, que todo encaja bien.
And continuing with the bodywork, the tailgate rests on a guide that runs along the entire base, with a slight curvature. We take a square strip, cut it and fix it with tape to give it the necessary curvature. At this point, we put a drop of Tamiya Extra-thin glue on the outside of the joint, where there is no tape. Once dry, remove the tape and reinforce the joint with more drops of glue, checking with the tailgate and lights, that everything fits well.
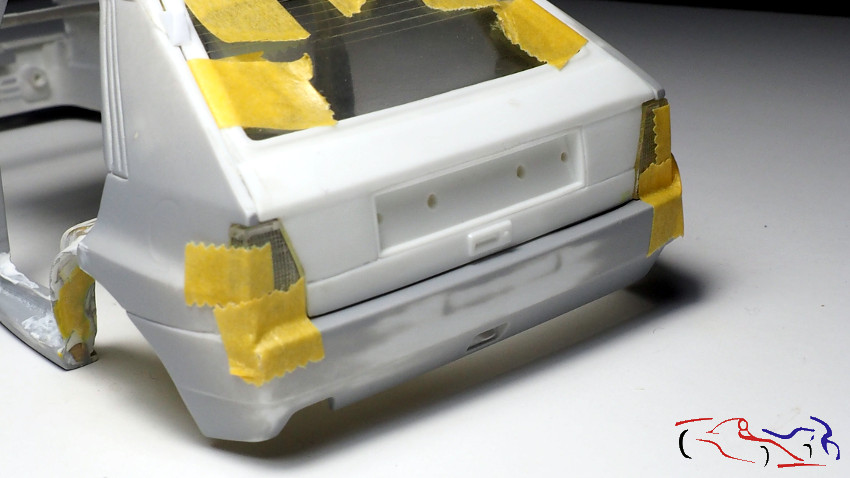
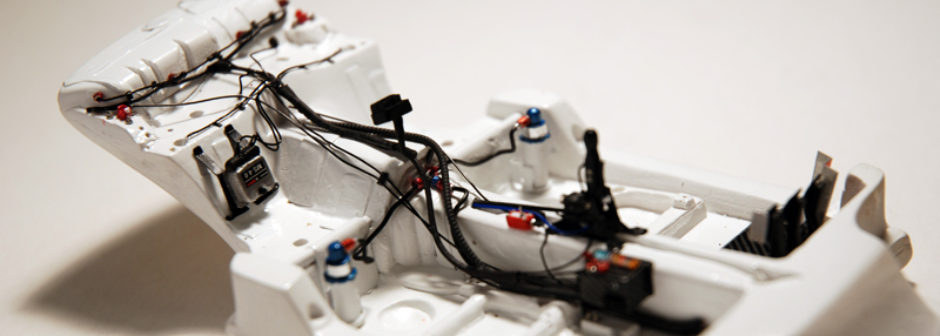
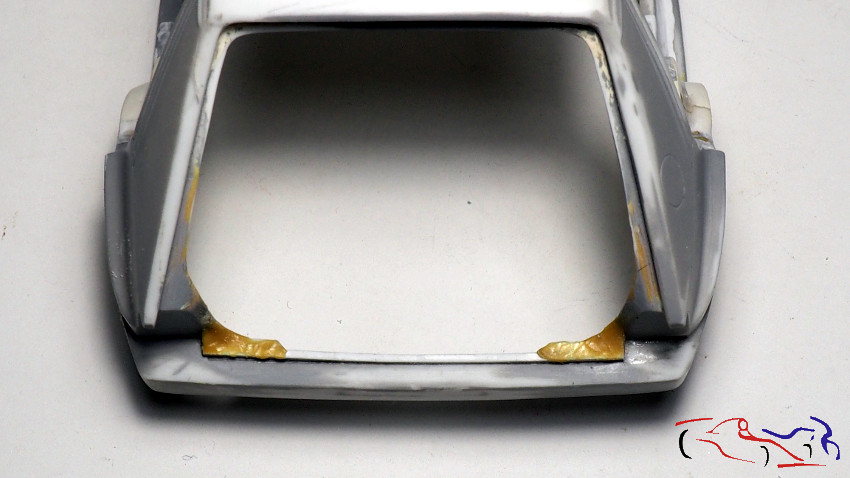
A continuación, añadimos dos listones en los extremos ya que ahí, el ancho aumenta, y le ponemos masilla epoxy Tamiya para dar la forma a la carrocería. Decir que he rebajado estos dos laterales (detrás de los pilotos traseros) de como lo dejé hace cinco años porque me parecían excesivos. En la última foto, vemos como queda con el chasis puesto:
Next, we add two strips at the ends as the width increases there, and we put Tamiya epoxy putty to give the shape to the bodywork. I have lowered these two sides (behind the rear lights) from how I left it five years ago because they seemed excessive. In the last picture, we can see how it looks with the chassis on:
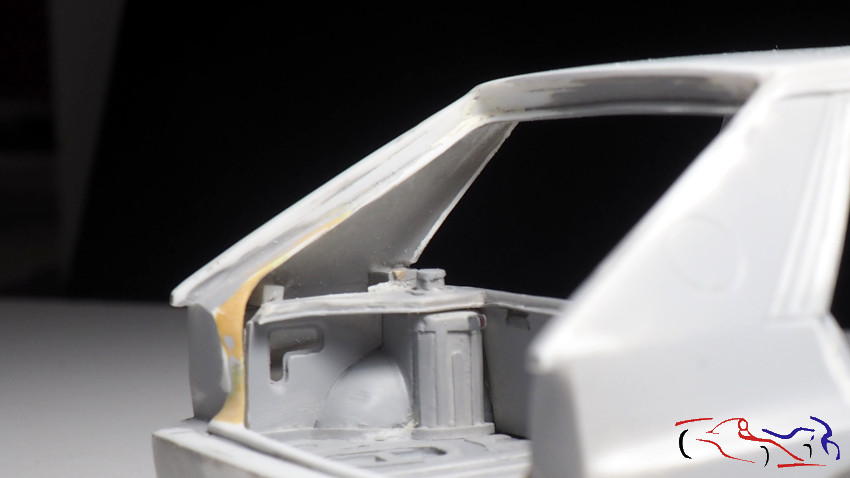
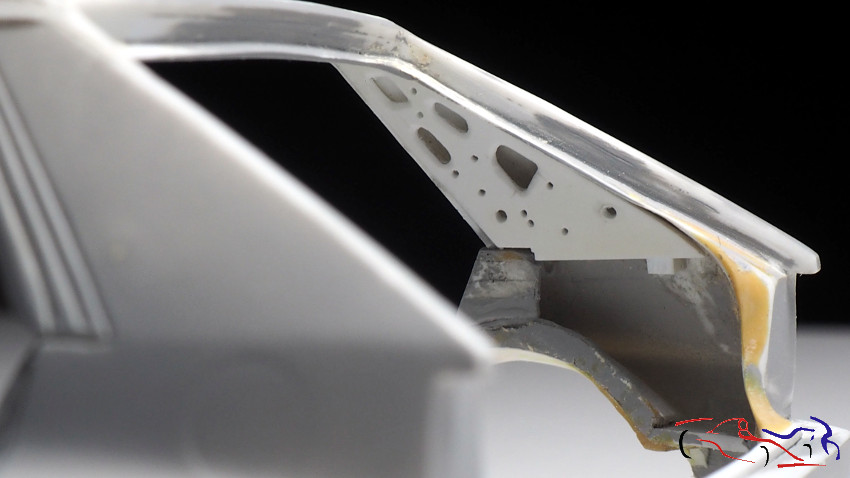
El siguiente paso es rellenar los pilares traseros, tal y como estaban los coches en realidad. No llevaban el guarnecido interior y se veía la chapa de la carrocería, con unos agujeros realizados para disminuir el peso, sin mermar la resistencia. Y después de hacer una plantilla con cartón, dibujé los huecos, los corté, y los pegué en la carrocería en su lugar:
The next step is to fill in the rear pillars, just as the cars were in reality. They didn’t have the interior trim and the body sheet metal was visible, with some holes made to reduce the weight, without reducing the resistance. And after making a template with cardboard, I drew the holes, cut them out, and glued them to the body in place:


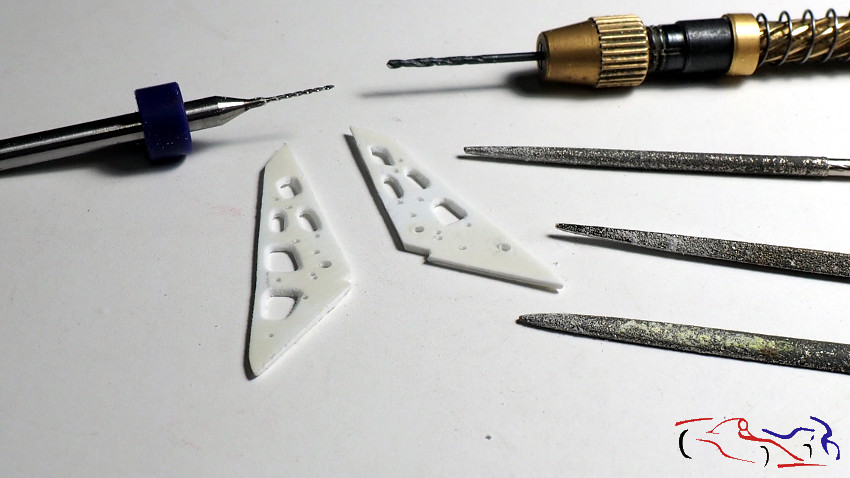
Pero no me gustó el resultado, ya que la lámina era muy fina, y en realidad, se ve que los agujeros tienen relieve, que tiene grosor. Por tanto las despego y hago otras con una lámina más gorda. Y sigo el mismo proceso: pinto los huecos, hago los extremos redondeados con una broca, corto por la tangente de los agujeros, limo, lijo…..Y para terminar, rebajo el canto exterior un poco con limas para darle el efecto deseado de inclinación. Para terminar, le practico unos pequeños agujeros por aquí y allá. Podréis ver, que a la pieza derecha le falta el hueco inferior: esto es debido a que en ese lugar está la toma de combustible. Esta spiezas me llevaron un par de tardes de trabajo!!!
But I didn’t like the result, as the foil was very thin, and in reality, you can see that the holes are embossed, that they are thick. So I peeled them off and made another one with a thicker sheet. And I follow the same process: paint the holes, make the rounded ends with a drill bit, cut along the tangent of the holes, file, sand, sand…..And to finish, I lower the outer edge a little with files to give it the desired sloping effect. To finish, I make a few small holes here and there. You can see that the right piece is missing the lower hole: this is because that’s where the fuel inlet is located. This took me a couple of work afternoons!!!
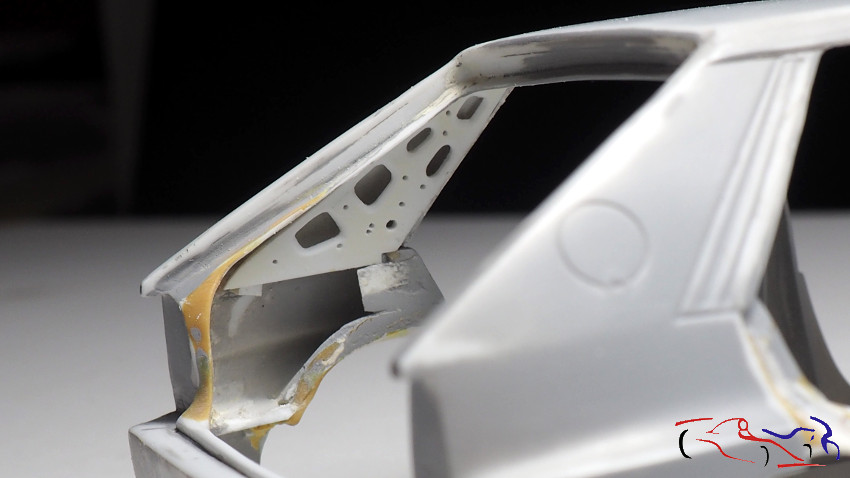
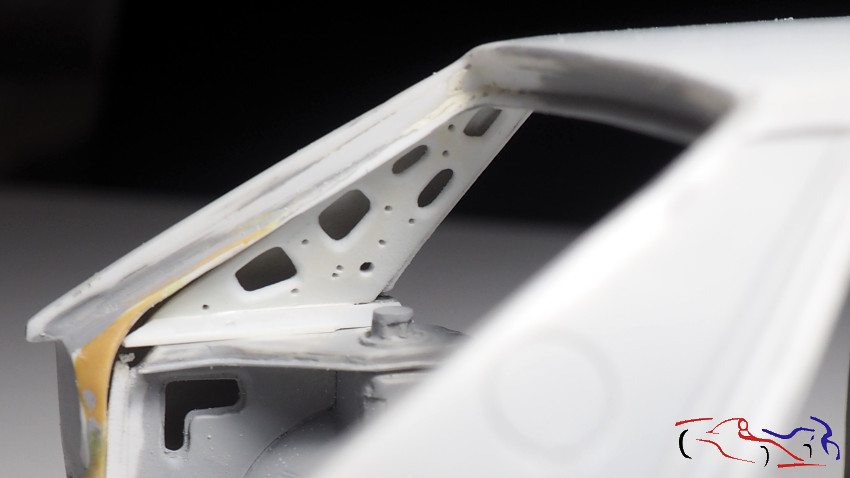
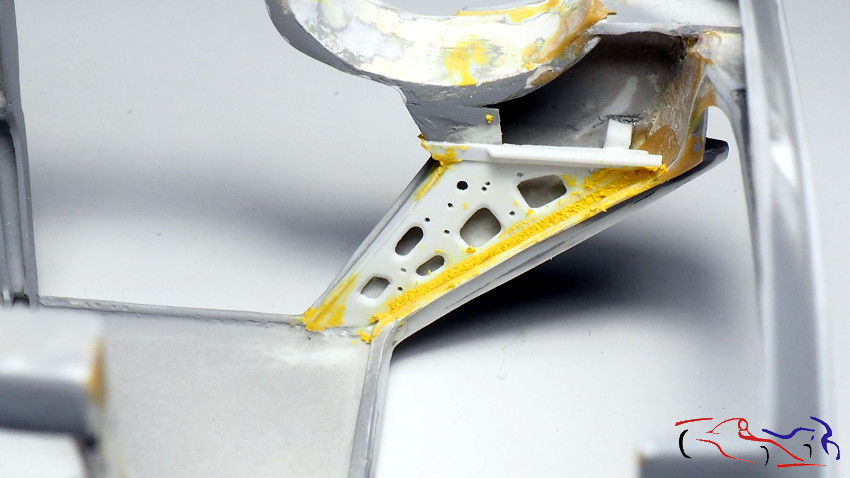
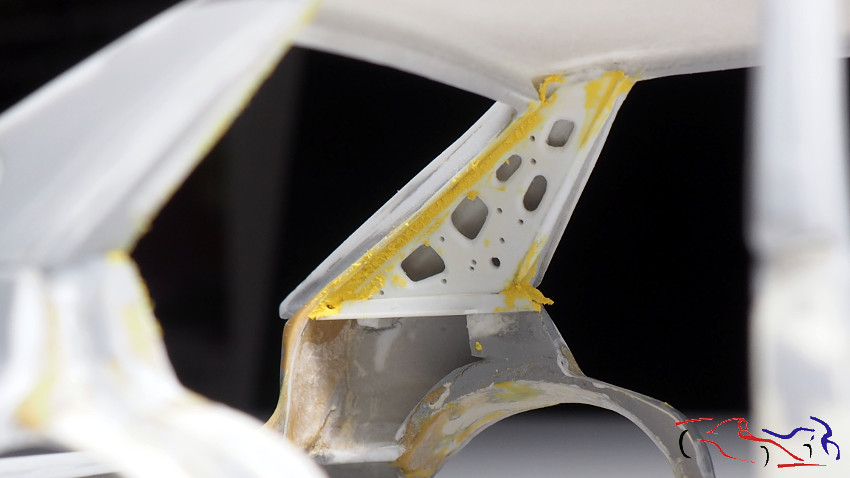
Una vez pegados, vamos a rematarlos. Para ello, cojo una varilla en ángulo, y la pongo en la unión entre la pieza interior del pilar C y la bandeja del maletero. La fijo ocn dos gotitas de Extra-thin de Tamiya, por la parte de la carrocería. Así, esta pieza hará de tope con el chasis. Y por supuesto, relleno los huecos con masilla Tamiya de poliuretano, de dos componentes. Esta masilla es muy fácil de trabajar, sobre todo cuando está seca a las 24 horas de haberse aplicado.
Once they are glued, let’s finish them off. To do this, I take a rod at an angle, and put it in the joint between the inner part of the C-pillar and the boot tray. I fix it with two drops of Tamiya Extra-thin, on the body side. This way, this piece will be the butt with the chassis. And of course, I fill the holes with Tamiya two-component polyurethane putty. This putty is very easy to work with, especially when it is dry 24 hours after being applied.
En la siguiente entrada, estará toda esta parte ya lijada. Gracias por ver y comentar!
In the next post, all this part will be sanded. Thanks for watching and commenting!


