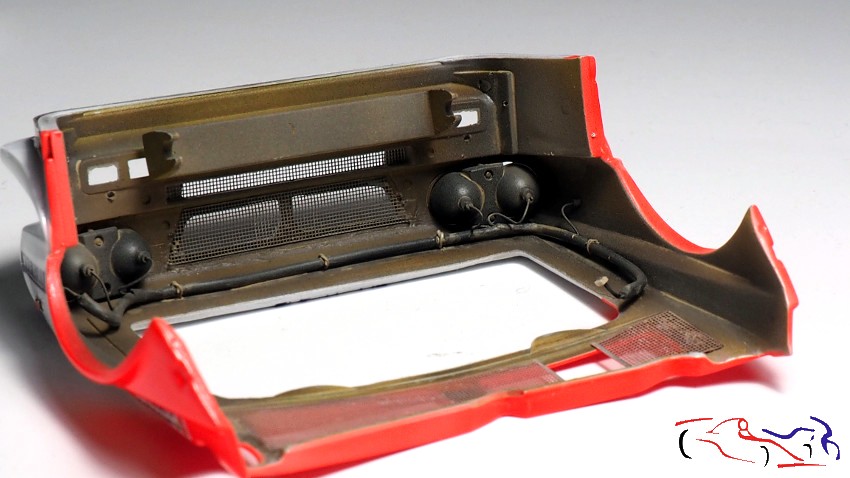
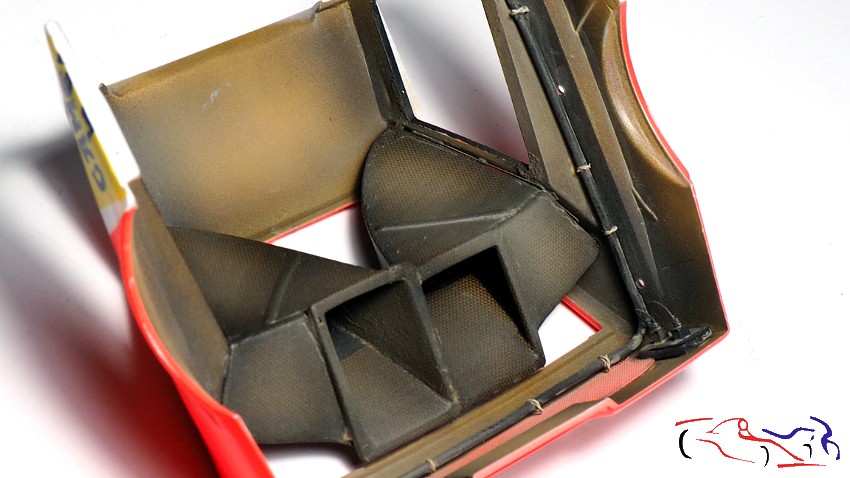
Como comenté en el post anterior, el proyecto va llegando a su fin y los detalles finales aumentan. En este caso, vemos los faros delanteros con sus cristales pegados con el pegamento Ultra Glue de MIG, dedicado a cristales y fotograbados. Buen resultado!!
As I mentioned in the previous post, the project is coming to an end and the final details are increasing. In this case, we can see the headlights with their lenses glued with MIG’s Ultra Glue, dedicated to lenses and photoetched parts. Good result!
Y claro está, que dichos faros llevan los cables que vimos en el post anterior, a colocados y ensuciados con Tamiya XF75, el Ligth Dust Deposits de AK y el Shader Dust de MIG. Los tres son buenos complementos tanto en el capó delantero como en el portón trasero!!
And of course, these headlights are fitted with the wires that we saw in the previous post, which were placed and dirtied with Tamiya XF75, AK’s Light Dust Deposits and MIG’s Shader Dust. All three are good additions to both the front bonnet and tailgate!!!
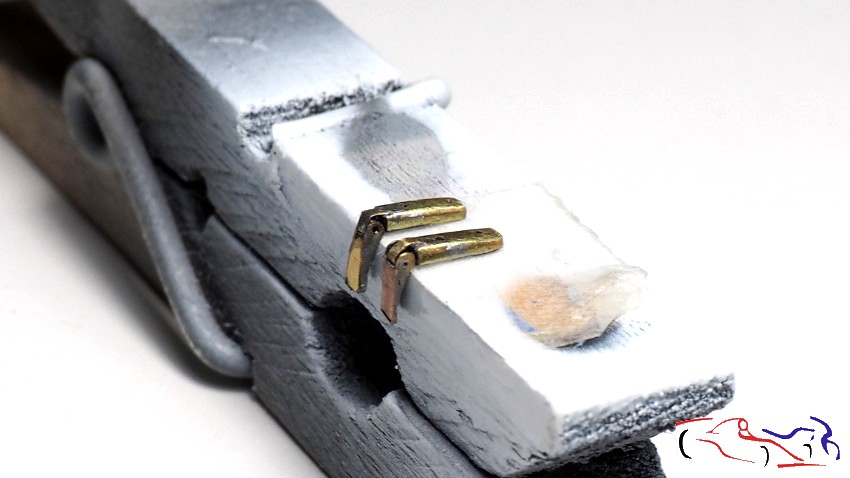
Y como no, ya era hora de pegar la parte central de la carrocería al chasis, utilizando pegamento epoxy de dos componentes, y para fijarla bien, utilicé un sargento previamente protegido en sus pinzas:
And of course, it was time to glue the central part of the body to the chassis, using two-component epoxy glue, and to fix it well, I used a clamp previously protected in its clamps:
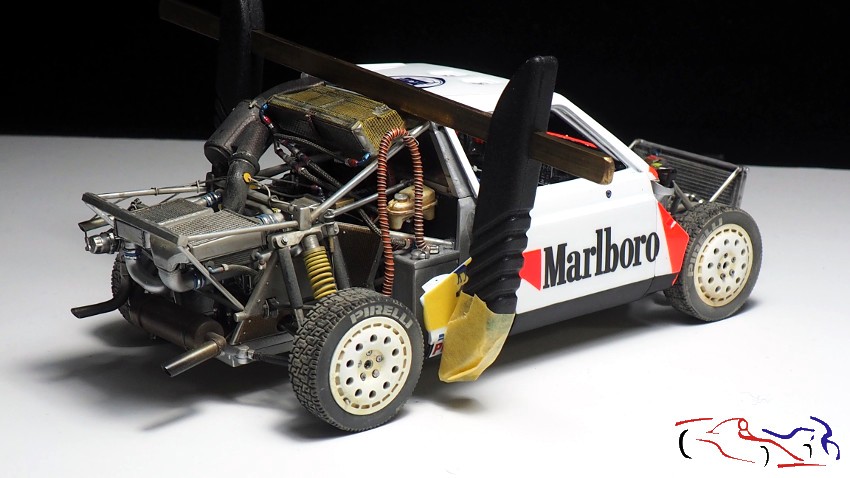
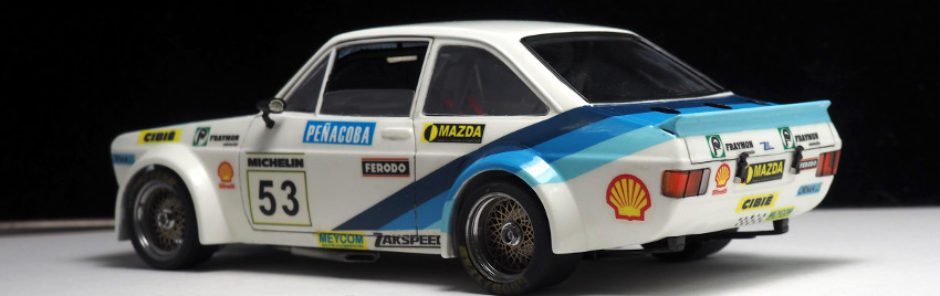
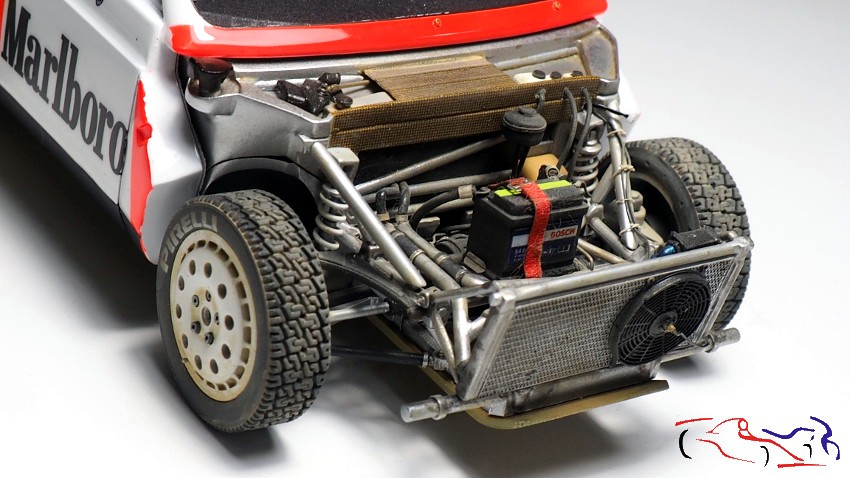
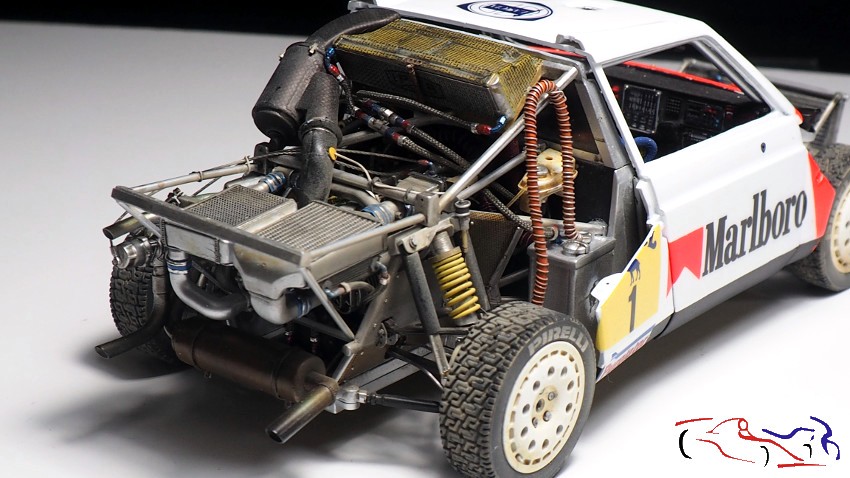
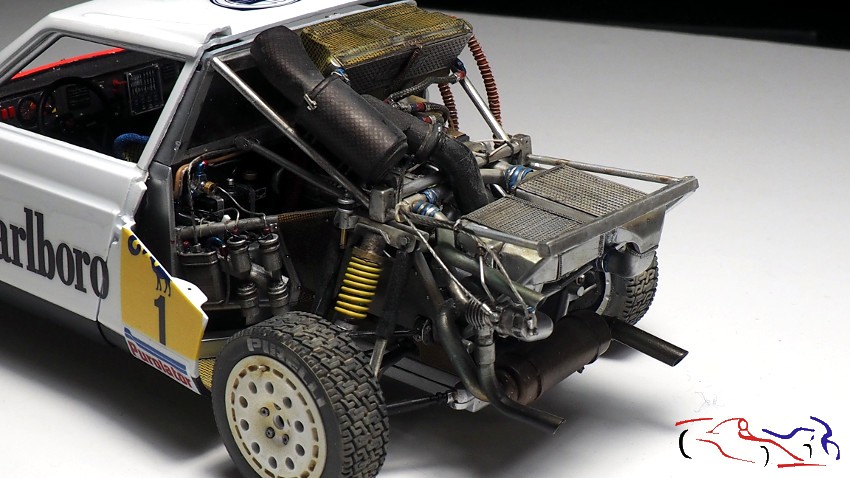
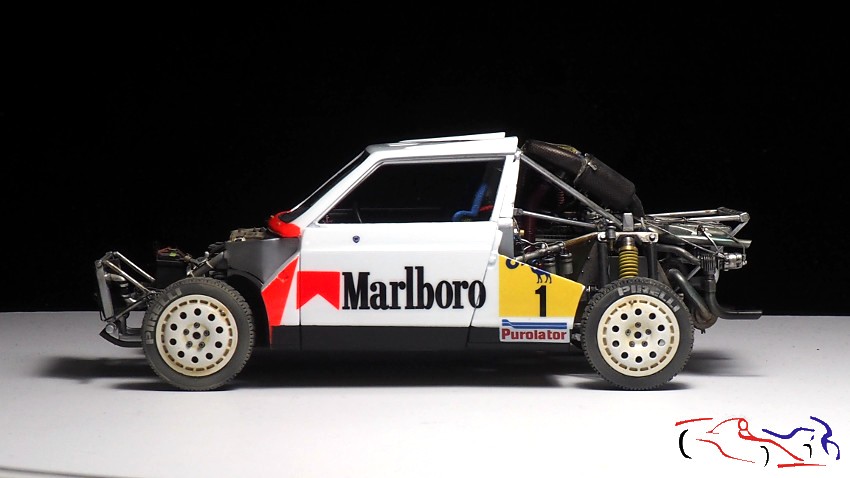
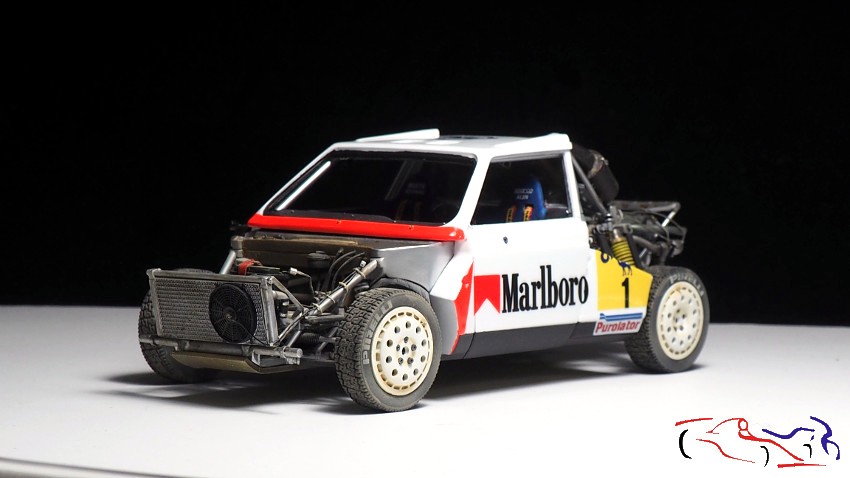
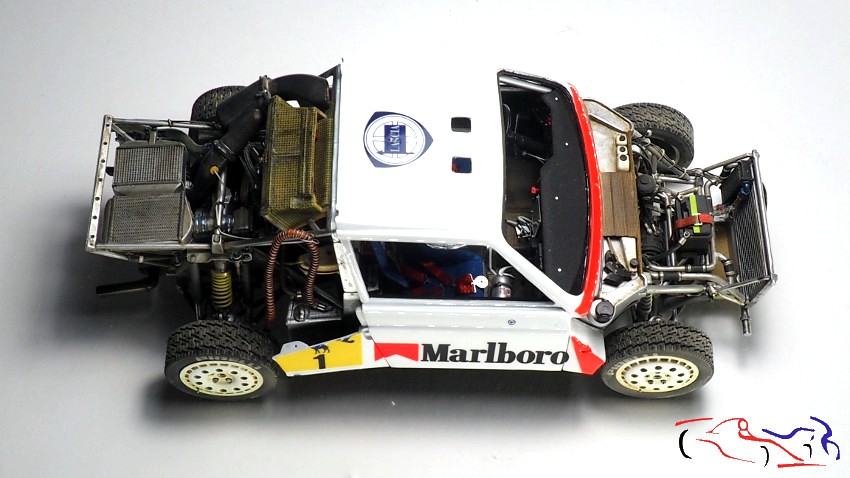
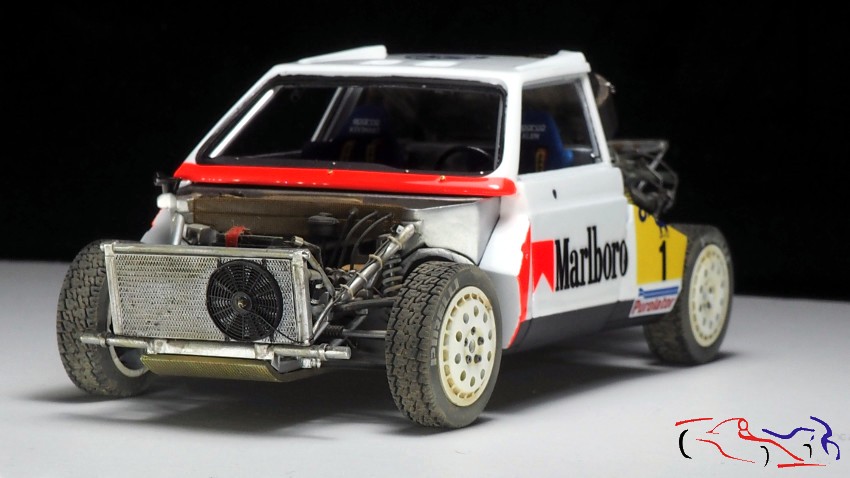
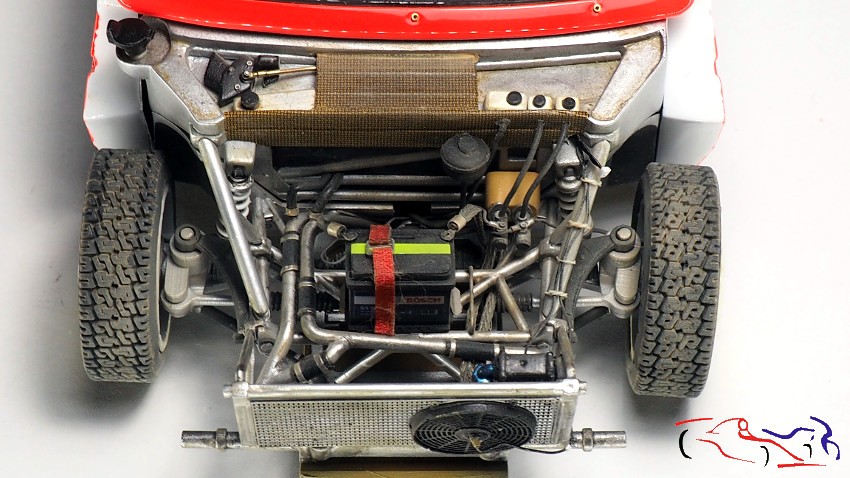
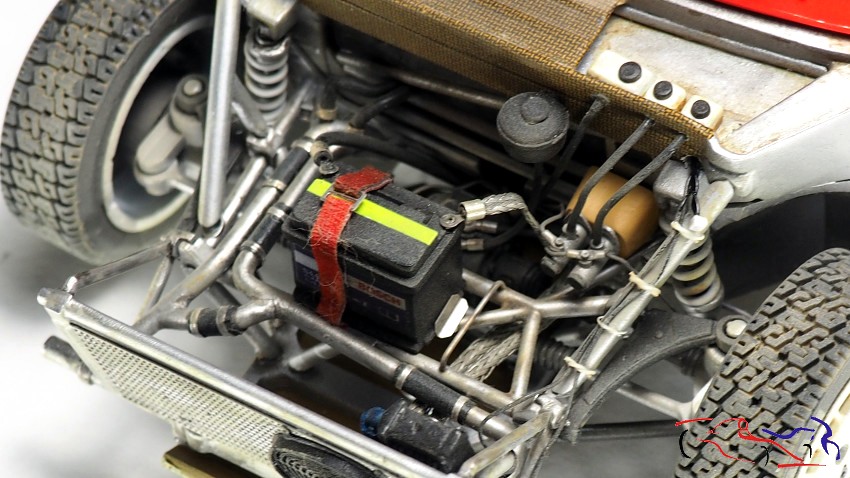
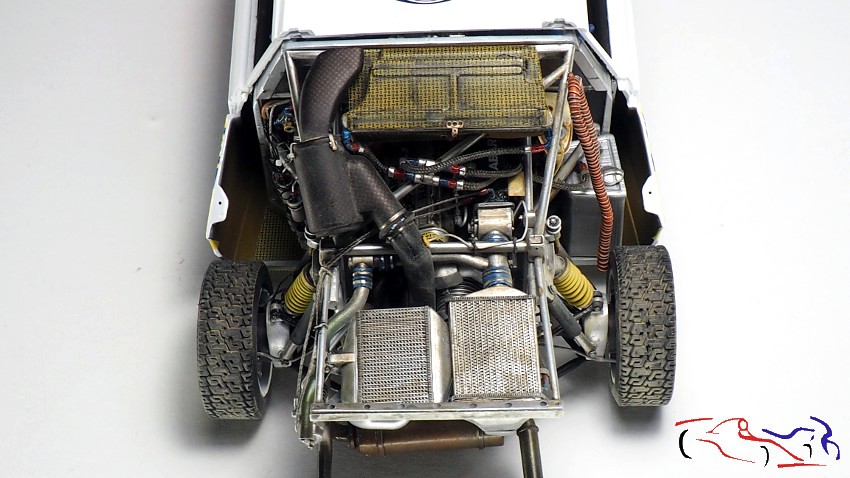
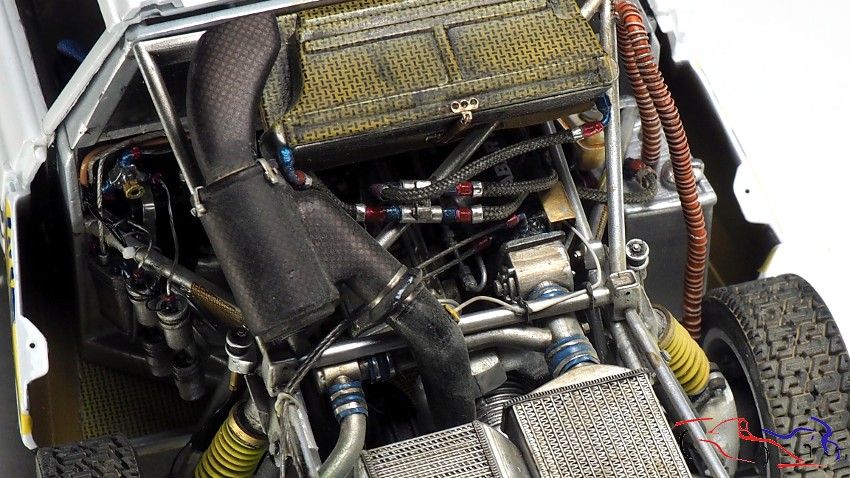
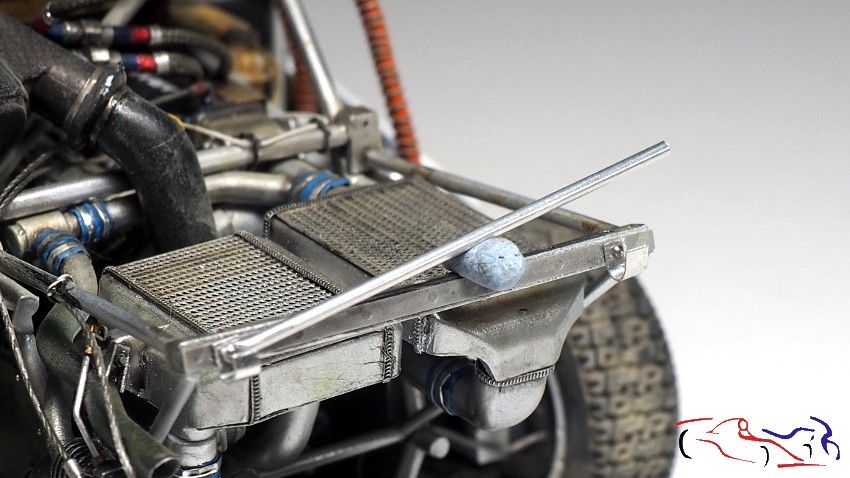
Y una vez pegado, os muestro los extermos del coche, con el último ensuciado general con XF57. El tono se unifica permitiendo ver las partes de metal y sus detalles:
And once glued, I show you the exteriors of the car, with the last general dirtying with XF57. The tone has unified all allowing to see the metal parts and their details:
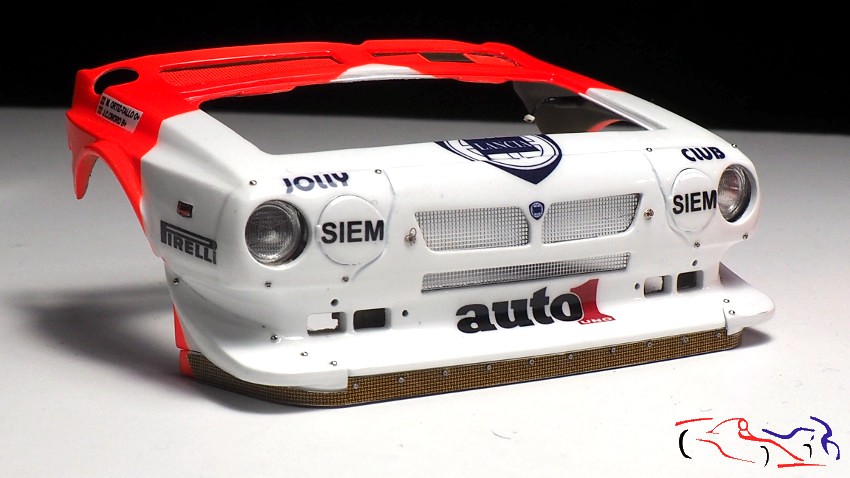
Y por supuesto, las fotos de esa parte de la carrocería colocada:
And of course, the photos of that part of the body in place:
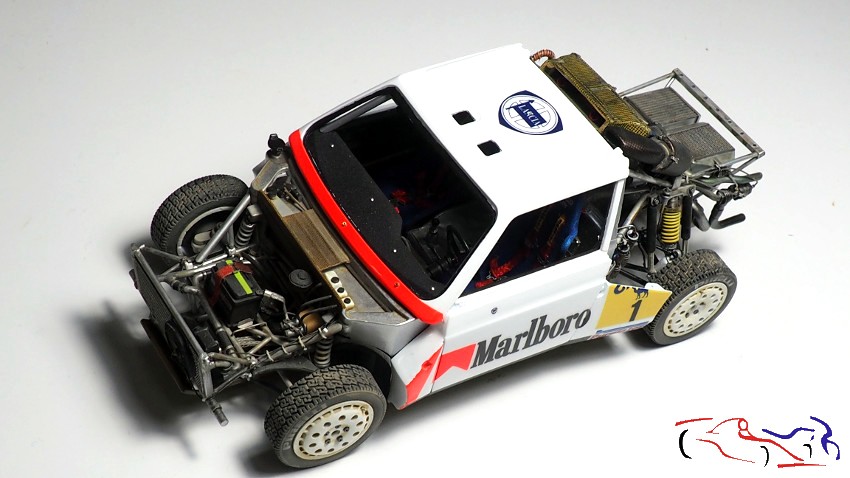
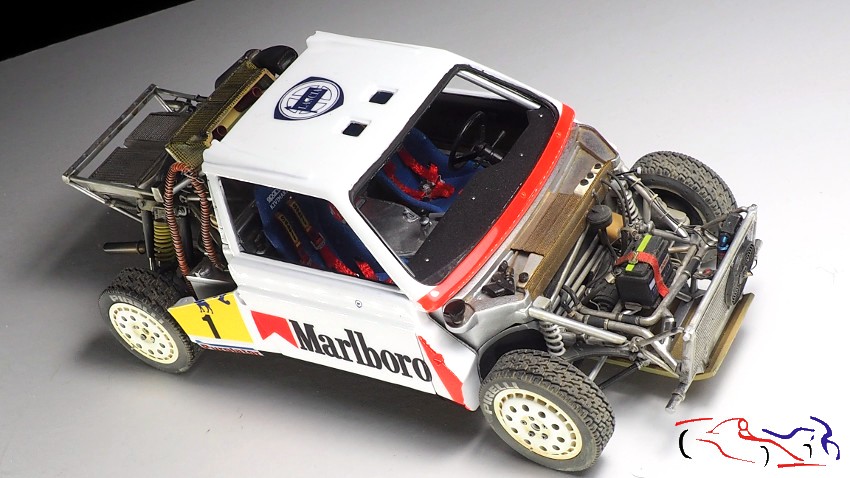
Y para terminar esta serie, cuatro fotos de ambas partes del coche:
Y para terminar esta serie, cuatro fotos de ambas partes del coche:
Y ahora ponemos, lo que he añadido ahora. Primero os pongo la barra que sujeta el portón trasero cuando está abierto. He tomado dos piezas de aluminio que las he doblado y taladrado por un lado. Ese taladro contiene un remache que se ha pegado en la barra transaversal del chasis. Y el la del lado izquierdo, he colocado una barra de aluminio con un agujero, para que pueda girar, y así sijetar el portón, oapoyarse en la ottra pieza del lado derecho. Para que la barra pueda girar, aplasté un extremo con unos alicates, hice un agujero y limé las esquinas, redondeando el extremo.
And now we put, what I have added now. First I’ll show you the bar that holds the tailgate in place when it’s open. I have taken two pieces of aluminium which I have bent and drilled on one side. That hole contains a rivet that has been glued to the transverse bar of the chassis. And on the left side, I have placed an aluminium bar with a hole in it, so that it can rotate, and thus hold the tailgate, or lean on the other piece on the right side. To allow the bar to rotate, I flattened one end with a pair of pliers, drilled a hole and filed the corners, rounding the end.
Más cosas: las bisagras del portón trasero. Ya tenía la parte vertical que aparece en la foto, pero la parte horizontal que hice era de quita y pon, y poco fiable. Por tanto, cogí lámina de latón, la corté para que cupiera por el agujero de la parte vertical, y la soldé a una lámina de latón por el extremo. La introduje, doblé y la volví a soldar a la pieza de latón por debajo. Una vez limado toda la pieza, le hice dos taladros para los remaches que irán anclados al techo de la carrocería, y las puse en esa posición para pintar. Decir, que están fijadas con cinta de doble cara autoadhesiva!!
More stuff: the tailgate hinges. I already had the vertical part that appears in the photo, but the horizontal part I did was removable and unreliable. So I took a sheet of brass, cut it to fit through the hole in the vertical part, and welded it to a sheet of brass at the end. I pushed it in, folded it, and soldered it back to the brass piece underneath. Once the entire piece had been filed, I made two holes for the rivets that will be anchored to the roof of the body, and I put them in that position to paint. Say, they are affixed with self-adhesive double-sided tape !!
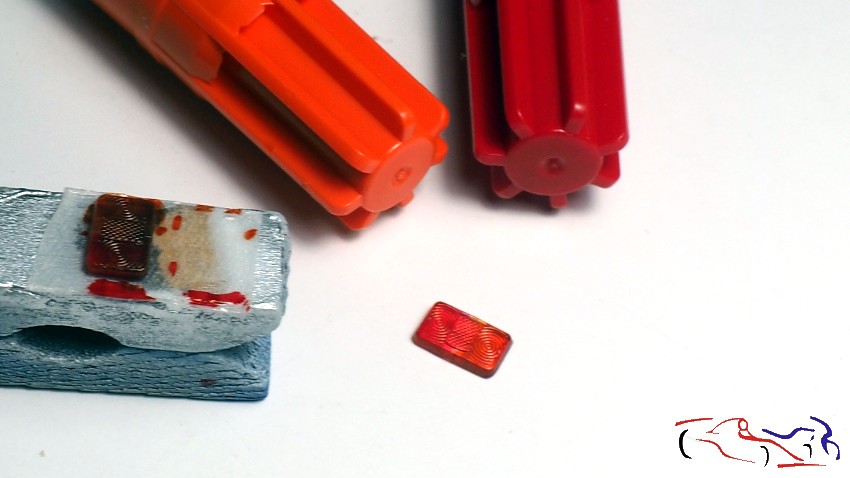
Mas piezas: los pilotos traseros. Los pegué sobre cinta autoadhesiva de docble cara y las pinté con los rotuladores Edding 3000 permanentes:
More parts: the taillights. I glued them onto double-sided self-adhesive tape and painted them with Edding 3000 permanent markers:
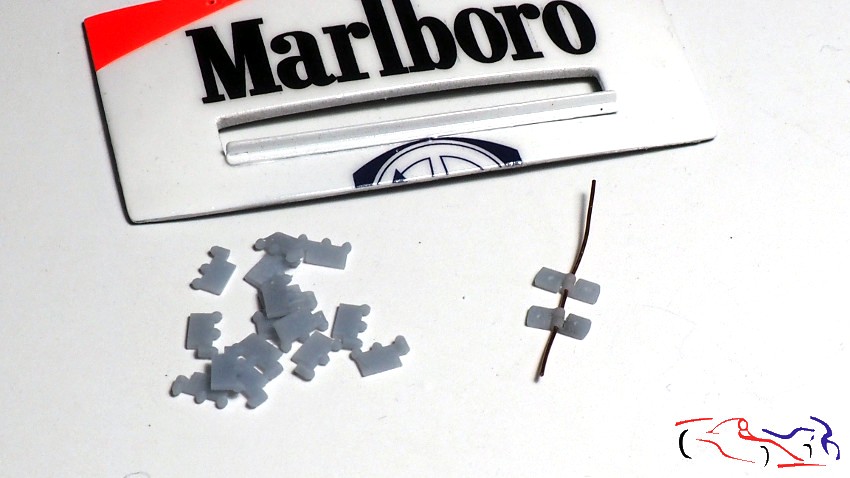
Y por último, para las bisagras de la trampilla del capó, utilizo piezas diseñadas en 3d que me hizo un amigo (gracias Julio!!), que modificándolas un poco, sirven muy bien para esta pieza. Luego irán pintadas de blanco y se fijarán con un remache con agujeros realizados directamente en la carrocería, para que su fijación sea más fuerte.
And finally, for the bonnet hatch hinges, I use pieces designed in 3d that a friend made for me (thanks Julio!!), which, modifying them a little, works very well for this piece. Then they will go painted in white and they will be fixed with a rivet with holes made directly in the body, so that their fixation is stronger.
Ya queda menos!!! Gracias por mirar y comentar!!
Less is left!!! Thanks for watching and commenting !!


