Continuamos con este pequeñín a 1/43, ya que finalmente, recibí las calcas que durante el confinamiento, se perdieron!!
We continue with this little one at 1/43, since finally, I received the decals that were lost during the confinement!!
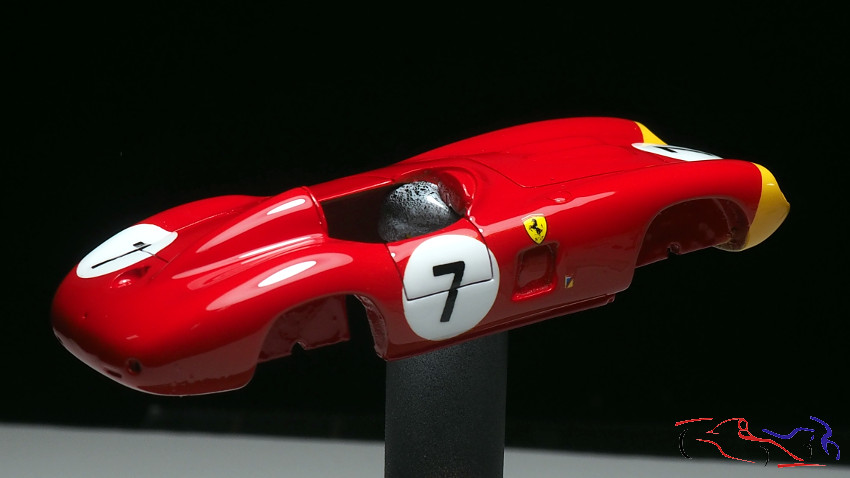
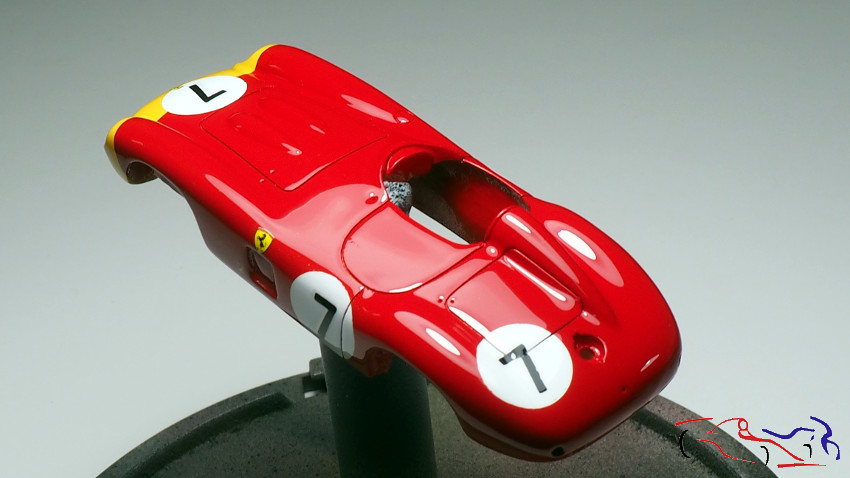
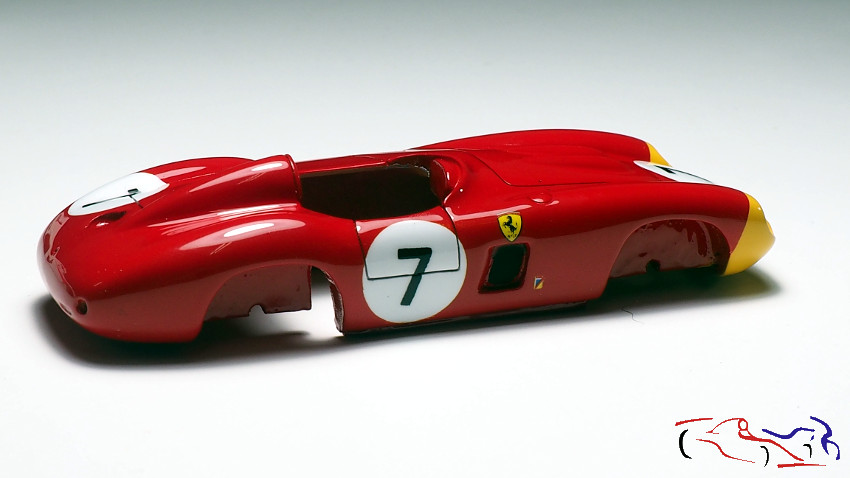
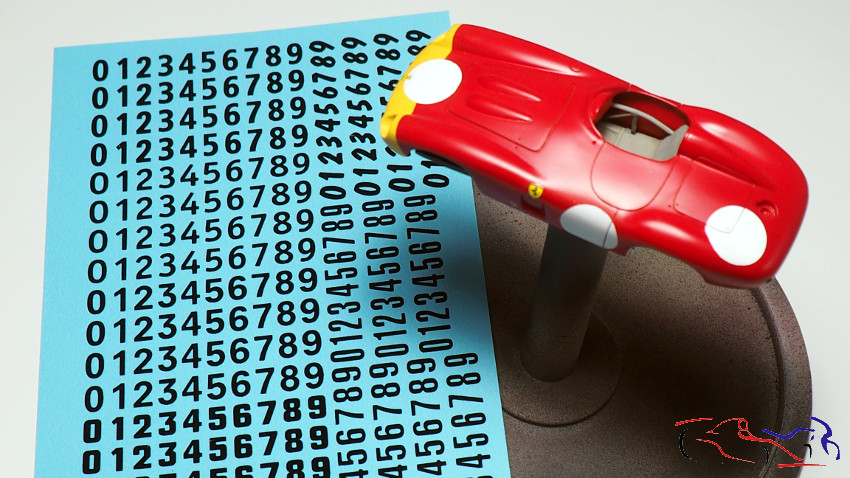 Y aquí ya están puestas. He cogido las del nº7 que condujo Fernando de Portago con Phill Hill en los 1000 kms de Paris, Monthlery de 1956, quedando quintos:
And here they are already set. I took the ones from nº7 that Fernando de Portago drove with Phill Hill in the 1000 kms of Paris, Monthlery of 1956, finishing in p5:
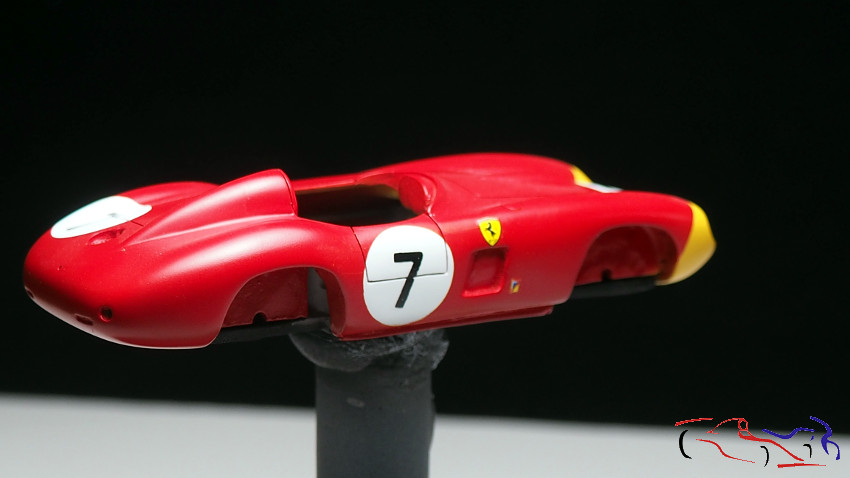
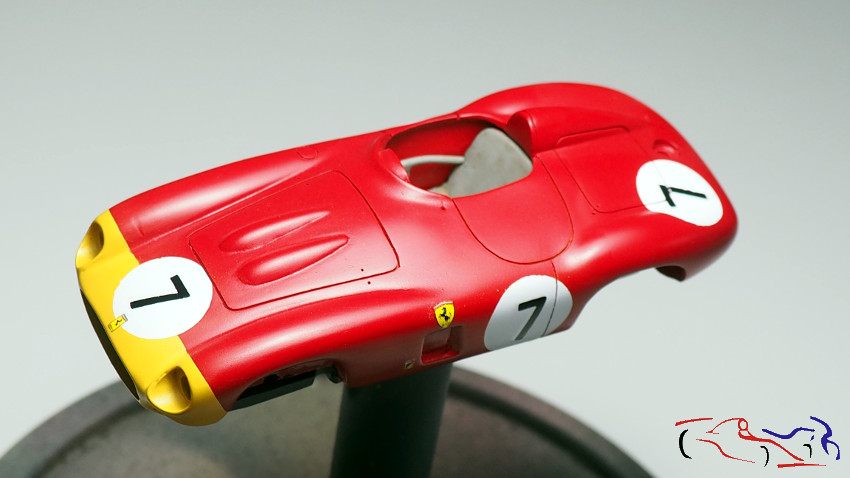
 Y aprovechando que me ponía a lacar el Porsche 936, también laqué este kit, con laca de la marca Gravity: el resultado muy bueno, con 2 capas finas y una tercera cargada.
And taking advantage of the fact that I put the Porsche 936 to lacquer, I also lacquered this kit, with lacquer from the Gravity brand: the very good result, with 2 thin layers and a third loaded one.
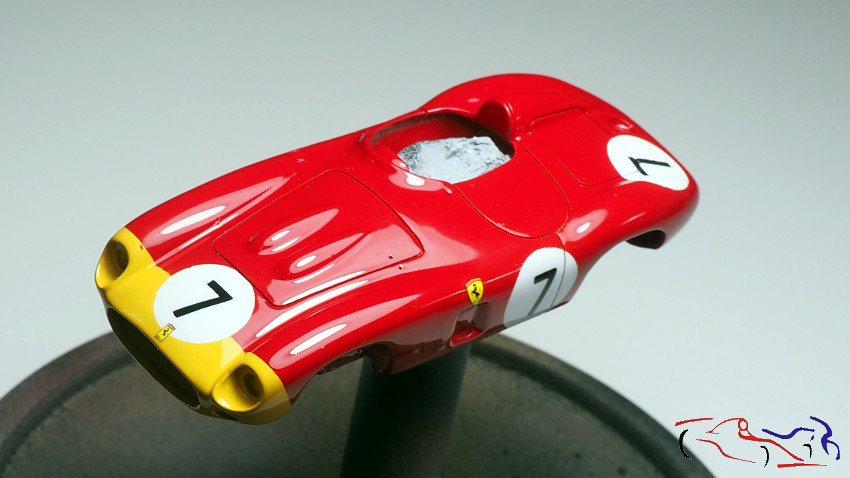
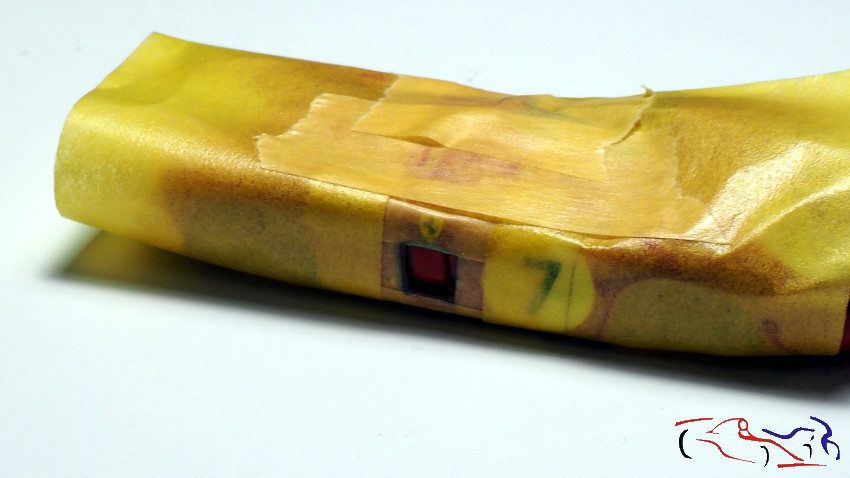
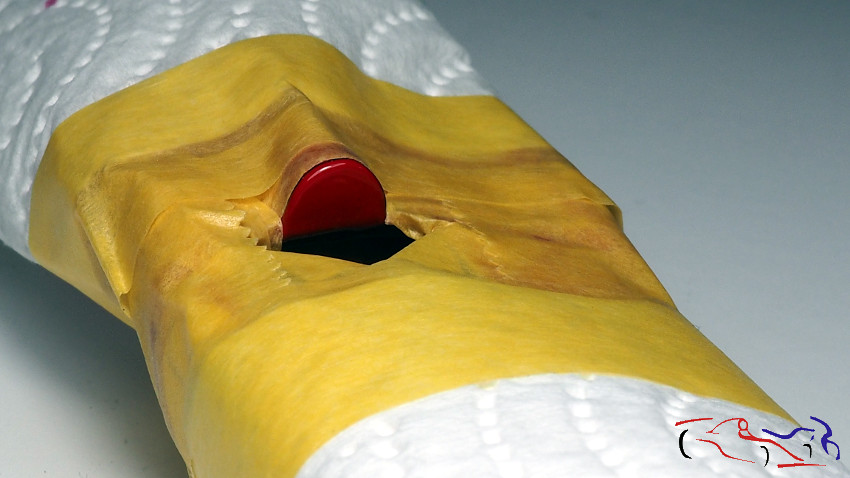
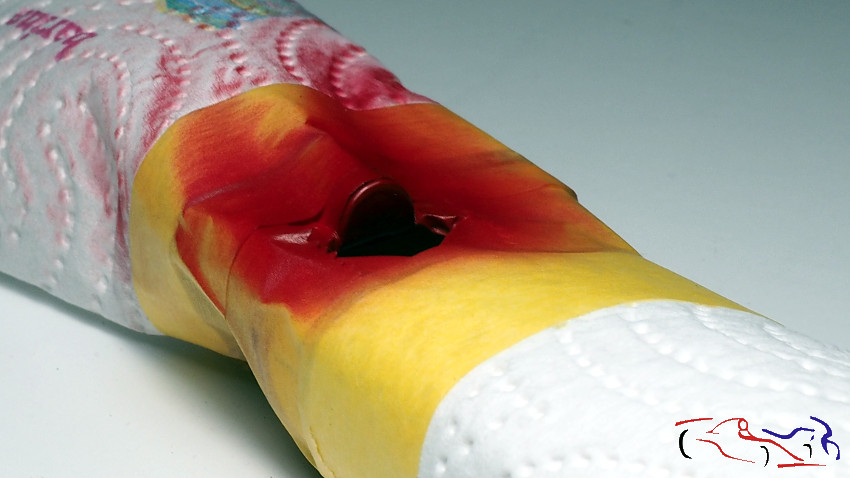
 Una vez seco, enmascaramos para pintar las aslidas laterales de aire, de color negro mate:
Once dry, we masked to paint the air sides, in matt black:
 En las faros, pinto las cuencas con gris acrílco de Tamiya, y el interior, donde va la bombilla, con Molotow, auqnue después lo tapará el faro metálico, pero quería ver el resultado:
In the headlights, I paint the basins with Tamiya acrylic gray, and the interior, where the bulb goes, with Molotow, although later the metal headlight will cover it, but I wanted to see the result:
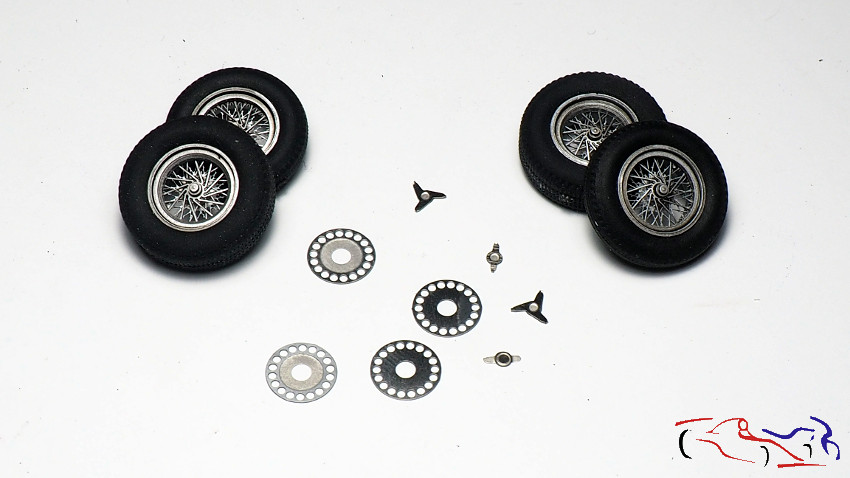
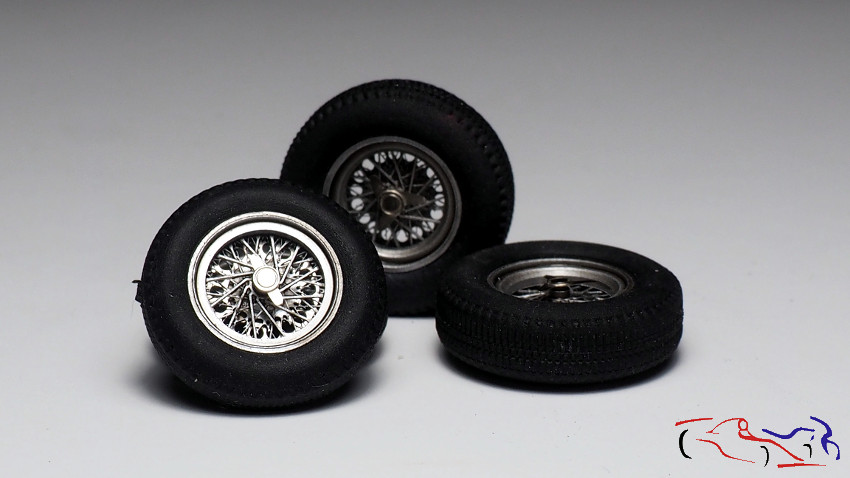
 A las ruedas, una vez pintadas y con un par de capas de Smoke diluido, es hora de pegar los fotograbados:
To the wheels, once painted and with a couple of layers of diluted Smoke, it is time to stick the photoetches:
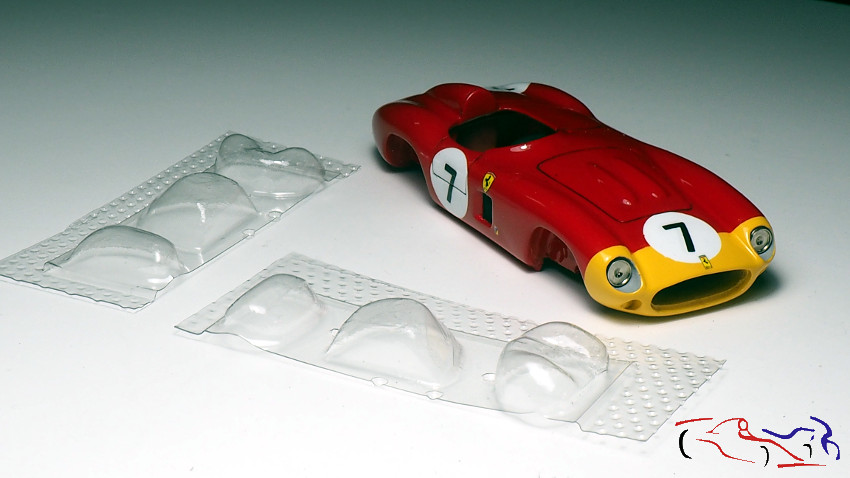
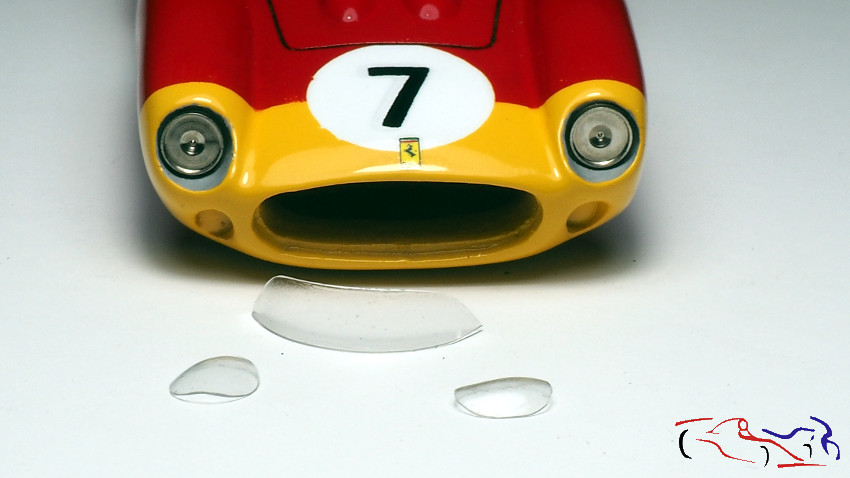
 Así mismo, tenemos que recortar los cristales de los moldes. Una buena idea ha sido que incluyan dos copias porque estropear una es muy fácil:
Likewise, we have to cut the crystals from the molds. It has been a good idea to include two copies because spoiling one is very easy:
 El proceso que he seguido ha sido pintar con un rotulador la parte esterior de donde tengo que cortar…..
The process I have followed has been to paint with a marker the outside of where I have to cut …..
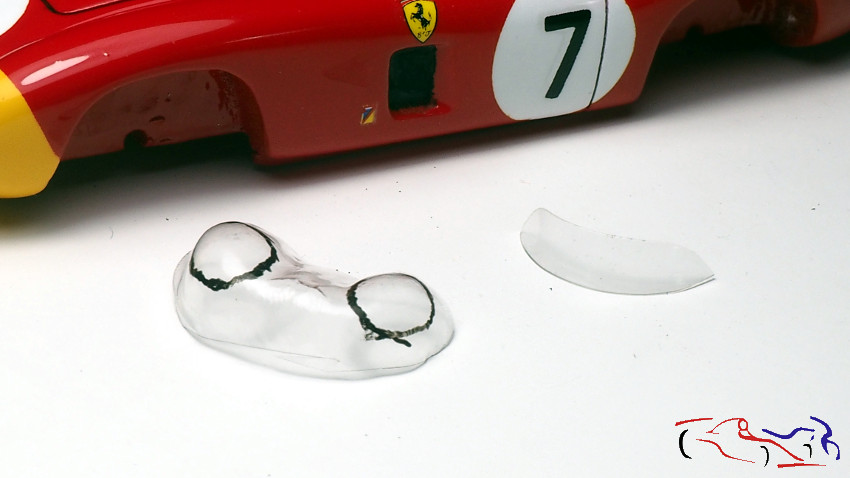 ….cortarlo y después lijar hasta llegar a donde tiene que llegar (suelel haber una línea que lo delimita), y después probar y lijar, hasta que encaje. Una vez conseguido, lo pego con cola blanca aplicada con un palillo. También vemos que las piezas metálicas del fonfo del faro, ya están pegadas.
.… cut it and then sand until it reaches where it has to go (there is usually a line that delimits it), and then test and sand, until it fits. Once achieved, I glue it with white glue applied with a toothpick. We also see that the metal parts of the lighthouse font are already glued.
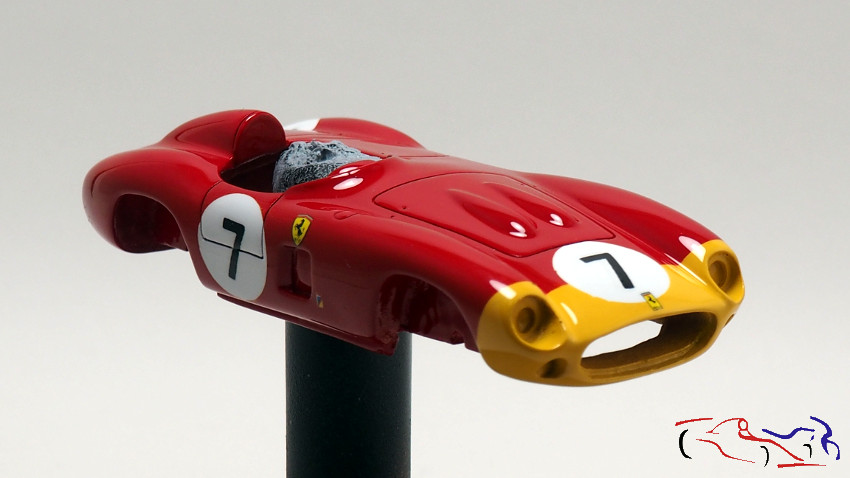
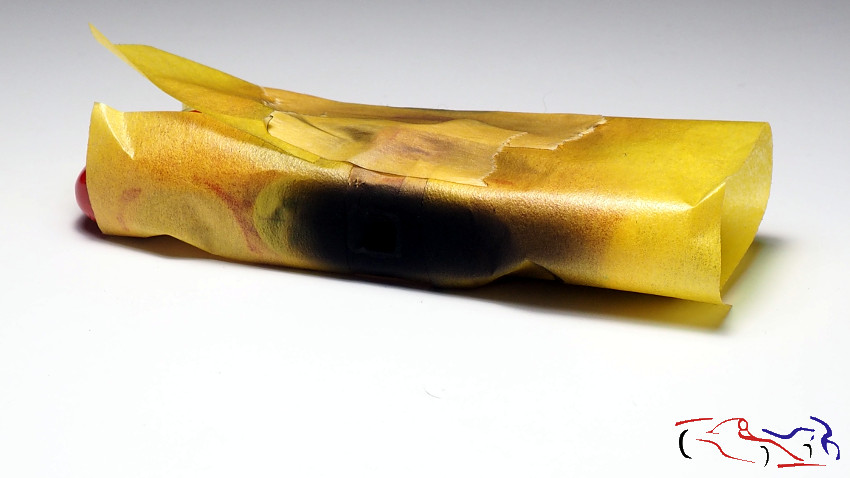
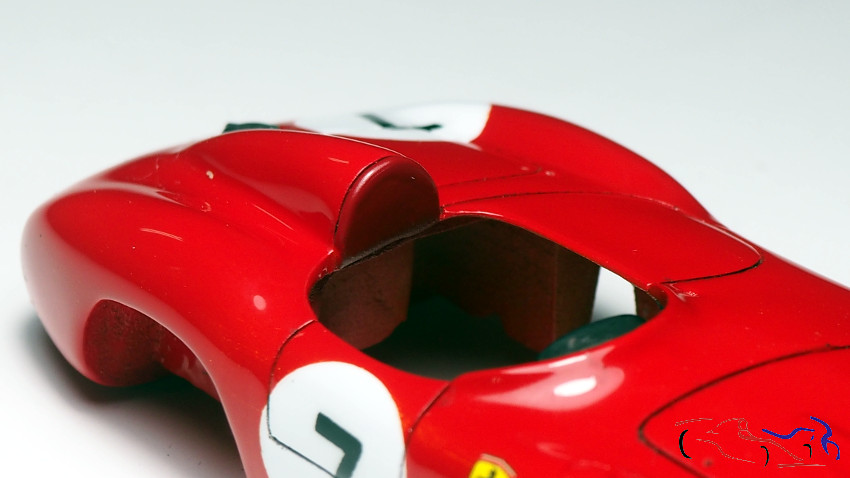
 Otro enmascaramiento posterior a la laca de la carrocería: el reposacabezas. Sueles ser de un material blando, que amortigüe el posible golpe de la cabeza.
Another post-lacquer masking of the body: the headrest. You are usually made of a soft material, which cushions the possible blow from the head.
 Yo lo he pintado de color rojo Alfa Romero de Zero, que es como si fuera un poco de color cuero:
I have painted it Zero Alfa Romero red, which is like a leather colour:
 Este es el resultado:
This is the result:
 Pasamos al cockpit. Hacemos ters agujeros de 0,4 mm donde vayan air los pedales, cogemos los fotograbados que vienen con el kit, y cortamos unos trozos de tubo de 0,4 mm, que aplastamos por un extremo y doblamos, para pegar el propio pedal. Para el acelerador, la parte aplastada es más grande ya que apoya en la base:
We go to the cockpit. We make three 0.4 mm holes where the pedals go, we take the photoetches that come with the kit, and we cut some pieces of 0.4 mm tube, which we crush at one end and bend, to stick the pedal itself. For the accelerator, the flattened part is larger since it rests on the base:
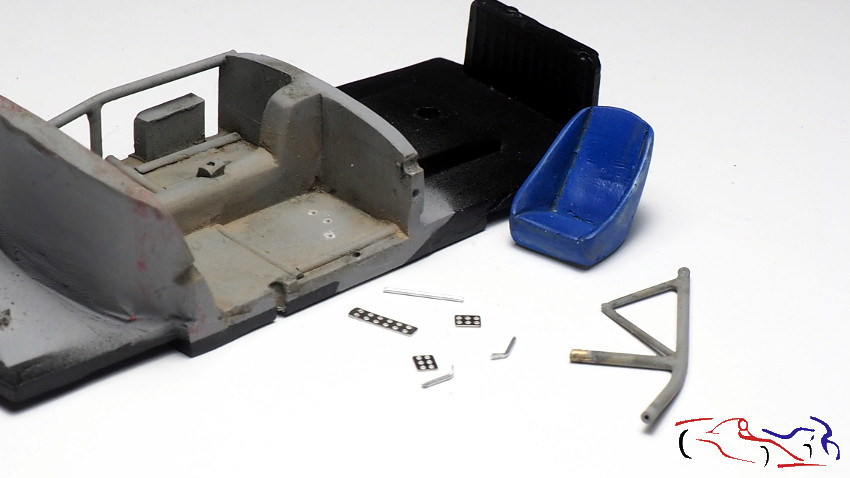 Lo pegamos todo con ciano. Para la palanca de cambios, cojo un fotograbado redondo con la rejilla para la base, recorto un poco la palanca y lo pego todo con ciano.:
We glue everything with cyano. For the gear lever, I take a round gravure with the grid for the base, I cut the lever a bit and glue everything with cyano .:
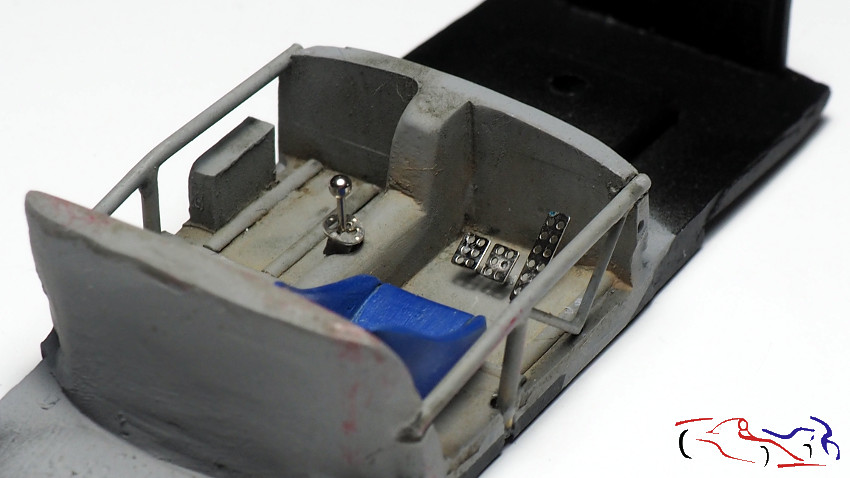 Ponemos la calca de los relojes, pegando el fotograbado encima…
We put the decal of the watches, sticking the photoengraving on top …
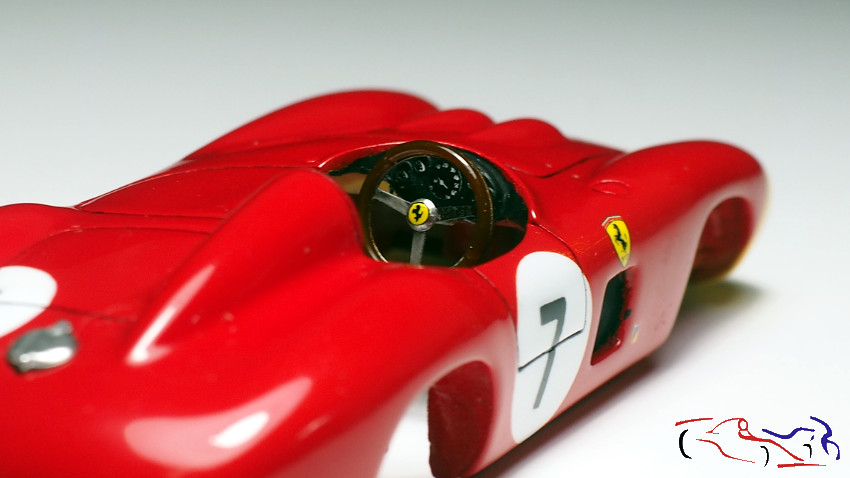
 Y posteriormente pegamos el volante, al que le hemos dado previamente, una capa de naranja transparente de Tamiya a la parte de madera:
And later we glued the steering wheel, to which we have previously given, a layer of transparent Tamiya orange to the wooden part:
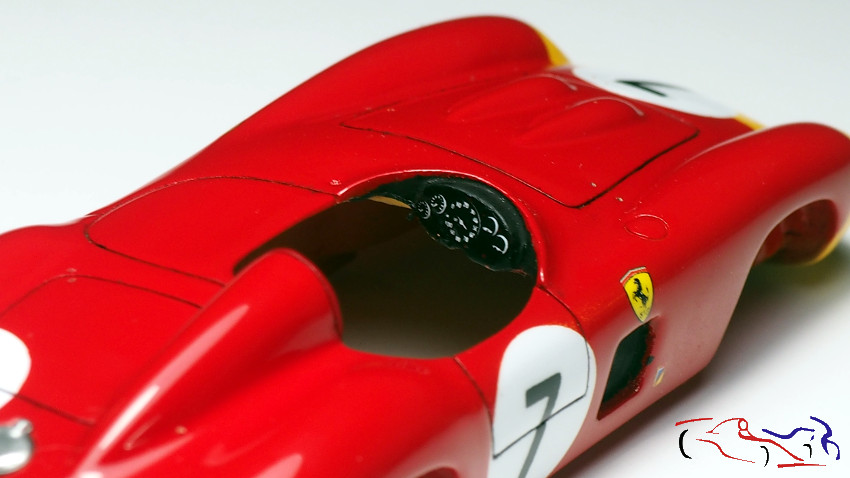
 Pegamos los ejes y las ruedas a la carrocería…
We glue the axles and wheels to the body …
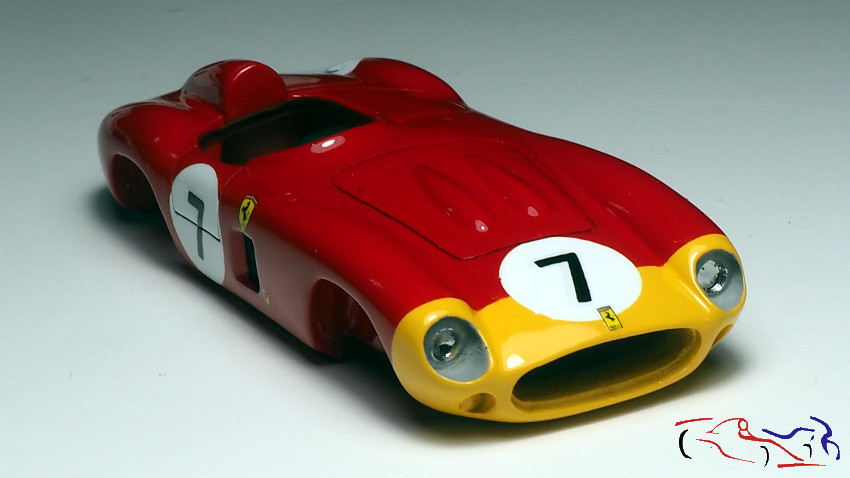
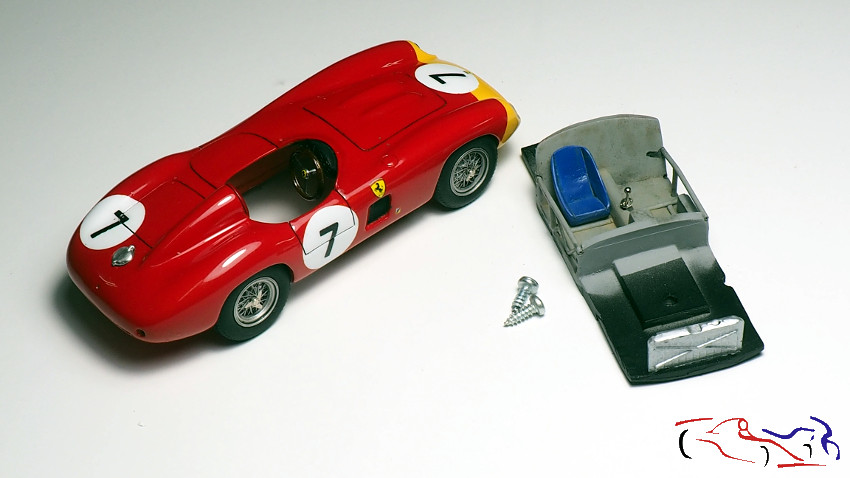 …quedando unicamente atornillar el chasis, siendo este el resultado:
… leaving only to screw the chassis, this being the result:
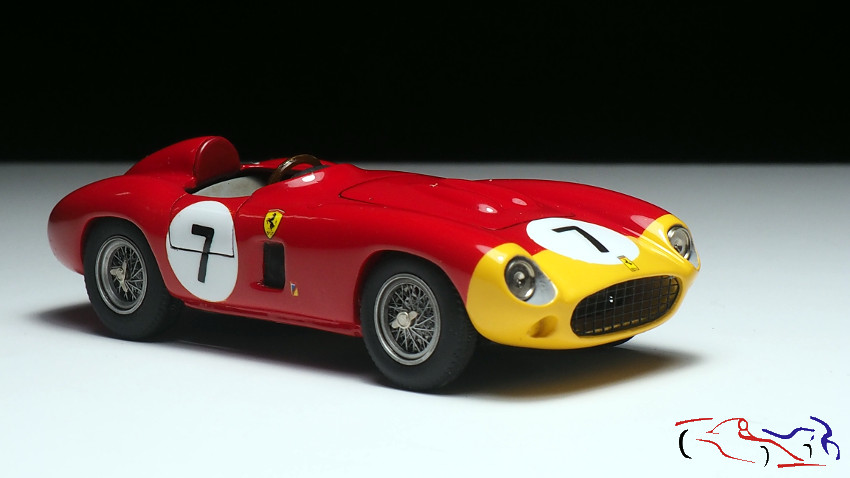
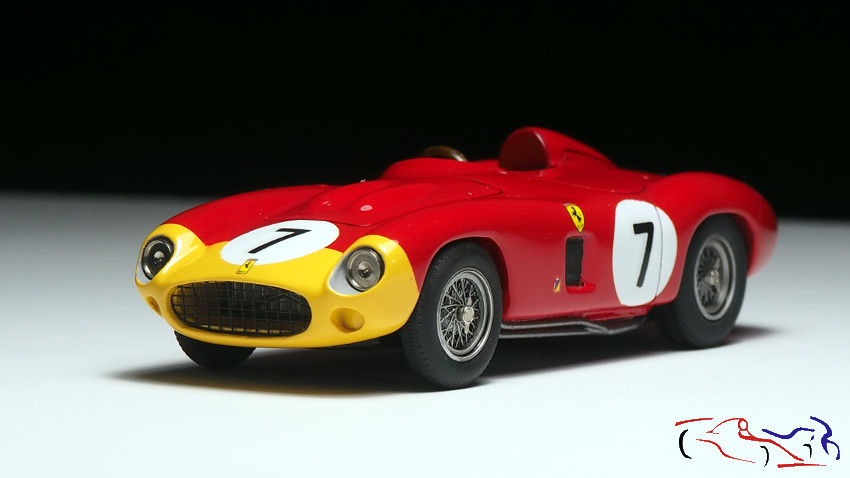 Lo siguiente será poner cristales, y accesorios de la carrocería, con lo que pondremos las fotos finales.
Gracias por ver y comentar.
The next thing will be to put crystals, and body accessories, with which we will put the final photos.
Thanks for viewing and commenting.


I am falling in love of your mini !
1/24, 1/43 scale, you rock !
I’m happy to ear that!!