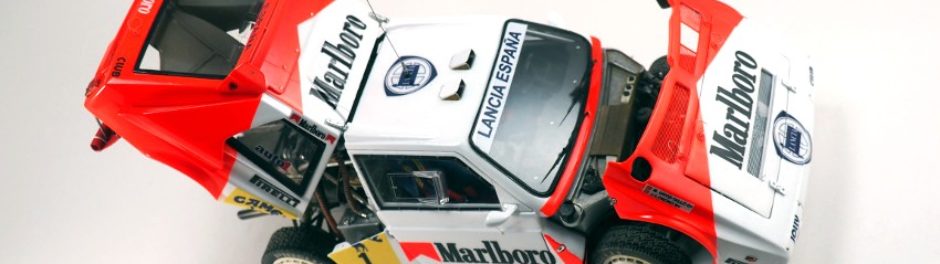
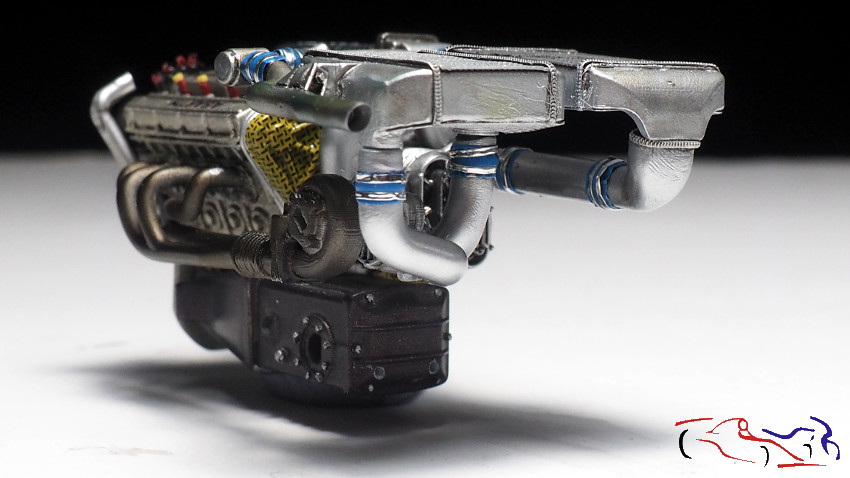
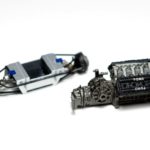
Continuamos con el Delta S4 Marlboro, y aquí os muestro una imagen del motor con varias partes superpuestas sin pegar, para ver como encajan:
We continue with the Delta S4 Marlboro, and here I show you an image of the engine with several superimposed parts without hitting, to see how they fit:
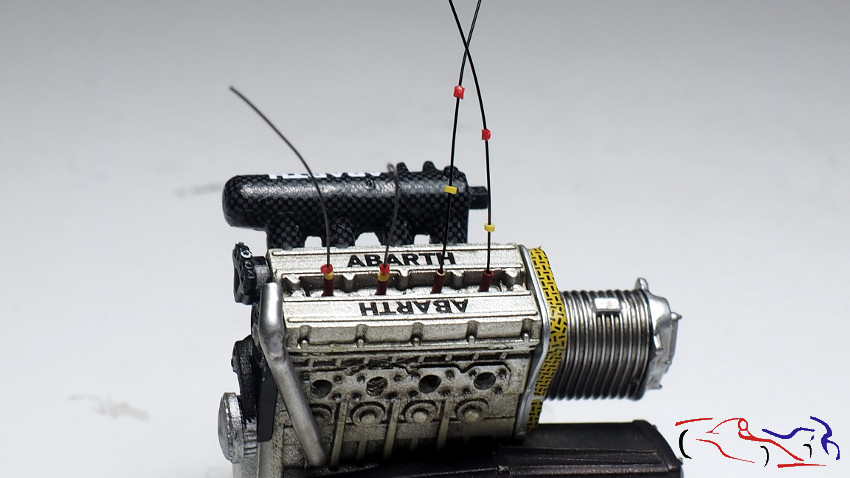
 Pero vamos al principio. Para hacer los cables de las bujias, utilizo uno de T2M de 0,4 mm, que introduzco por las bobinas rojas que hice en metal. También, he recortado cable rojo y amarillo, y he usado su funda para introducir el cable negro. La amarilla va pegada a las bobinas, y la roja al extremo contrario:
But let’s go to the beginning. To make the spark plug wires, I use a 0.4 mm T2M, which I introduce through the red coils I made in metal. Also, I have trimmed red and yellow wire, and used its sheath to insert the black wire. The yellow is glued to the coils, and the red to the opposite end:
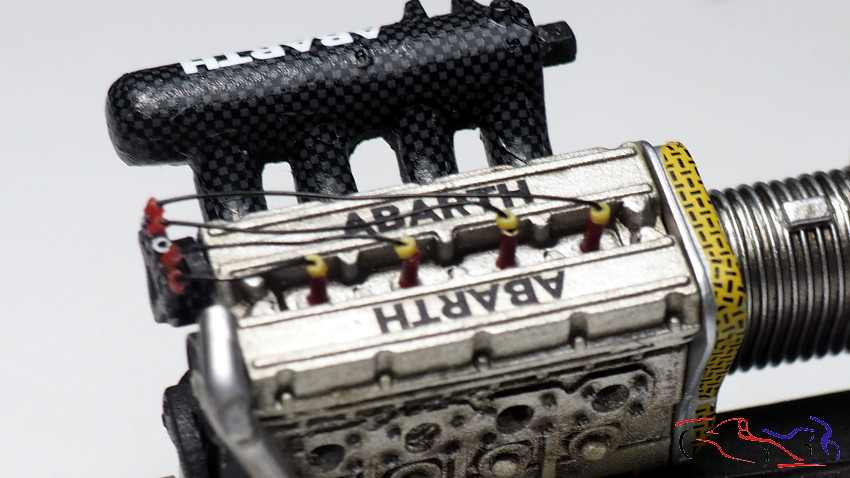
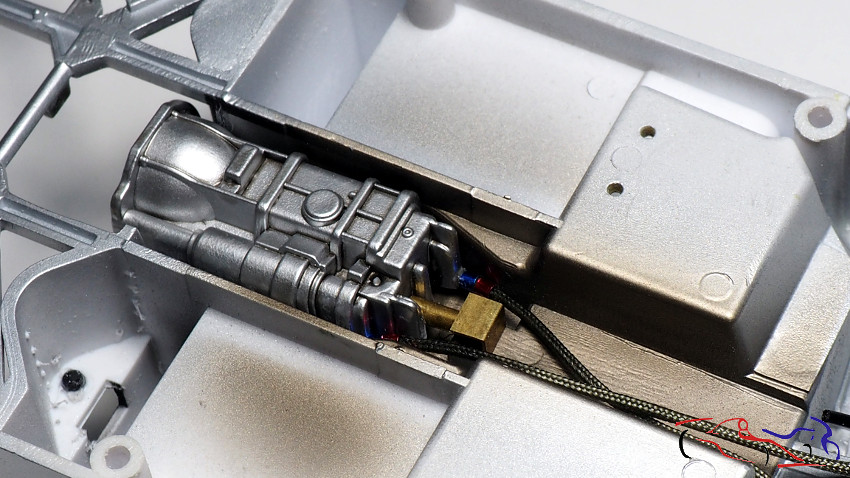
 Aquí vemos como están colocados los cables y las fundas roja y amarilla. Decir que entre las fundas rojas, hay un hueco para otro cable, que irá conectado a la centralita situada en el cortafuegos trasero.
Here we see how the cables and the red and yellow sheaths are placed. Say that between the red covers, there is a hole for another cable, which will be connected to the switchboard located in the rear firewall.
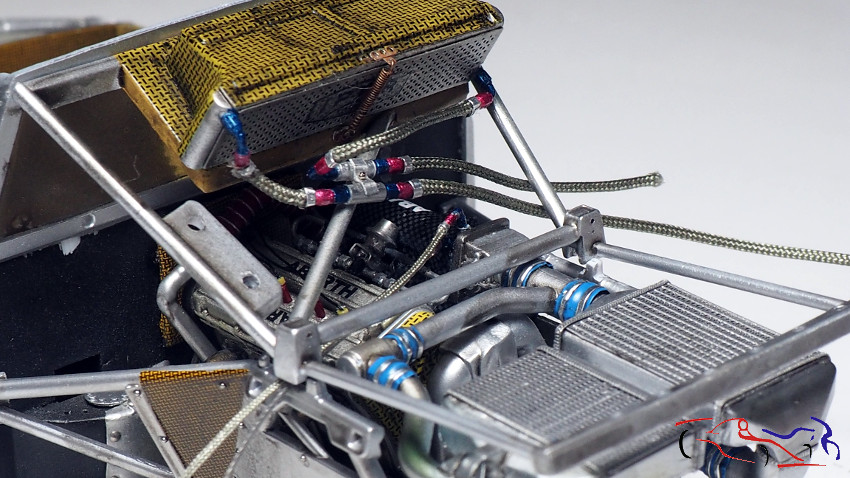
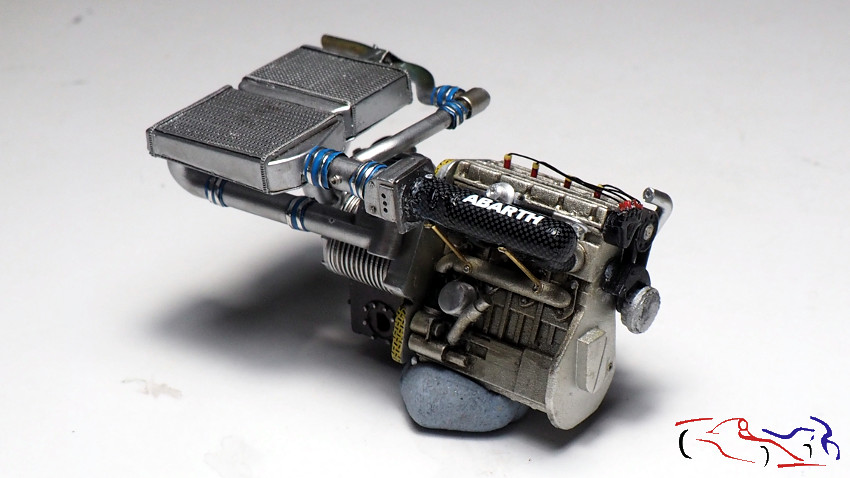
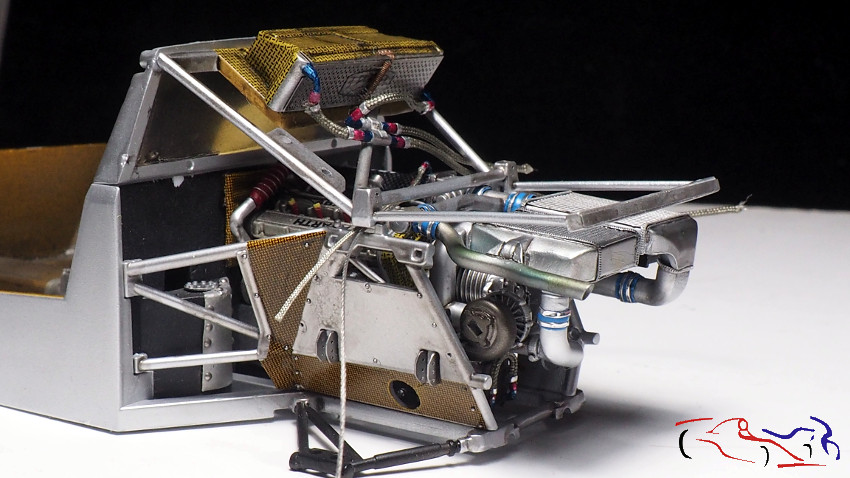
 En la siguiente foto, ya hemos colocado tanto los tubos de escape con el turbo, como los dos radiadores grandes traseros:
In the following photo, we have already placed both the exhaust pipes with the turbo, and the two large rear radiators:
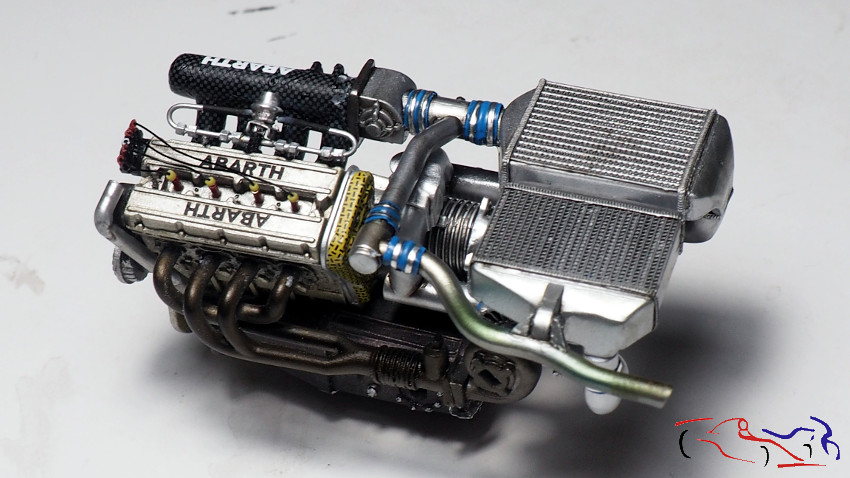
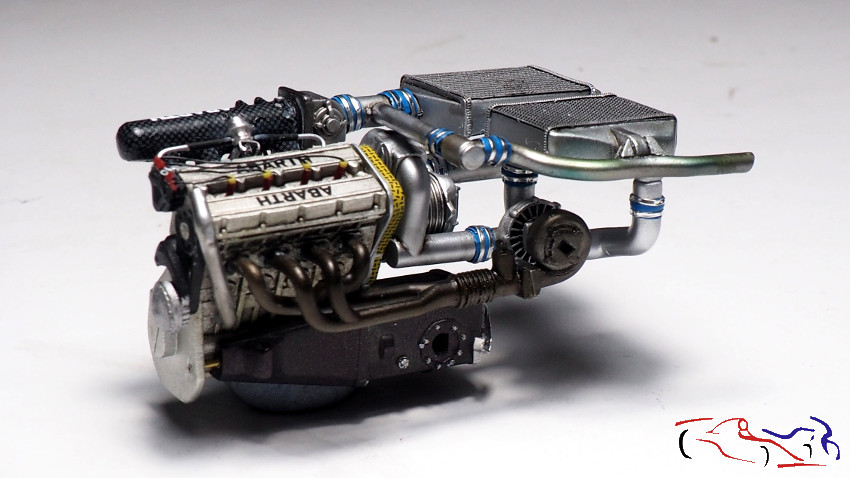 Vemos también el sistema de inyección colocado entre el bloque motor y la entrada de aire que está forrada con fibra de carbono:
We also see the injection system placed between the engine block and the air inlet that is lined with carbon fiber:
 No da la sensación de haber visto un aparato similar en alguna película (Enterprise de Start Treck!!)???
Does not it seem to have seen a similar device in any movie (Start Treck Enterprise !!) ???
 En esta foto, vemos también, dos soportes realizados con tubo de cobre, que sujeta la bombona de entrada de aire:
In this photo, we also see two supports made of copper tube, which holds the air inlet cylinder:
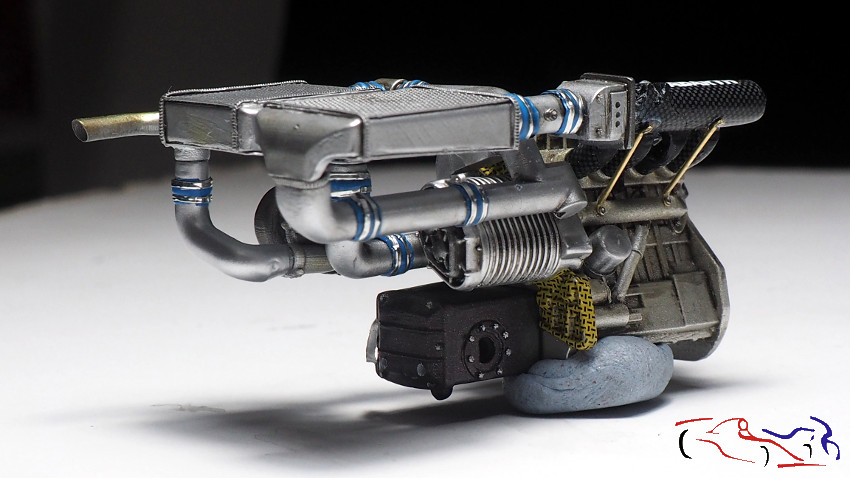
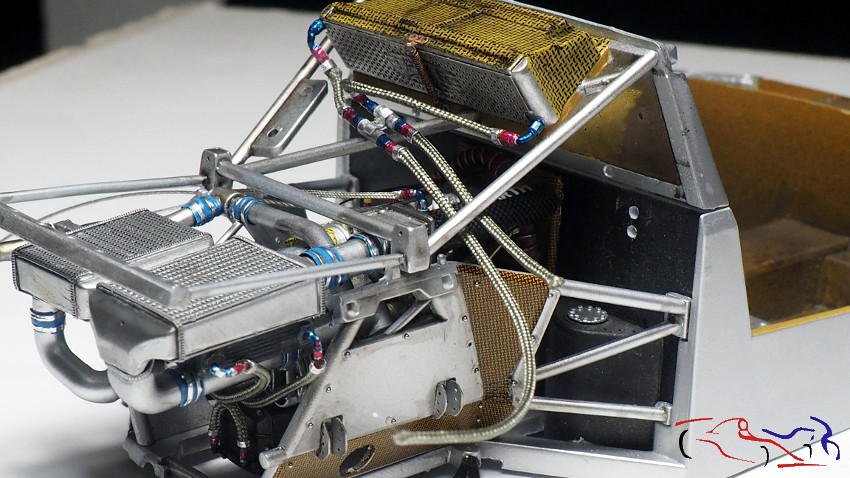
 Pasamos al radiador del techo. De los extermos, salen dos racores cuyos tubos se unen en na pieza que los conecta y sujeta al arco. Esa pieza está realizada con dos tubitos cortados, y un trozo de lata ajustado con un tornillo de metal en el centro, como sujección a la barra de aluminio transversal:
We pass to the ceiling radiator. From the outer, two fittings come out whose pipes are joined in a piece that connects them and fastened to the arch. This piece is made with two cut tubes, and a piece of can adjusted with a metal screw in the center, as a fastener to the transverse aluminum bar:
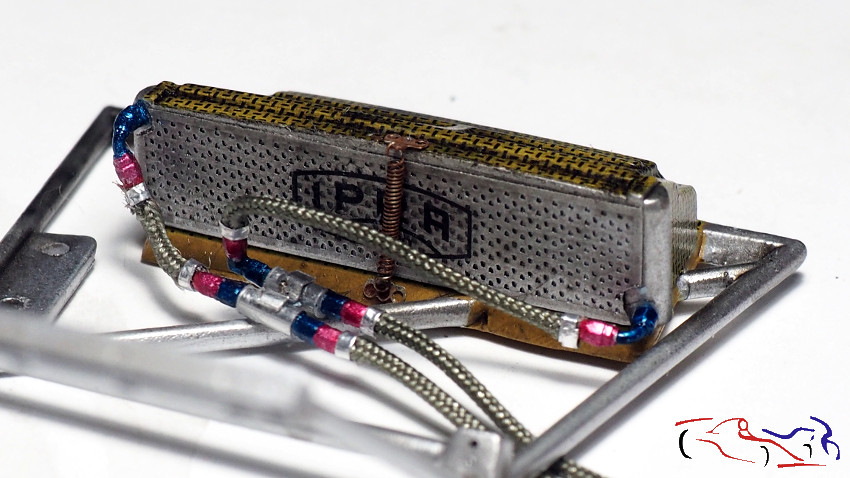
 En al siguiente foto, vemos todos los tubos conectados, y el muelle, un poco oxidado, que fija el radiador. Este muelle es uno que hay para detallar las motos, que he estirado un poco para que se ajuste a las medidas del radiador. Y como sujecciones, he usado unas chapitas agujereadas de un fotograbado.
In the next photo, we see all the connected pipes, and the spring, a little rusty, that fixes the radiator. This spring is one that there is to detail the motorcycles, which I have stretched a bit to fit the radiator measurements. And as fasteners, I used a few holes boring a photogravure.
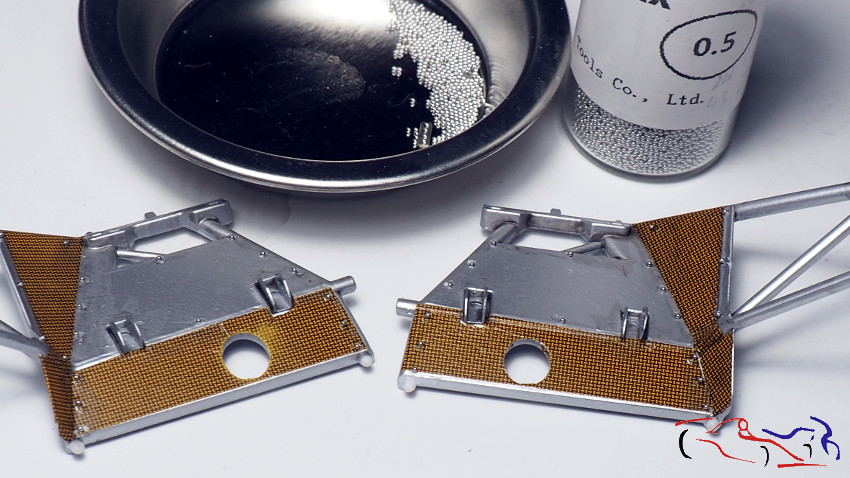
 Vamos con los paneles laterales del motor. Una vez ensuciados con humo diluido, vamos a ponerles los remaches, pero no usaré los habituales, sino bolas de soldadura de 0,5 mm. Pongo un poco de pegamento (ciano o cola blanca diluida) con un palillo, humedezco la otra punta del palillo para coger la bolita, y la pongo en el agujero correspondiente. EL resultado es bueno y muy barato!!
We go with the engine side panels. Once soiled with diluted smoke, we are going to put the rivets, but I will not use the usual ones, but 0.5 mm solder balls. I put some glue (cyano or diluted white glue) with a stick, moisten the other end of the stick to take the ball, and put it in the corresponding hole. The result is good and very cheap!
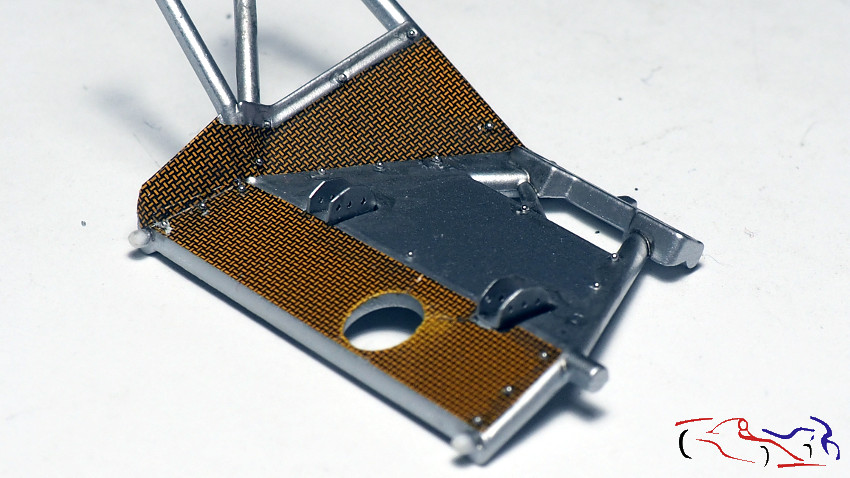
 Aquí podemos ver el resultado… Y si alguna se pierde? En el bote hay muuuuchas!!
Here we can see the result … And if any is lost? In the boat there are maaaaaaaaaaaany!
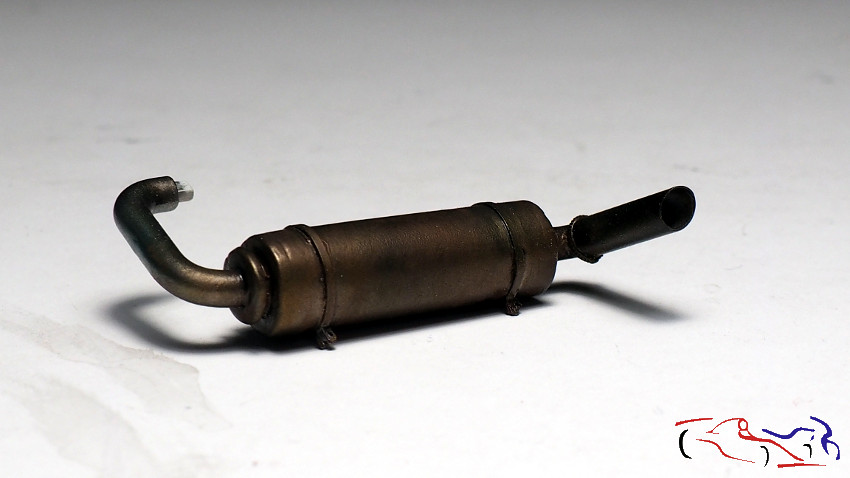
 Una foto del tubo de escape, terminado a falta de una capa de barniz mate:
A photo of the exhaust pipe, finished in the absence of a layer of matt varnish:
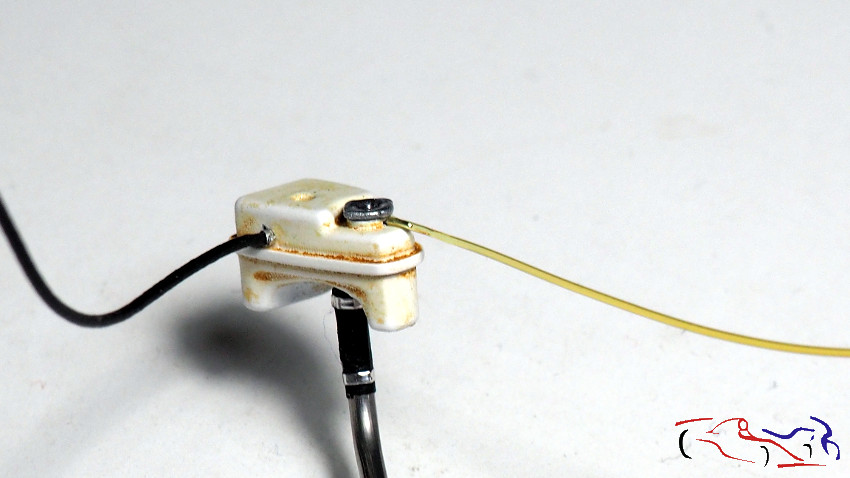
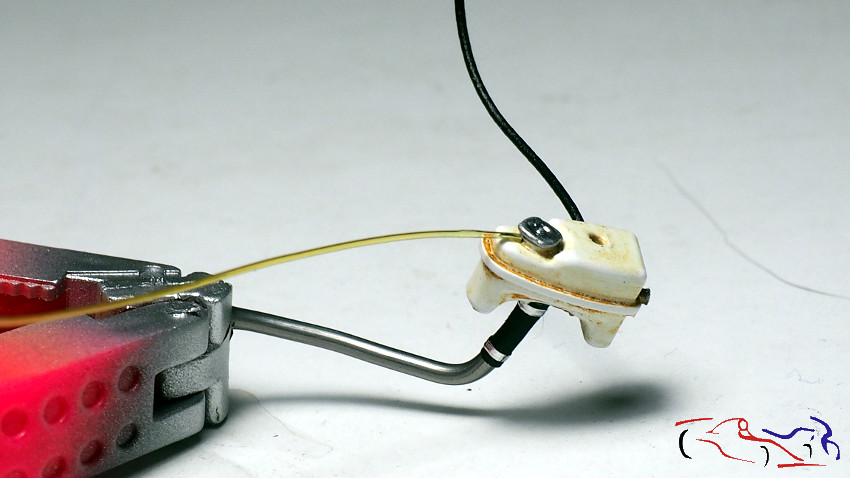
 Otra pieza terminada: un depósito cn todos sus cables, listo para ponerlo en el cortafuegos trasero, en su parte derecha. Es una pieza del transkit de Andrea!!
Another finished piece: a tank with all its cables, ready to be placed in the rear firewall, on its right side. It’s a piece of Andrea’s transkit !!
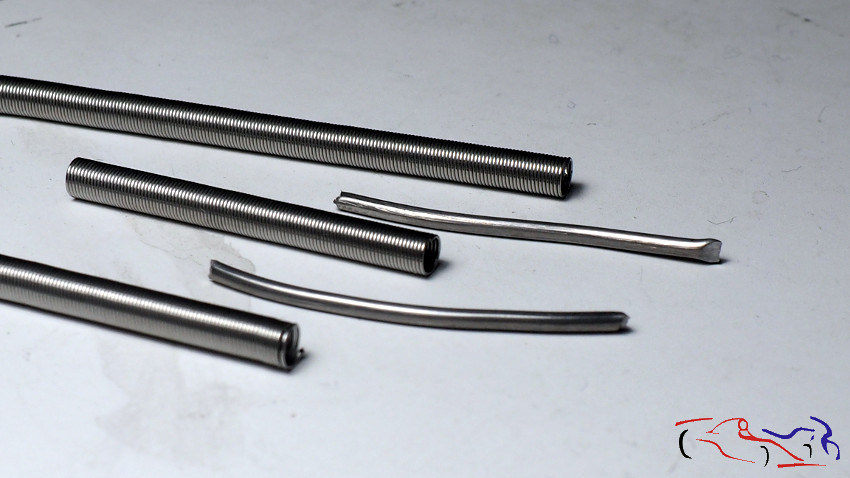
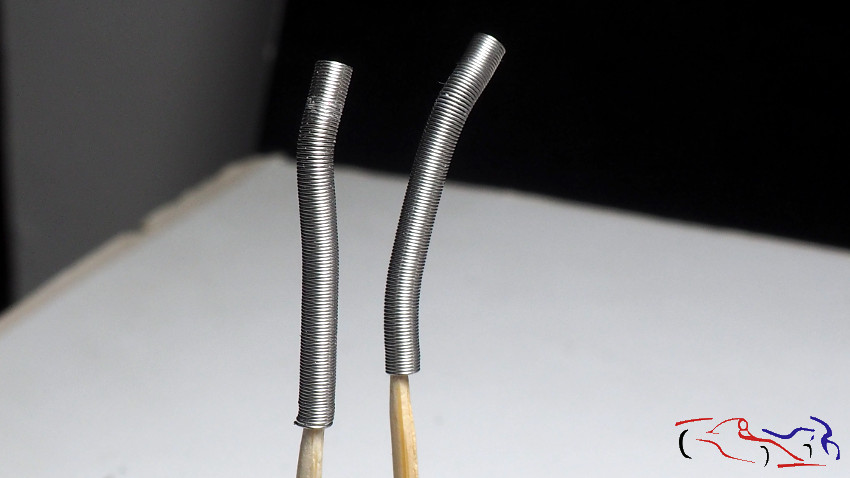
 Debajo del radiador trasero, o filtro que está detrás del cockpit, en la parte de arriba, hay unos tubos que salen del mismo y van a los frenos traseros, con aire del exterior. Para imitarlos, cogemos muelle de TMF comprado en su día, al que le metemos por dentro, estaño grueso para que nos de la forma deseada.
Under the rear radiator, or filter that is behind the cockpit, at the top, there are some pipes that come out of it and go to the rear brakes, with outside air. To imitate them, we take TMF spring purchased in its day, which we put inside, thick tin to give us the desired shape.
 Metemos el estaño y lo metemos dentro del muelle, y lo pegamos con ciano:
We put the tin and put it inside the dock, and stick it with cyano:
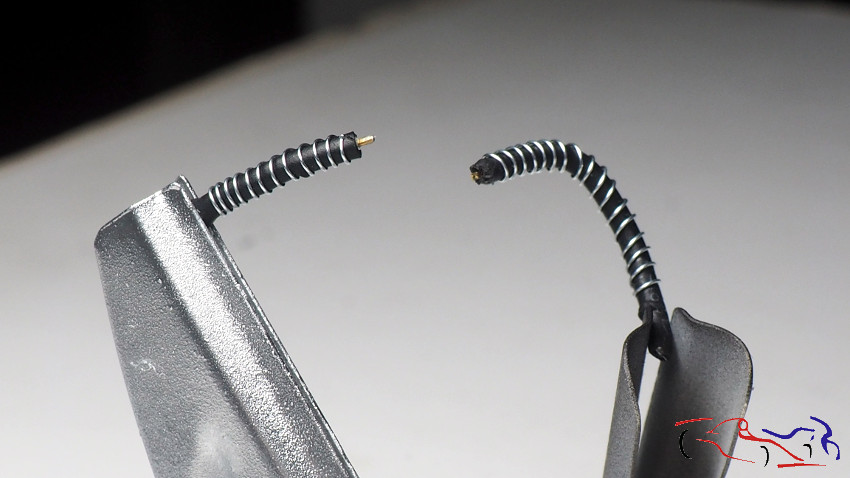
 Como irán pintados de la misma manera que otro tubo del motor, aprovecho la ocasión para hacerlo. Este tubo, es un alambre doblado que he introducido por un termoretractil, para que se adapte al alambre con calor. Una vez ajustado, lo rodeo con hilo de metal fino de 0,2 mm, el cual lo pego con ciano por la parte que no se verá:
As they will be painted in the same way as another motor tube, I take the opportunity to do so. This tube is a bent wire that I have introduced by a heat shrink, so that it adapts to the wire with heat. Once adjusted, I surround it with 0.2 mm thin metal thread, which I glue it with cyano on the part that will not be seen:
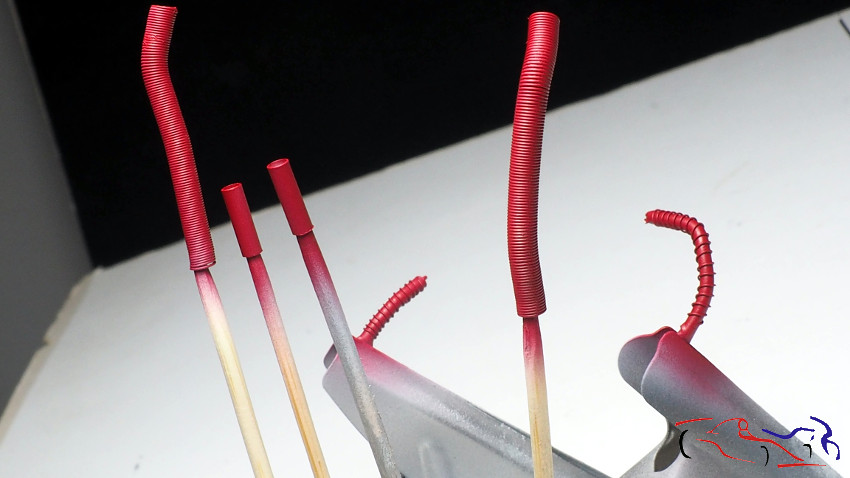
Para pintarlos, después de la imprimación Gravity, utilizo pintura roja de Zero, la que tiene para los Brabham de F1, la cual es un poco más oscura, perfecta para estas piezas:
To paint them, after Gravity primer, I use Zero’s red paint, the one he has for the F1 Brabham, which is a bit darker, perfect for these pieces:
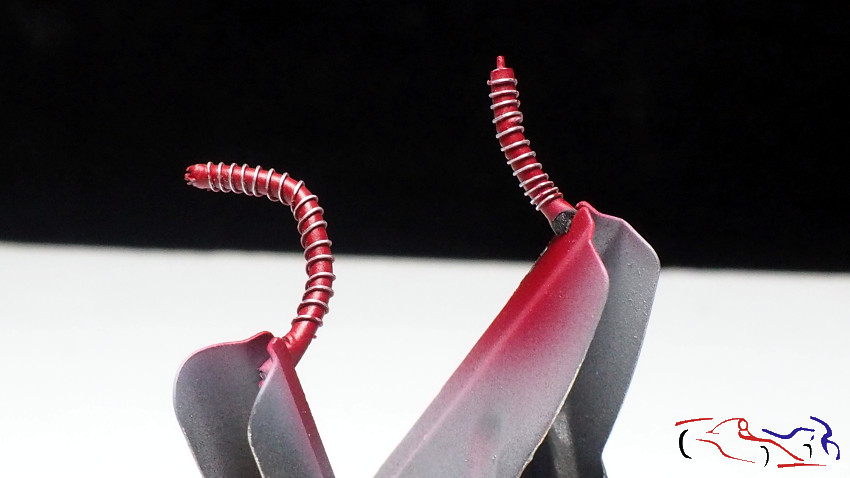
 Una vez secos, paso una lija a los tubos del motor, para que elimine la pintura del cable fino de metal, y aparezca el color del mismo. Solo falta aplicar unos lavados para dar profundidad y uso:
Once dry, pass an sandpaper to the motor tubes, so that it removes the paint from the thin metal cable, and the color of the same appears. It is only necessary to apply some washings to give depth and use:
 Y vamos pegando piezas. Le danos la vuelta al chasis y pegamos la parte del la caja de cambios que se verá:
And we are gluing pieces. We flip the chassis and paste the part of the gearbox that will be seen:
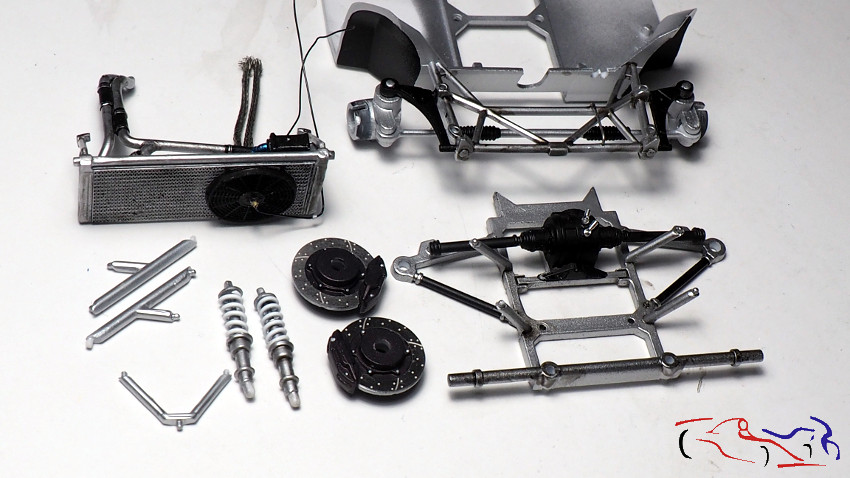
 Y de ahí, nos vamos a la parte delantera. Os muestro las piezas existentes, que vamos a empezar a pegar. Los discos de freno y los amortiguadores los dejaremos para más adelante.
And from there, we go to the front. I show you the existing pieces, which we are going to start gluing. We will leave the brake discs and shock absorbers for later.
 Y este es el resultado:
And this is the result:
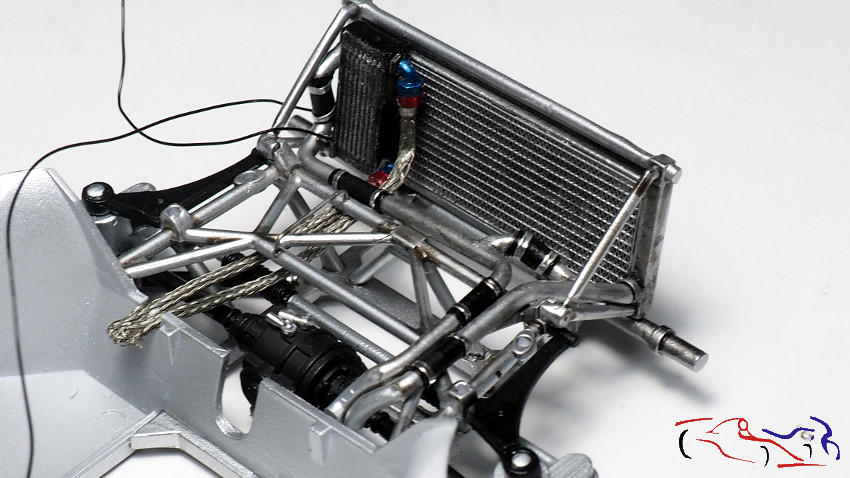
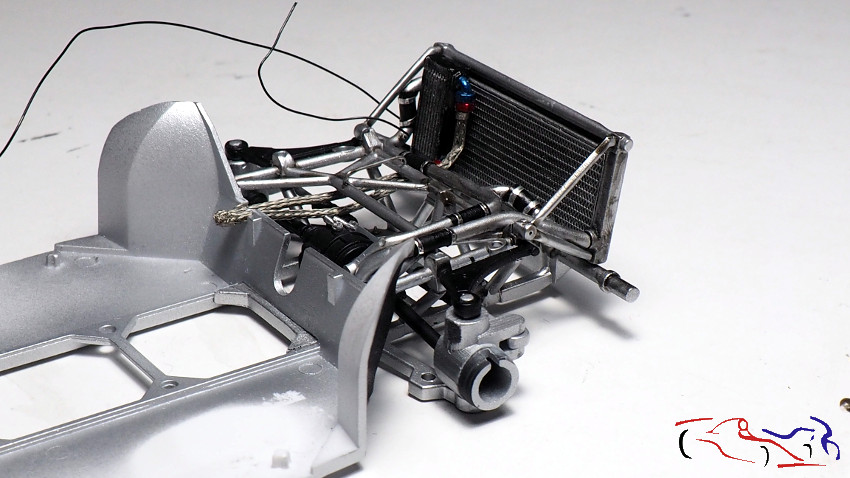
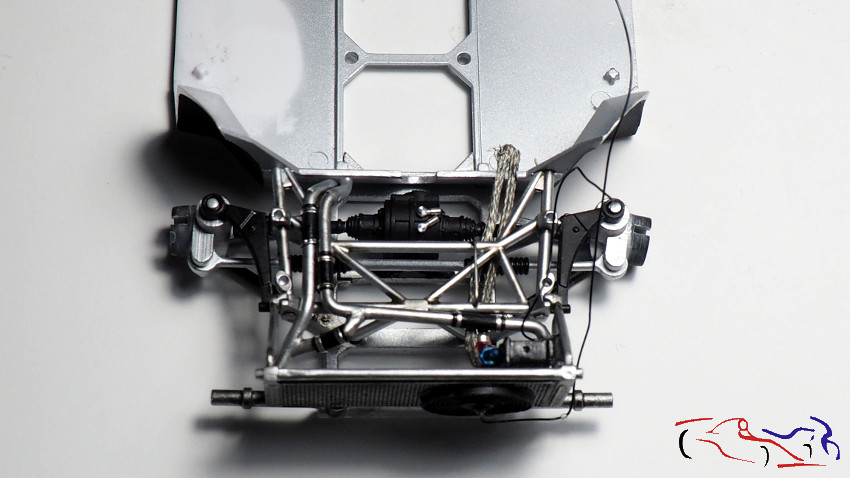
Para terminar hoy, os dejo unas fotos de la parte trasera del coche, con varias piezas colocadas sin pegamento:
To finish today, I leave some photos of the back of the car, with several pieces placed without glue:
Espero que os haya gustado!
Gracias por ver y comentar!!
I hope you liked it!
Thanks for viewing and commenting!!


Para quitarse el sombrero….enhorabuena!!
Estupendo!!! Felicitaciones!!!
Gracias Miguel Angel!!