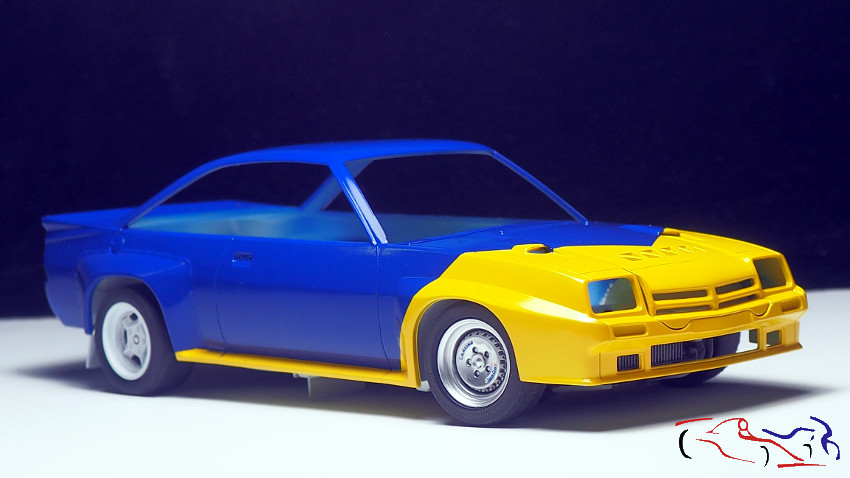
Como hace tiempo que no pongo nada del Opel Manta Philips, os muestro las últimas fotos que tengo. La verdad es que estaba muy adelantado, y mientras espero a las calcas de Decalcas, he avanzado con el resto.
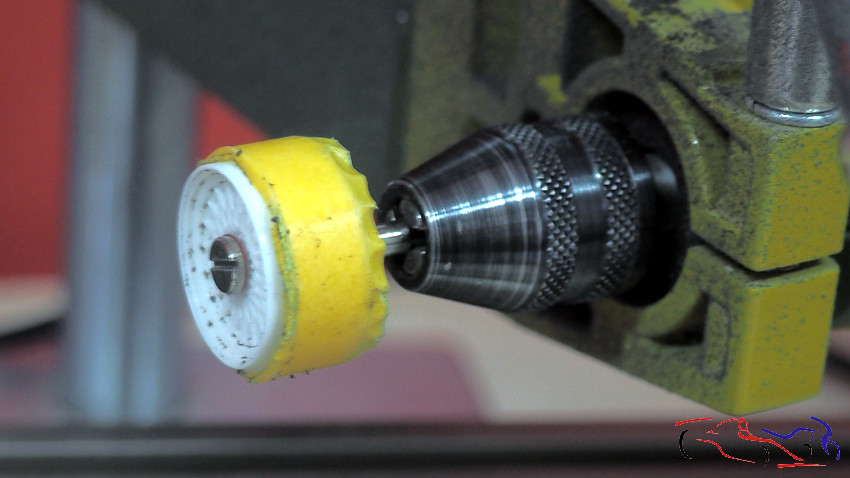
Y para empezar, los neumáticos que en el kit están para tierra o mojado y con un acabado muy nuevo, vamos a rebajarlos un poco, a gastarlos y a rebajarles un poco el dibujo. Para ello, usamos una de las llantas que no he usado y le taladro el centro para poner unos de las fijaciones del minitaladro de los discos de corte. Y a la llanta, la agrandamos el diámetro con cinta Tamiya de enmascarar para que la goma se fije mejor y no resbale al pasarle la lima o la lija:
Since I have not added anything in the Opel Manta Philips in the blog, I show you the last pictures I have. The truth is that it was very advanced, and while I wait for the decals of Decalcas, I have advanced with the rest.
And to begin with, the tires in the kit are for dirt or wet surface and with a very new finished, we are going to reduce them a little, to spend them and to reduce them the drawing a little. For this, we use one of the rims that I have not used and I drill the center to put some of the fixings of the mini-drill of the cutting discs. And we enlarge the diameter of the rim with Tamiya masking tape so that the rubber fixes better and does not slip when passing the file or sandpaper:
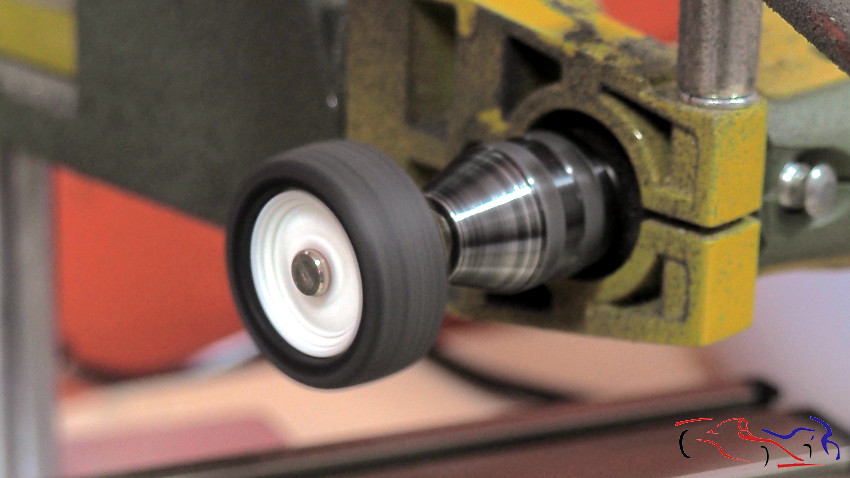
 Ponemos la goma y a limar primero y a lijar después como si fuera un torno:
We put the rubber on it, and to file first, and to sand later, as if it were a lathe:
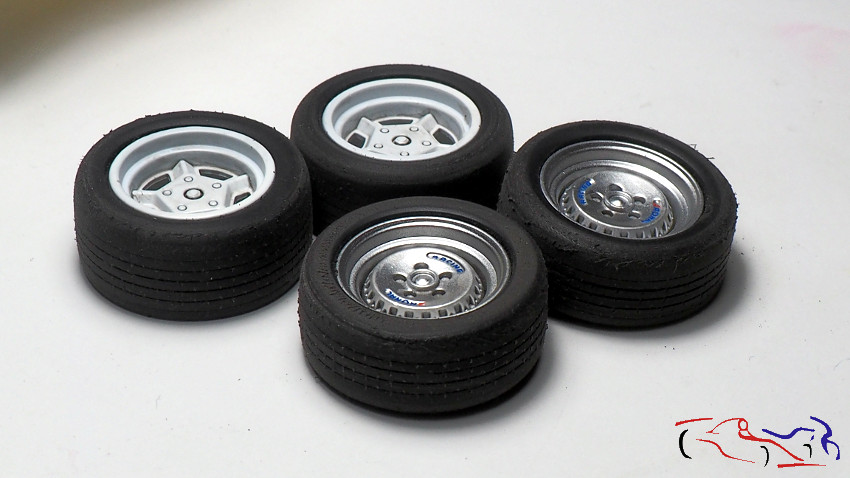
 Y este es el resultado: no he eliminado mucho el dibujo y le he redondeado el perfil.
And this is the result: I have not eliminated much the drawing and I have rounded the profile.
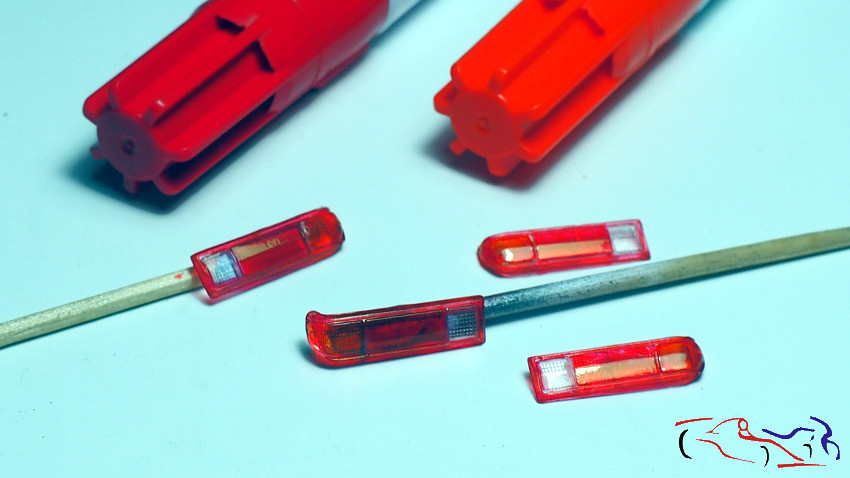
 Pasamos a los faros de detrás, que coloreamos con rotuladores permanentes rojo y naranja. Para terminar, le marcaré el borde con negro y con cromo de Molotov, pintaré el hueco en la carrocería un vez la haya lacado. Aquí vemos los juegos de los dos coches:
We went to the headlights behind, which we colored with red and orange permanent markers. To finish, I will mark the edge with black, and with chrome Molotov, I’ll paint the hollow in the body once lacquered. Here we see the crystals of the two cars:
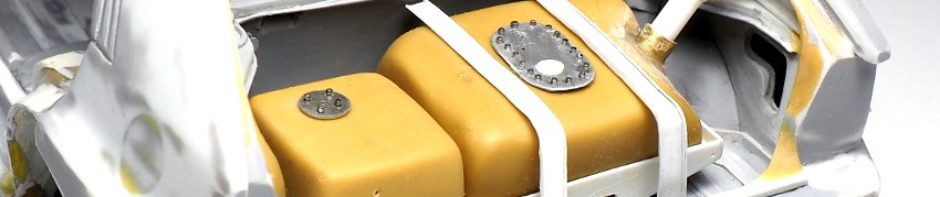
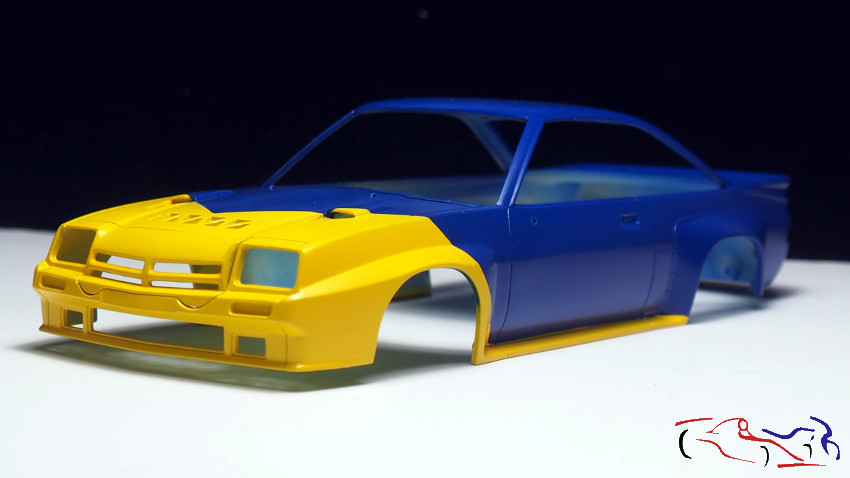
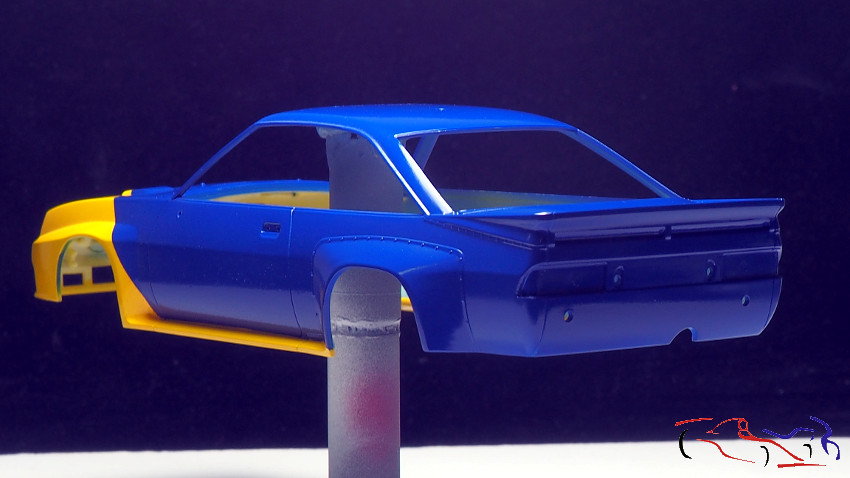
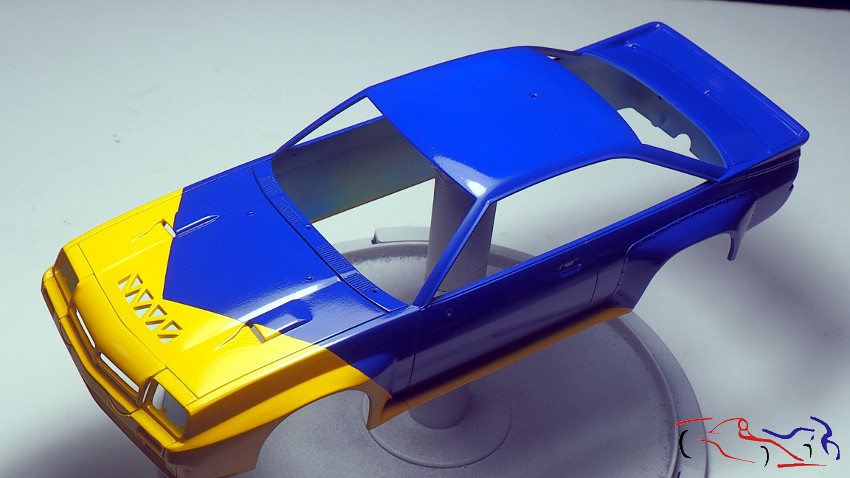
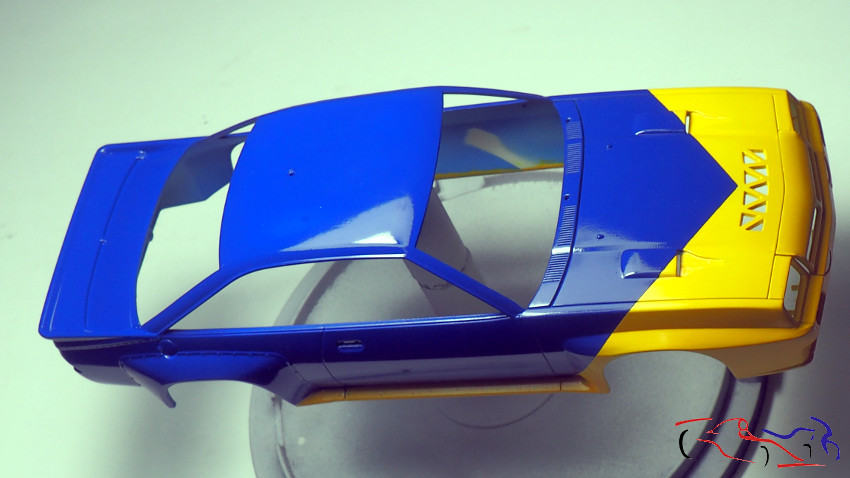
 En cuanto a la carrocería, la barnicé con barniz pre diluido de Zero, con una capa para poner las calcas:
As for the body, I cleared it with prediluted varnish of Zero, with one layer to put the decals:
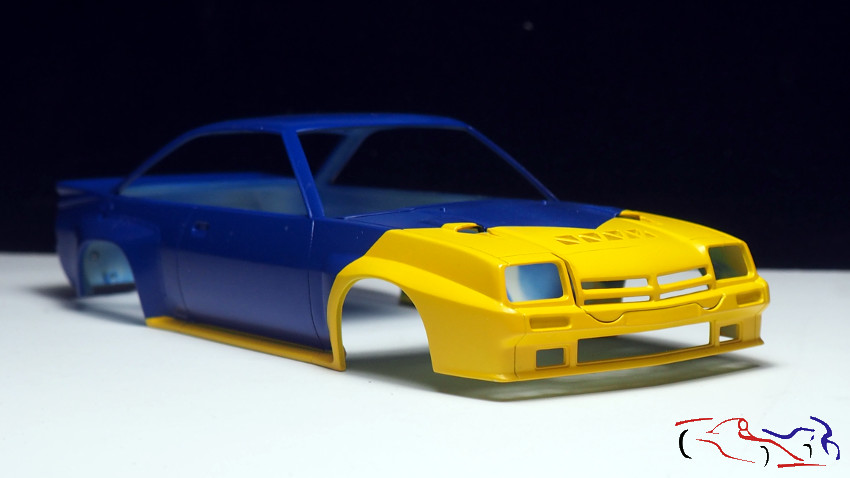
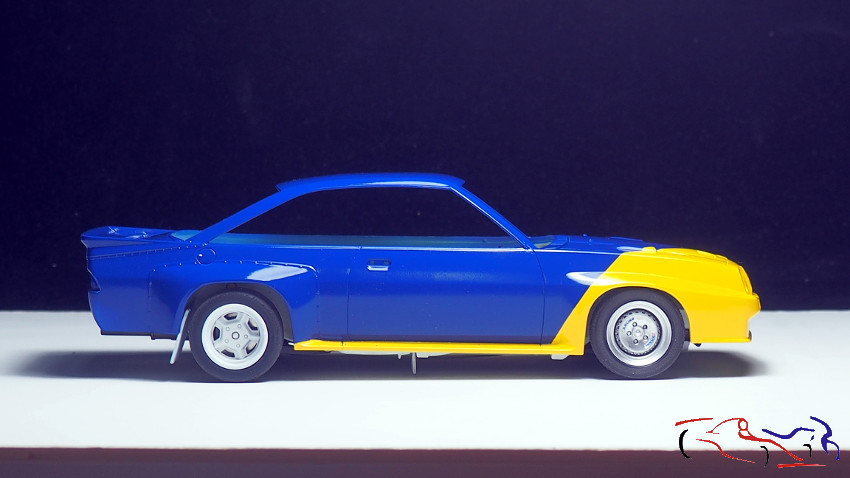
 Y como me gusta ver como queda, le coloco el chasis para ver el efecto de rebajar las ruedas delanteras, y el resultado es bastante mejor!!
And as I like to see how it goes, I put the chassis to see the effect of lowering the front wheels, and the result is much better!
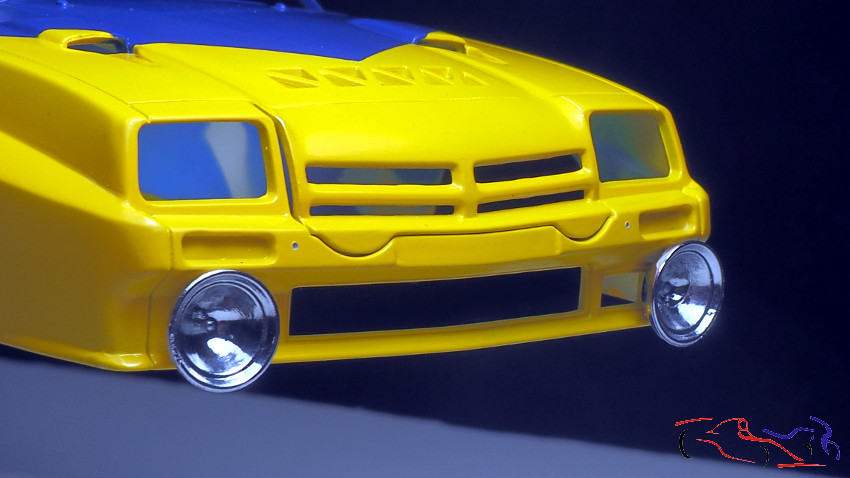
 Pasamos a los faros supletorios. Los de este Manta irán con la tapa blanca en esta situación:
We went to the auxiliary lights. Those of this Manta will go with the white cap in this situation:
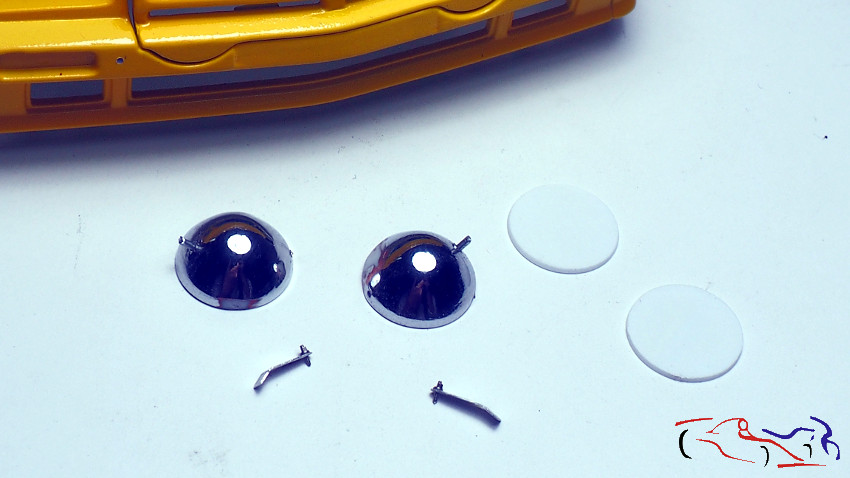
 Para fijarlos, les hago un taladro y le introduzco un vástago, que irá colocado en otro agujero en la carrocería. Con esto haremos una fijación robusta. Para las tapas, corté unos círculos de Evergreen con el cortador de círculos, y una vez pegados, adaptaré el contorno al faro. Y para terminar, en la parte de abajo, le he fabricado unas tiras de metal con un agujero, por el que he introducido una tuerca con arandela de T2M, y que se fijará al faro en un agujero que ya he practicado en la parte inferior, y en el otro extremo a la carrocería:
To fix them, I make a drill and I insert a shank, which will be placed in another hole in the body. With this, we will make a robust fixation. For the covers, I cut some circles of Evergreen with the circle cutter, and once they are glued, I will adapt their contour to the headlight. And finally, at the bottom, I made metal strips with a hole, through which I inserted a nut with washer T2M, and that will be fixed to the headlight in a hole that I have already practiced in the bottom , and on the other end to the body:
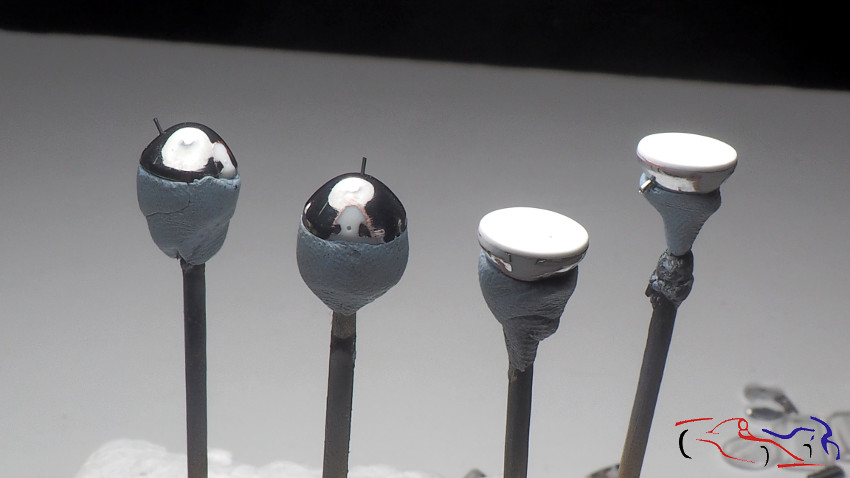
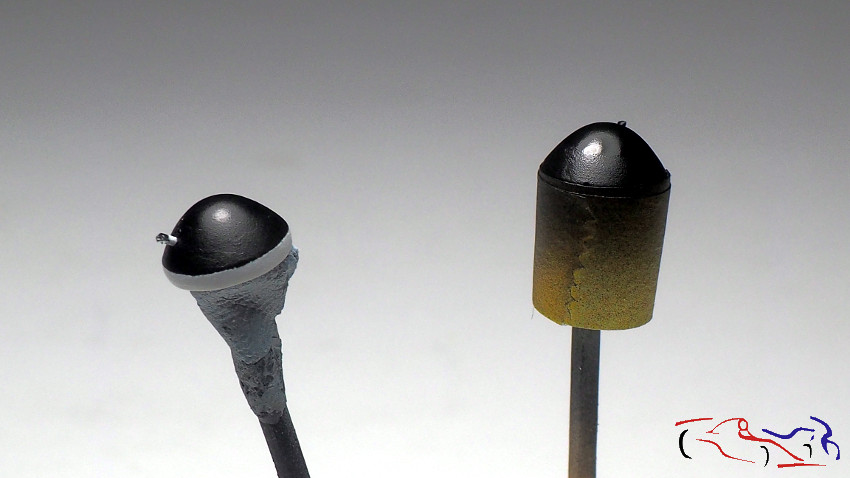
 Aquí vemos los cuatro faros; los de Finley a la izquierda que irán con el cristal y pintados de gris por fuera, y los del Philips, a la derecha con la tapa ya colocada y lista para pintar de blanco. El cono irá de negro satinado:
Here we see the four lighthouses; those of Finley on the left that will go with the glass and painted gray on the outside, and those of the Philips, on the right with the cover already placed and ready to paint in white. The cone will go black satin:
 Aquí vemos una vez pintados de negro, con el de la izquierda sin la máscara y con el lateral blanco del la tapa:
Here we see once painted black, with the one on the left without the mask and with the white side of the cap:
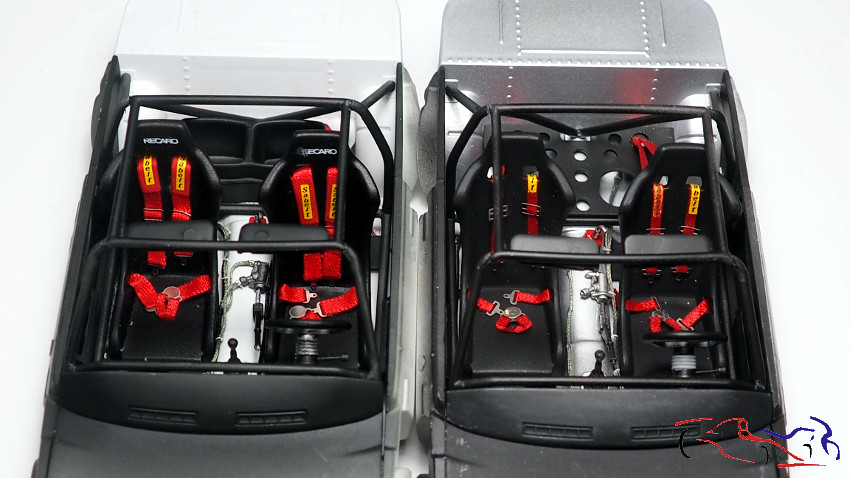
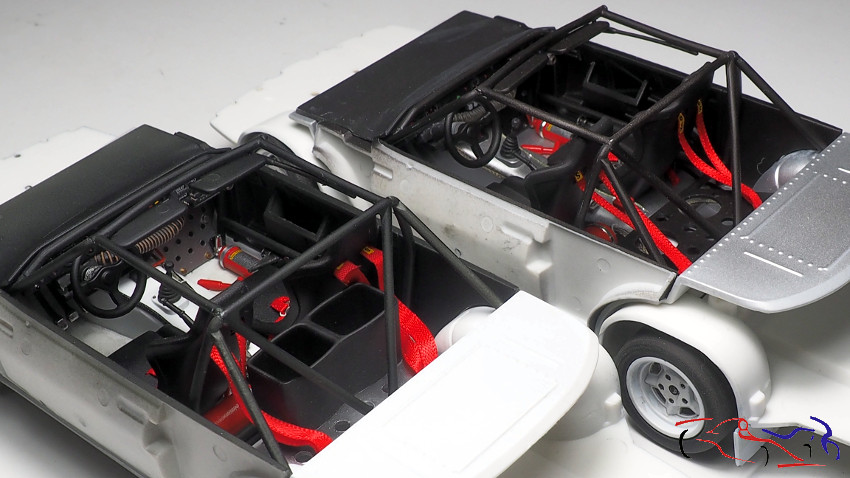
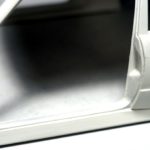
 Y para terminar, unas comparativas de los dos cockpits: blanco el de Finley a la izquierda, y plateado a la derecha el de Philips. Diferencias? El ancho de cinturones y más detalle en el Finley:
And finally, some comparisons of the two cockpits: white Finley on the left, and silver on the right the Philips. Differences? The width of belts and more detail in the Finley:
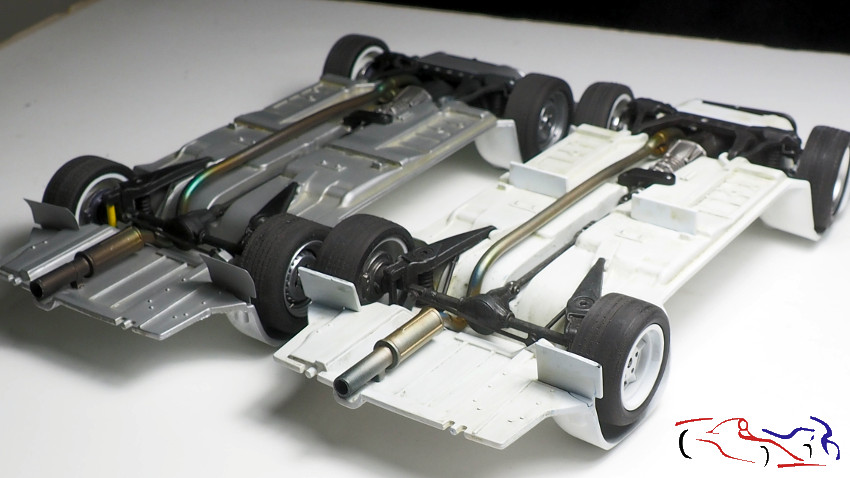
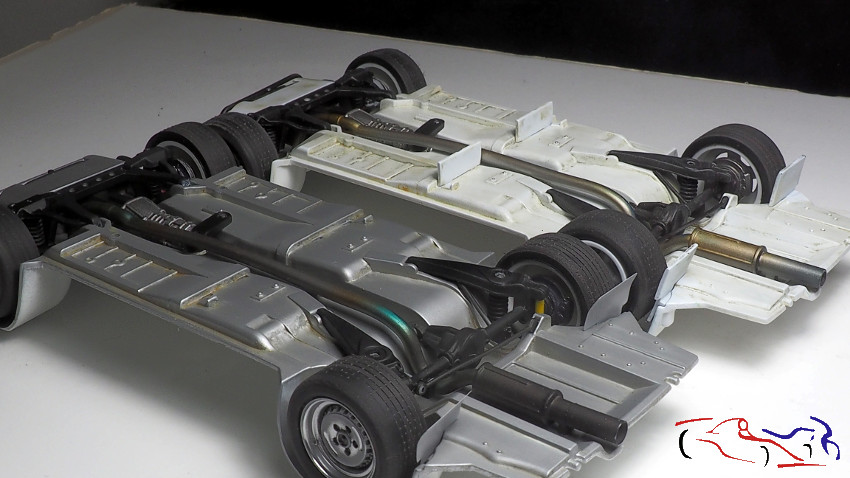
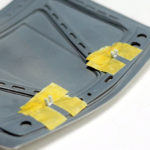
 En cuanto al chasis, el plateado de la izquierda es el de Finley y el blanco de la derecha de Philips:
As for the chassis, the silver on the left is Finley and the white on the right of Philips:
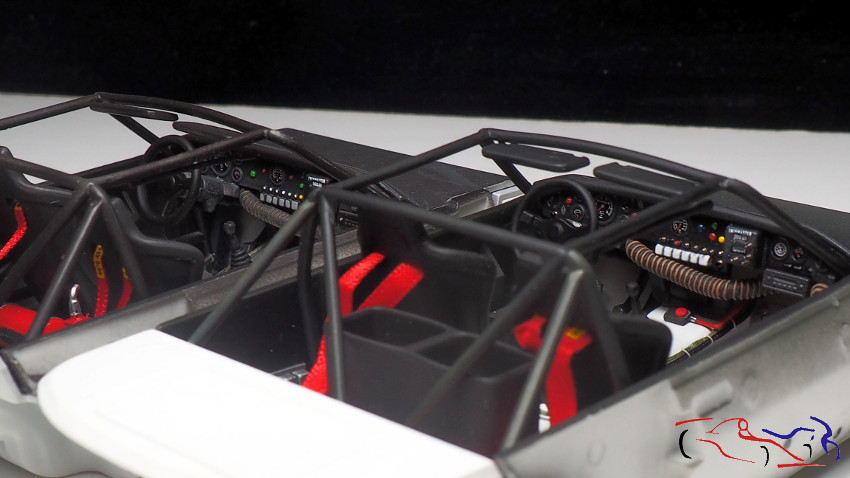
 Aquí, para terminar, los dos juntos:
Here, to finish, both together:
 Gracias por mirar y comentar!!
Thanks for watching and commenting!

Excelente, esta quedando!!! que buen truco el de los neumáticos!!!
Gracias Miguel!!