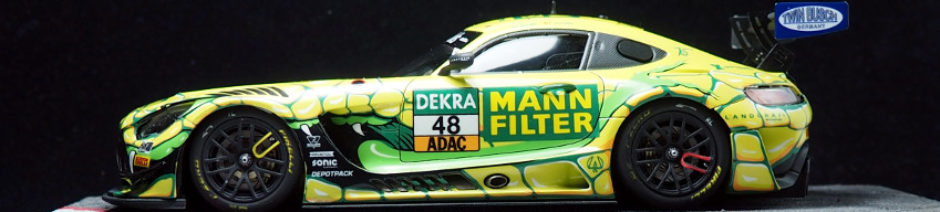
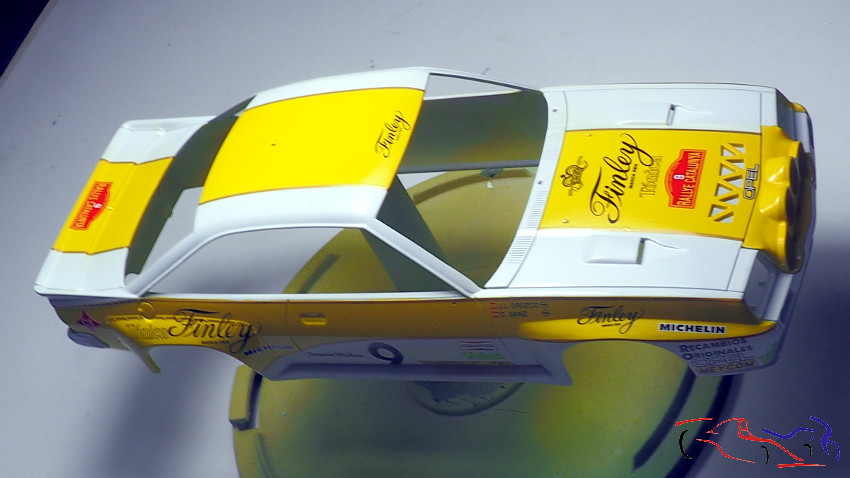
Continuamos con el Opel Manta 400 de Carlos Sainz. Como veis en la siguiente foto, he colocado la carrocería sobre el chasis con el cockpit del otro Manta de Philips para ver como queda, superponiendo las ruedas, para ver su altura, y aunque éstas sobresalen ahora, la altura es mucho mejor con los cambios que le hice:
We continue with the Opel Manta 400 by Carlos Sainz. As you can see in the next photo, I placed the body on the chassis with the cockpit of the other Philips Blanket to see how it is, overlapping the wheels, to see its height, and although these protrude now, the height is much better with the changes what I did to it:
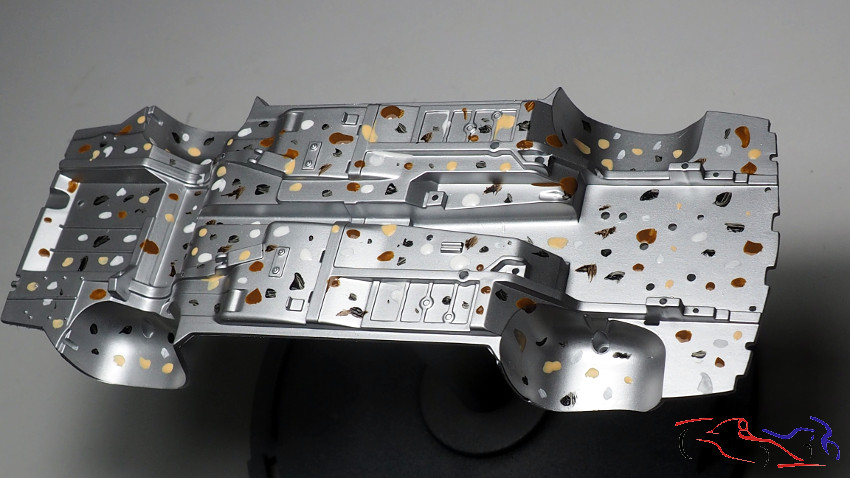
 Pero vamos con los avances, y primero con el chasis. Lo pinté de plata y para ensuciarlo, utilizo los oleos de MIG, que voy poniendo aleatoriamente por el chasis, de colores, negro, blanco, y marrones:
But let’s go with the advances, and first with the chassis. I painted it in silver and in order to dirty it, I use the MIG oils, which I’m randomly putting on the chassis, in colors, black, white, and brown:
 Con disolvente de MIG, y un pincel plano, los voy disolviendo en trazos de delante a detrás:
With MIG solvent, and a flat brush, I dissolve them in strokes from front to back:
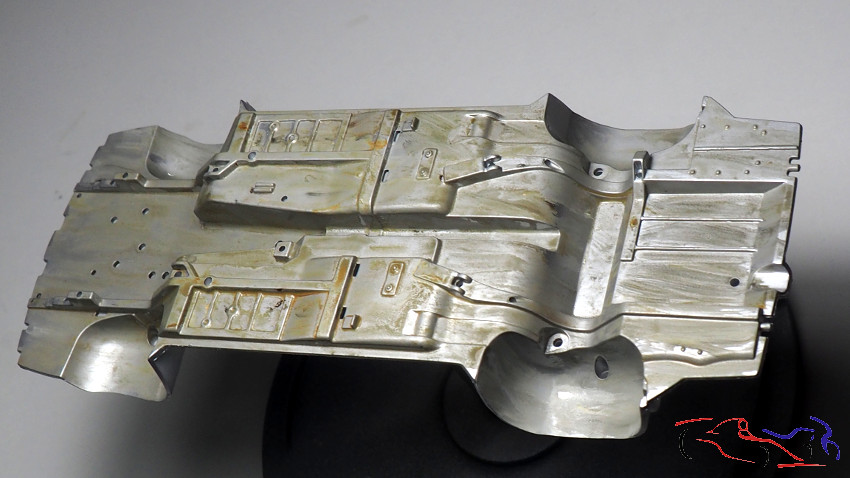 Después, paso un papel de cocina también en sentido longitudinal del coche:
Then, I pass a kitchen paper, also in the longitudinal direction of the car:
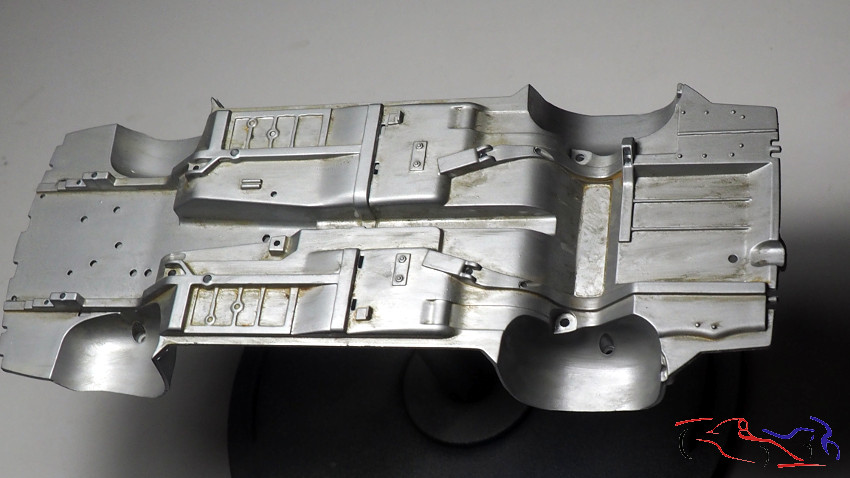 Y finalmente un bastoncillo: el resultado es que la suciedad se queda en los bordes. Para que este proceso sea más intenso, usaremos menos disolvente y seremos menos impulsivos con el papel y el bastoncillo:
And finally a swab: the result is that the dirt stays on the edges. To be more intense with this process, we will use less solvent and we will be less impulsive with the paper and the swab:
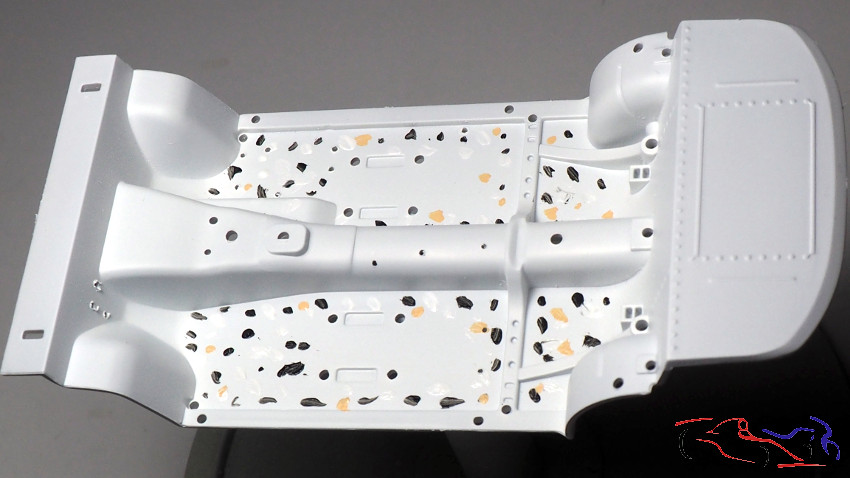
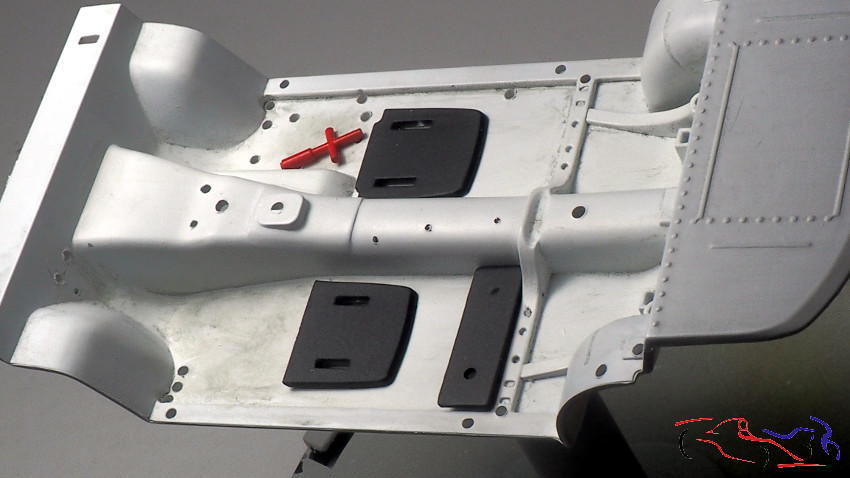
 Y lo mismo hacemos con el suelo del habitáculo, pero en este caso, partimos de blanco:
And we do the same proces with the floor of the passenger compartment, but in this case, we start with white:
 Ponemos puntos de óleo,
We put oil points,
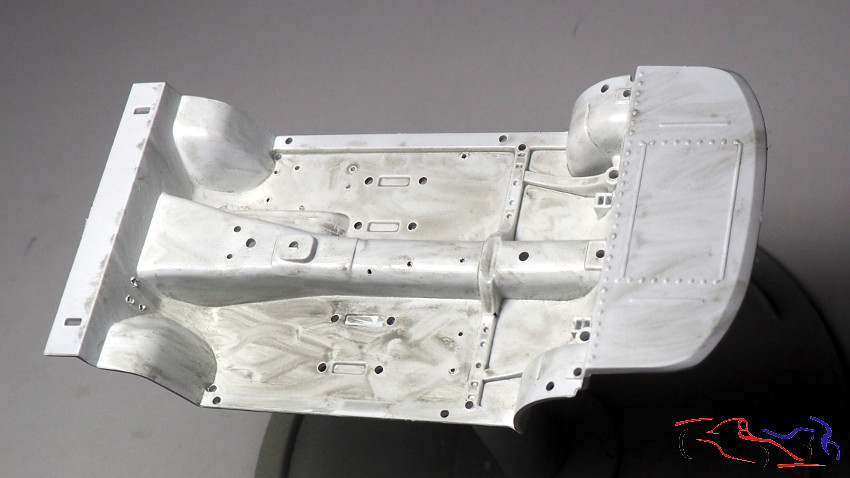
 Difuminamos con pincel y disolvente….
Blur with brush and solvent ….
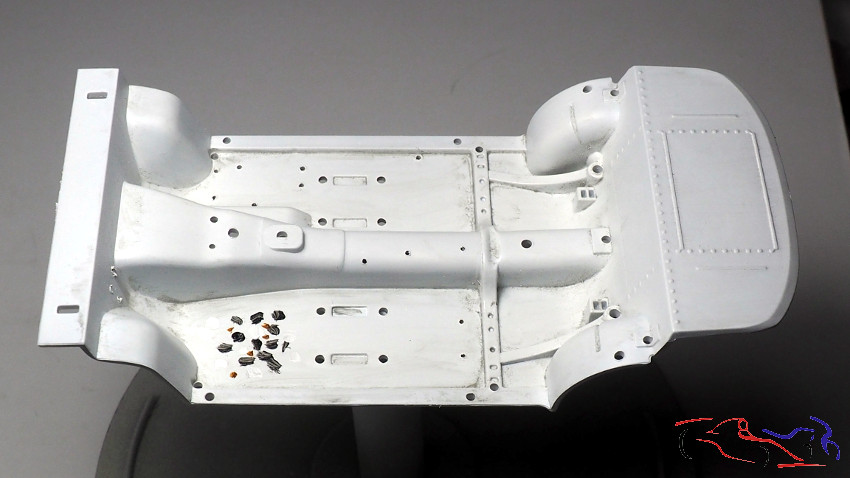
 Y en este caso, insistimos con la base del piloto y copiloto, para evidenciar un uso mayor:
And in this case, we insist with the base of the pilot and co-pilot, to demonstrate a greater use:
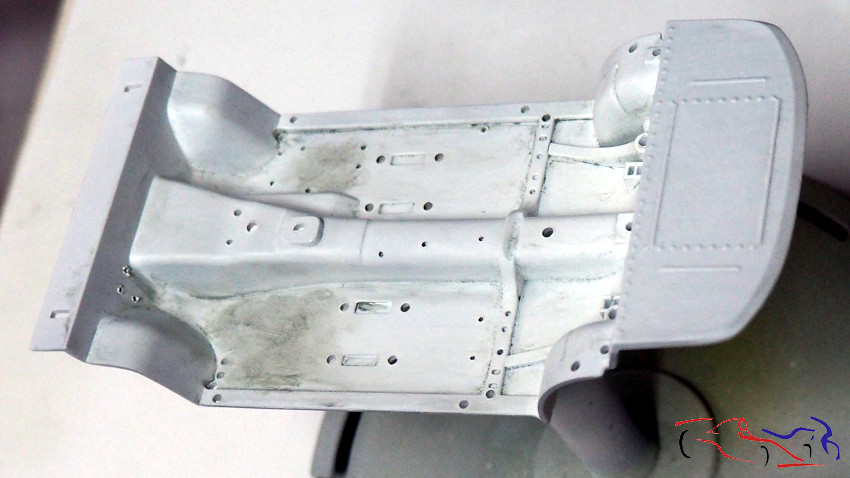
 El resultado son unas sombras por la zona de los pies y por las esquinas del resto del cockpit:
The result is some shadows in the area of the feet and the corners of the rest of the cockpit:
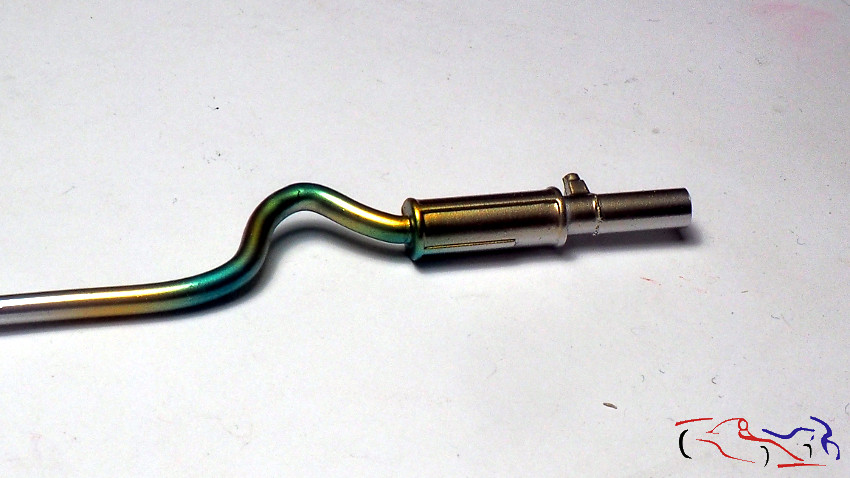
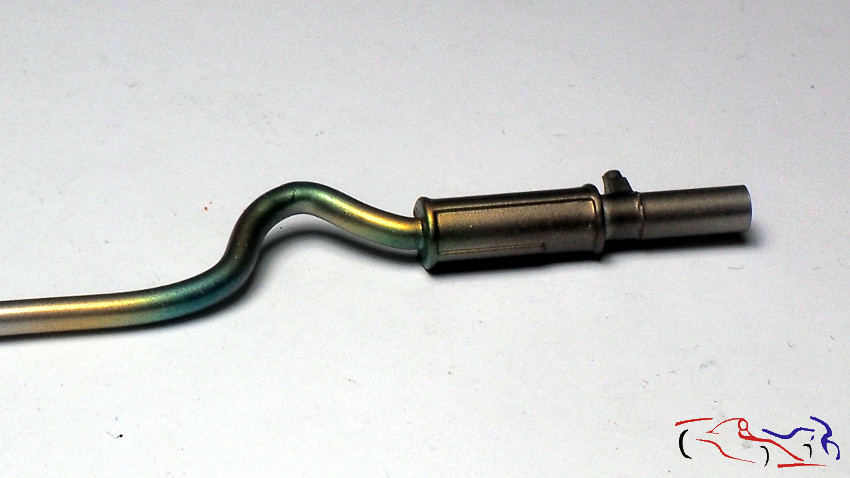
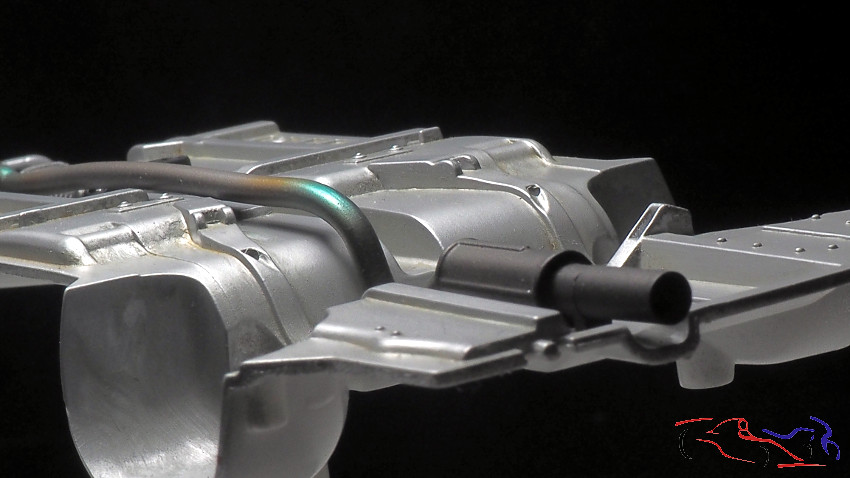
 Pasamos al tubo de escape. Después del cromo del spray, le damos tonalidades de Alclad amarillo y azul trasparente en distintas zonas:
We went to the exhaust pipe. After the chrome of the spray, we give shades of yellow Alclad and transparent blue in different areas:
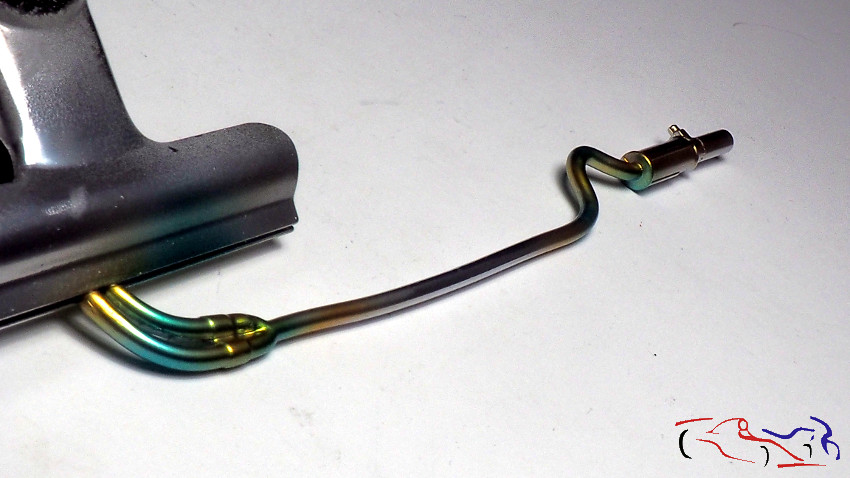
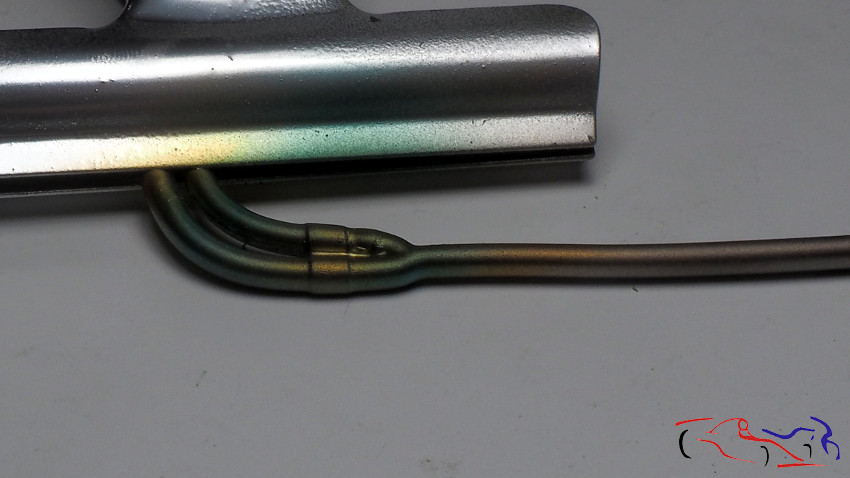
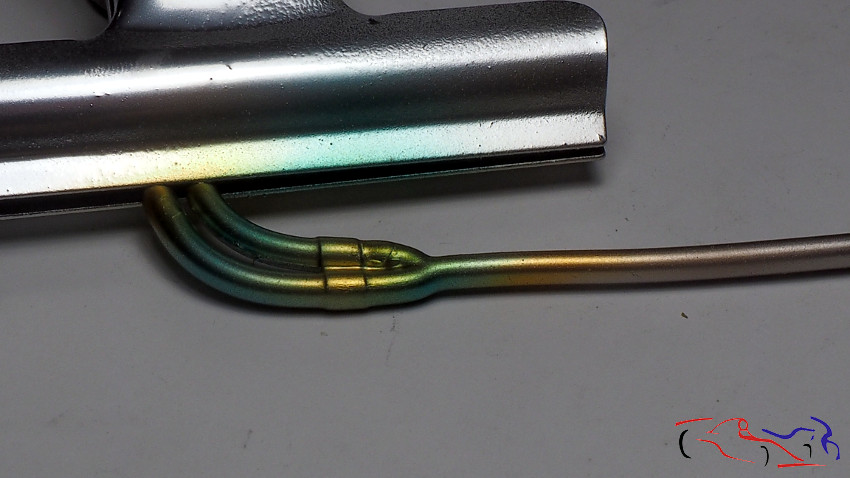 También le damos tonalidades de metal quemado:
We also give tones of burned metal:
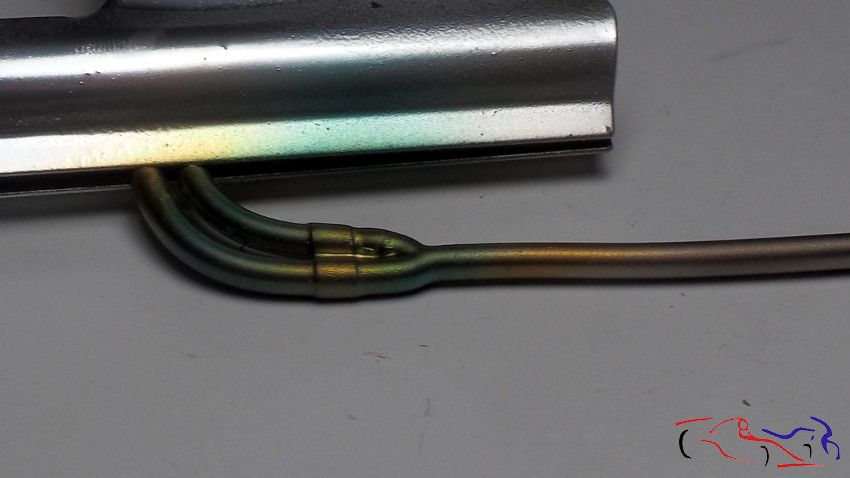
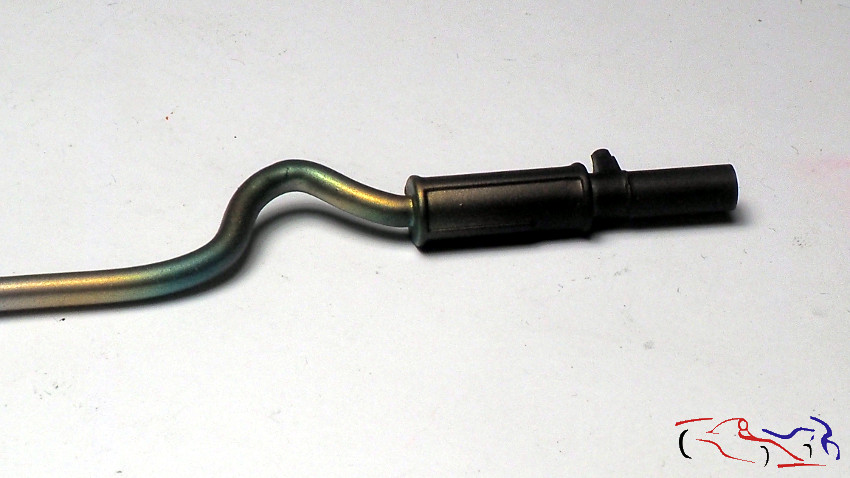
 Y terminando con negro mate muy diluido:
And ending with very diluted matte black:
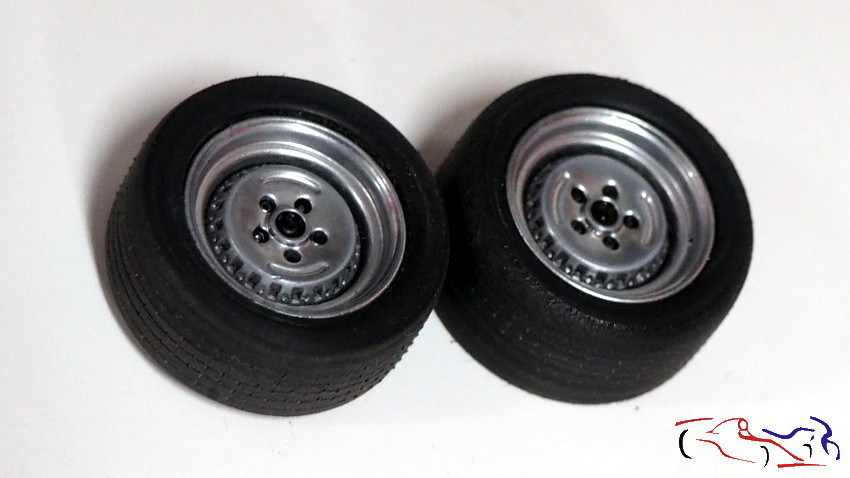
 Para las llantas, le pasamos un pincel con Smoke diluido. Podemos ver el lijado realizado en las gomas.
For the tires, we passed a brush with diluted Smoke. We can see the sanding done on the gums.
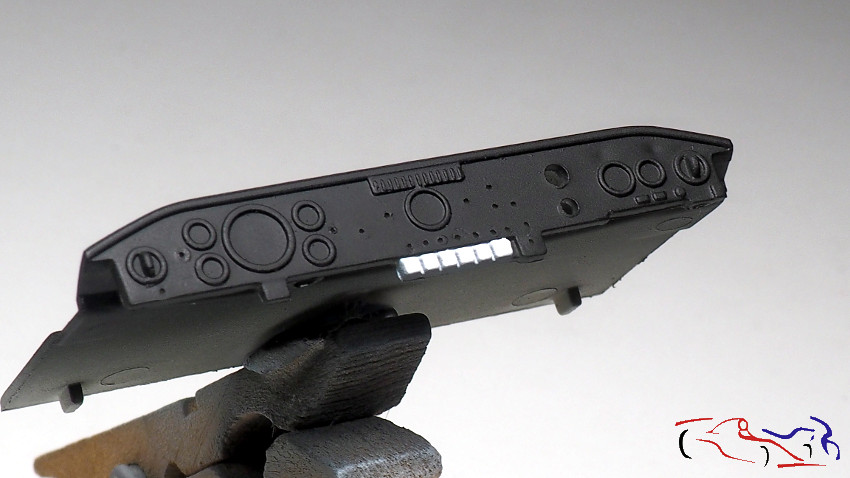
 Pasamos al salpicadero. Sobre el negro semimate, enmascaramos y pintamos los botones de un blanco un poco sucio:
We move to the dashboard. On the semi-matt black, we masked and painted the buttons of a slightly dirty white:
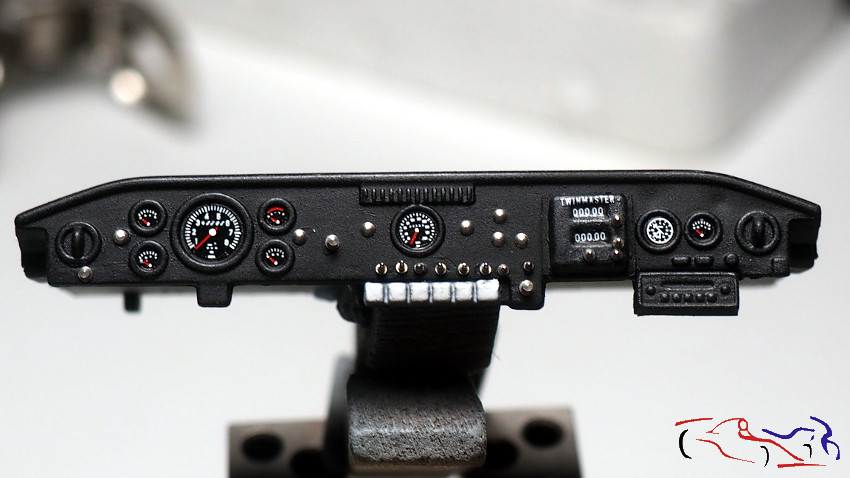
 Posteriormente, ponemos las calcas, remaches para las luces, y los botones e interruptores. A las calcas, le ponemos dos gotas de barniz brillo, previo secado entre ambas gotas:
Later, we put the decals, rivets for the lights, and the buttons and switches. I put two drops of gloss varnish to the decals, after drying between both drops:
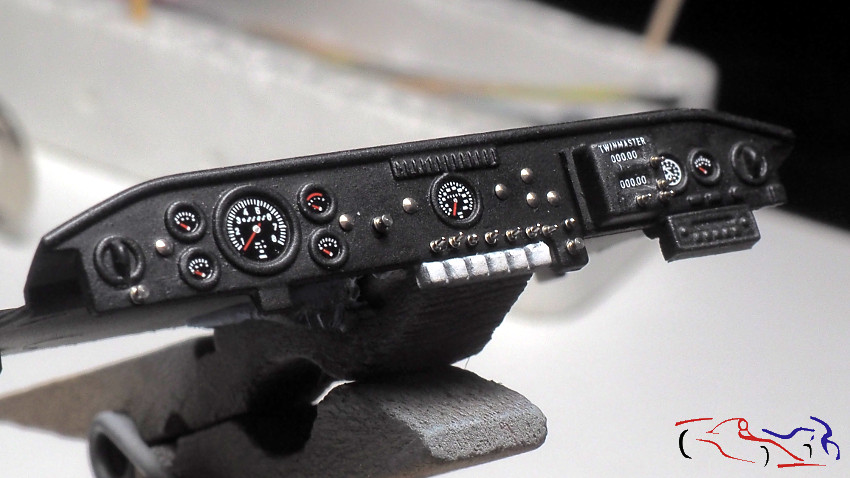 Y pintamos con colores los remaches para imitar las luces, y con negro, la punta de los interruptores:
And we paint the rivets with colors to imitate the lights, and with black, the tip of the switches:
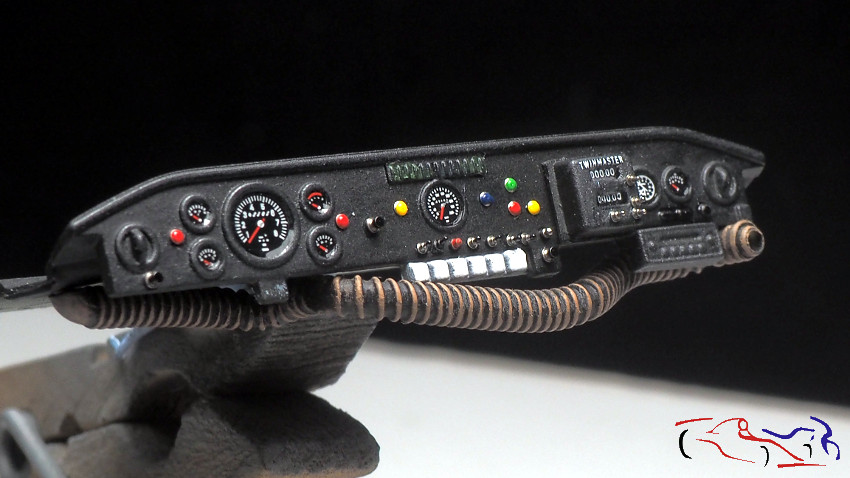
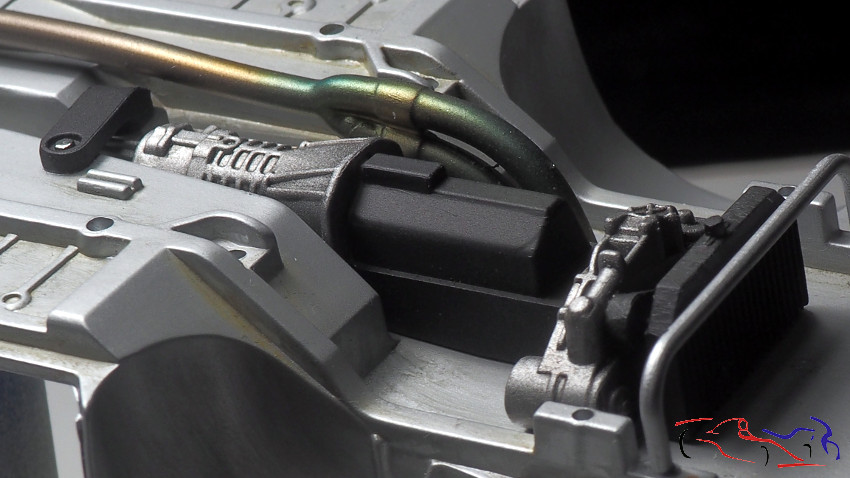
 Siguiente paso es colocar el tubo de aireación, que se pintó de negro con subidas marrones a pincel seco. A los colores, también le ponemos una gota de barniz brillo:
Next step is to place the aeration tube, which was painted in black with brown rises of dry brush. To the colors, we also put a drop of gloss varnish:
 Y empezamos a poner piezas en el chasis: partes del motor, tubo de escape…
And we started putting pieces in the chassis: parts of the engine, exhaust pipe …

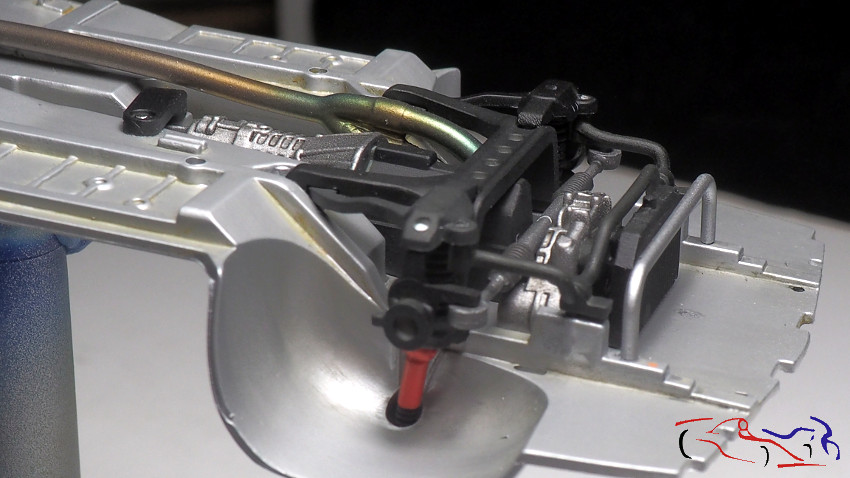
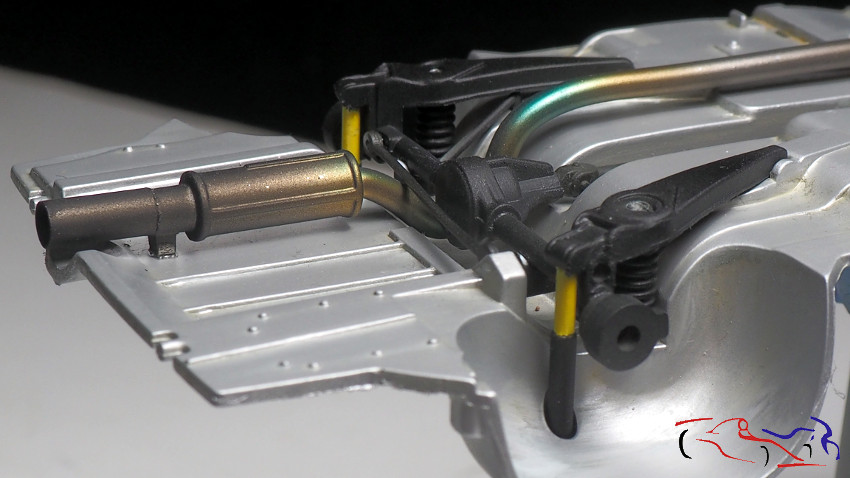
 Y las piezas que forman el conjunto del eje delantero…
And the parts that form the front axle assembly …
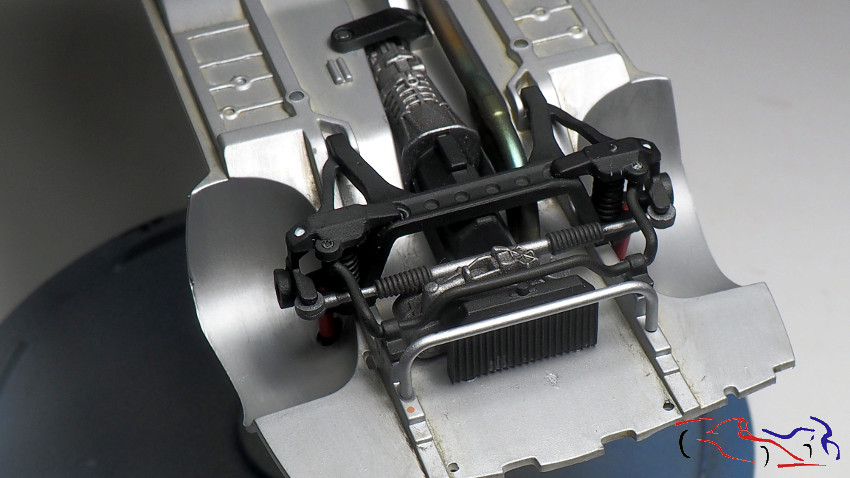
 …y trasero
…and back
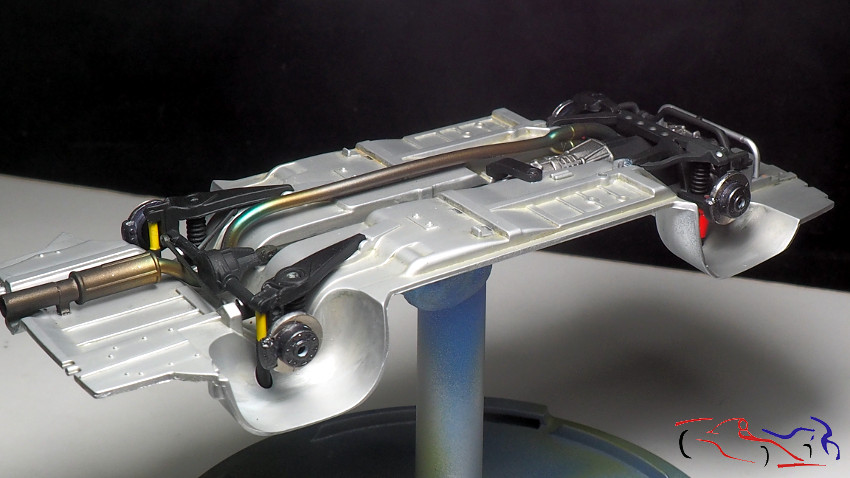
 Aquí tenemos todo colocado con los discos pegados. Tampoco me he molestado mucho en los discos por que no se verán nada:
Here we have everything placed with the glued discs. I have not bothered much on the discs either because you will not see anything:
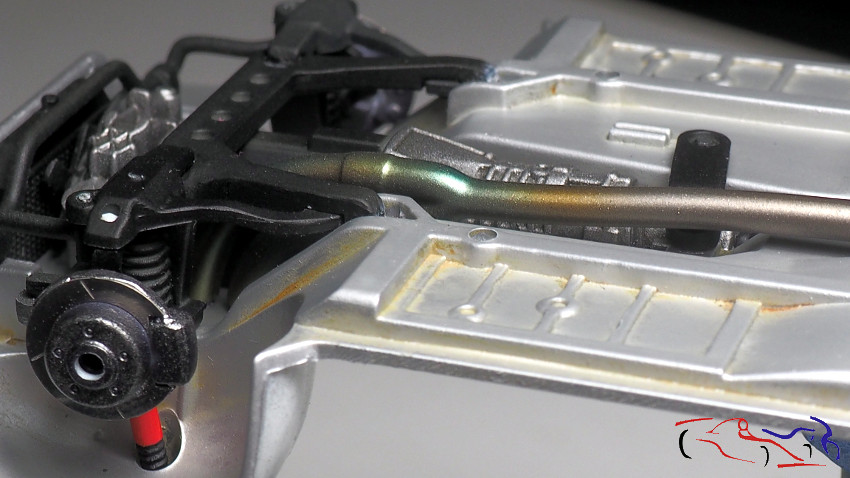
 En la siguiente foto se aprecia el ligero ensuciado que he realizado con los oleos:
In the following photo you can see the slight dirtiness that I have made with the oils:
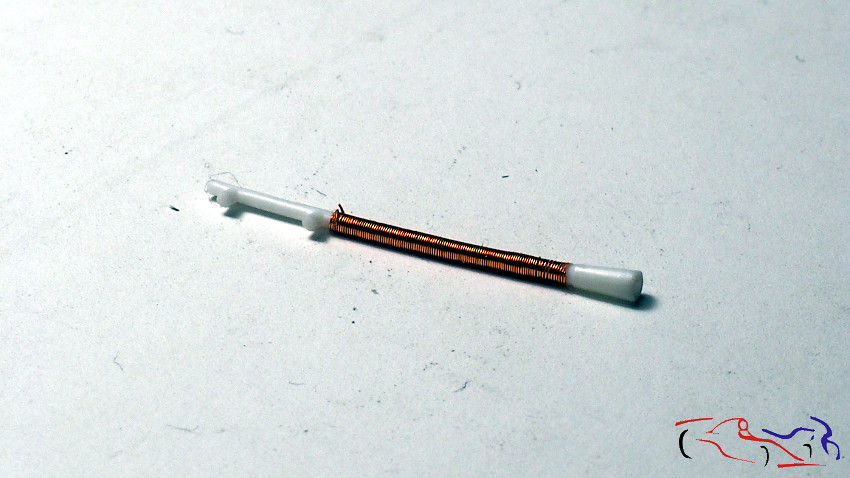
 Otro detalle que he incorporado es el hilo de cobre de 0,1 mm que he enrollado al tubo de la luz del copilotos para hacer que sea un tubo flexible. Después irá pintado de negro semimate:
Another detail that I have incorporated is the copper wire of 0.1 mm that I have wound to the light tube of the co-pilot to make it a flexible tube. Then it will be painted in semi-matt black:
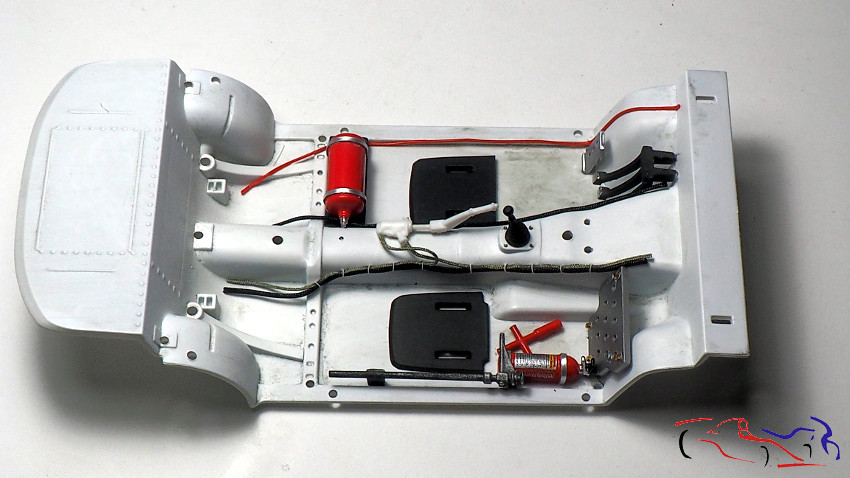
 Y empezamos a colocar piezas en el cockpit:
And we started to place pieces in the cockpit:
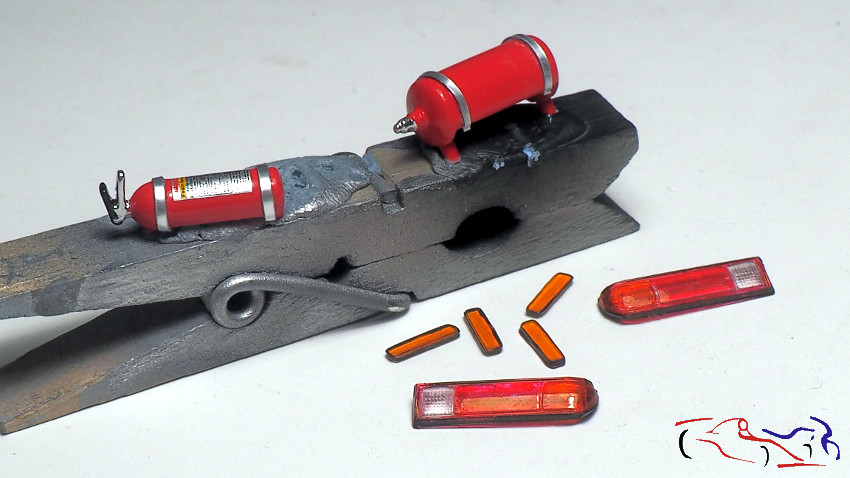
Para los extintores, he usado otra técnica para las fijaciones metálicas: esta vez he usado la cápsula de las botellas de vino, cortada con un cutter y pegada con ciano. Par alas luces, las de detrás han sido pintadas con rotulador Edding 3000 naranja y rojo. Para los intermitentes delanteros, he aerografiado naranja trasparente de Tamiya diluido con alcohol, pintando los bordes de ambas con otro rotulador negro:
For fire extinguishers, I used another technique for metal fixings: this time I used the capsule of wine bottles, cut with a cutter and stuck with cyano. For the lights, the back ones have been painted with Edding 3000 orange and red marker. For the front turn signals, I sprayed transparent orange Tamiya diluted with alcohol, painting the edges of both, with another black marker:
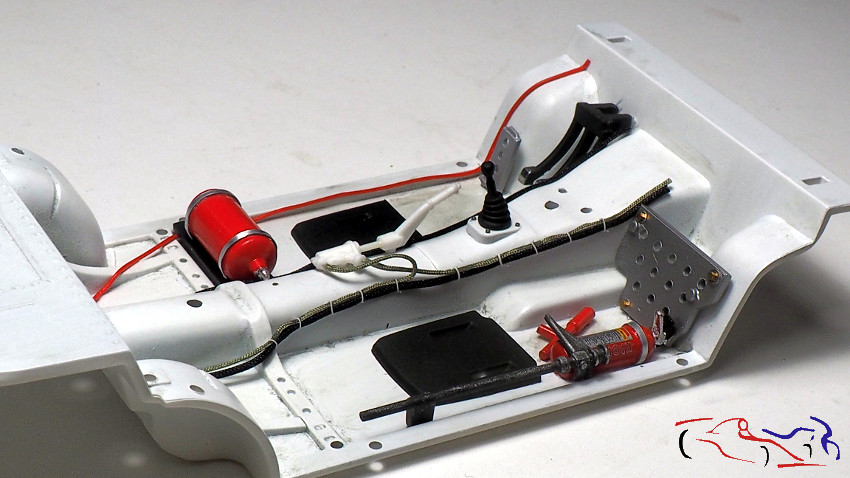
 Dichos extintores se han colocado en el habitáculo, junto con cables anudados con plástico blanco estirado. Destacar que el freno de mano, aun sin pintar, ha sido modificado para acoplar los correspondientes cables. También hago mención a las fijaciones d ela palanca de cambio:
These extinguishers have been placed in the passenger compartment, together with cables knotted with stretched white plastic. Note that the handbrake, still unpainted, has been modified to fit the corresponding cables. I also mention the fixations of the gear lever:
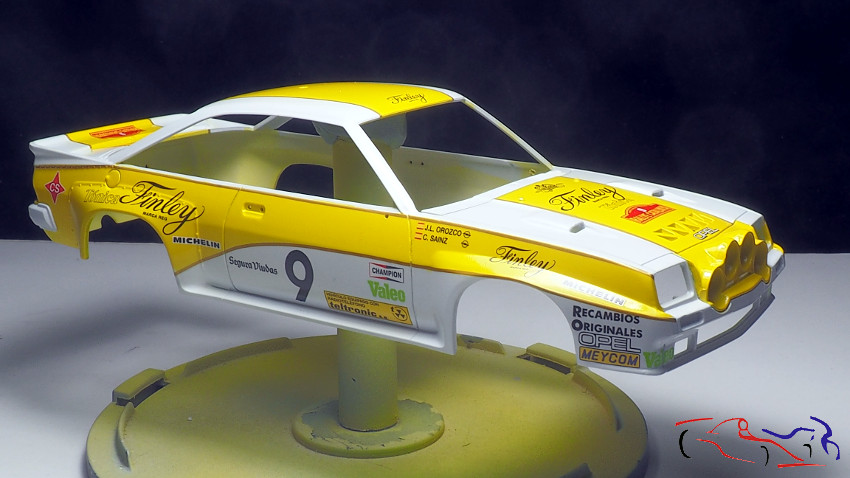
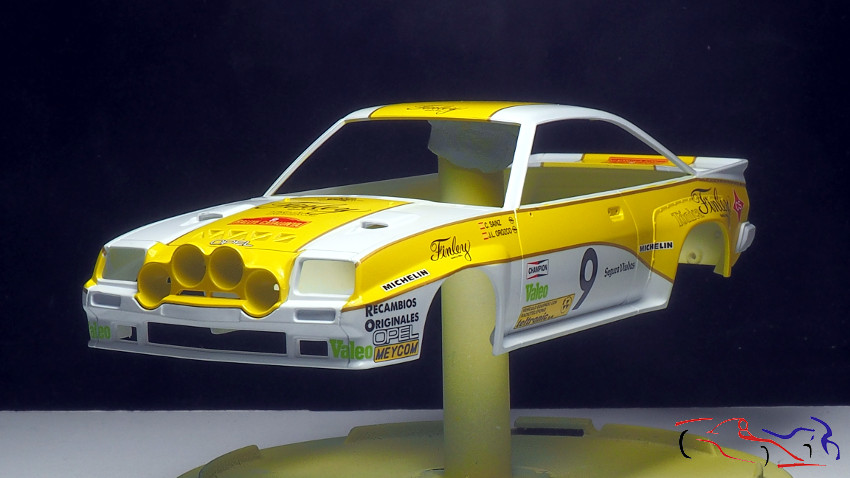
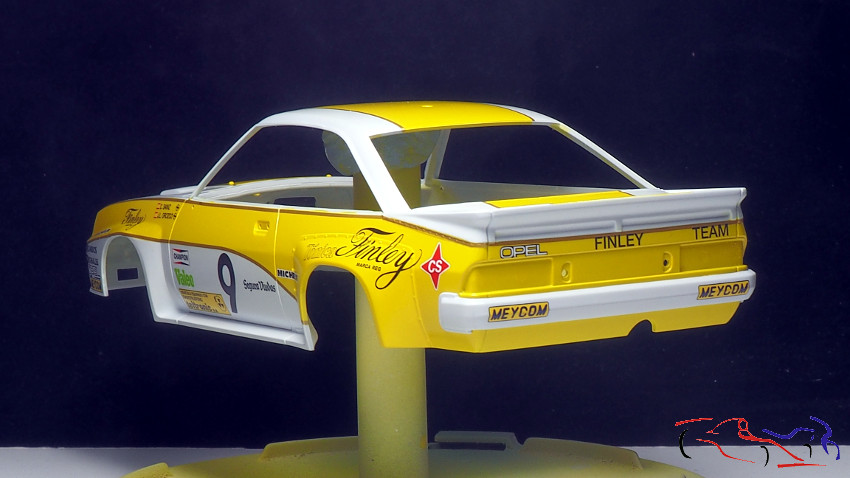
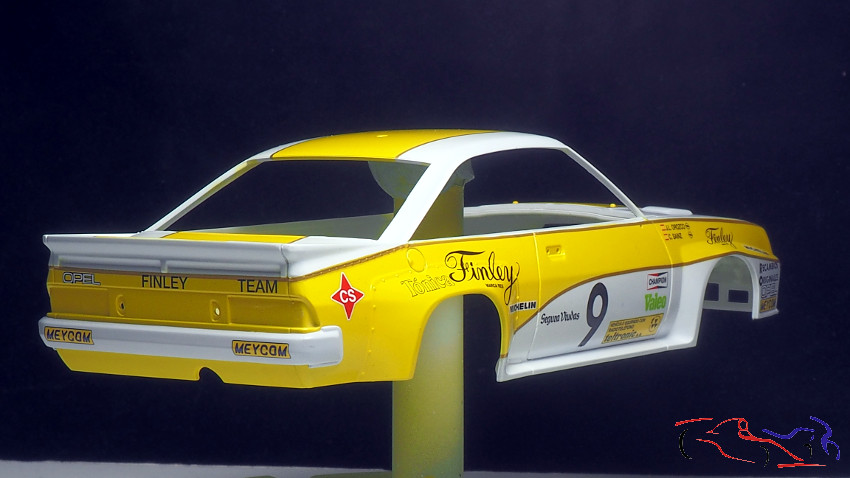
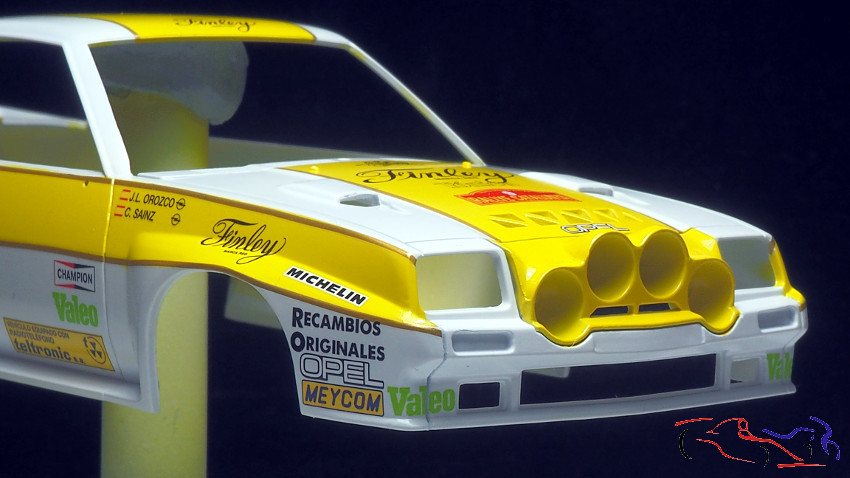
 Lo siguiente es mostraros la carrocería con un par de manos de barniz pre diluido de Zero, como protección de las calcas y como base para la laca:
The following is to show you the body with a pair of hands of varnish pre diluted of Zero, as protection of the decals and as a base for the lacquer:
 Y como no podía dejar de ver el coche con un aspecto final, lo he premontado todo:
And since I could not stop seeing the car with a final appearance, I have preassembled everything:

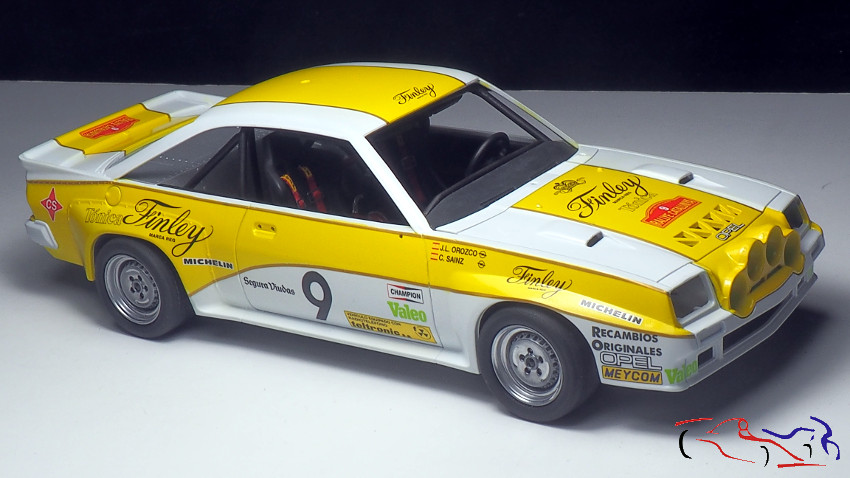
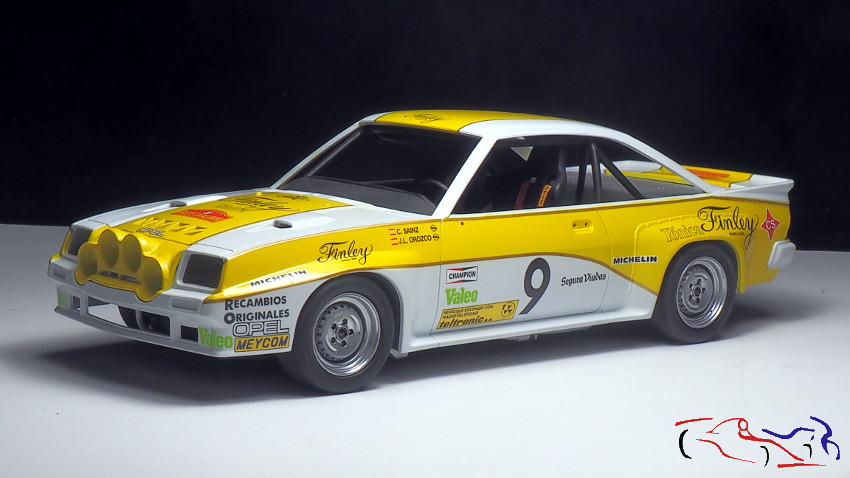
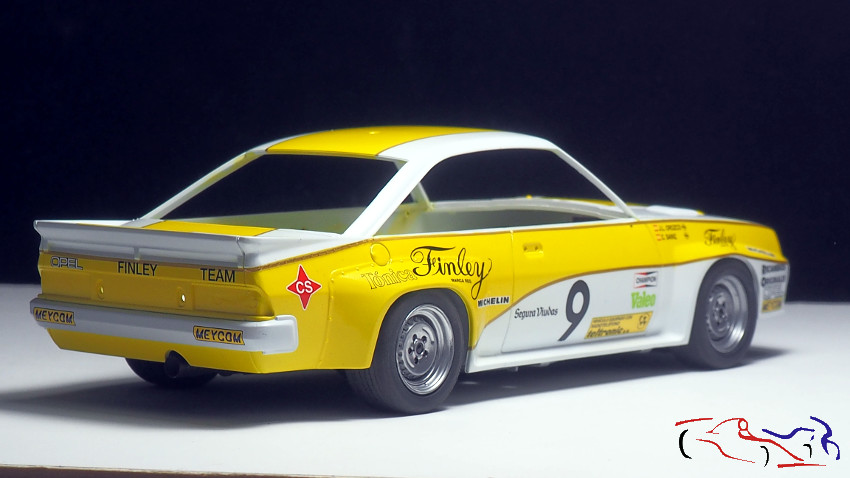
El resultado de bajar las suspensiones es bueno y lo recomiendo!!
Lo siguiente: Terminar el interior y lacar la carrocería!! Gracias por ver y comentar!!
The result of lowering the suspensions is good and I recommend it!
The following: Finish the interior and clean the body! Thanks for viewing and commenting!!


Fantastico trabajo…enhorabuena!
Gracias Juani!