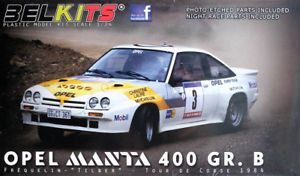
Empezamos un nuevo proyecto, aprovechando que acaba se ser lanzada al mercado, la nueva maqueta de Belkits, con referencia BEL008, del Opel Manta GrB que corrió en los años 80, con muy diversas decoraciones, siendo la elegida por el fabricante, la del equipo oficial conducido por Frequelin – “Tilber” en el rally Tour de Corse del año 1984:
We started a new project, taking advantage of the fact that the new model of Belkits, with reference BEL008, of the Opel Manta GrB that ran in the 80s, with very different decorations, being chosen by the manufacturer, the team officer led by Frequelin – “Tilber” in the 1984 Tour de Corse rally:
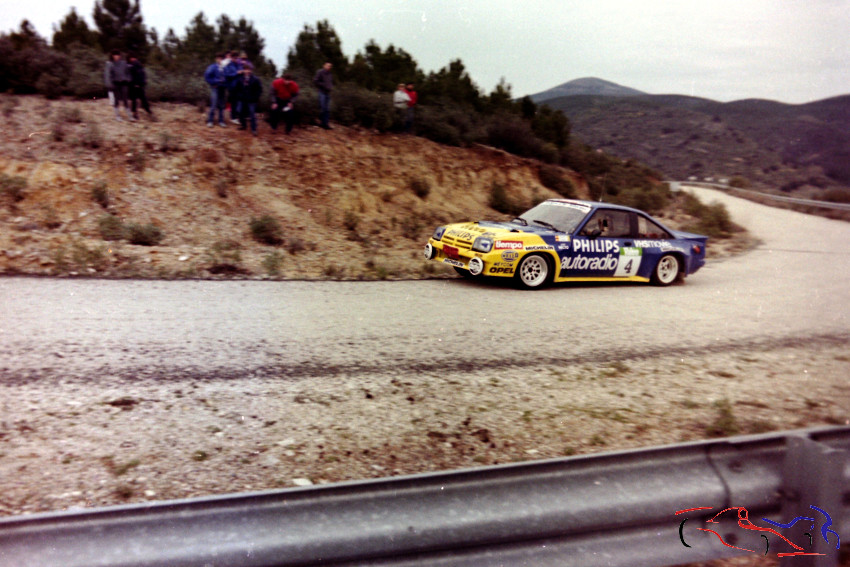
Sin embargo, y siguiendo mi tendencia a realizar los coches españole que vi correr, voy a hacer la versión Philips que condujo Beny Fernandez copilotado por JL Orozco en el Rally Valeo de 1986, y como muestra, una foto mía del rally:
However, and following my tendency to make the Spanish cars that I saw running, I’m going to do the Philips version that Beny Fernandez drove co-driven by JL Orozco in the 1986 Valeo Rally, and as a sample, a photo of me of the rally:
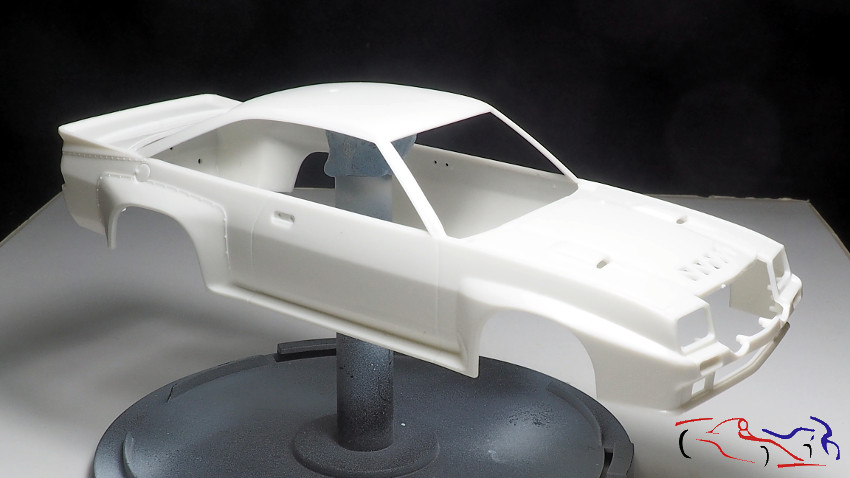
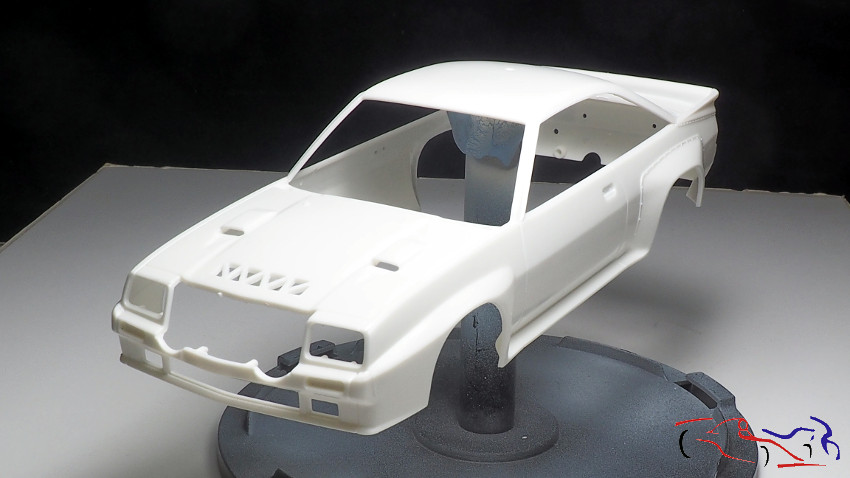
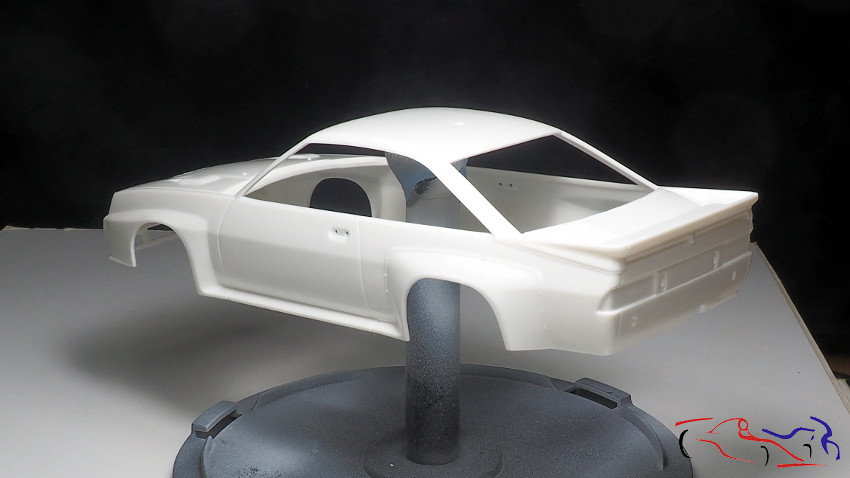
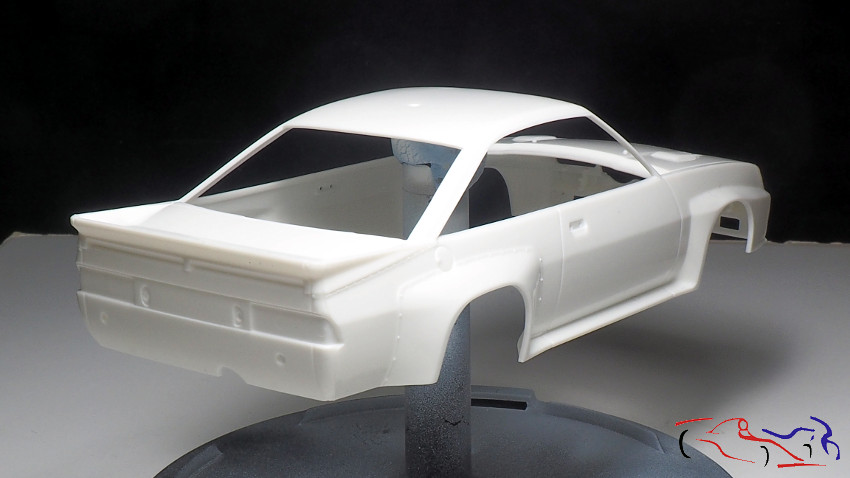
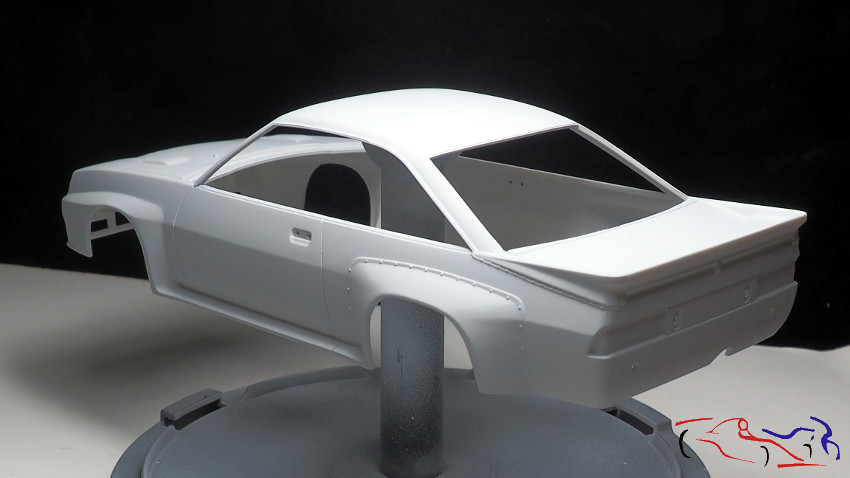
Empezamos por ver la caja y su contenido, comentando que la haré mayormente de caja, poniendo solo algunos detalles. A destacar la carrocería, bien de proporciones, con pocas lineas de molde, pero las que hay se notan, lo mismo que ocurre en todas las piezas:
We start by seeing the box and its contents, commenting that I will do it mostly out of the box, putting only some details. To emphasize the body, good of proportions, with few lines of mold, but those that there are noticed, the same thing that happens in all the pieces:
La parte delantera viene detallada para elegir entre los faros nocturnos centrales, o la parrilla del radiador:
The front part is detailed to choose between the central night headlights, or the radiator grille:
Los fotograbados que vienen son principalmente las hebillas de los cinturones, los discos de freno, las matriculas, los cierres, las rejillas y un par de fijaciones de los asientos en lugar de cuatro, que hay que ponerlos solo en la parte exterior de los asientos. Pero como ahí no se van a ver, yo los pondré en la parte interior:
The photoetched parts that come in kit are mainly the buckles of the belts, the brake discs, the license plates, the latches, the grilles and a couple of fixings of the seats instead of four, that you have to put them only on the outside of the seats . But since they will not be seen there, I’ll put them on the inside:

En cuanto a los faros delanteros, viene la opción de elegir entre los bifaros redondos o los faros cuadrados. Yo elijo la de los faros cuadrado que es la que llevó el coche elegido:
As for the headlights, there is the option to choose between round bi-lights or square headlights. I choose the one of the square headlights which is the one that took the chosen car:

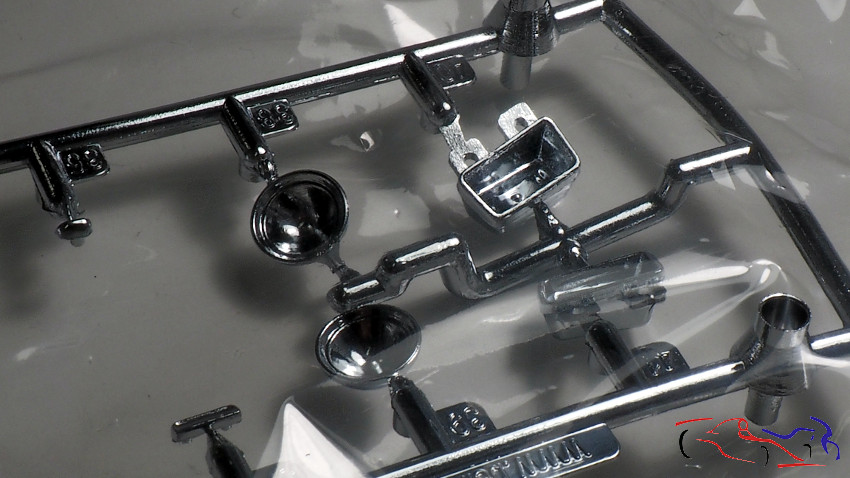
En cuanto al cromado, no es tan “juguete” como en otros kits, con lo que en principio, lo voy a dejar así:
And regarding the Chrome parts, they are not as “toy” as in other kits, so in principle, I’ll leave them like they are:
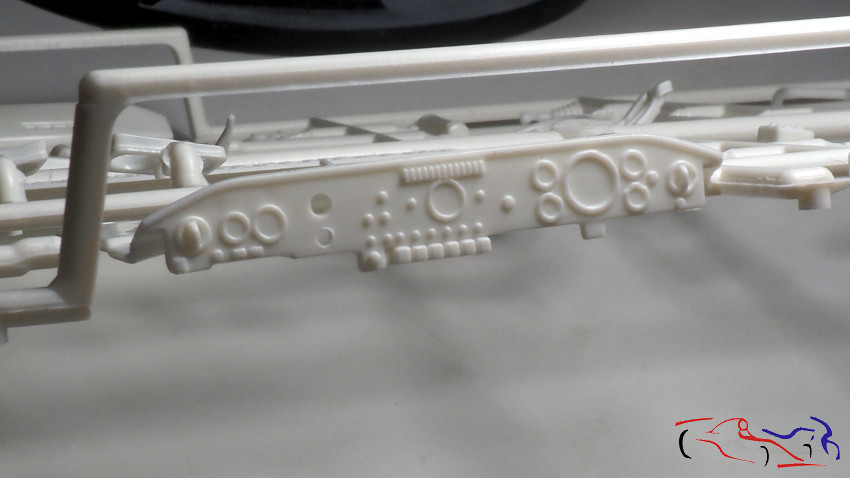
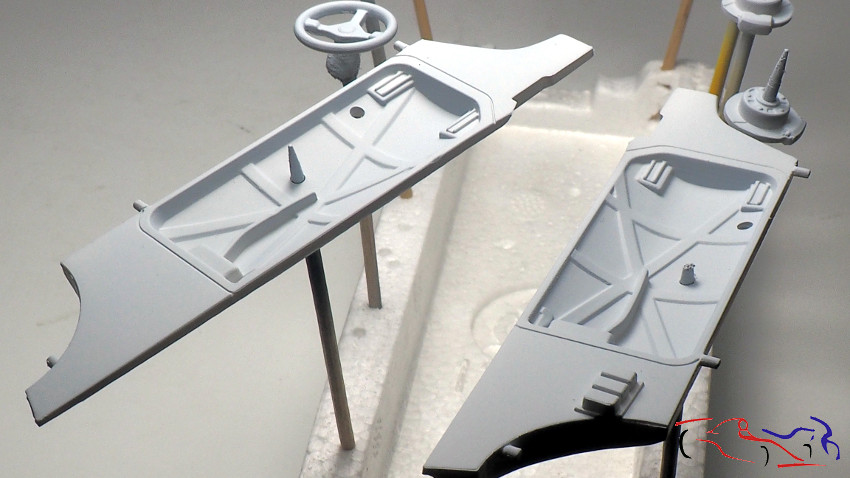
El salpicadero: se puede hacer alguna cosa curiosa!! (en este caso es el de volante a la derecha)
The dashboard: we can do something curious! (this is the steering wheel to the right)
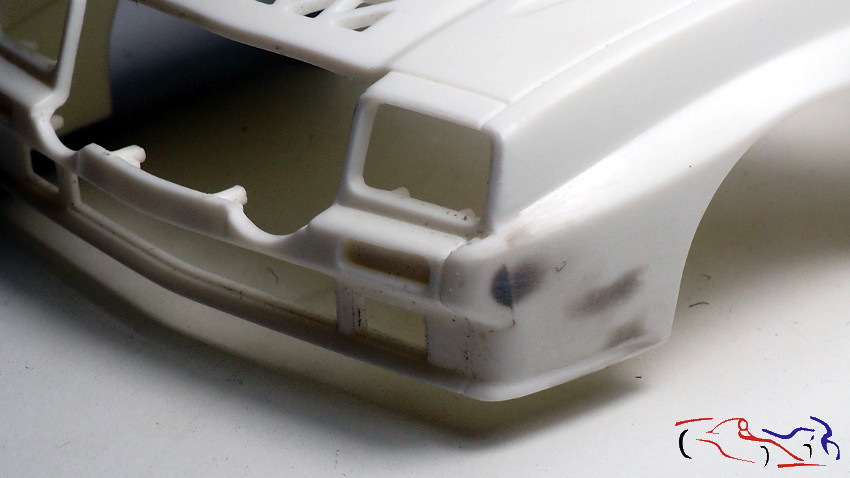
Empezamos lijando las lineas y poniendo masilla al principio de las aletas delanteras:
We started by sanding the lines and adding putty at the beginning of the front fins:
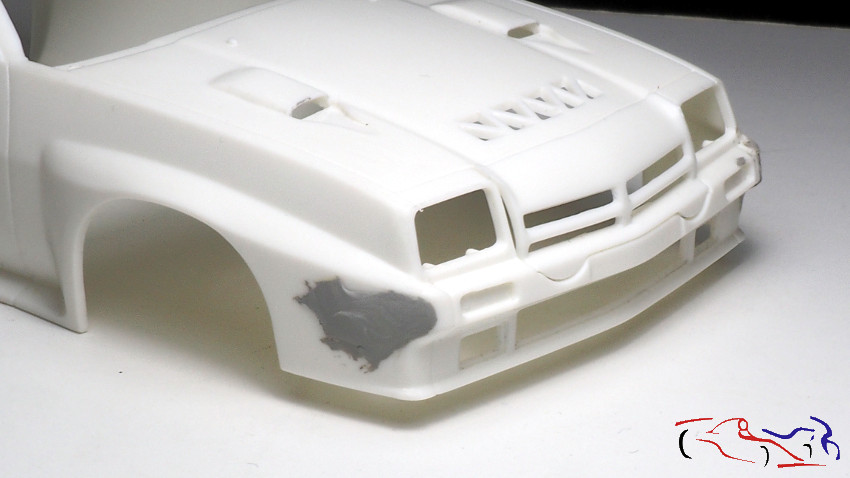
Afinamos con lija:
Performed with sandpaper:
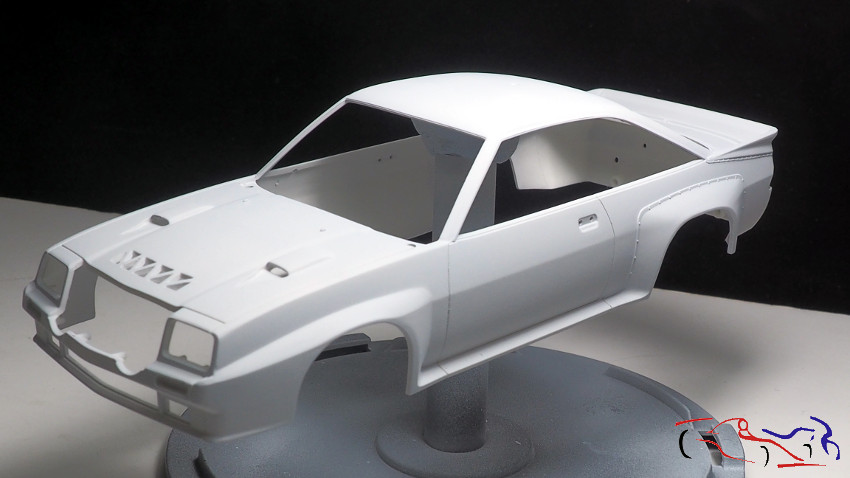
E imprimamos con Gravity:
And primed with Gravity:
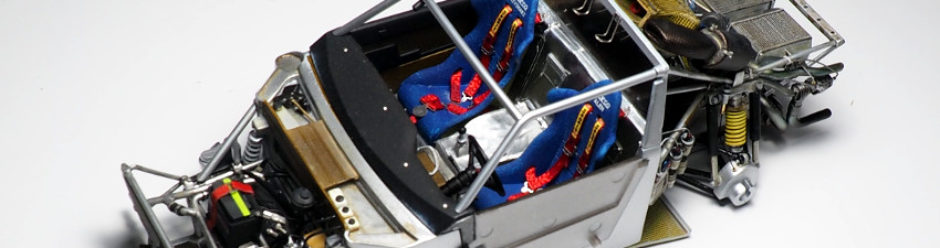
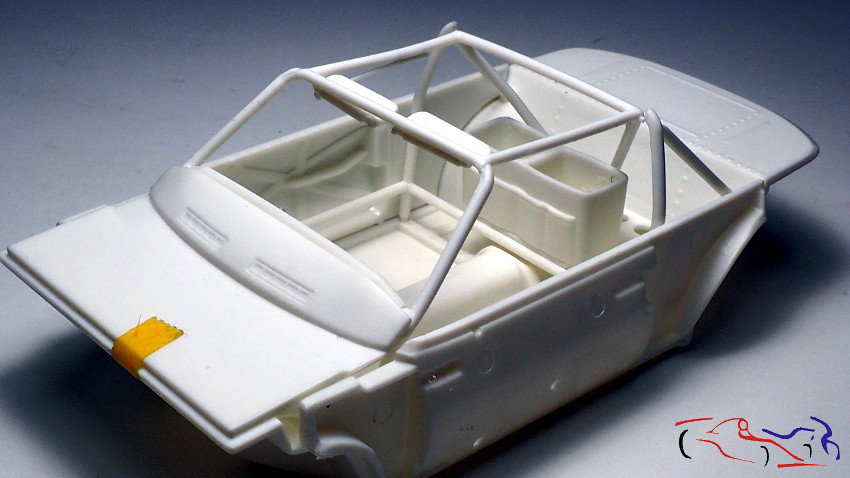
Para el cockpit, primero montamos para ver como encaja:
For the cockpit, we first assemble it to see how it fits:
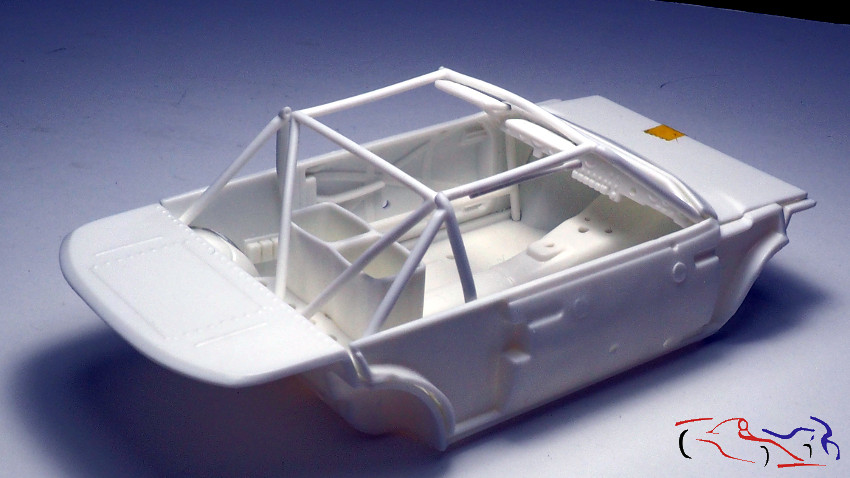
Detalle de la parte trasera con los portacascos:
Detail of the rear part with the helmet holders:
El chasis viene en dos partes: la superior, en la que hacemos los agujeros que indican las instrucciones para la versión con volante a la izquierda, ya que se puede elegir también la otra versión con volante a la derecha. Y debido a esto, hay muchas piezas que están repetidas…. Y la segunda parte que es la del chasis propiamente dicho.
The chassis comes in two parts: the upper one, in which we make the holes that indicate the instructions for the version with steering wheel to the left, since you can also choose the other version with steering wheel to the right. And because of this, there are many pieces that are repeated…And the second part is the chassis itself.

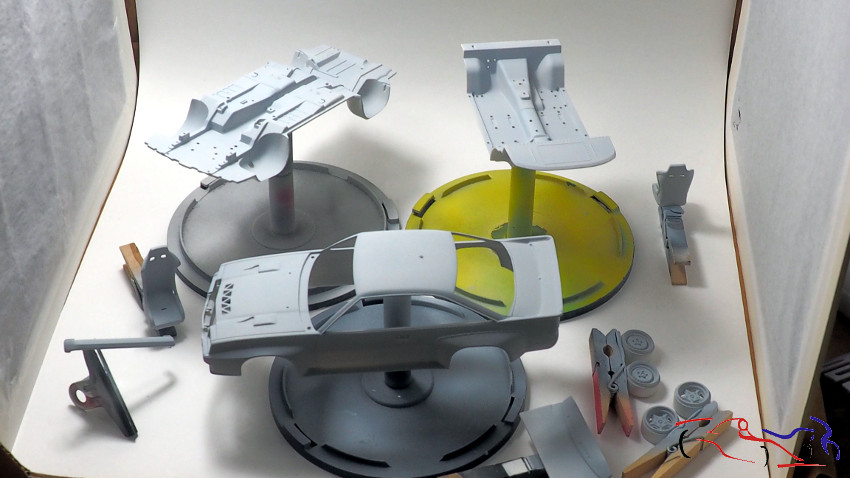
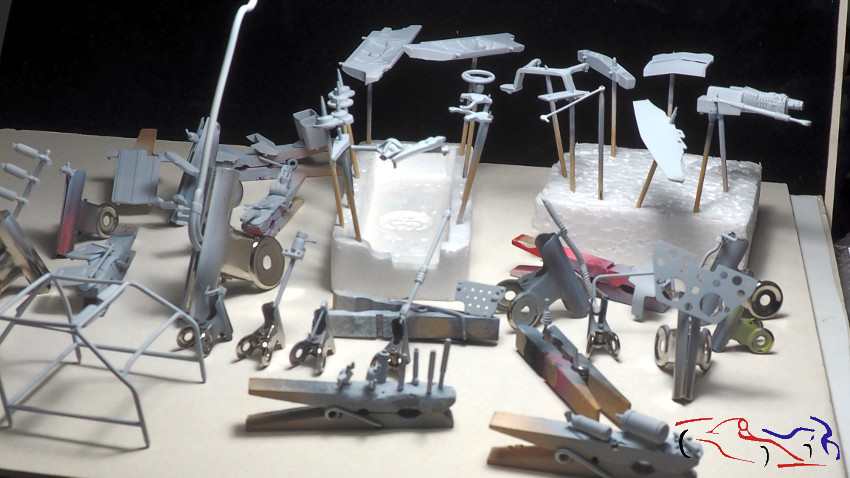
Y preparamos las piezas para imprimar:
And we prepare the parts for pimer!

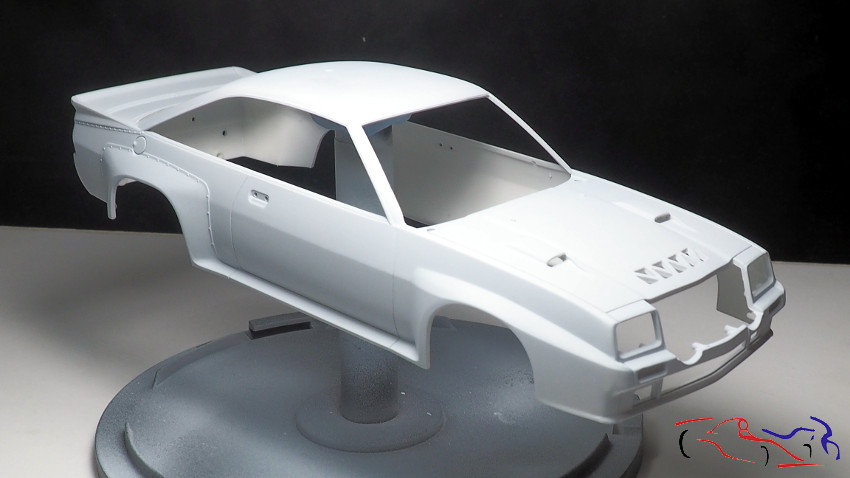
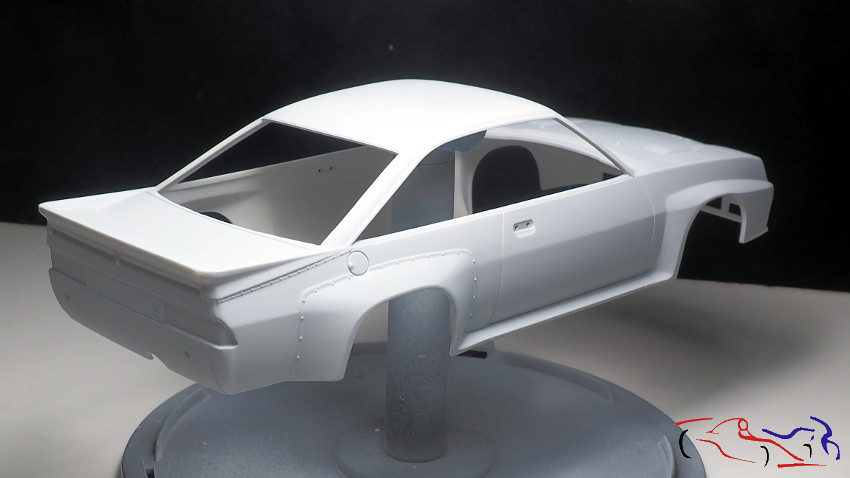
Aquí las piezas que ya había imprimado, listas para la pintura blanca, que daré como base a mi decoración:
Here the pieces that I had already primed, ready for the white paint, which I will give as a base to my livery:
La carrocería ya pintada de blanco:
The body already painted in white:
Y la parte superior del chasis lista para ser pintada de aluminio:
And the upper part of the chassis ready to be painted aluminum:
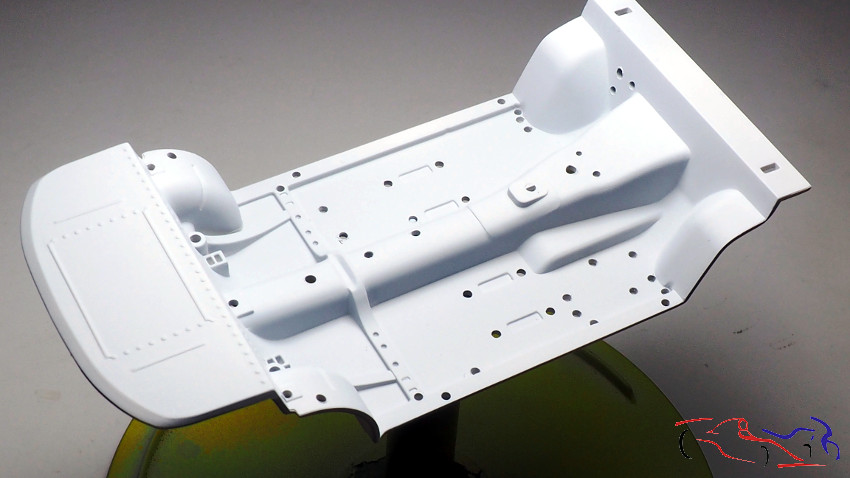
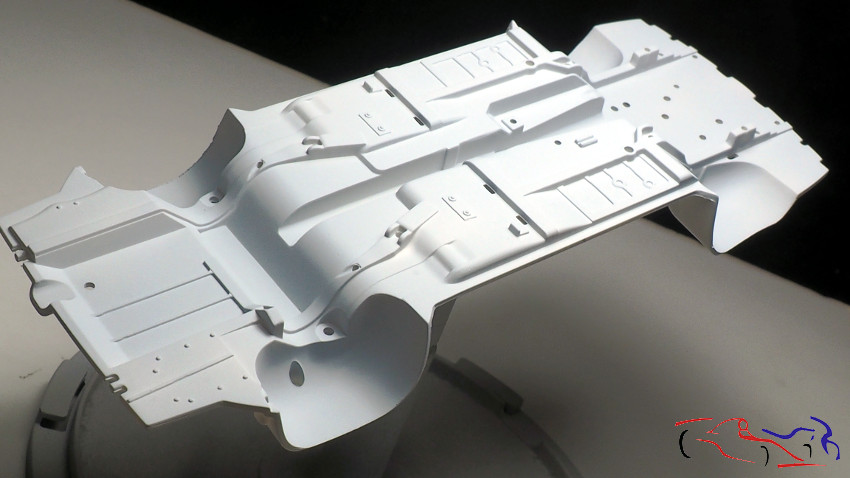
En cuanto a los bajos del chasis, ya pintados de blanco listos para ensuciar un poco:
As for the underside of the chassis, already painted white ready to mess up a bit:
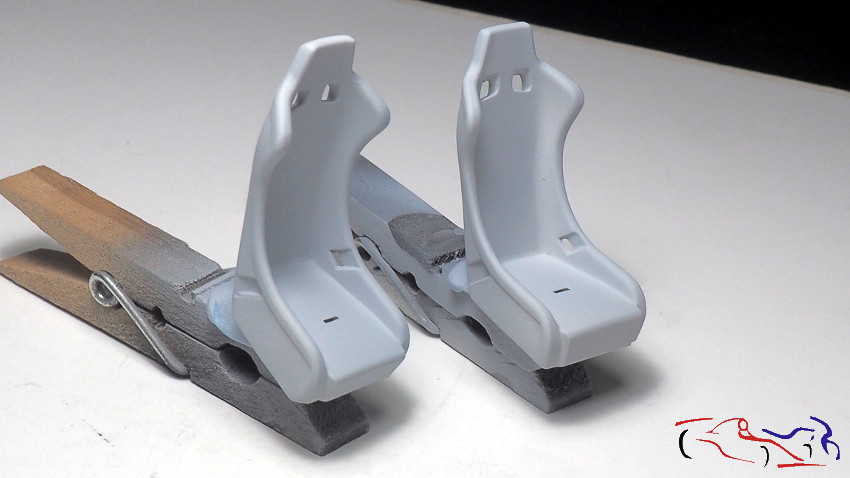
Aquí tenemos los asientos:
Here we have the seats:
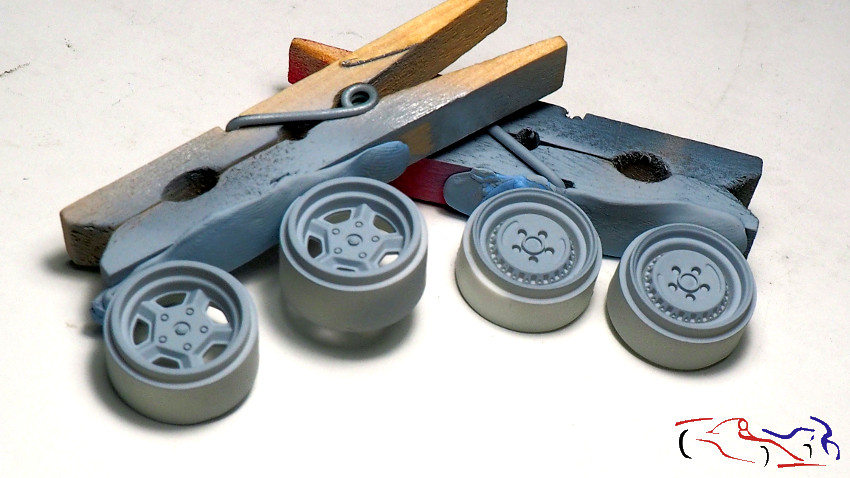
Otra opción que trae el kit son las llantas, y estas son las elegidas: las delanteras son las Ronal, pintadas en aluminio, y las traseras en blanco:
Another option of the kit are the rims, and these are the chosen ones: the front ones are the Ronal, painted in aluminum, and the back ones in white:
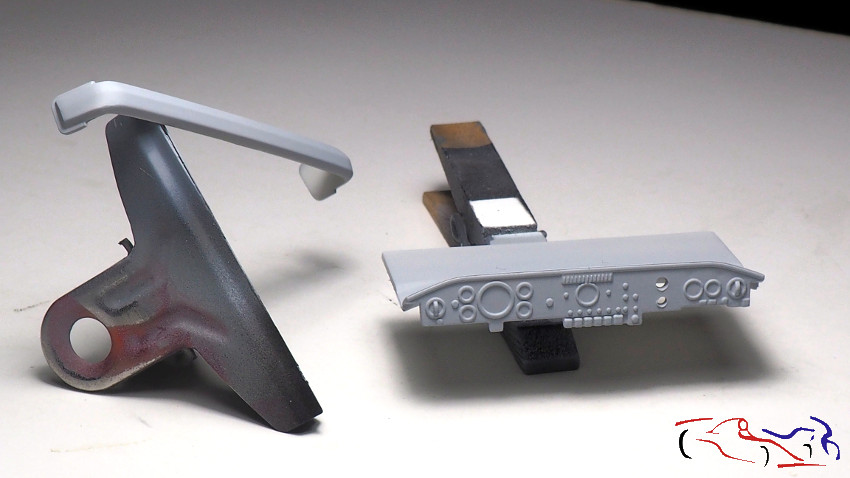
Parachoques trasero y salpicadero, listos para pintar:
Rear bumper and dashboard, ready to paint:
Y todas las piezas ya imprimadas:
And all the parts already primed:
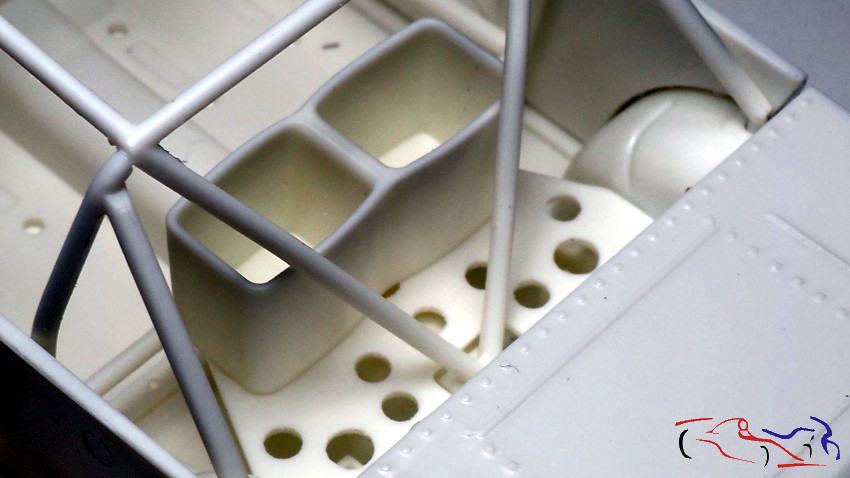
Destacar los parasoles y la luz del copiloto, que van pegados a la pieza central del arco de seguridad:
Highlight the sun visors and the passenger light, which are attached to the central part of the rollcage:

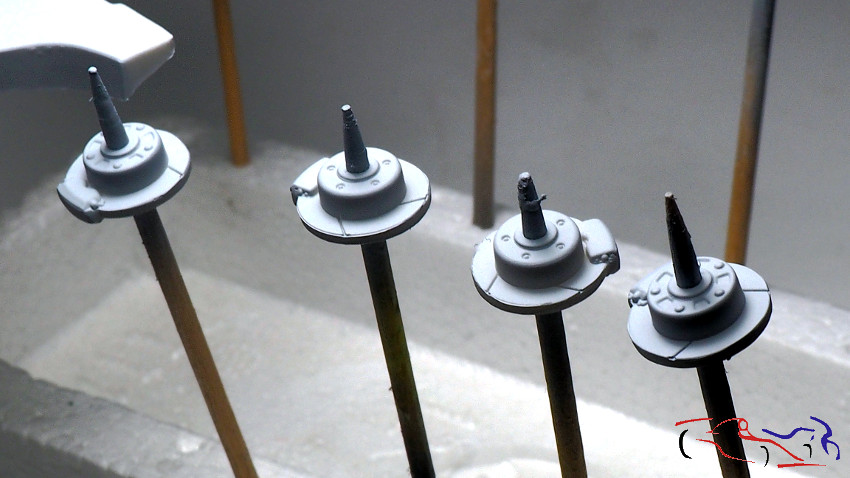
Detalle de los discos de freno:
Detail of the brake discs:
Y de los interiores de las puertas:
And the interiors of the doors:
Hasta aquí hemos llegado.
Gracias por ver y comentar!
So far we have come.
Thanks for viewing and commenting!


Gracias por compartir amigo!…estoy en fase con uno!! Saludos!