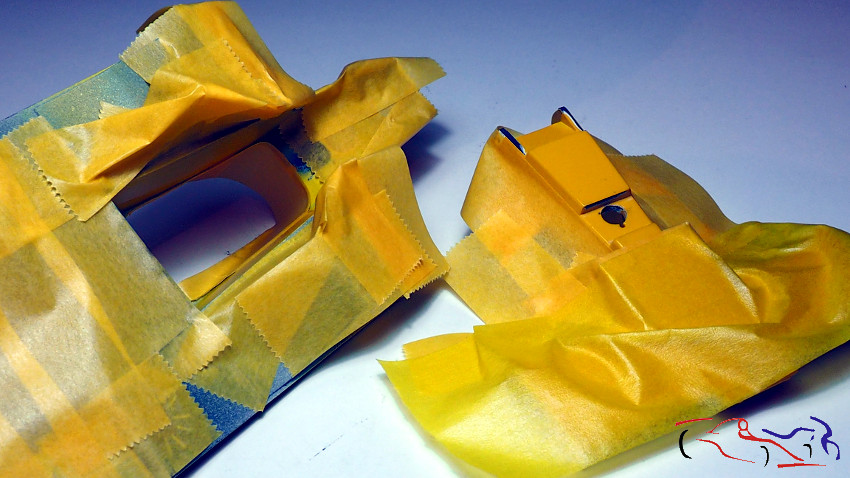
Con la carrocería lacada, ya es hora de ir montando las piezas. Pero aun falta pintar sobre el amarillo en color metalizado. La parte de abajo de la parte delantera irá del mismo color que las fijaciones de los triángulos inferiores, es decir, Aluminio mate de Alclad:
With the body lacquered, it is time to go mounting the pieces. But I still need to paint on the yellow in metallic color. The lower part of the front will be of the same color as the fixings of the lower triangles, ie Alclad Matte Aluminum:
Y la parte interior del cockpit con el aluminio de AK que es un poco más brillante. Y para ello, enmascaramos ambas piezas:
And the inside of the cockpit with AK aluminum that is a bit brighter. And for this, we mask both pieces:
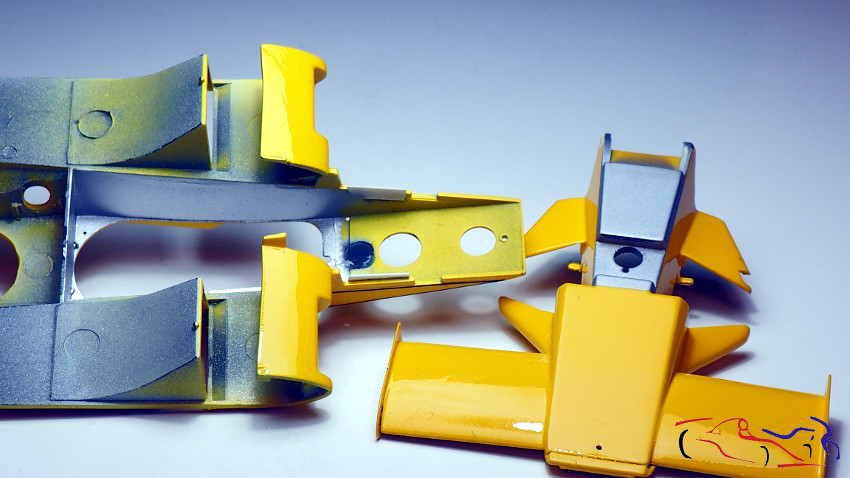
Y aquí el resultado: Ya podemos empezar a montar!
nd here the result: We can start to ride!
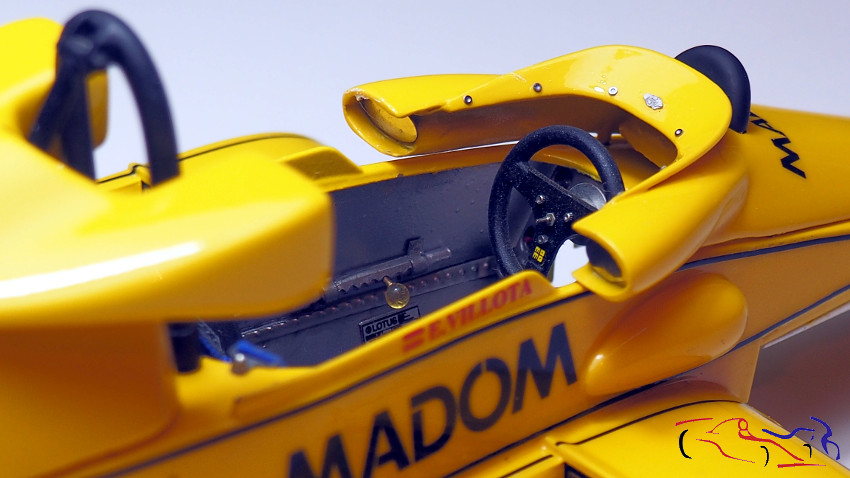
Lo primero fue la parte superior del cockpit. Pinto de negro mate el arco de seguridad, y pongo los remaches de fotograbado con cola blanca diluida:
First, It was the top of the cockpit. I paint the black matte security arch, and put the photographed rivets with diluted white glue:
Los espejos de fotograbado son pulidas con Micromesh sobre el soporte para sacar el espejo:
The gravure mirrors are polished with Micromesh on the stand:
Y los montamos:
And I added them!
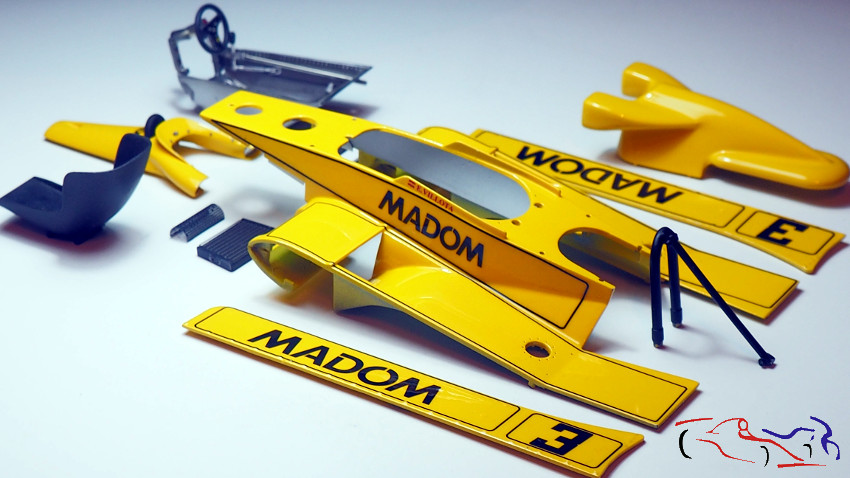
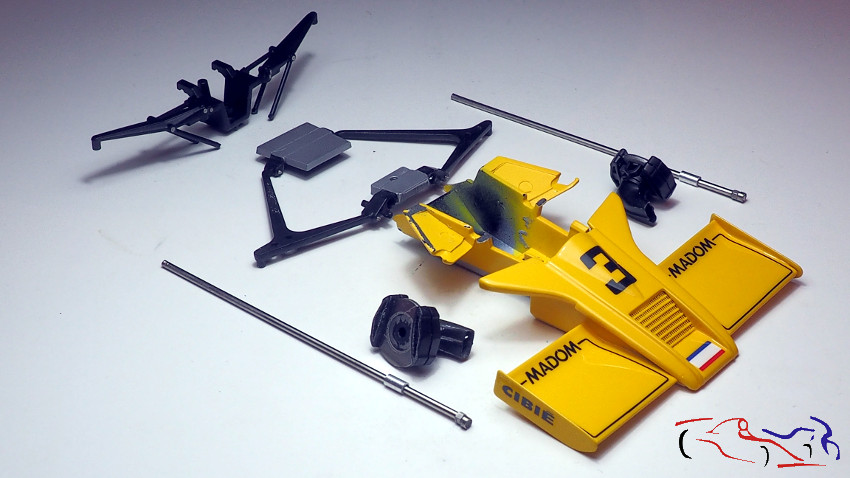
Y ahora, un despiece de las piezas:
ANd now, all the pieces together!
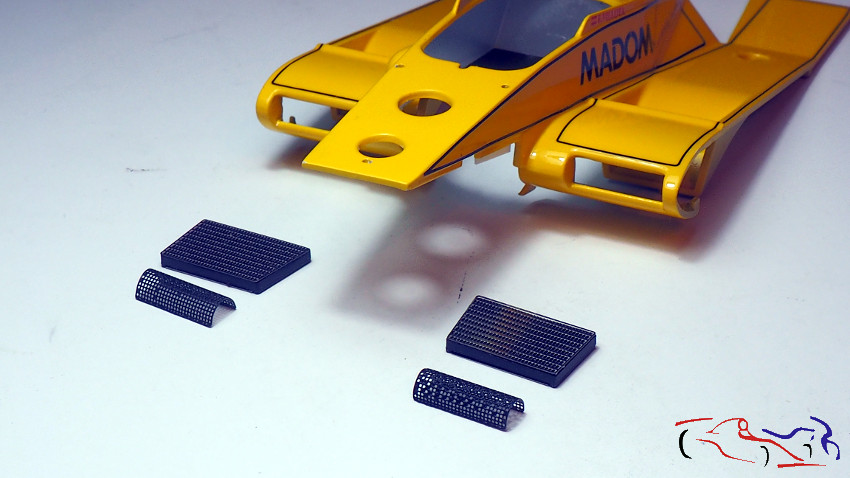
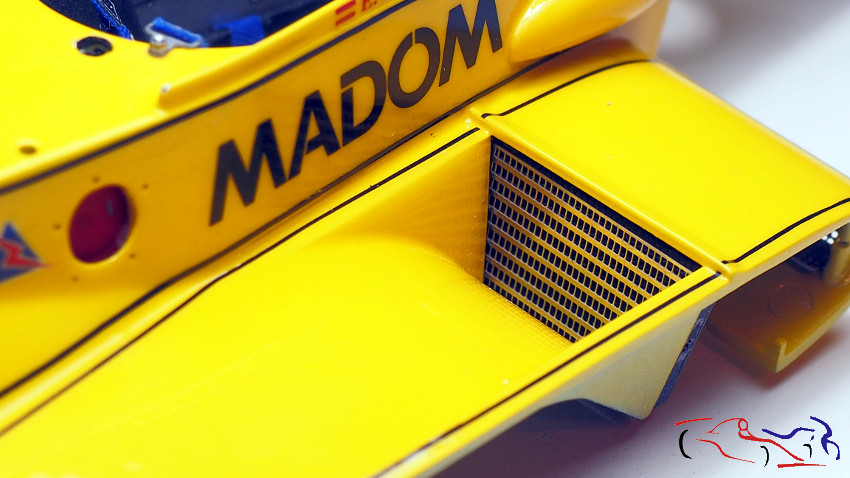
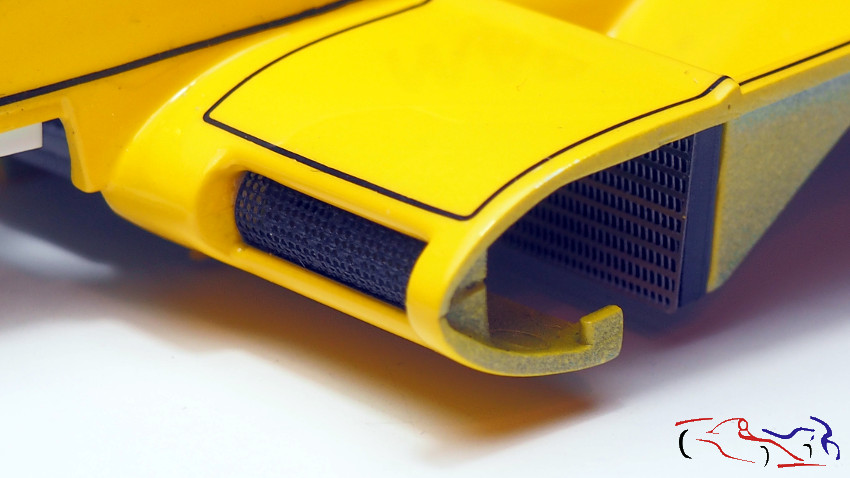
Empezamos por los radiadores y los filtros de los pontones:
We start with the radiators and filters of the pontoon:
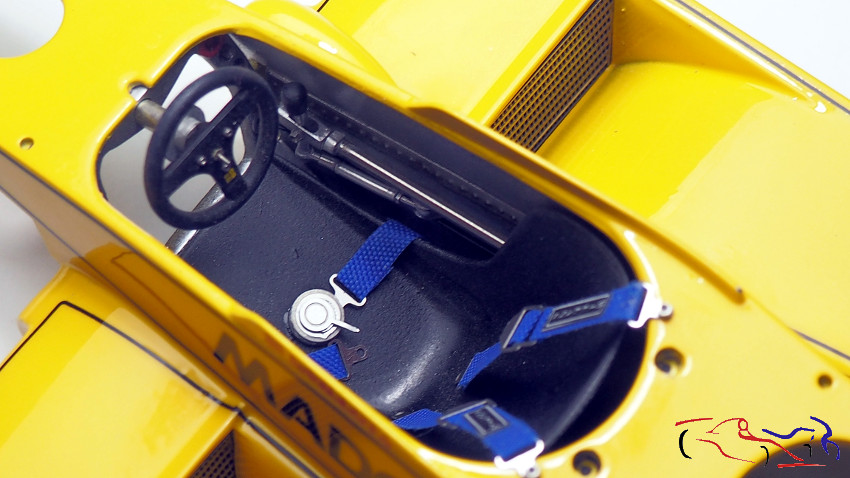
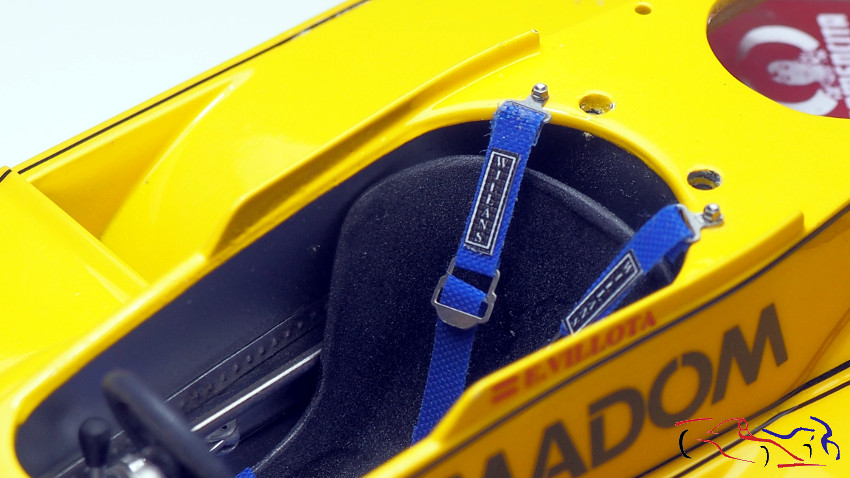
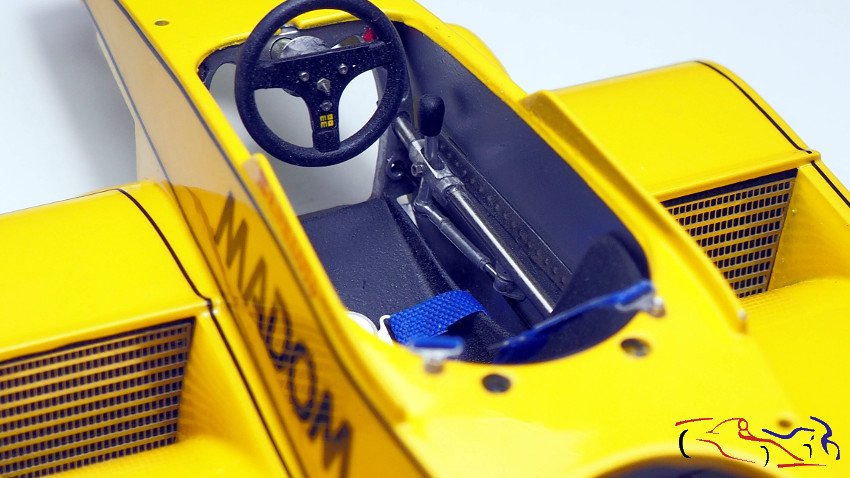
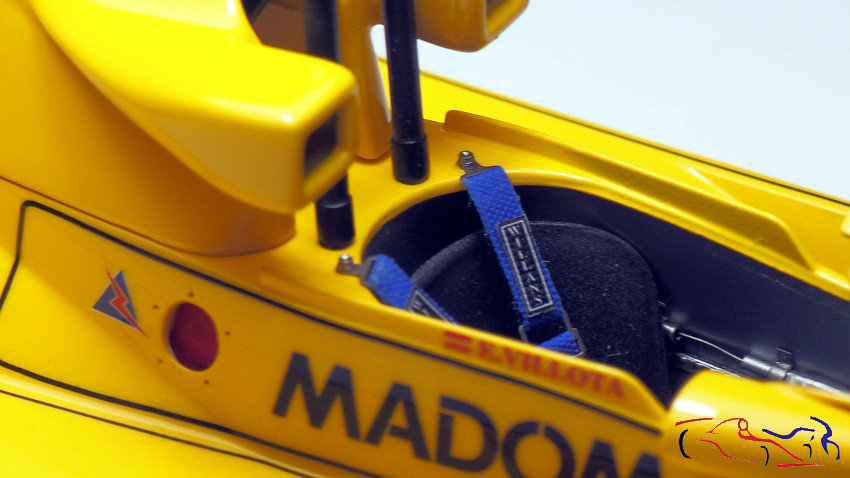
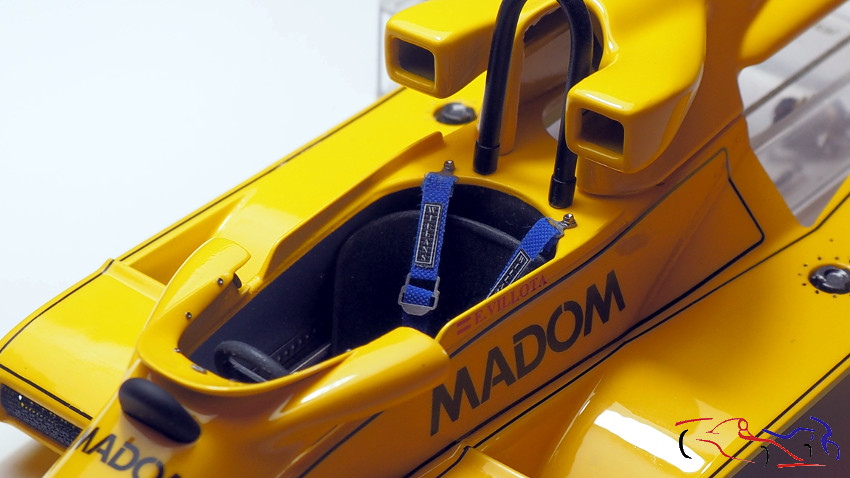
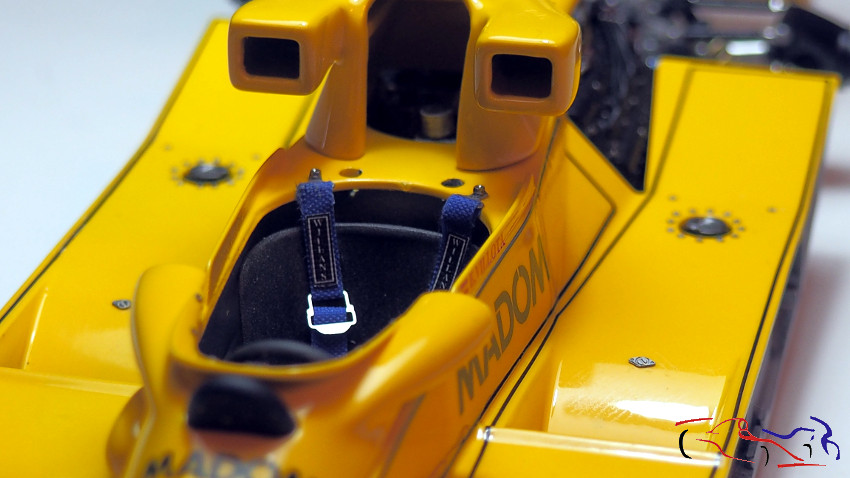
Seguimos con la parte inferior del cockpit con el asiento y los cinturones:
We continue with the bottom of the cockpit with the seat and the set belts:
También ponemos la placa del fabricante y el mecanismo de control de la estabilizadora trasera (la bola la pintaré de negro más adelante). Todas estas piezas fueron explicadas en post anteriores.
Also we put the plate of the manufacturer and the mechanism of control of the rear stabilizer ( I will paint the ball in black later). All of these pieces were explained in previous posts.

Y así queda el conjunto!
And now the set!
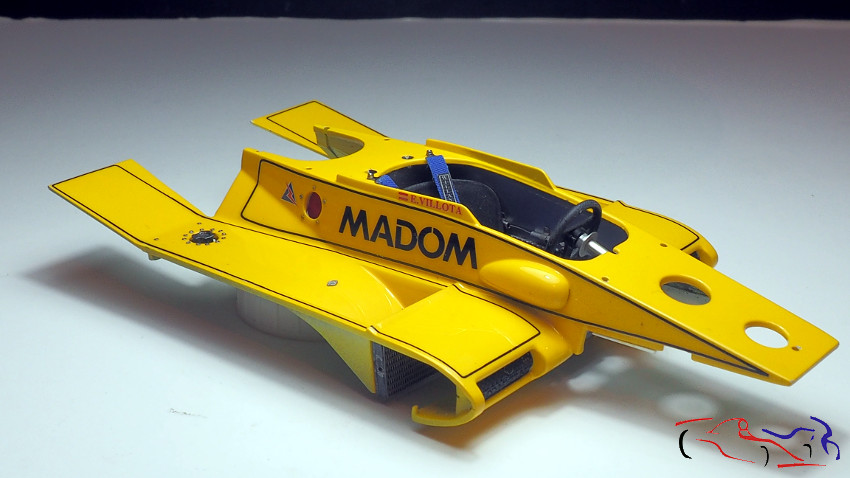
Y lo montamos junto con otras piezas para ver como va quedando:
And we assemble it together with other pieces to see how it is going:
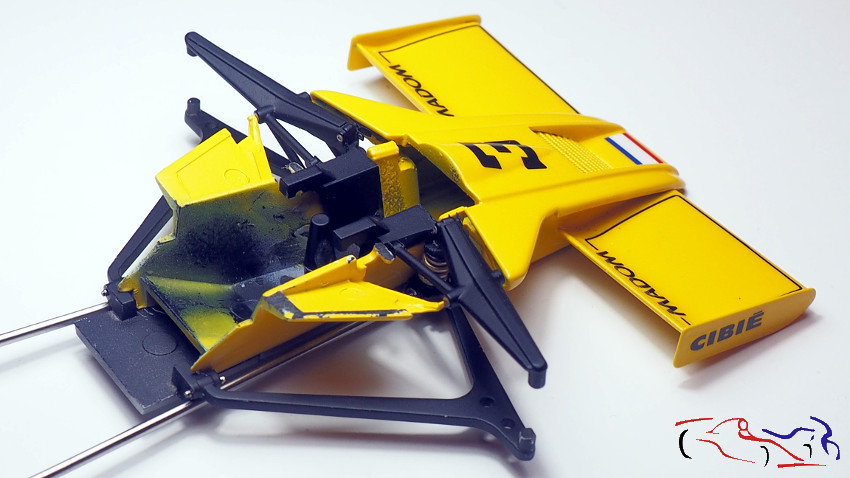
Vamos con la parte delantera. Este es el despiece:
Let’s go with the front. Here is the exploded view:
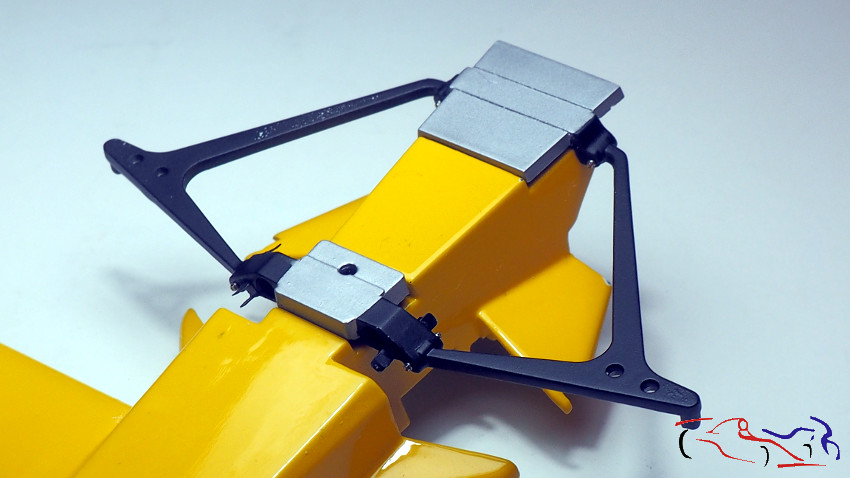
Fijamos los triángulos inferiores y los tubos que van al radiador delantero:
We fix the lower triangles and the tubes that go to the front radiator:

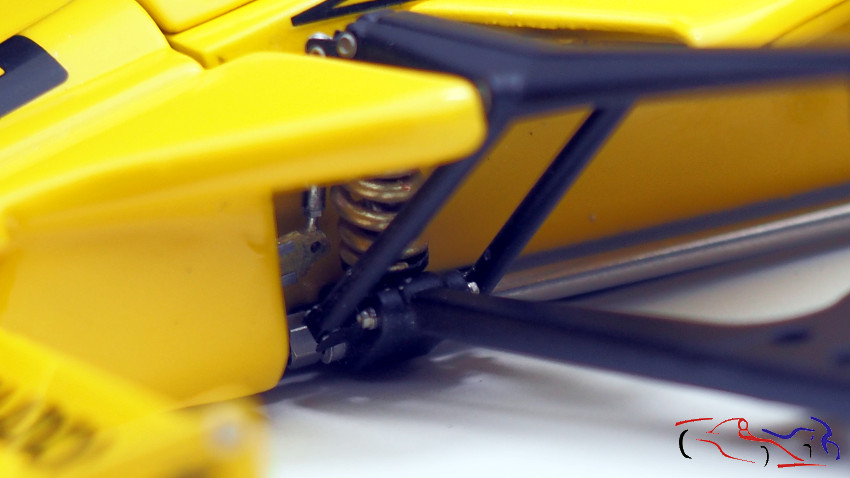
Ahora es el turno de los amortiguadores, los balancines superiores y las conexiones de la estabilizadora delantera:
Now it is the turn of the shock absorbers, the upper rockers and the connections of the front stabilizer:
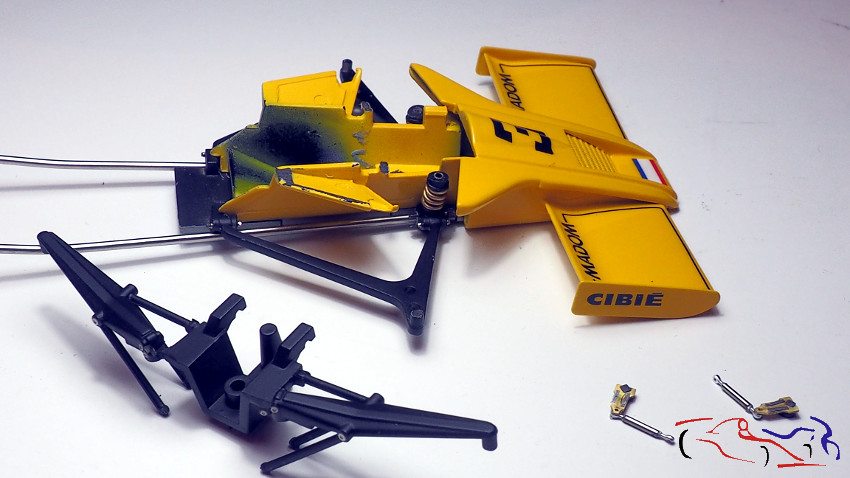
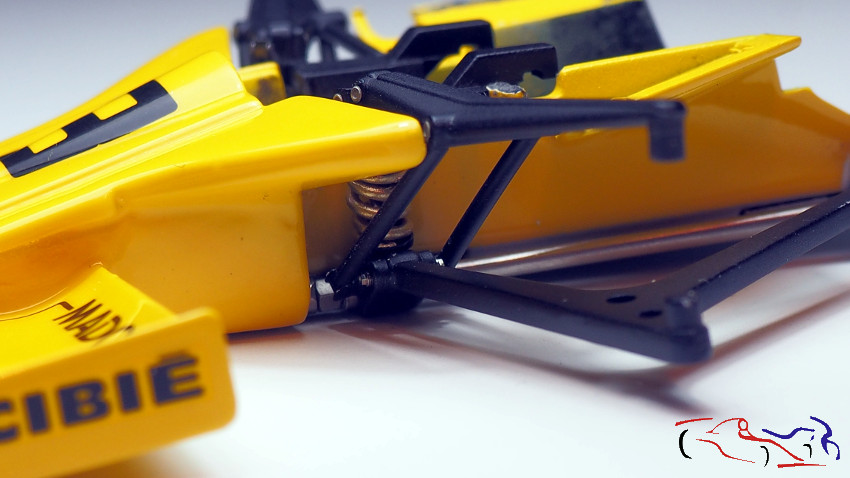
Se ven partes lijadas para los encajes de la carrocería:
You see parts sanded for the lace of the body:
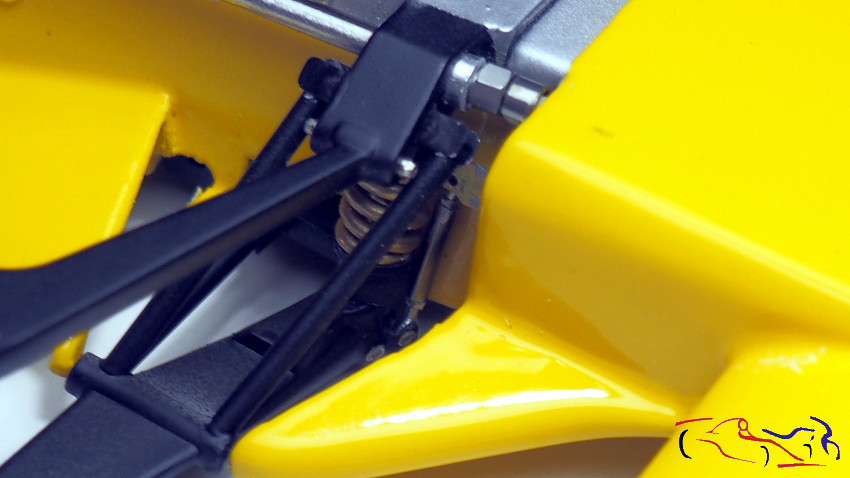
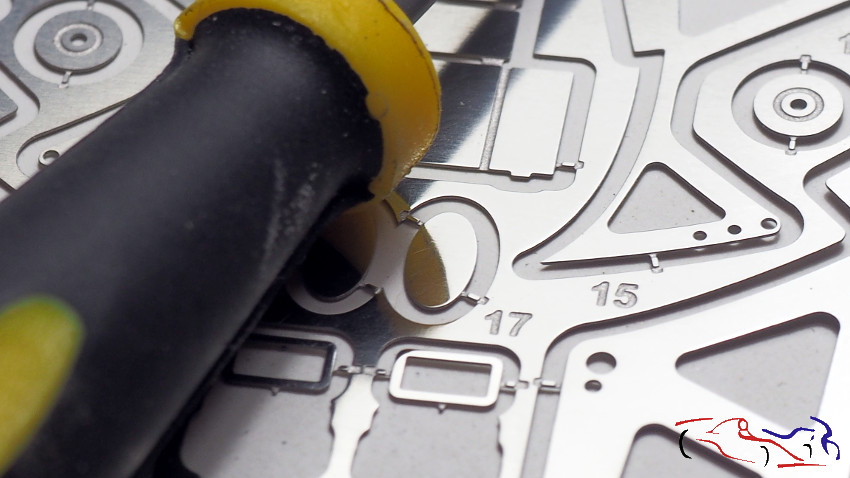
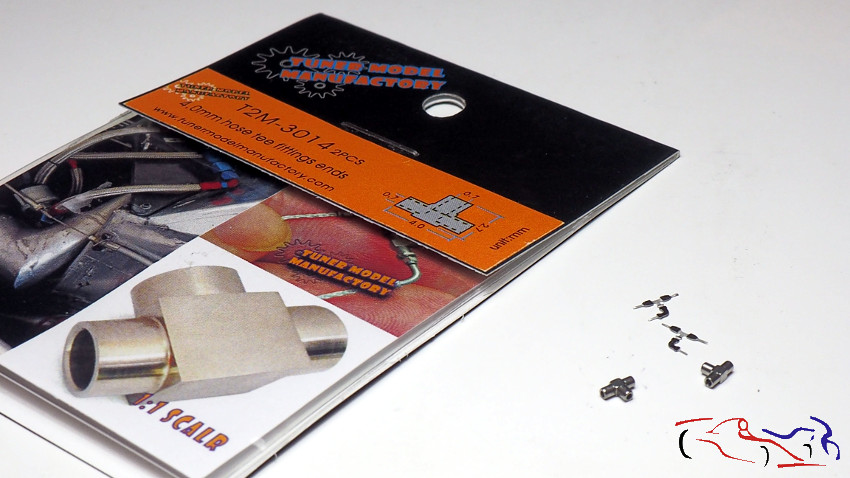
Para hacer las conexiones del tubo del líquidos de freno, el fotograbado de Studio27 trae unas piezas, pero no tienen altura al ser planas. Las reemplazo con unas de T2M mucho más reales:
To make the connections of the brake fluid tube, Studio27 photogravure brings some parts, but they have no height because they are flat. Replacement with a much more real T2M:
Y aquí ya están puestas. Las pondré en su sitio en el momento de fijar las ruedas.
And here they are. I’ll put them in place when the wheels are set.
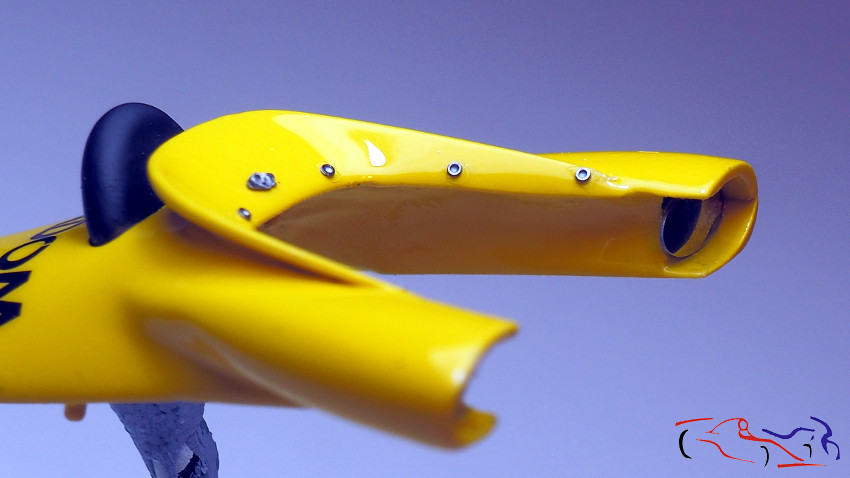
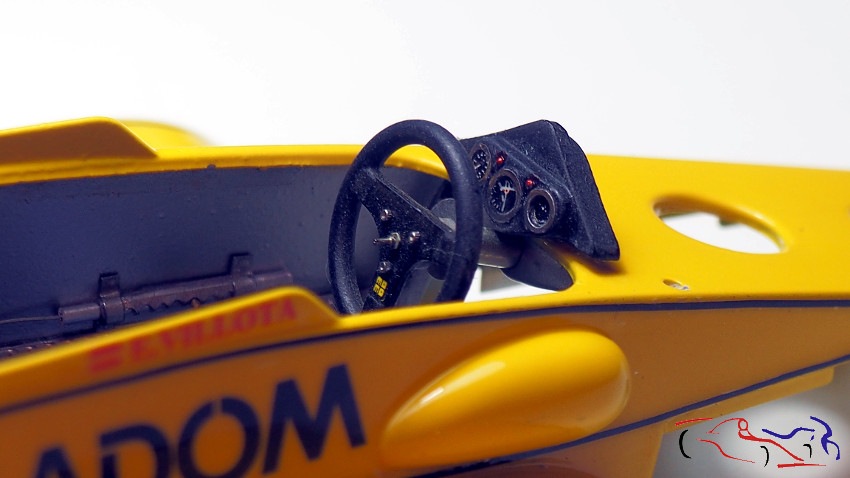
Toca el turno de los relojes. A los relojes les taladré para ponerles un tubo de latón, a los que puse las calcas y barnicé. En su parte exterior, le puse unas arandelas de fotograbado de ScaleProduction especiales para los relojes. Metí los tubos de latón y dos remaches que pinté con rojo trasparente:
Turn the clocks on. At the clocks I drilled them to put a tube of brass, to which I put the decals and clear. On the outside, I put special ScaleProduction photo-engraving washers for the clocks. I put the tubes of brass and two rivets that I painted them with transparent red:
En la parte posterior, le hice unos agujeros al latón para pegar los cables, a los que después puse una tirita de papel metálico autoadhesivo a modo de casquillo:
In the back, I made holes in the brass to stick the cables, which I then put a strip of metal paper self-adhesive to the shape of a bush:
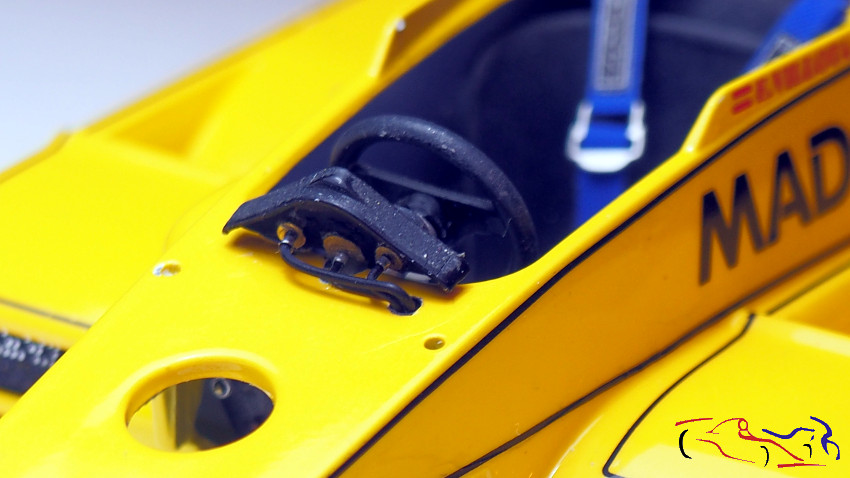
También pegué los remaches de fotograbado con cola blanca diluida:
I also glued the photo-etching rivets with diluted white glue:
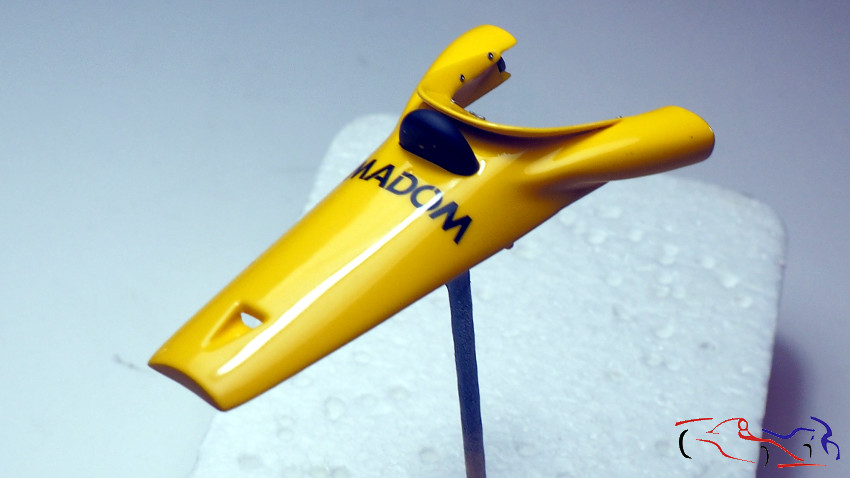
Y finalmente, pegué a cúpula a la carrocería:
And finally, I add the dome to the body:
Una foto del conjunto:
A picture of all together:

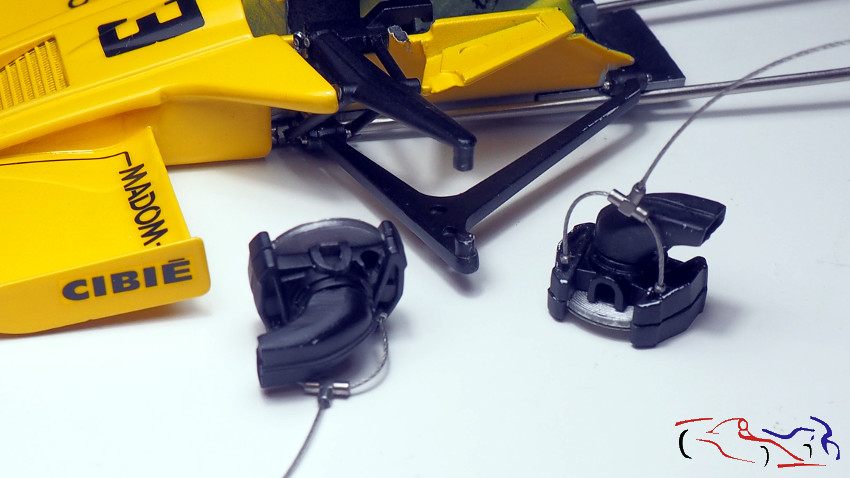
Pasamos a la luz de freno. Tomamos un redondo de aluminio y lo metemos en la fresadora para hacer un vástago que quepa en el minitaladro:
We pass to the brake light. We take a round of aluminum and put it in the milling machine to make a stem that fits in the mini-frame:
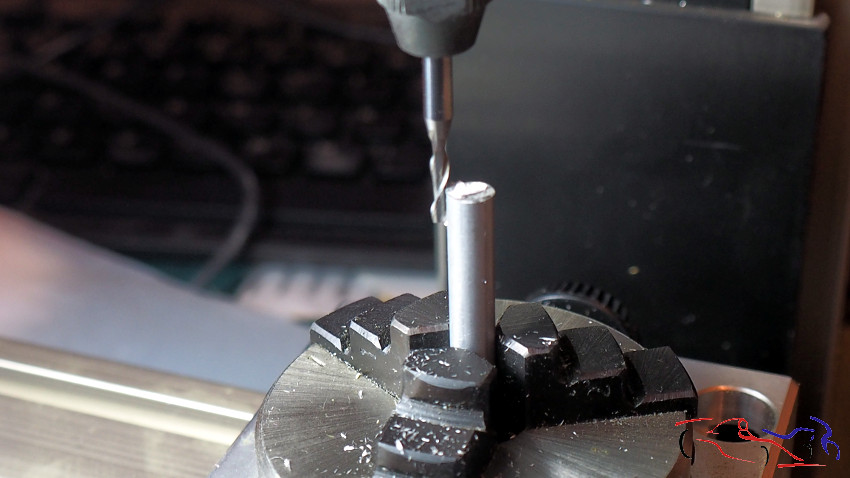
De esta manera, vamos a tornearlo para darle la forma:
In this way, let’s turn it to give it the form:
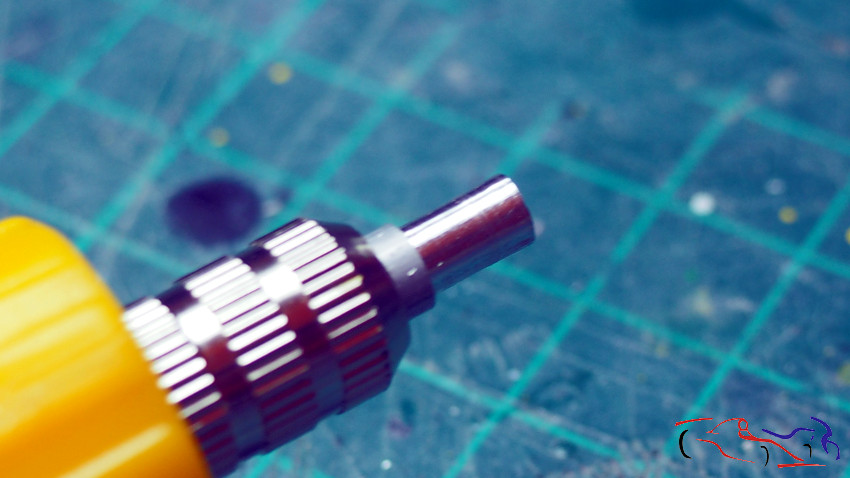
Y lo pulimos para sacarle brillo:
And we polished it to make it shine:
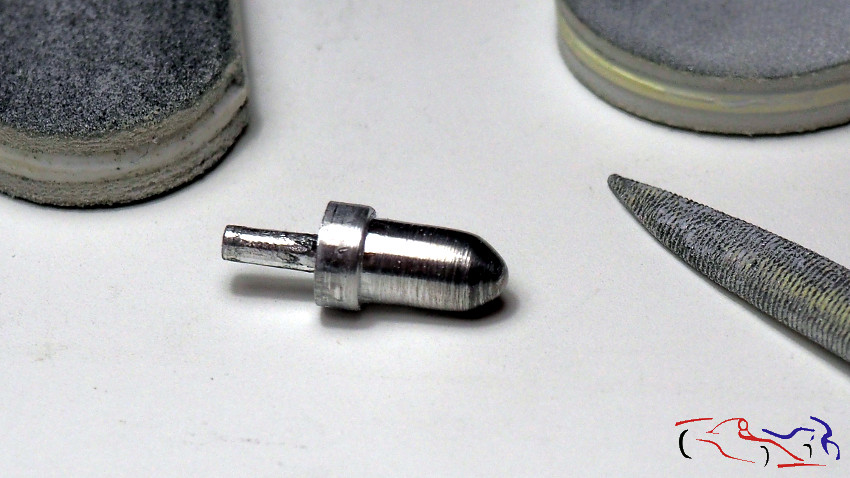
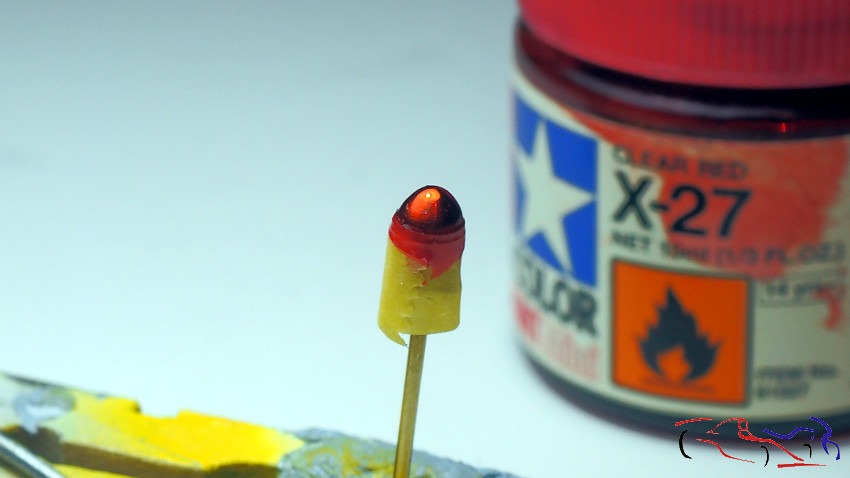
Una vez cortado, enmascaramos y lo intruduzco literalmente en rojo trasparente. Más adelante lo terminaré…
Once cut, we mask and intrude it into literally transparent red boat. I’ll finish it later …
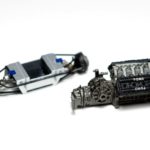
Y pegamos la carrocería al conjunto chasis/motor:
And we attach the body to the chassis / engine assembly:
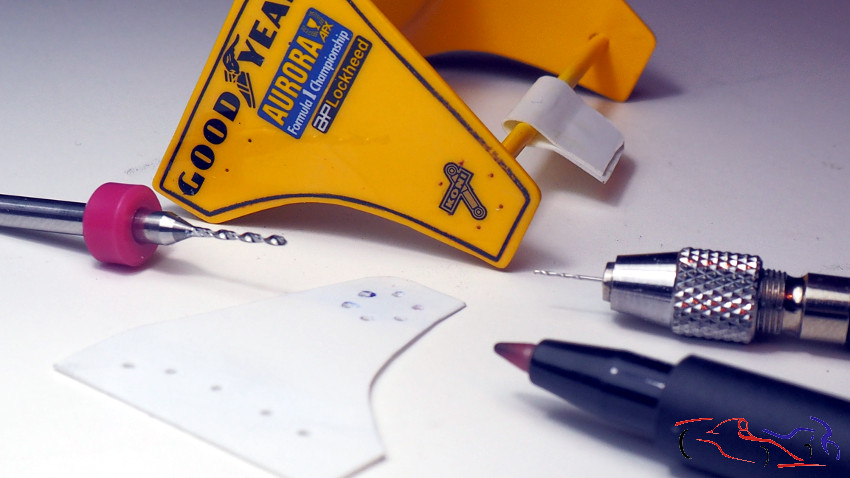
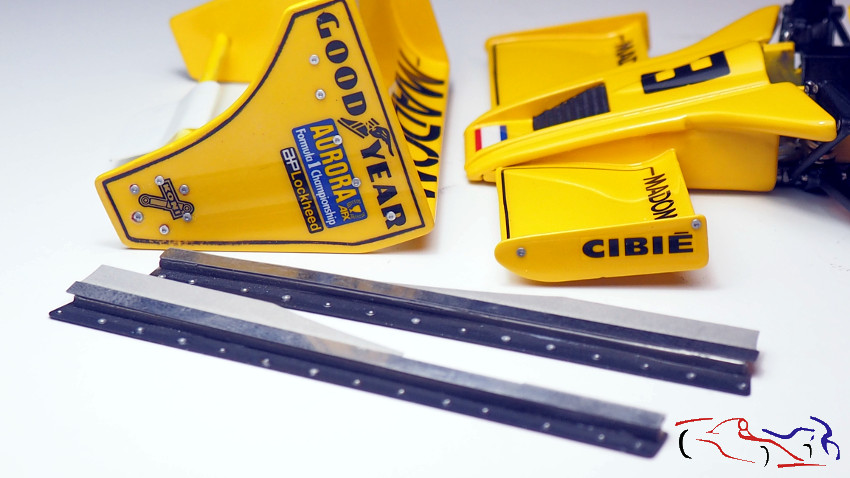
Pasamos a poner remaches. Para el alerón trasero, creo una plantilla con los agujero adecuados, para introducir un rotulador permanente. La plantilla nos sirve para ambos lados:
Let’s go to put rivets. For the rear spoiler, I create a template with the appropriate holes, to introduce a permanent marker. The template serves to both sides:
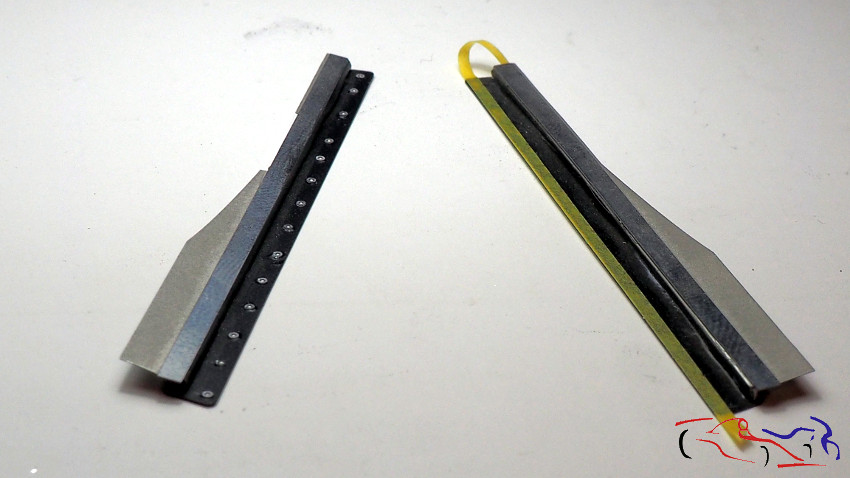
También ponemos los remaches de las faldillas, poniendo cinta de enmascarar para guiarnos. A título de comentario, el propio Emilio de Villota me dijo que en la carrera de campeones, les obligaron a quitarlas a todos los coches del Cto Aurora, saliendo a continuación de los F1 del Cto del Mundo:
Also we put the rivets of the skirts, putting masking tape to guide us. As a comment, Emilio de Villota himself told me that in the race of champions, they forced to remove them for all the cars of the Cto Aurora, leaving after the F1 World Cto:
Y aquí tenemos todos los remaches puestos:
And here we have all the rivets added:
La motor, también le ponemos una conexión de aire comprimido, para arrancar los motores. Es la del cable rojo:
In the engine, we also put a compressed air connection, to start the engines. It is the red cable one:

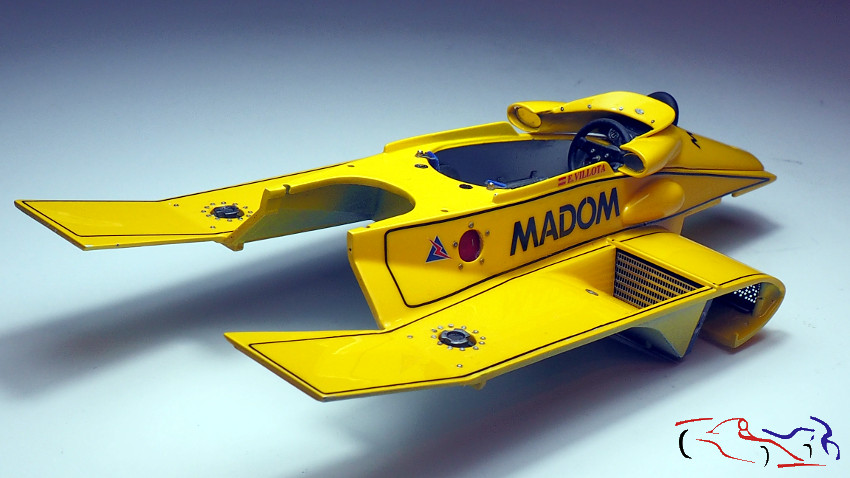
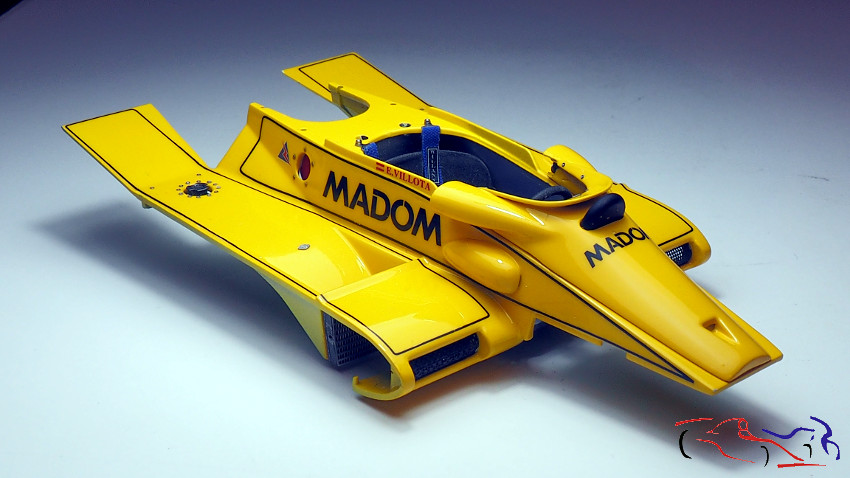
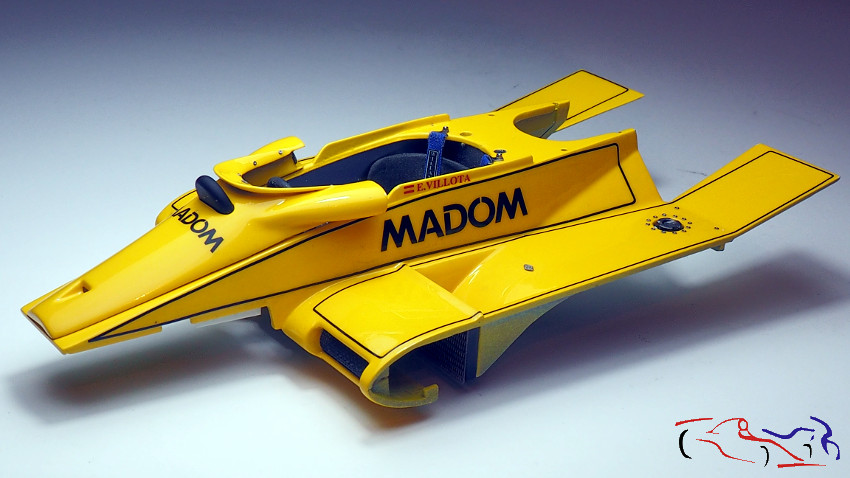
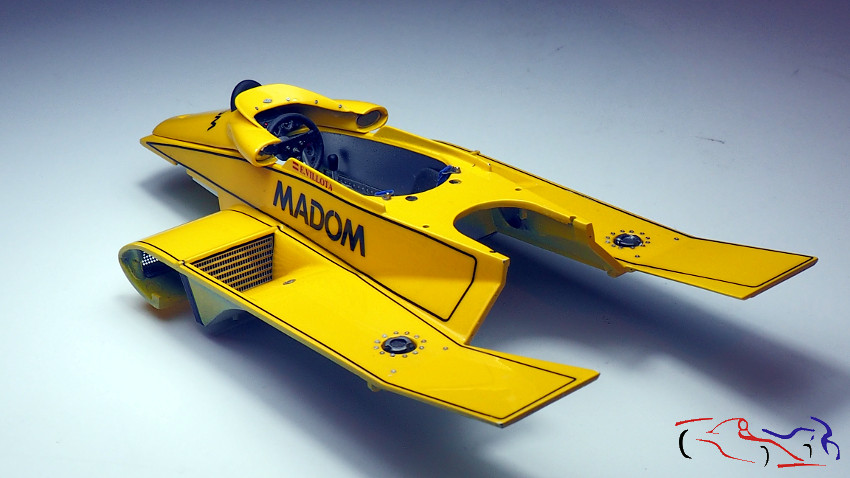
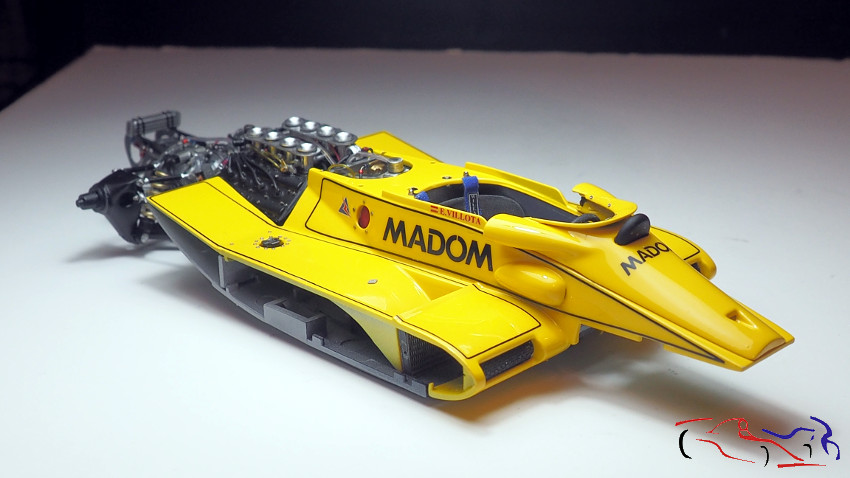
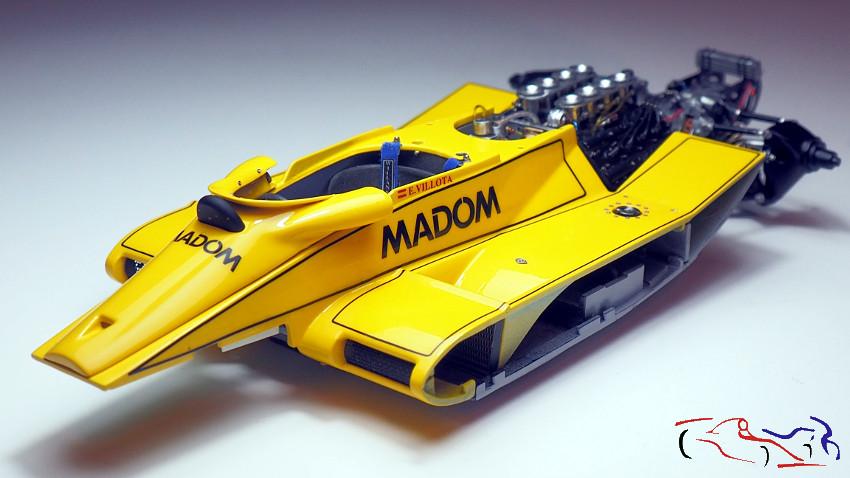
Y para terminar este hilo, unas fotos del conjunto;
And to finish this thread, some photos of the set;
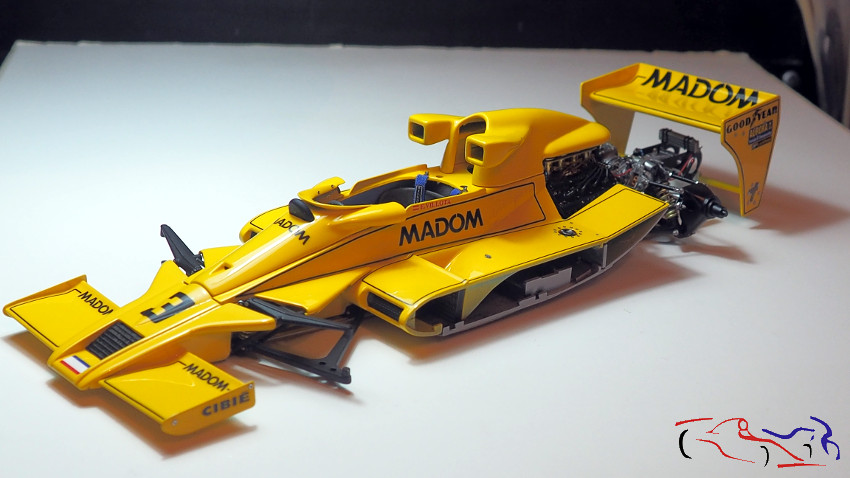
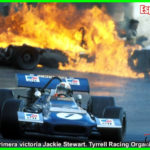
Está claro quien pilotó este coche!!
It is clear who piloted this car !!


Y yo creo que el siguiente hilo será el último antes de que lo termine.
Gracias por ver y comentar!!
And I think the next thread will be the last one before I finish it.
Thanks for viewing and commenting!!

Absolutely sensational! Extraordinary attention to detail. Emilio would be thrilled.
Thanks Marcus!!
Marcus, I can tell you now that Emilio is happy with it! Thanks for your comments!