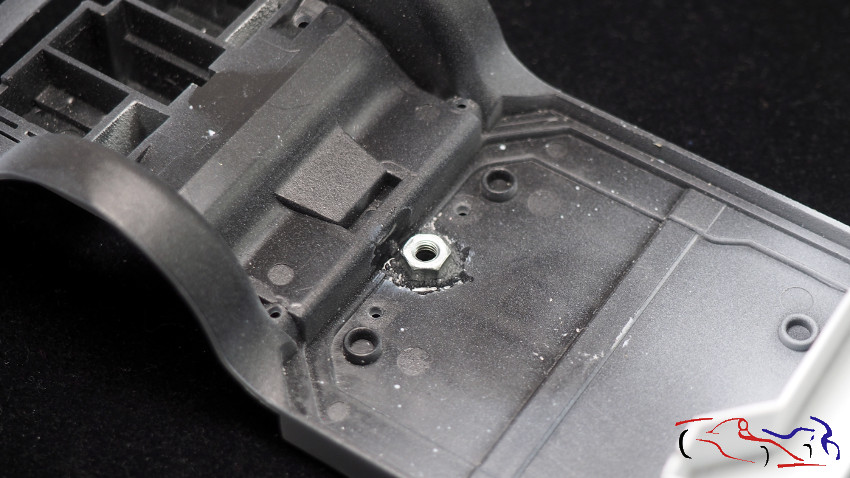
En la entrega de hoy, vamos a ir detallando y pintando piezas del coche. Pero lo primero, es hacer la fijación que mantendrá el coche a la base, como he ido haciendo en mis ultimos modelos. Para ello, busco un lugar encima del chasis, donde pegar una tuerca que tenga espacio para ella, que no moleste a otras piezas, y si es posible, que tenga espacio superior para que pueda pasar el tornillo por encima. Una vez buscado, se hace un taladro y se pega la tuerca con ciano, al que he puesto bicarbonato para endurecer la fijación:
In today’s post, we will be detailing and painting parts of the car. But the first thing, is to make the fixation that will keep the car to the base, as I have been doing in my last models. To do this, I look for a place on top of the chassis, where to stick a nut with space for it, that does not bother other parts, and if possible, that has space above so that it can pass the screw over it. Once I have found it, I drill a hole and glue the nut with cyano in chasis, to which I have added bicarbonate to harden the ciano fixation:
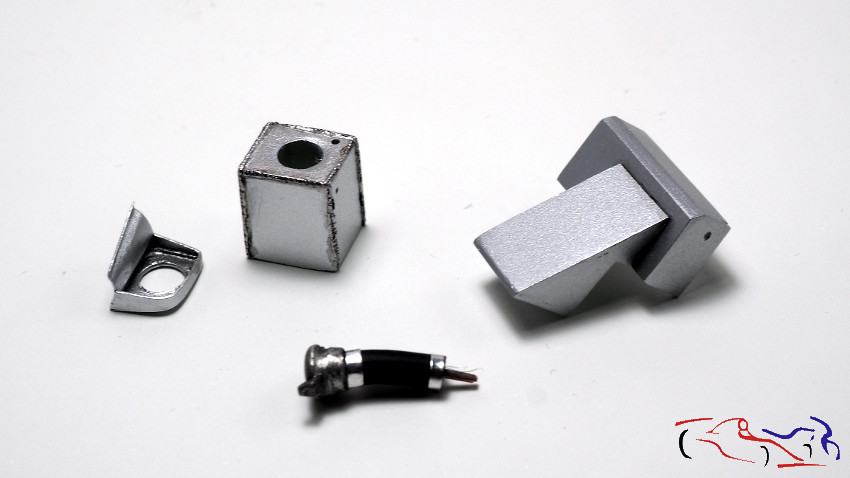
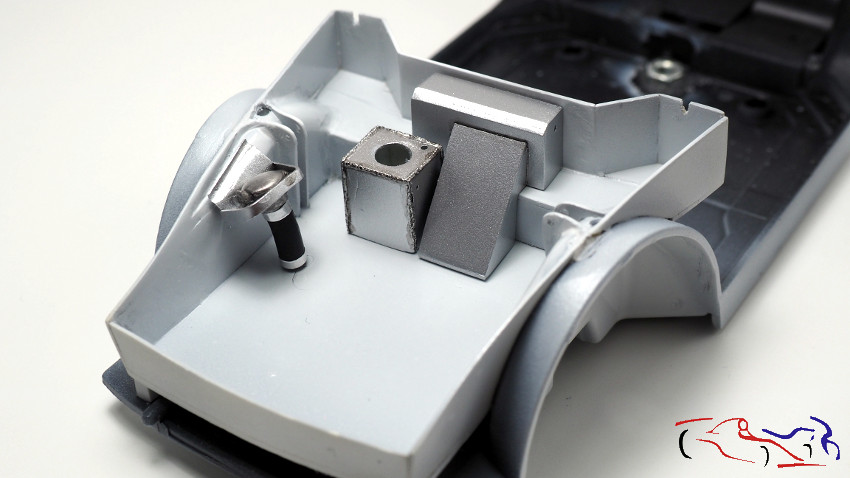
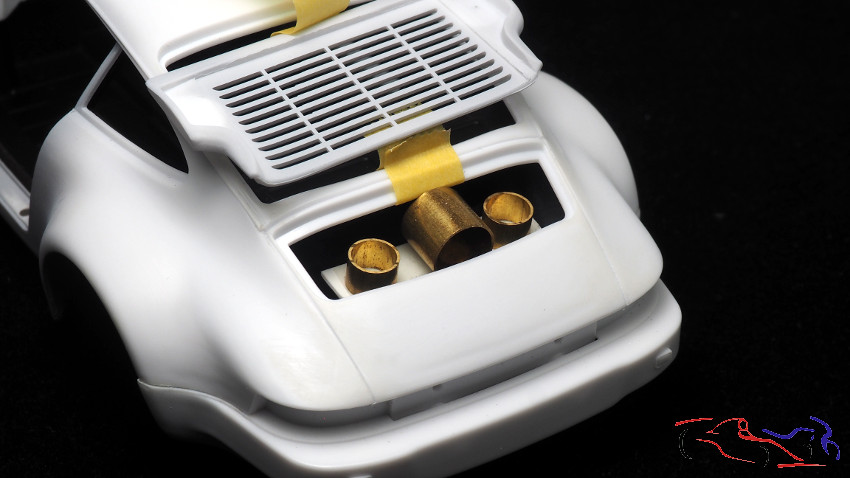
Y nos centramos en las piezas. Las siguientes van colocadas en el capo, y están hechas con tiras de plástico. De derecha a izquierda: fijación de la entrada de gasolina (realizada con lámina de hojalata y plástico), deposito de aceite (plástico con plastico estirado en los porden pegado con mucho pegamento para que se deshaga y se pueda manipular para imitar soldaduras), depósito central que desconozco su cometido (realizado con plástico y tiene esa forma para solventar las formas d ela base). Debajo, está la toma de compbustible que va colocada en el eagugero d ela primera pieza. La boca es de Renaissance. En la siguiente foto, los veís precolocados en el interior del capo:
And we focus on the parts. The following parts are placed on the bonnet, and are made of plastic strips. From right to left: fixing of the fuel inlet (made with tin foil and plastic), oil tank (plastic with plastic stretched on the edges glued with a lot of glue so that it can be undone and can be manipulated to imitate welds), central tank that I don’t know its purpose (made with plastic and has that shape to solve the shapes of the base). Underneath, there is the fuel inlet that is placed in the first piece. The mouth is from Renaissance. In the next picture, you can see them pre-placed inside the bonnet:
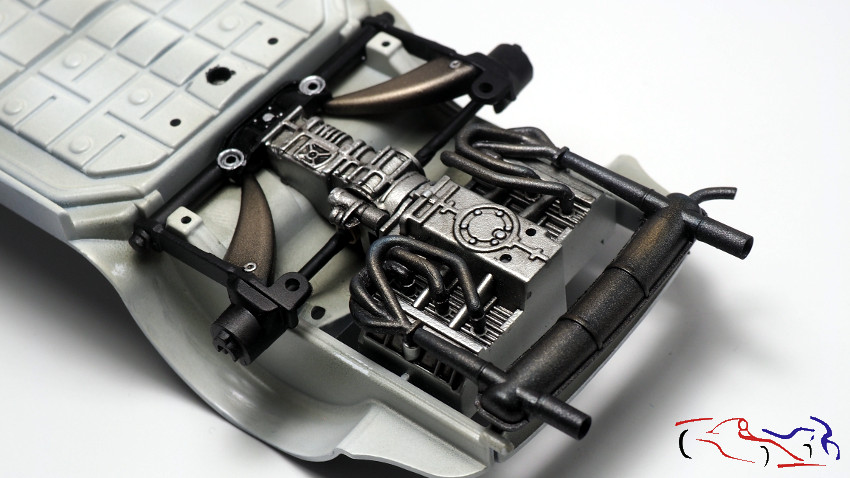
Otras piezas….del motor. Aquí tenéis los sistemas de escape. Una vez imprimados, los pinté con negro satinado y les di con los polvos de Tamiya para escapes, naranja y azul. Para terminar, Alclad hierro quemado selectivamente:
Other engine parts….. Here you have the exhaust systems. Once primed, I painted them with satin black and gave them with Tamiya exhaust powders, orange and blue. To finish, Alclad burnt iron selectively:

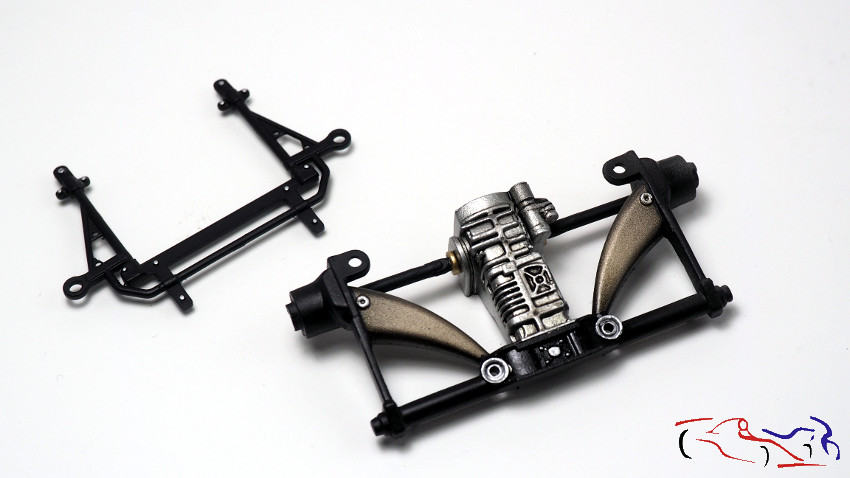
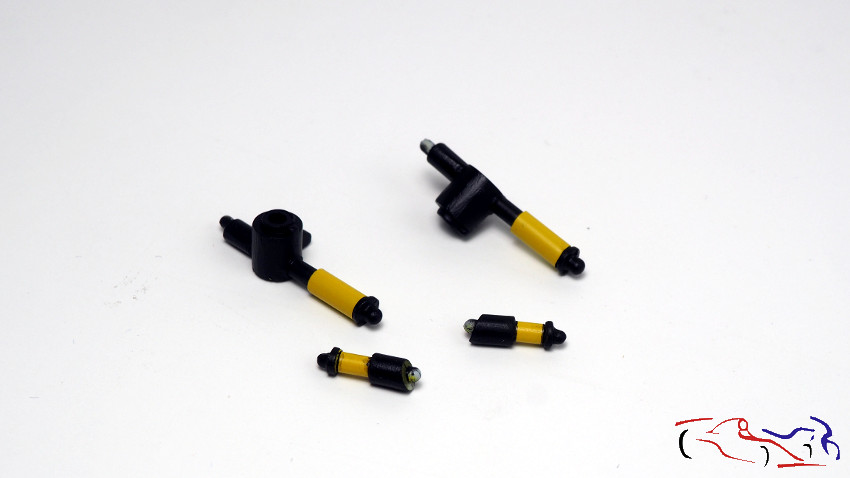
Y ahora, las fijaciones de las ruedas delanteras y traseras. Negro semimate, con aluminio en el bloque, y Alclad hierroquemado en esos soportes traseros. Después tiene pale liner de Tamiya negro y un ensuciado con Shaders de MIG, tono Dust:
And now, the front and rear wheel mounts. Painted in semi-matt black, with aluminium on the block, and Alclad burnt iron on those rear brackets. Then it has a black Tamiya pale liner and a MIG Shaders Dust:
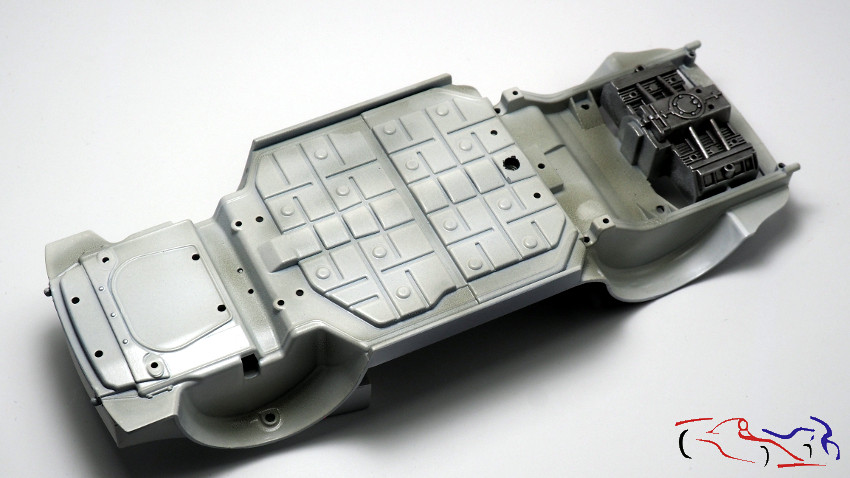
Y el mismo Shader de MIG, fue usado también en los bajos del chasis, aplicado con el aerógrafo de forma selectiva, incidiendo en las partes ondas:
And the same MIG Shader was also used on the underbody, applied with the airbrush in a selective way, focusing on the wave parts:
El ensuciado es mínimo para que no sobrecargue, y cuando superponemos las piezas del motor, éste es el resultado:
Fouling is kept to a minimum so that it does not overload, and when we overlap the engine parts, this is the result:

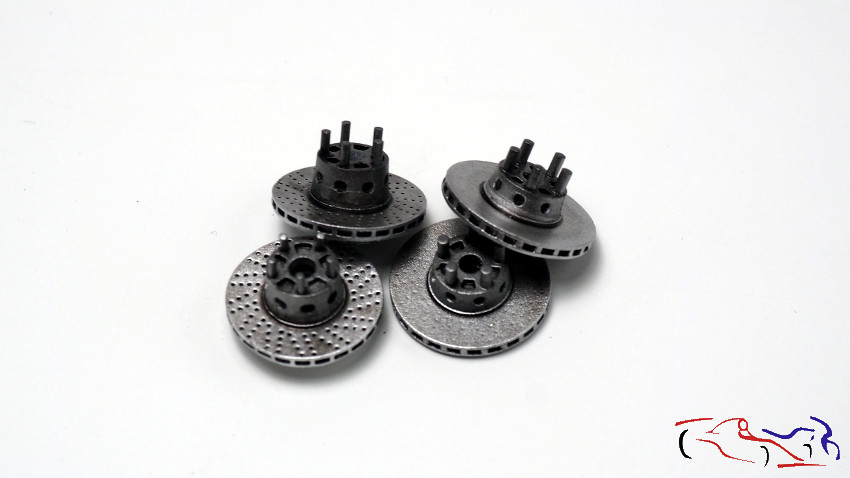
Otras piezas terminadas son los discos de freno, pintados con plata LP para los discos, y gris metálico de Zero para los bujes. Todo tiene un panelado en negro realizado con Panel Liner de Tamiya:
Other finished parts are the brake discs, painted with LP silver on the discs, and Zero metallic grey for the hubs. Everything has a black paneling made with Tamiya Panel Liner:
Y relacionado con los discos de freno, aquí os pongo como han quedado los amortiguadores. Los he pinatdo de amarillo porque los vi en una foto de una réplica y me pareció vistoso (las fotos originales que tengo son en B/N y no se ven bien), pero tendré que envejecerlos un poco, cuando ponga todo el conjunto de las ruedas…
And related to the brake discs, here’s how the shock absorbers have turned out. I have painted them yellow because I saw them in a photo of a replica car and I thought it looked nice (the original photos I have are in B/W and they don’t look good), but I will have to age them a bit, when I put the whole set of wheels on…
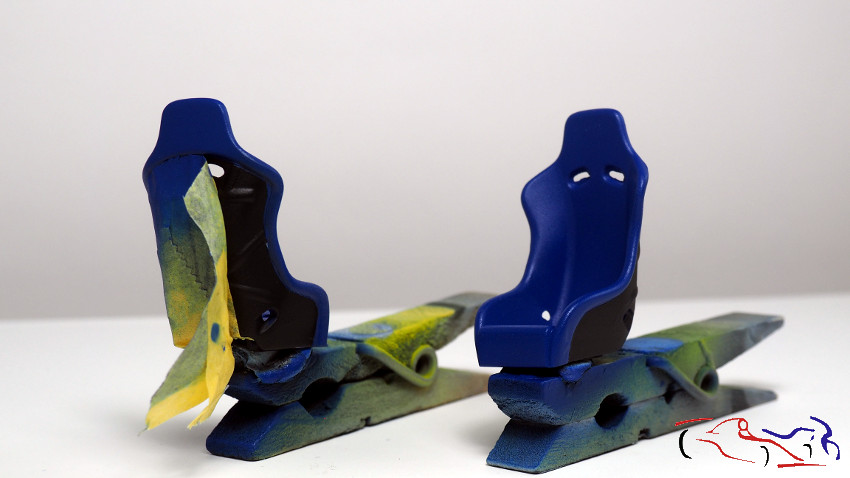
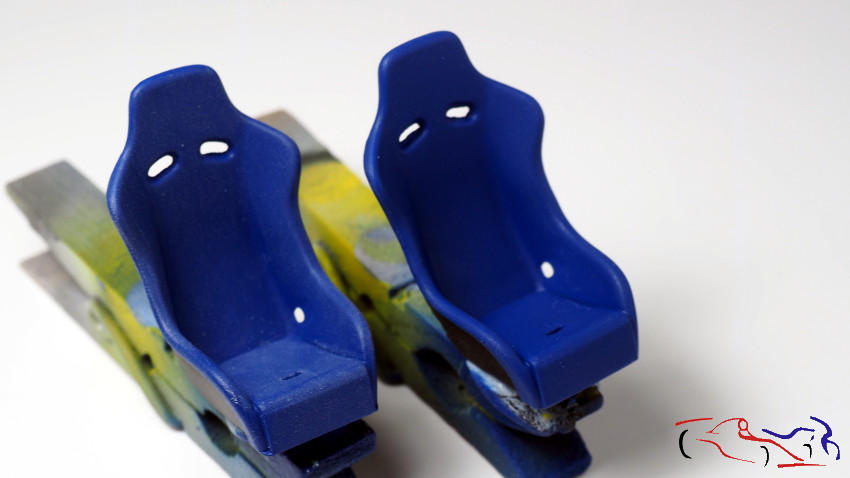
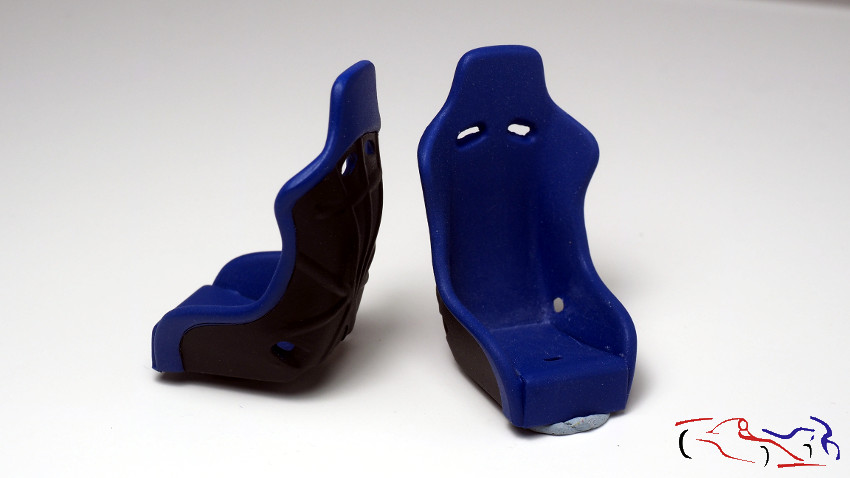
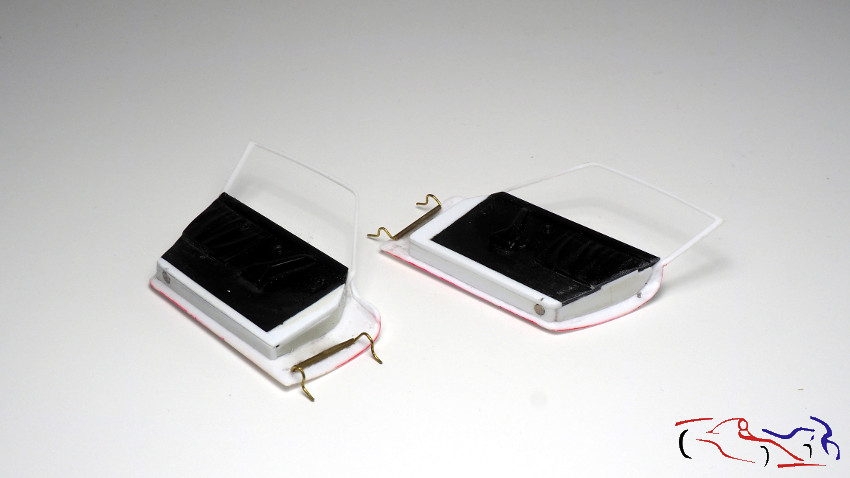
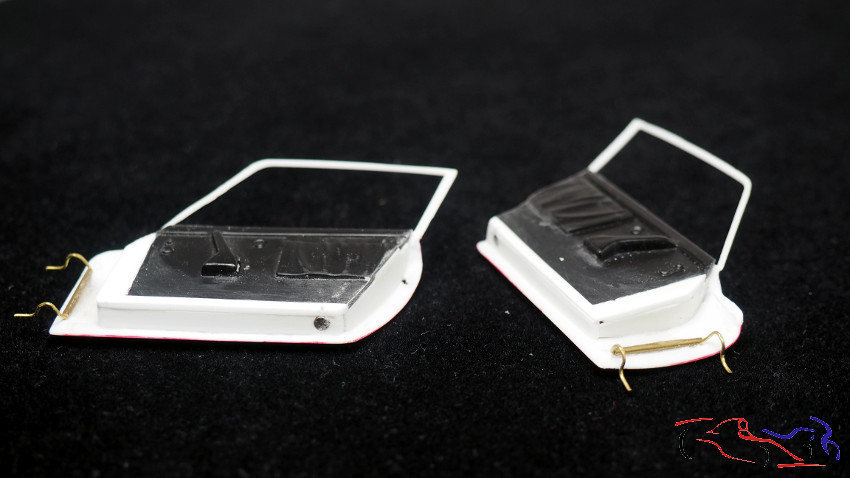
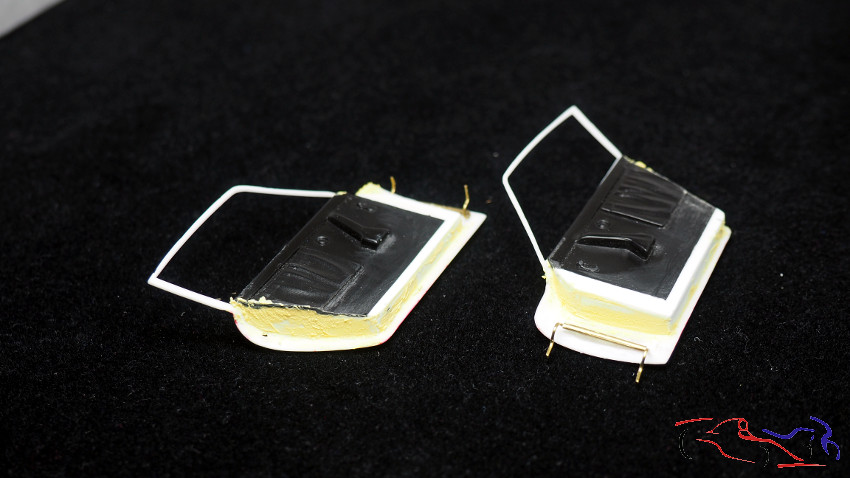
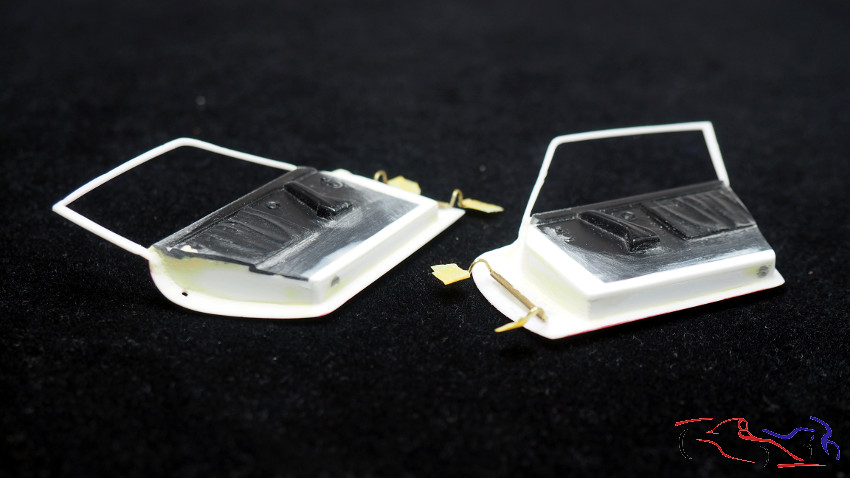
Pasamos a los asientos. En las siguientes fotos, veis el proceso: 1- Se pinta la parte trasera de negro satinado (yo veo que es negro en las fotos….), 2 – se enmascara y se pìnta con azul de Zero, al que le he puesto un poco de polvos de talco (debería haberle puesto más!!). 3 – Una vez seco, le paso el dedo con polvos de talco para darle luces (el asiento de la izquierda lo tiene aplicado), 4 – y finalmente, barniz mate:
We move on to the seats. In the following photos, you can see the process: 1- Paint the rear part of the seat in satin black (I can see it’s black in the photos ….), 2 – mask and paint it with Zero blue, to which I put a bit of talcum powder (I should have put more!!!). 3 – Once dry, I put talcum powder on the finger to give it some highlights (the seat on the left has it applied), 4 – and finally, matt varnish:

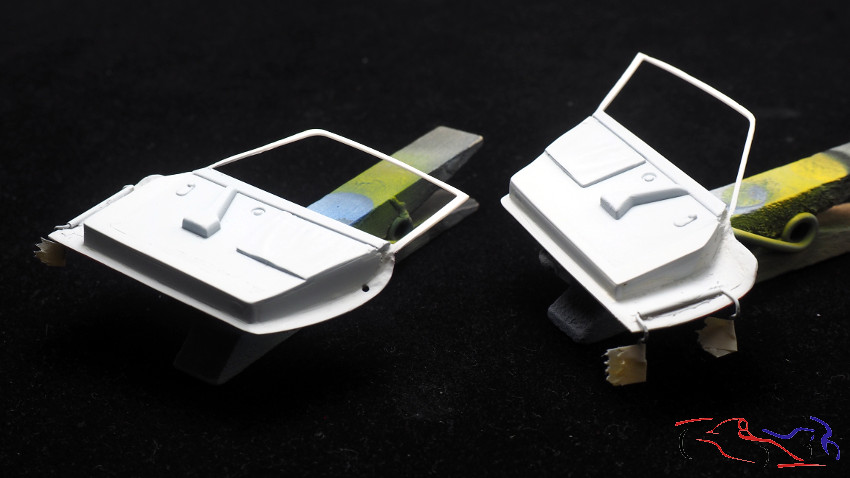
Ahora es el turno del interior de las puertas. Recortamos la parte necesaria de los laterales del habitáculo, y le añadimos piezas extras de plástico en los extremos delantero e inferior. Asi mismo, rellenamos con plástico los huecos entre la puerta y este panel interior, e incluso ponemos un imán, en la parte trasera inferior de la puerta. Lógicamente, la carrocería tiene otro imán donde coincide con el de la puerta, para que cierre mejor y no se abra.
Now it’s time for the inside of the doors. We cut out the necessary part of the sides of the cockpit, and add extra pieces of plastic at the front and lower ends. Also, we fill with plastic the gaps between the door and this interior panel, and we even put a magnet in the lower rear part of the door. Logically, the body has another magnet where it fits with the one on the door, so that it closes better and does not open.
Y enmasillamos todo el contorno con masilla de poliester de Tamiya, la cual lijamos, y después, imprimamos, para ver defectos. Un poco más de masilla se necesitará!!
And we putty the whole contour with Tamiya polyester putty, which we sand, and after that, we prime it, to see defects. A little more putty will be needed!!!
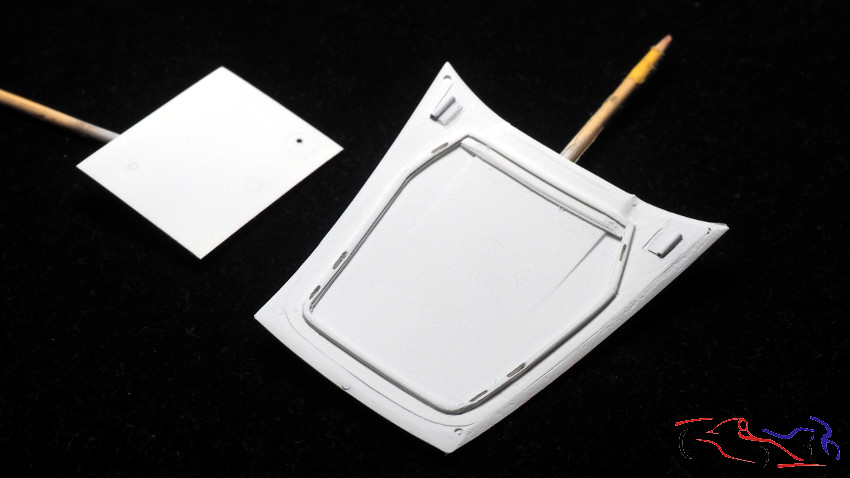
Al mismo tiempo que imprimamos las puertas, lo hacemos con la parte superior del depósito de gasolina que va situado en el capó, y con la parte inferior del propio capó:
At the same time as we print the doors, we print the upper part of the fuel tank which is located on the bonnet, and the lower part of the bonnet itself:
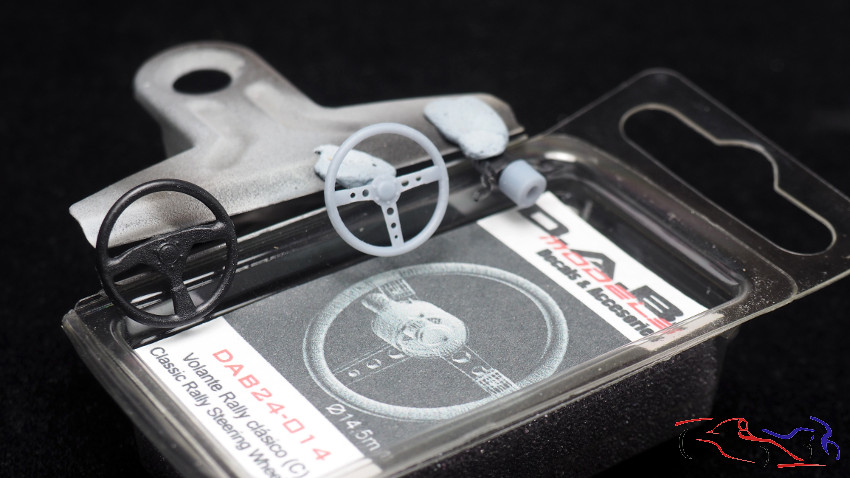
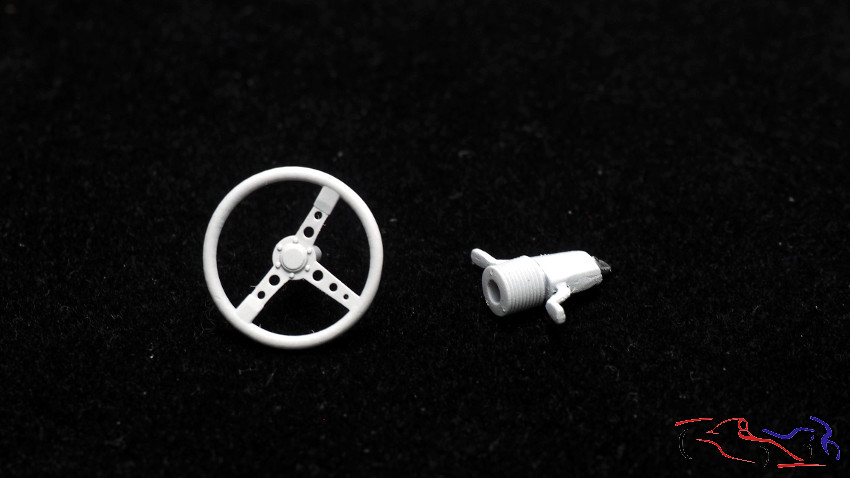
Y como estamos imprimando piezas, lo hacemos con el volante, que he sustituido por el de DAB models, que es una maravilla. EN al primera foto veis la diferencia, y en la segunda, el volante ya imprimado con su fijación. Tengo que decir que el volante viene con una prolongación que va colocada entre el volante y la pieza que sujeta el mismo. Un acierto de Pablo, creador de DAB models!!
And as we are priming parts, we do it with the steering wheel, which I have replaced by the one from DAB models, which is a marvel. In the first picture you can see the difference, and in the second one, the steering wheel already primed with its fixing. I have to say that the steering wheel comes with an extension that is placed between the steering wheel and the piece that holds it. A success of Pablo, the creator of DAB models!
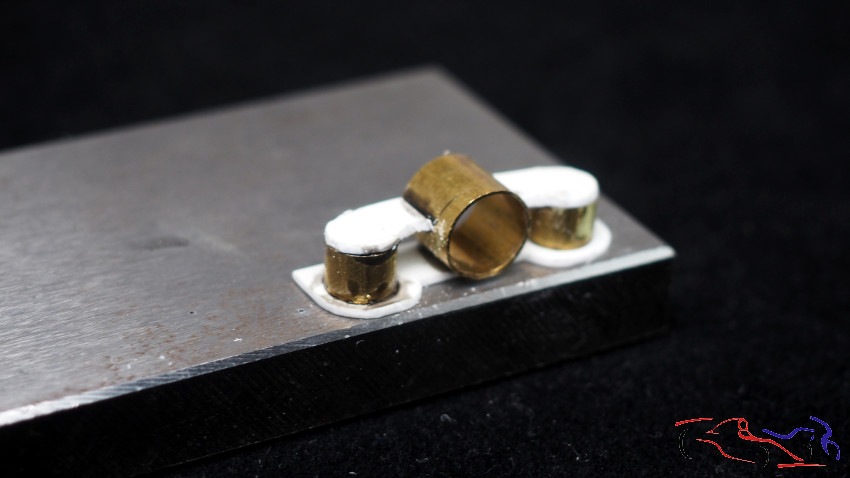
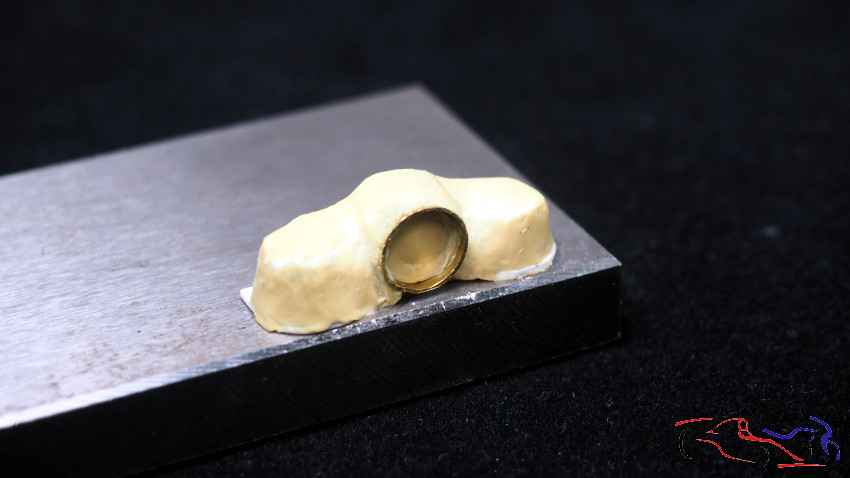
Y por último, y por consejo de mi amigo Mario Vallina, es conveniente hacer algo que simule la parte del motor que se ve a través de la rejilla trasera. Para ello, cojo un trozo de plástico y tubos de cobre de la medida aproximada, los pego, y lo relleno con masilla epoxy. Ahora habrá que dejar secar y dar forma:
And finally, on the advice of my friend Mario Vallina, it is convenient to make something that simulates the part of the engine that can be seen through the rear grille. To do this, I take a piece of plastic and copper pipes of the approximate size, glue them together, and fill it with epoxy putty. Now it will be necessary to let it dry and shape it:
Esto es todo por ahora. Gracias por ver y comentar!!
That’s all for now. Thanks for watching and commenting!


