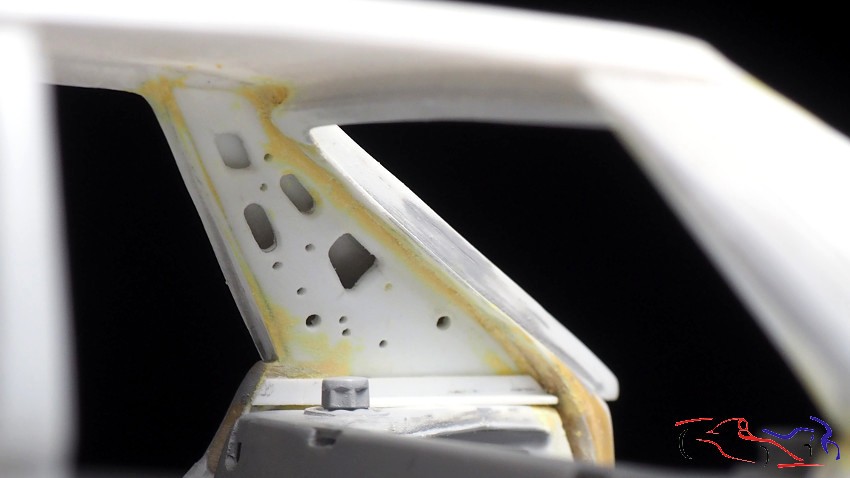
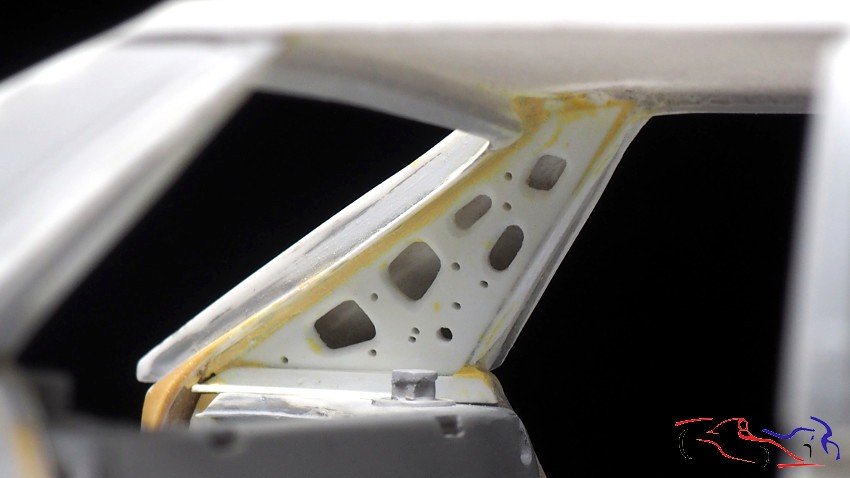
Seguimos con el Deltona Repsol de Carlos Sainz. Aquí os muestro los interiores de los pilares traseros, con su masilla aplicada y lijada. Deciros, que la masilla es Tamiya Polyester Putty, de dos componentes y muy fina. Además, no encoje, y se lija muy bien.
We continue with Carlos Sainz’s Deltona Repsol. Here I show you the inside of the rear pillars, with the putty applied and sanded. The putty is Tamiya Polyester Putty, two-component and very fine. In addition, it does not shrink, and sands very well.
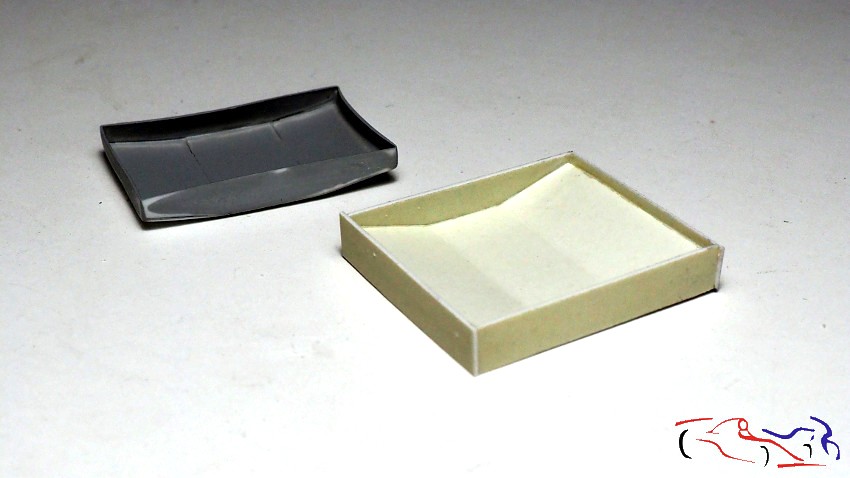
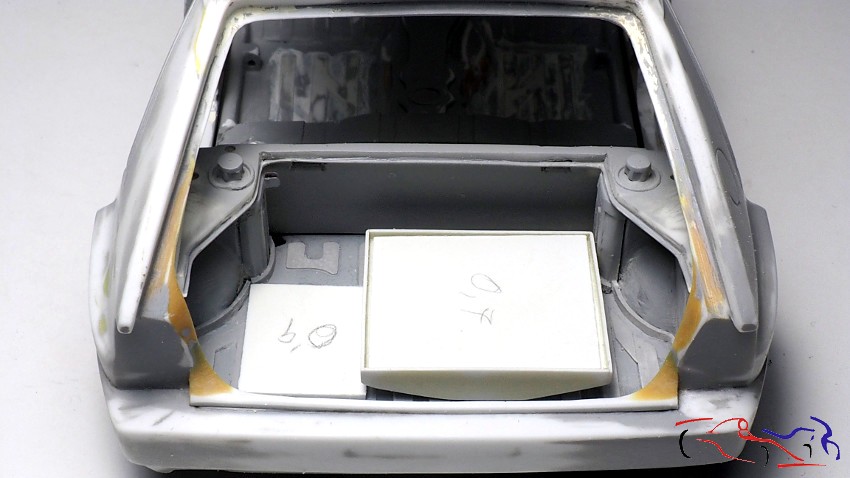
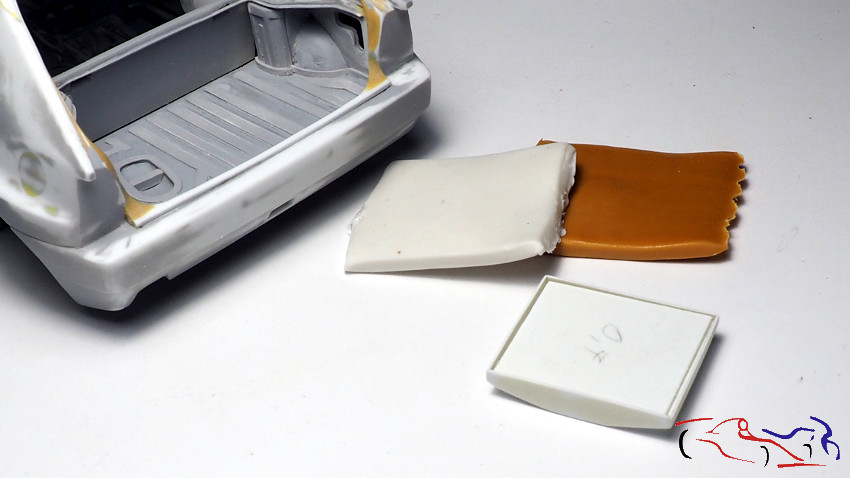
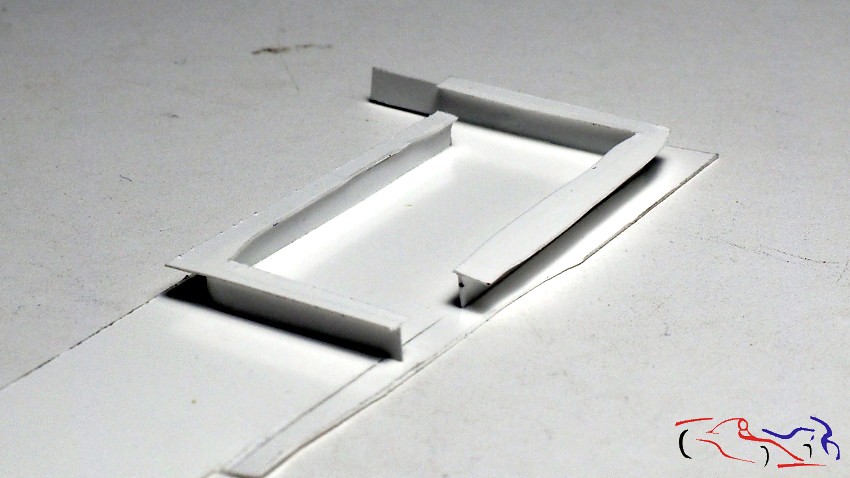
Continuamos con el maletero. Cuando dejé este proyecto parado, habia hecho la base donde iría el depósito de combustible, y ahora me parece que es pequeña, por lo que la rehago más grande. Una base que divido en tres partes, sin cortar del todo, para que pueda doblar los extremos hacia arriba. Le pego los laterales, la pruebo en su lugar, y rebajo el inferior de los laterales para que tenga la forma de la base, con los extremos elevados.
Let’s continue with the boot. When I left this project stopped, I had made the base where the fuel tank would go, and now I think it’s too small, so I’m making it bigger. I divide then base into three parts, without cutting it completely, so that I can fold the ends upwards. I glue the sides, and then, I try it in place, and lower the bottom of the sides so that it has the shape of the base, with the ends raised.
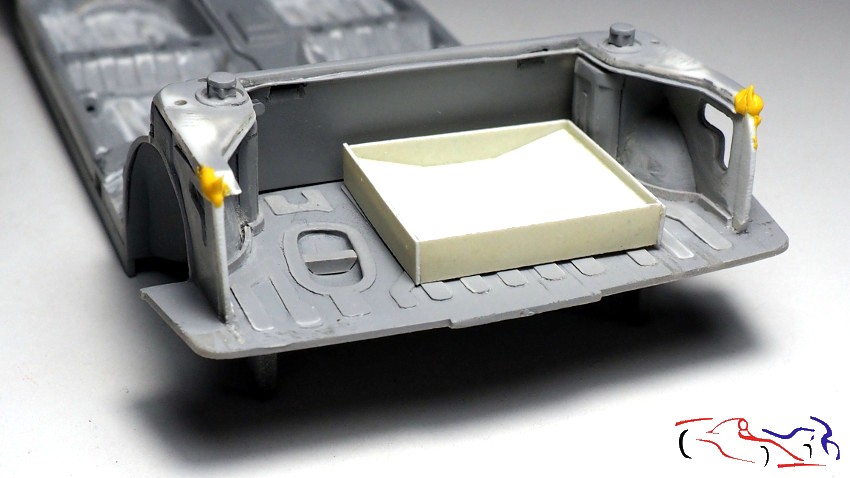
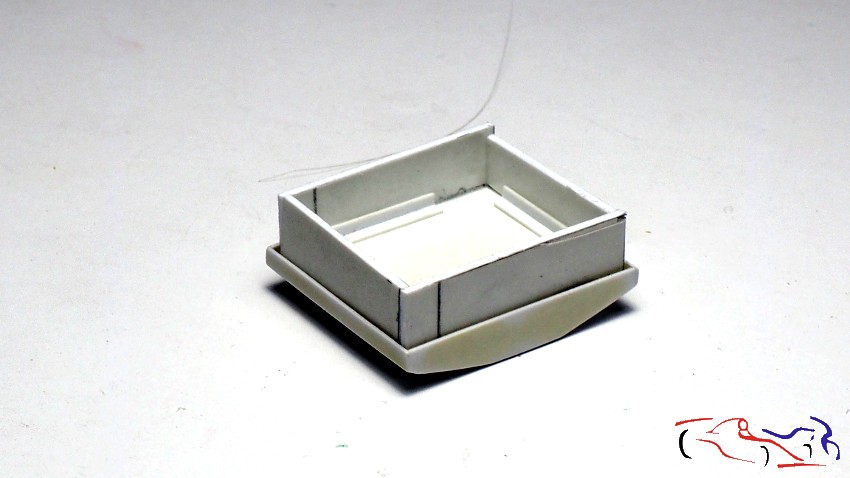
A la hora de hacer los depósitos, hago unas bases del espacio que tengo. Emzamos con el de gasolina, añadiendo unos laterales a la base a modo de cubo:
When it comes to making the tanks, I make some bases from the space I have. We start with the petrol tank, adding some sides to the base in the form of a cube:
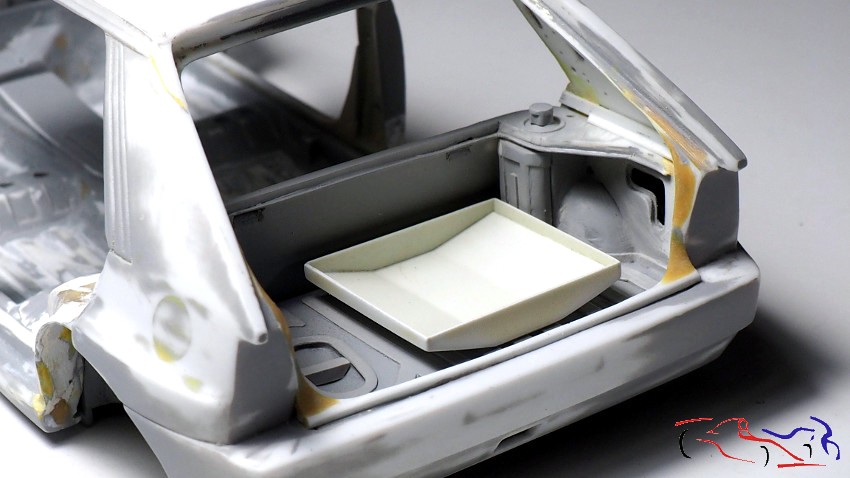
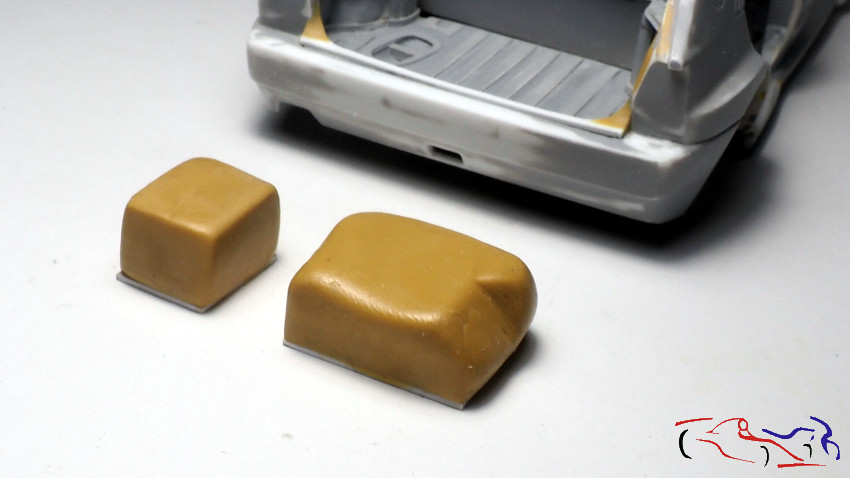
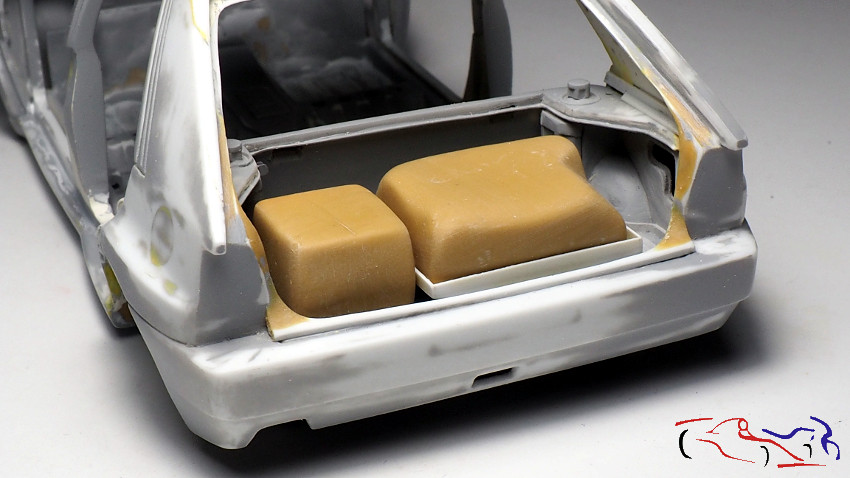
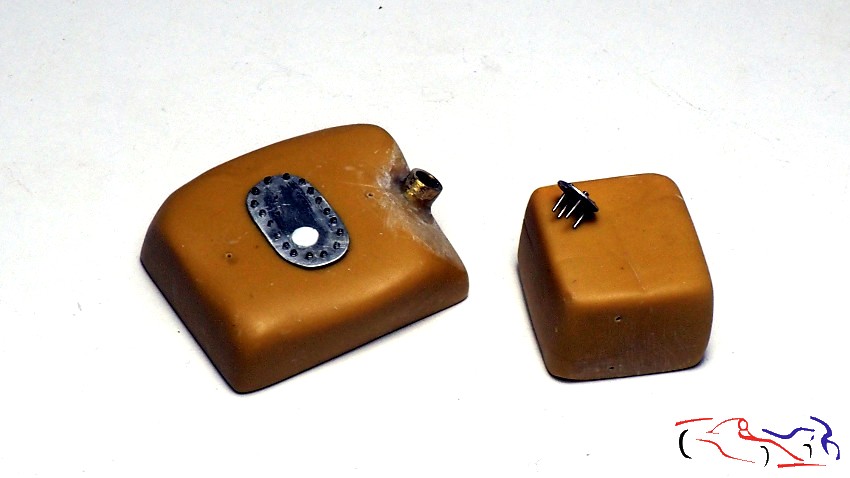
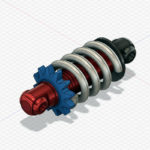
Pero fijandome en el real, el depósito no es una caja fija, sino que es como una bolsa deformable, por lo que decido hacerla con masilla Tamiya epoxy de dos componentes. Una vez mezclada la masilla, la doy forma sobre las bases que hice, teniendo el deposito de gasolina, una parte inclinada que es donde se acoplará la toma de combustible que llega a la carrocería. La del otro depósito, es más cuadrada. Una vez secos, los adapto al maletero, limando y lijando.
But looking at the real one, the fuel tank is not a fixed box, but it is like a deformable bag, so I decide to make it with Tamiya epoxy putty of two components. Once the putty is mixed, I shape it on the bases that I made, having the fuel tank, a sloping part which is where the fuel intake that reaches the body will be attached. The other tank is more square. Once dry, I adapt them to the boot, filing and sanding.
Ahora es el turno de detallar un poco más, y empezamos por las unas placas que tienen de ambos depósitos. La placa del depósito de combustible es ovalada, y lleva las tomas de la bomba de gasolina, por lo que hacemos un dibujo en papel con una plantilla, la cual pegamos sobre una plancha de metal, para trabajar sobre ella.
Now it’s time to detail them a little more, and we start with the plates of both tanks. The fuel tank plate is oval, and has the fuel pump intakes, so we make a drawing on paper with a template, which we stick on a metal plate, to work on it.
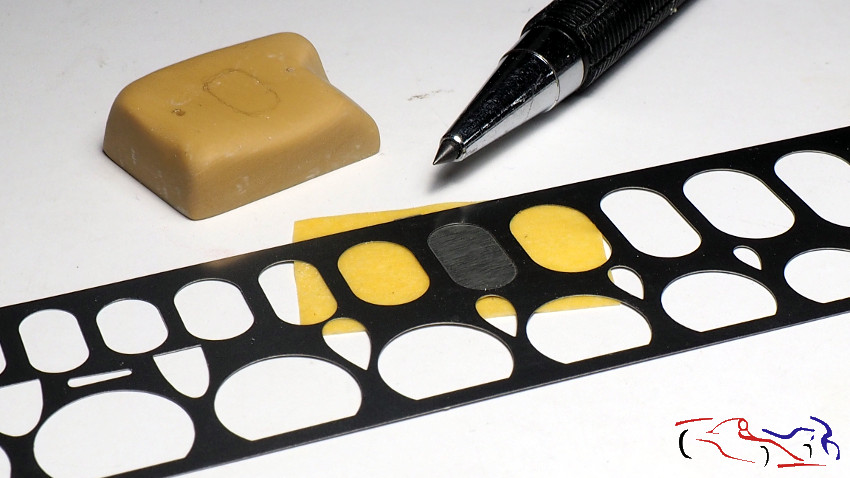
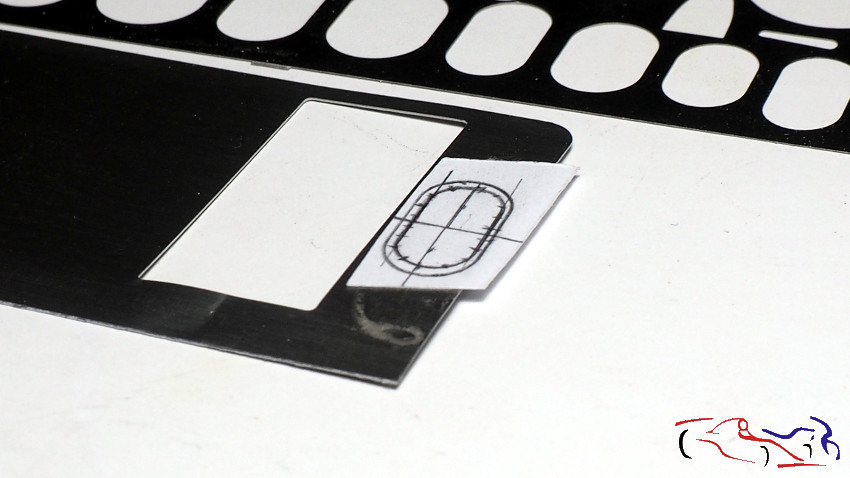
Una vez pegada, la recortamos con el papel, le hacemos los taladros de los remaches. En este punto, quitamos el papel para poner los remaches, y cortamos los extremos sobrantes de la parte inferior. Vemos la tapa del otro depósito con los remaches sin cortar en la parte inferior. También podemos observar que he añadido al depósito de combustible, la boca donde se conectará la toma de combustible.
Once glued, we cut it out with the paper and make the holes for the rivets. At this point, we remove the paper to put the rivets, and we cut the excess ends of the lower part. We can see the lid of the other tank with the rivets uncut at the bottom. We can also see that I have added to the fuel tank, the mouth where the fuel inlet will be connected.
the fuel inlet.
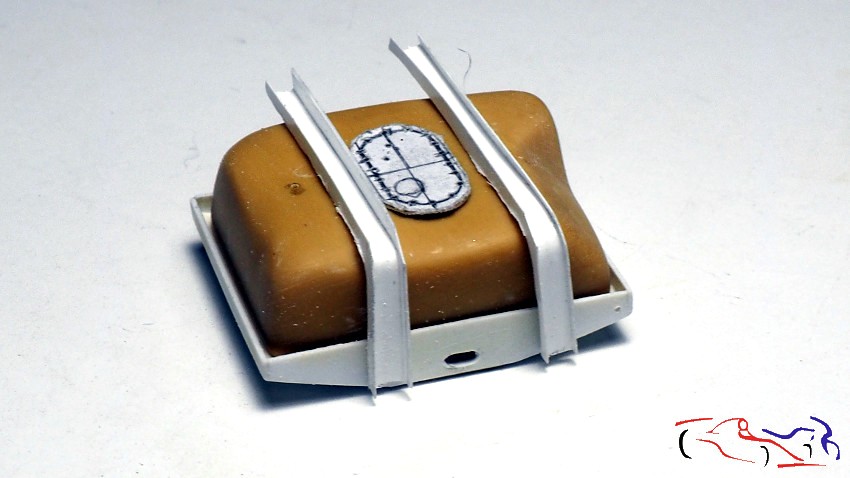
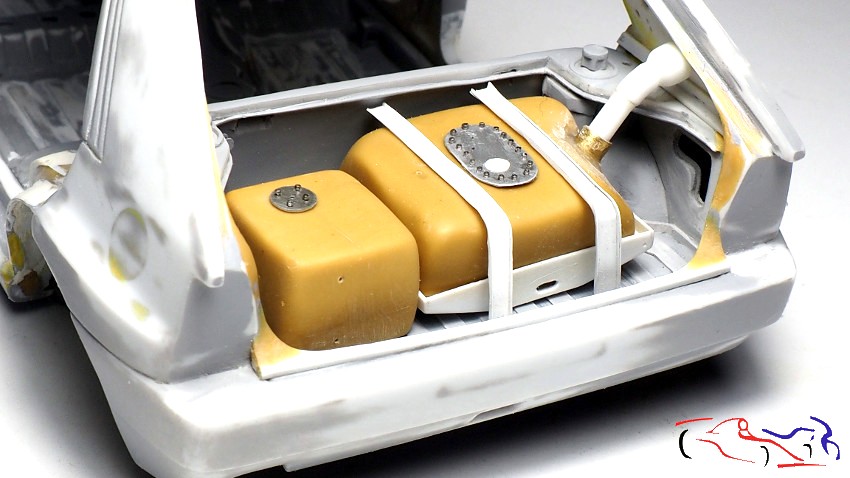
Pero este depósito va fijado con dos soportes de fibra, en ángulo por donde irán las cinchas que lo fijarán. Estos soportes los hago con Evergreen fino, pegando la base perpendicularmente a la plancha, por ambos lados, que después cortaré y ajustaré, como se ve en la foto con el depósito. Decir que aun falta afinarlos, y que la toma de combustible, está recortada pero sin eliminar el papel del dibujo. Y para terminar, la tercera foto muestra los dos depósitos en su lugar, los soportes, las placas superiores, y la toma de combustible, tal como estrá dispuesto en el maletero. Decir también que faltan los mangitos, cables y demás aparatos que controlan dichos depósitos.
But this tank is fixed with two fibre supports, at an angle where the straps that will fix it will go. These supports are made with thin Evergreen, gluing the base perpendicularly to the plate, on both sides, which I will later cut and adjust, as shown in the photo with the tank. The fuel inlet is cut out, but without removing the paper from the drawing. And finally, the third picture shows the two tanks in place, the brackets, the top plates, and the fuel inlet, as it will be arranged in the boot. It is also worth mentioning that the hoses, cables and other devices that control the tanks are missing.
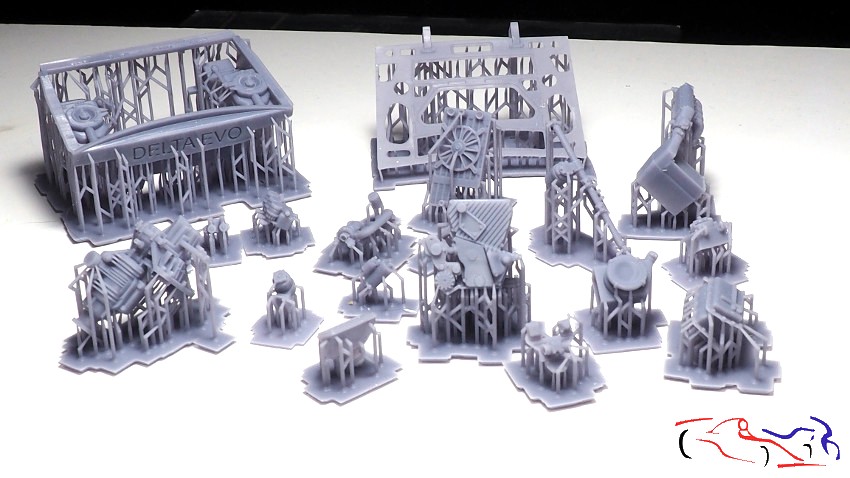
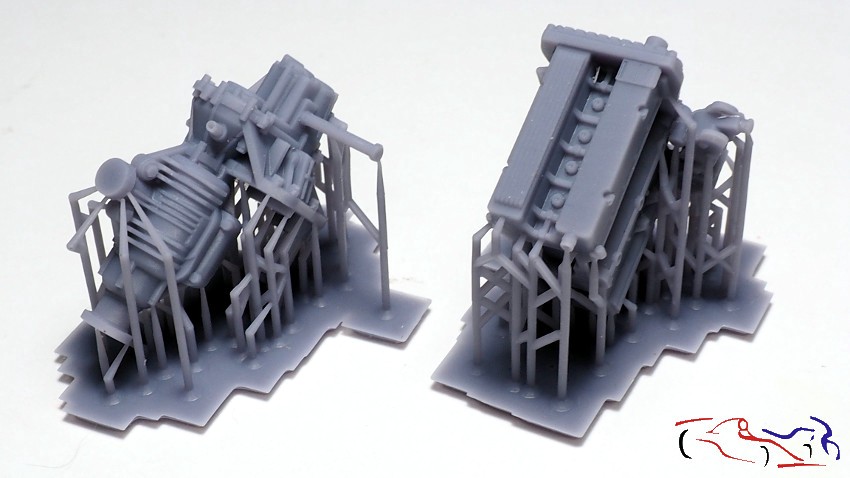
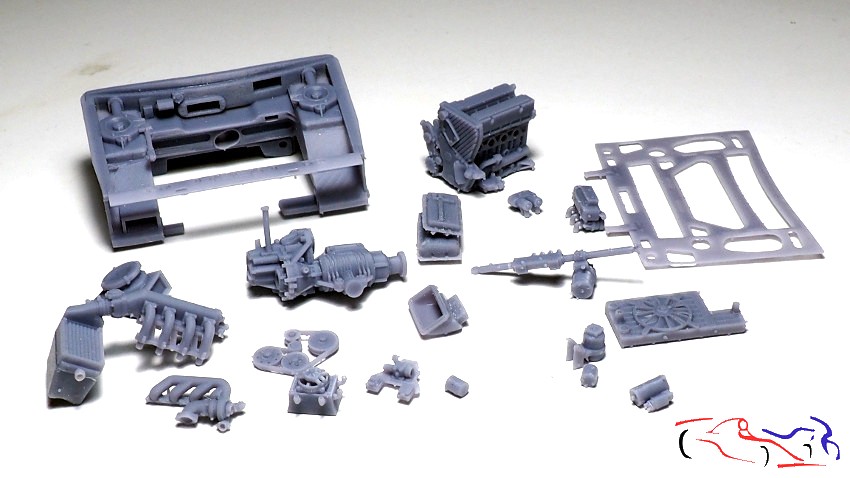
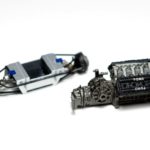
Además, esta semana he recibido el pedido que realicé a Claudio de Bellis, que corresponde al motor del Lancia Delta, que tan fielmente ha creado. Está realizado en 3D, esto es lo que he recibido: todas las piezas con unos soprtes, que hay que cortar. SI nos fijamos en el detalle del bloque motor y el diferencial, vemos que se puede sacar mucho partido de ellos. Y en la tercera foto, vemos también todas las piezas ya limpias, incluyendo la cuna donde va alojado el motor, y la parte de abajo del capó, con todos sus nervios.
In addition, this week I received the order I placed with Claudio de Bellis, which corresponds to the Lancia Delta engine that he has created so faithfully. It is made in 3D, and this is what I have received: all the parts with some supports, which have to be cut. If you look at the detail of the engine block and the differential, you can see that you can make a lot of use of them. And in the third photo, we can also see all the parts already cleaned, including the cradle where the engine is housed, and the underside of the bonnet, with all its ribs.
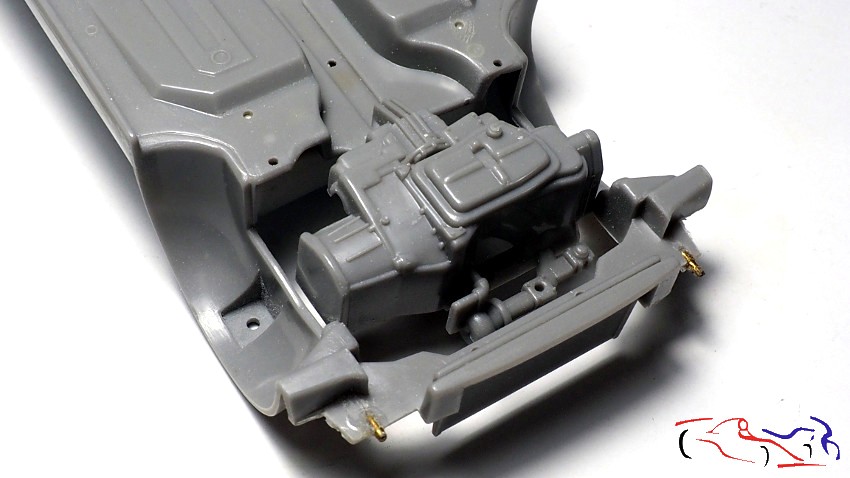
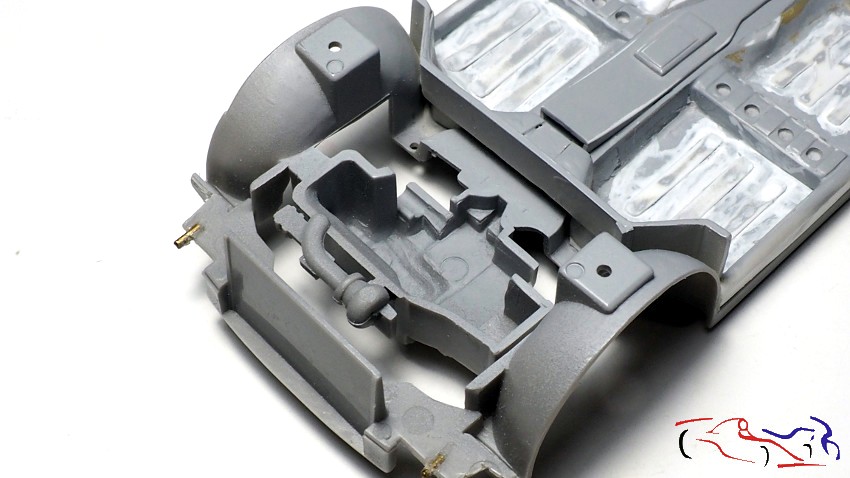
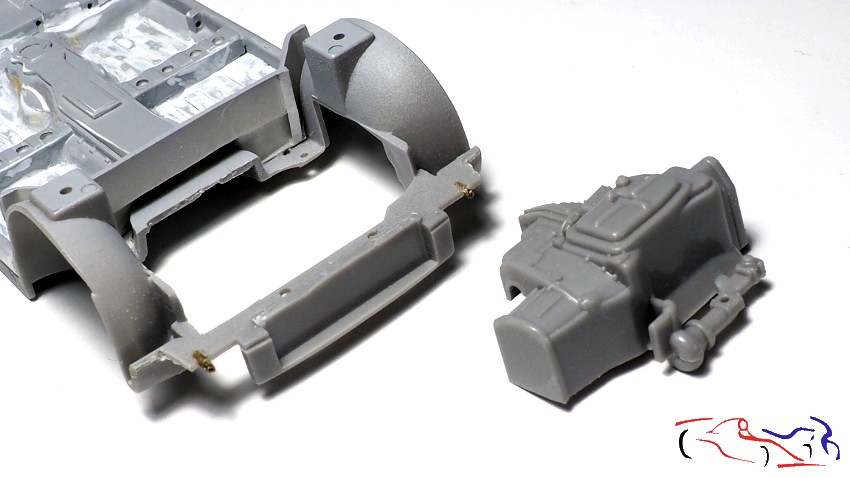
Y como hay muchas ganas de probarlo todo, vamos a acometer, la eliminación del motor que tiene el chasis originalmente, según las indicaciones escritas de Claudio. Vemos como viene el chasis con el motor, tanto por debajo como por encima, para finalizar, en una foto con el motor eliminado.
And as we are eager to test everything, we are going to undertake the removal of the engine that the chassis originally has, according to Claudio’s written instructions. We see how the chassis comes with the engine, both below and above, to finish in a photo with the engine removed.
Y para finalizar hoy, una imagen del chasis, la carrocería y la cuna motor del transkit:
And to finish today, a picture of the chassis, body and engine cradle of the transkit:

Espero que os haya parecido tan interesante como a mi, y con ganas de seguir en este proyecto. Gracias por ver y comentar!!
I hope you found it as interesting as I did, and I look forward to continuing with this project. Thanks for watching and commenting!


Buen trabajo en el tanque de combustible. La mejor solución para hacerlo con masilla de 2 componentes. Las partes tridimensionales de Claudio son impresionantes. Espero con ansias la próxima entrada.
Gracias MArtin!!
Absolute Fan for sure!!!
Thanks!! Happy you like it!!