
Ya estamos de vuelta con el Lancia S4, puesto que desde Febrero no he mostrado nada, y mientras me dedicaba a otros kits durante el confinamiento de la pandemia. Mucho trabajo he ido haciendo, y aquí os lo muestro.
We are back with the Lancia S4, since since February I have not shown anything, and while I was dedicating myself to other kits during the confinement of the pandemic. I have been doing a lot of work, and here I show you.
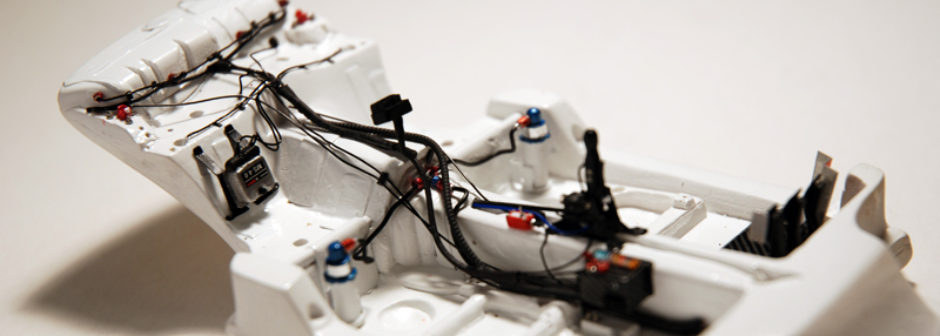
Empezamos con el chasis. La idea es terminar el chasis para empezar a pegarle las partes del motor que ya están listas. Para ello, lo primero que hacemos, es pegar los tubos, cables, y transmisión debajo del habitáculo.
We start with the chassis. The idea is to finish the chassis to start gluing the engine parts that are already ready. To do this, the first thing we do is glue the tubes, cables, and transmission under the cabin.

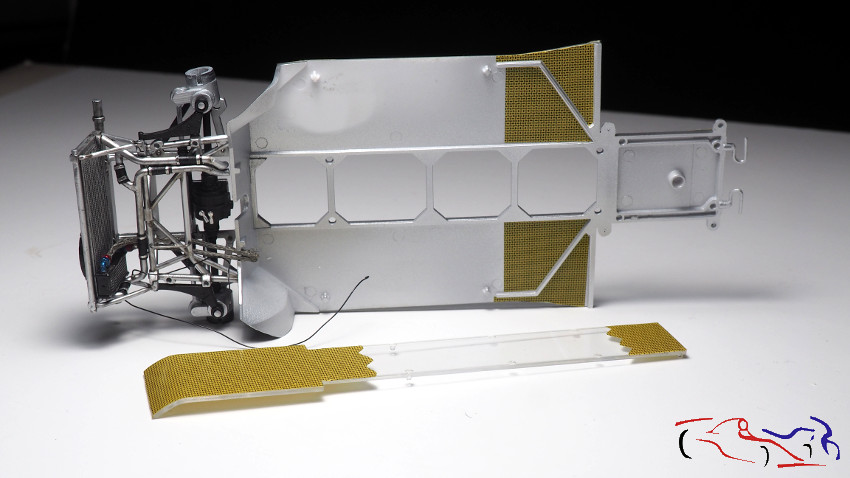
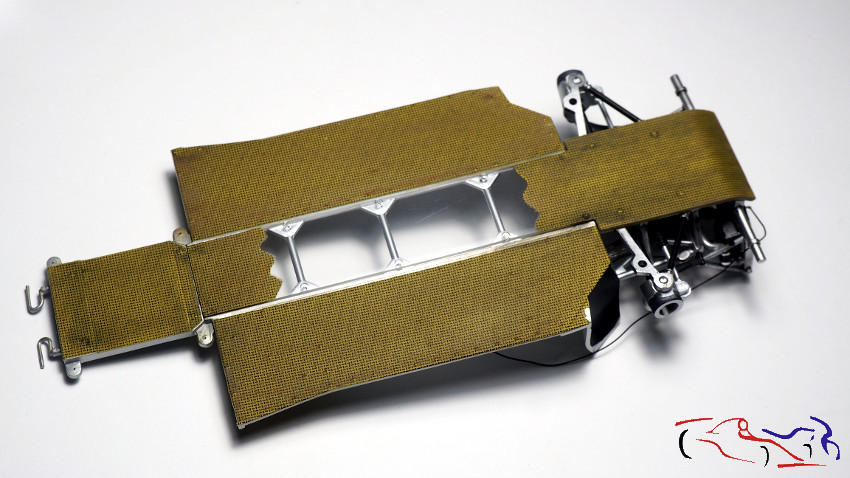
Mientras se seca, cogemos el chasis propiamente dicho, y le colocamos las calcas de fibra. Podéis ver la pieza suelta, que es originalmente transparente, que se colocará en el centro del chasis, a la que le he eliminado parte de la calca para que se vea el trabajo realizado en la transmisión, y que hemos colocado en la foto anterior.
While it dries, we take the chassis itself, and put the fiber decals on it. You can see the loose piece, which is originally transparent, which will be placed in the center of the chassis, from which I have removed part of the decal to show the work done on the transmission, and which we have placed in the previous photo.
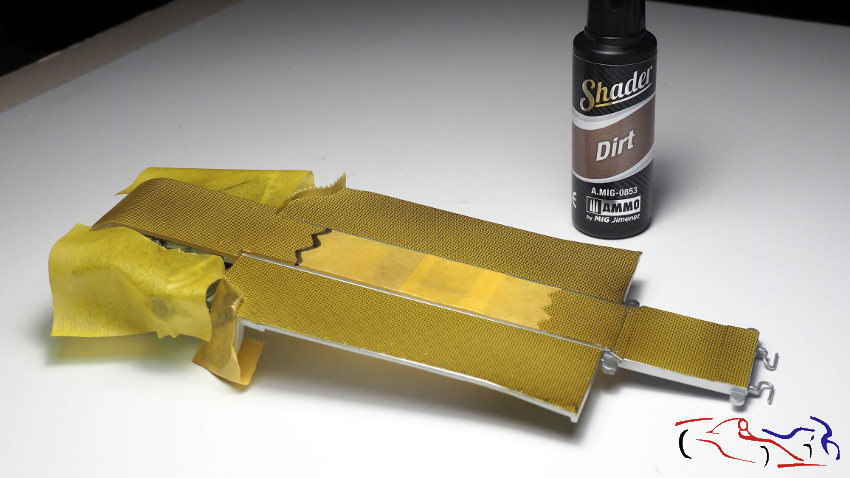
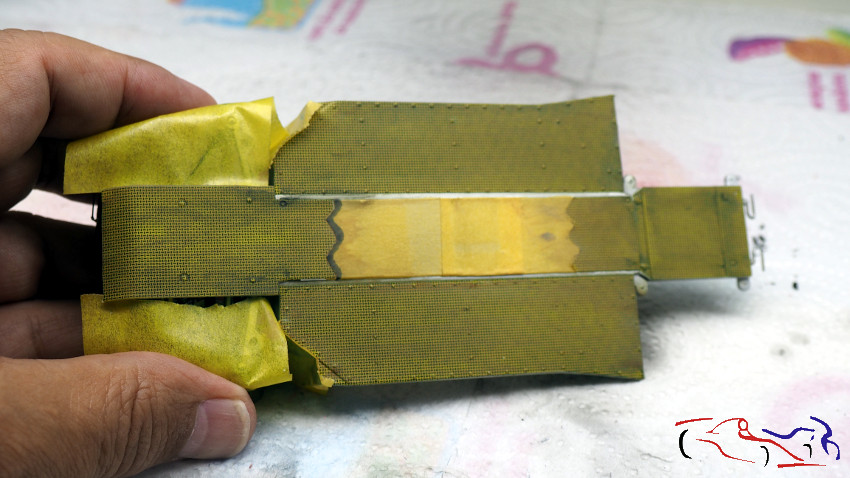
Si le damos la vuelta al chasis, vemos la calca de fibra colocada, y todo el resto enmascarado para ensuciarla. Y como primera etapa, le he dado una capa fina de barniz mate de AMMO MIG, que seca muy rápido.
If we turn the chassis, we see the fiber decal in place, and all the rest masked to make it dirty. And as a first stage, I have given it a thin coat of AMMO MIG matte varnish, which dries very quickly.

Y lo primero que hacemos, es probar el Shaders de MIG, color “Dirt”, es decir sucio. Se aplica de forma muy fina, sin encharcar nada, y siempre sobre superficie mate. Se ha incidido sobre los bordes.
And the first thing we do is try the MIG Shaders, “Dirt” color, that is to say dirty. It is applied very thinly, without puddling anything, and always on a matte surface. It has incised on the edges..
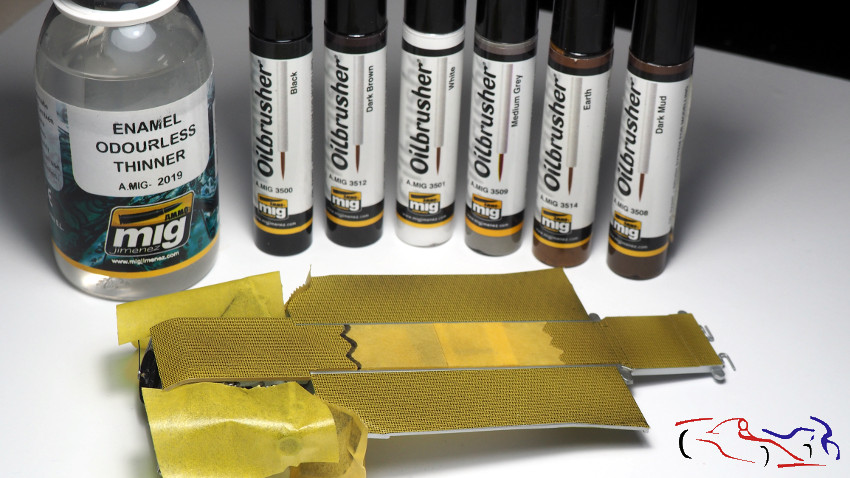
Lo siguiente es aplicar otra capa de barniz mate, para proteger lo anterior y poder continuar con los siguientes procesos. Y ahora toca aplicar los oilbrushers que aparecen en la foto, poniendo puntos de las diferentes pintiras repartidos sobre toda la superficie. Una vez puestos, cogemos un pincel plano, el diluyente y empezamos a difumiarlo todo, con movimientos longitudinales a lo largo del chasis.
The next thing is to apply another layer of matte varnish, to protect the above and to continue with the following processes. And now it’s time to apply the oilbrushers that appear in the photo, putting dots of the different paints spread over the entire surface. Once they are in place, we take a flat brush, the thinner and begin to blur everything, with longitudinal movements along the chassis.
Y este es el resultado. Decir qye a los remacheso grandes y a las juntas, le he dado un lavado de negro mate XF-1 diluido. Y después, otra capa de barniz mate de MIG.
And this is the result. Saying that to the large rivets and joints, I have given a dilute XF-1 matte black wash. And then another coat of MIG matte varnish.
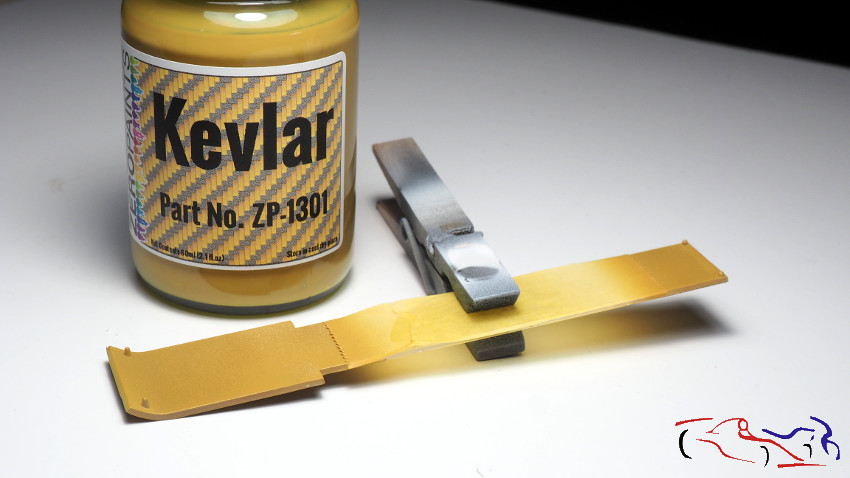
Para la parte transparente, lógicamente hay que tratarla también por la parte superior, en los extremos, puesto que la calca puesta debajo, aparece como blanca si se mira desde el otro lado, y se vería en el extremo del motor y debajo de la parte forntal. Por tanto, enmascaamos la parte transparente y pintamos con kevlar de Zero.
For the transparent part, logically it must also be treated from the upper part, at the ends, since the decal placed underneath appears as white if viewed from the other side, and it would be seen at the end of the motor and under the part. forntal. Therefore, we mask the transparent part and paint with Zero’s kevlar.
Una vez pintado, aplicamos un ligero ensuciado de negro mate XF-1 diluido, incidiendo en los bordes,
Once painted, we apply a light soiling of diluted XF-1 matt black, focusing on the edges,
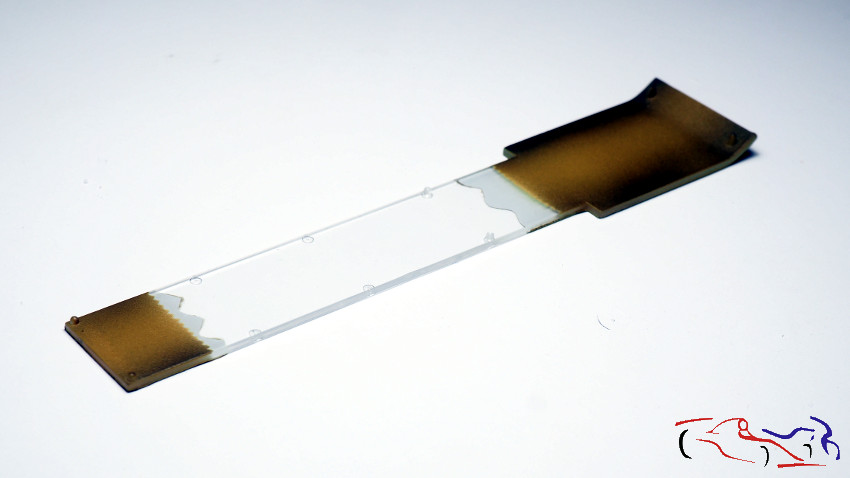
Siendo este el resultado, visto desde envima de la estructura.
This being the result, seen from above the structure.
Y aquí, ya están pegados, el chasis y la pieza transparente.
And here, the chassis and the transparent part are already glued.
A su vez, pegamos el cockpit y el motor al chasis.
In turn, we glue the cockpit and the engine to the chassis.
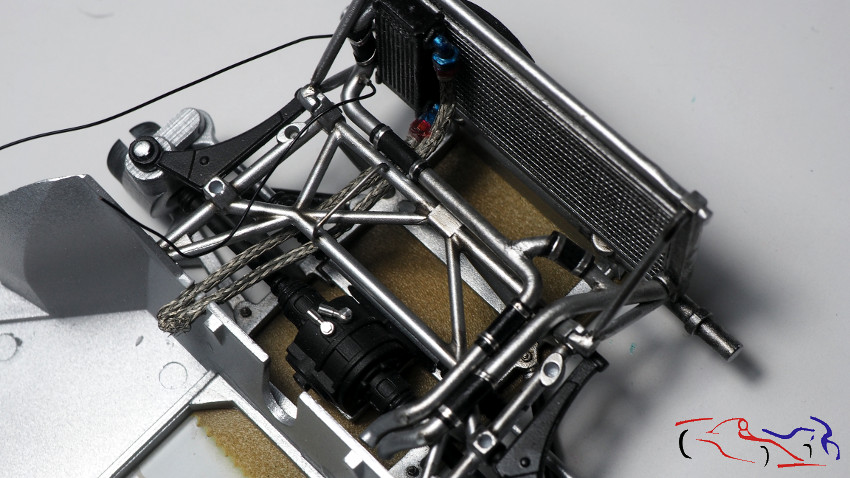
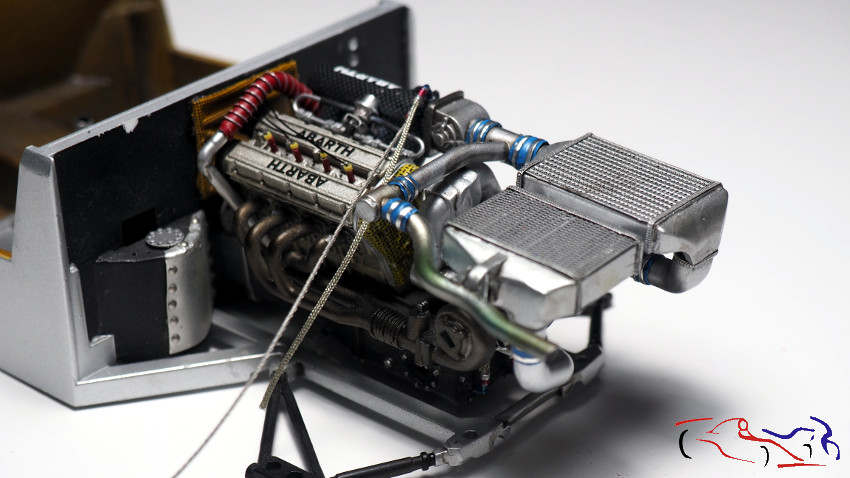
En la siguiente foto, os muestro el motor pegado al chasis. Los dos cables sueltos irán colocados en las tomas de una válvula que hay al lado de un escape.
In the next photo, I show you the engine attached to the chassis. The two loose cables will be placed in the sockets of a valve next to an exhaust.
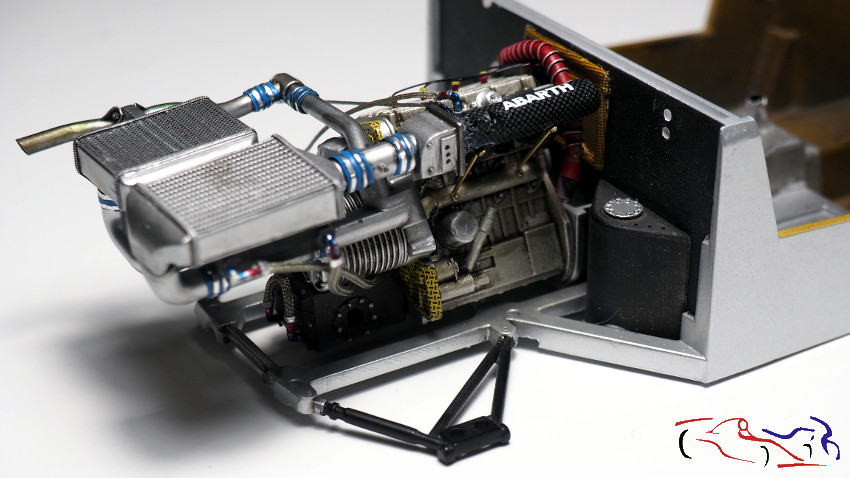
La vista desde el otro lado:
Another view of the opposite side:
Entre el motor y la ruedas, existen estas piezas donde van sujetos la amoriguación y los triángulos superiores de la suspensión. Estas piezas van unidas al chasis por esos tubos de la izquierda, donde varios depositos están ubicados. Esta pieza es también de KMP, a la que le he añadido los distintos cableados. Esta pertenece al lado izuierdo en orden de marcha. La del otro lado, tienen un depósito de aceite.
Between the engine and the wheels, there are these parts where the damping and the upper suspension triangles are attached. These pieces are attached to the chassis by those tubes on the left, where several tanks are located. This part is also from KMP, to which I have added the different wiring. This belongs to the left side in running order. The one on the other side, they have an oil reservoir.
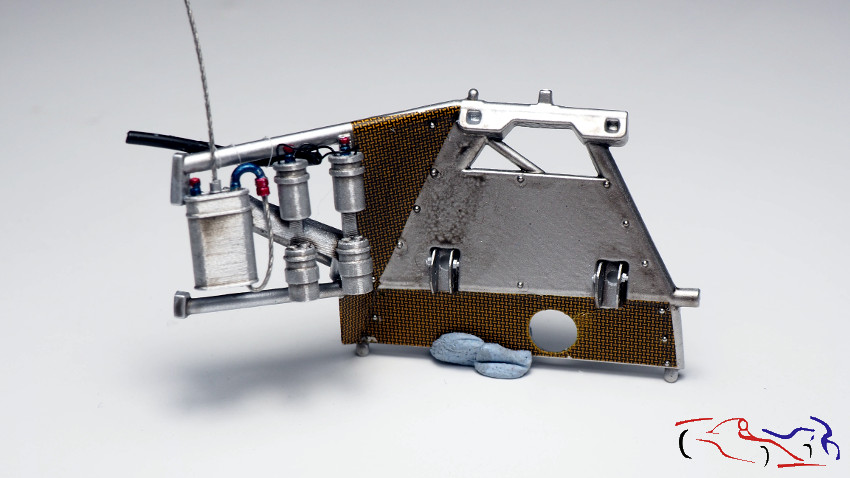
Para fijar este tubo de escape, y que no se caiga, le he puesto este tirante que tiene en sus extremos, unas láminas de aluminio con agujeros, a las que he fijado el tirante con tuercas.
To fix this exhaust pipe, so that it does not fall, I have put this tie rod that has aluminum sheets with holes at its ends, to which I have fixed the tie rod with nuts.
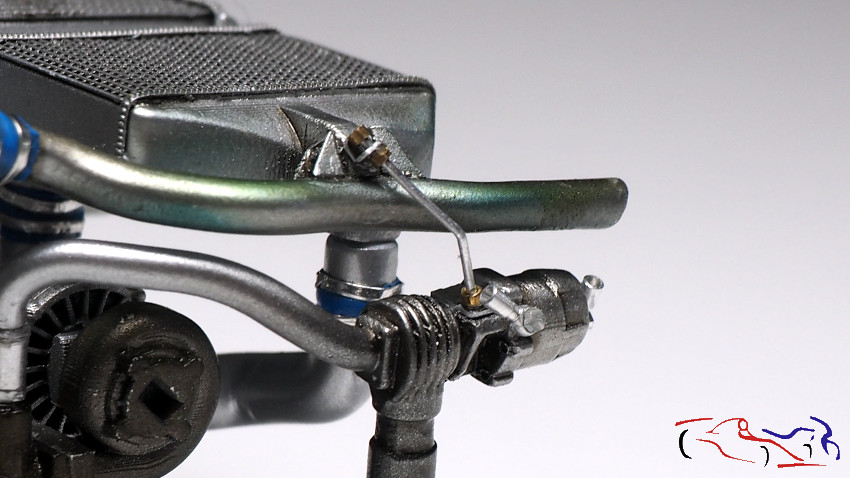
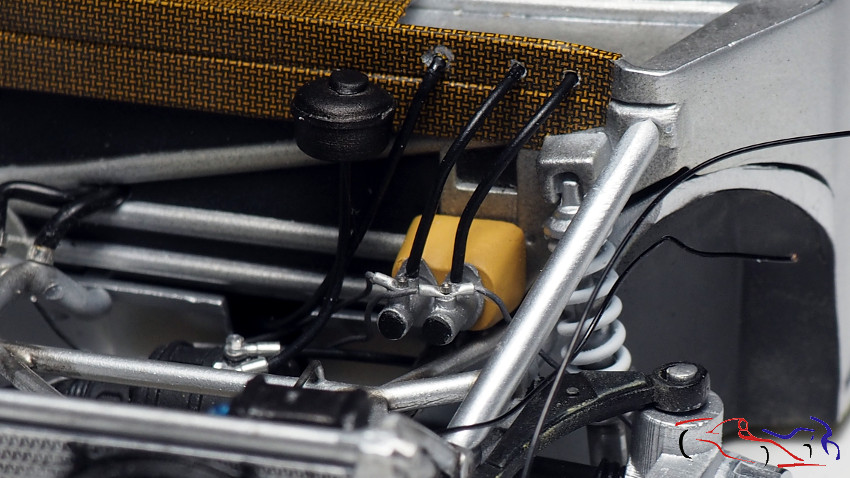
Más añadidos: este depósito que tiene un tubo de desagüe, y otro que va a la tapa de balancines. También se ve, la pieza de cobre con agujeros, que se encatga de sujetar los muelles del acelerador.
More additions: this tank that has a drain tube, and another that goes to the rocker cover. It is also seen, the piece of copper with holes, which fits to hold the springs of the accelerator.
Otra vista del depósito:
Another view of the tank:
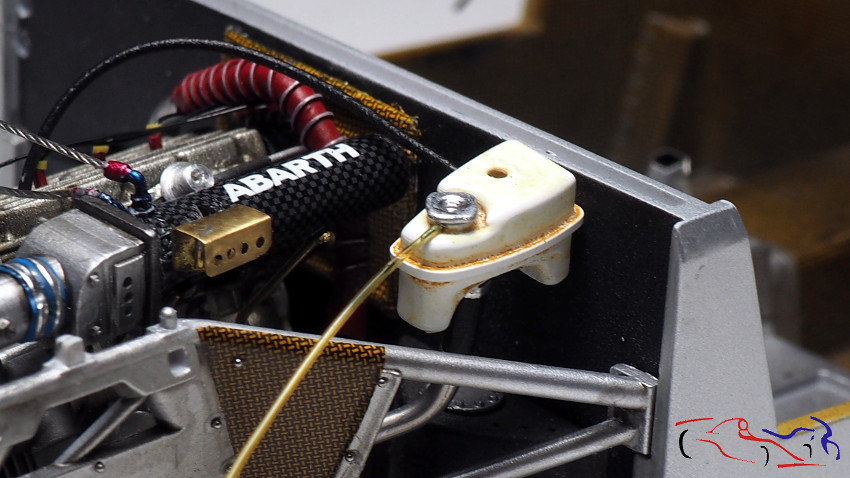
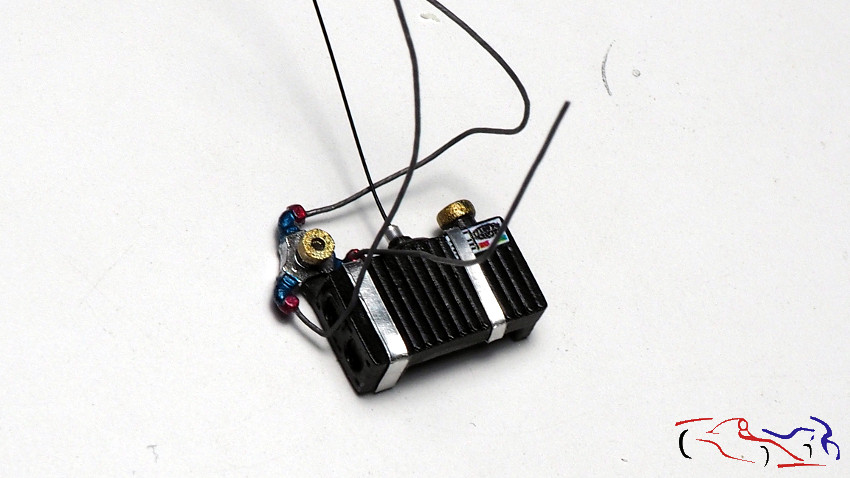
En la parte izquierda del motor y detrás del piloto, se situa la centralita, pieza de KMP que uso en lugar d ela del kit. La he pintado, le he puesto cables, la calca y unas fijaciones.
On the left side of the engine and behind the pilot, the control unit is located, a KMP part that I use instead of the kit. I have painted it, I have put cables, the decal and some fixings.
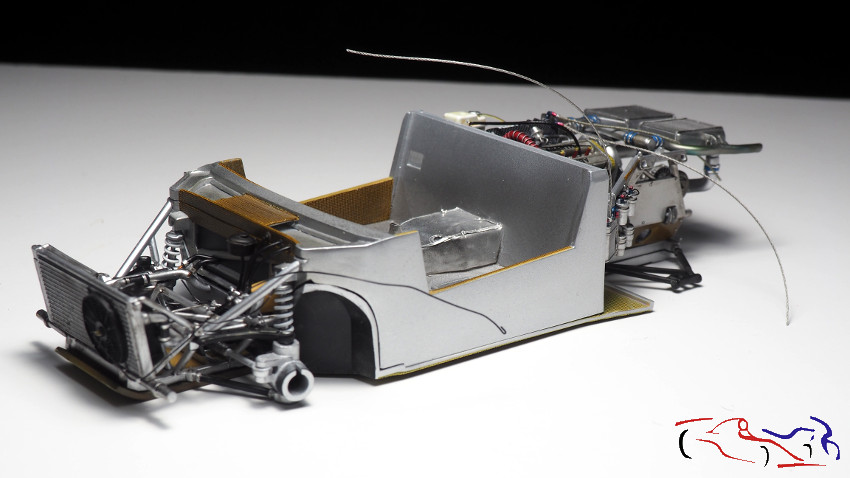
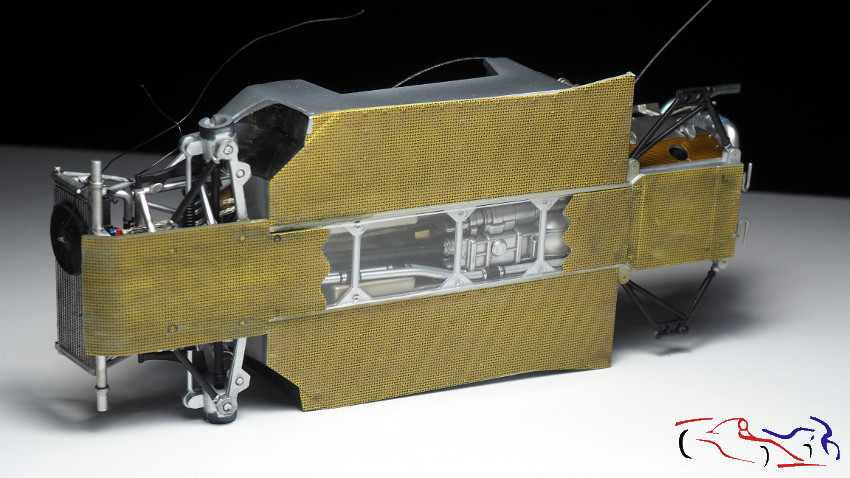
Y esta es la vista del chasis, con todo lo anteriormente dicho ya montado, y con la pieza transparente:
And this is the chassis view with all previous mentioned already glued and with the transparent piece:
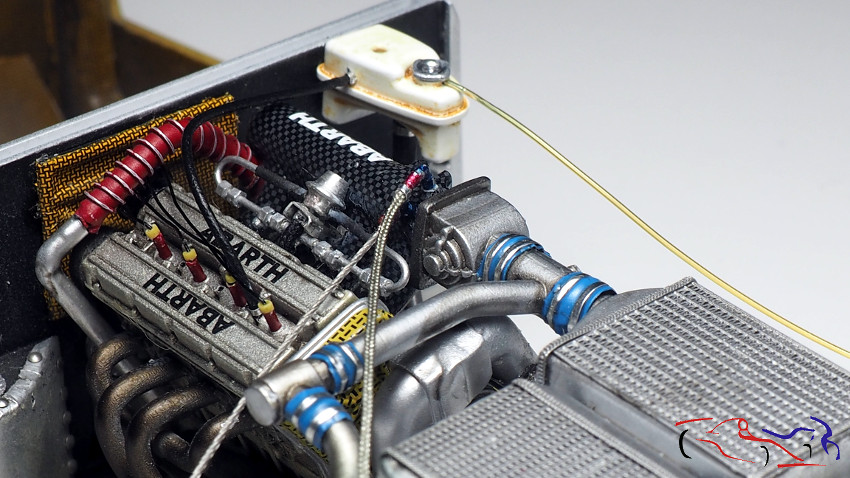
Más piezas: a la entrada de aire superior, le he añadido los tubos que hice anteriomente, y que sirven para airear el motor.
More parts: to the upper air intake, I have added the tubes that I made previously, and that serve to aerate the engine.
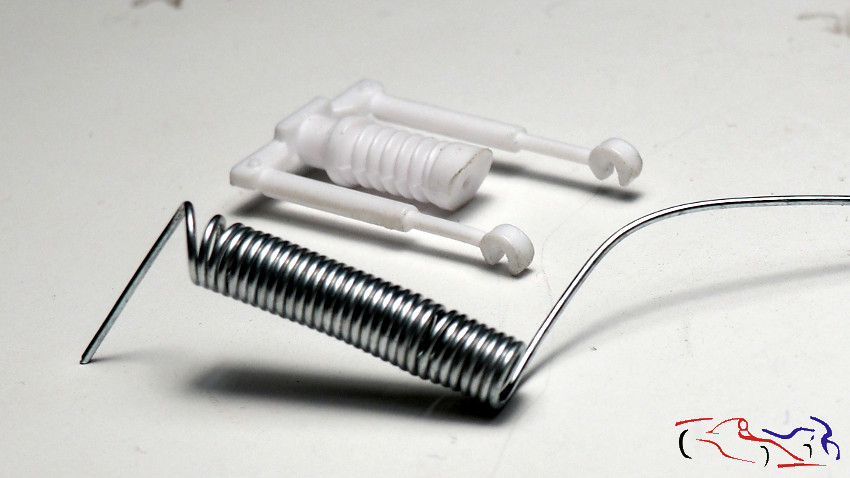
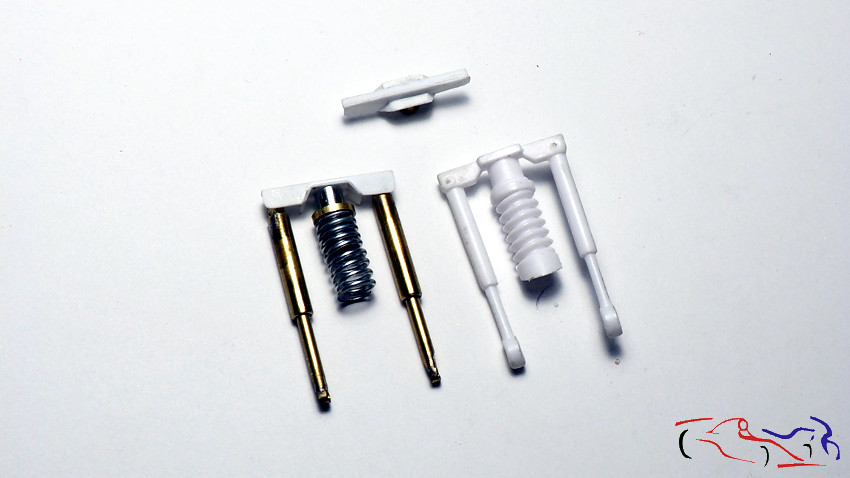
Pasamos a la amortiguación trasera. Vemos arriba a la izquierda, la pieza de KMP que usaré como base de la suspensión y del disco de freno. Vemos varios tubos de latón que he cortado para sustituir los d ela pieza original, en blanco en la foto. Los circulos de latón están soldados al tubo, y servirán para encajar los amortiguadores en la pieza de KMP.
We move on to the rear shock. We see above on the left, the KMP part that I will use as the base of the suspension and the brake disc. We see several brass tubes that I have cut to replace the original part, white in the photo. The brass circles are welded to the tube, and will serve to fit the shock absorbers into the KMP part..
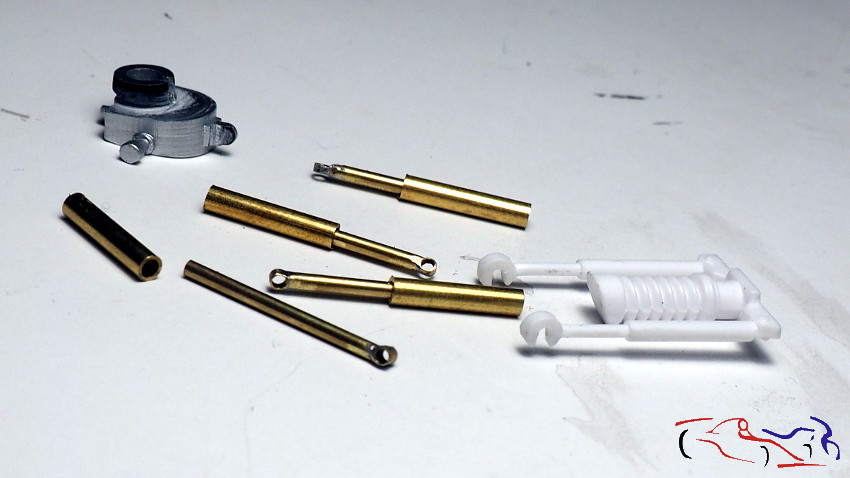
Para el muelle, usamos cable del mismo diámetro enrollado en un tubo. De éste obtendré los dos muelles necesarios.
For the spring, we use cable of the same diameter wound on a tube. From this I will get the two necessary springs.
Para acoplar la pieza de KMP, le corto las fijaciones originales de los lados, y mediante unos agujeros en su lugar, introduzco un tubo de latón, que pego con cianocrilato.
To attach the KMP piece, I cut the original fixings on the sides, and through some holes in their place, I insert a brass tube, which I glued with cyanoacrylate.

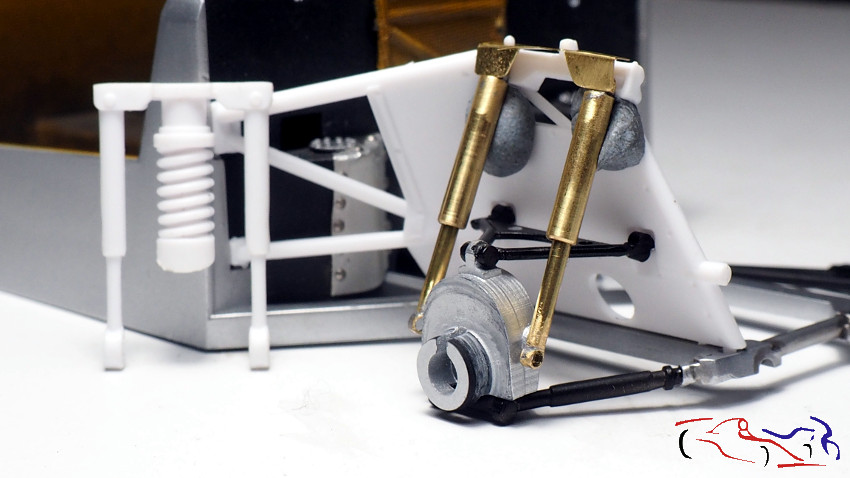
Y aquí tenéis una preinstalación de los amortiguadores, anclados al tubo de la pieza de KMP que sustituimos, que podemos comparar con la pieza original en blanco.
And here is a pre-installation of the shock absorbers, anchored to the tube of the KMP part that we replaced, which we can compare with the original white part.
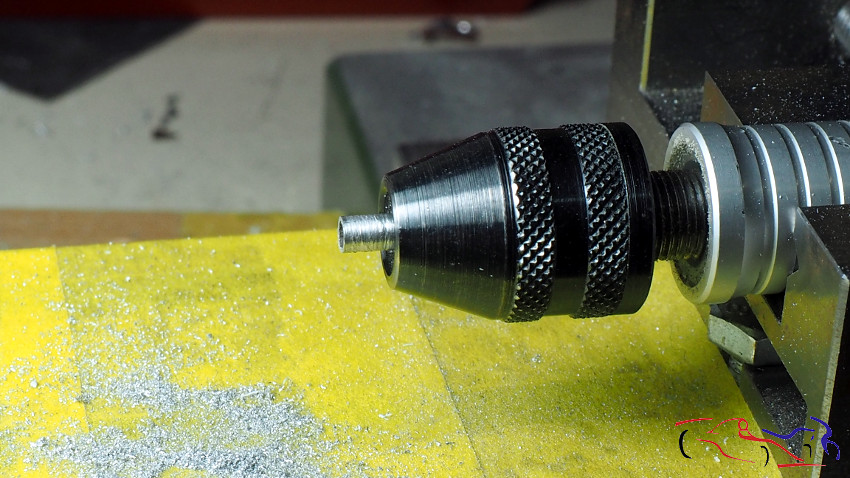
Vamos con más detalles. Al tubo que va por dentro del muelle, lo pongo en el minitaladro y lo araño con una lima, para simular las vueltas de la turca que fija el muelle. Después lo matizaremos con smoke diluido para dar profundidad.
Let’s go with more details. The tube that goes inside the spring, I put it in the mini-drill and scratch it with a file, to simulate the turns of the turkey that fixes the spring. Then we will clarify it with diluted smoke to give it depth.
Pero tenía unas dudas respecto a la pieza supeior, donde van fijados los amortiguadores. Y para ello, fui haciendo piezas de plástico para al final, hacer la pieza de la derecha…
But I had some doubts about the upper part, where the shock absorbers are attached. And for that, I was making plastic pieces and, at the end, I made the piece on the right …
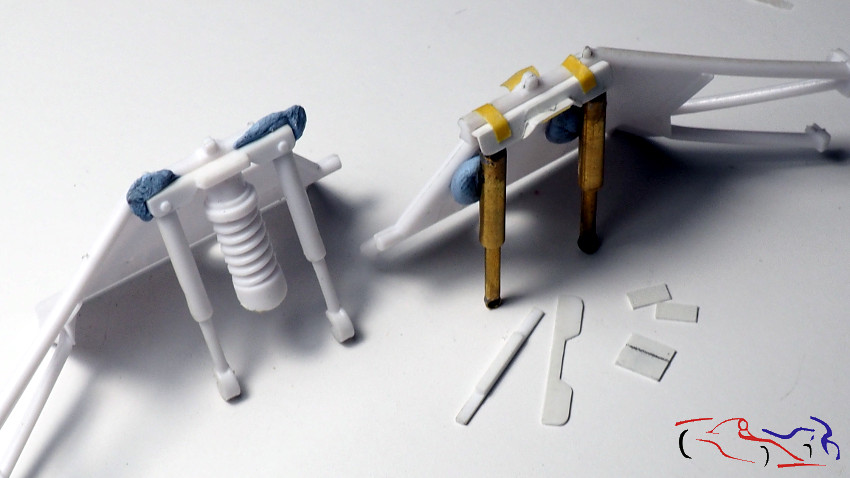
….y que aquí vemos colocada en su lugar, la pieza de la izquierda, y que podemos compararla con la original del kit:
…. and that here we see the piece on the left in place, and that we can compare it with the original of the kit:
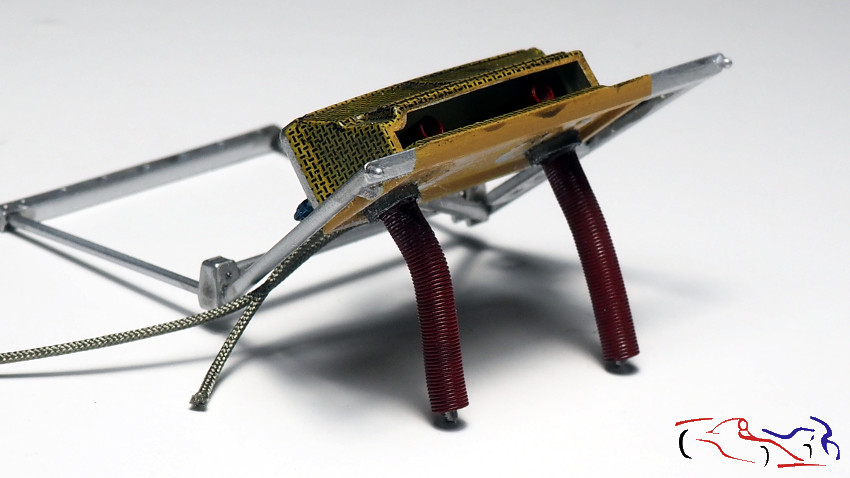
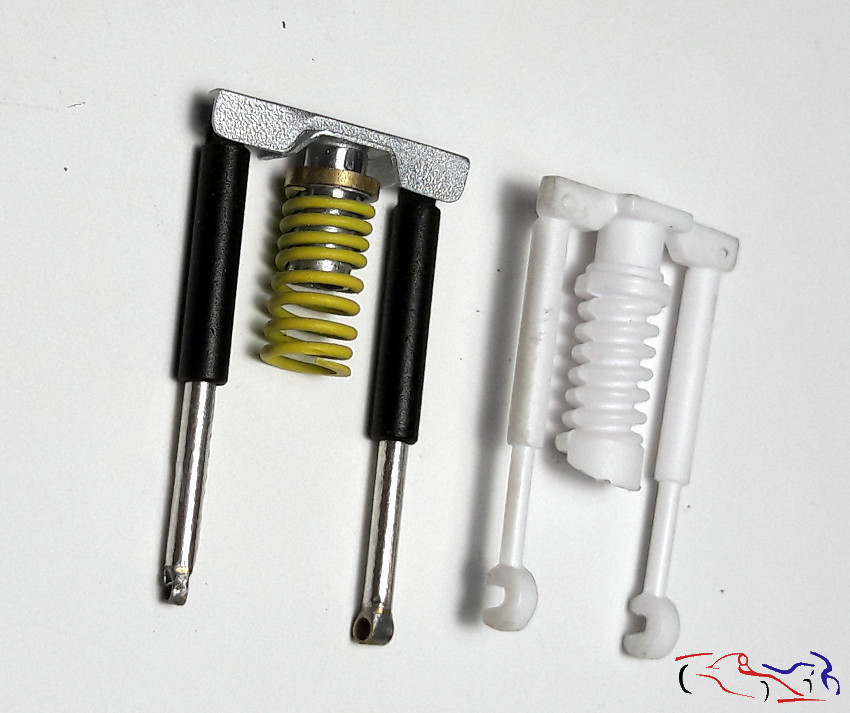
Y ahora, la comparamos también, pero la pieza fabricada ya está pintada. Decir que la parte metálica de abajo del amortiguador, es Bare Metal sobre el tubo de cobre.
And now, we also compare it, but the manufactured part is already painted. Say that the metal part underneath the shock absorber is Bare Metal on the copper tube.
Y vamos poniendo más piezas, ahora en la parte delantera: Un depósito del diferencial delantero en negro (que torneé de aluminio) y las bombas d elos frenos, que se conectan con los botecitos que irán en ese espacio superior:
And we are putting more pieces, now in the front part: A deposit of the front differential in black (that I turned from aluminum) and the brake pumps, which are connected with the little bottles that will go in that upper space:
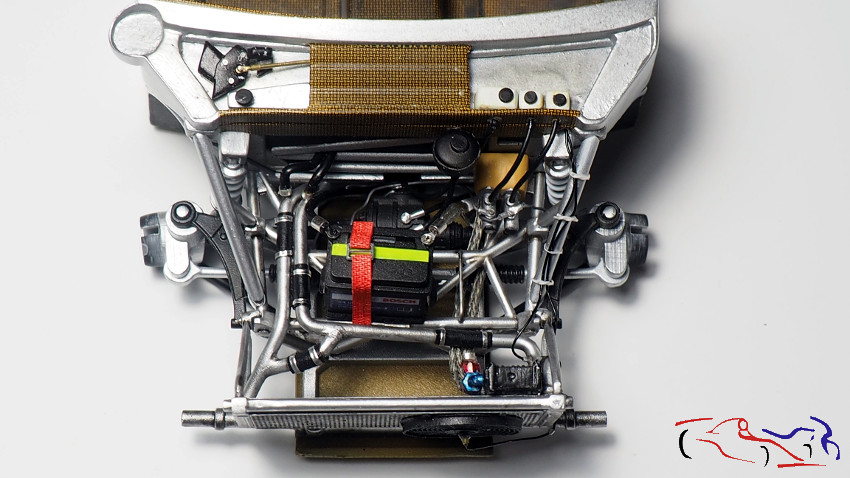
También vemos la batería, pieza de KMP, a la que puse los bornes de fotograbado, unidos a dos cables (uno negro (+) y un cable trenzado aplastado (-)), y una cinturón para la fijación de la misma.
We also see the battery, a KMP part, to which I put the photo-etched terminals, attached to two cables (one black (+) and a flattened braided cable (-)), and a belt to fix it.
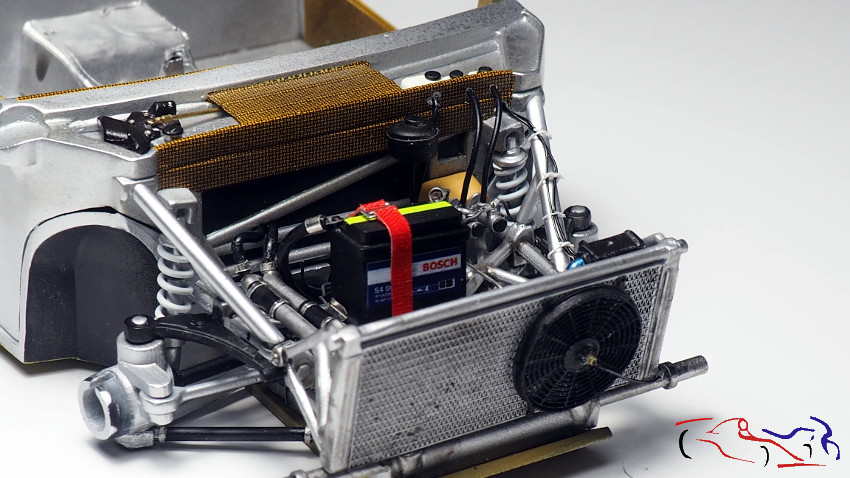
En esta foto, vemos también que los cables de la parte derecha en la foto, han sido conducidos por la barra de aluminio, y anudados con bridas hechas de plásticos estirado blanco. También vemos los depósitos en la parte derecha asuperior, y el motor de los limpiaparabrisas en la parte izquierda.
In this photo, we also see that the cables on the right side in the photo, have been led by the aluminum bar, and knotted with ties made of white stretched plastics. We also see the deposits on the top right side, and the windshield wiper motor on the left side.
Ahora toca empezar a poner más piezas del motor, y del cockpit.
Gracias por ver y comentar!!
Now it’s time to start putting more parts of the engine, and the cockpit.
Thanks for viewing and commenting!!


It all looks great. I am impressed with the details you replicate and everything in 1:24. There’s a lot to see and learn, I’ll be back.
Hi MArtin, glad you like it!! Hope you can use my experience in any model!!
Impresionante trabajo, me gustan las explicaciones, espero seguir viendo la evolucion, gracias.
Gracias Javier, si, verás más pasos del proceso!!