Ultima actualización antes de las fotos finales!! Deciros que ya está la maqueta terminada, pero tengo que poneros los últimos componentes añadidos al kit.
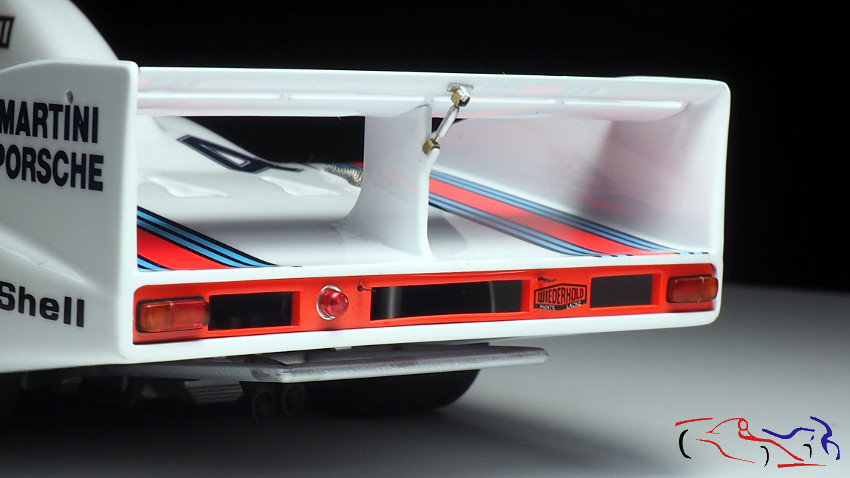
Empezamos por la parte posterior del coche. Las luces se pintaron con rotuladores por el exterior, con molotow en la parte interior, y se pegaron en unas plaquitas pintadas en negro mate, realizadas con hoja de lata. La luz roja redonda, fue hecha torneando y puliendo aluminio, y pintada con rotulador rojo. La base es un círculo de aliminio autoadhesivo. Estas tres luces fueron barnizadas después en el exterior con Gauzy con pincel. También pegué el mecanismo que fija la inclinación del plano superior del alerón, así como los fijadores del portón trasero, colocados también en el mismo palno que las luces.
Last update before the final photos !! Just to tell you that the model is already finished, but I have to put the last components added to the kit.
We start at the back of the car. The lights were painted with markers on the outside, with Molotow on the back, and they were glued on some plates painted in matt black, made with tin foil. The round red light was made by turning and polishing aluminum, and painted with a red marker. The base is a self-adhesive aluminum circle. These three lights were then varnished on the outside with Gauzy with a brush. I also glued the mechanism that fixes the inclination of the upper plane of the spoiler, as well as the fasteners of the tailgate, also placed on the same plane as the lights.
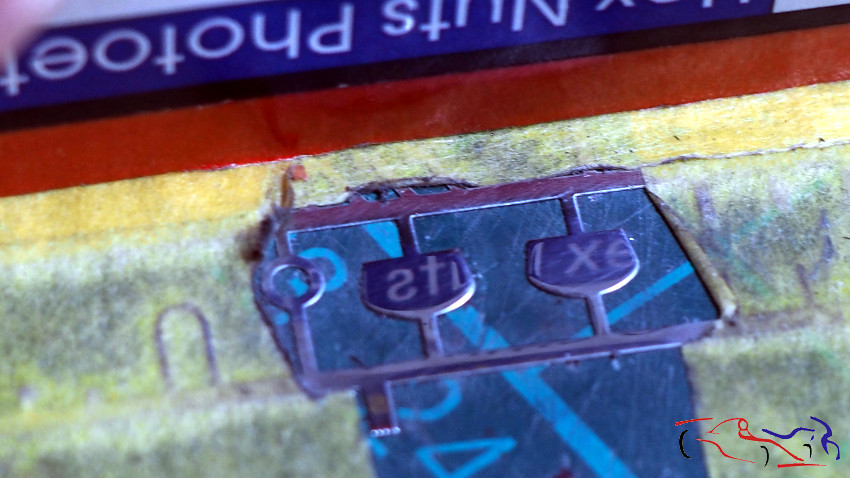
 En las entradas de gasolina o aceite, ponemos fotograbados existentes de otros kits.
At the fuel or oil inlets, we put existing photo-etches from other kits.
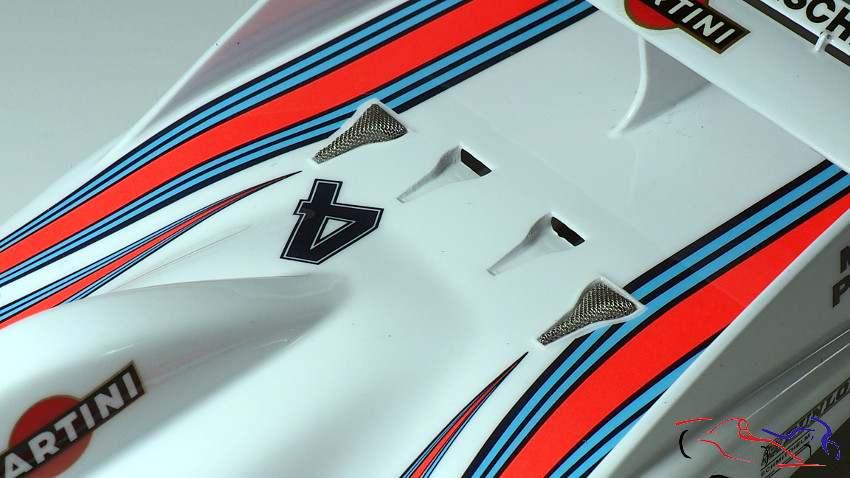
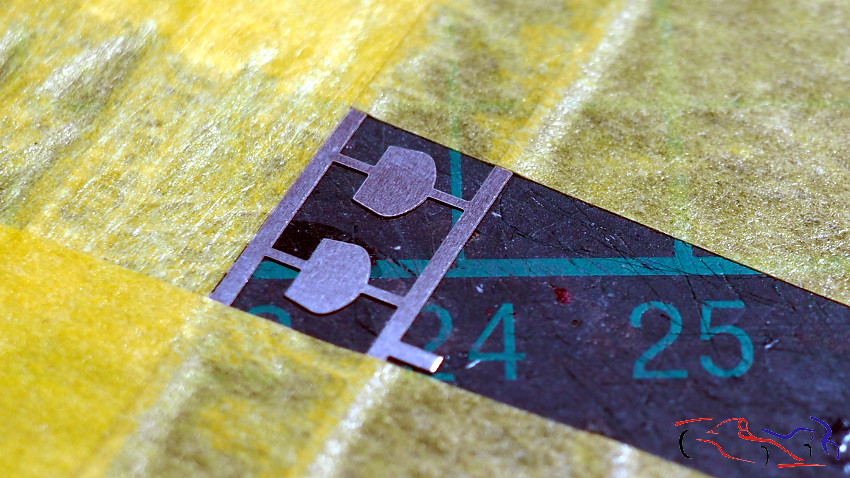
 Añadimos las rejillas de las entradas NACA que proveen de aire a los turbos:
We add the grids of the NACA inlets that provide air to the turbos:
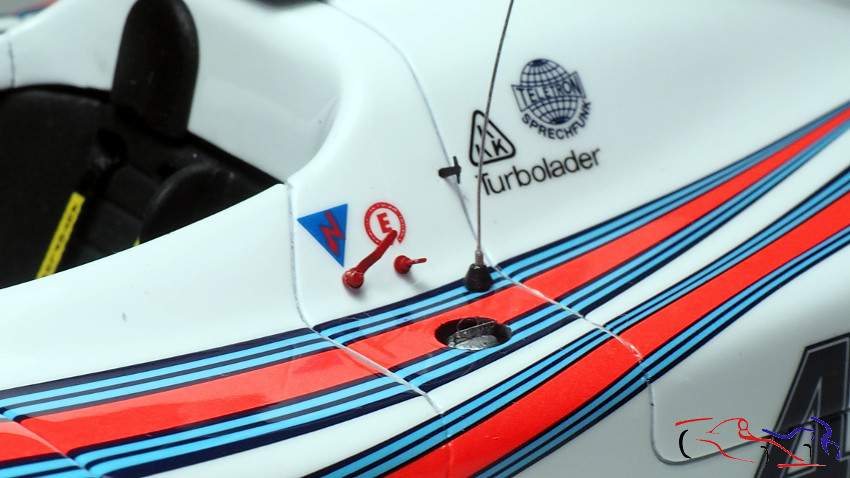
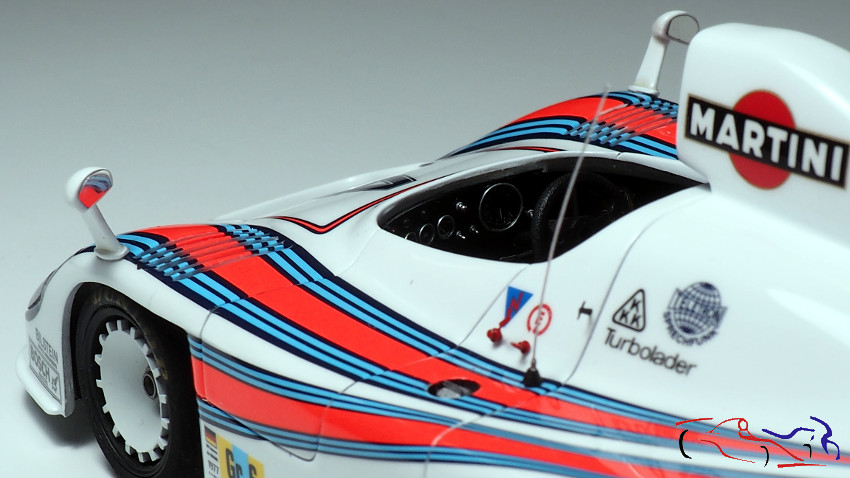
 En al siguiente foto, os muestro los dispositivos de seguridad, antena, fijaciones del portón trasero y el fotograbado de la tapa, en la que hice una linea para poder incrustrar dicho fotograbado:
In the following photo, I show you the security devices, antenna, tailgate fixings and the photoengraving of the cover, in which I made a line to be able to embed this photoengraving:
 Pasamos a los faros. Primero pegamos con cola blanca los aros de aluminio que corté de un tubo.
We go to the lighthouses. First we glued the aluminum rings that I cut from a tube with white glue
 …para después pegar los cristales sobre esos aros. Se puede ver también el gancho de arrastre delantero, pintado en un rojo distinto, no tan fluo:
… and then stick the crystals on those rings. You can also see the front drag hook, painted in a different red, not so fluo:
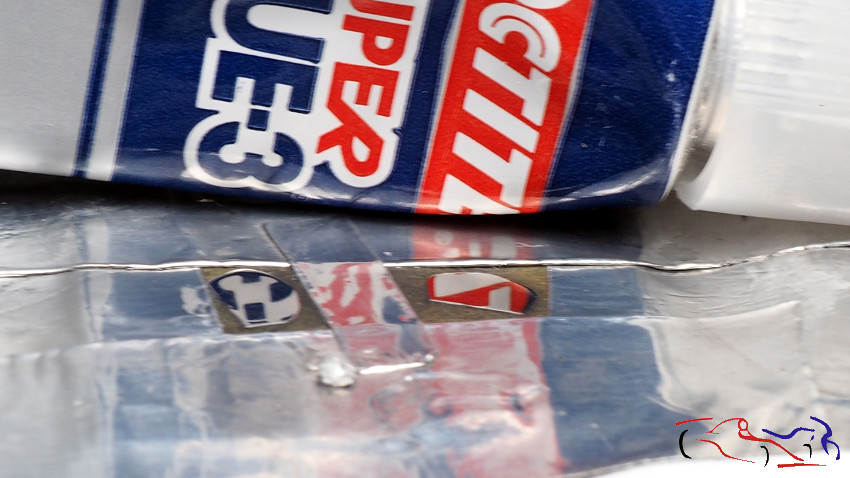
 Después, y con cola blanca, pegamos los cristales que han sido pulidos. Posteriormente, le añadiré los remaches de estos crsitales.
Then, with white glue, we glue the crystals that have been polished. Later, I will add the rivets of these crystals.
En esta foto podemos ver los espejos, cuyo proceso explico a continuación:
In this photo we can see the mirrors, whose process I explain below:
Antes de cortar los espejos del soporte, los pegamos en la mesa con cinta de enmascarar y protegemos el resto de fotograbados:
Before cutting the mirrors from the support, we glue them to the table with masking tape and protect the rest of the photoetched parts:
 En la siguiente, vemos el resultado de pasar las esponjas Micro Mesh, desde el grano 1500 hasta el 12000. Ya vemos algo reflejado.
In the next one, we see the result of passing Micro Mesh sponges, from grain 1500 to 12000. We already see something reflected.
 Pero necesitamos pulirlo más. Ahora los recorto y los pego en un soporte con cinta de enmascarar, poniendo cinta autoadhesiva de aluminio alrededor para que al pulirlo con el minitaladro, no se lleve la cinta de enmascarar. Aplico el líquido para pulir en el minitaladro, y lo aplico. El resultado se puede comprobar!!
But we need to polish it more. Now I cut them out and glue them on a support with masking tape, putting self-adhesive aluminum tape around themso that when polishing with the mini drill, the masking tape is not taken away. I apply the polishing liquid to the mini drill, and apply it. The result can be verified !!
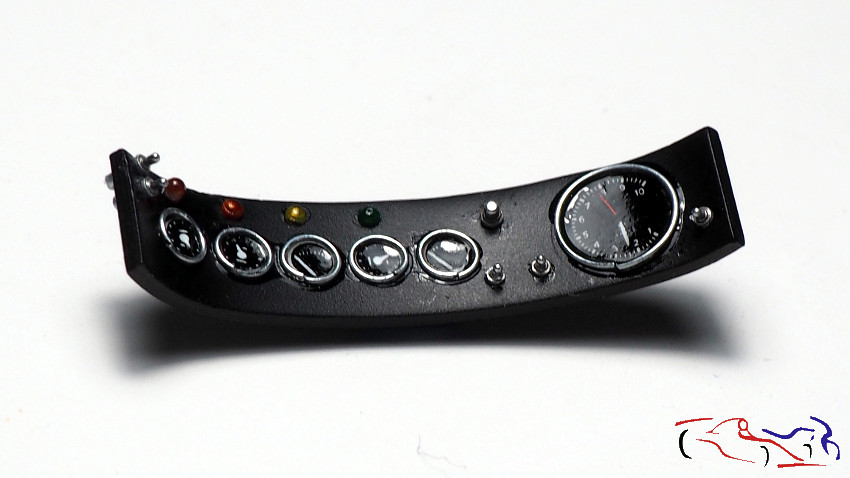
 El salpicadero terminado con barniz Gauzy aplicado en los relojes con un pincel:
The dashboard finished with Gauzy varnish applied to the watches with a brush:
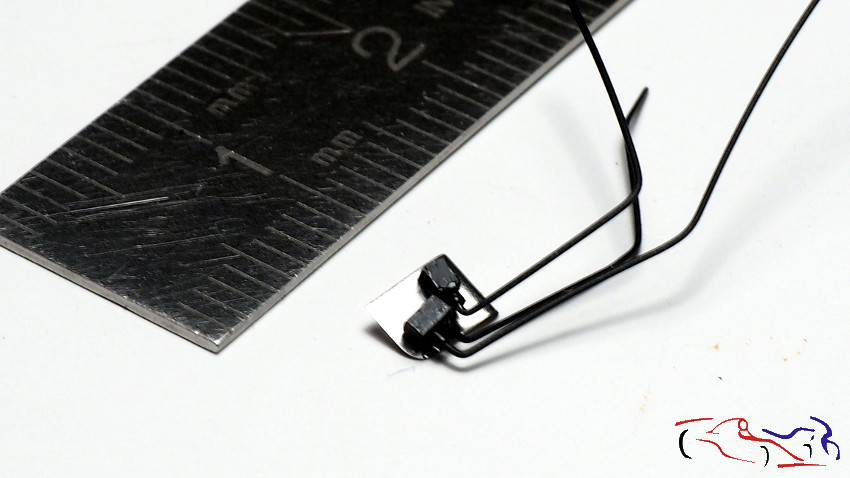
 Para rellenar la parte izquierda del cockpit, hice una pequeña tabla con dos “centralitas” a las que acoplé uns cables de plástico estirado:
To fill the left side of the cockpit, I made a small board with two “switchboards” to which I attached a stretched plastic cables:
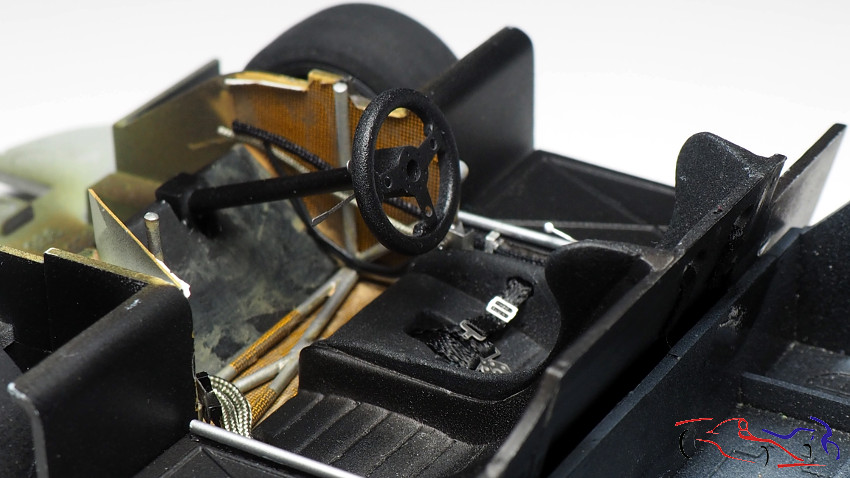
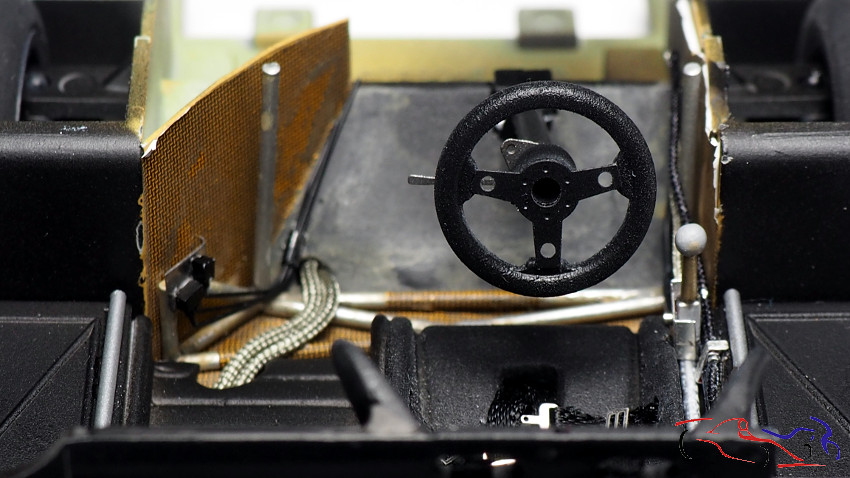
 Y unas vistas del cockpit terminado:
And some views of the finished cockpit:
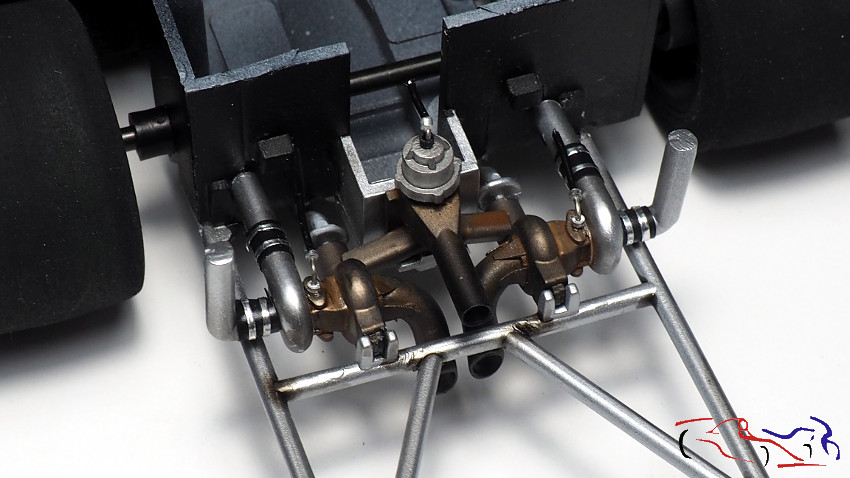
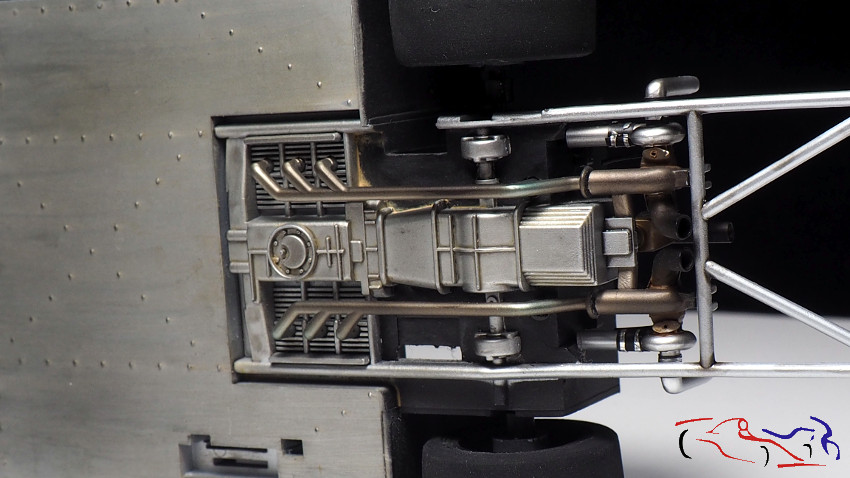
 Continuamos con el motor, o lo que se ve de él: ya están todas las piezas pegadas, y se pueden ver, unos cables que llegan a los turbos. En estas piezas, mi intención era probar acabados ya que casi no se ven, con un resultado muy decente, para cuando las aplique en otros coches!
We continue with the engine, or what we can see of it: all the parts are already glued, and you can see, some cables that reach the turbos. In these parts, my intention was to test finishes as they are hardly seen, with a very decent result, for when I apply them to other cars!
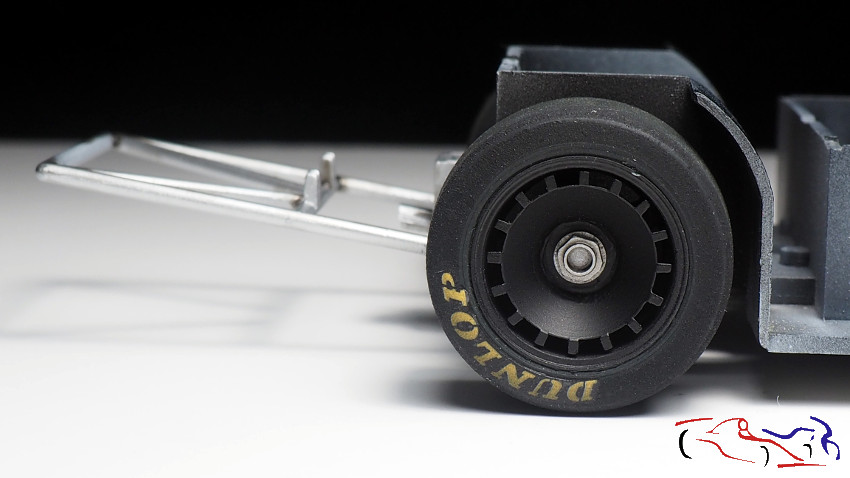
 Las ruedas traseras ya montadas…
The rear wheels already mounted …
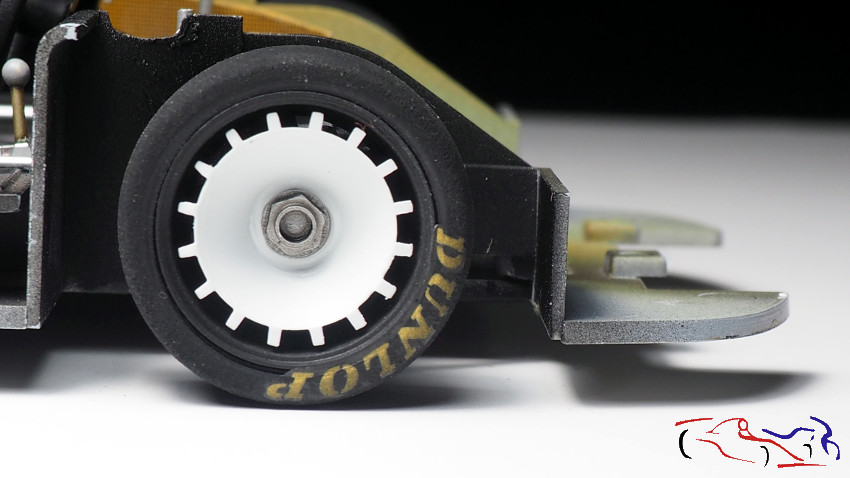
 …y las delanteras!!
…and the front ones!!
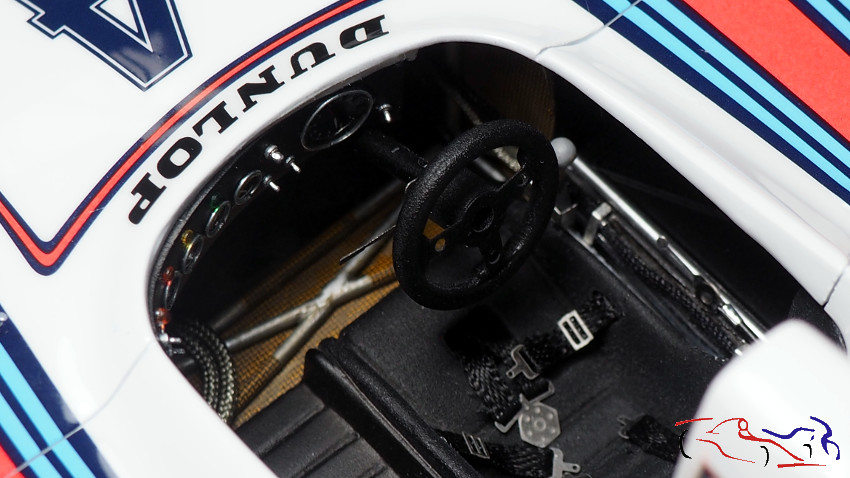
 Para temrinar, una vista del cockpit con la carrocería montada:
For finishing, a cockpit view with the body mounted:
 El siguente post serán las fotos finales.
Gracias por ver y comentar!!
The next post will be the final photos.
Thanks for viewing and commenting!!


