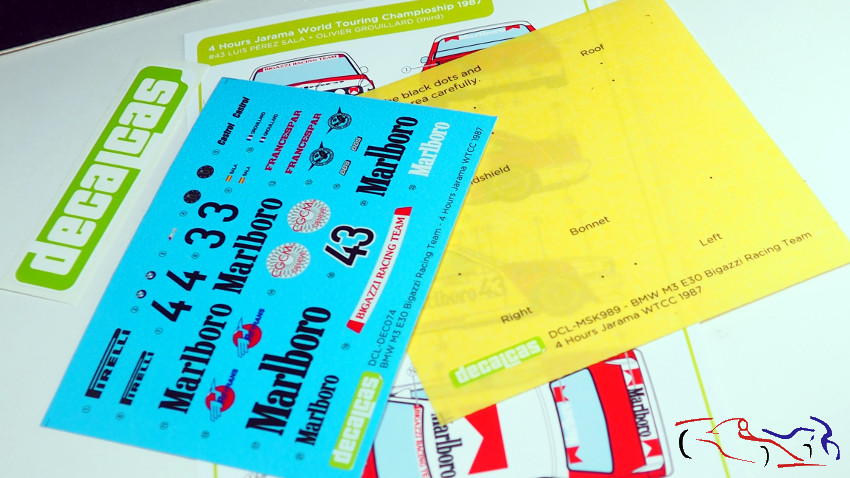
Buenos dias. El BMW M3 sigue sin descanso su proceso, gracias a la ayuda de Borja Martinez Request, que sin ella, hubiera tardado mucho más en buscar, pensar y realizar todos los pasos que estoy dando. Para empezar hoy, comentaros que llegó el correo con más componentes que me faltaban para realizar este proyecto: Pinturas de Number5, el motor de USCP que es bastante mejor que el de Scaleproduction, y las calcas para este coche realizadas por Decalcas. Decir, que estas calcas, llevan unas máscaras para ayudar a pintar el color rojo fluorescente, incluyendo las de los logos de Marlboro, que asi estarán con el mismo color.
Good morning. The BMW M3 continues its process without a break, thanks to the help of Borja Martinez Request, without which, it would have taken me much longer to search, think about and carry out all the steps I am taking. To start today, I would like to tell you that I received the post with more components that I needed to carry out this project: Number5 paints, the USCP engine which is much better than the Scaleproduction one, and the decals for this car made by Decalcas. These decals have masks to help paint the fluorescent red color, including those of the Marlboro logos, which will thus be the same color.

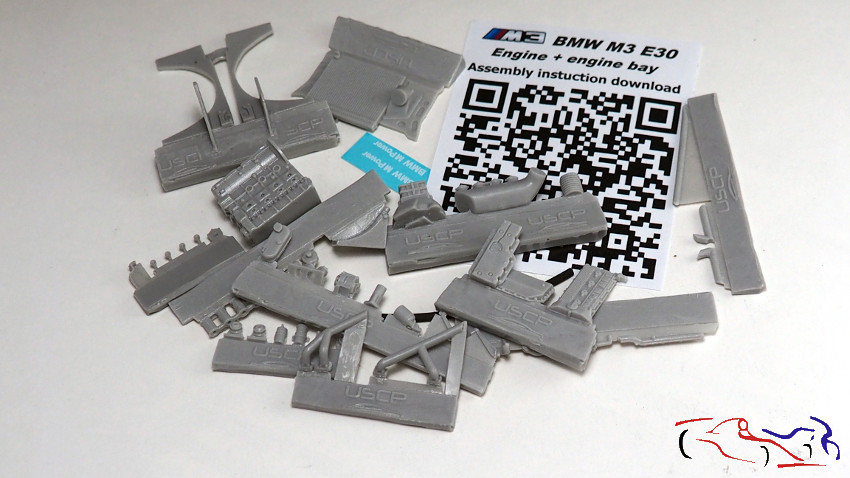
Aquí tenéis el despiece del motor, que aunque está bien, seguro que le modifico o le añado algo….
Here you have the engine parts, which although it is good, I will surely modify it or add something to it….
Y seguimos con el vano motor. Añado unas láminas de plastico en el cortafuegos para dar profundidad al mismo, así como en las piezas laterales.
And we continue with the engine compartment. I added some plastic sheets to the firewall to give it depth, as well as to the side pieces.
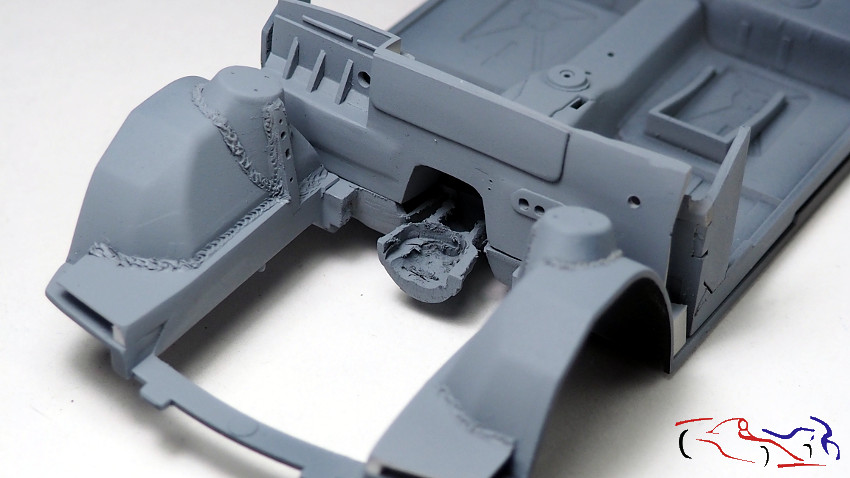
Lo siguiente es rellenar con masilla epoxy, las lineas de soldadura y el contorno de las piezas del cortafuegos, para hacerlas más reales. A las lineas de soldadura, les pasé un buril para imitar las soldaduras.
The next step is to fill the welding lines and the outline of the firewall pieces with epoxy putty to make them look more realistic. I used a burin to chisel the welding lines to imitate the welds.
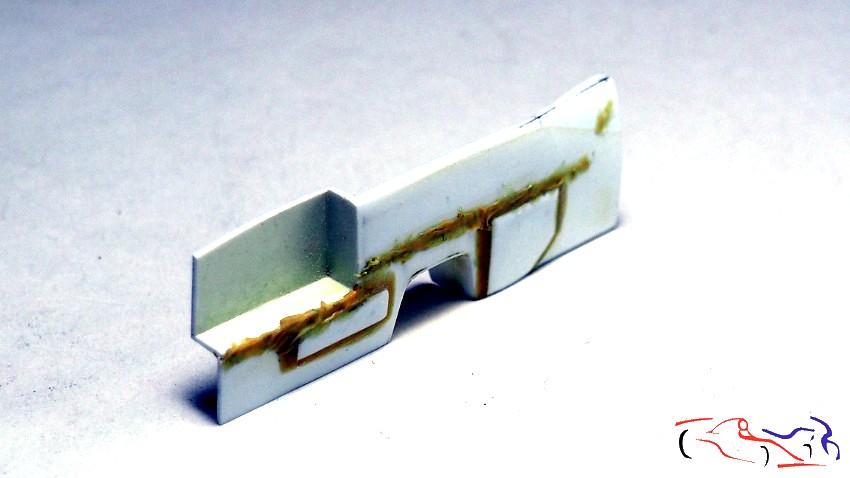
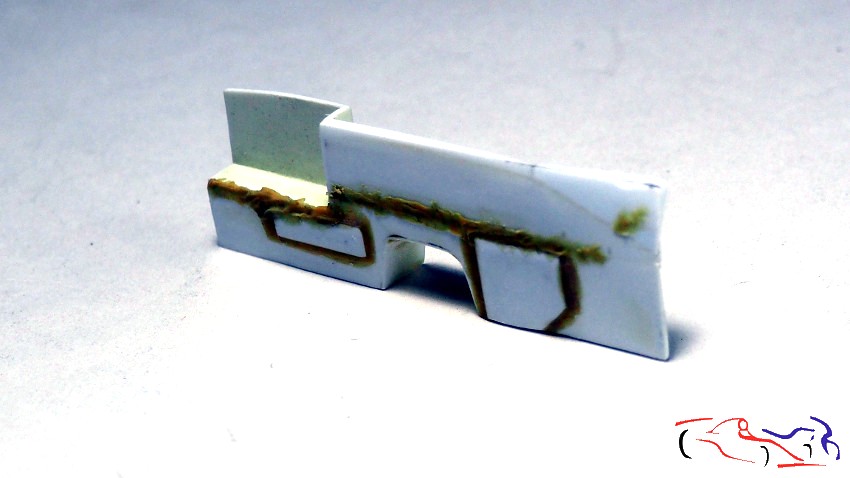
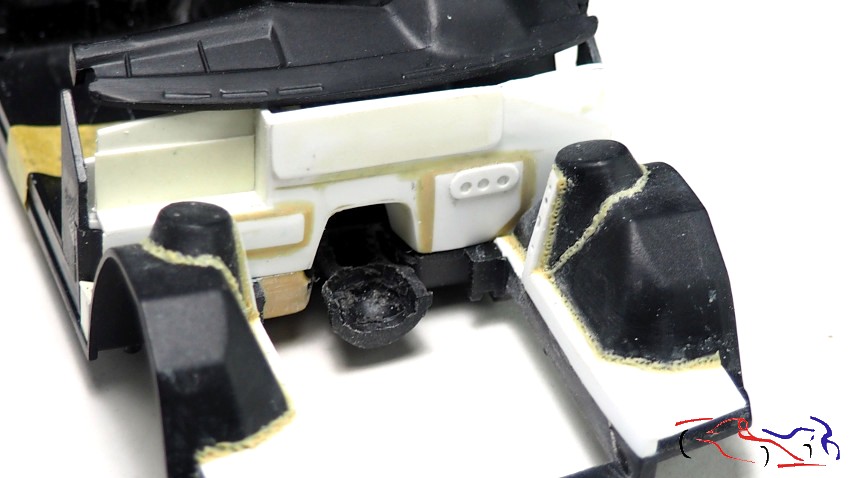
COntinuamos con el cortafuegos. Una vez lijada la masilla, pego la parte superior a la inferior, e incluyo esa caja en la parte izquierda de la fotografia, ya que es un rebaje que lleva el coche real. Y para la parte del lado contrario, le pego por detras, refuerzos de plastico porque tengo que desbastarla para darle la forma necesaria, como se aprecian en las fotos. A su vez, le ponemos más masilla epoxy en la unión de las dos piezas:
We continue with the firewall. Once the putty is sanded, I glue the upper part to the lower part, and I include that box on the left side of the photo, since it is a recess that the real car has. And for the part on the opposite side, I glue plastic reinforcements from behind because I have to roughen it to give it the necessary shape, as you can see in the photos. At the same time, we put more epoxy putty on the joint between the two pieces:
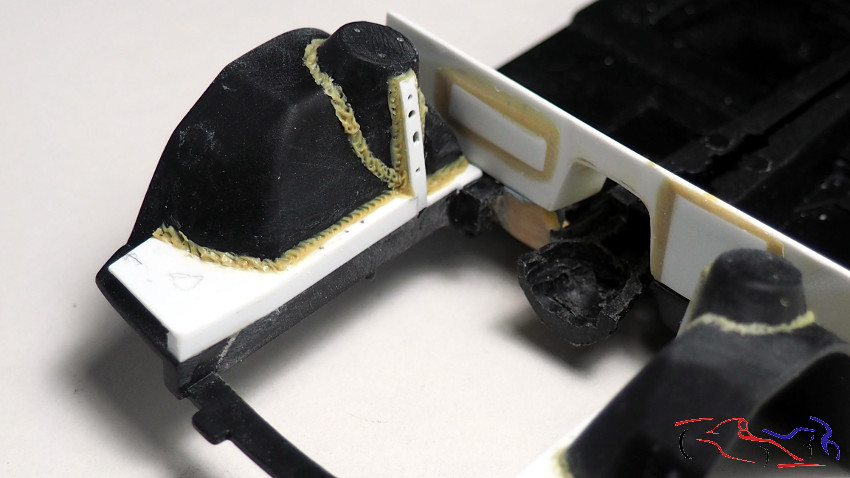
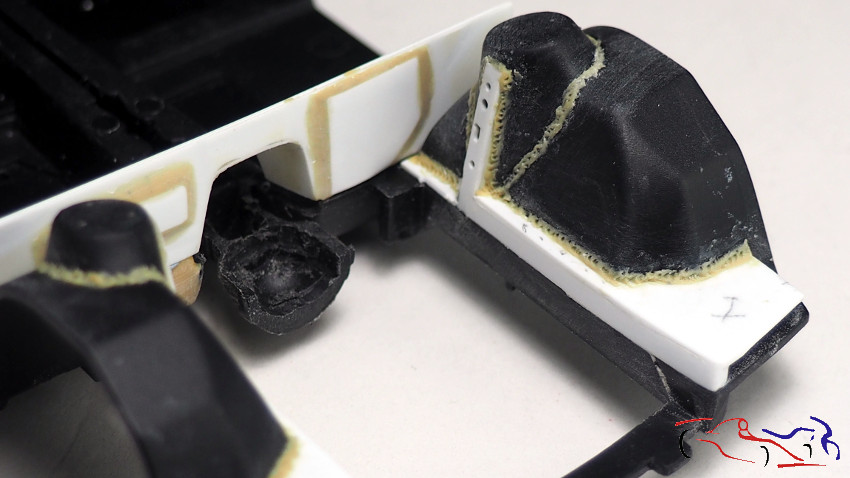
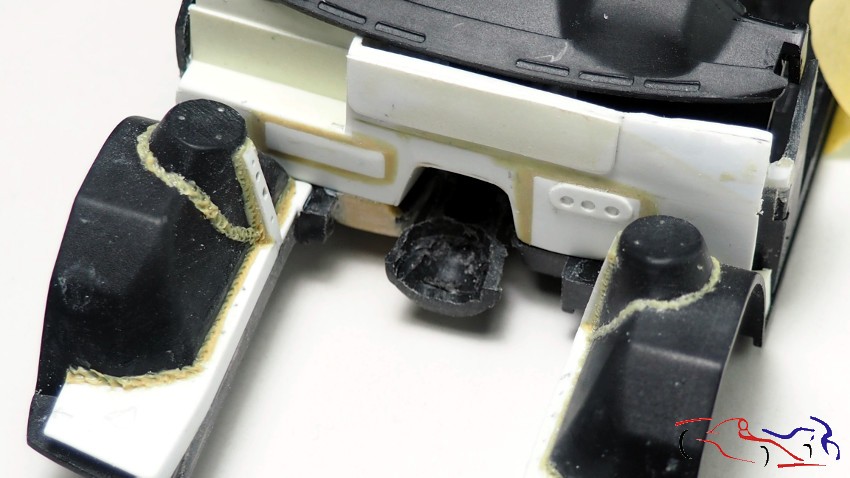
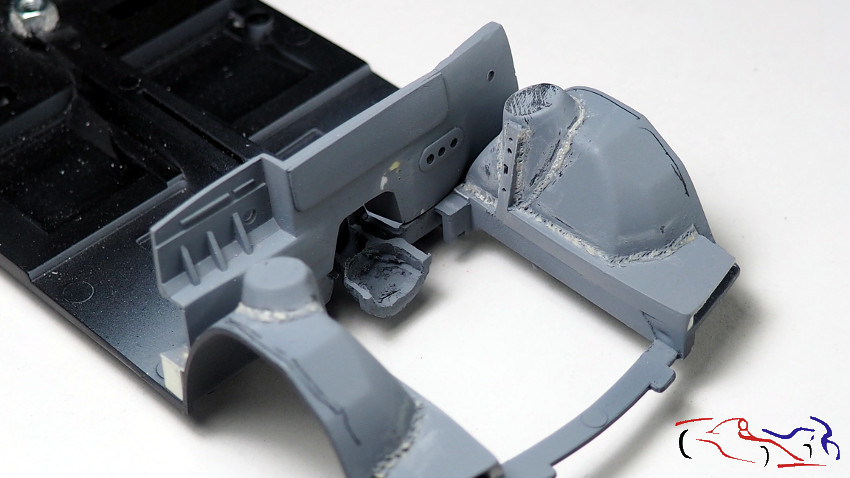
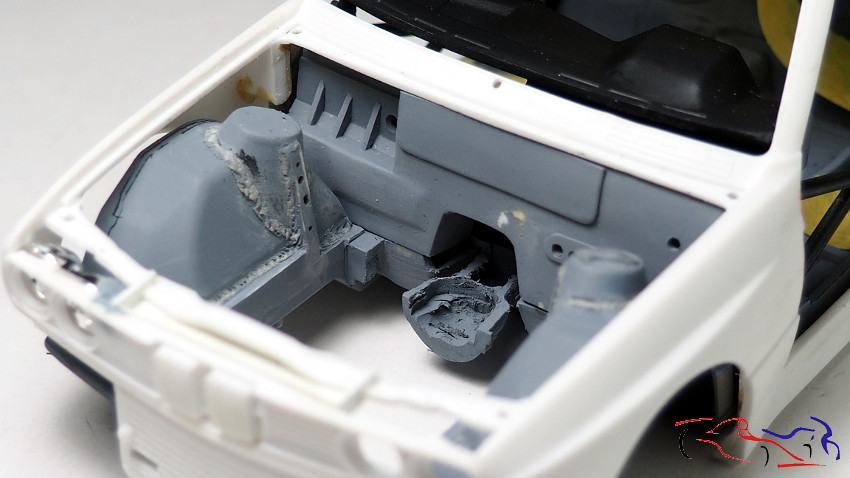
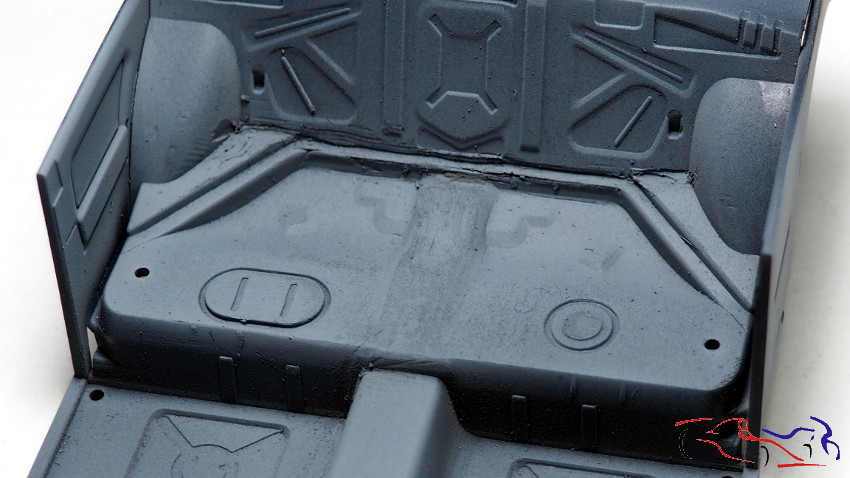
Una vez lijado todo, le añado la base donde irán las bombas de freno y embrague, y una placa en la parte superior, que irá dando forma a dicha parte del cortafuegos. Asi es como aparece incluyendo esa pieza en el chasis:
Once everything is sanded, I add the base where the brake and clutch pumps will go, and a plate on top, which will give shape to that part of the firewall. This is how it appears with that piece included in the chassis:
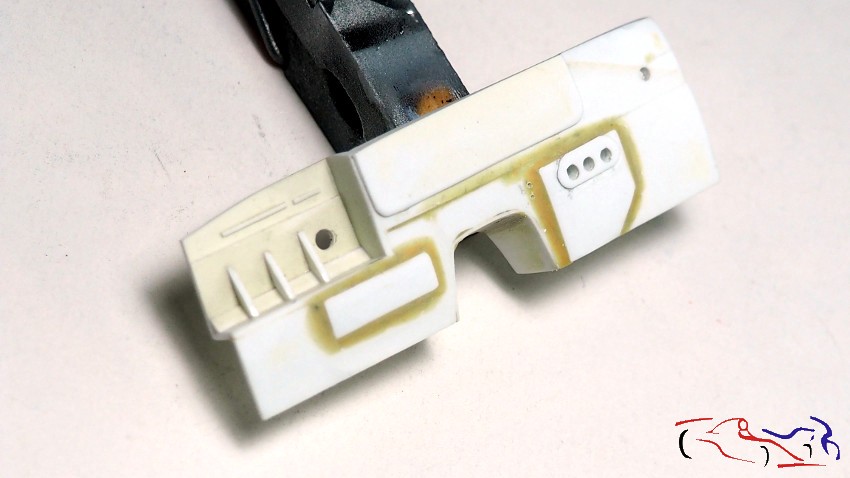
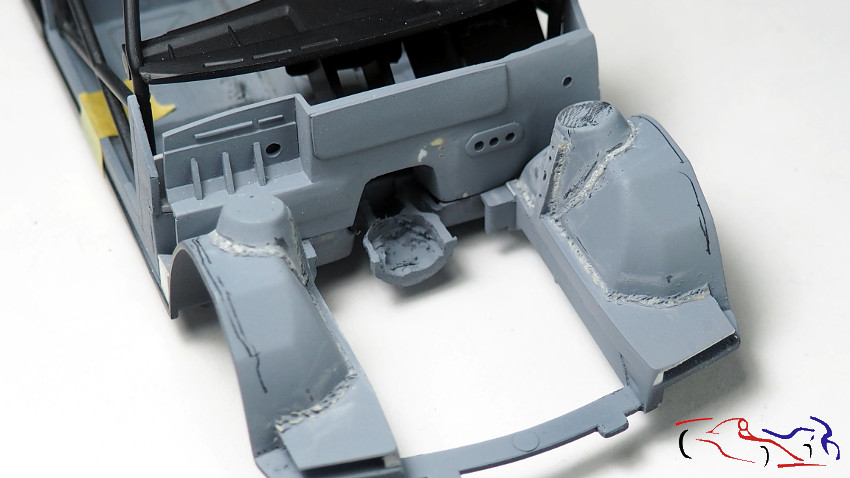
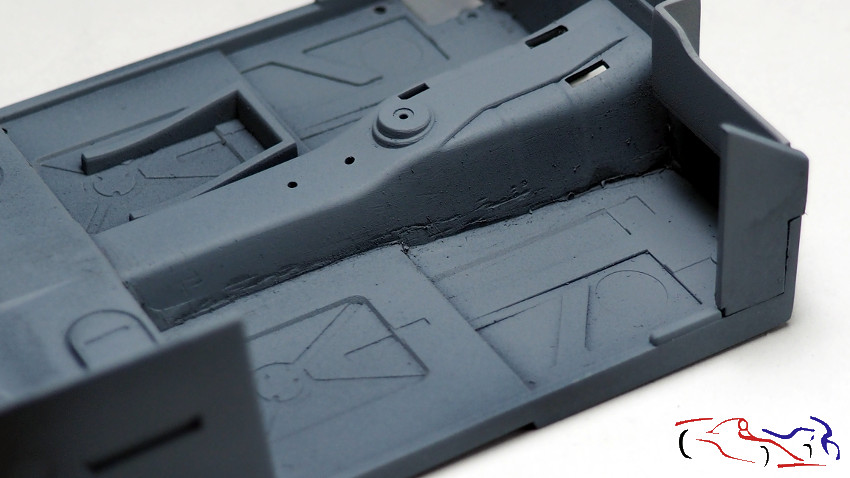
Y seguimos añadiendo piezas al cortafuegos. Con lámina de plástico cortada ad-hoc, rellenamos el hueco de la izquierda incluyendo un agujero por donde pasaráb los cables. Y aprovechamos a imprimarla….
And we continue adding pieces to the firewall. With a plastic sheet cut ad-hoc, we fill the gap on the left, including a hole where the cables will pass through. And we take the opportunity to prime it…

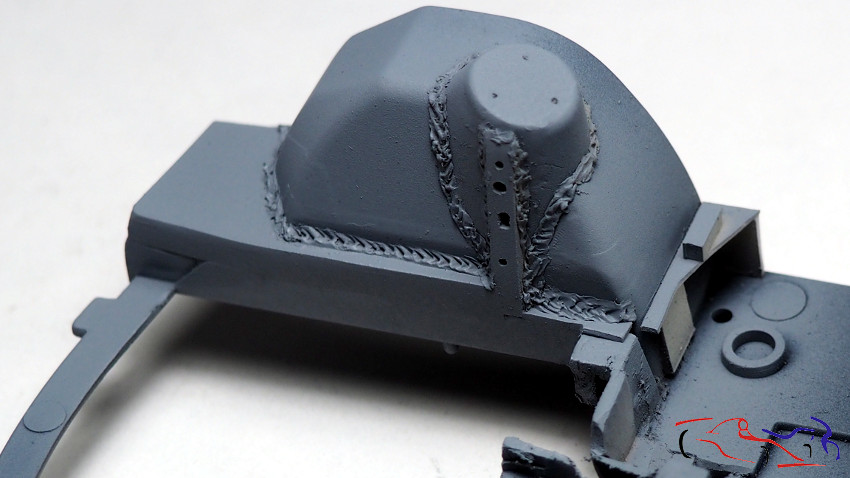
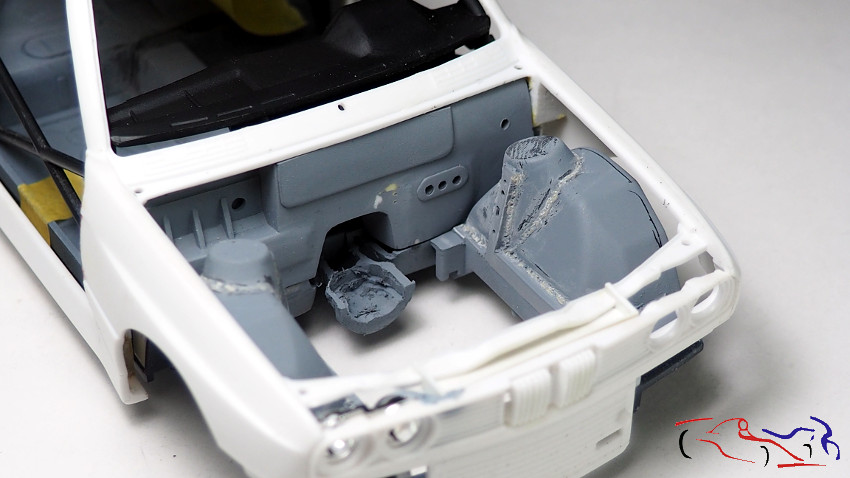
… junto con el chasis y el cockpit. Lo pongo todo junto y este es el resultado: va muy bien pero tengo que disimular un poco con lija las soldaduras porque parecen estar realizadas no por un especialista!!
…along with the chassis and cockpit. I put it all together and this is the result: it goes very well but I have to cover up the welds a bit with sandpaper because they seem to have been done by someone other than a specialist!!

Y si, repasamos esas soldaduras y lo presentamos con el chasis, y la carrocería: el resultado va siendo bueno!!!
And yes, we reviewed those welds and presented it with the chassis and the body: the result is going well!!!
Y para finalizar esta parte por hoy, pegamos el cortafuegos al chasis. Primero lo pusimos con el cockpit y la carrocería para ajustarlo. Ahí le dimos un poco de pegamento, para depués retiralo para pegarlo a conciencia:
And to finish this part for today, we glue the firewall to the chassis. First we put it with the cockpit and the body to adjust it. There we gave it a little glue, to then remove it to glue it thoroughly:

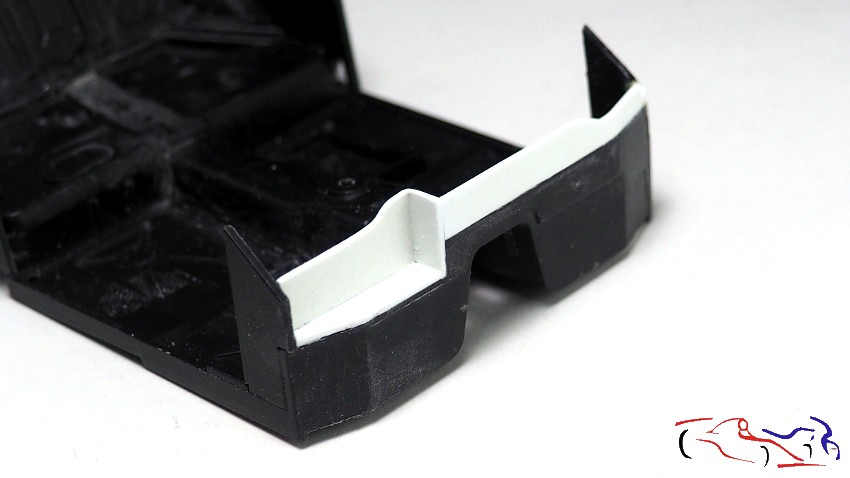
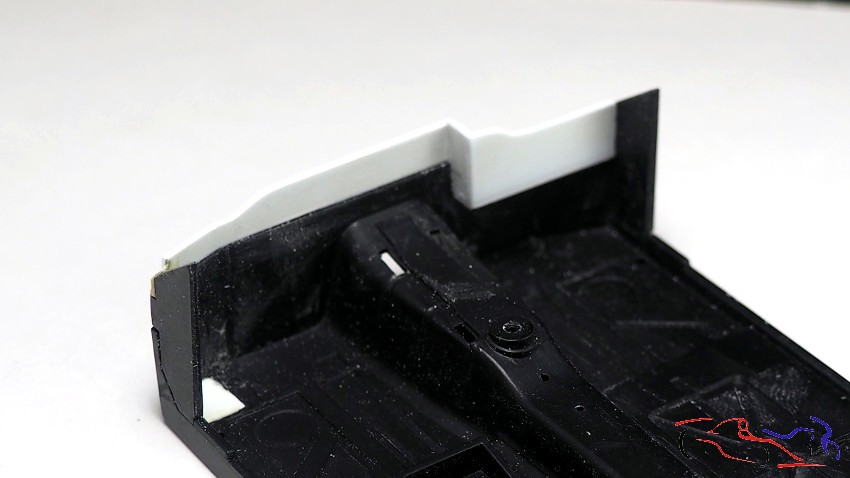
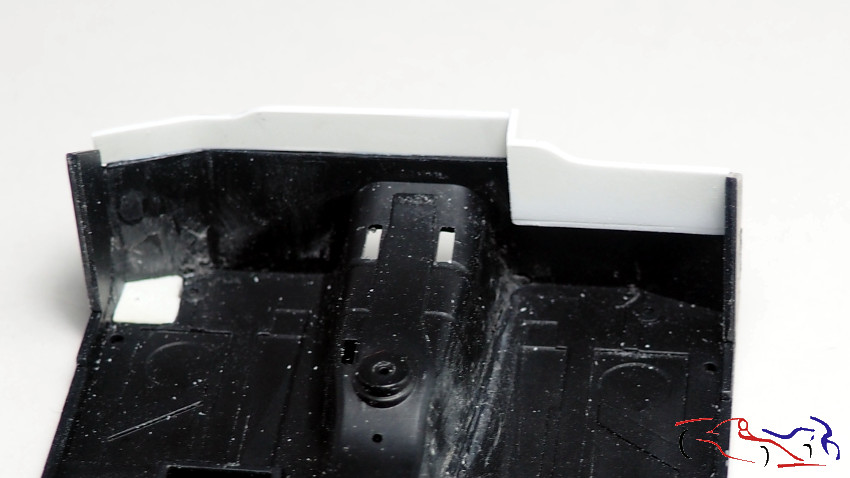
Y al igual que en el cortafuegos hemos realizado una caja en el lado derecho, el cockpit debe tener su correspondiente caja que se adapte al cortafuegos. Elevamos y damos forma al frontal vertical, e incluimos la caja:
And just as we have made a box on the right side of the firewall, the cockpit must have its corresponding box that fits the firewall. We raise and shape the vertical front, and include the box::
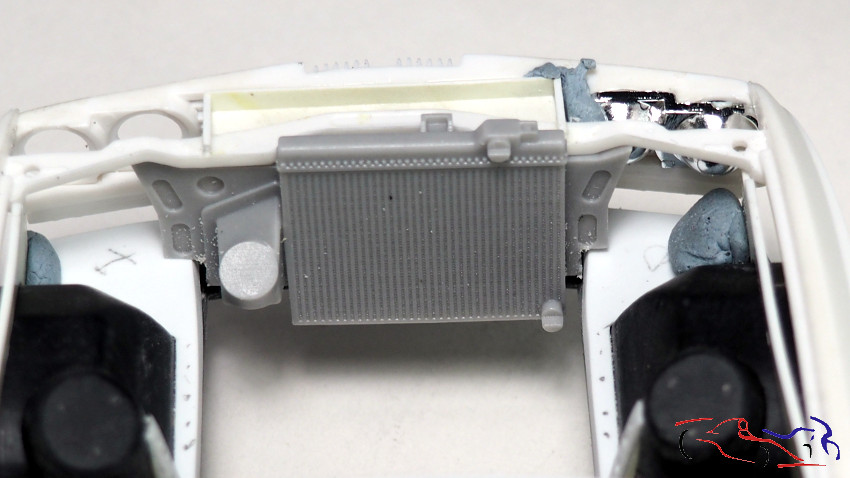
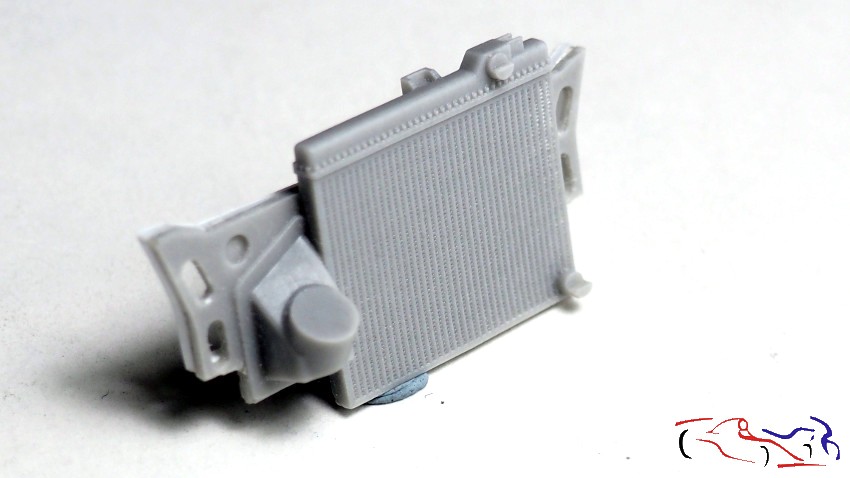
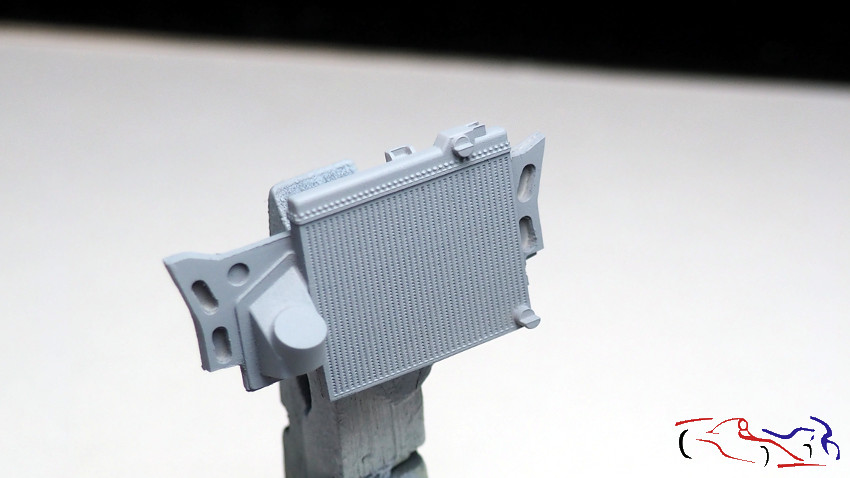
Ahora pasamos al radiador del motor de USCP. Como hemos subido la base del chasis donde se coloca el radiador, he decidido recortar la base en sus dos laterales, para adaptar la altura y que siga encajando. Además, he taladrado los agujeros de los laterales, poniendo una l.aminade plastico por detrás, para darle más profundidad. Y despues, lo he imprimado:
Now we move on to the radiator of the USCP engine. Since we have raised the base of the chassis where the radiator is placed, I have decided to cut the base on both sides, to adapt the height and still fit. In addition, I have drilled the holes on the sides, putting a plastic sheet behind it, to give it more depth. And then, I have primed it:
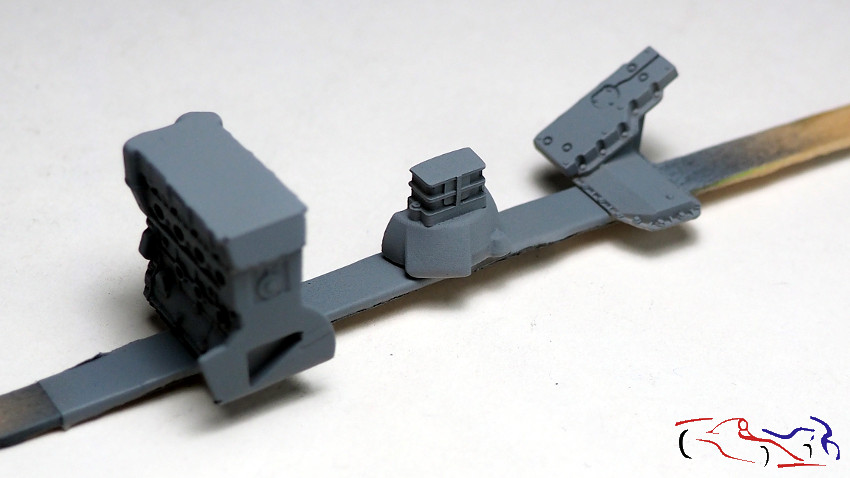
Otras piezas que imprimé del motor fueron las siguientes: el bloque, la conexión a la caja de cmabios y la tapa inferior, unas vez lijadas las bases por donde se unen, ya que cualquier parecido con una unión perfecta es pura imaginación.
Other parts of the engine that I printed were the following: the block, the connection to the gearbox and the lower cover, once the bases where they join were sanded, since any resemblance to a perfect union is pure imagination.
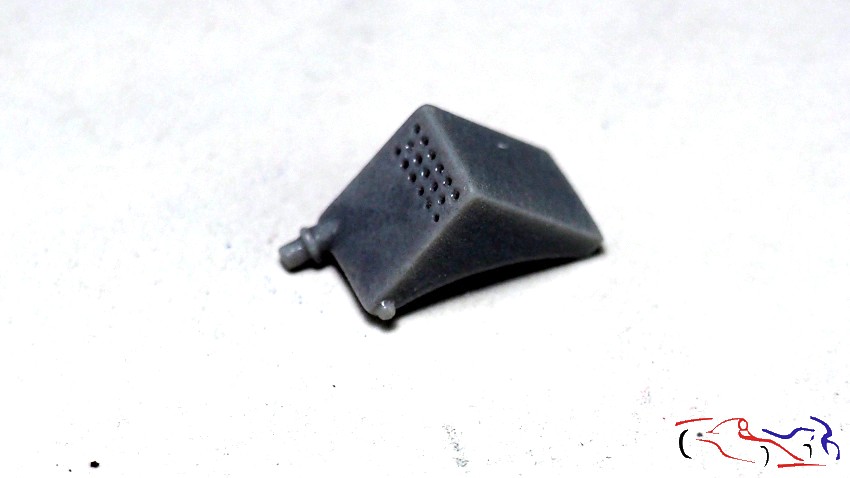
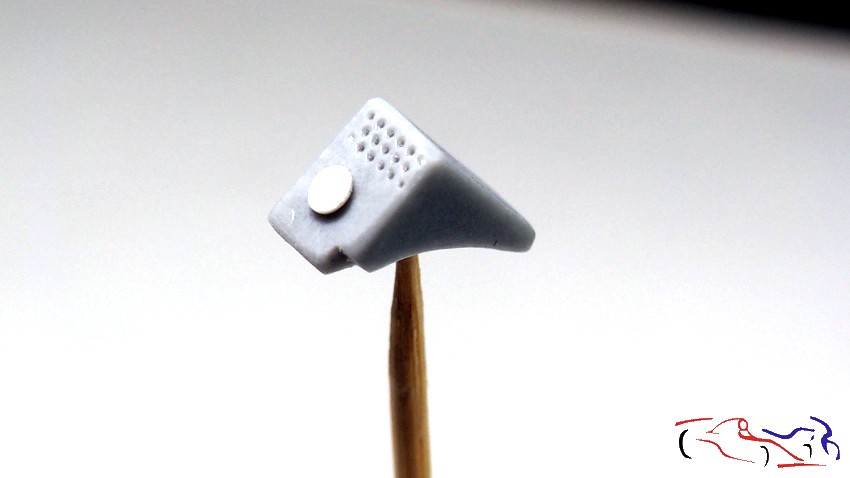
Otra pieza del motor que ya he modificado es este depósito, que le he cambiado el lugae de la toma y le he puesto un tapón de llenado. Esta pieza está a falta de imprimar.
Another part of the engine that I have already modified is this tank, which I have changed the location of the intake and I have put a filler cap on. This part is still waiting to be primed.
En el proceso del cortafuegos, habési visto que hice 3 agujeros para las bombas de freno y embrague. Pues en esos agujeros irán estas tres bombas, que aquí las veis imprimadas, realizadas por Decalcas.
During the firewall process, you have seen that I made 3 holes for the brake and clutch pumps. Well, these three pumps will go in these holes, which you can see here primed, made by Decalcas.

Al imprimar, también lo hice con la cuna del cockpit para ver el resultado de eliminar el cableado existente del kit. En la siguientes fotos, vemos que hay que trabajar más esas partes con masilla y putty:
When priming, I also did it with the cockpit cradle to see the result of removing the existing wiring from the kit. In the following photos, we see that those parts need more work with putty:
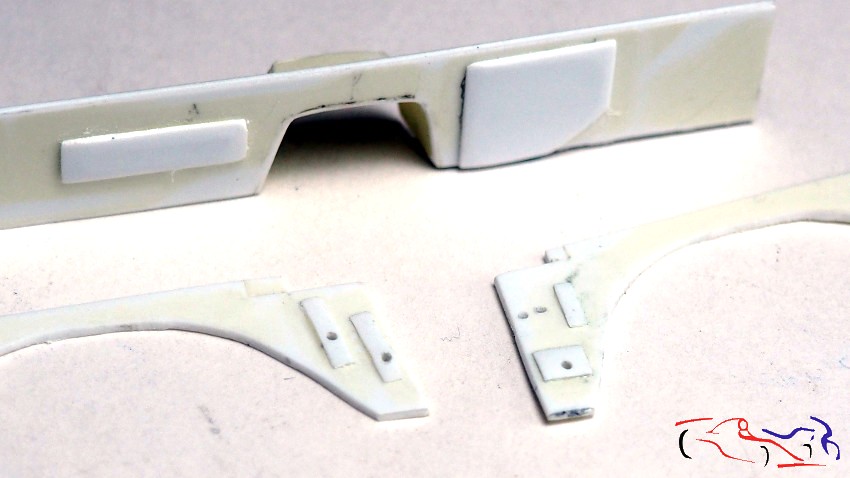
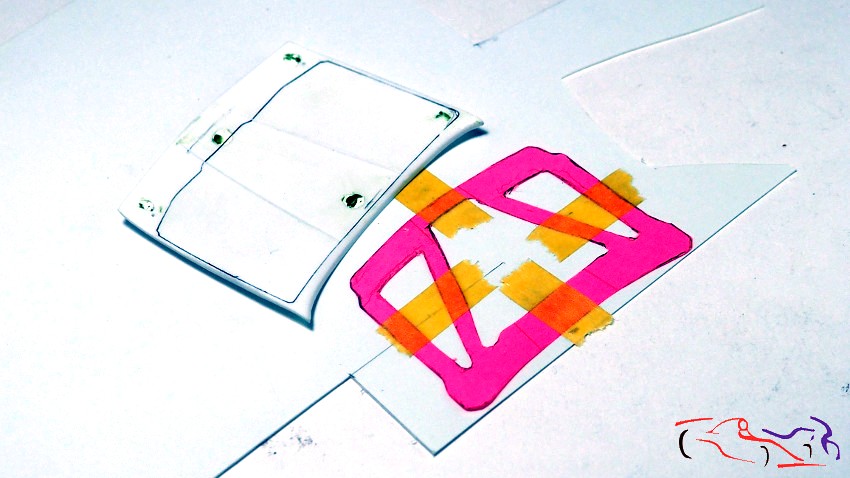
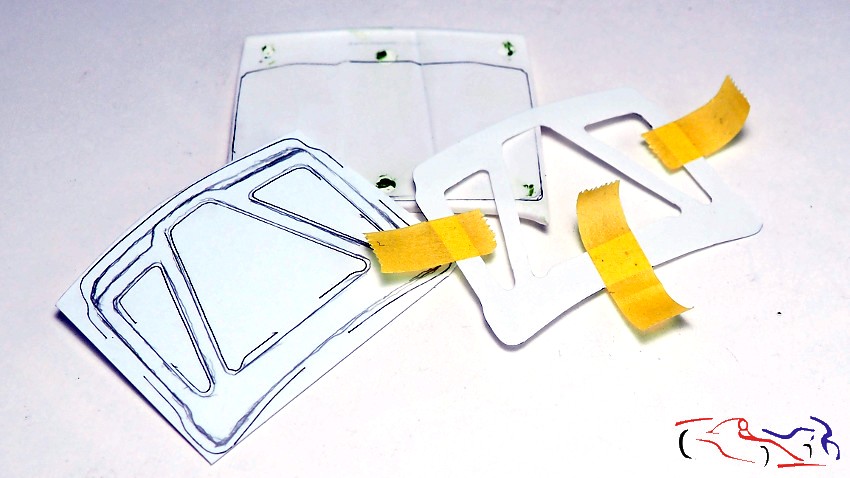
Todo el proceso anterior del vano del motor lo comencé con vistas a hacer las bisagras del capó, como hice con las puertas, y así meterme de lleno con el interior de la carrocería. Y una parte imprescindible para hacer las bisgaras del capó es el entramado de nervios que tiene el capó por debajo, y que influyen en la altura de la posición de dichas bisagras. Por tanto, he empezado a gestionarlo. Lo primero, es un dibujo en cartulina, que trasbaso a una lámina de o,3mm (primera foto), para psoteriormente, traspasarlo a otra de 0,5mm que irá por encima de la anterior, pero un poco más pequeña. En cuanto acabe con el vano motor, seguiré con esta pieza.
I started the whole previous process of the engine compartment with a view to making the bonnet hinges, as I did with the doors, and thus fully immerse myself in the interior of the body. And an essential part to make the bonnet hinges is the network of ribs that the bonnet has underneath, and that influences the height of the position of said hinges. Therefore, I have started to manage it. The first thing is a drawing on cardboard, which I transfer to a sheet of 0.3mm (first photo), to later transfer it to another of 0.5mm that will go above the previous one, but a little smaller. As soon as I finish with the engine compartment, I will continue with this piece.
Espero que os haya gustado. Gracias por ver y comentar!!
I hope you liked it. Thanks for watching and commenting!!


