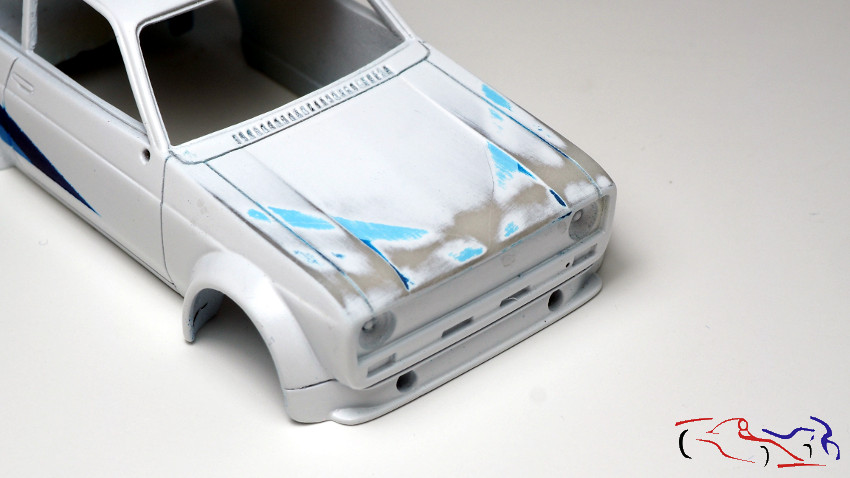
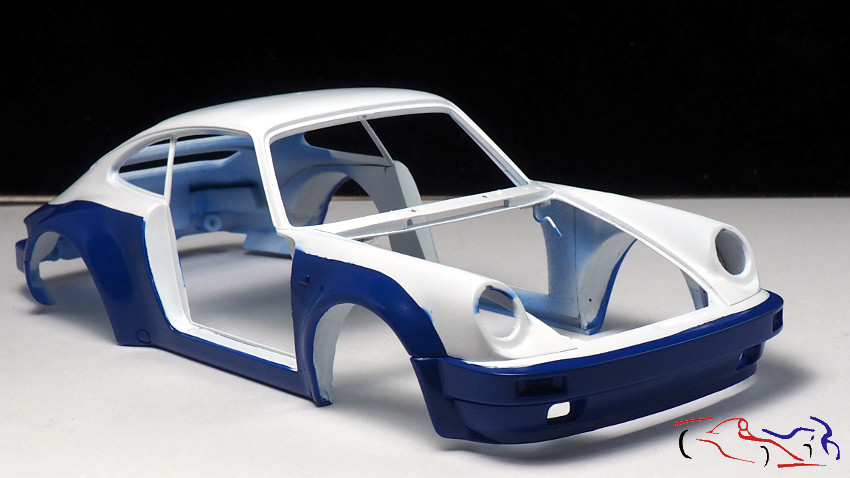
Desde Marzo de 2023, no ponía nada de esta pareja de coches, aunque si he ido haciendo cosas… Como tuve errores de pintura en el capó delantero del Ford, decidí lijara y pintar de nuevo de blanco:
Since March 2023, I didn’t post anything about this pair of cars, although I’ve been doing some things… As I had some paint mistakes on the front bonnet of the Ford, I decided to sand it and repaint it in white:
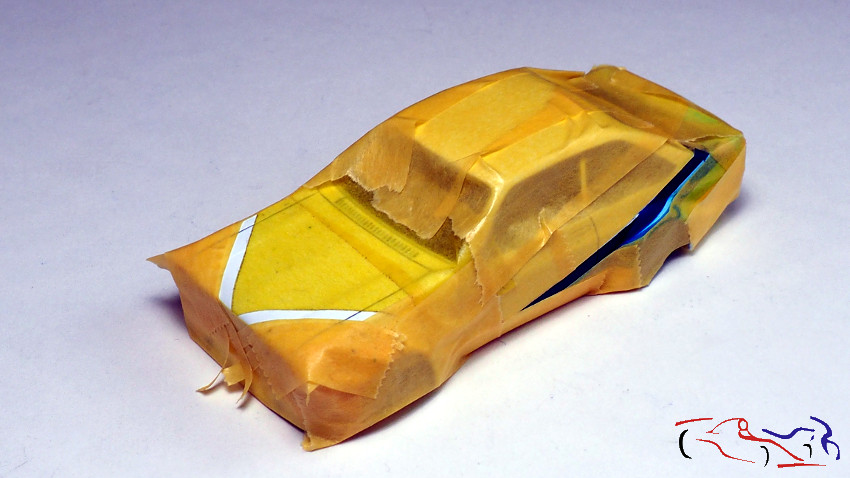
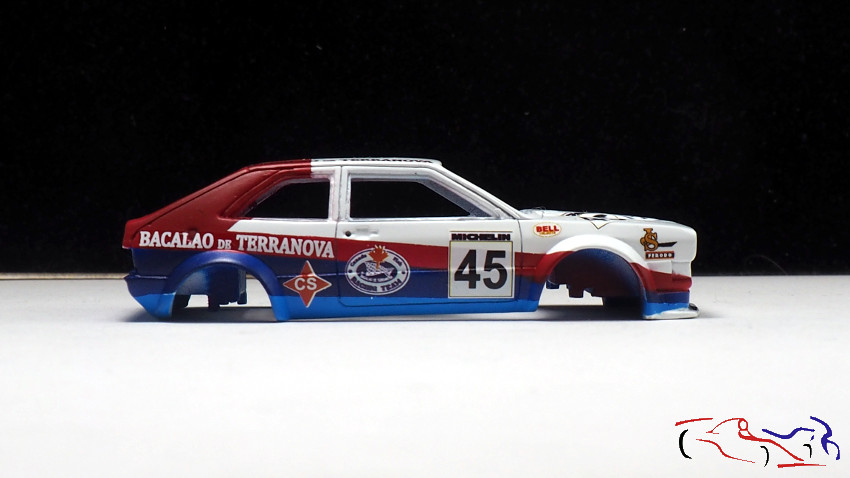
Y para el último color, aproveché a repintar la franja lateral izquierda, que como se ve en las máscaras, no las puse bien en la primera sesión de pintura:
And for the last colour, I took the opportunity to repaint the left side stripe, which as you can see in the masks, I didn’t put well in the first painting session:
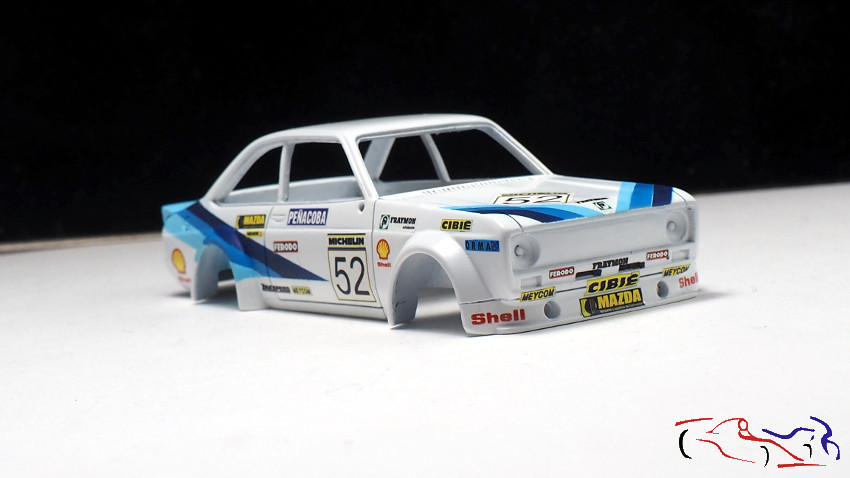
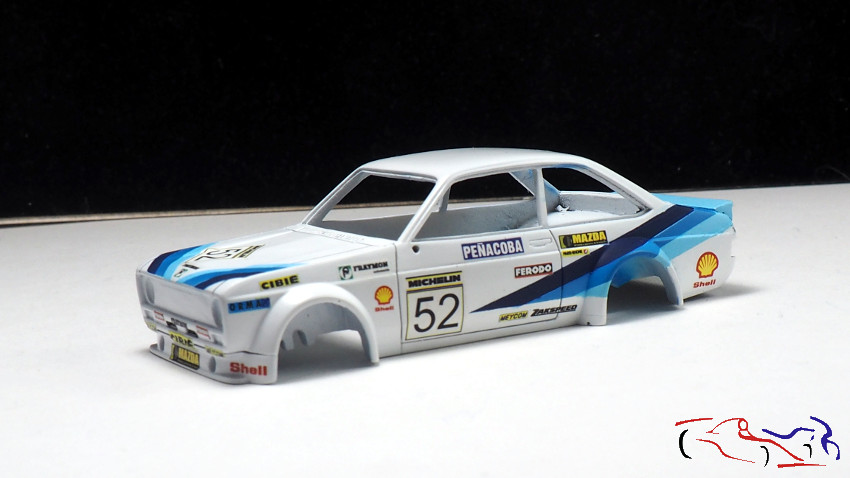
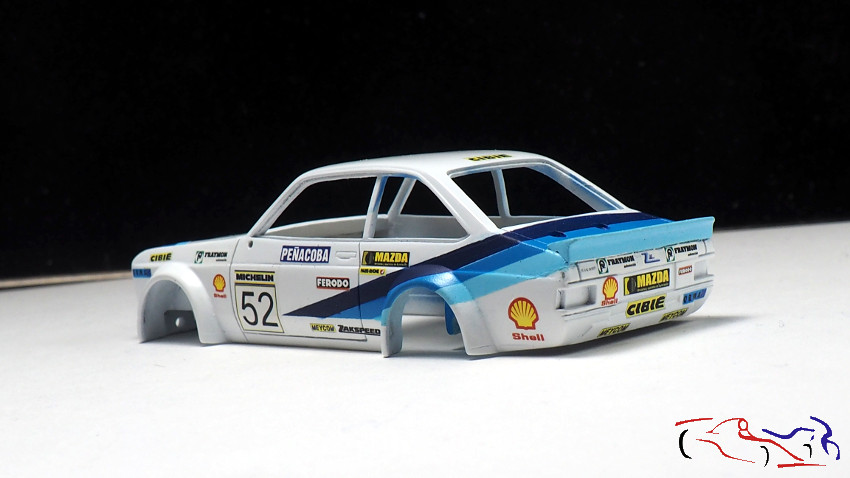
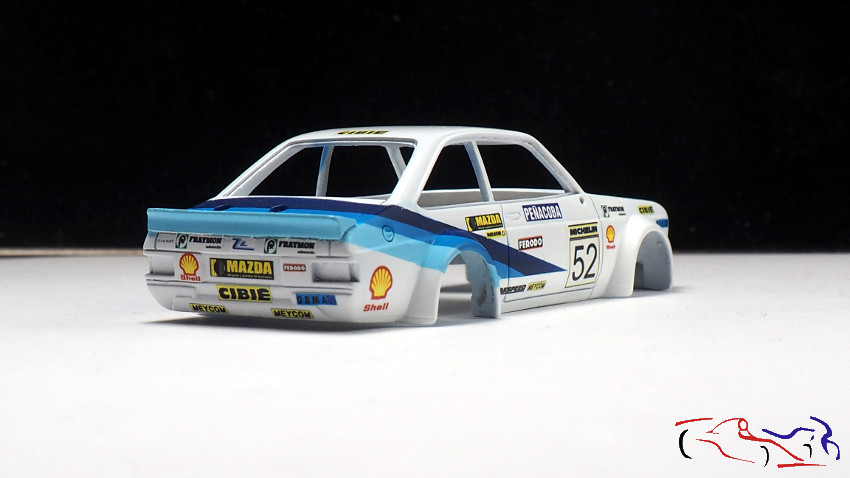
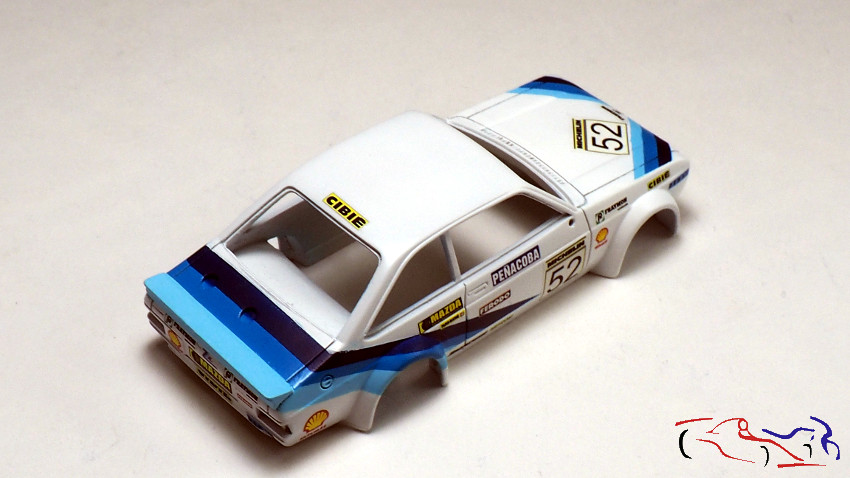
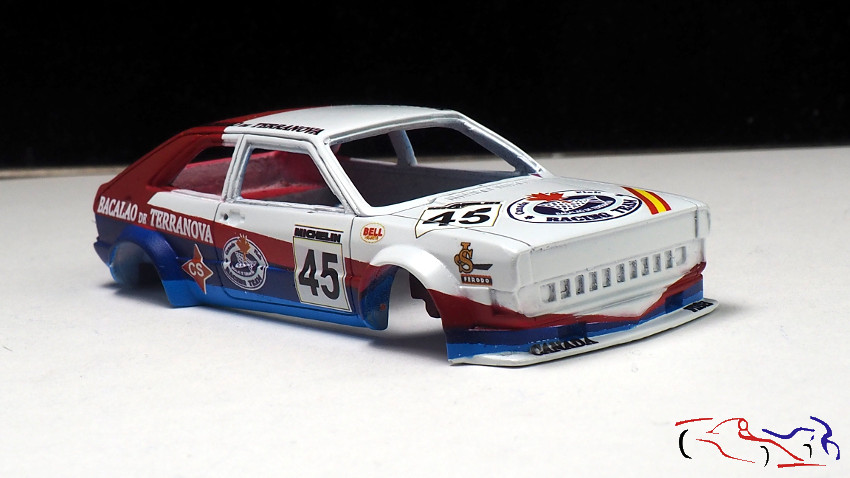
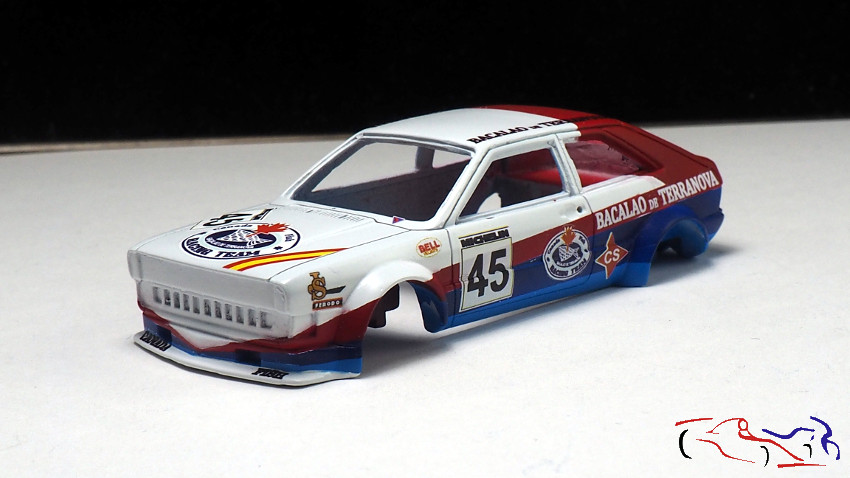
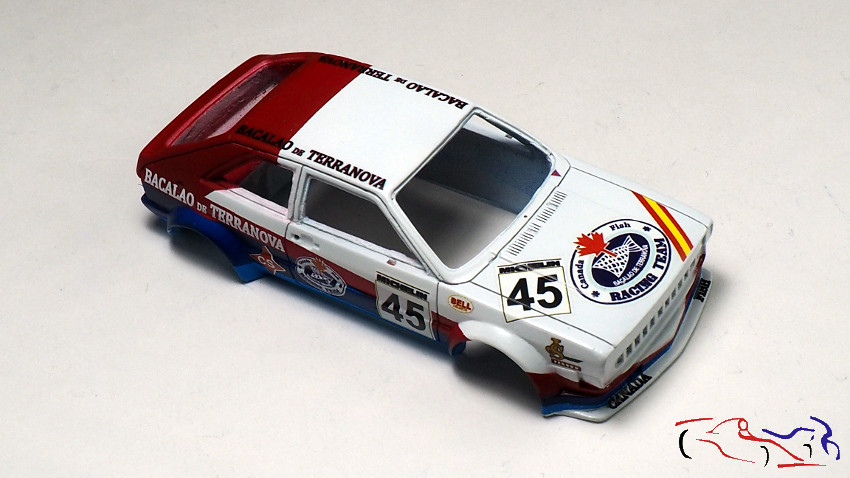
Y después, fue hora de poner las calcas. Al ser unas calcas que no estaban precortadas, tuve que ir recortándolas todas e irlas aplicando con sumo cuidado. Recordad que es una escala 1/43:
And then it was time to apply the decals. As the decals were not pre-cut, I had to cut them all out and apply them very carefully. Remember that it is a 1/43 scale:
Y al mismo tiempo, puse las calcas de WV Scirocco:
And at the same time, I put on the WV Scirocco decals:
Ahora queda lacarlas, que aprovecharé a hacerlo al mismo tiempo que el Porsche 911 de escala 1/24. Espero que os haya gustado, y gracias por ver y comentar!!
Now it’s time to lacquer them, which I will do at the same time as the 1/24 scale Porsche 911. I hope you liked it, and thanks for watching and commenting!
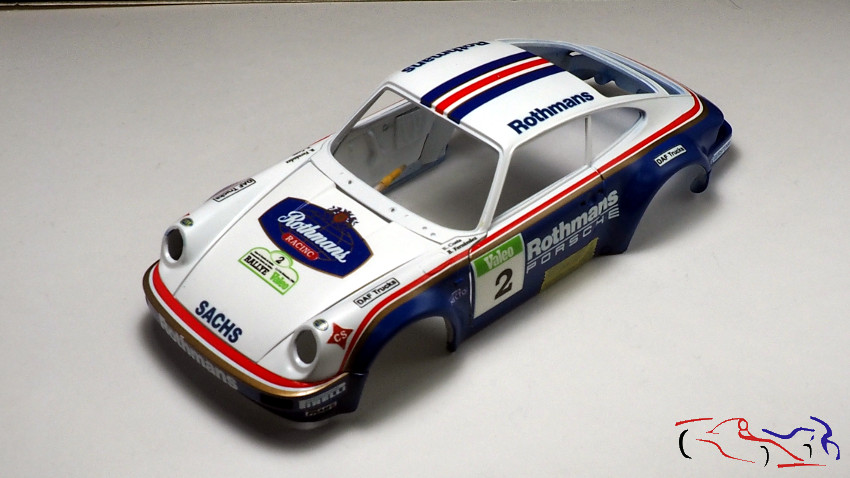
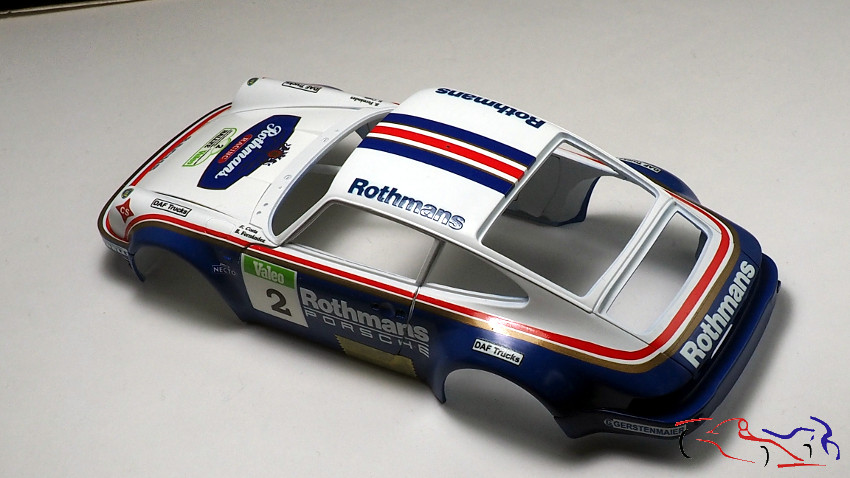
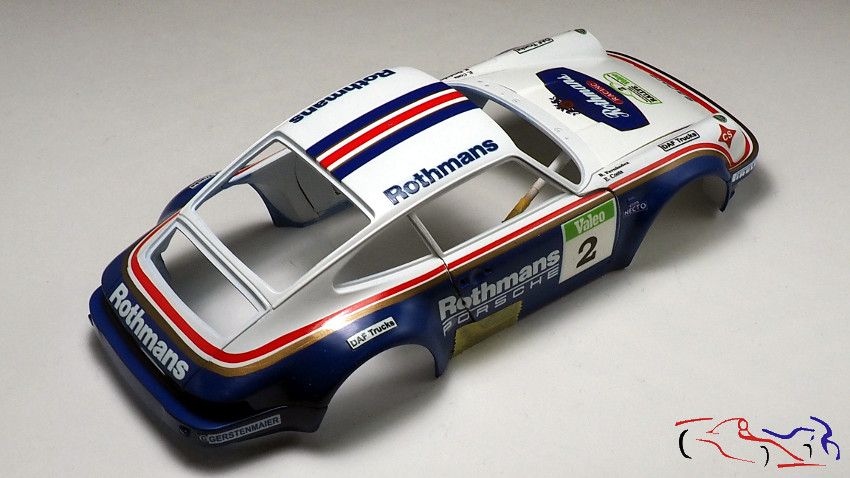
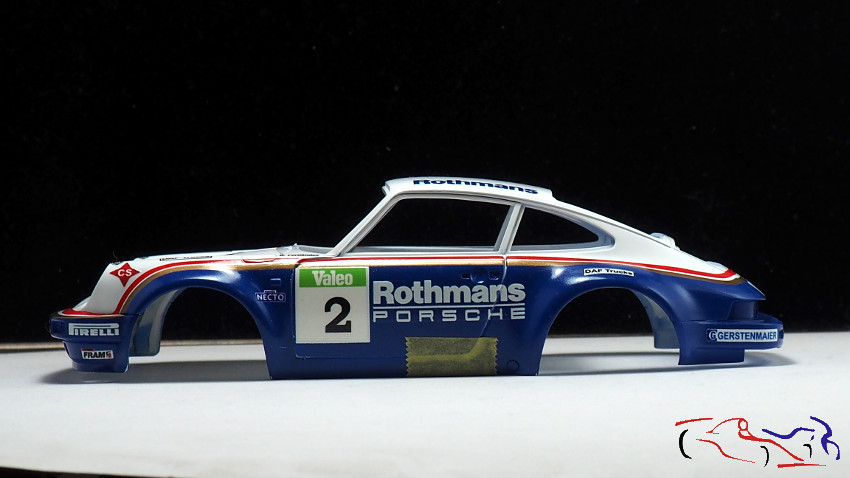
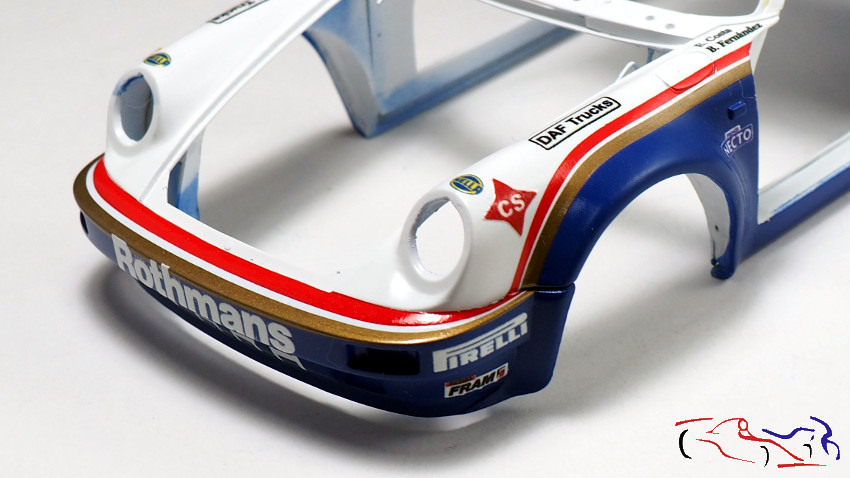
Continuamos con el Porsche, que le dejamos con la pintura puesta, siendo ahora el momento de poner las calcas. Deciros que al ser la versión española, de las calcas originales del kit poco pude utilizar, excepto las bandas laterales que recorren todo el contorno de la carrocería. Al poner estas calcas, los posibles defectos que tuve al enmascarar la pintura azul, se disimulan porque queda situadas por debajo de dicha calca.
We continue with the Porsche, which we left with the paint on, being now the time to put the decals. As this is the Spanish version, I could use little of the original decals from the kit, except for the side stripes that run around the bodywork. By putting these decals, the possible defects that I had when masking the blue paint, are disguised because they are located below the decals.
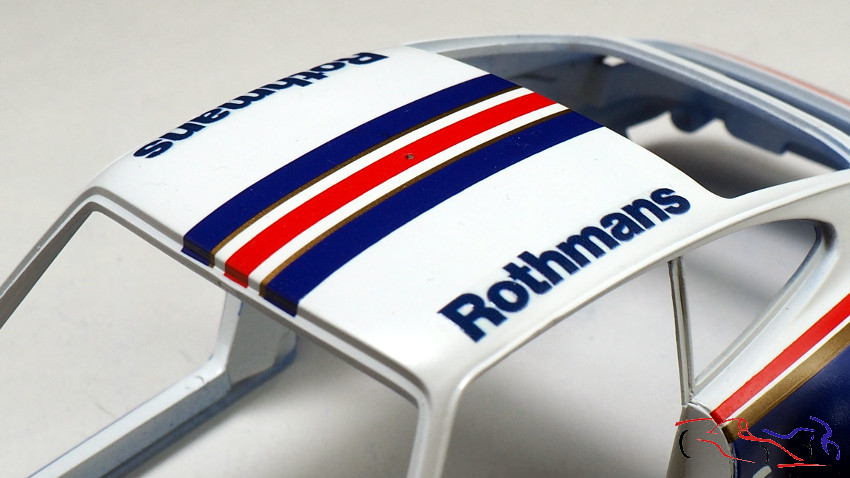
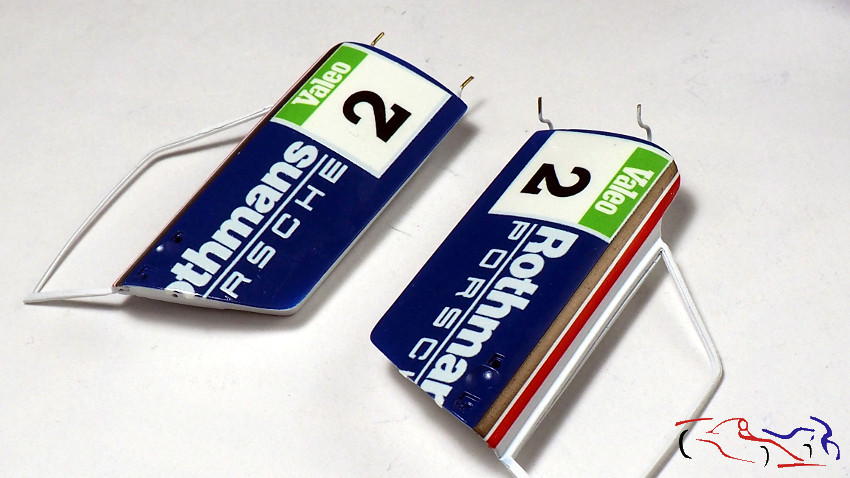
Si recordáis del post anterior, tuve que recortar las máscaras de Scalelab24 porque la versión española tenía las franjas del mismo grosor. De la misma manera, he tenido que recortar las calcas para dejar las franjas del mismo grosor , tal y como veis en las siguientes fotos:
If you remember from the previous post, I had to cut the Scalelab24 masks because the Spanish version had the stripes of the same thickness. In the same way, I had to cut the decals to leave the stripes of the same thickness, as you can see in the following pictures:
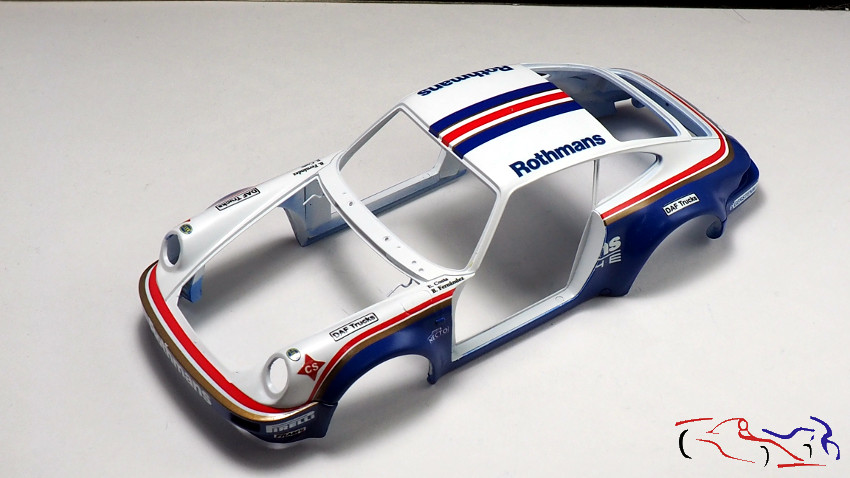
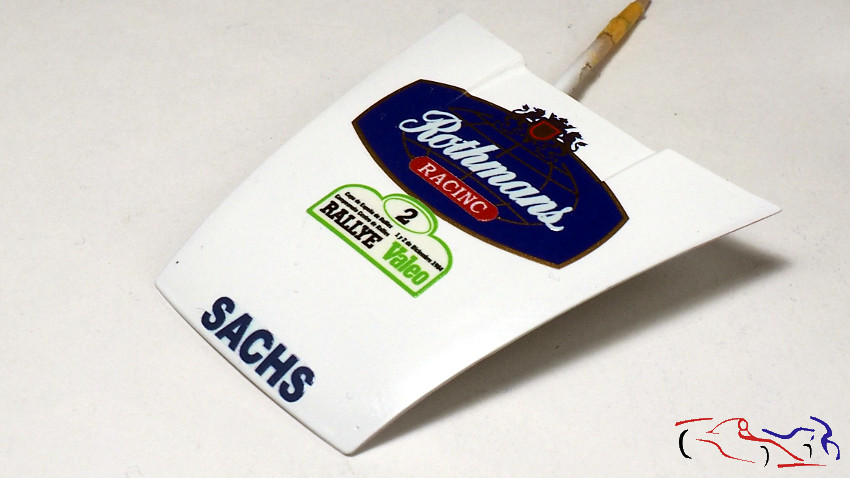
Y una vez puestas las calcas de las franjas y los dorsales, queda completar el resto de ellas con las calcas diseñadas por Mario Vallina, e impresas por Decalab en Spotmodel.
And once the decals of the stripes and the bibs have been placed, the rest of the decals designed by Mario Vallina, and printed by Decalab in Spotmodel, have to be completed.
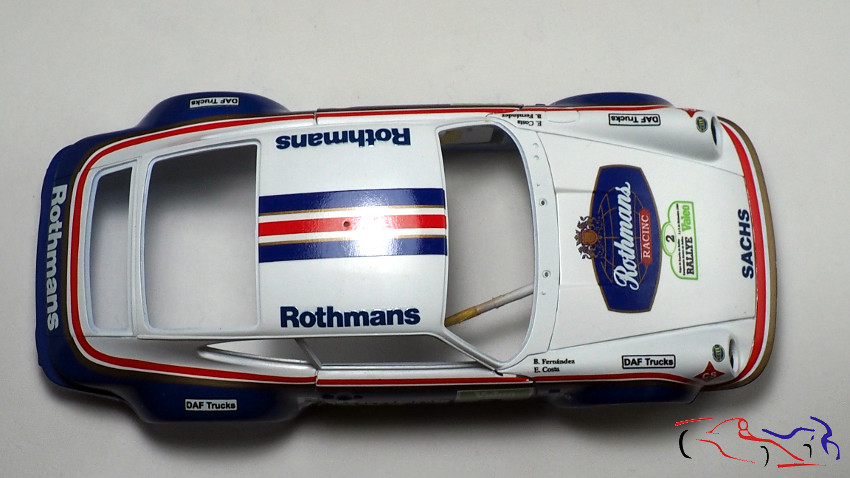
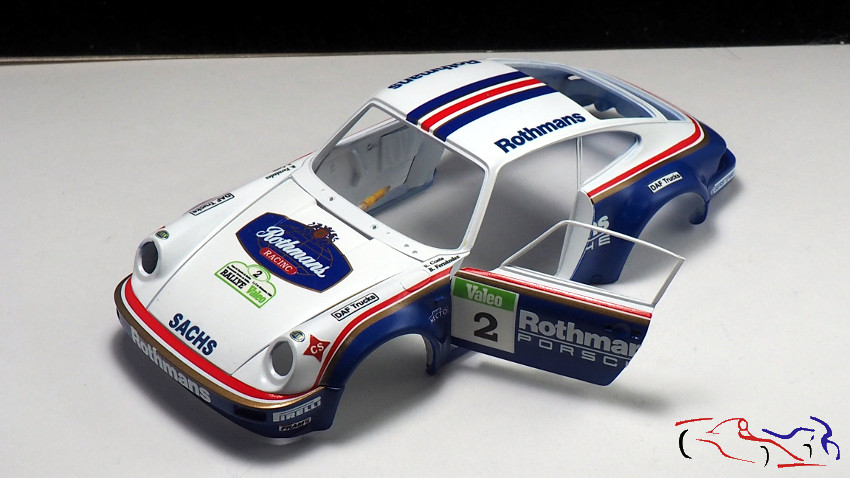
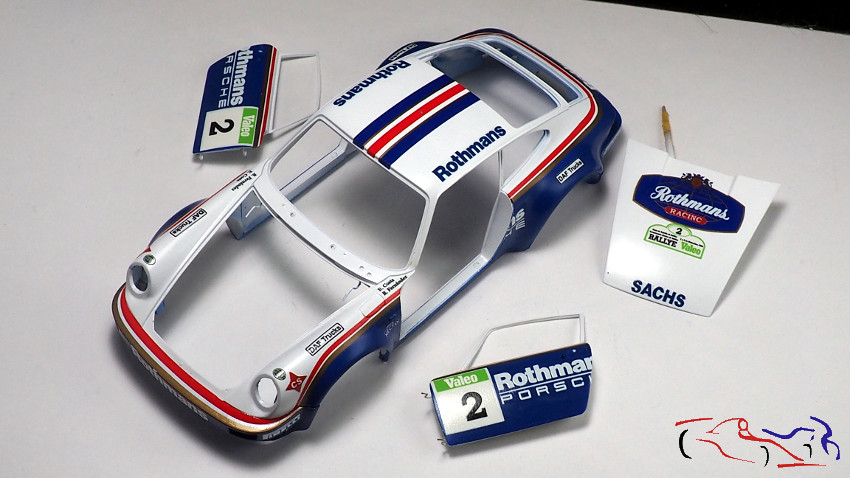
Como las puertas se abren, una vez estén las calcas fijas, con un cutter y una cuchilla nueva, se cortan por la línea del panel, poniendo los líquidos Micro para que se adapten a los cortes de la carrocería. Y aquí vemos todas las piezas, que ya están listas para lacar:
As the doors open, once the decals are fixed, with a cutter and a new blade, they are cut along the line of the panel, putting the Micro liquids so that they adapt to the cuts in the bodywork. And here we can see all the pieces, which are ready to be lacquered:
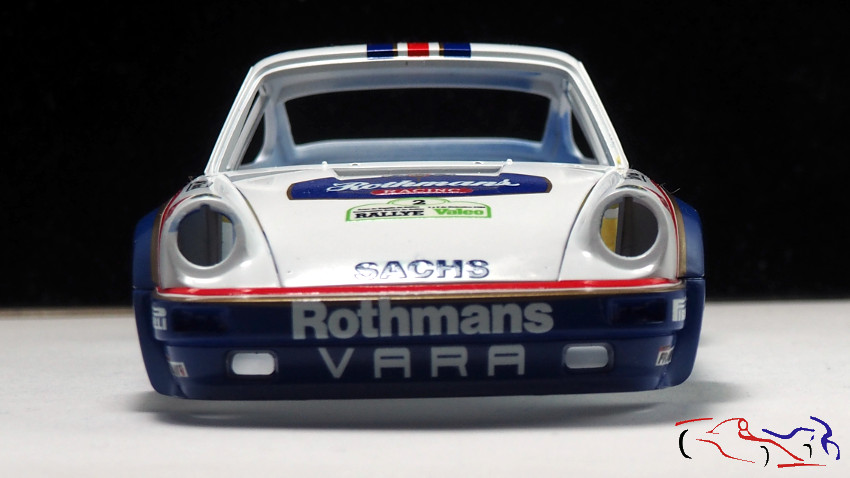
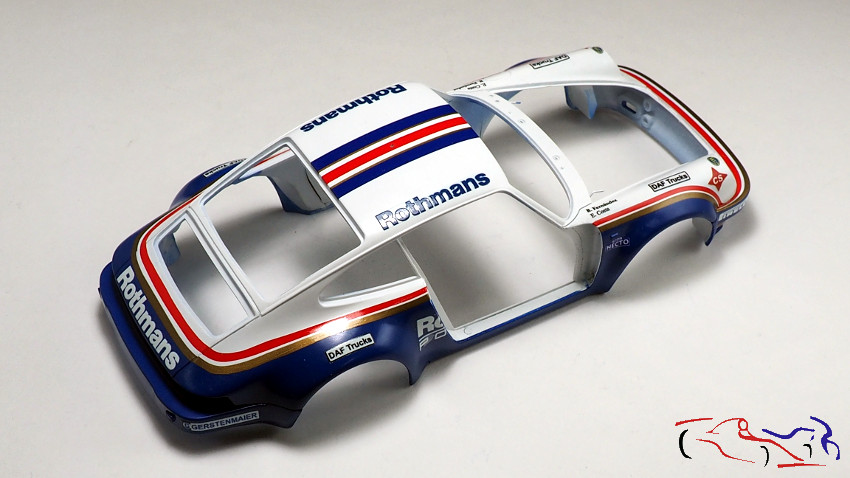
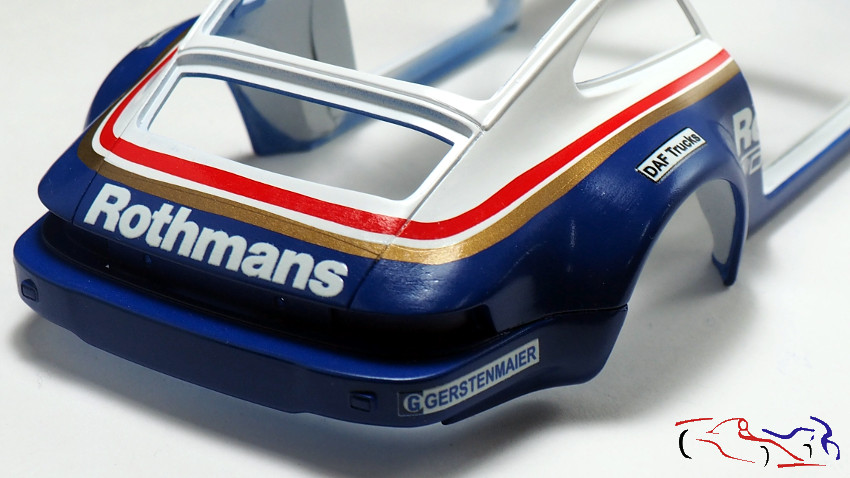
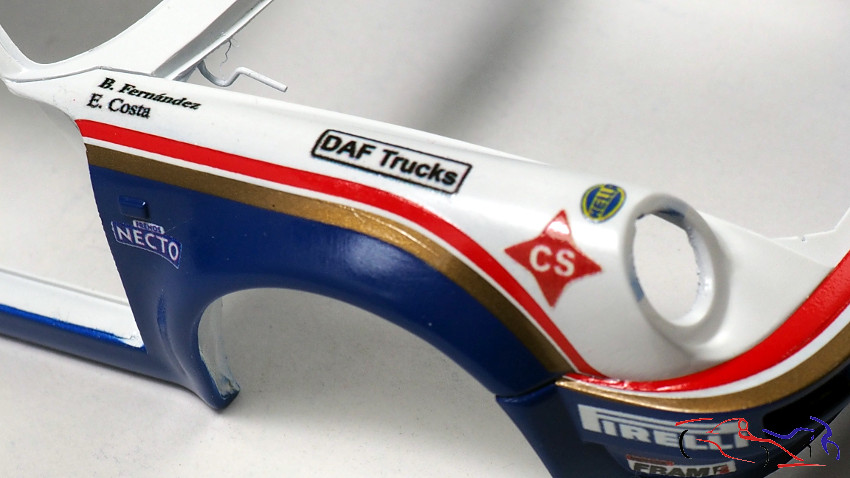
Y ahora, algunos detalles más cercanos de la carrocería y sus calcas:
And now, some closer details of the bodywork and decals:
Terminamos con el capó delantero y las puertas:
We finish with the front bonnet and doors:
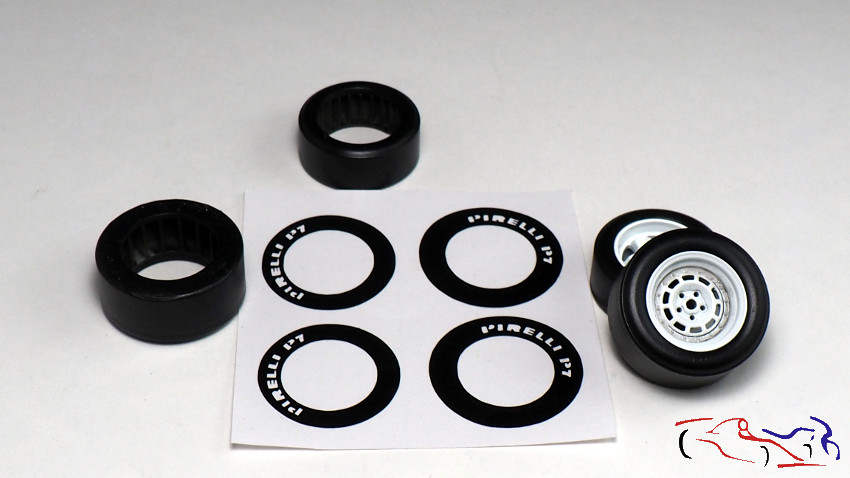
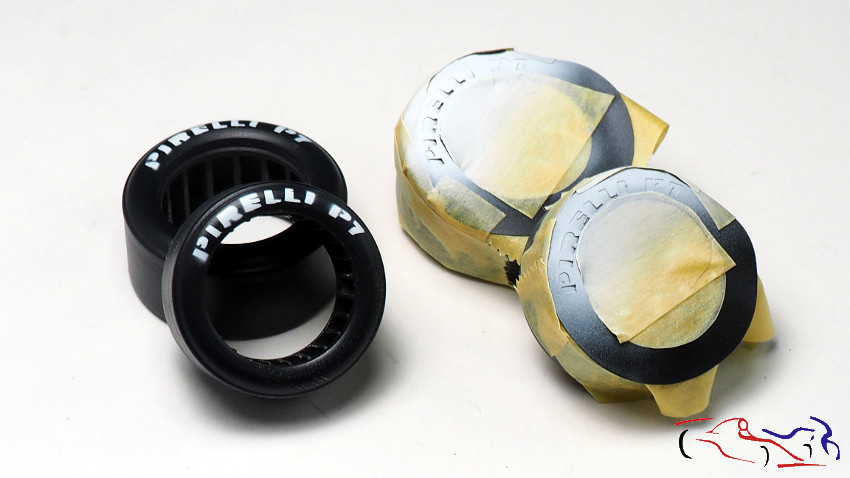
Al mismo tiempo que iba poniendo las calcas, pintaba los neumáticos de negro Rubber de Zero, y sobre éstas, colocaba las máscaras que hizo Mario Vallina para su gran Porsche, y que amablemente me proporcionó:
At the same time as I was putting the decals on, I was painting the tyres in Zero Rubber black, and over them, I was putting the masks that Mario Vallina made for his big Porsche, and which he kindly provided me with:
Decir que todo fue bien excepto la última máscara, que la puse descentrada y que tuve que volver a repetir. No siempre salen las cosas bien!!
Everything went well except the last mask, which I put on off-centre and had to repeat it. Things don’t always go well!
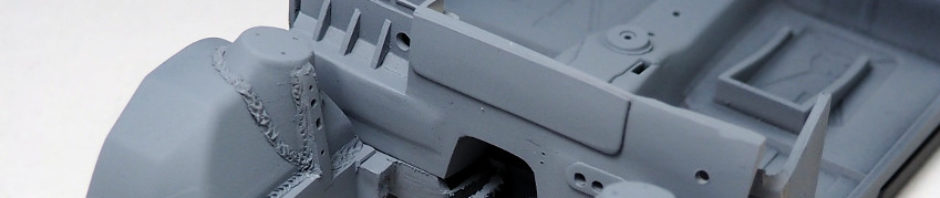
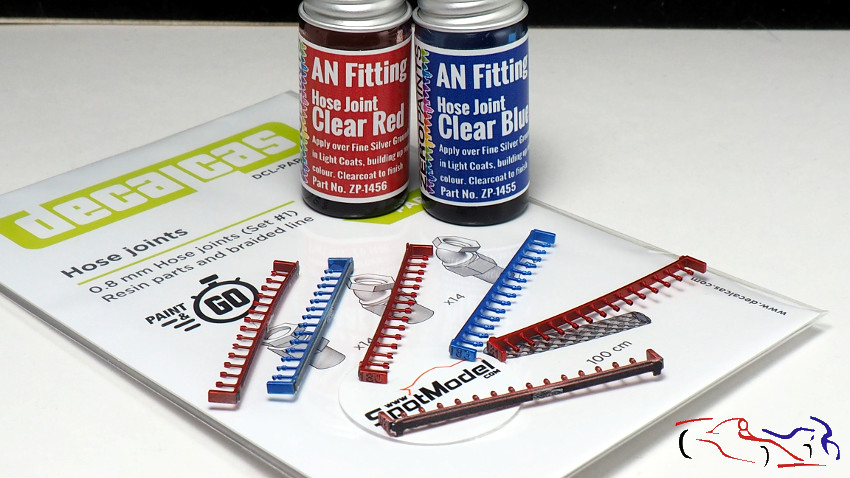
Para terminar este hilo, os muestro los conectores de Decalcas, que usaré en el capó delantero. Van imprimadas, pintadas con plata, para finalmente, aplicar los colores clásicos, rojo y azul, de Zero paints:
To finish this thread, I show you the Decalcas connectors, which I will use on the front bonnet. They are primed, painted with silver, and finally, I applied the classic colours, red and blue, from Zero paints:
Espero que os hay gustado, y lo próximo será el lacado de la carrocería!! Gracias por ver y comentar!!
I hope you liked it, and next will be the lacquering of the bodywork! Thanks for watching and commenting!
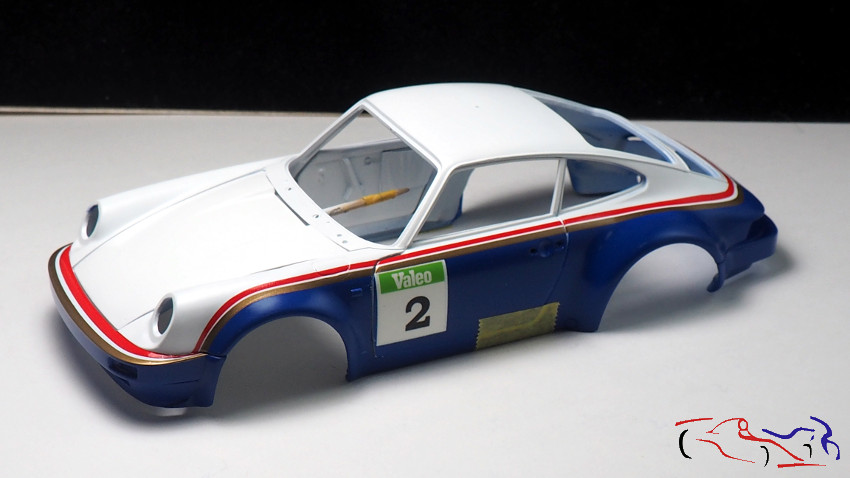
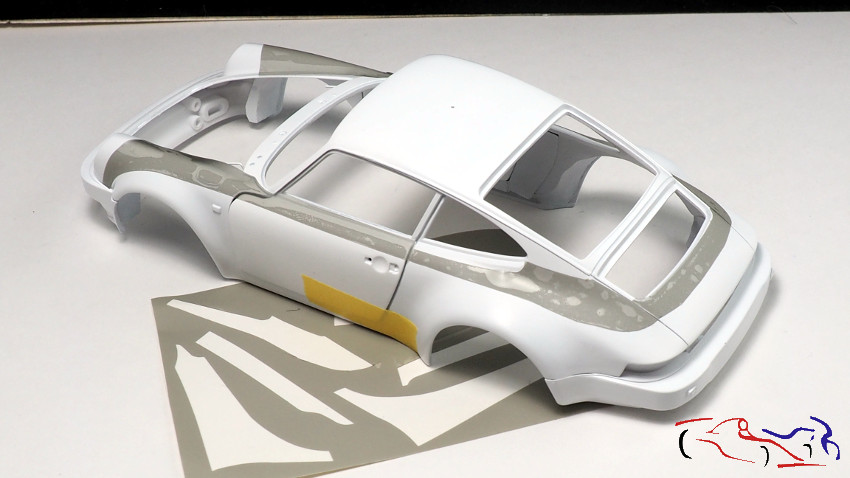
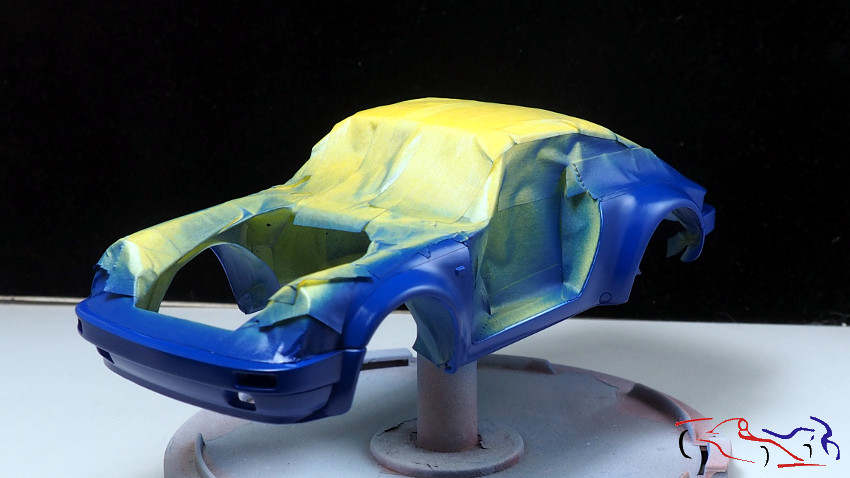
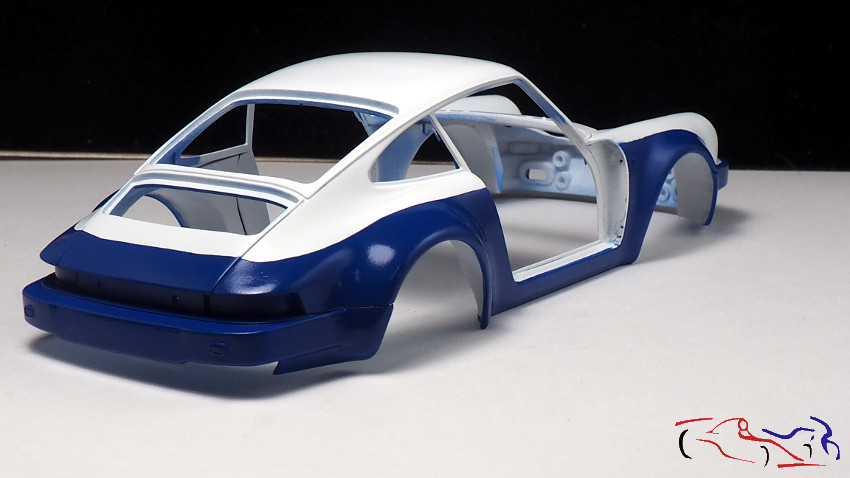
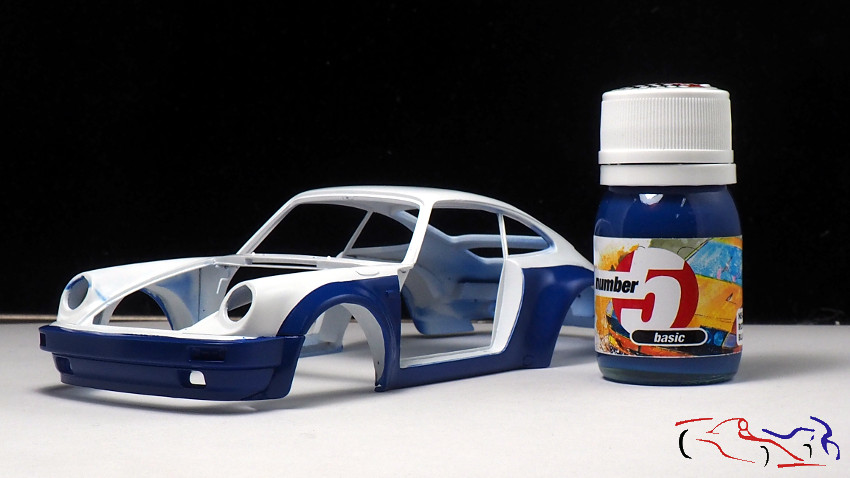
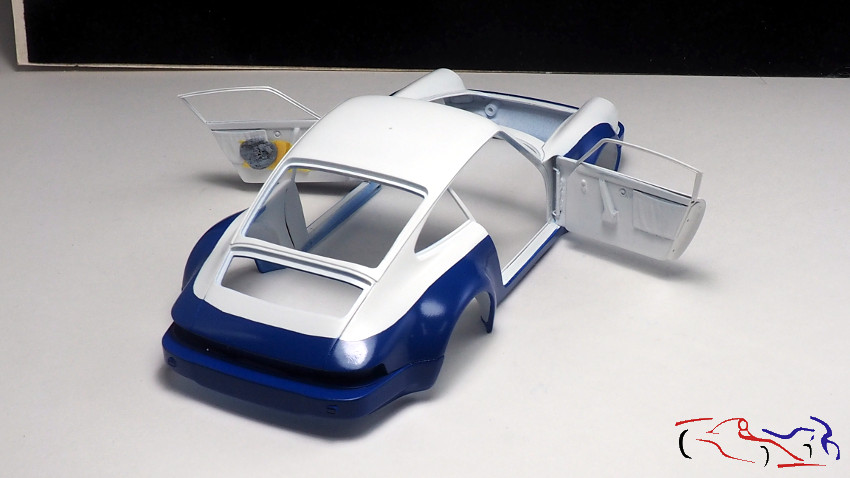
Hola de nuevo. Seguimos con el Porsche y hoy os muestro el proceso de pintura de la carrocería con el color azul Rothmans de Number5, después de haber pintado con el blanco. Y lo primero es colocar las puertas y fijarlas para poder poner las máscaras:
Hello again. We continue with the Porsche and today I show you the painting process of the bodywork with the Rothmans blue colour from Number5, after having painted it with the white one. And the first thing is to place the doors and fix them to be able to put the masks:
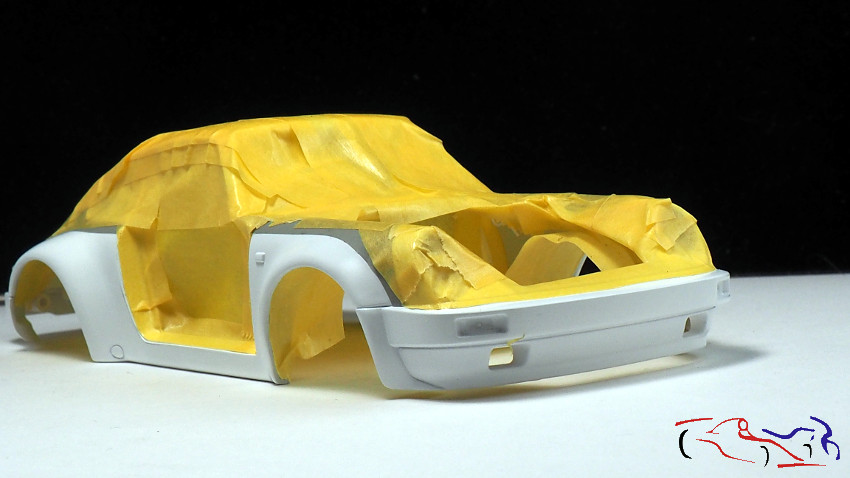
Voy a usar las máscaras de Scalelab24, que son de vinilo gris semitransparente, que vienen muy bien para ver lo que hay debajo a la hora de ponerlas (las normales te impiden ver debajo). Pero no funcionan muy bien si las tienes que doblar, que es lo que me pasó a mi en los extremos de las puertas. También tengo que decir que recorté las curvas de la parte trasera para hacer la versión española del preparador Vara, cuyas franjas son del mismo ancho en todo su contorno, siendo más gordas en la versión que trae el kit como corresponde a la versión utilizada en Europa.
I’m going to use the Scalelab24 masks, which are made of semi-transparent grey vinyl, which are very good to see what’s underneath when you put them on (the normal ones prevent you from seeing underneath). But they don’t work very well if you have to bend them, which is what happened to me on the ends of the doors. I also have to say that I cut the curves of the rear part to make the Spanish version of the Vara preparer, whose stripes are the same width all around, being fatter in the version that comes with the kit, as it corresponds to the version used in Europe.
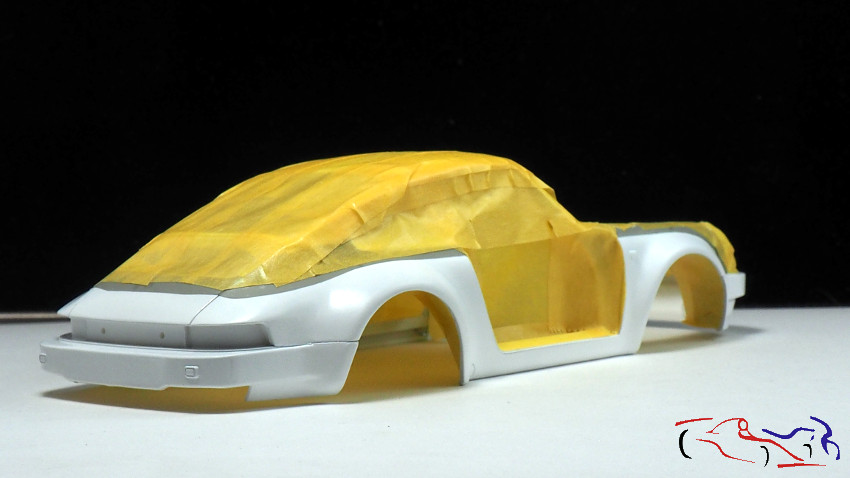
Y después de esa primera máscara, había que enmascarar el resto….largo trabajo sobre todo con las puertas y su hueco en la carrocería!!
And after that first mask, the rest had to be masked…. long work especially with the doors and their recesses in the bodywork!
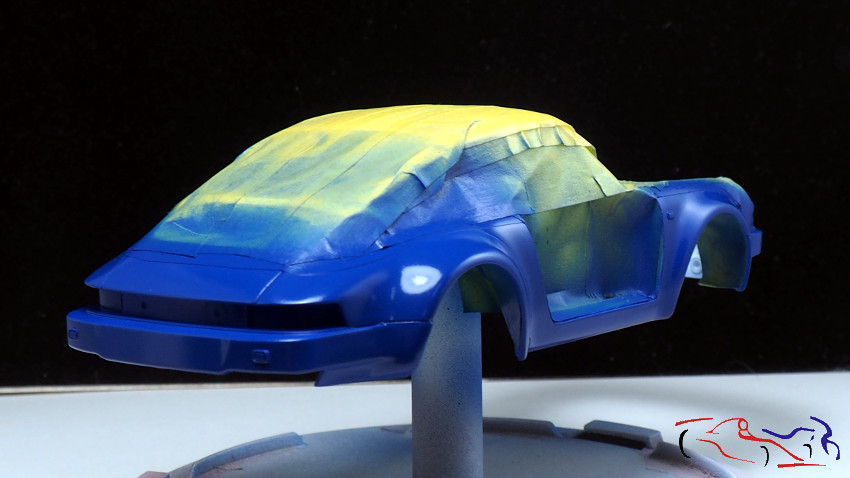
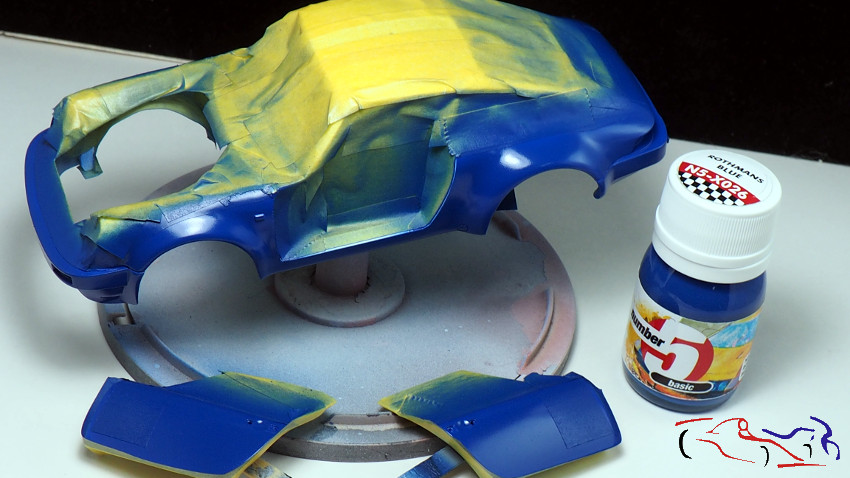
El siguiente paso es la pintura azul de Number5. Le di 2 capas muy finas y las dos siguientes más húmedas. Fácil de aplicar y cubre muy bien!!
The next step is the Number5 blue paint. I applied 2 very thin coats and the next two more were wet coats. Easy to apply and covers very well!
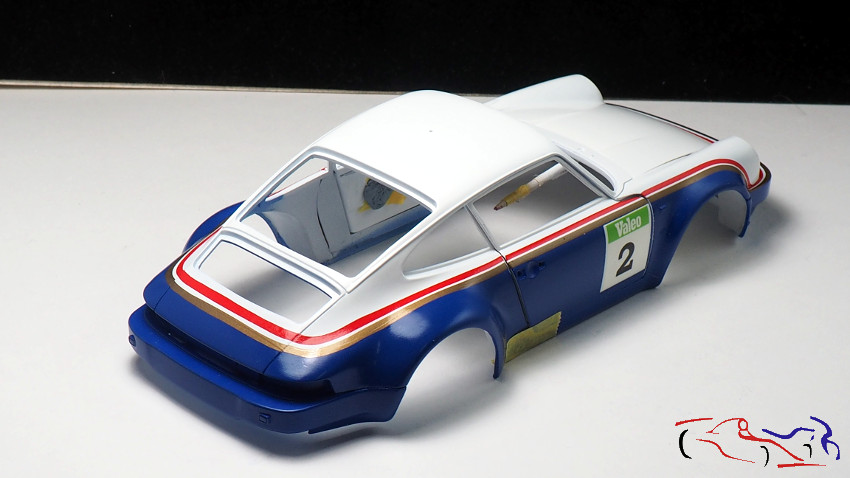
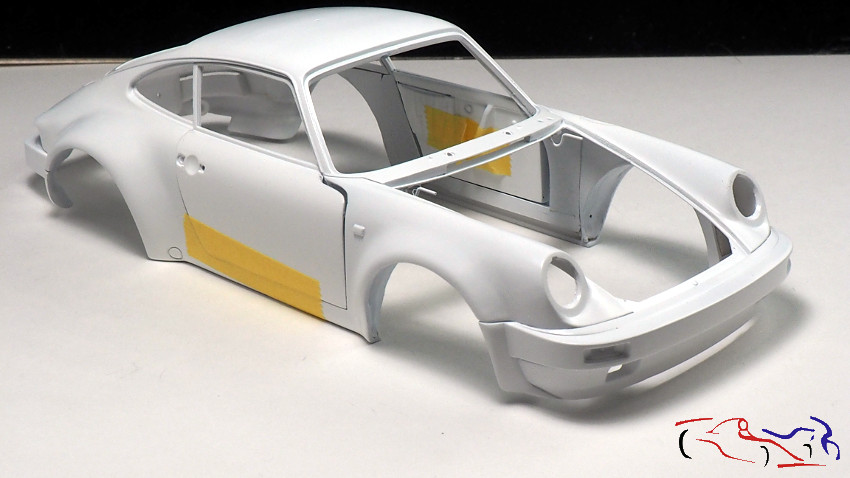
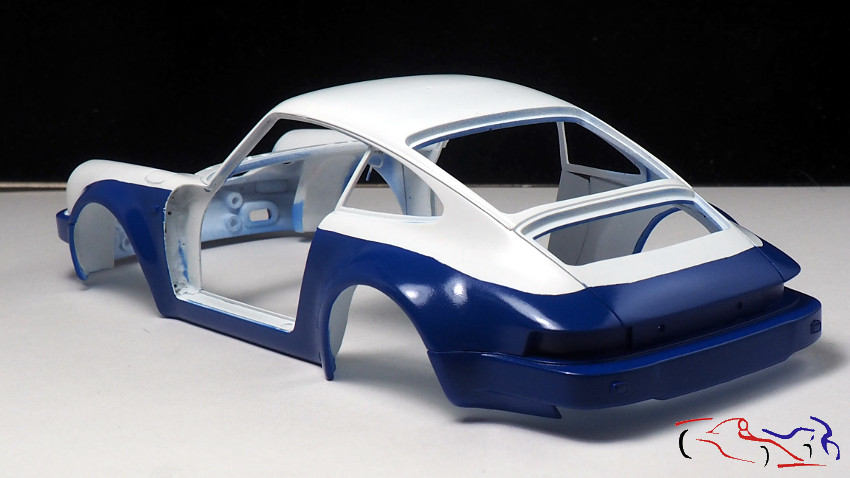
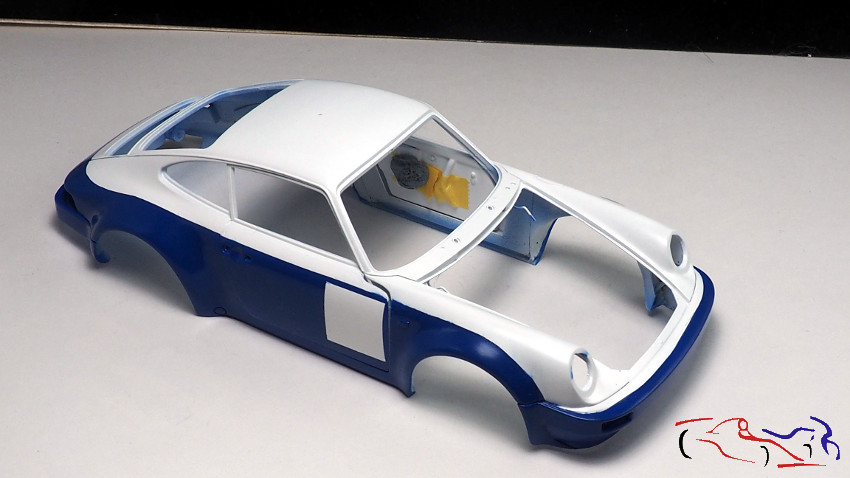
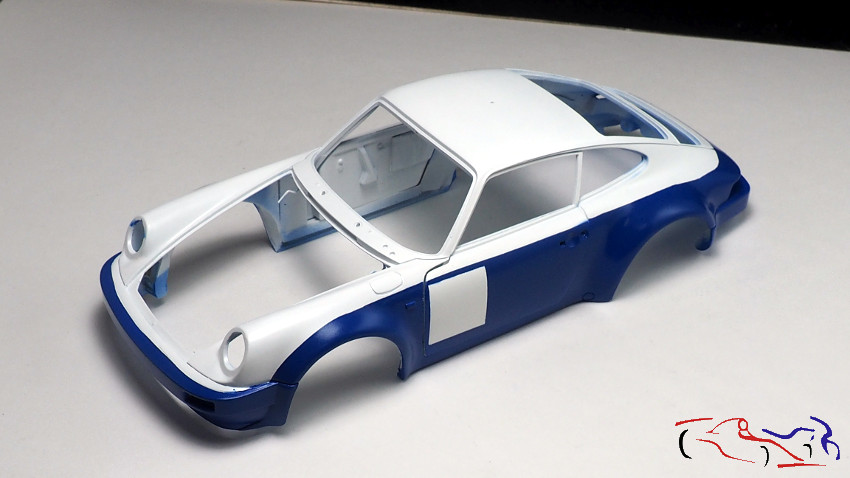
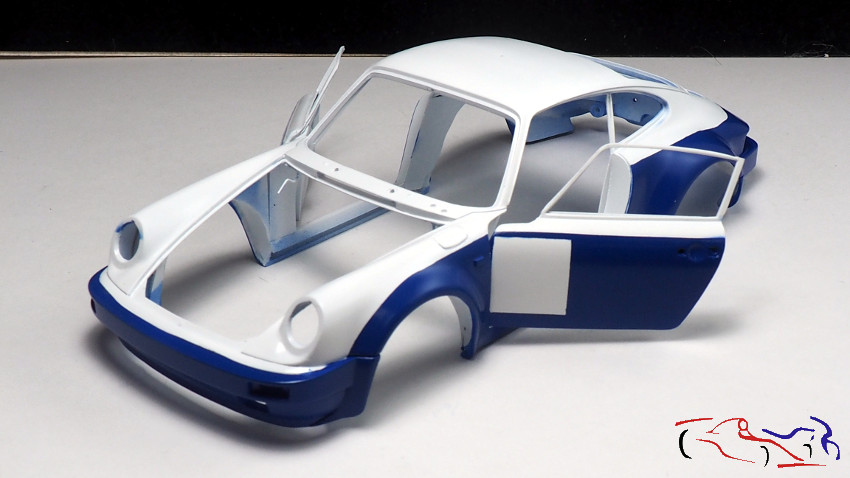
Aquí os muestro la carrocería sin las máscaras. El resultado es bueno aunque algunos fallos han hecho que el azul pase al blanco, pero no es nada grave, que con un ligero paso de la lija se arregla!!
Here I show you the bodywork without the masks. The result is good although some mistakes have made the blue turn on to white, but it is nothing serious, with a light sanding it is fixed!!!
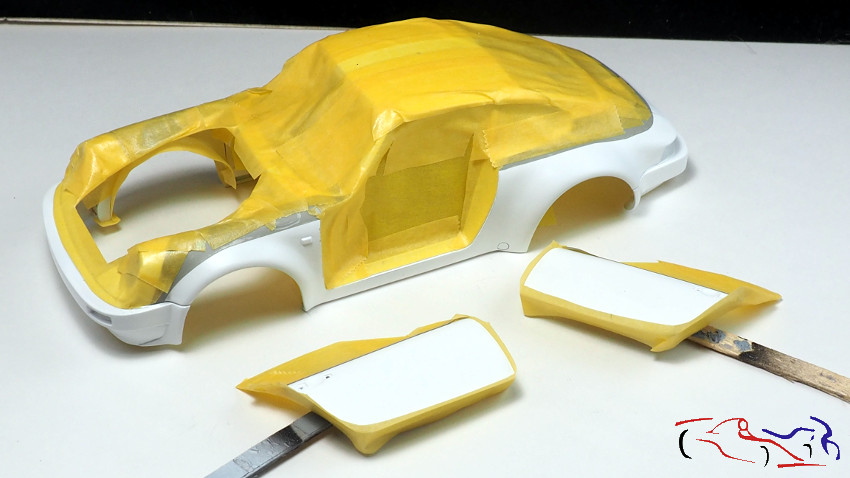
Vemos que las puertas, le puse una máscara para mantener el blanco como base del número del coche, por si la calca dejaba pasar el azul de la base.
We can see that I put a mask in the doors to keep the white as the base of the number of the car, in case the decal let the blue of the base go through.
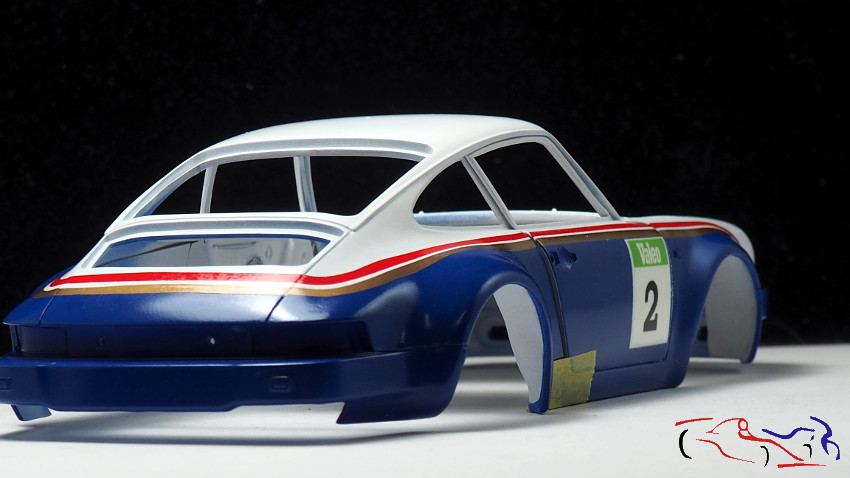
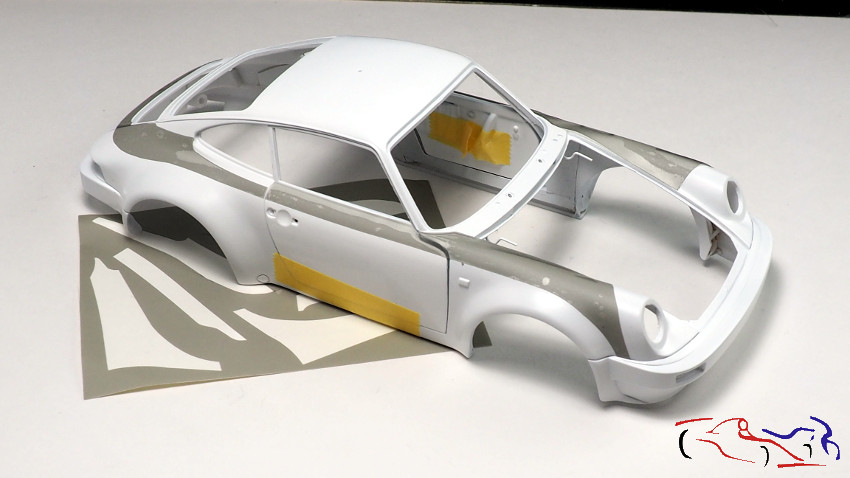
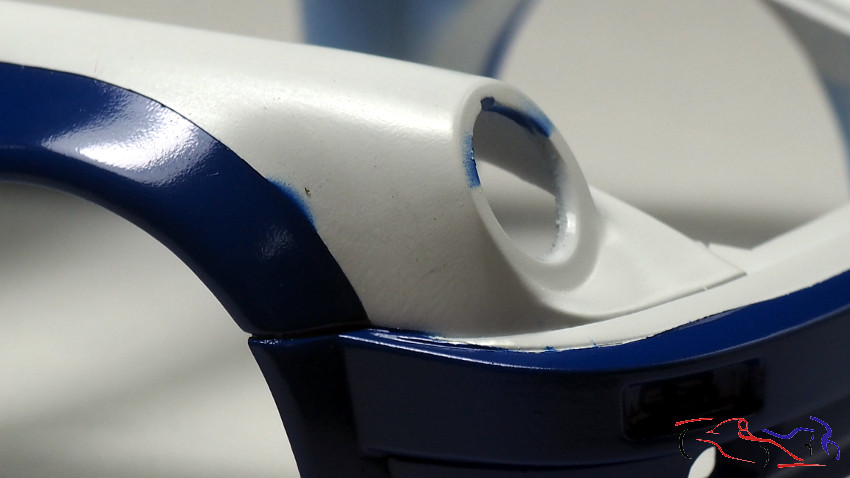
En estas fotos os muestro el fallo más importante donde el azul pasó la máscara…Pulsad en la foto para ver en grande!!
In these pictures I show you the most important failure where the blue passed the mask…Click on the picture to see it bigger!!!
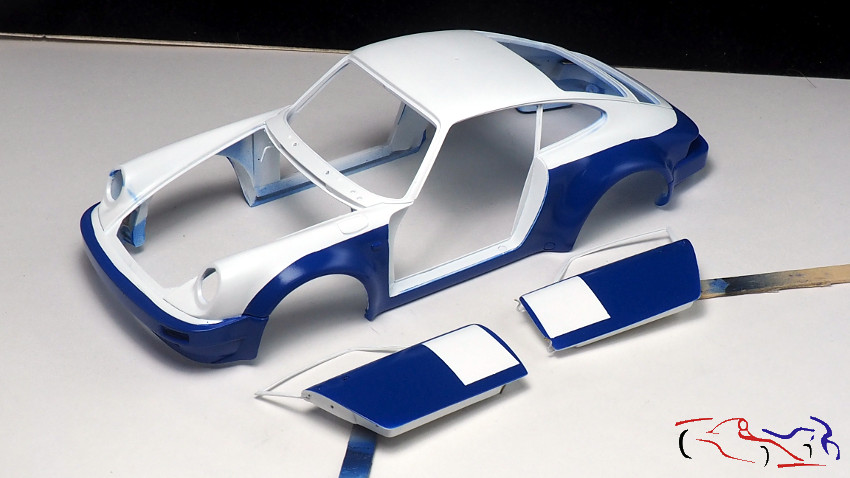
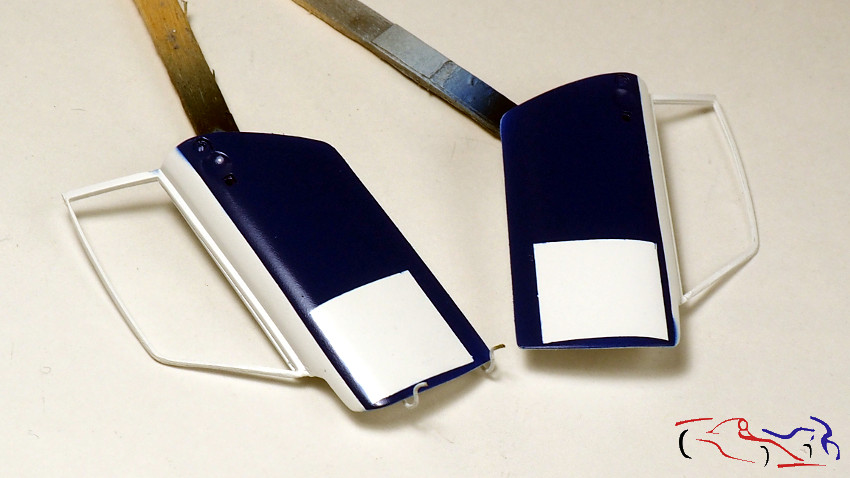
Y ahora, unas fotos van las puertas superpuestas..cerradas y abiertas!!
And now, some photos of the overlapping doors… closed and open!
Esto es todo por hoy. EN el próximo, creo que irá todo lo de las calcas,
That’s all for today. In the next one, I think it will be all about the decals,
Hola a todos. Antes de poner la explicación completa, os muestro un video que he realizado del proceso de pintura de la carrocería. He usado el Azul Rothmans de Number5, el cual me ha sido facilísimo de aplicar. Has sido 3 manos progresando desde la primera que fue muy ligera hasta la ultima que fue muy húmeda. Han aparecido algunos problemas con las máscaras pero como la linea superio va tapada por la calca, no me preocupa mucho. Ya pronto, la explicación habitual. Espero que os guste!!
Hello everybody. Before I put the full explanation, I show you a video I have made of the painting process of the bodywork. I used Number5 Rothmans Blue, which was very easy to apply. It was 3 coats progressing from the first one which was very light to the last one which was very wet. There have been some problems with the masks but as the top line is covered by the decal, I’m not too worried. Soon, the usual explanation. I hope you like it!